1
Introduction RAW Image Processing, Viewing and Editing Software Contents at a Glance Digital Photo Professional Basic Operation Ver. 3.5 Instruction Manual O Content of this Instruction Manual O DPP is used for Digital Photo Professional. O In this manual, the windows used in the examples are from Windows XP. O indicates the selection procedure of the menu. Example: [File] menu [Exit]. O Square brackets are used to indicate items such as menu names, button names and window names that appear on the computer screen. O Text inside < > indicates a key on the keyboard. O ** indicates a reference page. Click to move to the relevant page. O : Marks helpful information when a problem arises. O : Marks tips for using the software skillfully. O : Marks information that should be read before use. O : Marks additional information you may find helpful. C 1 2 3 4 5 Advanced Operation Y P O Advanced Image Editing and Printing O Switching Between Pages O Click on arrows on the bottom right of the screen. : next page : previous page : return to a page you had previously displayed O Click on the chapter headings on the right side of the screen to switch to the contents page of that chapter. Also, click the item you want to read about on the table of contents to move to the relevant page. Editing JPEG/TIFF Images Reference Index O Help and Shortcut Keys O For information about using DPP, refer to Help from the [Help] menu. O Refer to the [Troubleshooting] [Shortcut Key List] in the Help for a list of shortcut keys which are helpful for quick operation. © CANON INC. 2008 Processing Large Numbers of Images CT1-7162DPPWE-000 READ CAREFULLY BEFORE USING! CANON SOFTWARE LICENSE AGREEMENT IMPORTANT - READ THIS AGREEMENT BEFORE USING THE SOFTWARE ON THE CD-ROM IN THIS BOX. BY USING THE SOFTWARE, YOU AGREE TO BE BOUND BY THE TERMS OF THIS AGREEMENT. This is a license agreement (the [Agreement]) between you and Canon Inc. ([Canon]). IF YOU DO NOT AGREE TO THE TERMS AND CONDITIONS OF THIS AGREEMENT, DO NOT USE THE SOFTWARE PROGRAM ON THE CD-ROM AND THE USER MANUAL IN THIS BOX (COLLECTIVELY, THE [SOFTWARE]) AND RETURN THE SOFTWARE WITHIN 30 DAYS FROM THE DATE OF PURCHASE TO YOUR POINT OF PURCHASE FOR A REFUND. In consideration of the right to use the SOFTWARE, you agree to abide by the terms and conditions of this Agreement. 1. LICENSE: Canon grants you the non-exclusive right to use the SOFTWARE only on a single computer. You may physically transfer the SOFTWARE from one computer to another provided that the SOFTWARE is used on only one computer at a time. You shall not install or use the SOFTWARE on a network, multiple CPU, multiple site arrangement, or any other hardware configuration where the SOFTWARE is accessible to more than one CPU or to more than one user. YOU SHALL NOT ASSIGN, SUBLICENSE, RENT, LEASE, LOAN, CONVEY OR OTHERWISE USE, TRANSFER, COPY, TRANSLATE, CONVERT TO ANOTHER PROGRAMMING LANGUAGE, ALTER, MODIFY, DECOMPILE OR DISASSEMBLE THE SOFTWARE, IN WHOLE OR IN PART, EXCEPT AS EXPRESSLY PROVIDED IN THIS AGREEMENT. 2. BACK-UP COPY: You may make one copy of the SOFTWARE solely for back-up purposes, or copy the SOFTWARE onto the permanent storage device (e.g. a hard disk) of your computer and retain the original for back-up purposes. Any other copying of the SOFTWARE is a violation of this Agreement. You must reproduce and include the copyright notice on the back-up copy. C 3. SUPPORT AND UPDATES: Canon is not responsible for providing maintenance or support for use of the SOFTWARE. No updates, fixes or support will be made available for the SOFTWARE. 4. LIMITED WARRANTY AND LIMITATION OF LIABILITY: It is your responsibility to choose, maintain and match the hardware and software components of your computer system. Thus Canon does not guarantee uninterrupted service or correction of errors or that the functions or performance of the SOFTWARE will meet your requirements. THE SOFTWARE IS LICENSED ON AN [AS IS] BASIS AND WITHOUT WARRANTY OF ANY KIND. The CD-ROM storing the SOFTWARE is warranted only against defective material under normal use for a period of ninety (90) days after purchase from an authorized Canon dealer as evidenced by your sales receipt. Your sole remedy for a defective CD-ROM shall be replacement of the same without charge when returned by you at your expense to your point of purchase and proven to be defective upon inspection. The replacement CD-ROM will be warranted for the remainder of the original ninety (90) day warranty period of the defective CD-ROM. The limited warranty does not apply if the failure of the CD-ROM resulted from accident, abuse or misapplication of the SOFTWARE and shall not extend to anyone other than the original user of the SOFTWARE. EXCEPT AS SPECIFICALLY SET FORTH IN THIS PARAGRAPH 4, CANON, CANON’S SUBSIDIARIES, DISTRIBUTORS AND DEALERS DISCLAIM ALL WARRANTIES, EXPRESS OR IMPLIED, INCLUDING ANY WARRANTY OF MERCHANTABILITY OR FITNESS FOR A PARTICULAR PURPOSE, WITH RESPECT TO THE SOFTWARE. NEITHER CANON NOR ANY OF CANON’S SUBSIDIARIES, DISTRIBUTORS OR DEALERS IS LIABLE FOR ANY DAMAGES HOWSOEVER CAUSED, INCLUDING WITHOUT LIMITATION, DIRECT, CONSEQUENTIAL OR INCIDENTAL LOSS OR DAMAGE INCLUDING LOSS OF PROFITS, EXPENSE OR INCONVENIENCE HOWSOEVER CAUSED OR ARISING OUT OF THE SOFTWARE OR THE USE THEREOF. NEITHER CANON, NOR ANY OF CANON’S SUBSIDIARIES, DISTRIBUTORS OR DEALERS SHALL HAVE ANY OBLIGATION TO INDEMNIFY YOU AGAINST ANY CLAIM OR SUIT BROUGHT BY A THIRD PARTY ALLEGING THAT THE SOFTWARE OR THE USE THEREOF INFRINGES ANY INTELLECTUAL PROPERTY OF SUCH THIRD PARTY. 5. TERM: This Agreement is effective upon your using the SOFTWARE and remains in effect until expiration of all copyright interests in the SOFTWARE unless earlier terminated. You may terminate this Agreement by destroying the SOFTWARE. This Agreement will also terminate without notice to you if you fail to comply with any of the terms of this Agreement and you must then promptly return the SOFTWARE. In addition, Canon may enforce its other legal rights. 6. U.S. GOVERNMENT RESTRICTED RIGHTS NOTICE: The SOFTWARE is provided with restricted rights. Use, duplication or disclosure is subject to restrictions as set forth in either subparagraph (c) (1) (ii) of the Rights in Technical Data and Computer software clause at DFARs 252.227-7013 or subparagraph (c) (1) and (2) of the Commercial Computer Software Restricted Rights Clause at FAR 52.227-19, as applicable. Y P O 7. SEVERABILITY: In the event that any provision of this Agreement is declared or found to be illegal by any court or tribunal of competent jurisdiction, such provision shall be null and void with respect to the jurisdiction of that court or tribunal and all the remaining provisions of this Agreement shall remain in full force and effect. 8. CONTROLLING LAW: The terms of this Agreement as it relates to purchases of the Software in the United States of America shall be governed and construed in all respects in accordance with the laws and regulations of the State of New York, without reference to choice of law principles. The terms of this Agreement as it relates to purchases of the Software in Canada shall be governed by the laws of the province of Ontario. 9. OWNERSHIP: All rights, including but not limited to copyrights and trade secret rights, to the SOFTWARE belong to Canon, its affiliated corporations and third party licensors. Your use of the SOFTWARE is subject to the United States, Canada and other applicable copyright and trademark laws and nothing in this Agreement constitutes a waiver of the rights of Canon, its affiliated corporations and third party licensors under such laws. Nothing contained in Paragraph 1 shall be construed to give Canon any ownership rights in any images, graphics or textual material that you save in connection with the Software. 10.ACKNOWLEDGEMENT: BY USING THE SOFTWARE, YOU ACKNOWLEDGE THAT YOU HAVE READ THIS AGREEMENT, UNDERSTOOD IT, AND AGREE TO BE BOUND BY ITS TERMS AND CONDITIONS. YOU ALSO AGREE THAT THIS AGREEMENT IS THE COMPLETE AND EXCLUSIVE STATEMENT OF AGREEMENT BETWEEN YOU AND CANON CONCERNING THE SUBJECT MATTER HEREOF AND SUPERSEDES ALL PROPOSALS OR PRIOR AGREEMENTS, VERBAL OR WRITTEN, AND ANY OTHER COMMUNICATIONS BETWEEN THE PARTIES RELATING TO THE SUBJECT MATTER HEREOF. NO AMENDMENT TO THIS AGREEMENT SHALL BE EFFECTIVE UNLESS SIGNED BY A DULY AUTHORIZED OFFICER OF CANON. Introduction Contents at a Glance 1 2 3 4 5 Basic Operation Advanced Operation Advanced Image Editing and Printing Processing Large Numbers of Images Editing JPEG/TIFF Images Reference Index 1 Introduction Introduction Digital Photo Professional (hereinafter, “DPP”) is high-performance RAW image processing, viewing and editing software for EOS DIGITAL cameras. It is often thought that RAW images are difficult to handle compared with ordinary JPEG images, but using DPP, you can perform advanced edits and print RAW images with ease. RAW Images and Their Features What is a RAW Image? A RAW image is image data that has recorded output data of imaging sensor. Because image processing does not occur inside the camera when a photo is taken and the photo has been recorded in the special form of “RAW image data + Image processing conditions information at the time of shooting”, special software is needed to view or edit the image. * “RAW” means “in a natural condition” or “not processed or refined”. What is RAW Development? C If described in terms of film, the concept of a RAW image is a shot image not yet developed (latent image). With film, the image appears for the first time when it is developed. And as for the RAW image too, you cannot view it as an image on your computer unless you perform subsequent image signal processing. Therefore, even though it is digital, this processing is called “development” and with EOS DIGITAL is performed using DPP. With DPP, you can view, edit and print RAW images without having to be particularly conscious of the development processing. What Advantages Does a RAW Image Have? RAW images are recorded in the format “RAW image data + Image processing conditions information at the time of shooting”. When you open an image in DPP, the image is instantly developed and you can view the image as an image to which image processing conditions at the time of shooting have been applied. Even if you perform various adjustments to the image you have opened (it undergoes automatic development processing each time), only the image processing conditions (development conditions) change and the “original image data itself” remains unaffected. Consequently, image deterioration is not a problem and it is the perfect image data for users who want to get creative with their images after they have been shot. In DPP, the “Image processing conditions information” that can be adjusted is called a “Recipe”. Y P O Contents at a Glance 1 2 3 4 5 Basic Operation Advanced Operation Advanced Image Editing and Printing Processing Large Numbers of Images Editing JPEG/TIFF Images Reference RAW image data Image processing conditions information Index 2 Main Features of DPP System Requirements Introduction Following are the main tasks you can perform with images you have downloaded to your computer. OS Windows Vista*1 Windows XP Professional/Home Edition*2 O View and organize RAW images Computer PC with one of the above OS preinstalled * Upgraded machines not supported O Real-time adjustment of a RAW image CPU 1.3GHz Pentium or higher*3 RAM Minimum 1GB Display Screen resolution: 1024 × 768 pixels or more Color quality : Medium (16 bit) or more O Various image adjustments while maintaining the original image O Freely apply a Picture Style O View your image before and after adjustment in the same window O Trim an image and change its size O Correction of lens aberration O Automatic/manual dust erasure processing O Convert from a RAW image to a JPEG or TIFF image and save C O View and organize JPEG and TIFF images O Real-time adjustment of JPEG and TIFF images O Various image adjustments while maintaining the original image O Print JPEG and TIFF images O Color management compatibility O CMYK simulation for commercial printing *1 Compatible with 32-bit/64-bit systems for all versions except Starter Edition (Also compatible with Service Pack 1) *2 Compatible with Service Pack 2/Service Pack 3 *3 Core2 Duo or higher is recommended Y P O Supported Images RAW images Extension images*1 *2 .CR2 .TIF .CRW JPEG images Exif 2.2 or 2.21-compatible JPEG images TIFF images Exif-compatible TIFF images Advanced Operation Advanced Image Editing and Printing Processing Large Numbers of Images Image type RAW shot with EOS DIGITAL cameras, excluding EOS DCS1 and EOS DCS3 1 2 3 4 5 Basic Operation This software supports the following image types. O Process large numbers of RAW images in batches O Transfer the image to image editing software O Print a RAW image Contents at a Glance Editing JPEG/TIFF Images .JPG, .JPEG .TIF, .TIFF *1 Compatible with RAW images shot with EOS D6000 or EOS D2000 that have been converted to RAW images using the CR2 Converter and have the “.CR2” extension. For information on CR2 Converter, refer to Canon’s web site. *2 RAW images shot with PowerShot Pro1 are also compatible images. However, you cannot edit RAW images shot with PowerShot Pro1 using the RAW image adjustment function. Reference Index 3 Contents at a Glance Introduction Downloading Images to Your Computer O Download images by connecting your camera and computer ¿ p.7 O Download images using a card reader ¿ p.9 O Erase dust shot with the image ¿ p.63, p.65 O Erase unwanted parts of an image ¿ p.67 O Auto correct RAW images with the Auto Lighting Optimizer ¿ p.56 Viewing and Checking RAW Images O Reduce image noise ¿ p.57 O Correct lens aberration ¿ p.58 O Use a Picture Style file ¿ p.53 ¿ p.31 O Quickly enlarge parts of an image ¿ p.11 O Edit efficiently O Sort images (check marks) ¿ p.17, p.18 O Display an image shot simultaneously as a RAW image and JPEG image as a single image ¿ p.20 O Edit an image while comparing the image before and ¿ p.49 after adjustment O Display the images in the thumbnail list display at high ¿ p.21 resolution O Check shooting information such as the shooting date ¿ p.10, p.21 Editing RAW Images (Adjusting) O Adjust brightness/darkness O Use automatic adjustment O Change the Picture Style ¿ p.12, p.24 ¿ p.30 ¿ p.24 O Sharpen the modulation and contrast of colors (contrast) ¿ p.27 O Make skin tone look healthier (color tone) ¿ p.27 O Make the image colors more vivid (color saturation) ¿ p.27 O Make an image sharp (sharpness) ¿ p.29 O Adjust an image to make color tone more natural (white balance) ¿ p.25 O Change an image to black-and-white or sepia tones (monochrome) ¿ p.28 O Trim parts of an image (trimming) ¿ p.35 O Specify an aspect ratio that matches the size of the paper on which an image is to be printed ¿ p.35 C O Synchronize multiple images ¿ p.50 O Display an area beyond the set range as a warning indicator (Highlight/Shadow warning) ¿ p.51 Y P O O Restore an adjusted image to its condition at the time ¿ p.39 of shooting Printing O Print well on a Canon printer ¿ p.39, p.70, p.71 O Faithfully reproduce the color of the subject when printing ¿ p.39, p.70, p.71 O Print with the shooting information ¿ p.68 O Print a thumbnail list of images ¿ p.69 Contents at a Glance 1 2 3 4 5 Basic Operation Advanced Operation Advanced Image Editing and Printing Processing Large Numbers of Images Editing JPEG/TIFF Images Reference O Approximate the color seen on screen with your ¿ p.76 printing results Index Conversion of Images O Convert a RAW image to a JPEG image ¿ p.38, p.82 O Edit in Photoshop ¿ p.67, p.83 O Perform batch processing ¿ p.82 O Edit (adjust) a JPEG image ¿ p.86 4 1 Basic Operation Introduction The basic operational flow – from how to download to your computer images shot with a camera to checking, editing, saving and printing a downloaded RAW image – is explained here. Starting up DPP......................................................... 6 Main Window Display ................................................... 6 Downloading an Image to Your Computer ................ 7 Downloading Images Using Your Card Reader............ 9 Viewing an Image .................................................... 10 View Images as Thumbnails in the Main Window ...... 10 Changing the Size of Thumbnail Images................ 10 Enlarge and View an Image in the Edit Window......... 11 Enlarging and Viewing a Specific Area................... 11 C Y P O Adjusting an Image.................................................. 12 About the Tool Palette ................................................ 12 About Recipes ............................................................ 12 Saving an Image...................................................... 13 Saving......................................................................... 13 Contents at a Glance 1 2 3 4 5 Basic Operation Advanced Operation Advanced Image Editing and Printing Processing Large Numbers of Images Editing JPEG/TIFF Images Reference Printing an Image .................................................... 14 Printing ....................................................................... 14 Exiting DPP ............................................................. 14 Index 5 Starting up DPP Introduction Double-click the desktop icon. Main Window Display In the main window, you can use tabs to select either the [Folder] window or the [Collection] window. The [Folder] window displays the images in folders on your computer, while the [Collection] window (p.33) displays images selected randomly by the user from one or more folders and gathered together. Unless noted otherwise, the [Folder] window will be described as the main window from this point on. Double-click [Folder] window ¿ DPP starts up and the main window ([Folder] window) appears. Main window ([Folder] window) C Y P O Contents at a Glance 1 2 3 4 5 Basic Operation Advanced Operation Advanced Image Editing and Printing Processing Large Numbers of Images Editing JPEG/TIFF Images [Collection] window Reference Index 6 Downloading an Image to Your Computer Introduction Connect the camera and computer with the cable provided and download the images saved on the memory card inserted in the camera. For downloading images, start up the camera software “EOS Utility” from DPP and use. Contents at a Glance EOS Utility 1 Select the save destination for the images. O Select the save destination in the folder area on the left of the main window. O When creating a folder, refer to p.45. 1 2 3 4 5 Basic Operation Advanced Operation Y P O your camera and computer and turn the 3 Connect camera on. 2 Start up EOS Utility. O Select the [Tools] menu [Start EOS Utility]. C O Connect the camera and your computer with the interface cable provided with the camera and turn the camera on. O For detailed instructions on connecting your camera and computer, refer to the “EOS Utility Instruction Manual” (PDF electronic manual). Advanced Image Editing and Printing Processing Large Numbers of Images Editing JPEG/TIFF Images Reference Index ¿ The capture window for EOS Utility appears. ¿ EOS Utility starts up. 7 Introduction 4 Click the [Main Window] button. Advantages of using EOS Utility to download images Using EOS Utility to download images makes it easier to organize your images as they are downloaded, sorted and saved into folders by date. ¿ The main window for EOS Utility appears. 5 Download images. Click C O You cannot start up EOS Utility in the [Collection] window (p.6, p.33). O When EOS Utility has been started up from DPP, you cannot use the following functions. • Quick check window view (p.16) • Trimming images (p.35, p.94) • Dust erasure processing (copy stamp function) (p.63 to p.67, p.96 to p.100) • Batch change file names (rename function) (p.84) • Printing with shooting information (p.68) • Printing a thumbnail list (contact sheet printing) (p.69) • Printing using Easy-PhotoPrint EX or Easy-PhotoPrint (Plug-in printing) (p.39, p.42) • Transferring images to Photoshop (p.67) • Batch saving images (batch processing) (p.82) Y P O Contents at a Glance 1 2 3 4 5 Basic Operation Advanced Operation Advanced Image Editing and Printing Processing Large Numbers of Images Editing JPEG/TIFF Images Reference Index ¿ Downloading of images begins. ¿ The downloaded images are saved in the folder selected in step 1 and are displayed in the main window of DPP. ¿ The downloaded images are sorted by date into folders and saved. 8 Introduction Downloading Images Using Your Card Reader You can also download images to the computer using a third-party card reader. 3 Display the images downloaded to your computer. O In the [DCIM] folder copied to your desktop, select the folder where the shot images are saved. 1 Load the memory card into the card reader. Contents at a Glance 1 2 3 4 5 Basic Operation Advanced Operation Open [My Computer] [EOS_DIGITAL] and drag the 2 [DCIM] folder to the [Desktop]. C Y P O ¿ Images in the folder are displayed in the main window of DPP. Advanced Image Editing and Printing Processing Large Numbers of Images Editing JPEG/TIFF Images Reference Checking before downloading images ¿ The [DCIM] folder is downloaded to your computer. O All images are saved in folder units inside the [DCIM] folder. By selecting the memory card folder directly in DPP, the images in the folder are displayed in DPP and you can check the shot images. O Copying to your computer may take time when there is a large number of shot images saved in the memory card. O For details on the [DCIM] folder structure and the file names of shot images, refer to “Folder Structure and File Names in the Memory Card” in the “EOS Utility Instruction Manual” (PDF electronic manual). Index 9 Viewing an Image Introduction Images downloaded to your computer are displayed as a thumbnails list in the main window. You can double-click an image to open the edit window and display the image at large size. View Images as Thumbnails in the Main Window Changing the Size of Thumbnail Images You can change the size of the thumbnail images displayed in the main window and display them with shooting information attached. Select the [View] menu desired item. 1 2 3 4 5 Basic Operation Rotate selected image Main window Contents at a Glance Advanced Operation Y P O ¿ The display changes to the selected item. Click to select the image C Display thumbnails of all the images inside the folder selected in the folder area on the left Advanced Image Editing and Printing Processing Large Numbers of Images Editing JPEG/TIFF Images Reference Index O When aspect ratio information is attached to the shot image with the EOS-1Ds Mark III or EOS-1D Mark III, the image is displayed as a trimmed image (p.35, p.94). O For a list of main window functions, refer to p.105. 10 Introduction Enlarge and View an Image in the Edit Window Enlarging and Viewing a Specific Area Double-click the area you want to enlarge. Contents at a Glance Double-click Double-click 1 2 3 4 5 Basic Operation Advanced Operation ¿ The edit window appears. Edit window Tool palette C Y P O ¿ The area you double-clicked is enlarged to 100% (actual pixel size). If you wait for a while, it changes to a clearer display. O Double-click again to revert to the full view. O To change the display position, drag on the image or drag the enlargement display position of the tool palette. Tool palette enlargement display position Advanced Image Editing and Printing Processing Large Numbers of Images Editing JPEG/TIFF Images Change the enlargement display position by dragging Reference Index ¿ It may take time for the image to redraw itself. O Click the [ ] in the upper right of the window to close the edit window. O By selecting the [View] menu [AF Point] in the edit window, you can display the AF points selected in the camera at the time of shooting. However, AF points are not displayed for images which have had their image size changed and then been converted and saved (p.38, p.113). O For a list of edit window functions, refer to p.108. To display an image in an enlargement ratio other than 100% Select the [View] menu [200% view] or [50% view]. You can change the enlargement ratio when you double-click (p.74). 11 Adjusting an Image Introduction You can perform a variety of image adjustments, such as adjusting the brightness or changing the Picture Style of an image using the tool palette of the edit window. You can easily restore an image to its original settings with the [ ] button even if you have made the wrong adjustment. Try out the various adjustments. As an example, the procedure to adjust the brightness of an image is explained here. Tool palette Reverts the image to the original settings Drag the slider left or right About the Tool Palette You can adjust images with the tool palette by switching between the [RAW], [RGB] and [NR/Lens/ALO] tab sheets according to your editing requirements. Because adjustment made with the tool palette (it undergoes automatic development processing each time) only changes the image processing conditions, the “original image data itself” remains unaffected. Therefore, there are no problems with image deterioration that arise with editing and you can readjust your images any number of times. See Chapter 2 onwards for more detailed information on the various functions of the tool palette. Y P O About Recipes In DPP, all the adjustment contents (image processing conditions information) made with the tool palette is saved to an image as data called a “Recipe” (p.79). C Contents at a Glance 1 2 3 4 5 Basic Operation Advanced Operation Advanced Image Editing and Printing Processing Large Numbers of Images Editing JPEG/TIFF Images Reference Index ¿ The image brightness changes in real time according to the amount of adjustments. The tool palette does not display Select the [View] menu [Tool palette]. For a list of tool palette functions, refer to p.109. 12 Saving an Image Introduction If you perform the save operation described here, you can save all the adjustment contents (recipe) made with the tool palette to the RAW image. Select the [File] menu [Save]. ¿ Your adjustment contents (recipe) are saved to the image. C Saving With DPP, you can perform the following types of saving according to your requirements. For detailed information on each saving method, refer to Chapter 2 onwards. O Save (p.37) Add adjustment contents (recipe) made with the tool palette to a RAW image and save. O Save as (p.37) Add adjustment contents (recipe) made with the tool palette to a RAW image and save as a separate RAW image. The original RAW image remains unaffected. O Add thumbnail to image and save* (p.21) Create a new thumbnail image for the main window and save to each image. The quality of images in the main window improves and images redraw themselves more quickly. O Convert and save (p.38) Convert adjusted RAW image to a JPEG or TIFF image and save. The original RAW image remains unaffected. O Batch process* (p.82) Convert in batches adjusted multiple RAW images to JPEG or TIFF images and save. The original RAW images remain unaffected. Y P O * You can save these images in the main window. Contents at a Glance 1 2 3 4 5 Basic Operation Advanced Operation Advanced Image Editing and Printing Processing Large Numbers of Images Editing JPEG/TIFF Images Reference Index 13 Printing an Image Exiting DPP You can print images with a printer. As an example, the procedure to print one image on one sheet of paper is described here. 1 Select the [File] menu In the main window, select the [File] menu Introduction [Exit]. Contents at a Glance [Print]. 1 2 3 4 5 Basic Operation Advanced Operation ¿ The printer’s print settings dialog box appears. 2 Print. O Specify the optimum settings for photograph printing in the printer’s print settings dialog box and click the [OK] button. ¿ Printing begins. Printing C Y P O ¿ DPP exits. Advanced Image Editing and Printing Processing Large Numbers of Images Editing JPEG/TIFF Images Reference With DPP, you can perform the following types of printing according to your requirements. For detailed information on each printing method, refer to Chapter 2 onwards. O Print one image (p.44) O Print using a Canon inkjet printer (p.39, p.42) O Print with a high-end Canon printer (p.70) O Print with shooting information (p.68) O Printing a thumbnail list (contact sheet printing) (p.69) Index A confirmation dialog box for saving the images appears when you try to exit DPP without saving the adjusted image. Click the [Yes to all] button to save the adjustment contents (recipe) to all the images adjusted. 14 2 Advanced Operation Introduction A more advanced operation – from efficiently checking images, to various ways of editing an image, printing a RAW image using a Canon printer and sorting images – is explained here. Efficiently Checking/Sorting Images......................... 16 Sorting Images........................................................... 17 Sorting Images in the Main Window ...................... 18 Arranging Images in the Main Window ...................... 18 Arranging by Type ................................................. 18 Arranging Freely .................................................... 19 Displaying a RAW Image and JPEG Image as a Single Image......................................................................... 20 Improving the Quality of an Image in the Main Window ... 21 Checking Image Information...................................... 21 Editing an Image ...................................................... 23 About the RAW Tool Palette...................................... 23 Editing with the Tool Palette in the Main Window.. 23 Adjusting Brightness .................................................. 24 Changing a Picture Style ........................................... 24 Picture Style File.................................................... 25 Adjusting Color Tone by Changing White Balance.... 25 Adjusting Color Tone Using Click White Balance ...... 26 Adjusting Contrast ..................................................... 27 Changing Color Tone and Color Saturation............... 27 Adjusting Monochrome .......................................... 28 Adjusting Sharpness.................................................. 29 C Automatically Adjusting Brightness and Color (Tone Curve Assist) ............................................................. 30 Editing Efficiently ..................................................... 31 Editing in the Edit Image Window............................... 31 Changing the Thumbnail Display Position to a Horizontal Position....................................................................... 33 Gathering and Editing Images in the Collection Window ... 33 Trimming an Image.................................................. 35 Applying Adjustment Contents to Other Images...... 37 Saving Editing Results............................................. 37 Saving Editing Contents to a RAW Image.................. 37 Saving as a JPEG or TIFF Image............................... 38 Y P O Re-Editing an Image................................................ 39 Printing an Image .................................................... 39 Printing Photographs with Canon Inkjet Printers Compatible with Easy-PhotoPrint EX ......................... 39 Printing Photographs with Canon Inkjet Printers Compatible with Easy-PhotoPrint ............................... 42 Printing Photographs with a Printer other than the Canon Inkjet Printers.............................................................. 44 Organizing Images .................................................. 45 Deleting an Unwanted Image ..................................... 45 Creating a Folder for Saving Images.......................... 45 Moving Images ........................................................... 46 Moving Images in Folders .......................................... 46 Contents at a Glance 1 2 3 4 5 Basic Operation Advanced Operation Advanced Image Editing and Printing Processing Large Numbers of Images Editing JPEG/TIFF Images Reference Index Registering Frequent-Use Folders (Bookmark Registration) ............................................................... 47 Organizing Bookmarks ........................................... 47 15 Efficiently Checking/Sorting Images You can enlarge images displayed as thumbnails in the main window and efficiently check each image. You can attach check marks and sort images into three groups. Introduction 3 Double-click the area you want to enlarge. Contents at a Glance 1 Display the quick check window. O Select the [Tools] menu Double-click [Start Quick check tool]. 1 2 3 4 5 Basic Operation Advanced Operation ¿ The area you double-clicked is enlarged to 50% view. O Double-click again to revert to the full view. O To change the display position, drag on the image. O To exit, click the [OK] button. ¿ The quick check window appears. the [Next] or [Previous] button to switch 2 Click between images to be checked. Quick check window C Y P O Advanced Image Editing and Printing Processing Large Numbers of Images Editing JPEG/TIFF Images Reference Index O All the images displayed in the main window can be checked in the quick check window. When [AF Point] is checkmarked, you can display the AF points selected in the camera at the time of shooting. However, AF points are not displayed for images which have had their image size changed and then been converted and saved (p.38, p.113). 16 Introduction Sorting Images Convenient functions of the quick check window O To check only selected images You can use the quick check window to check only selected images by selecting the desired images from those displayed in the main window and then performing step 1. O Switch between images using the keyboard You can also switch between images by pressing the < > or <> key. O Switch between screens using the keyboard You can also switch between full screen display/normal screen display by pressing the <Alt> + <Enter> keys. O Operate using the menu Each operation can also be performed with the menu which appears when you right-click with the mouse on an image. O The enlargement ratio when an image is enlarged is half (50%) of the 100% (actual pixel size). O You can change the enlargement ratio to 100%, when an image is enlarged (p.74). O For a list of quick check window functions, refer to p.111. C You can sort images by attaching three types of check marks for each subject or theme. Contents at a Glance Attach check marks for sorting. Check mark 1 2 3 4 5 Basic Operation Advanced Operation Y P O ¿ The selected check mark appears in the upper left of the window. O Click the [Clear] button to remove the check marks. Advanced Image Editing and Printing Processing Large Numbers of Images Editing JPEG/TIFF Images Reference Index 17 Introduction Sorting Images in the Main Window Arranging Images in the Main Window You can sort images by attaching three types of check marks in the main window. In the main window, select the images you want to sort and attach a check mark for sorting. You can arrange images in the order of the types of check marks you have attached to images, or in the order of date and time at which the images were shot. You can also freely arrange images by moving them individually. 1 2 3 4 5 Basic Operation Arranging by Type Select the [View] menu Contents at a Glance [Sort] desired item. Advanced Operation Check mark ¿ The selected check mark appears in the upper left of the image frame. O Click the [Clear check] button to remove the check marks. C Y P O ¿ The images are arranged in the order according to the selected item. Advanced Image Editing and Printing Processing Large Numbers of Images Editing JPEG/TIFF Images Reference Index To select multiple images in the main window Click on desired images while holding down the <Ctrl> key. To select multiple consecutive images, click on the first image, and then click on the last image while holding down the <Shift> key. 18 Introduction Sort item Arranging Freely Description Check mark1 Check mark3 Images with check marks take priority and are sorted in number order. Shooting Date/Time Images are sorted by shooting date and time from the earliest. File name Images are sorted by file name in alphanumeric order (0 to 9 A to Z). RAW priority Images are sorted in the following order: RAW images JPEG images TIFF images. C Drag and drop the image to the desired location. Contents at a Glance Advanced Operation Y P O ¿ The image moves to the desired location. O You can also select multiple images (p.18) and move them. O The order of rearranged images is maintained until you exit DPP or select another folder in the folder area. O Select the [View] menu [Sort] [File name] to revert to the order before the images were rearranged. When you assign check marks 1 to 3, the images are sorted as follows: 1 selected: 1 2 3 2 selected: 2 1 3 3 selected: 3 2 1 Advanced Image Editing and Printing Processing Large Numbers of Images Editing JPEG/TIFF Images Reference Maintaining the order of rearranged images Check mark order 1 2 3 4 5 Basic Operation You can maintain the order of rearranged images even if you exit DPP or select another folder in the folder area. O Maintain order without changing image file names You can use the [View settings] tab sheet in Preferences to maintain the order of images without changing the image file names (p.74). O Maintain order and change image file names You can use the rename function to maintain the order of images and change the image file names all at once in the order they were rearranged (p.84). Index 19 Introduction Displaying a RAW Image and JPEG Image as a Single Image You can display and handle a RAW image and JPEG image shot simultaneously as a single image. In particular, you can halve the number of images displayed in the main window and you can streamline the checking of a large number of images shot simultaneously. 1 the [View settings] tab sheet and checkmark 2 Select [Display only CR2 images for CR2 and JPEG files of Select the [Tools] menu [Preferences]. the same name]. C RAW images with the extension “.CR2” can be displayed as a single image Images that can be displayed as a single image are images shot with a camera that shoots RAW images with the extension “.CR2” and JPEG images simultaneously. Images that have been simultaneously shot with a camera that shoots RAW images with the extension “.CRW” or “.TIF” cannot be displayed as a single image. When a single image is displayed O Image displayed The RAW image is displayed in all windows. O Edited image The content which has been adjusted with any of DPP’s functions (the tool palette etc.) will be applied to the RAW image only. However, if you have used the following functions, the adjustments will be applied to both the RAW image and the JPEG image. • Deleting an image (p.45) • Moving or copying an image (p.46) • Checkmarks (p.17, p.18) • Rotating an image (p.105, p.111, p.112) • Attaching a thumbnail to an image and saving (p.21) O Images added to the [Collection] window When you add a RAW image and JPEG image displayed as a single image to the [Collection] window, the single image is marked with the [ ] mark. However, because the RAW and JPEG images are actually added individually, the number of images shown on the [Collection] tab sheet increases by 2 (p.106). Y P O Contents at a Glance 1 2 3 4 5 Basic Operation Advanced Operation Advanced Image Editing and Printing Processing Large Numbers of Images Editing JPEG/TIFF Images Reference Index In step 2, if you uncheck [Display only CR2 images for CR2 and JPEG files of the same name], the RAW image and JPEG image are displayed as separate images. ¿ The main window display updates and the simultaneously shot RAW image and JPEG image are displayed as a single image with the [ ] mark (p.107). 20 Introduction Improving the Quality of an Image in the Main Window Create a new thumbnail image for the main window and save to each image. The quality of images in the main window improves and images redraw themselves more quickly. With all the images selected, select the [File] menu [Add thumbnail to image and save]. Checking Image Information the image for which you want to check the 1 Select image information. 2 Select the [File] menu [Info]. Contents at a Glance 1 2 3 4 5 Basic Operation Advanced Operation C The extent of the improvement in quality Y P O Advanced Image Editing and Printing Processing Large Numbers of Images Editing JPEG/TIFF Images Reference ¿ The image information window appears (p.22). Index The quality is improved for any RAW, JPEG or TIFF image. While the image quality improves regardless of the thumbnail size (p.10), selecting [Large thumbnail], with its larger display size, shows the improvement more clearly than [Medium thumbnail] and [Small thumbnail]. O A large number of images may take some time to add. O You can specify a presetting for JPEG images to improve the quality of all main window thumbnails (p.72, p.73). 21 3 Select a tab sheet and check information. [Shooting Information] tab sheet [Metadata] tab sheet C O Shooting information is displayed in the [Shooting Information] tab sheet, while IPTC* information appended to the image in Photoshop CS3 after shooting is displayed in the [Metadata] tab sheet. IPTC* information provides additional comments on images, such as captions, credits and the shooting location. The information is sorted into 5 different categories and can be viewed by selecting [Description], [IPTC Contact], [IPTC Image], [IPTC Content] or [IPTC Status] from the list box in the [Metadata] tab sheet. * International Press Telecommunications Council (IPTC) O The contents of the [Shooting Information] tab sheet will vary depending on the camera model. Y P O Introduction Contents at a Glance 1 2 3 4 5 Basic Operation Advanced Operation Advanced Image Editing and Printing Processing Large Numbers of Images Editing JPEG/TIFF Images Reference Convenient uses in the main window O Switching displays If a different image is selected in the main window when the image information window is displayed, the image information for that image will be displayed. O Difference with the [Thumbnail with information] Detailed shooting information for each image is displayed in the image information window. However, if you want to only check the main shooting information, you can check it for each image in [Thumbnail with information] (p.10). Index 22 Editing an Image Introduction This section explains how to adjust an image using the tool palette in the edit window. You can easily restore an image to its original condition with the [ ] button even if you have made the wrong adjustment. Try out the various adjustments. How to make adjustments using the [RAW] tool palette functions, and how to adjust automatically with the [RGB] tool palette are explained in this section. Edit window Tool palette About the RAW Tool Palette You can adjust images with the tool palette by switching between the [RAW], [RGB] and [NR/Lens/ALO] tab sheets according to your editing requirements. Adjustments similar to those that can be performed with the functions of your camera can be performed using the functions of the [RAW] tool palette. When the camera settings were incorrect during shooting, or when the shooting result is not what you visualized, you can get closer to what you envisaged with the [RAW] tool palette which is similar to the camera. All functions other than [RGB] tool palette automatic adjustment, and each function of the [NR/Lens/ALO] tool palette are explained in Chapter 3. Y P O Editing with the Tool Palette in the Main Window By clicking the [Tool] button (p.105) in the toolbar on the main window, the same tool palette that appears in the edit window is displayed and you can edit images. C ¿ The image changes in real time according to adjustments performed with the tool palette. O To revert to the condition before the last operation performed on the tool palette, select [Undo] in the [Edit] menu or press <Ctrl> + <Z> keys. Contents at a Glance 1 2 3 4 5 Basic Operation Advanced Operation Advanced Image Editing and Printing Processing Large Numbers of Images Editing JPEG/TIFF Images Reference Index O You can rotate an image in the [Adjustment] menu. O You can adjust an image while comparing the image before and after adjustment (p.49). O You can synchronize multiple images and edit while comparing them (p.50). O Refer to p.108 for a list of edit window functions, and p.109 for a list of tool palette functions. 23 Introduction Adjusting Brightness Changing a Picture Style The brightness of an image can be adjusted. Move the slider to the right to make the image brighter and to the left to make the image darker. Reverts the image to the original settings If the image you shot is different to what you visualized, you can change the Picture Style to get closer to what you envisaged. Even if you have saved the image (p.37) with [Monochrome] (p.28) selected, you can still change to another Picture Style at any point by simply selecting a Picture Style other than [Monochrome]. Enter a numerical value Drag the slider left or right C Reverts the image to the original settings Select Y P O Contents at a Glance 1 2 3 4 5 Basic Operation Advanced Operation Advanced Image Editing and Printing Processing Large Numbers of Images Editing JPEG/TIFF Images Reference Index The adjustment range is –2.0 to +2.0 (in 0.01-stop increments when entering a value). O Even if the RAW image is from a camera that does not have Picture Style settings, you can still set a Picture Style as long as the RAW image is compatible with DPP (p.3). O You can retain the [Color tone], [Color saturation], [Contrast] and [Sharpness] settings, even if you change the Picture Style (p.75). 24 Introduction Picture Style Description Adjusting Color Tone by Changing White Balance Standard The image looks vivid. Ordinarily, this setting is suitable for most images. Portrait For nice skin tones. Effective for close-ups of women and children. By changing the [Color tone], you can adjust the skin tone (p.27). If the color tone of the photographed image does not appear natural, change the white balance to make it appear natural. You can make the color tone natural by setting the light source at the time of shooting an image of, for example, pale-colored flowers. Landscape For natural colors and subdued images. Effective for base images which are to undergo adjustment. Faithful When the subject is photographed under a color temperature of 5200K, the color is adjusted colorimetrically to match the subject’s color. Effective for base images which are to undergo adjustment. C Monochrome For black and white images. You can also adjust with [Filter effect] or [Toning effect] (p.28). (Picture Style file registered in the camera) Displayed when selecting an image shot with the Picture Style file registered in the camera. In the list, the name of the Picture Style file is displayed in ( ). [Picture Style file applied in DPP] The name of the Picture Style file applied in DPP is displayed in [ ]. Picture Style File A Picture Style file is an extended function file of Picture Style. Refer to p.53 for how to use Picture Style files. 1 2 3 4 5 Basic Operation For vivid blues and greens. Effective for making images of landscapes impressive. Neutral Contents at a Glance Y P O Reverts the image to the original settings Select The color tone does not become more natural even when the white balance is changed If the color tone of the image does not appear natural after changing the white balance, adjust the white balance using click white balance (p.26). Advanced Operation Advanced Image Editing and Printing Processing Large Numbers of Images Editing JPEG/TIFF Images Reference Tune with color tone To make further fine adjustments to color tone after adjusting the white balance, you can use [Color tone] (p.27) to get closer to your requirements. Index You cannot register the adjustment results as personal white balance (p.81) when you have selected [Shot settings] from the list box. Refer to your camera’s Instruction Manual for details on each white balance setting. 25 Adjusting Color Tone Using Click White Balance You can adjust white balance using a selected part of an image as the standard for white to make the image appear natural. Using click white balance is effective when using it in parts of an image where white color tone has changed under the influence of a light source. ¿ The color of the image is adjusted with the point you selected as the standard for white. O If you click on another point in the image, the white balance is adjusted again. O To finish click white balance, right-click with the mouse or click the [ ] button again. Introduction Contents at a Glance 1 2 3 4 5 Basic Operation 1 Advanced Operation Click 2 Click on a point that is to be the standard for white. C Y P O Advanced Image Editing and Printing Processing Large Numbers of Images Editing JPEG/TIFF Images Reference Index Click The coordinates of the cursor position and the RGB values (8-bit conversion) Reverts the image to the original settings When there are no white areas in your image When there are no white areas in your image, you can adjust the white balance by clicking on a grey point of the image in step 2. This has the same adjustment result as selecting a white point. The image is adjusted based on the average value of 5 × 5 pixel range from the clicked point. 26 Introduction Adjusting Contrast Changing Color Tone and Color Saturation Modulation and degree of contrast can be adjusted. Move the slider to the right to make contrast stronger and to the left to make contrast weaker. Skin tone and overall color saturation can be adjusted. If Picture Style (p.24) is set to [Monochrome], [Color tone] and [Color saturation] switch to [Filter effect] and [Toning effect] (p.28). Reverts the image to the original settings Reverts the image to the original settings Contents at a Glance 1 2 3 4 5 Basic Operation Advanced Operation Drag the slider left or right (9 steps) Display the value of the setting C Y P O Advanced Image Editing and Printing Drag the sliders left or right Display the values of the settings O Color tone: Mainly used for adjusting skin tones. Move the slider to the right to make skin tones more yellow, and to the left to make skin tones redder. O Color saturation: The overall color depth of the image is adjusted with color saturation. Move the slider to the right to make the color deeper, and to the left to make the color weaker. Processing Large Numbers of Images Editing JPEG/TIFF Images Reference Index [Linear] - A function for advanced adjustment Use [Linear] when you will be adjusting separately using image editing software that has advanced editing functions. Note that when [Linear] is checkmarked, the image will become dim. The adjustment range is –4 to +4 (in 1-stop increments). 27 Adjusting Monochrome When the Picture Style (p.24) is set to [Monochrome], you can create monochrome photographs with effects similar to filtering and with the look of a single-color photograph. 1 2 Select [Monochrome] in the [Picture Style] list box. Reverts the image to the original settings O Filter effect: Creates an image where the white of clouds and the green of trees are emphasized in the same monochrome photograph. Filter None Ordinary monochrome image without filter effect. Yellow Blue sky is reproduced more naturally and white clouds emerge clearly. Orange Blue sky becomes somewhat darker. The brightness of the setting sun increases further. Red Blue sky becomes quite dark. Autumn leaves become clear and bright. Y P O Green Drag the sliders left or right Display the values of the settings C Example of effect Human skin tones and lips become softer. The green leaves of trees become clear and bright. O Toning effect: You can create a monochrome photograph to which a single color has been added. You can choose from [None], [Sepia], [Blue], [Purple] and [Green]. Introduction Contents at a Glance 1 2 3 4 5 Basic Operation Advanced Operation Advanced Image Editing and Printing Processing Large Numbers of Images Editing JPEG/TIFF Images Reference Index Increase the [Contrast] to emphasize the filter effect To emphasize the filter effect, set the [Contrast] slider closer to the right. 28 Introduction Adjusting Sharpness Sharpness is unnatural You can make the overall atmosphere of an image harder or softer. Move the slider to the right to make an image harder and to the left to make an image softer. Reverts the image to the original settings Adjust sharpness with the window view set to [100% view], [50% view] or [200% view]. If the view is set to [Fit to window] (full view), the sharpness may seem unnatural. The adjustment range is 0 to 10 (in 1-stop increments). Contents at a Glance 1 2 3 4 5 Basic Operation Advanced Operation Display the value of the setting Drag the slider left or right C Y P O Advanced Image Editing and Printing Processing Large Numbers of Images Editing JPEG/TIFF Images Reference Index 29 Introduction Automatically Adjusting Brightness and Color (Tone Curve Assist) In order to make the image a desirable standard image, automatically adjust the image tone curve (p.119). You can select the degree of automatic adjustment from “Standard” and “High”. Click on the [RGB] tab sheet and click the desired automatic adjustment button. O Standard: Standard automatic adjustment. Suitable for most images. O High: Use when the effect achieved in standard automatic adjustment is not strong enough. Reverts the tone curve to the original settings High Standard C Images not suitable for automatic adjustment (tone curve assist) The result of automatic adjustment (tone curve assist) may not be as expected with the following images: • Images which have been shot with the proper exposure • Images where the brightness is unbalanced • Images which are too dark • Images which have extreme backlighting If you click the [ ] button, the tone curve as well as the [Hue] and [Saturation] revert to the default settings. Take care when adjusting the [Hue] and [Saturation] individually (p.90). Y P O Contents at a Glance 1 2 3 4 5 Basic Operation Advanced Operation Advanced Image Editing and Printing Processing Large Numbers of Images Editing JPEG/TIFF Images Reference Index ¿ The tone curve changes as adjusted. 30 Editing Efficiently Introduction Editing in the Edit Image Window The thumbnail display and the edit window are combined and images can be edited efficiently while quickly switching between images to be edited. Images to be edited are selected beforehand in the main window. 3 Edit the image. Change the size Edit image window 1 In the main window, select the images you want to edit. 2 Switch to the edit image window. Click ¿ The main window switches to the edit image window. C Contents at a Glance 1 2 3 4 5 Basic Operation Advanced Operation Y P O Select the image to be edited The selected image is displayed as an enlargement in the middle of the window ¿ It may take time for the image to redraw itself. O The same tool palette as in the edit window is displayed and you can edit the image. O To revert to the condition before the last operation performed on the tool palette, select [Undo] in the [Edit] menu or press <Ctrl> + <Z> keys. By selecting the [View] menu [AF Point] in the edit window or edit image window, you can display the AF points selected in the camera at the time of shooting. However, AF points are not displayed for images which have had their image size changed and then been converted and saved (p.38, p.113). Advanced Image Editing and Printing Processing Large Numbers of Images Editing JPEG/TIFF Images Reference Index 31 4 Introduction Double-click the area you want to enlarge. To display an image in an enlargement ratio other than 100% Click the [50% view] or [200% view] on the toolbar. Doubleclick ¿ The area you double-clicked is enlarged to 100% (actual pixel size). If you wait for a while, it changes to a clearer display. O Double-click again to revert to the full view ([Fit to window]). O To change the display position, drag on the image or drag the enlargement display position (p.109) of the tool palette. O To return to the main window, click the [Main window] button on the toolbar. C O You can change the way the tool palette is displayed (p.75). O You can change the enlargement ratio when you double-click (p.74). O With the edit image window, you can only select images from one folder. To gather images from several folders for editing, refer to “Gathering and Editing Images in the Collection Window” (p.33). O For a list of edit image window functions, refer to p.112. Y P O Contents at a Glance 1 2 3 4 5 Basic Operation Advanced Operation Advanced Image Editing and Printing Processing Large Numbers of Images Editing JPEG/TIFF Images Reference Index 32 Introduction Changing the Thumbnail Display Position to a Horizontal Position Select the [View] menu position]. Gathering and Editing Images in the Collection Window You can gather any randomly selected images together in the [Collection] window for viewing, comparison and editing. You can gather images from several folders as well as from only one folder, allowing you to work with them efficiently. [Change thumbnail 1 O If you select [Change thumbnail position] again, the thumbnail display reverts to the vertical position. C Select images from the [Folder] window in the main window, and select the [File] menu [Add to collection]. Y P O Contents at a Glance 1 2 3 4 5 Basic Operation Advanced Operation Advanced Image Editing and Printing Processing Large Numbers of Images Editing JPEG/TIFF Images Reference ¿ The selected images are added to the [Collection] window and the number of selected images is shown on the [Collection] tab sheet. O When you add RAW and JPEG images displayed as a single image (p.20), the number of images shown on the [Collection] tab sheet increases by 2. O You can select several images and add them to the [Collection] window. O You can also add images to the [Collection] window by selecting images, right-clicking with your mouse, and selecting [Add to collection] from the menu that appears. O You can add up to 1,000 images to the [Collection] window. Index 33 Introduction 2 Select the [Collection] tab sheet. To remove images from the [Collection] window Select the images to be removed in the [Collection] window and then select [Remove from collection] in the [File] menu. (You can also remove images from the [Collection] window by selecting the images, rightclicking with the mouse, and selecting [Remove from collection] from the menu that appears.) Note that even if you remove an image from the [Collection] window, the original image remains unaffected. ¿ The selected images are displayed in the [Collection] window. 3 Check displayed images in the [Collection] window. C O Images brought together in the [Collection] window are retained until you exit DPP When you exit DPP, the gathered images disappear from the [Collection] window, but this removal from the [Collection] window does not mean that the original images themselves have been deleted. O Modifications to the image are applied to the original image Modifications made to images added to the [Collection] window are all applied to the original image. Y P O You cannot use the following functions in the [Collection] window. • Starting of EOS Utility (p.7), or synchronizing of folders with EOS Utility • Batch change the file name of images (p.84) Contents at a Glance 1 2 3 4 5 Basic Operation Advanced Operation Advanced Image Editing and Printing Processing Large Numbers of Images Editing JPEG/TIFF Images Reference Index 4 Edit the images. O You can now edit the images displayed in the [Collection] window. 34 Trimming an Image Introduction You can trim only the part of an image you need, or change the composition of an image where an image shot horizontally becomes vertical. Also, when aspect ratio information is attached to an image shot with the EOS-1Ds Mark III or EOS-1D Mark III, the trimming range based on the aspect ratio information is displayed. 3 When the image has redrawn itself, select a ratio and drag the trimming range. Trimming window Cancel Select a trimming ratio 1 2 Open the trimming window. Select the image to be trimmed. O Select the [Tools] menu [Start Trimming tool]. ¿ The trimming window appears. C Contents at a Glance Y P O Drag the trimming range O The trimming range can be moved by dragging. O You can enlarge or reduce the size of the trimming range by dragging the four corners of the trimming range. O List of aspect ratios (width : height) [Free]: You can trim an image to any size, regardless of the selectable ratio. [Custom]: You can trim an image at the specified ratio. 1 2 3 4 5 Basic Operation Advanced Operation Advanced Image Editing and Printing Processing Large Numbers of Images Editing JPEG/TIFF Images Reference Index 4 Click the [OK] button to return to the main window. ¿ The trimming range frame is displayed in the trimmed image (p.107). ¿ When the trimmed image is displayed in an edit window or the edit image window, it is displayed in its trimmed form. 35 Introduction About trimmed images Convenient functions of the trimming window O The trimmed range can be reverted to its original condition at any time A trimmed image is displayed or printed as a trimmed image. However, since the image is not actually trimmed, you can always revert to the original image by clicking the [Reset] button in the trimming window or performing the “Re-Editing an Image” procedure (p.39). O Display of the trimmed image in each window • Main window: The frame showing the trimming range is displayed on the image (p.107). • Edit window: The image is displayed in its trimmed condition. • Edit image window: The thumbnail image is the same as the main window display, and the enlarged image is the same as the edit window display. O Printing a trimmed image You can print as a trimmed image by printing it in DPP. O The image becomes a trimmed image when converted and saved The trimmed RAW image actually becomes a trimmed image when converted to a JPEG or TIFF image and saved (p.38). O Images that have aspect ratio set will be displayed as trimmed images When aspect ratio information is attached to an image shot with EOS1Ds Mark III or EOS-1D Mark III, the set trimming range based on the aspect ratio information is displayed. However, since the image is not actually trimmed, you can change the trimming range or revert to the condition before trimming. When reverting to the condition before trimming is performed based on the aspect ratio information at the time of shooting, click the [Reset] button. Also, if you want to cancel all the trimming range, click the [Clear] button (p.114). C O Switch between screens using the keyboard You can also switch between full screen display/normal screen display by pressing the <Alt> + <Enter> keys or the <F11> key. O Operate using the menu Each operation can also be performed with the menu which appears when you right-click with the mouse on the image. O Apply the trimmed range to another image You can apply the trimmed range to another image by clicking the [Copy] button to copy the trimmed range, displaying another image and then clicking the [Paste] button. To batch apply a copied trimming range to multiple images, select the trimmed image and the multiple images to which you want to apply the trimmed range in the main window, and display the trimming window. With the trimmed image displayed, click the [Copy] button and then click the [Apply All] button. This will apply the trimming range to all the images selected when the trimming window is displayed. Y P O For a list of the trimming window functions, refer to p.114. Contents at a Glance 1 2 3 4 5 Basic Operation Advanced Operation Advanced Image Editing and Printing Processing Large Numbers of Images Editing JPEG/TIFF Images Reference Index 36 Applying Adjustment Contents to Other Images You can copy the image adjustment contents (recipe) adjusted with the tool palette and apply it to other images. You can efficiently adjust multiple images by adjusting one image and applying the results of this to multiple images shot in similar shooting environment. the adjusted image and then select the [Edit] 1 Select menu [Copy recipe to clipboard]. ¿ The recipe is copied. 2 Saving Editing Results Saving Editing Contents to a RAW Image All the contents (recipe) adjusted with the tool palette as well as the trimmed (p.35) range information can be saved to a RAW image or to a separate RAW image. The adjustments made with the tool palette (p.52 to p.62) and the dust erase processing explained in Chapter 3 (p.63 to p.67) can also be saved in a RAW image. Select the [File] menu desired item. Select the image to which the recipe is to be applied and then select the [Edit] menu [Paste recipe]. ¿ The recipe is applied to the image. C Introduction Contents at a Glance 1 2 3 4 5 Basic Operation Advanced Operation Y P O Advanced Image Editing and Printing Processing Large Numbers of Images Editing JPEG/TIFF Images Reference Index ¿ Your adjustments are saved to the image. The recipe (p.79) can be saved as a separate file from the image and loaded and applied to another image (p.80). 37 Introduction Saving as a JPEG or TIFF Image To view, edit and print a RAW image with software other than DPP, convert to a more versatile JPEG or TIFF image and save. The image is saved as a separate image, so the RAW image remains unaffected. 1 2 Select the [File] menu Contents at a Glance Select the save destination Select the image to be converted. Click and save [Convert and save]. 1 2 3 4 5 Basic Operation Advanced Operation Y P O Enter a file name and select an image type ¿ The RAW image is converted to a JPEG or TIFF image which is then saved as a new image in the specified save destination. C ¿ The [Convert and save] window appears. the necessary settings, and then click the 3 Specify [Save] button. O By default, the image is converted and saved to a JPEG image with the highest image quality, without changing the image size. Change the settings according to your requirements. To save the developing/editing results for the version you are currently using DPP’s RAW image development processing technology is continually being improved upon so that you can perform the latest image processing more appropriately. Meaning that, between two differing versions of DPP, processing results may differ very slightly even if with the same RAW image data, or the results of significant editing of RAW image data with an attached recipe may be different. When you want to save the developing or editing results of the version you are currently using as it is, it is recommended that you convert and save images as JPEG image or TIFF images. O By saving as explained on this page, a trimmed image (p.35) or dust-erased image explained in Chapter 3 (p.63 to p.67) actually becomes a trimmed image or dust-erased image. O You can reduce the noise characteristic of JPEG images which occurs when you convert and save an image as a JPEG (p.72). O You can batch convert and save multiple images (p.82). O For a list of [Convert and save] window functions, refer to p.113. Advanced Image Editing and Printing Processing Large Numbers of Images Editing JPEG/TIFF Images Reference Index 38 Re-Editing an Image Printing an Image Only the image processing conditions are changed in images adjusted with the tool palette (p.23), so the “original image data itself” remains unaffected. Also, the trimming range information of a trimmed image (p.35) is simply saved to the image. For this reason, you can undo any adjustments saved (p.37) to the image, trimming information, and revert to the condition when last saved, or when the image was shot. This section explains how to print high-resolution photographs easily with the Canon inkjet printers compatible with the Canon printing software, Easy-PhotoPrint EX or Easy-PhotoPrint. It also explains how to print photographs using other printers. 1 Select the image that is to be re-edited. 2 Select the [Adjustment] menu desired item. Proceed to the page for the printer you are using. O Printing Photographs with Canon Inkjet Printers Compatible with Easy-PhotoPrint EX (Same page) O Printing Photographs with Canon Inkjet Printers Compatible with Easy-PhotoPrint (p.42) O Printing Photographs with a Printer other than the Canon Inkjet Printers (p.44) Y P O Printing Photographs with Canon Inkjet Printers Compatible with Easy-PhotoPrint EX C ¿ The image reverts to the conditions of the selected item. You can perform the following types of photograph printing with the Canon inkjet printers compatible with Easy-PhotoPrint EX (hereinafter, “EPP EX”) : O Simple printing of RAW images O Printing with faithful colors O High quality printing using the color reproduction range of Adobe RGB and a Canon inkjet printer To perform this printing, it is necessary to first install EPP EX version 1.1 or later on your computer. Introduction Contents at a Glance 1 2 3 4 5 Basic Operation Advanced Operation Advanced Image Editing and Printing Processing Large Numbers of Images Editing JPEG/TIFF Images Reference Index 39 Introduction 1 Select the image to be printed. 2 Start up EPP EX. O Select the [File] menu PhotoPrint EX]. [Plug-in printing] 4 In [Print Quality], select [Quality Priority]. Contents at a Glance [Print with Easy- Select Quality Priority 1 2 3 4 5 Basic Operation Advanced Operation ¿ EPP EX starts up. In the EPP EX window, select the [File] menu 3 [Preferences]. C Y P O 5 Advanced Image Editing and Printing Click to close the window Specify the number of sheets to be printed, and then click [Select Paper]. EPP EX Editing JPEG/TIFF Images Reference Click to increase the number of sheets to be printed ¿ The [Preferences] window appears. Processing Large Numbers of Images Index Click 40 Introduction 6 Select the paper type, and then click the [Layout/ Print] button. Select the paper size and type Additional information O Print up to 1000 images at a time You can print up to 1000 images selected in DPP at a time. When printing more than 1000 images, divide the printing into several jobs. O The printed image’s color is not what you expected In the EPP EX window, select [Preferences] in the [File] menu and then click the [Advanced] tab in the [Preferences] window to display the [Advanced] tab sheet. In the [Advanced] tab sheet, select [Enable ICC profile] in [Color correction for printing] and print using the [Perceptual] setting (p.120). Y P O Advantages of printing using EPP EX Click 7 Specify the layout, and then click the [Print] button. C Select the layout O Printing with faithful colors When the color space (p.120) is set to sRGB or Adobe RGB (p.67, p.76), this color space is automatically transmitted from DPP to EPP EX, allowing you to print with faithful colors. If you set Apple RGB, ColorMatch RGB or Wide Gamut RGB, the image is printed with Adobe RGB color space. O Printing with a wide color reproduction When the color space (p.67, p.76) is set to Adobe RGB and the image is printed with the Canon inkjet printer, the color reproduction area widens, and green and blue in particular are reproduced vividly. Contents at a Glance 1 2 3 4 5 Basic Operation Advanced Operation Advanced Image Editing and Printing Processing Large Numbers of Images Editing JPEG/TIFF Images Reference DPP is also compatible for printing with Easy-PhotoPrint Pro (p.70). Index Click to print ¿ Printing begins. 41 Introduction Printing Photographs with Canon Inkjet Printers Compatible with Easy-PhotoPrint You can perform the following types of photograph printing with the Canon inkjet printers compatible with Easy-PhotoPrint (hereinafter, “EPP”): O Simple printing of RAW images O Printing with faithful colors O High quality printing using the color reproduction range of Adobe RGB and a Canon inkjet printer To perform this printing, it is necessary to first install EPP version 3.6 or later on your computer. 1 Select the image to be printed. 2 Start up EPP. O Select the [File] menu PhotoPrint]. [Plug-in printing] [Print with Easy- C 3 In the EPP window, select the [File] menu [Preferences]. Contents at a Glance 4 In [Print Quality], select [Quality Priority]. Y P O 1 2 3 4 5 Basic Operation ¿ The [Preferences] window appears. Advanced Operation Select Quality Priority Advanced Image Editing and Printing Processing Large Numbers of Images Editing JPEG/TIFF Images Reference Index ¿ EPP starts up. 42 Introduction 5 Select the [Advanced] tab sheet and check that the EPP image compensation function is disabled. O If not disabled, the operation of the EPP image compensation function may prevent images being printed with faithful color reproduction. 7 Check that the image compensation function is disabled, select the paper type and then click [Next]. If checked, click to remove the check marks Click If checked, click to remove the check mark Click to close the window C the number of sheets to be printed, and then 6 Specify click [Next]. Click Select the paper type Y P O Contents at a Glance 1 2 3 4 5 Basic Operation Advanced Operation Advanced Image Editing and Printing Processing Large Numbers of Images 8 Specify the layout, and then click [Print]. Editing JPEG/TIFF Images Click to print Reference Index Click to increase the number of sheets to be printed Select the layout ¿ Printing begins. 43 Introduction Printing Photographs with a Printer other than the Canon Inkjet Printers Additional information O Print up to 1000 images at a time You can print up to 1000 images selected in DPP at a time. When printing more than 1000 images, divide the printing into several jobs. O The printed image’s color is not what you expected Change the [Rendering intents when using Easy-PhotoPrint] (p.76) to [Perceptual] (p.120) and print. You can print one image on one sheet of paper. 1 Select the image to be printed. 2 Select the [File] menu [Print]. Contents at a Glance 1 2 3 4 5 Basic Operation Advanced Operation Advantages of printing using EPP O Printing with faithful colors When the color space (p.120) is set to sRGB or Adobe RGB (p.67, p.76), this color space is automatically transmitted from DPP to EPP, allowing you to print with faithful colors. If you set Apple RGB, ColorMatch RGB or Wide Gamut RGB, the image is printed with Adobe RGB color space. O Printing with a wide color reproduction When the color space (p.67, p.76) is set to Adobe RGB and the image is printed with the Canon inkjet printer, the color reproduction area widens, and green and blue in particular are reproduced vividly. C DPP is also compatible for printing with Easy-PhotoPrint Pro (p.70). Y P O Advanced Image Editing and Printing Processing Large Numbers of Images Editing JPEG/TIFF Images Reference ¿ The [Print] dialog box appears. 3 Set to photograph printing and print. Index O Specify the optimum settings for photograph printing in the printer’s print settings dialog box and click the [OK] button. ¿ Printing begins. 44 Organizing Images Introduction This section explains how to delete unwanted images, create folders for saving images, move or copy images, etc., and organize your images. Creating a Folder for Saving Images You can create a folder for sorting images. Deleting an Unwanted Image the folder area, select the location where the new 1 Infolder is to be created. Be aware that you cannot recover deleted images. 1 2 Select the [File] menu Select an unwanted image in the main window. [Delete]. Contents at a Glance 1 2 3 4 5 Basic Operation Advanced Operation Y P O 2 Select the [File] menu C Advanced Image Editing and Printing [Create new folder]. Processing Large Numbers of Images Editing JPEG/TIFF Images Reference Index ¿ The [Confirm File Delete] dialog box appears. 3 Click the [Yes] button. ¿ The image is moved to the [Recycle Bin] and is deleted from DPP. O The images are deleted completely from your computer when the [Empty Recycle Bin] operation is performed on the [Recycle Bin] on the desktop. ¿ The [Create new folder] dialog box appears. 3 Enter a folder name and click the [OK] button. ¿ The new folder is created in the folder selected in step 1. 45 Introduction Moving Images Moving Images in Folders You can move or copy images to a separate folder and sort by shooting date or themes. You can move or copy folders that contain images, and sort the images by folders. Drag the image to be moved or copied. Drag the folder to be moved or copied. O To move: Drag the image and release when the image is in the destination folder. O To copy: Drag the image while holding down the <Ctrl> key and release when the image is in the destination folder. O To move: Drag the folder and release when the folder is in the destination folder. O To copy: Drag the folder while holding down the <Ctrl> key and release when the folder is in the destination folder. ¿ The images are moved or copied to the destination folder. C Y P O ¿ The folders are moved or copied to the destination folder. Contents at a Glance 1 2 3 4 5 Basic Operation Advanced Operation Advanced Image Editing and Printing Processing Large Numbers of Images Editing JPEG/TIFF Images Reference Index 46 Introduction Registering Frequent-Use Folders (Bookmark Registration) You can change a folder name or delete a folder registered in [Bookmark]. You can register frequently used folders in bookmarks. Registered folders appear by clicking the [Bookmark] menu. 1 Organizing Bookmarks Select the [Bookmark] menu Select the folder for which a bookmark is to be registered. Contents at a Glance [Organize]. ¿ The [Sort bookmarks] window appears and you can change folder names or delete folders. 1 2 3 4 5 Basic Operation Advanced Operation Select 2 Select the [Bookmark] menu [Add]. C ¿ The folder selected in step 1 is registered in the [Bookmark] menu. O Select a registered folder from the [Bookmark] menu to display images in the selected folder in the main window. Y P O Advanced Image Editing and Printing Processing Large Numbers of Images Editing JPEG/TIFF Images Reference Index 47 3 Advanced Image Editing and Printing Introduction Various preferences including advanced image adjustment, automatic dust erasure processing, various printing functions for printing out work, and color management are explained here, geared to the user who is competent in the handling of third-party image editing software. Performing Automatic Dust Erasure Processing ..... 63 Compatible Cameras.................................................. 63 Automatic Dust Erasure Processing in the Main Window... 64 Manually Erasing Dust (Repair Function)................ 65 Contents at a Glance 1 2 3 4 5 Adjusting While Comparing with the Original Image... 49 Changing How the Window is Split............................ 49 Erasing Unwanted Parts of an Image (Copy Stamp Function)..................................................................... 67 Basic Operation Adjusting by Comparing Multiple Images................. 50 Transferring a RAW Image to Photoshop................ 67 Displaying an Area Beyond the Set Range as a Warning Indicator (Highlight/Shadow Warning) ....... 51 Setting Work Color Space ....................................... 67 Advanced Operation Performing Advanced Editing................................... 52 Adjusting White Balance with Color Temperature ..... 52 Tuning White Balance with Color Wheel ................... 52 Adjusting Dynamic Range ......................................... 53 Using a Picture Style File........................................... 53 Tone Curve Adjustment ............................................. 54 Example of a Tone Curve Operation ..................... 55 About the RGB Tool Palette ...................................... 55 C Using the Auto Lighting Optimizer............................ 56 Y P O Printing with Shooting Information........................... 68 Printing a Thumbnail List (Contact Sheet Printing).. 69 Printing RAW Images on a High-End Canon Printer.. 70 Printing with a High-End Canon Inkjet Printer ............ 70 Printing with a Large-Format Canon Printer ............... 71 Specifying Preferences............................................ 72 General Settings......................................................... 72 View Settings.............................................................. 74 Tool Palette ................................................................ 75 Color Management ..................................................... 76 Advanced Image Editing and Printing Processing Large Numbers of Images Editing JPEG/TIFF Images Reference Reducing Noise........................................................ 57 Correcting Lens Aberration ...................................... 58 Compatible Cameras ................................................. 58 Compatible Lenses .................................................... 59 Making Corrections.................................................... 61 About Shooting Distance Information Slider .............. 62 Correcting Multiple Images at a Time ........................ 62 Index 48 Adjusting While Comparing with the Original Image You can display before and after versions of an adjusted image in the same window and adjust while checking the adjustment results. Introduction Changing How the Window is Split You can change the display of the image to a single image split in two. 1 In the edit window, select the [View] menu after comparison]. [Before/ In the edit window, select the [View] menu mode] [Split single image]. [Display Contents at a Glance 1 2 3 4 5 Basic Operation Advanced Operation 2 Change the image display. O Select the [View] menu down]. [Change up/down/left/right] Y P O ¿ One image is divided and displayed on the left and right or top and bottom. O To switch between top and bottom, and left and right, perform the same operation as step 2 on the left page. ¿ The image divides into a left and right window. O The window on the right shows the image after editing. C [Up/ Advanced Image Editing and Printing Processing Large Numbers of Images Editing JPEG/TIFF Images Reference Index ¿ The layout of the two images changes to top and bottom. O The bottom window shows the image after editing. Images can also be displayed in the edit image window by the same operation. 49 Adjusting by Comparing Multiple Images You can synchronize the display position of multiple edit windows and adjust images while comparing them with each other. 1 2 Align the images. In the edit window, display the multiple images to be compared. 5 ¿ If you move the enlargement display position in one of the edit windows, the enlargement display position will also change in the other edit windows. O To cancel synchronization, select the [Window] menu [Synchronize] again. 3 4 Enlarge the image. C 1 2 3 4 5 Advanced Operation [Synchronize]. O Enlarge and display any of the edit windows. Contents at a Glance Basic Operation O Select the [Window] menu [Arrange vertically] or [Arrange horizontally]. ¿ The edit windows are aligned. Select the [Window] menu Introduction Move the display position. Y P O Advanced Image Editing and Printing Processing Large Numbers of Images Editing JPEG/TIFF Images Reference Index ¿ The other edit windows will also be displayed in the same position/enlargement ratio. Synchronization only applies to the enlargement display position and the enlargement ratio. Adjustments to the images are not synchronized. 50 Displaying an Area Beyond the Set Range as a Warning Indicator (Highlight/Shadow Warning) You can set up a warning indicator in both the highlighted part and the shaded part, which is effective for checking the light and dark areas and preventing excessive adjustment of an image. Where the area on the image has exceeded that set range, you can display the highlighted part in red and the shaded part in blue. 1 Select the [Tools] menu [Preferences]. 2 Select the [View settings] tab sheet. 3 Enter the warning value for [Highlight] and [Shadow]. C 5 the [View] menu 6 Select [Shadow]. Introduction Display the edit window. [Highlight]. Similarly, select ¿ On the opened image, if there is an area that exceeds the value entered in step 3, the highlighted part of that area is displayed in red and the shaded part is displayed in blue. Contents at a Glance 1 2 3 4 5 Basic Operation Advanced Operation Y P O Advanced Image Editing and Printing Processing Large Numbers of Images Editing JPEG/TIFF Images Reference Index 4 Click the [OK] button to close the window. You can also display the warning with the same operation in the edit image window. 51 Performing Advanced Editing Introduction This section explains how to use the advanced adjustment function on the tool palette in the edit window. Adjustments made using the high-level functions of the [RAW] and [RGB] tool palettes, as well as the functions of the [NR/Lens/ALO] tool palette are explained in this section. Adjusting White Balance with Color Temperature White balance can be adjusted by setting a numerical value for color temperature. [Color temperature] from the [White balance 1 Select adjustment] list box. 2 Set the color temperature. C Display the value of the setting Drag the slider left or right Tuning White Balance with Color Wheel White balance can be tuned by moving a cursor in the color direction shown in the color wheel. 1 In the [RAW] tool palette, click the [Tune] button. 2 Tune by dragging a point. O You can also fine-tune your adjustment by directly entering the adjustment values. Y P O 1 2 3 4 5 Basic Operation Advanced Operation Advanced Image Editing and Printing Enter the values to set Drag Processing Large Numbers of Images Editing JPEG/TIFF Images Reference To register adjustment results as personal white balance (p.81), select a setting other than [Shot settings] from the [White balance adjustment] list box, and then tune with the color wheel. You cannot register the adjustment results as personal white balance when you have selected [Shot settings] from the list box and have done any tuning. The adjustment range is 2500 to 10000K (in 100K units). Contents at a Glance The adjustment range of color tone is 0 to 359 (1 unit in numerical value input), and the adjustment range of color saturation is 0 to 255 (1 unit in numerical value input). Index 52 Introduction Adjusting Dynamic Range Using a Picture Style File Dynamic range (width of gradation expression) from dark points to bright points in an image can be adjusted. Move downwards Output highlight points Move to the left or rignt Input highlight points Move upwards Output shadow points Move to the left or right Input shadow points C O The horizontal axis shows the input level and the vertical axis shows the output level. A Picture Style file is an extended function file of a Picture Style. With DPP, you can apply to RAW images Picture Style files that you have downloaded from Canon’s web site effective for various scenes or Picture Style files created with “Picture Style Editor”. When using a Picture Style file, save it to your computer beforehand. 1 the [RAW] tab sheet in the tool palette, and 2 Select click the [Browse] button. Display the image to which the Picture Style file is to be applied in the edit window (p.11). Y P O ¿ The [Open] dialog box appears. a Picture Style file saved on your computer, 3 Select and click the [Open] button. ¿ The Picture Style file you selected is applied to an image. O To apply a different Picture Style file, follow the procedure from step 2 again. The Picture Style files that you can apply to the camera are files with the “.PF2” extension only. Furthermore, you cannot apply Picture Style files with the extension “.PSE” to an image; however if such a file is registered in the camera and the image is shot, the image will display correctly. Contents at a Glance 1 2 3 4 5 Basic Operation Advanced Operation Advanced Image Editing and Printing Processing Large Numbers of Images Editing JPEG/TIFF Images Reference Index 53 Introduction Tone Curve Adjustment You can adjust the brightness, contrast and color of a specific area by changing the tone curve (p.119). 3 Make adjustments. Contents at a Glance 1 In the tool palette, select the [RGB] tab sheet. the tone curve mode and interpolation 2 Select method. Adjusts each channel Batch adjusts RGB 1 2 3 4 5 Basic Operation Advanced Operation Right-click with the mouse inside the graph to display the menu C Y P O Click to add a [ ] (point) Adjust by dragging [ ] Advanced Image Editing and Printing Processing Large Numbers of Images Editing JPEG/TIFF Images Reference O The horizontal axis shows the input level and the vertical axis shows the output level. O The maximum number of [ ] is 8. O To delete a [ ], either press the <Del> key or double-click on the [ ]. O The histogram display changes according to adjustment. You can also fix the histogram display to the display before any adjustments (p.75). O The tone curve mode and interpolation method for a tone curve can also be changed in [Preferences] (p.75). Index 54 Introduction Example of a Tone Curve Operation Makes medium tones brighter Makes tones harder About the RGB Tool Palette Makes medium tones darker Makes tones softer C You can adjust images with the tool palette by switching between the [RAW], [RGB] and [NR/Lens/ALO] tab sheets according to your editing requirements. The [RGB] tool palette functions are the same as ordinary image editing software, such as tone curve adjustment that is explained here, with which you can adjust RAW images. However, because the adjustment width of the adjustment functions in the [RGB] tool palette is wider than the [RAW] tool palette, the image color may be saturated, or the image quality may deteriorate if you adjust too much. Therefore we recommend for functions other than tone curve adjustment and automatic adjustment (p.30), that you adjust images using the same functions available in the [RAW] tool palette. Refer to Chapter 5 for explanations on functions of the [RGB] tool palette other than tone curve adjustment. Y P O Contents at a Glance 1 2 3 4 5 Basic Operation Advanced Operation Advanced Image Editing and Printing Processing Large Numbers of Images Editing JPEG/TIFF Images Reference Using the tool palette We recommend that as a general principle you edit RAW images using the [RAW] tool palette. However, where the adjustment width with the [RAW] tool palette is not wide enough and you wish to use the special functions in the [RGB] tool palette, we recommend that you adjust your images at the necessary lowest limit with the [RGB] tool palette after having completed basic adjustment with the [RAW] tool palette. Use the adjustment function of the [NR/Lens/ALO] tool palette (p.110) when applying the Auto Lighting Optimizer (p.56), reducing noise (p.57) or correcting aberration (p.58) after you have made any required adjustments with the [RAW] and [RGB] tool palettes. Index 55 Using the Auto Lighting Optimizer If the shooting result is dark or the contrast is low, using the Auto Lighting Optimizer will auto-correct the brightness or contrast to provide the desirable image. You can also change the settings of the image shot with the camera’s Auto Lighting Optimizer function. This function is compatible only with RAW images shot with EOS 50D. * ALO stands for Auto Lighting Optimizer. 1 Select the [NR/Lens/ALO] tab sheet from the tool palette in the edit window or edit image window. C Introduction 2 Checkmark the checkbox. Checkmark O For images shot with the camera’s Auto Lighting Optimizer function, the checkbox is already checked. 3 Change the settings according to your preferences. Y P O Select from three levels: Low/Standard/Strong ¿ Auto correction is applied to the image to match the settings. O For images shot with the camera’s Auto Lighting Optimizer function, the settings at the time of shooting are applied as the default values. O To cancel the Auto Lighting Optimizer, remove the check mark from the checkbox. Contents at a Glance 1 2 3 4 5 Basic Operation Advanced Operation Advanced Image Editing and Printing Processing Large Numbers of Images Editing JPEG/TIFF Images Reference Index 56 Reducing Noise Introduction You can reduce noise that arises in RAW images that have been shot at night or with a high ISO speed. NR is an abbreviation for “noise reduction”. the [NR/Lens/ALO] tab sheet from the tool 1 Select palette in the edit window or edit image window. 2 Adjust an image. Drag the sliders right C O You can set a noise reduction level from within a range of 0 to 20. The larger the setting, the larger the noise reduction effect. 3 Click the [Apply] button. ¿ Noise reduction is applied to the image and the image is redisplayed. 4 Display the image in the [100% view] or [200% view]. ¿ You can check the noise reduction effect. O In the [50% view] or [Fit to window] display, it may be difficult to check the noise reduction effect. Additional information O The noise reduction function does not work Noise reduction cannot be applied when [Viewing and saving RAW images] (p.72) is set to [High speed] in the [Preferences] window. Select [High quality] to reduce noise. O To check the noise reduction effect, enlarge the image and display it Because noise reduction effect is difficult to see in the [50% view] and [Fit to window] displays, use [100% view] or [200% view] to check the noise reduction. O Luminance noise reduction is not available for sRAW images You can only reduce chrominance noise for sRAW images. You cannot reduce luminance noise. Y P O O You can set the default noise reduction beforehand, using [Default noise reduction settings] in the [Tool palette] tab sheet in Preferences (p.75). • When [Apply camera settings] is selected, you can pre-set a noise reduction level that suits the camera settings beforehand as the default. • When [Set as defaults] is selected, you can pre-set a preferred default setting for the noise reduction level beforehand. This is particularly useful for applying noise reduction to all the images in a folder at once, such as batch noise reduction for images with high ISO speeds. However, for images with recipes attached, the noise level recorded in the recipe will be applied. O If [Luminance noise reduction] has been set, resolution may be reduced along with reduction of noise. O If [Chrominance noise reduction] has been set, color bleeding may occur along with reduction of noise. O For a list of tool palette functions, refer to p.110. Contents at a Glance 1 2 3 4 5 Basic Operation Advanced Operation Advanced Image Editing and Printing Processing Large Numbers of Images Editing JPEG/TIFF Images Reference Index 57 Correcting Lens Aberration Introduction You can easily make corrections to drops in peripheral illumination, distortions in the subject, and color blur which occur by the physical characteristics of the lens or slightly remaining aberration. Please note that you can only correct RAW images which have been taken with the compatible cameras and lenses listed below. JPEG or TIFF images cannot be corrected. Contents at a Glance Compatible Cameras EOS-1Ds Mark III EOS-1D Mark III EOS-1D Mark II N EOS-1Ds Mark II EOS-1D Mark II EOS-1Ds EOS-1D EOS 5D*1 EOS 50D EOS 40D EOS 30D*2 EOS DIGITAL REBEL XSi/450D EOS DIGITAL REBEL EOS DIGITAL REBEL XTi/400D DIGITAL XS/1000D *1 Requires firmware version 1.1.1 *2 Requires firmware version 1.0.6 1 2 3 4 5 Basic Operation _ C Advanced Operation Y P O Advanced Image Editing and Printing Processing Large Numbers of Images Editing JPEG/TIFF Images Reference Index 58 Introduction Compatible Lenses Zoom lenses Ultra wide and wide lenses EF 14mm f/2.8L USM EF 14mm f/2.8L II USM EF 20mm f/2.8 USM EF 24mm f/1.4L USM EF 24mm f/2.8 EF 28mm f/1.8 USM EF 28mm f/2.8 EF 35mm f/1.4L USM _ EF 35mm f/2 Standard and medium telephoto lenses EF 50mm f/1.2L USM EF 50mm f/1.4 USM EF 50mm f/1.8 EF 50mm f/1.8 II EF 85mm f/1.2L USM EF 85mm f/1.2L II USM EF 85mm f/1.8 USM EF 100mm f/2 USM Telephoto lenses EF 135mm f/2L USM EF 135mm f/2.8 (with Softfocus mechanism) EF 200mm f/2L IS USM EF 200mm f/2.8L USM EF 200mm f/2.8L II USM EF 300mm f/2.8L IS USM EF 300mm f/4L IS USM EF 400mm f/2.8L IS USM EF 400mm f/5.6L USM EF 400mm f/4 DO IS USM EF 500mm f/4L IS USM EF 600mm f/4L IS USM _ EF 800mm f/5.6L IS USM C EF 16-35mm f/2.8L USM EF 16-35mm f/2.8L II USM EF 17-35mm f/2.8L USM EF 17-40mm f/4L USM EF 20-35mm f/3.5-4.5 USM EF 24-70mm f/2.8L USM EF 24-85mm f/3.5-4.5 USM EF 24-105mm f/4L IS USM EF 28-70mm f/2.8L USM EF 28-90mm f/4-5.6 USM EF 28-90mm f/4-5.6 II USM EF 28-90mm f/4-5.6 EF 28-90mm f/4-5.6 II EF 28-90mm f/4-5.6 III EF 28-105mm f/3.5-4.5 USM EF 28-105mm f/3.5-4.5 II USM Y P O EF 28-105mm f/4-5.6 USM EF 28-105mm f/4-5.6 EF 28-135mm f/3.5-5.6 IS USM EF 28-200mm f/3.5-5.6 EF 28-200mm f/3.5-5.6 USM EF 28-300mm f/3.5-5.6L IS USM EF 55-200mm f/4.5-5.6 II USM EF 55-200mm f/4-5.6 USM EF 70-200mm f/2.8L USM EF 70-200mm f/4L USM EF 70-200mm f/2.8L IS USM EF 70-200mm f/4L IS USM EF 70-300mm f/4-5.6 IS USM EF 70-300mm f/4.5-5.6 DO IS USM EF 75-300mm f/4-5.6 II EF 75-300mm f/4-5.6 III EF 75-300mm f/4-5.6 USM EF 75-300mm f/4-5.6 II USM EF 75-300mm f/4-5.6 III USM EF 90-300mm f/4.5-5.6 EF 100-300mm f/4.5-5.6 USM _ EF 100-400mm f/4.5-5.6L IS USM Contents at a Glance 1 2 3 4 5 Basic Operation Advanced Operation Advanced Image Editing and Printing Processing Large Numbers of Images Editing JPEG/TIFF Images Reference EF 90-300mm f/4.5-5.6 USM Index Macro lenses EF 100mm f/2.8 Macro USM EF 180mm f/3.5L Macro USM 59 Introduction EF-S lenses EF-S 60mm f/2.8 Macro USM EF-S 10-22mm f/3.5-4.5 USM EF-S 17-55mm f/2.8 IS USM EF-S 17-85mm f/4-5.6 IS USM EF-S 18-55mm f/3.5-5.6 EF-S 18-55mm f/3.5-5.6 II EF-S 18-55mm f/3.5-5.6 USM EF-S 18-55mm f/3.5-5.6 II USM EF-S 18-55mm f/3.5-5.6 IS EF-S 18-200mm f/3.5-5.6 IS _ EF-S 55-250mm f/4-5.6 IS O You can also correct RAW images taken with the compatible lens even when the extender is attached. O The aberration correction function is not available for images shot with combinations of camera/lens other than those given under “Compatible Cameras” and “Compatible Lenses”. They are therefore not displayed and cannot be used. Contents at a Glance 1 2 3 4 5 Basic Operation Advanced Operation C Y P O Advanced Image Editing and Printing Processing Large Numbers of Images Editing JPEG/TIFF Images Reference Index 60 Introduction Making Corrections You can make corrections to any of the four aberrations as below, either one at a time or simultaneously. O Peripheral illumination O Distortions O Chromatic aberration (color fringing which occurs in the periphery of an image) O Color blur (blue or red color blur which sometimes occurs at the edge of the highlighted area of an image) 3 Checkmark the items to be corrected. Contents at a Glance 1 2 3 4 5 Basic Operation Advanced Operation the tool palette, select the [NR/Lens/ALO] tab 1 Insheet. 2 Click the [Tune] button. C Y P O ¿ The image is corrected and redisplayed. O Check the results of corrections to peripheral illumination or distortions in the full view. O Check the results of corrections to chromatic aberration and color blur by clicking the area on the image you want to check. In the top right of the window, the area is displayed at 200% in the enlargement display section (p.115). O You can lessen the degree of correction by moving the slider to the left for the item you want to correct. O You can respectively correct red chromatic aberration with the [R] slider of the [Chromatic aberration] or blue chromatic aberration with the [B] slider. Advanced Image Editing and Printing Processing Large Numbers of Images Editing JPEG/TIFF Images Reference Index 4 Click the [OK] button. ¿ The [Lens aberration correction] window appears. ¿ The [Lens aberration correction] window closes and the result of the corrections is applied to the image in the edit window and the image is redisplayed. ¿ The result of the settings of the [Lens aberration correction] window is also displayed in the tool palette. ¿ In the main window, the [ ] mark is displayed on the image to indicate the lens aberration corrections (p.107). 61 Introduction About Shooting Distance Information Slider O When correcting RAW images shot with EOS-1Ds Mark III, EOS-1D Mark III, EOS 50D, EOS 40D, EOS DIGITAL REBEL XSi/450D or EOS DIGITAL REBEL XS/1000D, if shooting distance information has been saved to the image, the slider is set automatically according to this shooting distance information. However, if no shooting distance information is saved to the image, the slider is set automatically to the right end at infinity position. If the image’s shooting distance is not infinite, you can minutely adjust the distance by operating the slider while looking at the screen. O When correcting RAW images shot with EOS-1D Mark II N, EOS-1Ds Mark II, EOS-1D Mark II, EOS-1Ds, EOS-1D, EOS 5D, EOS 30D or EOS DIGITAL REBEL XTi/400D DIGITAL, it is set automatically to the right end at infinity position. You can then minutely adjust the distance by operating the slider while looking at the screen if the shooting distance is not infinite. O [Shooting distance information] slider is applied to all the correction items with check marks. Correcting Multiple Images at a Time C Select multiple images to correct in the main window. Display tool palette by selecting [View] menu [Tool palette]. If you perform correction procedures (p.61) when tool palette is displayed, you can apply the same corrections to all the images selected in the main window. Also, you can apply same corrections by copying the recipe of the corrected image and pasting it onto the multiple images (p.37). Additional information O Some noise appeared in the periphery of an image after correcting [Peripheral illumination] You can reduce the noise by using luminance and/or chromatic noise reduction of the noise reduction function (p.57). However, if you had applied high amount of [Peripheral illumination] correction to the images that have been shot at night or with a high ISO speed, the noise might not be reduced. O The image appears with less resolution after correcting [Distortion] You can make the image similar to the one before correction by applying more sharpness with the sharpness adjusting function (p.29). O The colors of the image became weaker after correcting [Color blur] You can make the image similar to the one before correction by adjusting the color tone (p.27) and/or the color saturation (p.90) to make the color deeper. O The result of [Color blur] correction cannot be detected [Color blur] correction is effective for correcting blue or red color blur which occurs at the edge of the highlighted area of an image. If conditions do not match, correction cannot be made. Y P O Contents at a Glance 1 2 3 4 5 Basic Operation Advanced Operation Advanced Image Editing and Printing Processing Large Numbers of Images Editing JPEG/TIFF Images Reference The periphery of the image may be truncated when [Distortion] correction is made. Index For a list of the [Lens aberration correction] window functions, refer to p.115. 62 Performing Automatic Dust Erasure Processing The Dust Delete Data that is appended to images shot with the camera that can attach this data, can be used to automatically erase dust spots. 4 ¿ The [ ] mark (p.107) is displayed on an image from which dust spots have been erased. Compatible Cameras EOS-1D Mark III EOS 50D EOS 40D EOS DIGITAL REBEL EOS DIGITAL REBEL XSi/450D XTi/400D DIGITAL _ _ 1 2 Select the [Tools] menu [Start Stamp tool]. the image has redrawn itself, click the [Apply 3 When Dust Delete Data] button. In the main window, select an image appended with Dust Delete Data. ¿ The copy stamp window appears. C ¿ Dust spots are erased in a single operation. Contents at a Glance 1 2 3 4 5 Basic Operation EOS-1Ds Mark III EOS DIGITAL REBEL XS/1000D Introduction Click the [OK] button to return to the main window. Additional information O The dust-erased image can be reverted to its original condition at any time A dust-erased image is displayed or printed as a dust-erased image. However, since the dust on the image is not actually erased, you can always revert to the original image by clicking the [Undo] button in the copy stamp window or performing the “Re-Editing an Image” procedure (p.39). O Check dust erasure in the copy stamp window Check dust erasure in the copy stamp window. Images before dust erasure are displayed in other windows and you will be unable to check them. O Printing dust-erased images You can print as a dust-erased image by printing it in DPP. O The [Apply Dust Delete Data] button cannot be clicked Even with an image that has Dust Delete Data attached to it in the camera, if there is no dust to remove by DPP from the image, the [Apply Dust Delete Data] button will be disabled. O To erase dust spots that cannot be erased with the automatic dust erasure processing In automatic dust erasure processing, dust spots are erased based on information relating to dust saved in the Dust Delete Data. However, there may be cases where you will not be able to erase dust spots depending on the type of dust. If this occurs, erase those dust spots using the repair function (p.65) or the copy stamp function (p.67). O The image becomes a dust-erased image when converted and saved The dust-erased RAW image actually becomes a dust-erased image when converted to a JPEG or TIFF image and saved (p.38). Y P O Advanced Operation Advanced Image Editing and Printing Processing Large Numbers of Images Editing JPEG/TIFF Images Reference Index 63 Introduction Automatic Dust Erasure Processing in the Main Window Useful functions of the copy stamp window O Checking the dust erased spots After step 3, you can display and check in detail the erased dust spots one by one by pressing the <Shift> + <F> keys. (Press the <Shift> + <B> keys to return to the previous dust spot.) O Canceling a specified erased dust spot only After step 3, you can press the <Shift> + <F> keys or the <Shift> + <B> keys to display the erased dust spot, and then press the <Shift> + <Del> keys to cancel only the erased dust spot displayed. O Switch between full screen display/normal screen display using shortcut keys You can also switch between full screen display/normal screen display by pressing the <Alt> + <Enter> keys. O Applying the dust erasure result to another image You can apply dust erasure to the same place in another image by clicking the [Copy] button to copy the dust erasure results and then displaying the other image to which you want to apply the results and clicking the [Paste] button. For a list of the copy stamp window functions, refer to p.116. C In the main window, you can also automatically erase dust spots in multiple images appended with Dust Delete Data. Select multiple images appended with Dust Delete Data, and then select the [Adjustment] menu [Apply Dust Delete Data]. ¿ Dust spots in all the selected images are erased in a single operation. Y P O Contents at a Glance 1 2 3 4 5 Basic Operation Advanced Operation Advanced Image Editing and Printing Processing Large Numbers of Images Editing JPEG/TIFF Images Reference Index 64 Manually Erasing Dust (Repair Function) You can erase dust spots in an image by selecting them one by one. the main window, select the image you want to 1 Inerase dust spots. 2 Select the [Tools] menu [Start Stamp tool]. the image has redrawn itself, double-click the 3 When point from where dust is to be erased. 5 Introduction Place the dust spot to be erased within the [ ] and click. Contents at a Glance ¿ The copy stamp window appears. Doubleclick ¿ The display changes to 100% view. O The display position can be changed by dragging. C the button that matches the dust spot to be 4 Click erased. 1 2 3 4 5 Basic Operation Click Advanced Operation Y P O ¿ The dust spot within the [ ] is erased. O Click on another part of the image to continue erasing dust spots in the image. O To erase dust in another part of the image, either right-click with the mouse, or click the button clicked in step 4 again to cancel dust erasure processing and perform the operation again from step 3. O When the dust spot cannot be erased, [ ] is displayed. 6 Click the [OK] button to return to the main window. Advanced Image Editing and Printing Processing Large Numbers of Images Editing JPEG/TIFF Images Reference ¿ The [ ] mark (p.107) is displayed on an image from which dust spots have been erased. Index O If the dust spot is dark in color, click the [ ] button, and if the dust spot is light in color, click the [ ] button. O When you move the cursor over the image, the dust erasure range appears as [ ]. 65 Introduction Additional information Useful functions of the copy stamp window O Click several times when dust spots are not erased completely Where unwanted dust spots are not erased even after performing step 5 once, they may be erased completely when you click several times. O Mainly spots of dust can be erased with the repair function Spots of dust can be erased with the repair function. You may be unable to erase lines of dust. In this case, use the copy stamp function (p.67). O The dust-erased image can be reverted to its original condition at any time A dust-erased image is displayed or printed as a dust-erased image. However, since the dust on the image is not actually erased, you can always revert to the original image by clicking the [Undo] button in the copy stamp window or performing the “Re-Editing an Image” procedure (p.39). O Check dust erasure in the copy stamp window Check dust erasure in the copy stamp window. Images before dust erasure are displayed in other windows and you will be unable to check them. O Printing dust-erased images You can print as a dust-erased image by printing it in DPP. O The image becomes a dust-erased image when converted and saved The dust-erased RAW image actually becomes a dust-erased image when converted to a JPEG or TIFF image and saved (p.38). C O Checking the dust erased spots After step 3, you can display and check in detail the erased dust spots one by one by pressing the <Shift> + <F> keys. (Press the <Shift> + <B> keys to return to the previous dust spot.) O Canceling a specified erased dust spot only After step 3, you can press the <Shift> + <F> keys or the <Shift> + <B> keys to display the erased dust spot, and then press the <Shift> + <Del> keys to cancel only the erased dust spot displayed. O Switch between full screen display/normal screen display using shortcut keys You can also switch between full screen display/normal screen display by pressing the <Alt> + <Enter> keys. O Applying the dust erasure result to another image You can apply dust erasure to the same place in another image by clicking the [Copy] button to copy the dust erasure results and then displaying the other image to which you want to apply the results and clicking the [Paste] button. Y P O For a list of the copy stamp window functions, refer to p.116. Contents at a Glance 1 2 3 4 5 Basic Operation Advanced Operation Advanced Image Editing and Printing Processing Large Numbers of Images Editing JPEG/TIFF Images Reference Index 66 Transferring a RAW Image to Photoshop Erasing Unwanted Parts of an Image (Copy Stamp Function) You can correct an image by pasting a section copied from another part of the image to an unwanted part of the image. 1 2 Specify the section to be copied. Follow steps 1 to 3 in “Manually Erasing Dust (Repair Function)” (p.65). O Click on the section that is to be the copy source while holding down the <Alt> key. O To change the section that is to be the copy source, perform the operation above again. O To fix the position of the copy source, checkmark [Fix Copy Source position]. 3 Correct the image. O Click or drag on the section you want to correct on the image. [+] in the window indicates the copy source and [ ] indicates the copy destination. ¿ The copied image is pasted in the position to which it was dragged. O For [Pen type], you can select from [Brush] (the pasted image’s borders simulate a brush) and [Pencil] (the pasted image’s borders are sharp). C 4 Click the [OK] button to return to the main window. ¿ The [ ] mark (p.107) is displayed on a corrected image. Introduction A RAW image can be converted to a TIFF image (16bit) and transferred to Photoshop. Select the [Tools] menu [Transfer to Photoshop]. Contents at a Glance ¿ Photoshop starts up and the transferred image is displayed. A single image can be transferred at a time Only one image can be transferred at a time. To send multiple images at a time, refer to p.83. O Compatible versions of Photoshop are 7.0 or later. O Transferred images are automatically converted to TIFF images (16bit) to which an ICC profile (p.119) is added. The ICC profile contains information about [Preferences] (p.76) or work color space set for each image as described below and the appropriate color information is relayed to Photoshop. O When you exit Photoshop, only the original RAW image remains, and the transferred image will disappear. Saving the transferred image as a separate image in Photoshop is highly recommended. Y P O Setting Work Color Space A different work color space (p.120) from the default settings (p.76) can be set for each image. Select the [Adjustment] menu color space to be set. [Work color space] A color space set individually does not change even when the default setting is changed 1 2 3 4 5 Basic Operation Advanced Operation Advanced Image Editing and Printing Processing Large Numbers of Images Editing JPEG/TIFF Images Reference Index If you set an image with a color space different to the default setting and then subsequently change the default color space setting (p.76), this default setting will not be applied and the individually set color space will remain. The color space of a RAW image can be changed freely as many times as required Since only the image processing conditions information changes, the color space of a RAW image can be changed at any time. 67 Printing with Shooting Information You can freely lay out one image on one sheet of paper and print together with titles and shooting information, etc. Introduction To maintain the settings 1 2 Select the [File] menu [Print with detailed setting]. the required settings for printing, and then 3 Specify click the [Print] button. Select one image to be printed. The settings of each tab sheet in step 3 are memorized when the [Apply] button is clicked (excluding the contents of the [Text] tab sheet). The settings can be applied to another image when printing. O You can set printer profiles (p.76). O If CMYK simulation has been set, the image is printed in the set colors (p.76). 1 2 3 4 5 Basic Operation Advanced Operation Switches the settings tab sheet C Contents at a Glance Y P O Advanced Image Editing and Printing Processing Large Numbers of Images Editing JPEG/TIFF Images Reference Index Print preview O The image can be moved by dragging. O Drag the four corners of the image to change the size. O For the shooting information, click [ ] on the [Text] tab sheet and select the necessary items in the window that is displayed. 68 Printing a Thumbnail List (Contact Sheet Printing) You can print rows of multiple images on one sheet of paper. Introduction To maintain the settings 1 Select images to be printed in a thumbnail list. 2 Select the [File] menu [Contact Sheet Prints]. the required settings for printing, and then 3 Specify click the [Print] button. Switches the settings tab sheet C The settings of each tab sheet in step 3 are memorized when the [Apply] button is clicked (excluding the contents of the [Text] tab sheet). The settings can be applied to another image when printing. O You can set printer profiles (p.76). O If CMYK simulation has been set, the image is printed in the set colors (p.76). Contents at a Glance 1 2 3 4 5 Basic Operation Advanced Operation Y P O Advanced Image Editing and Printing Processing Large Numbers of Images Editing JPEG/TIFF Images Reference Index Print preview 69 Printing RAW Images on a High-End Canon Printer Printing with a High-End Canon Inkjet Printer For high-end Canon inkjet printers that are compatible with the printing software Easy-PhotoPrint Pro, you can print with DPP by a simple operation that has the following features: O Simple printing of RAW images O Printing in faithful colors O High quality printing using a wide color space of Adobe RGB, etc. and the wide color reproduction range of a high-end Canon inkjet printer To print with DPP, first install Easy-PhotoPrint Pro version 1.3 or later on your computer. Select the [File] menu [Plug-in printing] 1 with Easy-PhotoPrint Pro]. [Print ¿ Easy-PhotoPrint Pro starts up. the required settings for printing, and then 2 Specify print. C Introduction Additional information O Print up to 1000 images at a time You can print up to 1000 images selected in DPP at a time. When printing more than 1000 images, divide the printing into several jobs. O Function set in DPP that is not applied to printing Specified CMYK simulation (p.76) is not applied. Advantages of printing with Easy-PhotoPrint Pro O Printing with faithful colors When the color space is set to sRGB or Adobe RGB (p.67, p.76), this color space is automatically transmitted from DPP to Easy-PhotoPrint Pro, allowing you to print with faithful colors. If you set Apple RGB, ColorMatch RGB or Wide Gamut RGB, the image is printed with Adobe RGB color space. O Printing with a wide color reproduction When the color space (p.67, p.76) is set to Adobe RGB and the image is printed with a high-end Canon inkjet printer, the color reproduction area widens, and green and blue in particular are reproduced vividly. Y P O Contents at a Glance 1 2 3 4 5 Basic Operation Advanced Operation Advanced Image Editing and Printing Processing Large Numbers of Images Editing JPEG/TIFF Images Reference Index 70 Introduction Printing with a Large-Format Canon Printer You can use DPP to print with the DPP-compatible Canon large-format imagePROGRAF printer. To print with DPP, first install imagePROGRAF Print Plug-In for Digital Photo Professional on your computer. Select the [File] menu [Plug-in printing] 1 for the printer you use. Plug-In ¿ The Plug-In starts up. the required settings for photograph 2 Specify printing, and then print. Additional information O A single image can be printed at a time You can print a single image selected in DPP at a time. When printing multiple images, perform printing for each image individually. O Functions set in DPP that are not applied to printing Specified output resolution (p.72) and CMYK simulation (p.76) are not applied. C Advantages of printing with imagePROGRAF Print Plug-In O Printing with faithful colors When a color space is set (p.67, p.76), it is automatically transmitted from DPP to the Plug-In, allowing you to print with faithful colors. O Printing with a wide color reproduction When the color space setting (p.67, p.76) is set to a color space wider than sRGB (such as Adobe RGB), the color reproduction range of the imagePROGRAF printer is fully utilized and the image is printed with a wider color gamut than an image that has an sRGB color space, with green and blue in particular being reproduced vividly. Y P O Contents at a Glance 1 2 3 4 5 Basic Operation Advanced Operation Advanced Image Editing and Printing Processing Large Numbers of Images Editing JPEG/TIFF Images Reference Index 71 Specifying Preferences Introduction You can change the various functions of DPP in the Preferences window. Check the contents of each window and set. Also, depending on the item, a detailed explanation may be available, so refer to each window. General Settings You can specify the folder that opens when DPP is started up, image quality of displayed and saved RAW images, etc. 1 Select the [Tools] menu [Preferences]. the tab sheet, specify the settings, and then 2 Select click the [OK] button. ¿ The [Preferences] window appears. C Contents at a Glance 1 2 3 4 5 Basic Operation Advanced Operation Y P O Advanced Image Editing and Printing Processing Large Numbers of Images Editing JPEG/TIFF Images Reference Index 72 O Viewing and saving RAW images You can select from two types of image quality for displaying/saving RAW images: high image quality with false color reduction processing and noise reduction function (p.57) used, or high speed without false color processing and noise reduction function used. [High quality] O False color reduction processing is automatically applied, and the image can be displayed/saved as a false color reduced-high quality image. Furthermore, you can use the noise reduction function (p.57) to reduce the luminance noise and chrominance noise. O Because the effects of the false color reduction processing and noise reduction function are difficult to see in the [50% view] or [Fit to window] display of the edit window and edit image window, use [100% view] or [200% view] to check. O We recommend that you normally set [High quality] for a balance between image quality and display speed. [View images at high speed (moiré reduction off)] of [High quality] O If you checkmark [View images at high speed (moiré reduction off)], when the image is displayed in the edit window or the edit image window, false color reduction processing is not applied. O As the [View images at high speed (moiré reduction off)] setting is the same as [High quality] other than for display of the image, the image undergoes false color reduction processing when it is saved and the noise reduction function is also available. C [High speed] O Since false color reduction processing is not applied, the display speed of a RAW image in the edit window or the edit image window in the [100% view] or [200% view] enlargement display, and the time it takes to save a RAW image is less than in [High quality]. O You cannot use the noise reduction function (p.57). O Depending on the image, it may be displayed/saved with false color or noise being noticeable. What is the difference between the [High quality] and [High speed] displays? The display image quality of [High quality] and [High speed] is the same except when the image is displayed in the [100% view] or [200% view] enlargement display in the edit window or the edit image window. Y P O O JPEG image quality [Remove block noise and mosquito noise] O You can improve the quality of a JPEG image by reducing the noise that is likely to occur when RAW images are converted to JPEG images and saved (p.38, p.82). This setting is also effective for JPEG images that have been saved with a different name. [Display thumbnails at high quality] O You can have the thumbnails for JPEG images automatically displayed at high quality. If you checkmark [Display thumbnails at high quality], all subsequent JPEG image thumbnails imported into DPP will be displayed at high quality. Introduction Contents at a Glance 1 2 3 4 5 Basic Operation Advanced Operation Advanced Image Editing and Printing Processing Large Numbers of Images Editing JPEG/TIFF Images Reference Index The extent of the improvement in noise reduction The higher the JPEG image’s compression rate, the more noise is reduced. When the compression rate is low, the effect of noise reduction is negligible. O Default value of output resolution You can set the resolution for RAW images converted and saved as JPEG or TIFF images (p.38, p.82). 73 Introduction O Sort order in main window View Settings You can set the order of images which have been rearranged in the main window to be maintained or not maintained (p.19). If you checkmark the checkbox, the order of the rearranged images is maintained even if you exit DPP or select another folder in the folder area. If you remove the check mark, the order of the rearranged images is not maintained and reverts to the previous order when you exit DPP or select another folder in the folder area. You can specify settings relating to the display. Contents at a Glance 1 2 3 4 5 Basic Operation Advanced Operation O Highlight/shadow warning Y P O Highlighted/shaded areas that exceed the set range can be displayed on the image as warning indicators (p.51). C Advanced Image Editing and Printing Processing Large Numbers of Images Editing JPEG/TIFF Images Reference Index 74 Introduction O Modified Picture Style settings Tool Palette You can select whether the [Color tone], [Color saturation], [Contrast] and [Sharpness] settings will be changed or retained, when you change the Picture Style. O If you checkmark the checkbox, the [Color tone], [Color saturation], [Contrast] and [Sharpness] settings will be changed to match the camera’s preset settings, when you change the Picture Style. O If you remove the check mark, the [Color tone], [Color saturation], [Contrast] and [Sharpness] settings will be retained, even if you change the Picture Style. You can specify settings for the tool palette. O Default noise reduction settings C Y P O You can set a default beforehand for the noise reduction level. RAW Images • When [Apply camera settings] is selected, you can pre-set a noise reduction level that suits the camera settings beforehand as the default. • When [Set as defaults] is selected, you can pre-set a preferred default setting for the noise reduction level beforehand. JPEG/TIFF Images • You can set a desired default noise reduction level beforehand. For images not having a recipe attached, the default set here for noise reduction level is applied. However, if you want to apply settings to images in the opened folder, you need to re-open the folder after making settings here. For images with a recipe attached, the noise level recorded in the recipe remains as it is and the default for noise reduction level set here is not applied. Contents at a Glance 1 2 3 4 5 Basic Operation Advanced Operation Advanced Image Editing and Printing Processing Large Numbers of Images Editing JPEG/TIFF Images Reference Index O Default settings of RGB tool palette You cannot apply changes to the settings until you re-open the folder. Changes are not applied to the edited image Even if the default setting is changed, the new default setting is not applied to edited (i.e., adjusted using the tool palette, trimmed, dusterased) images. Change each one individually. Advantages of setting a noise reduction default In instances where the same level of noise occurs in several images, such as images shot with high ISO speed, setting an appropriate default noise reduction setting enables you to apply a batch noise reduction default to all the images displayed in DPP (excluding images with a recipe attached). This eliminates the need to apply noise reduction to each individual image. And, since you always shoot with the same conditions, it is also useful when you want to set the same noise reduction level for all shot images. 75 Introduction O Default settings of Work color space Color Management You can specify settings relating to color management, such as settings for work color space, conditions for color matching, etc. You can select from five types of color space (p.120) that is applied as a default setting in RAW images. Color space that has been set is applied as the color space when a RAW image is converted and saved (p.38, p.82) or printed (p.39, p.42, p.44, p.68 to p.71). O If you have changed the setting, and you restart DPP, the new setting is applied as the default setting color space. O You can check color space that has been set in an image in the edit window (p.108) and the edit image window (p.112). Changes are not applied to the edited image Even if the default setting is changed, the new default setting is not applied to edited (i.e., adjusted using the tool palette, trimmed, dusterased) images. Change each one individually. Y P O You can set a color space that is different from the default settings for each image (p.67). C O Display setting (color setting of the monitor) Where a profile (p.119) is attached to the monitor you are using, you can display an image in more faithful colors by setting the profile. O If you select [Use the OS settings], the color profile set in Windows will also be applied in DPP. If you are using multiple monitors, only the profile of the primary monitor is applied to DPP. O Select the [Monitor profile], click the [Browse] button and in the dialog box that appears, select a profile for your monitor. Contents at a Glance 1 2 3 4 5 Basic Operation Advanced Operation Advanced Image Editing and Printing Processing Large Numbers of Images Editing JPEG/TIFF Images Reference Index Precise coloring with a third-party monitor color reader If you use a profile created using a third-party monitor color reader, images can be displayed in even more precise colors. 76 Introduction O Setting of printing profile (color setting of the printer) O Setting of CMYK simulation profile Where a profile (p.119) is attached to the printer you are using to print images, you can print an image and simulate the colors displayed on screen by setting the profile. The profile that has been set is applied to all printing (p.44, p.68, p.69) except for printing using a Canon inkjet printer (p.39, p.42) or linked printing (p.70, p.71). You can select the color when printing in the CMYK environment of a printing machine, etc. from four types of profiles (p.120) and perform simulation on screen. O When CMYK simulation has been set, [CMYK] appears (p.105, p.106, p.108, p.112) in the bottom of the main window, edit window and edit image window, and colors can be checked. O To temporarily cancel CMYK simulation, press the <Ctrl> + <Y> keys. The adjustment function of the printer driver should not be used Even if you set a printer profile, if you use the color adjustment function of the printer driver, the image may print in colors different from those displayed on screen. Automatic settings for printing using EPP EX, EPP, and linked printing If you are printing using a Canon inkjet printer (p.39, p.42) or using linked printing (p.70, p.71), a profile is set automatically even when the [Printing profile] setting is not performed. This allows you to print faithful colors easily. C O Rendering intents when using Easy-PhotoPrint You can set a rendering intent (matching method) (p.120) for printing using Easy-PhotoPrint (p.42). O The rendering intent is ordinarily set to [Relative Colorimetric]. O When colors with [Relative Colorimetric] are not satisfactory, set to [Perceptual]. Y P O Contents at a Glance 1 2 3 4 5 Basic Operation Advanced Operation Advanced Image Editing and Printing Processing Large Numbers of Images Editing JPEG/TIFF Images Reference Index 77 4 Useful Functions for Processing Large Numbers of RAW Images Introduction For users shooting a large amount of RAW images, the convenient function of batch processing large amounts of RAW images is explained here. Utilizing Adjustment Contents (Recipe) ................... 79 Saving Recipes as a File ............................................ 80 Loading and Pasting Recipes..................................... 80 Copying a Recipe and Applying to Another Image..... 80 Batch Apply White Balance to Images (Personal White Balance) .................................................................. 81 Registering Personal White Balance .......................... 81 Applying Personal White Balance .............................. 81 Y P O Batch Save as JPEG or TIFF Images (Batch Processing).............................................................. 82 C Batch Transfer Images to Image Editing Software .. 83 Batch Change the File Name of Images.................. 84 Changing the File Name of Images in the Order in the Main Window .............................................................. 84 Contents at a Glance 1 2 3 4 5 Basic Operation Advanced Operation Advanced Image Editing and Printing Processing Large Numbers of Images Editing JPEG/TIFF Images Reference Index 78 Utilizing Adjustment Contents (Recipe) All the adjustment contents (recipe) made using the tool palette can be saved as an individual recipe file (extension “.vrd”) and loaded and applied to another image. You can edit images efficiently by selecting and adjusting one image from images shot with the same shooting environment and batch applying the adjustment results to a large number of images. RAW image data Image processing conditions information C Contents adjusted using the tool palette can be handled individually as a recicpe file (extension “.vrd”). Introduction Additional information O Recipe data includes tool palette contents Recipe data includes adjustments made with the tool palette ([RAW], [RGB] and [NR/Lens/ALO]). For this reason, other editing content such as trimming or dust-erasure (copy stamp) is not included in the recipe data. O Recipes adjusted with the [RAW] tool palette can only be applied to RAW images Adjustments in the [RAW] tool palette, which can only be made for RAW images, are not applied to a JPEG or TIFF image even if they are pasted. Y P O Contents at a Glance 1 2 3 4 5 Basic Operation Advanced Operation Advanced Image Editing and Printing Processing Large Numbers of Images Editing JPEG/TIFF Images Reference Index The adjustment contents of JPEG or TIFF images (p.86) can be saved as a recipe file (extension “.vrd”) and loaded and applied to another image in the same way as with RAW images. 79 Introduction Saving Recipes as a File Copying a Recipe and Applying to Another Image an edited image, and then select the [Edit] 1 Select menu [Save recipe in file]. ¿ The [Save recipe in file] dialog box appears. 2 Select the destination folder, enter a file name, and then click the [Save] button. You can copy a recipe of an edited image and then apply it to another image. the image from which a recipe is to be copied 1 Select and then select the [Edit] menu [Copy recipe to clipboard]. ¿ The recipe is copied. Check the contents of a recipe file by pasting to an image When you do not know the contents of a recipe file, paste it to an image and check the settings in the tool palette. When only a few settings are adjusted, we recommend you use a file name that describes the contents or that you separately record the adjustments as text information. Loading and Pasting Recipes 1 C Select the image to which a recipe is to be applied, and then select the [Edit] menu [Read and paste recipe from file]. ¿ The [Open] dialog box appears. 2 Select a recipe and click the [Open] button. 2 Select the image to which the recipe is to be applied and then select the [Edit] menu [Paste recipe to selected image]. Y P O ¿ The recipe is applied to the image. Contents at a Glance 1 2 3 4 5 Basic Operation Advanced Operation Advanced Image Editing and Printing Processing Large Numbers of Images Editing JPEG/TIFF Images Reference ¿ The recipe is applied to the image. Index 80 Batch Apply White Balance to Images (Personal White Balance) The white balance adjustments made to a RAW image shot in a specific shooting environment can be registered as personal white balance. You can then perform efficient white balance adjustment by applying this personal white balance to a large number of RAW images shot in the same shooting environment. Applying Personal White Balance the main window, select the image to which white 1 Inbalance is to be applied. 2 Click the [Tool] button on the toolbar. the personal white balance number button that 3 Click is to be applied. ¿ The tool palette appears. Registering Personal White Balance 1 Adjust the white balance (p.25, p.26, p.52). O To adjust white balance, select a setting other than [Shot settings] from the [White balance adjustment] list box (p.25). You will be unable to register the adjustments if you select [Shot settings]. 2 In the [RAW] tool palette, click the [Register] button. the button number to be registered from the 3 Select list and click the [OK] button. ¿ The [Register personal white balance] dialog box appears. C Introduction Y P O Contents at a Glance 1 2 3 4 5 Basic Operation Advanced Operation Advanced Image Editing and Printing Processing Large Numbers of Images Editing JPEG/TIFF Images Reference Index To use the registered personal white balance on another computer 1 In step 3, click the [Export] button to write as a file. 2 Copy the file to another computer. 3 In DPP on the other computer, display the window of step 3. 4 Click the [Import] button and in the window that appears, select the copied file. ¿ Personal white balance is applied to all the selected images. 81 Batch Save as JPEG or TIFF Images (Batch Processing) You can batch convert and save edited RAW images to highly versatile JPEG or TIFF images. The images are saved as separate images, so the RAW images remain unaffected. 1 2 Click the [Batch process] button on the toolbar the required settings, and then click the 3 Specify [Execute] button. In the main window, select multiple images to be converted. (p.105). ¿ The [Batch settings] window appears. 4 [Save] cannot be performed In the [Batch settings] window, you cannot perform [Save] or [Save As] (p.37, p.100) to edited RAW images. To save the developing/editing results for the version you are currently using DPP’s RAW image development processing technology is continually being improved upon so that you can perform the latest image processing more appropriately. Meaning that, between two differing versions of DPP, processing results may differ very slightly even if with the same RAW image data, or the results of significant editing of RAW image data with an attached recipe may be different. When you want to save the developing or editing results of the version you are currently using as it is, it is recommended that you convert and save images as JPEG image or TIFF images. C ¿ The processing dialog box appears and saving begins. ¿ When all the images are saved, the [Exit] button appears in the processing dialog box. Introduction In the processing dialog box, click the [Exit] button. Y P O Skillful batch saving O While saving is being performed, you can continue working in another window Since the saving function operates independently in the background, you can continue with an operation in another window such as the main window or the edit window during the saving process. O To convert all images and save, do not select an image in the main window If you do not perform step 1 and perform step 2 with no image selected in the main window, all the images displayed in the main window will be converted and saved. O If you have selected [New file name] in [File name], [Sequence number] has to be set. O By saving as explained on this page, a trimmed image (p.35, p.94) or dust-erased image (p.63 to p.67, p.96 to p.100) actually becomes a trimmed image or dust-erased image. O For a list of [Batch settings] window functions, refer to p.117. Contents at a Glance 1 2 3 4 5 Basic Operation Advanced Operation Advanced Image Editing and Printing Processing Large Numbers of Images Editing JPEG/TIFF Images Reference Index 82 Batch Transfer Images to Image Editing Software You can transfer multiple images to image editing software. Unlike [Transferring a RAW Image to Photoshop] (p.67), you transfer images that have first been converted and saved as a seperate image, so the transferred image will not disappear after exiting the destination software. The software used here as an example is Adobe Photoshop CS. 1 2 Click the [Batch process] button on the toolbar settings required for transferring (e.g. file 3 Perform format). 4 Click the [Browse] button. In the main window, select multiple images to be transferred. 5 O In the [Open] dialog box, select a Photoshop CS file or a shortcut and click the [Open] button. ¿ The [Open] dialog box closes and [Image transfer settings] in the [Batch settings] window is set to Photoshop CS. 6 Checkmark [Open image using software]. (p.105). Contents at a Glance 1 2 3 4 5 Basic Operation Advanced Operation ¿ The [Batch settings] window appears. C Introduction Select Photoshop CS. Y P O 7 Click the [Execute] button. ¿ The processing dialog box appears and batch transfer begins. ¿ When the first image has been transferred, Photoshop CS starts up and transferred images are displayed in transferred order. Advanced Image Editing and Printing Processing Large Numbers of Images Editing JPEG/TIFF Images Reference Index ¿ The [Open] dialog box appears. 83 Batch Change the File Name of Images window, select multiple images of which 1 Inthethefilemain names are to be changed. 2 Select the [Tools] menu [Start Rename tool]. the required settings and click the 3 Specify [Execute] button. ¿ The rename window appears. (p.118) ¿ Processing begins and the file names are changed. C Changes cannot be made when the file name is duplicated If a file name in red text has appeared in [Modified File Name], the file name has been duplicated. Changes cannot be made if even one file name has been duplicated. Change the settings so that duplication does not occur. O You cannot start up the rename tool from the [Collection] window (p.33, p.106). O For a list of the rename window functions, refer to p.118. Introduction Changing the File Name of Images in the Order in the Main Window When you change the order of the images in the main window (p.19), you can change in one operation the names of the files for the images, in the order they were rearranged. the order of the images in the main window 1 Change . window, select multiple images of which 2 Inthethefilemain names are to be changed. 3 Select the [Tools] menu [Start Rename tool]. 4 Select [Fit to main window]. (p.19) Y P O Contents at a Glance 1 2 3 4 5 Basic Operation Advanced Operation Advanced Image Editing and Printing Processing Large Numbers of Images Editing JPEG/TIFF Images Reference 5 Specify the required settings 6 Click the [Execute] button. (p.118). O To copy an image, checkmark [Copy Rename]. Index ¿ The file names are changed and the order in the main window is maintained. 84 5 Editing JPEG and TIFF Images Introduction DPP is software mainly aimed for advanced RAW image editing, but it also has JPEG and TIFF image editing functions. Here, the editing and saving of JPEG and TIFF images are explained. Editing JPEG and TIFF Images............................... 86 About the RGB Tool Palette ....................................... 86 Automatically Adjusting Brightness and Color (Tone Curve Assist) .............................................................. Adjusting Brightness and Contrast ............................. Adjusting Color Tone Using Click White Balance....... Adjusting Hue, Saturation and Sharpness.................. Tone Curve Adjustment.............................................. Adjusting Dynamic Range .......................................... C Y P O 87 88 89 90 91 92 Reducing Noise ....................................................... 93 Trimming an Image.................................................. 94 Performing Automatic Dust Erasure Processing ..... 96 Compatible Cameras............................................. 96 Automatic Dust Erasure Processing in the Main Window ................................................................. 97 Contents at a Glance 1 2 3 4 5 Basic Operation Advanced Operation Advanced Image Editing and Printing Processing Large Numbers of Images Editing JPEG/TIFF Images Reference Manually Erasing Dust (Repair Function)................ 98 Erasing Unwanted Parts of an Image (Copy Stamp Function)................................................................... 100 Index Saving Editing Results........................................... 100 Saving Editing Content to an Image ......................... 100 Saving as a Separate Image .................................... 101 Applying Editing Contents to Another Image......... 101 Printing .................................................................. 101 Re-Editing an Image.............................................. 101 85 Editing JPEG and TIFF Images With DPP, you can adjust JPEG and TIFF images in the same way as RAW images using the [RGB] and [NR/Lens/ALO] tool palettes. Because adjustment made with the tool palette (recipe) only changes the image processing conditions, the “original image data itself” remains unaffected. Therefore, there are no problems with image deterioration that arise with editing and you can readjust your images any number of times. JPEG, TIFF image data Image processing conditions information C Contents adjusted using the tool palette can be handled individually as a recicpe file (extension “.vrd”) (p.79, p.101). Introduction About the RGB Tool Palette With the functions in the [RGB] tool palette, you can adjust JPEG and TIFF images with the same functions as ordinary image editing software. However, because the adjustment width of the adjustment functions in the [RGB] tool palette is wider than the [RAW] tool palette, the image color may be saturated, or the image quality may deteriorate if you adjust too much. Therefore, take care not to adjust your images to an excessive degree. You can adjust RAW images with the functions in the [RGB] tool palette. However, for functions other than tone curve adjustment (p.91) and automatic adjustment (p.87), we recommend adjusting RAW images using the same functions available in the [RAW] tool palette. Y P O Contents at a Glance 1 2 3 4 5 Basic Operation Advanced Operation Advanced Image Editing and Printing Processing Large Numbers of Images Editing JPEG/TIFF Images Reference Index In DPP all the adjustments (image processing conditions information) made with the tool palette can be saved in the image as data called a “recipe” (p.100), or can be saved, downloaded and applied to other images as a separate recipe file (extension “.vrd”) (p.79, p.101). 86 Introduction Automatically Adjusting Brightness and Color (Tone Curve Assist) In order to make the image a desirable standard image, automatically adjust the image tone curve (p.119). You can select the degree of automatic adjustment from “Standard” and “High”. Click the desired automatic adjustment button. O Standard: Standard automatic adjustment. Suitable for most images. O High: Use when the effect achieved in standard automatic adjustment is not strong enough. Reverts the tone curve to the original settings High Standard C Images not suitable for automatic adjustment (tone curve assist) The result of automatic adjustment (tone curve assist) may not be as expected with the following images: • Images which have been shot with the proper exposure • Images where the brightness is unbalanced • Images which are too dark • Images which have extreme backlighting If you click the [ ] button, the tone curve as well as the [Hue] and [Saturation] revert to the default settings. Take care when adjusting the [Hue] and [Saturation] individually (p.90). Y P O Contents at a Glance 1 2 3 4 5 Basic Operation Advanced Operation Advanced Image Editing and Printing Processing Large Numbers of Images Editing JPEG/TIFF Images Reference Index ¿ The tone curve changes as adjusted. 87 O Brightness: Move the slider to the right to make an image brighter and to the left to make an image darker. O Contrast: Used to adjust modulation and degree of contrast of color. Move the slider to the right to make contrast of an image stronger and to the left to make contrast weaker. Adjusting Brightness and Contrast The brightness and contrast of an image can be adjusted. Introduction Contents at a Glance 1 2 3 4 5 Basic Operation Advanced Operation C Drag the sliders left or right Enter numerical values Y P O Advanced Image Editing and Printing Processing Large Numbers of Images Editing JPEG/TIFF Images Reference Index The adjustment range is –100 to +100 (in 1-stop increments when entering a value). 88 Introduction Adjusting Color Tone Using Click White Balance You can adjust white balance using a selected part of an image as the standard for white to make the image appear natural. Using click white balance is effective when using it in parts of an image where white color tone has changed under the influence of a light source. 1 Click the [ 2 Click on a point that is to be the standard for white. Contents at a Glance 1 2 3 4 5 Basic Operation ] button. Advanced Operation Y P O The coordinates of the cursor position and the RGB values (8-bit conversion) C ¿ The color of the image is adjusted with the point you selected as the standard for white. O If you click on another point in the image, the white balance is adjusted again. O To finish click white balance, right-click with the mouse or click the [ ] button again. When there are no white areas in your image Advanced Image Editing and Printing Processing Large Numbers of Images Editing JPEG/TIFF Images Reference Index When there are no white areas in your image, you can adjust the white balance by clicking on a grey point of the image in step 2. This has the same adjustment result as selecting a white point. O The image is adjusted based on the average value of 5 × 5 pixel range from the clicked point. O The histogram display changes according to adjustment. You can also fix the histogram display to the display before any adjustments (p.75). 89 Adjusting Hue, Saturation and Sharpness You can adjust hue (tone) and saturation and make the overall atmosphere of an image harder or softer. O Hue: Move the slider to the right to make color tones more yellow, and to the left to make color tones redder. O Saturation: Move the slider to the right to make the color deeper, and to the left to make the color weaker. O Sharpness: Move the slider to the right to make an image harder, and to the left to make an image softer. Introduction Contents at a Glance 1 2 3 4 5 Basic Operation Advanced Operation C Y P O Advanced Image Editing and Printing Processing Large Numbers of Images Editing JPEG/TIFF Images Reference Enter numerical values Index Sharpness is unnatural Drag the sliders left or right Adjust sharpness with the window view set to [100% view], [50% view] or [200% view]. If the view is set to [Fit to window] (full view), the sharpness will seem unnatural. The adjustment range is –30 to 30 for hue, 0 to 200 for saturation, and 0 to 500 for sharpness (in 1-stop increments when entering a value). 90 Introduction Tone Curve Adjustment You can adjust the brightness, contrast and color of a specific area by changing the tone curve (p.119). 2 Make adjustments. Contents at a Glance the tone curve mode and interpolation 1 Select method. Adjusts each channel Batch adjusts RGB 1 2 3 4 5 Basic Operation Advanced Operation Right-click with the mouse inside the graph to display the menu C Y P O Click to add a [ ] (point) Adjust by dragging [ ] Advanced Image Editing and Printing Processing Large Numbers of Images Editing JPEG/TIFF Images Reference O The horizontal axis shows the input level and the vertical axis shows the output level. O The maximum number of [ ] is 8. O To delete a [ ], either press the <Del> key or double-click on the [ ]. Index O The histogram display changes according to adjustment. You can also fix the histogram display to the display before any adjustments (p.75). O The tone curve mode and interpolation method for a tone curve can also be changed in [Preferences] (p.75). 91 Introduction Adjusting Dynamic Range Dynamic range (width of gradation expression) from dark points to bright points in an image can be adjusted. Move downwards Output highlight points Reverts the image to the original settings Output highlight point numerical value Move to the left Input highlight points Move to the right Input shadow points C Output shadow point numerical value Input highlight point numerical value Input shadow point numerical value O The setting range of shadow points is 0 to 247 (in 1-stop increments when entering a value). O The setting range of highlight points is 8 to 255 (in 1-stop increments when entering a value). O The histogram display changes according to adjustment. You can also fix the histogram display to the display before any adjustments (p.75). Contents at a Glance 1 2 3 4 5 Basic Operation Advanced Operation Y P O Advanced Image Editing and Printing Processing Large Numbers of Images Editing JPEG/TIFF Images Reference Index Move upwards Output shadow points O The horizontal axis shows the input level and the vertical axis shows the output level. 92 Reducing Noise Introduction You can reduce noise that arises in JPEG and TIFF images that have been shot at night or with a high ISO speed. 1 2 Adjust an image. Select the [NR/Lens/ALO] tab sheet from the tool palette in the edit window or edit image window. 3 Click the [Apply] button. ¿ Noise reduction is applied to the image and the image is redisplayed. 4 Display the image in the [100% view] or [200% view]. ¿ You can check the noise reduction effect. O In the [50% view] or [Fit to window] display, it may be difficult to check the noise reduction effect. Contents at a Glance 1 2 3 4 5 Basic Operation Advanced Operation C Drag the sliders right O You can set a noise reduction level from within a range of 0 to 20. The larger the setting, the larger the noise reduction effect. Y P O To check the noise reduction effect, enlarge the image and display it Because noise reduction effect is difficult to see in the [50% view] and [Fit to window] displays, use [100% view] or [200% view] to check the noise reduction. Advanced Image Editing and Printing Processing Large Numbers of Images Editing JPEG/TIFF Images Reference O If [Luminance noise reduction] has been set, resolution may be reduced along with reduction of noise. O If [Chrominance noise reduction] has been set, color bleeding may occur along with reduction of noise. O You can set the batch processing settings for noise reduction beforehand, using [Default noise reduction settings] in the [Tool palette] tab sheet in Preferences (p.75). This is particularly useful for applying noise reduction to all the images in a folder at once, such as batch noise reduction for images with high ISO speeds. However, where images have a recipe attached, the noise level recorded in the recipe is applied. O For a list of tool palette functions, refer to p.110. Index 93 Trimming an Image You can trim only the part of an image you need, or change the composition of an image where an image shot horizontally becomes vertical. Also, when aspect ratio information is attached to an image shot with EOS-1Ds Mark III or EOS-1D Mark III, the trimming range based on the aspect ratio information is displayed. O List of aspect ratios (width : height) Introduction Contents at a Glance 1 2 3 4 5 Select the image to be trimmed. Basic Operation ¿ The trimming window appears. Advanced Operation 1 2 Select the [Tools] menu [Start Trimming tool]. the image has redrawn itself, select a ratio and 3 When drag the trimming range. Cancel Select a trimming ratio C Drag the trimming range O The trimming range can be moved by dragging. O You can enlarge or reduce the size of the trimming range by dragging the four corners of the trimming range. Y P O [Free]: You can trim an image to any size, regardless of the selectable ratio. [Custom]: You can trim an image at the specified ratio. 4 Click the [OK] button to return to the main window. ¿ The trimming range frame is displayed in the trimmed image (p.107). ¿ When the trimmed image is displayed in an edit window or the edit image window, it is displayed in its trimmed form. Advanced Image Editing and Printing Processing Large Numbers of Images Editing JPEG/TIFF Images Reference Index 94 Introduction About trimmed images Convenient functions of the trimming window O The trimmed range can be reverted to its original condition at any time A trimmed image is displayed or printed as a trimmed image. However, since the image is not actually trimmed, you can always revert to the original image by clicking the [Reset] button in the trimming window or performing the “Re-Editing an Image” procedure (p.101). O Display of the trimmed image in each window • Main window: The frame showing the trimming range is displayed on the image (p.107). • Edit window: The image is displayed in its trimmed condition. • Edit image window: The thumbnail image is the same as the main window display, and the enlarged image is the same as the edit window display. O Printing a trimmed image You can print as a trimmed image by printing it in DPP. O The image becomes a trimmed image when saved as a separate image The trimmed JPEG or TIFF image actually becomes a trimmed image when saved as a separate image (p.101). O Images that have aspect ratio set will be displayed as trimmed images When aspect ratio information is attached to an image shot with EOS1Ds Mark III or EOS-1D Mark III, the set trimming range based on the aspect ratio information is displayed. However, since the image is not actually trimmed, you can change the trimming range or revert to the condition before trimming. When reverting to the condition before trimming is performed based on the aspect ratio information at the time of shooting, click the [Reset] button. Also, if you want to cancel all the trimming range, click the [Clear] button (p.114). C O Switch between screens using the keyboard You can also switch between full screen display/normal screen display by pressing the <Alt> + <Enter> keys or the <F11> key. O Operate using the menu Each operation can also be performed with the menu which appears when you right-click with the mouse on the image. O Apply the trimmed range to another image You can apply the trimmed range to another image by clicking the [Copy] button to copy the trimmed range, displaying another image and then clicking the [Paste] button. To batch apply a copied trimming range to multiple images, select the trimmed image and the multiple images to which you want to apply the trimmed range in the main window, and display the trimming window. With the trimmed image displayed, click the [Copy] button and then click the [Apply All] button. This will apply the trimming range to all the images selected when the trimming window is displayed. Y P O For a list of the trimming window functions, refer to p.114. Contents at a Glance 1 2 3 4 5 Basic Operation Advanced Operation Advanced Image Editing and Printing Processing Large Numbers of Images Editing JPEG/TIFF Images Reference Index 95 Performing Automatic Dust Erasure Processing The Dust Delete Data that is appended to images shot with the camera that can attach this data, can be used to automatically erase dust spots. 4 ¿ The [ ] mark (p.107) is displayed on an image from which dust spots have been erased. Compatible Cameras EOS-1D Mark III EOS 50D EOS 40D EOS DIGITAL REBEL EOS DIGITAL REBEL XSi/450D XTi/400D DIGITAL _ _ 1 2 Select the [Tools] menu [Start Stamp tool]. the image has redrawn itself, click the [Apply 3 When Dust Delete Data] button. In the main window, select an image appended with Dust Delete Data. ¿ The copy stamp window appears. C ¿ Dust spots are erased in a single operation. Contents at a Glance 1 2 3 4 5 Basic Operation EOS-1Ds Mark III EOS DIGITAL REBEL XS/1000D Introduction Click the [OK] button to return to the main window. Additional Information O The dust-erased image can be reverted to its original condition at any time A dust-erased image is displayed or printed as a dust-erased image. However, since the dust on the image is not actually erased, you can always revert to the original image by clicking the [Undo] button in the copy stamp window or performing the “Re-Editing an Image” procedure (p.101). O Check dust erasure in the copy stamp window Check dust erasure in the copy stamp window. Images before dust erasure are displayed in other windows and you will be unable to check them. O Printing dust-erased images You can print as a dust-erased image by printing it in DPP. O The [Apply Dust Delete Data] button cannot be clicked Even with an image that has Dust Delete Data attached to it in the camera, if there is no dust to remove by DPP from the image, the [Apply Dust Delete Data] button will be disabled. O To erase dust spots that cannot be erased with the automatic dust erasure processing In automatic dust erasure processing, dust spots are erased based on information relating to dust saved in the Dust Delete Data. However, there may be cases where you will not be able to erase dust spots depending on the type of dust. If this occurs, erase those dust spots using the repair function (p.98) or the copy stamp function (p.100). O The image becomes a dust-erased image when saved as a separate image The dust-erased JPEG or TIFF image actually becomes a dusterased image when saved as a separate image (p.101). Y P O Advanced Operation Advanced Image Editing and Printing Processing Large Numbers of Images Editing JPEG/TIFF Images Reference Index 96 Introduction Automatic Dust Erasure Processing in the Main Window Useful functions of the copy stamp window O Checking the dust erased spots After step 3, you can display and check in detail the erased dust spots one by one by pressing the <Shift> + <F> keys. (Press the <Shift> + <B> keys to return to the previous dust spot.) O Canceling a specified erased dust spot only After step 3, you can press the <Shift> + <F> keys or the <Shift> + <B> keys to display the erased dust spot, and then press the <Shift> + <Del> keys to cancel only the erased dust spot displayed. O Switch between full screen display/normal screen display using shortcut keys You can also switch between full screen display/normal screen display by pressing the <Alt> + <Enter> keys. O Applying the dust erasure result to another image You can apply dust erasure to the same place in another image by clicking the [Copy] button to copy the dust erasure results and then displaying the other image to which you want to apply the results and clicking the [Paste] button. For a list of the copy stamp window functions, refer to p.116. C In the main window, you can also automatically erase dust spots in multiple images appended with Dust Delete Data. Select multiple images appended with Dust Delete Data, and then select the [Adjustment] menu [Apply Dust Delete Data]. ¿ Dust spots in all the selected images are erased in a single operation. Y P O Contents at a Glance 1 2 3 4 5 Basic Operation Advanced Operation Advanced Image Editing and Printing Processing Large Numbers of Images Editing JPEG/TIFF Images Reference Index 97 Manually Erasing Dust (Repair Function) You can erase dust spots in an image by selecting them one by one. the main window, select the image you want to 1 Inerase dust spots. 2 Select the [Tools] menu [Start Stamp tool]. the image has redrawn itself, double-click the 3 When point from where dust is to be erased. 5 Introduction Place the dust spot to be erased within the [ ] and click. Contents at a Glance ¿ The copy stamp window appears. Doubleclick ¿ The display changes to 100% view. O The display position can be changed by dragging. C the button that matches the dust spots to be 4 Click erased. 1 2 3 4 5 Basic Operation Click Y P O ¿ The dust spot within the [ ] is erased. O Click on another part of the image to continue erasing dust spots in the image. O To erase dust in another part of the image, either right-click with the mouse, or click the button clicked in step 4 again to cancel dust erasure processing and perform the operation again from step 3. O When the dust spot cannot be erased, [ ] is displayed. 6 Click the [OK] button to return to the main window. Advanced Operation Advanced Image Editing and Printing Processing Large Numbers of Images Editing JPEG/TIFF Images Reference ¿ The [ ] mark (p.107) is displayed on an image from which dust spots have been erased. Index O If the dust spot is dark in color, click the [ ] button, and if the dust spot is light in color, click the [ ] button. O When you move the cursor over the image, the dust erasure range appears as [ ]. 98 Introduction Additional information Useful functions of the copy stamp window O Click several times when dust spots are not erased completely Where unwanted dust spots are not erased even after performing step 5 once, they may be erased completely when you click several times. O Mainly spots of dust can be erased with the repair function Spots of dust can be erased with the repair function. You may be unable to erase lines of dust. In this case, use the copy stamp function (p.100). O The dust-erased image can be reverted to its original condition at any time A dust-erased image is displayed or printed as a dust-erased image. However, since the dust on the image is not actually erased, you can always revert to the original image by clicking the [Undo] button in the copy stamp window or performing the “Re-Editing an Image” procedure (p.101). O Check dust erasure in the copy stamp window Check dust erasure in the copy stamp window. Images before dust erasure are displayed in other windows and you will be unable to check them. O Printing dust-erased images You can print as a dust-erased image by printing it in DPP. O The image becomes a dust-erased image when saved as a separate image The dust-erased JPEG or TIFF image actually becomes a dusterased image when saved as a separate image (p.101). C O Checking the dust erased spots After step 3, you can display and check in detail the erased dust spots one by one by pressing the <Shift> + <F> keys. (Press the <Shift> + <B> keys to return to the previous dust spot.) O Canceling a specified erased dust spot only After step 3, you can press the <Shift> + <F> keys or the <Shift> + <B> keys to display the erased dust spot, and then press the <Shift> + <Del> keys to cancel only the erased dust spot displayed. O Switch between full screen display/normal screen display using shortcut keys You can also switch between full screen display/normal screen display by pressing the <Alt> + <Enter> keys. O Applying the dust erasure result to another image You can apply dust erasure to the same place in another image by clicking the [Copy] button to copy the dust erasure results and then displaying the other image to which you want to apply the results and clicking the [Paste] button. Y P O For a list of the copy stamp window functions, refer to p.116. Contents at a Glance 1 2 3 4 5 Basic Operation Advanced Operation Advanced Image Editing and Printing Processing Large Numbers of Images Editing JPEG/TIFF Images Reference Index 99 Saving Editing Results Erasing Unwanted Parts of an Image (Copy Stamp Function) You can correct an image by pasting a section copied from another part of the image to an unwanted part of the image. steps 1 to 3 in “Manually Erasing Dust (Repair 1 Follow Function)” . 2 Specify the section to be copied. (p.98) O Click on the section that is to be the copy source while holding down the <Alt> key. O To change the section that is to be the copy source, perform the operation above again. O To fix the position of the copy source, checkmark [Fix Copy Source position]. 3 Correct the image. O Click or drag on the section you want to correct on the image. [+] in the window indicates the copy source and [ ] indicates the copy destination. ¿ The copied image is pasted in the position to which it was dragged. O For [Pen type], you can select from [Brush] (the pasted image’s borders simulate a brush) and [Pencil] (the pasted image’s borders are sharp). C 4 Click the [OK] button to return to the main window. ¿ The [ ] mark (p.107) is displayed on a corrected image. Introduction Saving Editing Content to an Image All the contents (recipe) adjusted with the tool palette (p.86 to p.93) as well as the trimmed range (p.94) and dust-erasure (p.96 to p.100) information can be saved to a JPEG or TIFF image, or to a separate JPEG or TIFF image. Select the [File] menu desired item. Contents at a Glance 1 2 3 4 5 Basic Operation Advanced Operation Y P O Advanced Image Editing and Printing Processing Large Numbers of Images Editing JPEG/TIFF Images Reference ¿ Your adjustments are saved to the image. Index 100 Re-Editing an Image Saving as a Separate Image If a JPEG or TIFF image is adjusted with the tool palette (p.86 to p.93) and then saved in the same way as a RAW image as described below, the image can be saved as a separate image with the adjustments (recipe) applied to it. Furthermore, if a trimmed image (p.94) or dust-erased image (p.96 to p.100) is also saved in the same way, it actually becomes a trimmed or dust-erased image. O Saving as a JPEG or TIFF Image (p.38) O Batch save as JPEG or TIFF images (batch processing) (p.82) By saving as a separate JPEG or TIFF image as explained above, the adjustments made with the tool palette are applied, and some image deterioration that accompanies editing/saving occurs as when editing with ordinary image editing software. Applying Editing Contents to Another Image You can copy the adjustment contents (recipe) of JPEG and TIFF images that have been adjusted with the tool palette and apply them to another image with the procedures below, in the same way as with RAW images. O Applying adjustment contents to another image (p.37) O Utilizing adjustment contents (recipe) (p.79) Printing C Edited JPEG and TIFF images can be printed with the procedures below as with RAW images. O Printing (p.39) O Printing with shooting information (p.68) O Printing a thumbnail list (contact sheet printing) (p.69) O Printing RAW images on a high-end Canon printer (p.70) Only the image processing conditions are changed in images adjusted with the tool palette (p.86 to p.93), so the “original image data itself” remains unaffected. Also, the trimming range or dust-erasure information of a trimmed image (p.94) or dust-erased image (p.96 to p.100) is simply saved to the image. For this reason, you can undo any adjustments saved (p.100) to the image, trimming range and dust-erasure information, and revert to the condition when last saved, or when the image was shot. 1 Select the image that is to be re-edited. 2 Select the [Adjustment] menu desired item. Y P O Introduction Contents at a Glance 1 2 3 4 5 Basic Operation Advanced Operation Advanced Image Editing and Printing Processing Large Numbers of Images Editing JPEG/TIFF Images Reference ¿ The image reverts to the conditions of the selected item. Index 101 Reference Introduction This reference section has been provided to enhance your experience using DPP. It contains various troubleshooting solutions, how to delete DPP from your computer, explanations of the various windows and a glossary. An Index is provided at the end of the chapter for you to easily find information you are looking for. C Troubleshooting..................................................... 103 Deleting the Software (Uninstalling) ...................... 104 List of Main Window (Folder Window) Functions .. 105 List of Main Window (Collection Window) Functions... 106 Image Frame Information in the Main Window and Edit Image Window....................................................... 107 List of Edit Window Functions ............................... 108 List of Tool Palette Functions ................................ 109 List of Quick Check Window Functions ................. 111 List of Edit Image Window Functions .................... 112 List of Convert/Save One Image Window Functions 113 List of Trimming Window Functions....................... 114 List of Lens Aberration Correction Window Functions 115 List of Copy Stamp Window Functions.................. 116 List of Convert/Save Multiple Images Window (Batch Processing) Functions ........................................... 117 List of Rename Window Functions ........................ 118 Glossary ................................................................ 119 Index...................................................................... 121 About This Instruction Manual .............................. 125 Trademark Acknowledgments .............................. 125 Y P O Contents at a Glance 1 2 3 4 5 Basic Operation Advanced Operation Advanced Image Editing and Printing Processing Large Numbers of Images Editing JPEG/TIFF Images Reference Index 102 Troubleshooting Introduction If DPP is not operating correctly, refer to the items below. An image could not be adjusted Installation could not be completed correctly O You cannot install the software if a user setting other than [Computer administrator] privilege or [Administrator] privilege is selected. Select the [Computer administrator] privilege user setting in Windows XP or the [Administrator] privilege user setting in Windows Vista. For detailed information on selecting the user setting, refer to your computer User’s Manual. DPP does not work O DPP does not operate correctly on a computer if its system requirements does not meet. Use DPP on a computer with compatible system requirements (p.3). O Even if your computer has the RAM capacity (memory) described in the system requirements (p.3), if other applications are running at the same time as DPP, you may not have sufficient RAM (memory). Exit any applications other than DPP. Images do not display properly C O Images that are not supported by DPP do not display. There are various types of JPEG and TIFF images, so JPEG images other than Exif 2.2 and 2.21 compatible images and TIFF images other than Exif compatible images may not display properly (p.3). O When a dust-erased image (p.63 to p.67, p.96 to p.100) is displayed in a window other than the copy stamp window, it is displayed as it was before dust erasure was performed. Check dust-erased images in the copy stamp window. O The JPEG and TIFF images cannot be adjusted using the image adjustment function of the [RAW] tool palette. Adjust these images with the [RGB] tool palette (p.109). O PowerShot Pro1 RAW images cannot be adjusted with the image adjustment function of the [RAW] tool palette. Adjust these images with the [RGB] tool palette (p.109). A recipe could not be pasted (applied) to another image O You cannot paste (apply) rotation (p.10, p.23, p.105, p.111, p.112), trimming (p.35, p.94), dust erasure (copy stamp) (p.63 to p.67, p.96 to p.100) of an image to another image as a recipe. Trim the image or erase dust of the image using the copy/paste function in each window and rotate each image individually. O The adjustment contents (recipe) of RAW images that has been adjusted with the [RAW] tool palette cannot be applied to JPEG or TIFF images (p.109). O The Auto Lighting Optimizer (p.56) is a function that is only available for RAW images shot with EOS 50D. You cannot apply the Auto Lighting Optimizer’s adjustment contents to RAW images shot with other cameras. Y P O Color appears weak in the image when viewed with other software O A RAW image which has a color space other than sRGB set (p.67, p.76) and is then converted and saved as a JPEG or TIFF image will appear weak in color when viewed in software that is only compatible with sRGB color space. In this case, set the RAW image color space to sRGB, convert again to a JPEG or TIFF image and save, and then view this image. Contents at a Glance 1 2 3 4 5 Basic Operation Advanced Operation Advanced Image Editing and Printing Processing Large Numbers of Images Editing JPEG/TIFF Images Reference Index 103 Deleting the Software (Uninstalling) The colors of the image displayed on screen and the colors of the printed image do not match O If the color of the monitor that displays an image is not adjusted correctly, or if a profile for a printer that is to print images, has not been set up, the color of the image displayed on screen and the color of the printed photograph may differ greatly. If the color of the monitor that displays images is corrected (p.76) and a profile for a printer is set up correctly (p.76), the color of a printed photograph and the color of an image on screen can be more closely matched. Using a Canon printer (p.39, p.42) or linked printing (p.70, p.71) automatically sets up printer profiles, so you only need to set the color of the monitor to bring the colors closer together. O When printing using Easy-PhotoPrint and the Easy-PhotoPrint automatic compensation function and the various types of image adjustment functions are operating, colors are not printed correctly. Cancel all Easy-PhotoPrint image adjustment functions (p.43). O Even if you set a printer profile, if you use the color adjustment function of the printer driver, the image may print in colors different from those displayed on screen. Do not use the color adjustment function of the printer driver. C Printing a large number of images in batches cannot be performed O If a large number of images are printed in batches, printing may stop in the middle or the images may not be printed. Reduce the number of images to print or increase the memory on your computer. A file remains in the folder after images are deleted O Exit any applications before uninstalling the software. O Log in under the Computer administrator/Administrator privileges when uninstalling the software. O To prevent computer malfunctions, always restart your computer after you have uninstalled the software. Re-installing the software without first restarting your computer is particularly likely to result in computer malfunctions. 1 Select the [Start] button ([ ] button in Windows Vista) [All Programs] [Canon Utilities] [Digital Photo Professional] [Digital Photo Professional Uninstall]. Y P O 2 Proceed with the uninstallation as directed by the on-screen messages. ¿ The software is uninstalled. Introduction Contents at a Glance 1 2 3 4 5 Basic Operation Advanced Operation Advanced Image Editing and Printing Processing Large Numbers of Images Editing JPEG/TIFF Images Reference Index O Delete [CRW_YYYY.THM] (camera index display image) if it remains in the folder from which images have been deleted (p.45). * Numbers are entered for [YYYY] in the file name. The image information does not display O A JPEG image set to Adobe RGB and shot with EOS 10D, EOS DIGITAL REBEL/300D DIGITAL and PowerShot Pro1 may not display image information (p.10, p.21). 104 List of Main Window (Folder Window) Functions (p.10) Introduction Check marks (p.18) Shows/hides the tool palette (p.109) Removes check marks (p.18) Shows/hides the folder area Selects all images Cancels selection of all images Folder path Image rotation (90 degree units) Switches to the edit image window (p.112) Toolbar*1 [Collection] tab sheet*5 Batch conversion/ saving (p.82, p.83) [Folder] tab sheet*5 Contents at a Glance 1 2 3 4 5 Basic Operation Advanced Operation Folder area*2 C Y P O Advanced Image Editing and Printing Processing Large Numbers of Images Editing JPEG/TIFF Images Reference Information display*3 Index Display mode*4 Recipe attachment status (p.79) Number of selected images CMYK simulation display (p.76) Number of displayed images *1 To switch between show/hide, select the [View] menu [Toolbar]. *2 The images inside the folders selected here are displayed in a thumbnail list on the right. 3 * Displays the coordinates of the cursor position and the RGB values (8-bit conversion) when click white balance was performed with the tool palette. *4 The item selected in [Veiwing and saving RAW images] (p.72) of the [Preferences] window is displayed. *5 You can switch between the [Folder] and [Collection] windows. 105 List of Main Window (Collection Window) Functions Switches to the edit image window Shows/hides the tool palette Selects all images Cancels selection of all images (p.33) Introduction Check marks Removes check marks Image rotation (90 degree units) Toolbar [Collection] tab sheet* Batch conversion/ saving [Folder] tab sheet Contents at a Glance 1 2 3 4 5 Basic Operation Advanced Operation C Y P O Advanced Image Editing and Printing Processing Large Numbers of Images Editing JPEG/TIFF Images Reference Information display Index Display mode Recipe attachment status Number of selected images CMYK simulation display Number of displayed images * The total number of images added to the [Collection] window is displayed in the ( ) in the [Collection] tab sheet. Accordingly, when an image is added that is displayed as a single image (p.20), twice the total number of displayed images is displayed. 106 Image Frame Information in the Main Window and Edit Image Window (p.10, p.31) Introduction Information displayed when [Large thumbnail] (p.10) is selected Contents at a Glance 1 2 3 4 5 Basic Operation Check mark (p.17, p.18) Brightness adjustment value*1 (p.24) White balance icon*1 (p.25) C File name Image type*2 Y P O Copy stamp mark (p.63 to p.67, p.96 to p.100) Lens aberration correction mark (p.61) Trimming range*6 (p.35, p.94) Aperture*3 Advanced Operation Advanced Image Editing and Printing Processing Large Numbers of Images Editing JPEG/TIFF Images Reference RAW adjustment mark*1 *4 RGB adjustment mark*1 *5 Index Unsaved editing content mark Shutter speed*3 *1 Does not display with [Small thumbnail]. *2 Displays in RAW+JPEG images displayed as a single image (p.20). [RAW] is displayed in RAW images. (In [Small thumbnail] (p.10), [R] is displayed.) In PowerShot Pro1 RAW images, [RAW] is not displayed. 3 * Does not display with [Medium thumbnail] or [Small thumbnail]. *4 Displays in an image edited with the [RAW] tool palette in the edit window and the edit image window. *5 Displays in an image edited with the [RGB] tool palette in the edit window and the edit image window. *6 When aspect ratio information is attached to an image shot with EOS1Ds Mark III or EOS-1D Mark III, the image is displayed as a trimmed image. 107 List of Edit Window Functions (p.11, p.23) Introduction Tool palette*1 (p.109, p.110) Path and file name of image Contents at a Glance 1 2 3 4 5 Basic Operation Advanced Operation C Y P O Advanced Image Editing and Printing Processing Large Numbers of Images Editing JPEG/TIFF Images Reference Index Information display*2 Display mode*4 CMYK simulation display (p.76) Image color space*3 and work color space (p.67, p.76) *1 To switch between show/hide, select the [View] menu [Tool palette]. *2 Displays the coordinates of the cursor position and the RGB values (8bit conversion). *3 RAW images are displayed with [RAW]. *4 The item selected in [Viewing and saving RAW images] (p.72) of the [Preferences] window is displayed. 108 List of Tool Palette Functions Introduction RAW Tool Palette (p.23) RGB Tool Palette (p.55) Automatic adjustment (tone curve assist) (p.30, p.87) Brightness adjustment (p.24) Click white balance (p.89) White balance adjustment (p.25, p.26, p.52) Tone curve adjustment (p.54, p.91) Picture Style settings (p.24, p.53) Dynamic range adjustment (p.92) Dynamic range adjustment (p.53) Contrast adjustment (p.27) Linear setting (p.27) C Color tone and color saturation adjustment (p.27) Sharpness adjustment (p.29) Enlargement display position* Y P O Contents at a Glance 1 2 3 4 5 Basic Operation Advanced Operation Advanced Image Editing and Printing Brightness and contrast adjustment (p.88) Hue and Saturation adjustment (p.90) Processing Large Numbers of Images Editing JPEG/TIFF Images Sharpness adjustment (p.90) Reference Enlargement display position* Index * If an image is displayed enlarged, the enlargement display position can be moved by dragging. The enlargement display position appears when [Docking display] (p.75) has been set and the edit image window (p.112) has been enlarged. 109 Introduction NR/Lens/ALO Tool Palette NR/Lens/ALO Tool Palette (When a RAW image is selected) (When a JPEG or TIFF image is selected) Contents at a Glance Apply noise reduction button (p.93) Apply noise reduction button (p.57) Luminance noise reduction for RAW images (p.57) Chrominance noise reduction for RAW images (p.57) Tune lens aberration correction button (p.61) C Lens aberration correction (p.61) Enlargement display position* 1 2 3 4 5 Basic Operation Auto Lighting Optimizer (p.56) Y P O Luminance noise reduction for JPEG and TIFF images (p.93) Chrominance noise reduction for JPEG and TIFF images (p.93) Advanced Operation Advanced Image Editing and Printing Processing Large Numbers of Images Editing JPEG/TIFF Images Reference Enlargement display position* Index * If an image is displayed enlarged, the enlargement display position can be moved by dragging. The enlargement display position appears when [Docking display] (p.75) has been set and the edit image window (p.112) has been enlarged. 110 List of Quick Check Window Functions (p.16, p.17) Introduction view*1 Path and file name of image 50% view/100% view (moiré reduction off)/full Displays the image in full screen*2 Contents at a Glance Check mark display Removes check marks (p.17) Check marks (p.17) Switches between displayed images C Y P O Displays the AF poins (p.16) Displays the image information window (p.22) Image rotation (90 degree units) 1 2 3 4 5 Basic Operation Advanced Operation Advanced Image Editing and Printing Processing Large Numbers of Images Editing JPEG/TIFF Images Reference Index *1 You can select 50% view/100% view (moiré reduction off) by selecting [Preferences] in the [Tools] menu and using [Quick check tool display] in the [View settings] tab sheet. You can also move the display position in the enlarged display by dragging the image. *2 To return to the normal screen, press the <Esc> key. 111 List of Edit Image Window Functions (p.31, p.33) Introduction Shows/hides tool palette Image path and file name Shows/hides thumbnail display area Enlargement ratio of displayed image Image rotation (90 degree units) Shows/hides 4 Switches between displayed images Batch conversion/saving Switches to main window (p.105) grid* (p.82, p.83) Toolbar Contents at a Glance 1 2 3 4 5 Basic Operation Advanced Operation Thumbnail display area*3 C Y P O Advanced Image Editing and Printing Tool palette (p.109) Processing Large Numbers of Images Editing JPEG/TIFF Images Reference Display mode*5 Index Information display*2 Image color space*1 and work color space (p.67, p.76) CMYK simulation display (p.76) *1 RAW images are displayed with [RAW]. *2 Displays the coordinates of the cursor position and the RGB values (8-bit conversion). *3 Displays images selected in the main window. The image selected here is enlarged and displayed on the right. *4 You can set the grid spacing with [Grid pitch] in the [Preferences] (p.74). *5 The item selected in [Viewing and saving RAW images] (p.72) of the [Preferences] window is displayed. 112 List of Convert/Save One Image Window Functions (p.38) Introduction Contents at a Glance Types of image Type of image Extension Exif-JPEG .JPG Exif-TIFF 8bit .TIF TIFF 16bit .TIF Exif-Tiff 8bit+Exif-JPEG .TIF/.JPG TIFF 16bit+Exif-JPEG .TIF/.JPG Save destination File name Resolution*1 Embeds of ICC profiles*2 (p.119) 1 2 3 4 5 Basic Operation C Y P O Advanced Image Editing and Printing Save JPEG compression rate*3 Processing Large Numbers of Images Editing JPEG/TIFF Images Reference Size changing*4 *1 The setting range is 1 to 60,000 dpi. *2 Color space (p.67, p.76) information that is set in an image is attached to an ICC profile. Even if you remove the check mark from images that have been set to Apple RGB, ColorMatch RGB or Wide Gamut RGB color space (p.67, p.76), the ICC profiles are embedded automatically. Advanced Operation Index *3 The setting range is 1 to 10. The higher the numerical value, the higher the image quality becomes. *4 The larger of the two values set in [Width] and [Height] is applied to the longer edge of an image and change its size. 113 List of Trimming Window Functions (p.35, p.94) Introduction Cancels all the trimming (aspect ratio) information Full screen display/returns to normal screen Contents at a Glance Reverts to the condition when the image was shot Ratio of trimming range (you can also enter numerical values if you have selected [Custom])*1 Upper left coordinates of trimmed range (you can also enter numerical values) Basic Operation Size of trimmed range (you can also enter numerical values) Copies the trimmed range and applies (pastes) it to another image*2 Applies the copied trimming range to all other images*2 Displays borders around a trimmed range Level of opacity outside a trimmed range Advanced Operation Y P O Switches between displayed images*2 C 1 2 3 4 5 Advanced Image Editing and Printing Processing Large Numbers of Images Editing JPEG/TIFF Images Reference Index Trimming range *1 If [Free] has been selected in the [Aspect ratio] list box, you can also drag the borders of the trimmed range to change its range. *2 Operates when you have selected multiple images and the trimming window is displayed. 114 List of Lens Aberration Correction Window Functions (p.61) Introduction Contents at a Glance Enlargement display section* 1 2 3 4 5 Basic Operation Advanced Operation C Y P O Reverts to the condition when the image was shot Shooting distance information slider (p.62) Peripheral illumination correction Distortion correction Chromatic aberration correction Corrects blue chromatic aberration Color blur correction Shows/hides position of enlargement display section Grid display Advanced Image Editing and Printing Processing Large Numbers of Images Editing JPEG/TIFF Images Reference Index Enlargement display position (Navigator display) Corrects red chromatic aberration * The area you clicked on the image (Enlargement display position) is displayed at 200%. 115 List of Copy Stamp Window Functions (p.63 to p.67, p.96 to p.100) Full screen display/returns to normal screen Introduction Contents at a Glance Applies Dust Delete Data (p.63, p.96) Types of dust to be erased (p.65, p.98) Specifies the copy source (p.67, p.100) Fixes the copy source position (p.67, p.100) Types of stamps (p.67, p.100) Sets the size of the dust erasure range (p.65, p.98) or copy range (p.67, p.100) in a range of 5 to 100 (in one pixel units) (you can also enter a numerical value) Y P O Restores/redoes the image Copies the dust erasure range or copy range and applies (pastes) it to another image Switches between displayed images* C 1 2 3 4 5 Basic Operation Advanced Operation Advanced Image Editing and Printing Processing Large Numbers of Images Editing JPEG/TIFF Images Reference Index * Operates when you have selected multiple images and the copy stamp window is displayed. 116 List of Convert/Save Multiple Images Window (Batch Processing) Functions File names of images to be batch saved (p.82) Save destination Types of image Type of image Extension Exif-JPEG .JPG Exif-TIFF 8bit .TIF TIFF 16bit .TIF Exif-Tiff 8bit+Exif-JPEG .TIF/.JPG TIFF 16bit+Exif-JPEG .TIF/.JPG Embeds ICC profiles*2 (p.119) Resolution*1 Size changing*4 C Images to be converted are limited to RAW images*5 *1 The setting range is 1 to 60,000 dpi. *2 Color space (p.67, p.76) information that is set in an image is attached to an ICC profile. Even if you remove the check mark from images that have been set to Apple RGB, ColorMatch RGB or Wide Gamut RGB color space (p.67, p.76), the ICC profiles are embedded automatically. Y P O JPEG compression rate*3 File name Batch transfer to other image editing software (p.83) Save *3 The setting range is 1 to 10. The higher the numerical value, the higher the image quality becomes. *4 The larger of the two values set in [Width] and [Height] is applied to the longer edge of an image and change its size. *5 Appears when you click the [Batch process] button (p.105, p.112) without an image selected in the main window or the edit image window. To convert RAW images only, instead of clicking the [Execute] button, click this button. Introduction Contents at a Glance 1 2 3 4 5 Basic Operation Advanced Operation Advanced Image Editing and Printing Processing Large Numbers of Images Editing JPEG/TIFF Images Reference Index 117 List of Rename Window Functions (p.84) Introduction Sets the new file name Contents at a Glance 1 2 3 4 5 Basic Operation Order in which images are sorted Sets the format of information in the file name Check mark to apply the same name to RAW images and JPEG images recorded simultaneously Check mark to copy the images Click the [Browse] button and set the save destination C Y P O Advanced Operation Advanced Image Editing and Printing Processing Large Numbers of Images Editing JPEG/TIFF Images Reference Index 118 Glossary Introduction RAW image bit number EOS DIGITAL camera RAW images are recorded in an uncompressed 14bit or 12bit format. Because RAW images are special images in an undeveloped status, you need software with development processing functions such as DPP in order to view them. The advantage of the undeveloped RAW images is that you can make a variety of adjustments to RAW images with almost no deterioration of the image. * “RAW” meaning “in a natural condition” or “not processed or refined”. Binary unit of information volume in the color of an image. The number shows the number of bits per pixel. The larger the number of bits, the more the color numbers and the gradation becomes smoother. A one-bit image is a black-and-white image. JPEG image The most ordinary image in non-reversible compressed 8bit format. The advantage of this is that by saving at a high compression rate, the file size can be small, even for image data that has a high pixel count. Because during saving and compression part of the data is thinned out to make the file size small, every time you edit or save, the image deteriorates. With DPP, even if you repeat editing/saving, only the recipe data is modified, and no overwriting or compression occurs so the original image data does not deteriorate. * JPEG is an abbreviation of “Joint Photographic Experts Group”. TIFF image C Bitmap-format image recorded in a 8bit/16bit uncompressed format. Because TIFF images are in uncompressed format, they are suitable for saving an image while maintaining the original high image quality. * TIFF is an abbreviation of “Tagged Image File Format”. Recipe The “Image processing conditions information” for RAW images that can be edited in DPP is called a “recipe”. Further, in DPP, you can perform image editing on JPEG and TIFF images that use “recipes” as with RAW images. Contents at a Glance 1 2 3 4 5 Basic Operation Color Management System (Color Matching) Digital cameras that shoot images, monitors that display images, and printers that print images each have a different way of creating color. For this reason, there may be a difference between the color of an image when viewed on a monitor and when printed. A color management system is a system for managing color in order to bring these colors closer together. With DPP, you can more closely match color between different devices using ICC profiles between different devices. Y P O ICC profiles ICC profiles are files containing color information such as color characteristics and color space for various devices, set by the ICC (International Color Consortium). Most devices such as the monitor we use to view images or the printer we use to print images can be managed (color management) using these ICC profiles and the color between different devices can be more closely matched. DPP has color management that uses these ICC profiles. Tone Curve A tone curve shows values before adjustment (input) as the horizontal axis on a graph, and the values after adjustment (output) as the vertical axis. Since the values of before adjustment and after adjustment are the same before any adjustment is made, the tone curve displays as a straight line from bottom left to top right, and by changing this tone curve, you can adjust in detail the image’s brightness, contrast and color. The more you go right on the horizontal axis, the more the plus value it becomes, and the higher you go on the vertical axis, the more the plus value it becomes. Advanced Operation Advanced Image Editing and Printing Processing Large Numbers of Images Editing JPEG/TIFF Images Reference Index 119 Introduction Color space CMYK simulation profiles A color space is the reproducible color range (color gamut characteristics). DPP supports the following five kinds of color space. sRGB : Standard color space for Windows. Widely used for the standard color space of monitors, digital cameras, and scanners. Adobe RGB : A wider color space than sRGB. Mainly used for printing for business purposes. Apple RGB : Standard color space for Macintosh. A slightly wider color space than sRGB. ColorMatch RGB : A slightly wider color space than sRGB. Mainly used for printing for business purposes. Wide Gamut RGB : A wider color space than Adobe RGB. Refer to the color chart below for the color area of each color space. A profile that simulates colors when printing in a CMYK environment (printing machine, etc.). With DPP, you can simulate color with four types of profile. Euro Standard : Profile normally used for book printing in Europe, suitable for simulation of standard European printing. JMPA : Profile normally used for book printing, etc. in Japan, suitable for simulation of magazine advertising standard color printing. U.S.Web Coated : Profile normally used for book printing in North America, suitable for simulation of North American standard printing. JapanColor2001 type3 : Profile becoming a standard in the Japanese printing industry, suitable for simulation of JapanColor standard printing. Color chart of color spaces compatible with DPP Y P O Rendering intent C Color range that can be seen by the human eye sRGB Adobe RGB Apple RGB ColorMatch RGB Wide Gamut RGB Gamma value 2.2 2.2 1.8 1.8 2.2 White point (color temp.) 6500K(D65) 6500K(D65) 6500K(D65) 5000K(D50) 5000K(D50) Rendering intents are color conversion methods when printing an image. The conversion method of each rendering intent is shown below. Perceptual : Before and after conversion, all colors are converted to maintain the relationship between colors. Even where colors slightly change, you can print a natural-looking image which has maintained color harmony. However, depending on the image, the saturation may change overall. Relative Colorimetric : There will not be much conversion to colors which are similar before and after conversion, but colors which are not similar are converted appropriately. Because there are little changes to similar colors which comprise most of an image, you can print a natural-looking image in which the saturation has not changed greatly. However, depending on the image, there are cases where the overall tone of an image changes somewhat as colors which are not similar and highlights change. Contents at a Glance 1 2 3 4 5 Basic Operation Advanced Operation Advanced Image Editing and Printing Processing Large Numbers of Images Editing JPEG/TIFF Images Reference Index 120 Index Introduction A Adjust JPEG Images........................................................................... 86 Adjust RAW Images............................................................................ 23 Adjust TIFF Images............................................................................. 86 Adjusting (JPEG or TIFF Image) Automatic Adjustment (Tone Curve Assist).................................. 87 Brightness .................................................................................... 88 Click White Balance ..................................................................... 89 Contrast........................................................................................ 88 Dynamic Range............................................................................ 92 Hue............................................................................................... 90 RGB Tool Palette ....................................................................... 109 Saturation ..................................................................................... 90 Sharpness .................................................................................... 90 Tone Curve Adjustment................................................................ 91 Adjusting (RAW image) Apply Adjustments........................................................................ 80 Automatic Adjustment (Tone Curve Assist).................................. 30 Brightness .................................................................................... 24 Click White Balance ..................................................................... 26 Color Saturation ........................................................................... 27 Color Temperature ....................................................................... 52 Color Tone.................................................................................... 27 Color Wheel.................................................................................. 52 Contrast........................................................................................ 27 Copy Adjustments ........................................................................ 80 Dynamic Range............................................................................ 53 Filter Effect ................................................................................... 28 Monochrome ................................................................................ 28 Personal White Balance ............................................................... 81 Picture Style ................................................................................. 24 Picture Style File .......................................................................... 53 RAW Tool Palette....................................................................... 109 Save Adjustments ........................................................................ 80 Sharpness .................................................................................... 29 Tone Curve Adjustment................................................................ 54 Toning Effect ................................................................................ 28 Tool Palette ........................................................................ 109, 110 White Balance .............................................................................. 25 C Adjustment Contents (Recipe)..................................................... 79, 119 Adobe RGB ....................................................................................... 120 Apple RGB......................................................................................... 120 Arrange Images ............................................................................. 18, 19 Auto Lighting Optimizer ....................................................................... 56 Automatic Adjustment (Tone Curve Assist)................................... 30, 87 Automatic Dust Erasure Processing.................................. 63, 64, 96, 97 B Batch Apply White Balance to Images (Personal White Balance)....... 81 Batch Change the File Name of Images.............................................. 84 Batch Convert/Save Images (Batch Process) ..................................... 82 Batch Process (Batch Save JPEG and TIFF Images)................. 82, 117 Batch Process of Multiple Images Change File Name ........................................................................ 84 Convert/Save (Batch Process).............................................. 82, 117 Personal White Balance................................................................ 81 Recipe Data .................................................................................. 79 Transfer......................................................................................... 83 Batch Settings Window.......................................................... 82, 83, 117 Batch Transfer Images ........................................................................ 83 Batch Transfer Images to Image Editing Software .............................. 83 Before/After Comparison Display ........................................................ 49 bit Number ......................................................................................... 119 Bookmark ............................................................................................ 47 Brightness...................................................................................... 24, 88 Y P O Contents at a Glance 1 2 3 4 5 Basic Operation Advanced Operation Advanced Image Editing and Printing Processing Large Numbers of Images Editing JPEG/TIFF Images Reference C Change File Name............................................................................... 84 Changing the File Name of Images in the Order in the Main Window. 84 Check Mark ................................................................... 17, 18, 107, 111 Chromatic Aberration Correction ......................................................... 61 Chrominance Noise Reduction (JPEG, TIFF Images)......................... 93 Chrominance Noise Reduction (RAW Images) ................................... 57 Click White Balance....................................................................... 26, 89 CMYK Simulation .................................................................. 76, 77, 120 Collection Window ................................................................... 6, 33, 106 Index 121 Introduction Color Blur Correction .......................................................................... 61 Color Chart........................................................................................ 120 Color Management (Color Matching)................................................ 119 Color Setting of the Monitor (Profiles) .......................................... 76 Color Setting of the Printer (Profiles)...................................... 76, 77 Color Space................................................................................ 120 ICC Profiles ................................................................................ 119 Color Management (Preferences)....................................................... 76 Color Saturation .................................................................................. 27 Color Setting of the Monitor (Profiles)................................................. 76 Color Setting of the Printer (Profiles) ............................................ 76, 77 Color Space ...................................................................................... 120 Adobe RGB ................................................................................ 120 Apple RGB ................................................................................. 120 Color Space Setting for Each Image ............................................ 67 ColorMatch RGB ........................................................................ 120 Default Setting of Color Space ..................................................... 76 sRGB.......................................................................................... 120 Wide Gamut RGB....................................................................... 120 Color Space Setting for Each Image................................................... 67 Color Temperature.............................................................................. 52 Color Tone .......................................................................................... 27 Color Wheel ........................................................................................ 52 ColorMatch RGB............................................................................... 120 Compatible Cameras with the Lens Aberration Correction Function .. 58 Compatible Lenses with the Lens Aberration Correction Function ..... 59 Contact Sheet Printing (Printing a Thumbnail List) ............................. 69 Contrast ........................................................................................ 27, 88 Convert to JPEG or TIFF Image and Save ................... 38, 82, 113, 117 Convert/save One Image Window .............................................. 38, 113 Copy Stamp (Image Correction) ................................................. 67, 100 Copy Stamp Window ................................................ 63, 65, 96, 98, 116 Copying and Pasting (Applying) Recipes............................................ 80 Correct Images (Copy Stamp Function) ..................................... 67, 100 Creating a Folder ................................................................................ 45 C D Default Noise Reduction Settings........................................................ 75 Default Setting of Color Space ............................................................ 76 Delete Images ..................................................................................... 45 Deleting Delete Images ............................................................................... 45 Delete the Software .................................................................... 104 Deleting DPP (Uninstalling) ............................................................... 104 Detailed Setting Printing (Printing with Shooting Information)............. 68 Display Before/After Comparison Display.................................................. 49 Enlarged Display (Edit Window) ........................................... 11, 108 Enlarged Display (Quick Check Window) ............................. 16, 111 Shooting Information Display .................................................. 10, 21 Single Image Display .................................................................... 20 Synchronize Edit Window ............................................................. 50 Thumbnail Display (Main Window)........................................ 10, 105 Thumbnail Display and Enlarged Display (Edit Image Window)............................................................. 31, 112 Distortion Correction............................................................................ 61 Downloading an Image to Your Computer ............................................ 7 Downloading Images from a Camera ............................................. 7 Downloading Images from a Card Reader...................................... 9 Downloading Images ............................................................................. 7 Downloading Images from a Camera .................................................... 7 Downloading Images from a Card Reader ............................................ 9 Dust Delete Data ............................................................... 63, 64, 96, 97 Dust Erasure Processing Automatic Dust Erasure Processing ....................................... 63, 96 Image Correction (Copy Stamp Function) ............................ 67, 100 Manual Dust Erasure (Repair Function) ................................. 65, 98 Dynamic Range ............................................................................. 53, 92 Y P O Contents at a Glance 1 2 3 4 5 Basic Operation Advanced Operation Advanced Image Editing and Printing Processing Large Numbers of Images Editing JPEG/TIFF Images Reference Index E Edit Image Window...................................................................... 31, 112 Edit Window................................................................................. 11, 108 Editing................................................................................................ 121 Adjusting Enlarged Display (Edit Window) .................................................. 11, 108 122 Introduction Enlarged Display (Quick Check Window) ......................................... 111 EOS Utility............................................................................................. 7 Exiting DPP......................................................................................... 14 F False Color Reduction .................................................................. 72, 73 Filter Effect.......................................................................................... 28 Folder Window .............................................................................. 6, 105 G General Settings (Preferences) .......................................................... 72 Luminance Noise Reduction (RAW Images) ....................................... 57 M Main Window ............................................................................... 10, 105 Manual Dust Erasure (Repair Function) ........................................ 65, 98 Monochrome........................................................................................ 28 Filter Effect .................................................................................... 28 Toning Effect ................................................................................. 28 Move or Copy Folders ......................................................................... 46 Move or Copy Images ......................................................................... 46 N H Help....................................................................................................... 0 Cover Highlight Area Warning Indicator ........................................................ 51 Hue ..................................................................................................... 90 I ICC Profiles....................................................................................... 119 Image Frame Information (Image Marks) ......................................... 107 Image Marks (Image Frame Information) ......................................... 107 Image Quality Default Noise Reduction Settings................................................. 75 False Color Reduction............................................................ 72, 73 Improve the Quality of an Image (Main Window) ......................... 21 Noise Reduction of a JPEG Image (Luminance, Chrominance) .. 93 Noise Reduction of a RAW Image (Luminance, Chrominance) ... 57 View and Save a RAW Image ................................................ 72, 73 Image Shooting Information Display ............................................. 10, 21 Improve the Quality of an Image (Main Window)................................ 21 C J JPEG Image...................................................................................... 119 L Lens Aberration Correction ................................................................. 58 Lens Aberration Correction Window ........................................... 61, 115 Linear .................................................................................................. 27 Loading and Pasting (Applying) Recipes ............................................ 80 Luminance Noise Reduction (JPEG, TIFF Images)............................ 93 Contents at a Glance 1 2 3 4 5 Basic Operation Advanced Operation Noise Reduction (JPEG or TIFF Image).............................................. 93 Noise Reduction (RAW Image) ........................................................... 57 Noise Reduction of a JPEG Image (Luminance, Chrominance) ......... 93 Noise Reduction of a RAW Image (Luminance, Chrominance) .......... 57 NR/Lens/ALO Tool Palette ................................................................ 110 Advanced Image Editing and Printing O Processing Large Numbers of Images Y P O Organize Images ................................................................................. 45 Organizing Images .............................................................................. 45 Create a Folder ............................................................................. 45 Delete Images ............................................................................... 45 Move or Copy Folders................................................................... 46 Move or Copy Images ................................................................... 46 Register Folders as Bookmarks .................................................... 47 Editing JPEG/TIFF Images Reference P Peripheral Illumination Correction ....................................................... 61 Personal White Balance ...................................................................... 81 Picture Style ........................................................................................ 24 Picture Style File.................................................................................. 53 Preferences ......................................................................................... 72 Color Management ....................................................................... 76 General Settings ........................................................................... 72 Tool Palette ................................................................................... 75 View Settings ................................................................................ 74 Printing Printing a Thumbnail List (Contact Sheet Printing) ....................... 69 Index 123 Introduction Printing One Sheet of Paper .................................................. 14, 44 Printing Using Easy-PhotoPrint .................................................... 42 Printing Using Easy-PhotoPrint EX .............................................. 39 Printing with a High-End Canon Printer........................................ 70 Printing with a Large-Format Canon Printer ................................. 71 Printing with a Printer other than the Canon Printers ................... 44 Printing with Canon Inkjet Printers ......................................... 39, 42 Printing with Easy-PhotoPrint Pro ................................................ 70 Printing with Shooting Information (Detailed Setting Printing)...... 68 Rendering Intents when Using Easy-PhotoPrint .................... 76, 77 Printing a Thumbnail List (Contact Sheet Printing) ............................. 69 Printing One Sheet of Paper ......................................................... 14, 44 Printing Using Easy-PhotoPrint........................................................... 42 Printing Using Easy-PhotoPrint EX..................................................... 39 Printing with a High-End Canon Printer .............................................. 70 Printing with a Large-Format Canon Printer ....................................... 71 Printing with a Printer other than the Canon Printers.......................... 44 Printing with Canon Inkjet Printers................................................ 39, 42 Printing with Easy-PhotoPrint Pro....................................................... 70 Printing with Shooting Information (Detailed Setting Printing) ............ 68 Q C Quick Check Window.................................................................. 16, 111 R RAW Image....................................................................................... 119 RAW Tool Palette ............................................................................. 109 Re-Adjusting an Image ............................................................... 39, 101 Recipe......................................................................................... 79, 119 Recipe File .......................................................................................... 79 Re-Editing an Image ................................................................... 39, 101 Registering Folders as Bookmarks ..................................................... 47 Rename Window......................................................................... 84, 118 Rendering Intent (Matching Method) ................................................ 120 Rendering Intents when Using Easy-PhotoPrint .................... 76, 77 Rendering Intents when Using Easy-PhotoPrint........................... 76, 77 Repair (Manual Dust Erasure) ...................................................... 65, 98 RGB Tool Palette .............................................................................. 109 Rotate Images ............................................... 10, 23, 105, 106, 111, 112 S Saturation ............................................................................................ 90 Save Batch Convert/Save Images (Batch Process)....................... 82, 117 Convert to JPEG or TIFF Images and Save ......................... 38, 113 Save ...................................................................................... 37, 100 Save As................................................................................. 37, 100 Save JPEG or TIFF Image as a Separate Image ....................... 101 View and Save RAW Images .................................................. 72, 73 Save As ....................................................................................... 37, 100 Saving Recipes.................................................................................... 80 Select Images.......................................................................... 10, 16, 31 Shadow Area Warning Indicator.......................................................... 51 Sharpness ..................................................................................... 29, 90 Shooting Information Display......................................................... 10, 21 Cover Shortcut Keys ........................................................................................ 0 Single Image Display........................................................................... 20 Single Image Display of RAW and JPEG Image ................................. 20 Sorting Images (Check Marks) ...................................................... 17, 18 sRGB ................................................................................................. 120 Starting up DPP..................................................................................... 6 Supported Images ................................................................................. 3 Synchronization (Edit Window)............................................................ 50 Synchronize Edit Windows .................................................................. 50 Synchronize Images ............................................................................ 50 System Requirements ........................................................................... 3 Y P O Contents at a Glance 1 2 3 4 5 Basic Operation Advanced Operation Advanced Image Editing and Printing Processing Large Numbers of Images Editing JPEG/TIFF Images Reference Index T Thumbnail Display (Main Window) .............................................. 10, 105 Change the Display....................................................................... 10 Thumbnail Display and Enlarged Display (Edit Image Window) ......... 31 Thumbnail Display of Images (Main Window) ..................................... 10 Change the Display....................................................................... 10 TIFF Image ........................................................................................ 119 Tone Curve........................................................................................ 119 124 Introduction Tone Curve Adjustment ................................................................ 54, 91 Tone Curve Assist (Automatic Adjustment) .................................. 30, 87 Toning Effect....................................................................................... 28 Tool Palette NR/Lens/ALO Tool Palette ......................................................... 110 RAW Tool Palette....................................................................... 109 RGB Tool Palette ....................................................................... 109 Tool Palette (Preferences) .................................................................. 75 Transfer Batch Transfer Images to Image Editing Software....................... 83 Transfer an Image to Photoshop.................................................. 67 Transfer an Image to Photoshop ........................................................ 67 Trimming an Image ....................................................................... 35, 94 Trimming Window ................................................................. 35, 94, 114 About This Instruction Manual O It is prohibited to reproduce, in whole or part, the contents of this Instruction Manual without permission. O Canon may change without notice the software specifications and contents of this Instruction Manual. O The software screens and displays printed in this Instruction Manual may differ slightly from the actual software. O The content of this Instruction Manual has been reviewed thoroughly. However, if you should notice any errors or omissions, please contact a Canon Service Center. O Please note that irrespective of the above-mentioned, Canon does not take responsibility for the outcome of the operation of the software. Y P O Trademark Acknowledgments V View Settings (Preferences) ............................................................... 74 W White Balance..................................................................................... 25 Click White Balance ............................................................... 26, 89 Color Temperature ....................................................................... 52 Color Wheel.................................................................................. 52 Personal White Balance ............................................................... 81 Wide Gamut RGB ............................................................................. 120 Work Color Space............................................................................... 67 C O Microsoft and Windows are registered trademarks or trademarks of Microsoft Corporation in the United States and/or other countries. O Adobe and Photoshop are registered trademarks or trademarks of Adobe Systems Incorporated in the United States and/or other countries. O Other names and products not mentioned above may be registered trademarks or trademarks of their respective companies. Contents at a Glance 1 2 3 4 5 Basic Operation Advanced Operation Advanced Image Editing and Printing Processing Large Numbers of Images Editing JPEG/TIFF Images Reference Index 125


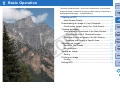
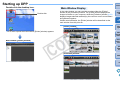
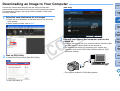
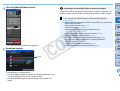


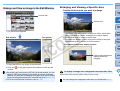
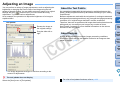

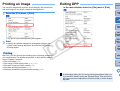


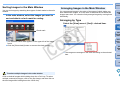


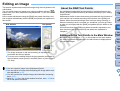


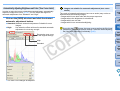

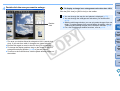
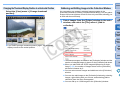

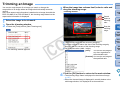

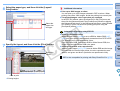
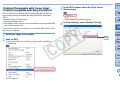
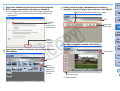


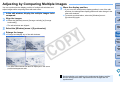
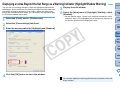
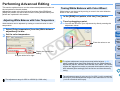
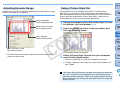
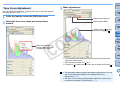


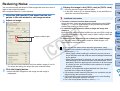

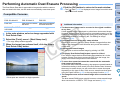


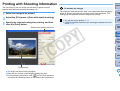

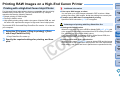

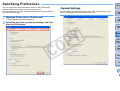
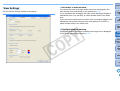
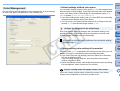
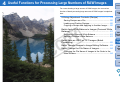
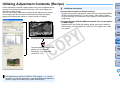
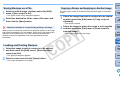
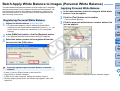
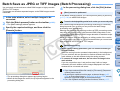
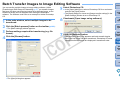
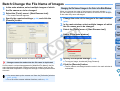
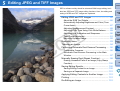
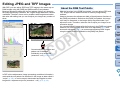
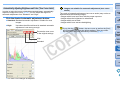
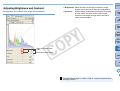

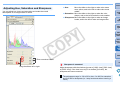


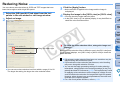


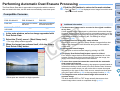
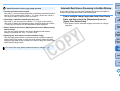
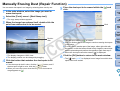


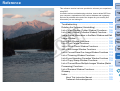

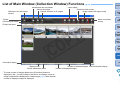
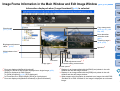
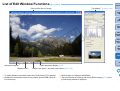

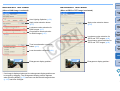

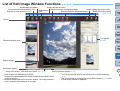
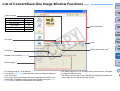
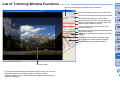
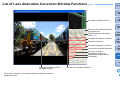


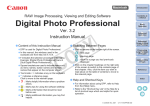


![DFare clic su [OK]](http://vs1.manualzilla.com/store/data/006130594_1-65ae61d15d92f4752c79f368e4200d5e-150x150.png)