1
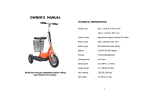
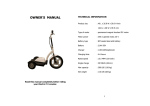
ElectricSA Trotinette
(*Picture for refernce only)
ElectricSA International
580, Avenue Lépine
Dorval, Québec, Canada, H9P 1G2
[email protected]
www.electricsa.com
Owner's Guide
Read this guide completely before assembling and riding your
ElectricSA Trotinette
Table of Contents
Technical Information-----------------------------------1
Warning Statement--------------------------------------2
List of Parts----------------------------------------------- 5
Handle Bar------------------------------------------------7
Tool Kits In The Tool Bag------------------------------ 8
Assembling The Trotinette -------------------------9
--Charging The Batteries--------------------------------12
Riding The Trotinette ---------------------------------13
Folding The Trotinette -------------------------------15
Wiring Diagram------------------------------------------17
Trouble Shooting Guide------------------------------18
-Warranty---------------------------------------------------20
ElectricSA International
580, Avenue Lépine
Dorval, Québec, Canada, H9P 1G2
[email protected]
www.electricsa.com
Technical Information
Tri
nf
Model No.
fo ESA-Trotinette
Packing size or 30.3L x 18.1W x 25.6 H inch
rm
(770 L x 460 W x 650 H mm)
ma
Permanent-magnet
at
Type of motor
brushless
DC Motor
i
Motor power
350 w geared motor, 36 V
Battery type
sealed lead acid battery
Battery capacity
36 Vo , 12Ah
Charger
110V/240V(optional)
ZAPPY3
n
Charging time
6-8 hours
Rated speed
Up to 30km/h
Single charge
Up to 40km
Max capacity
154 LBS (70 KG)
Gross weight
77 LBS (35 kg)
on
1
Warning Statement
Tri
nf
fo
or
rm
IMPORTANT !
ma YOUR ELECTRIC TROTINETTE
BEFORE YOU OPERATE
PLEASE READ
at CAREFULLY:
Your existing insurance policy
i may not provide coverage
for electrical vehicles. You should contact your insurance
agent to determine if coverage is provided.
Do not ride this trotinette until you read and thoroughly
understand the owner's guide. It contains information
critical to your safety. If you have questions about the
operation of this trotinette,
on you should contact ElectricSA
at [email protected]
3
n
ZAPPY
It is extremely important that you follow the safety
guidelines contained in this guide in order to insure maximum safety.
Faiure to comply to the standards outlined in this
guide could result in fire or/ serious injuries.
ElectricSA is not liable for any damage or injuries
caused by unsafe or faulty repairs. Any repairs made
to this product by unauthorized service technicians
are the sole responsability of the owner.
2
Warning Statement
Tri
nf WARNING
fo
CHECK IF ALL THE TIRES ARE PROPERLY INFLATED
orTHE TROTINETTE.
BEFORE RIDING
rm
ALWAYS WEAR A HELMET WHEN RIDING THE
maREFLECTIVE CLOTHING.
TROTINETTE. WEAR
at
NEVER TRY STUNTS. ALWAYS MAINTAIN A SAFE
i
SPEED.
FOLLOW ALL STATE&CITY LAWS REGARDING USE
OF ELECTRIC TROTINETTE ON ROADS.
Warning Statement
Tri
nf WARNING
THE ELECTRIC TROTINETTE
IS NOT A TOY AND
fo
SHOULD NOT BE OPERATED BY ANYONE UNDER 12
or
YEARS OLD.
rm
Safty Instruction(please
ma take note of the followings
before each ride)
at
The maximum load capacity is 154 lbs
i
Only one person at a time should reide.
Always wear protective gear including knee and elbow pads
and an approved safety helmet when riding the trotinette.
Before riding be sure to check that all pivot points, locking
buttons, quick release, and latches are secured properly.
on
n
ZAPPY3
on
n
The power switch lock must be in the “off” position when the
trotinette is being charged.
ZAPPY3
Do not use the trotinette when it is raining.
Our products are designed to be ecologically
conscious,please dispose of used batteries in compliance with local laws.
Do not place the battery near heat or fire.
Do not expose the charger near water.
Check if the battery is properly charged and installed.
Charge the battery after each use.
Always ride on dry paved surfaces. Wet and uneven surfaces
are a hazard.
Sand and loose impediments are your enemy, avoid them.
Never operate too fast for your skills or condition.
3
4
List of parts
B
ef
fo
di
or
n
ng
re
e
g
R
List of parts
re
e
R
ad Handlebar
1
d
5
ig
g
2
Quick release
3
Handlebar tube
4
Handlebar tube clamp
5
Connecting tube
6
Rear fender
7
Battery & controller compartment
8
Balancing wheel
9
Footboard
10
Rear wheel
11
Power connecting plug
12
Connecting tube clamp
13
Key ignition
14
Front fender
15
Front fork
16
Drum brake
17
Motor
18
Front wheel
6
Handlebar
f ar
P rt
ts
s
Tool Kits In The Tool Bag
ZAPPY3
is t
t
1 Brake lever
2 Horn switch
3 Multi-function Instrument
4 Key switch
5 Throttle
7
is
t
t
1
Allen wrench (8 x 10mm)
2
Allen wrench (14 x 17mm)
3
Allen wrench (14 x 17mm)
4
Screwdriver
5
Wrench (3mm)
6
Wrench (6mm)
7
charger
8
Assembling the Trotinette
Assembling the Trotinette
3
1. Unpack the Trotinette carefully so that you
do not misplace any of the parts.
4. Tighten the bolts and nuts using the 2 allen
wrenches 14 x 17mm in the tools kit.
2. Place the Trotinette on a flat, level surface.
Using any household item, raise the front base
of the trotinette up at least 4 inch, so you can
easily connect the frame/front wheel to
the base
5. Extend the handle bar tube to full upright
position and slide it into connecting with the
front fork.
3. Remove the bolts and nuts from the connecting
tube clamp (B). Place the connecting tube into
the top opening (A). After aligning the holes,
place two bolts through the connecting tube and
neck assembly. Twist and tighten the bolts.
6. Ensure that the handlebar is facing front, the
brake on the left side and the throttle on the
right, then tighten the handlebar tube collar
clamp using the enclosed 6mm wrench.
9
10
Assembling The Trotinette
Charging The Batteries
you ride the Trotinette for the first time
it is advised that the unit is fully charged (4-6
hours) and fully discharged(ride until the battery
gauge indicates low battery) for at least 3 cycles
to maximize the efficiency of the battery. After
that, you should continue to charge the battery
frequently, at least once every 30 days to prolong
the battery lifespan.
●Before
7. Plug in the two power connecting plugs into
the sockets. The design of each plug and
socket is different. Connect the ones which
best fit each other to finish the assembly.
8. Match pins of plugs to the holes of the
sockets. Note the alignment notches.
NOTE : Handlebar height adjustment. Handlebar
height can be easily adjusted by opening the
quick release on the handlebar tube to preferred
height, then firmly closing quick release.
11
Important:DO NOT leave the battery uncharged
for more than 3 months,otherwise it will greatly
reduce the battery lifespan.
●To
charge the batteries, plug the charger into
the charger socket located on the rear side of the
battery/ controller compartment. Then plug the
charger into a wall outlet.
12
Riding The Trotinette
●Once
you have completed the initial charge you
are readyb to ride. Remember, this is not a toy.
The Trotinette can reach speeds up to 30 Km / h
depending on the terrain and the weight of the
rider. You must wear a helmet and protective
pads. You must also be aware of all local laws
and ordinances that govern and/or restrict the use
of powered scooters. The laws and ordinances
vary greatly from municipality to municipality. It is
your responsibility to know and abide by your local
restrictions.
●To ride, plug the key into the key switch and
turn the key to the “ON” position. The battery gauge
will be illuminated indicating that the battery is in
operation.
Riding The Trotinette
Hold onto the front bar with both hands. Your left
fingers will control the brakes and your righthand
will control the thumb throttle. As you de-press
the throttle lever with your thumb the
speed will increase. Release the thumb throttle
and apply the brake to stop the Trotinette.You
will control the speed of the trotinette by using both the throttle and the brake. When the
brake handle is squeezed it cuts power to the
throttle.
●
NOTE 1: You may use the balancing wheel
(the smaller middle rear wheel) to balance the
Trotinette. WARNING: Never try stunts beyond
the control of your skills. Never ride too fast for
your skills or conditions.
NOTE 2: When trotinette is parked, please turn
off the power and take off the key, this will avoid
anyone from accidentally turning the throttle
causing the scooter to speed forward. Failure to
do this could lead to an accident.
13
13
14
Folding The Trotinette
Folding The Trotinette
1. Unplug the power connecting plugs.
Battery: (for professional use only)
2. Unscrew the bolts and nuts from the connecting tube clamp using the enclosed allen
wrenches .
The E-Trotinette is powered by three 12 volt, rechargeable batteries secured in a single compartment. Other than recharging, these batteries need
3. Lift the connecting tube (which is also attached
to the handlebar tube).
no maintenance. To prolong battery life, you must
4. Carefully place the handlebar tube on the
footrest frame.
also charge your Trotinette if it has not been
recharge the battery after each use. You must
used for 30 days or more. If you must replace
the battery pack, it is located inside the battery
compartment on the footboard. To get to the
battery pack, remove the compartment cover by
loosening the screws. To remove the batteries
disconnect the wires from the battery terminals.
Replace the battery pack with a new one and
5. Finger screw the bolts and nuts back to the
connecting tube clamp to avoid any misplacements.
reconnect the wires. Follow the instructions on
15
16
15
charging batteries to charge the new batteries.
16
Wiring Diagram
Trouble Shooting Guide
For professional use only
For professional use only
Problem
17
Cause
Solution
The power light
on the
instrument
does not
illuminate when
the trotinette
is on.
1. Battery is
discharged.
2.Loose
c onnec t i o n
inside the
trotinette.
3. Fuse is blown.
1. Recharge your
The power indicator on the
instrument
illuminates but
trotinette still
does not work.
1. The throttle
handle is not
operating
properly.
1. Replace the
throttle handle. Call
Customer Service to
order a new throttle
18
trotinette
2. Remove the
screws that hold the
battery compartment
cover and raise the
cover. Visually
inspect all wire
connections making
sure there are no
loose wires, reconnecting those that
are.
3. Replace the fuse.
Wiring Diagram
Warranty
Noise coming
from motor
1 The motor
sensor is
defective.
When the brake
lever is
squeezed the
1. The brakes
are not adjusted
properly.
trotinette
does not stop.
Trotinette is
losing speed.
1. Low battery
2. Battery is
defective
19
1. Replace motor
sensor. Call
Customer Service to
order a new sensor
1. Adjust the brake
by loosening the bolt
on the rear brake
wheel, pull the cable
and retighten the
bolt.
1. Recharge your
battery for 4~6 hours.
2. Replace battery.
Call Customer
Service to order a
new battery.
ElectricSA International warrants each new Electric
Trotinette product for six (6) months according to
the following terms. Batteries are also warranted
for three (3) months. This warranty extends to the
original retail purchaser only and commences on
the date of the original retail purchase. Any part
of the Electric Trotinette product manufactured
or supplied by ElectricSA International and found
in the reasonable judgment of ElectricSA International to be defective in material or workmanship
will be repaired or replaced by an authorized service dealer without charge for parts or labor. The
product including any defective par must be returned to an authorized service dealer within the
warranty period. The expense of delivering the
product to the factory or authorized service dealer for warranty work or the expense of returning it
back to the owner after repair or replacement will
be paid for by the owner. ElectricSA International’s responsibility in respect to claims is limited to
making the required repairs or replacements and
no claim of breach of warranty shall be cause for
cancellation or rescission of the contract of sale
of any ElectricSA International product. Proof of
date of purchase will be required by the dealer to
substantiate any warranty claim. An authorized
service dealer must perform all warranty
20
Warranty
Warranty
work. The warranty is limited to thirty (30) days
from the date of purchase for any ElectricSA
International product that is used for rental
demonstration or commercial purposes or any other
income producing purpose.This warranty does not
cover and ElectricSA International product that has
been subject to misuse, neglect, negligence or
accident, or has been operated in any way
contrary to the operating instructions as specified in the owner’s guide . This warranty
does not apply any damage to the ElectricSA
International product that is the result of improper maintenance or to any ElectricSA International product that has been altered or modified
so as to adversely affect the products operation,
performance or durability or that has been altered
or modified to change its intended use. This
warranty does not extend to repairs made
necessary by normal wear and or by use of parts
that are incompatible with ElectricSA International products. In addition this warranty does
not cover items that experience normal wear and
tear. ElectricSA International reserves the right
to improve the design of the product without
assuming any obligations to modify any product
previously manufactured. All warranties are limited in duration to the six (6) months warranty
period. Any such implied warranties including purpose or otherwise are disclaimed in their entirety
after the expiration of the appropriate thirty day
warranty period. ElectricSA International’s obligation under this warranty is strictly and exclusively
limited to the repair and replacement of defective
parts and ElectricSA International does not
assume for them any obligation. ElectricSA International assumes no responsibility for incidental
consequential or other damages including but not
limited to expense of returning the ElectricSA International product to an authorized service dealer and expense of delivering it back to the owner.
21
WHAT ELECTRICSA INTERNATIONAL WILL
DO:
ElectricSA International will, at its sole option,
either repair, replace or refund the purchase price
of any unit that does not conform to this limited
warranty. ElectricSA International may choose at
its option to use functionally equivalent reconditioned, refurbished or new units or parts or any
units. You are responsible to get the unit back to
ElectricSA International .
22
Warranty
HOW TO GET WARRANTY SERVICE:
To obtain warranty service, please call or fax to
the following telephone numbers from anywhere
in Canada:
Tel. 1-855-780-1529
or Fax.1-514-780-1530
Correspondence may also be mailed to:
Email: [email protected]
DO NOT RETURN YOUR PRODUCT TO THE
ABOVE ADDRESS.
Please call or write for the location of the ElectricSA
International authorized service center nearest
you and for the procedures for obtaining warranty
claims.
ElectricSA International
ElectricSA International
580, Avenue Lépine
Dorval, Québec, Canada, H9P 1G2
[email protected]
www.electricsa.com
580, Avenue Lépine
Dorval, Québec, Canada, H9P 1G2
[email protected]
www.electricsa.com
23