1
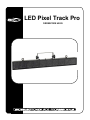
LED Pixel Track Pro ORDERCODE 42205 Congratulations! You have bought a great, innovative product from Showtec. The Showtec LED Pixel Track Pro brings excitement to any venue. Whether you want simple plug-&-play action or a sophisticated DMX show, this product provides the effect you need. You can rely on Showtec, for more excellent lighting products. We design and manufacture professional light equipment for the entertainment industry. New products are being launched regularly. We work hard to keep you, our customer, satisfied. For more information: [email protected] You can get some of the best quality, best priced products on the market from Showtec. So next time, turn to Showtec for more great lighting equipment. Always get the best -- with Showtec ! Thank you! Showtec Showtec LED Pixel Track Pro™ Product Guide Warning..…...................................................................................…………………………………………. 2 Safety-instructions………………………………………………………………………………………….…. 2 Operating Determinations…………………………………………………………………………………….3 Rigging…………………………………………………………………………………………………………. 3 Description..…..............................................................................……….………………………………… Features…….……………………………………………………………………………………….……...…. Overview……………………………………………………………………………………………………….. Backside……………………………………………………………………………………………………….. 4 4 4 4 Installation...............................................................................…...…………………………………….…… 5 Set Up and Operation.....................................................................……..…………………………….…… 5 Panel Functions……..……………………………………………………………………………….……...… 6 Manual Operation.............................................................................................................................. 7 Stand-Alone Mode………………...…………………………………………………………….…….……. 7 Master / Slave Mode….….………..…………………………………………………………….……...….. 7 DMX Operation…………..…………..…………………………………………………………….……...…. 8 EXAMPLES..…………..………………………………………………………………………………………… 11 - DMX Channels (MODE 4)...............………….........................……………………....……………. 11 - DMX Channels (MODE 7)...............………….........................……………………....……………. 11 Maintenance...................................................................................………..………….…….……………… 12 Changing the Fuse........................................................................…………………….………….………12 Troubleshooting............................................................................………………….………………….….. 12 Product Specifications.................................................................……………….…….………………….. 13 1 WARNING CAUTION! Keep this device away from rain and moisture! FOR YOUR OWN SAFETY, PLEASE READ THIS USER MANUAL CAREFULLY BEFORE YOUR INITIAL START-UP! SAFETY INSTRUCTIONS Every person involved with the installation, operation and maintenance of this device has to: be qualified follow the instructions of this manual CAUTION! Be careful with your operations. With a dangerous voltage you can suffer a dangerous electric shock when touching the wires! Before your initial start-up, please make sure that there is no damage caused by transportation. Should there be any, consult your dealer and do not use the device. To maintain perfect condition and to ensure a safe operation, it is absolutely necessary for the user to follow the safety instructions and warning notes written in this manual. Please consider that damages caused by manual modifications to the device are not subject to warranty. This device contains no user-serviceable parts. Refer servicing to qualified technicians only. IMPORTANT: The manufacturer will not accept liability for any resulting damages caused by the nonobservance of this manual or any unauthorized modification to the device. Never let the power-cord come into contact with other cables! Handle the power-cord and all connections with the mains with particular caution! Never remove warning or informative labels from the unit. Never leave any cables lying around. Never cover the air vents, otherwise the device will get to hot. Do not insert objects into air vents. Do not open the device and do not modify the device. Do not connect this device to a dimmerpack. Do not shake the device. Avoid brute force when installing or operating the device. Do not switch the device on and off in short intervals, as this would reduce the system’s life. Only use device indoor, avoid contact with water or other liquids. Only operate the device after having familiarized with its functions. Avoid flames and do not put close to flammable liquids or gases. Always allow free air space of at least 50 cm around the unit for ventilation. Always disconnect power from the mains, when device is not used or before cleaning! Only handle the power-cord by the plug. Never pull out the plug by tugging the power-cord. Make sure that the device is not exposed to extreme heat, moisture or dust. Make sure that the available voltage is not higher than stated on the rear panel. 2 Make sure that the power-cord is never crimped or damaged. Check the device and the powercord from time to time. If device is dropped or struck, disconnect mains power supply immediately. Have a qualified engineer inspect for safety before operating. If the device has been exposed to drastic temperature fluctuation (e.g. after transportation), do not switch it on immediately. The arising condensation water might damage your device. Leave the device switched off until it has reached room temperature. If your Showtec device fails to work properly, discontinue use immediately. Pack the unit securely (preferably in the original packing material), and return it to your Showtec dealer for service. For adult use only. The device must be installed out of the reach of children. Never leave the unit running unattended. For replacement use fuses of same type and rating only. Repairs, servicing and electric connection must be carried out by a qualified technician. WARRANTY: Till one year after date of purchase. OPERATING DETERMINATIONS If this device is operated in any other way, than the one described in this manual, the product may suffer damages and the warranty becomes void. Any other operation may lead to dangers like short-circuit, burns, electric shock, lamp explosion, crash etc. You endanger your own safety and the safety of others! Rigging Please follow the European and national guidelines concerning rigging, trussing and all other safety issues. Do not attempt the installation yourself ! Always let the installation be carried out by an authorized dealer ! Procedure: If the LED Pixel Track Pro is lowered from the ceiling or high joists, professional trussing systems have to be used. Use a clamp to mount the LED Pixel Track Pro, with the mounting-bracket, to the trussing system. The LED Pixel Track Pro must never be fixed swinging freely in the room. The installation must always be secured with a safety attachment, e.g. an appropriate safety net or safety-cable. When rigging, derigging or servicing the LED Pixel Track Pro, always make sure, that the area below the installation place is blocked and staying in the area is forbidden. The LED Pixel Track Pro can be placed on a flat stage floor or mounted to any kind of truss by a clamp. Improper installation can cause serious damage to people and property ! 3 Description of the device Features The LED Pixel Track Pro is a LED system from Showtec. • 840 high brightness LEDs • 15º beam angle • Digital display • 3 and 5 PIN DMX input + output connector • Neutrik input and output power connector • Power consumption: 70W (full output) • Flash rate: 20HZ • Manual color adjustment • Master/Slave mode • Sound active mode • 16 preprogrammed chase • DMX controlled • Selectable 4, 7, 8, 20, 40 and 160 DMX channel operation NOTE: Knowledge of DMX is required to fully utilize this unit. Overview Fig. 1 1) Safety Eye for Truss mounting 2) Total LED Pixel Track Pro 840 LEDS 3) Mountingbracket for Truss mounting 4) Adjustment Screw Backside Fig. 2 5) DMX signal connector (IN) 5-pin 6) DMX signal connector (IN) 3-pin 7) DMX signal connector (OUT) 3-pin 8) DMX signal connector (OUT) 5-pin 9) LCD Display + Menu buttons 10) Mic 11) Audio Level (sensitivity) 12) Fuse T2A 13) On / Off 14) Power OUT 15) Power IN 4 Fig. 3 Installation Remove all packing materials from the LED Pixel Track Pro. Check that all foam and plastic padding is removed. Connect all cables. Do not supply power before the whole system is set up and connected properly. Always disconnect from electric mains power supply before cleaning or servicing. Damages caused by non-observance are not subject to warranty. Fig. 4 5 Set Up and Operation Before plugging the unit in, always make sure that the power supply matches the product specification voltage. Do not attempt to operate a 120V specification product on 230V power, or vice versa. Panel Functions Fig. 5 6 Manual Operation Press the Select button to change between Red, Green or Blue. Red (000-255) Green (000-255) Blue (000-255) Use the UP/DOWN buttons to change the Color intensity from 0-255. You can combine all 3 colors to mix your own desired color. Stand-alone Operation Press the Select button to change Fade, Chase or Speed. The underline in the display, shows which setting you can change. Fade (000-100) In Chase Mode you can choose: Chase (0-16) Speed (000-255) Chase 1-15 Chase 16 (sound-controlled) Chase 16 is the Sound-controlled mode, you can use the Audio sensitivity control on the back to adjust the audio input level. The display shows. Note: in some programs you can not change the fade settings. Master / Slave Mode You can select Master or Slave Mode by using the UP/DOWN buttons. 7 DMX Operation The LED Pixel Track Pro’s built-in controller will automatically detect the presence of a DMX signal. When you put the DMX cable in the device, the display will change from N to Y. In order to receive a DMX signal, the built-in controller must be attached to a DMX controller by a 3-pin DMX cable and the DMX controller must be turned on. Select the desired DMX address by pressing the UP/DOWN buttons. The LED Pixel Track Pro system can operate as a 160-, 40-, 20-, 8-, 7- or 4-channel DMX fixture. Select the desired Mode by pressing the MODE button, you can choose: 160 Channels (40 sections) 160X Red Green Blue Dimmer 40 Channels (10 sections) 40X Red Green Blue Dimmer 20 Channels (5 sections) 8 Channels (2 sections) 20X Red Green Blue Dimmer 8X Red Green Blue Dimmer 8 7 Channels (1 section) 7X Red Green Blue Dimmer Chase Speed Fade Time 4 Channels (1 section) 4X Red Green Blue Dimmer Each section or pixel = 7x Red, 7x Green and 7x Blue In the most advanced mode (MODE 160) you can control 40 different sections. You can control Red, Green, Blue and Dimmer of each section (4x40). Fig. 6 1 Section (Pixel): 4 Sections (Pixels): Aa Ab Ac Ad 7 Red 7 Green 7 Blue Main Sections + Sub-sections (Cells) A b a B c d b a C c d b a D c d b a E c d b a F c d b a G c d b a H c d b a I c d b a J c d b a c d Fig. 7 9 MODE 160 40 20 8 R/G/B/Dimmer R/G/B/Dimmer R/G/B/Dimmer R/G/B/Dimmer R/G/B/Dimmer Cells Aa Ab Ac Ad Ba Bb Bc Bd Ca Cb Cc Cd Da Db Dc Dc Ea Eb Ec Ed Fa Fb Fc Fd Ga Gb Gc Gd Ha Hb Hc Hd Ia Ib Ic Id Ja Jb Jc Jd 7 4 R/G/B/Dimmer/ R/G/B/Dimmer Chase/Speed/Fade 1234 1234 1234 1234 1234567 1234 5678 1234 1234 1234 1234567 1234 9 10 11 12 1234 1234 1234 1234567 1234 13 14 15 16 1234 1234 1234 1234567 1234 17 18 19 20 21 22 23 24 5678 5678 1234 1234 1234 1234 1234567 1234567 1234 1234 25 26 27 28 5678 1234 1234 1234567 1234 29 30 31 32 33 34 35 36 5678 9 10 11 12 1234 5678 1234 1234 1234567 1234567 1234 1234 37 38 39 40 41 42 43 44 45 46 47 48 9 10 11 12 9 10 11 12 9 10 11 12 5678 5678 5678 1234 1234 1234 1234567 1234567 1234567 1234 1234 1234 49 50 51 52 53 54 55 56 13 14 15 16 13 14 15 16 5678 5678 1234 1234 1234567 1234567 1234 1234 57 58 59 60 13 14 15 16 5678 1234 1234567 1234 61 62 63 64 65 66 67 68 13 14 15 16 17 18 19 20 5678 9 10 11 12 1234 1234 1234567 1234567 1234 1234 69 70 71 72 73 74 75 76 77 78 79 80 17 18 19 20 17 18 19 20 17 18 19 20 9 10 11 12 9 10 11 12 9 10 11 12 1234 1234 1234 1234567 1234567 1234567 1234 1234 1234 81 82 83 84 85 86 87 88 21 22 23 24 21 22 23 24 9 10 11 12 9 10 11 12 5678 5678 1234567 1234567 1234 1234 89 90 91 92 21 22 23 24 9 10 11 12 5678 1234567 1234 93 94 95 96 97 98 99 100 21 22 23 24 25 26 27 28 9 10 11 12 13 14 15 16 5678 5678 1234567 1234567 1234 1234 101 102 103 104 25 26 27 28 13 14 15 16 5678 1234567 1234 105 106 107 108 25 26 27 28 13 14 15 16 5678 1234567 1234 109 110 111 112 25 26 27 28 13 14 15 16 5678 1234567 1234 113 114 115 116 117 118 119 120 29 30 31 32 29 30 31 32 13 14 15 16 13 14 15 16 5678 5678 1234567 1234567 1234 1234 121 122 123 124 29 30 31 32 13 14 15 16 5678 1234567 1234 125 126 127 128 29 30 31 32 13 14 15 16 5678 1234567 1234 129 130 131 132 133 134 135 136 33 34 35 36 33 34 35 36 17 18 19 20 17 18 19 20 5678 5678 1234567 1234567 1234 1234 137 138 139 140 33 34 35 36 17 18 19 20 5678 1234567 1234 141 142 143 144 145 146 147 148 149 150 151 152 153 154 155 156 33 34 35 36 37 38 39 40 17 18 19 20 17 18 19 20 5678 5678 1234567 1234567 1234 1234 37 38 39 40 17 18 19 20 5678 1234567 1234 37 38 39 40 17 18 19 20 5678 1234567 1234 157 158 159 160 37 38 39 40 17 18 19 20 5678 1234567 1234 10 EXAMPLES DMX Channels (MODE 4) Channel 1 – Red 0-255 Gradual adjustment Magenta from 0 – 100% Channel 2 – Green 0-255 Gradual adjustment Magenta from 0 – 100% Channel 3 – Blue 0-255 Gradual adjustment Magenta from 0 – 100% Channel 4 – Dimmer / Strobe 0-159 160-255 Gradual adjustment dimmer intensity from 0-100% Strobe effect from slow to fast DMX Channels (MODE 7) Channel 1 – Red 0-255 Gradual adjustment Magenta from 0 – 100% Channel 2 – Green 0-255 Gradual adjustment Magenta from 0 – 100% Channel 3 – Blue 0-255 Gradual adjustment Magenta from 0 – 100% Channel 4 – Dimmer / Strobe 0-159 160-255 Gradual adjustment dimmer intensity from 0-100% Strobe effect from slow to fast Channel 5 – Chase / Sound-controlled 0-15 16-31 32-47 48-63 64-79 80-95 96-111 112-127 128-143 144-159 160-175 176-191 192-207 208-223 224-239 240-255 Chase 1 Chase 2 Chase 3 Chase 4 Chase 5 Chase 6 Chase 7 Chase 8 Chase 9 Chase 10 Chase 11 Chase 12 Chase 13 Chase 14 Chase 15 Chase 16 (Sound-controlled) Channel 6 – Speed 0-255 Gradual adjustment Speed from 0-100% Channel 7 – Fade Time 0-255 Gradual adjustment Fade Time from 0-100% 11 Maintenance The LED Pixel Track Pro requires almost no maintenance. However, you should keep the unit clean. Disconnect the mains power supply, and then wipe the cover with a damp cloth. Do not immerse in liquid. Keep connections clean. Disconnect electric power, and then wipe the audio connections with a damp cloth. Make sure connections are thoroughly dry before linking equipment or supplying electric power. Replacing a Fuse Power surges, short-circuit or inappropriate electrical power supply may cause a fuse to burn out. If the fuse burns out, the product will not function whatsoever. If this happens, follow the directions below to do so. 1. Unplug the unit from electric power source. 2. Insert a screwdriver into the slot in the fuse cover. Turn the screwdriver to the left, at the same time gently push a bit (Turn and Push). The fuse will come out. (Fig. 8) 3. Remove the broken fuse. If brown or unclear, it is burned out. 4. Insert the replacement fuse into the holder where the old fuse was. Reinsert the fuse cover. Be sure to use a fuse of the same type and specification. See the product specification label for details. Fig. 8 Troubleshooting Showtec LED Pixel Track Pro This troubleshooting guide is meant to help solve simple problems. If a problem occurs, carry out the steps below in sequence until a solution is found. Once the unit operates properly, do not carry out following steps. 1. If the device does not operate properly, unplug the device. 2. Check the fuse, power from the wall, all cables etc. 3. If all of the above appears to be O.K., plug the unit in again. 4. If you are unable to determine the cause of the problem, do not open the LED Pixel Track Pro, as this may damage the unit and the warranty will become void. 5. Return the device to your Showtec dealer. 12 Product Specification Model: Showtec LED Pixel Track Pro Voltage : AC 230V-50Hz (CE) Power consumption: 70W (full output) Fuse: 250V / T2,5A Neutrik input and output power connector DMX Input : 3+5-pin XLR Male connector DMX Output : 3+5-pin XLR Female connector Dimensions : 1010 x 175 x 200 mm (LxWxH) Weight : 7,14 kg Selectable 4,7,8,20,40,160 DMX channel operation DMX control option • 4 Channel mode: CH1 Red, CH2 Green, CH3 Blue, Ch4 Dimmer/Strobe • 7 Channel mode: CH1 Red, CH2 Green, CH3 Blue, Ch4 Dimmer/Strobe, CH5 Preprogrammed chase, CH6 Speed, CH7 Fade • Control 2 x 5 sections = 8 DMX channels • Control 5 x 2 sections = 20 DMX channels Design and product specifications are subject to change without prior notice. Website: www.Highlite.nl Email: [email protected] 13 2007 Showtec.