1
T-17SXLG
Safe Handling
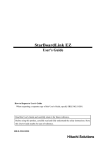
StarBoard T-17SXLG
How to Request a User's Guide
When requesting a separate copy of this user's guide, specify T17-US100601.
Read this user’s guide and carefully retain it for future reference.
Before using this product, carefully read and fully understand the safety instructions.
Store this User’s Guide nearby for ease of reference.
T17-US100601
Hitachi Software Engineering Co., Ltd
1
English
English English
한국어
简体中文
User's Guide
Español Italiano
StarBoard
StarBoard
T-17SXLG
Safe Handling
Notices
Reproduction or reprinting, without permission, of this manual or any part thereof is prohibited.
The contents of this manual are subject to change without prior notice.
Every effort has been made to ensure that this manual is complete and correct. However, should
any questionable points, mistakes, etc., come to your attention, please inform the vendor.
Please be advised in advance that this company will assume no responsibility for losses, etc.,
resulting from the operation of this product, regardless of the preceding clauses.
Disclaimers
Hitachi Software Engineering Co., Ltd. assumes no liability and makes no warranty, either
express or implicit, regarding the contents of this user’s guide.
Also, the company makes no warranty as to the product’s suitability, merchantability or fitness
for a particular intended use.
All products of Hitachi Software Engineering Co., Ltd., described in this user’s guide are
presently for sale or are site-licensed.
Users who purchased the aforesaid product(s) will bear the costs of all required services, repairs,
and damages resulting from defects in this product, and will bear the costs of direct or indirect
damages (including the loss of profits or required information) that resulted from the product
defects.
Moreover, Hitachi Software Engineering Co., Ltd., retains the right to revise this user’s guide
and to modify the contents thereof, without any obligation to notify anyone.
2
English
StarBoard
T-17SXLG
Safe Handling
Product Assurance Provisions
This product is limited to use in the country where the user bought this product.
For warranty details, refer to Appendix 3.6 at the end of this user’s guide.
This second edition of the user’s guide (T17-US100601) is for the following products:
95.64309G00x (StarBoard T-17SXLG), AH00131
* The term “x” as used in this manual denotes the model No. of the product.
The StarBoard T-17SXLG incorporates WALTOP’s 17-inch LCD monitor integrated digitizer
technology.
Windows is registered trademarks of Microsoft Corporation (U.S.) and in other countries.
Mac and Mac OS are trademarks of Apple Inc., registered in the U.S. and other countries.
Other trademarks and product names are trademarks and/or registered trademarks of their
respective holders.
User’s Guide Creation Dates
May 2010, Second Edition
T17-US100601
All Rights Reserved. Copyright © 2010, Hitachi Software Engineering Co., Ltd.
3
English
StarBoard
T-17SXLG
Safe Handling
Safe Handling
Markings and Symbols
Various markings and symbols are used in this user’s guide and on this product, to ensure the
safe and correct use of this product and to prevent personal injury and property damage. These
symbols and their meanings are as explained below. Understand the information well before
reading the body of the user’s guide.
This is a Safety Warning symbol. This symbol will appear to raise the attention
of the user to existing risks that may cause harm to people. To avoid any chances
of injuries or possibly death, DO NOT IGNORE the safety instructions that
follow this symbol.
WARNING
This warning will appear where there exists a risk of death or fatal injuries.
CAUTION
This warning will appear where there exists a risk of moderate or light injuries.
NOTICE
This warning will appear where there exists a risk of damage to property.
This symbol draws attention to cautions (including warnings).
This symbol indicates something prohibited.
This symbol indicates something that must be done.
4
English
StarBoard
T-17SXLG
Safe Handling
Safety Precautions
Always comply with them
WARNINGS
Securely insert the power plug into the
power socket.
Before moving this product, detach the
power plug and the power cable.
If it is not plugged in securely,
overheating will occur, possibly
resulting in electric shock or fire.
The power cable might be damaged,
possibly resulting in electric shock
or fire.
Do not plug in the power plug with a wet
hand.
When plugging in or unplugging the
power plug, hold the plug.
Electric shock will result.
If the power cord is pulled, it might
be damaged, possibly resulting in
electric shock or fire.
Before cleaning this product, unplug the
power plug.
Periodically clean the power plug to
remove dust.
Electric shock sometimes results.
If a dirty plug is plugged into an
outlet, fire or electric shock might
result.
Do not use this product near water.
Be careful about the locations of the power
cable, etc.
Electric shock will result.
The power cable might trip
someone, possibly causing the
product to fall, etc., thereby causing
injury or product failure. Be careful
with their locations.
Do not damage, break, process, or forcibly
bend the power cable.
The power cable will be damaged,
resulting in fire or electric shock.
Use the product at the indicated power
supply voltage.
If the product is used at a power
supply voltage other than the one
indicated, it will fail, resulting in fire
or electric shock.
5
English
StarBoard
T-17SXLG
Safe Handling
Safety Precautions
Always comply with them
WARNINGS
Do not use a power cable other than the
accessory power cable.
Do not open or alter the cabinet of this
product.
If a power cable other than the
accessory power cable is used, fire
or electric shock might result.
The cabinet contains high-voltage
areas, so electric shock or other
injury will result.
Unplug the power plug if you do not plan
on using the product for an extended
period of time.
Do not leave this product or any of its
accessories on the floor.
Failure to do so could result in a fire.
Someone might step on it and
break it, or might be injured by
tripping on it.
Only place specified objects on this
product.
Do not dispose the equipment as unsorted
municipal waste, but use the return and
collection systems available.
If a liquid or a metal object enters
this product, electric shock or fire
might result. If either should enter,
unplug the power plug from the
outlet and contact your dealer.
Contact your dealer for details.
Do not use this product in a location with
high temperature or high humidity.
Do not place a heavy object on the power
cable, heat or pull it.
This product’s usage environment
conditions:
Temp.: 50 °F to 95 °F
(10°C to 35 °C)
Humidity: 30% to 80%
(But no condensation may be
allowed to form.)
The power cable will be damaged,
causing fire or electric shock.
6
English
StarBoard
T-17SXLG
Safe Handling
Safety Precautions
Always comply with them
WARNINGS
In the following cases, unplug the product from the AC Adaptor socket
and ask the technical support of Hitachi Software.
a.
b.
c.
d.
e.
f.
After the power cord or AC Adaptor plug is damaged.
After liquid is spilled onto the main unit.
After the main unit is exposed to rain or water.
After this product malfunctions, even when operated according to the instruction
manual. Adjust this product within the ranges specified in the instruction manual. Do
not make other adjustments. A qualified service representative is required to correct
improper adjustments.
After this product falls or after its cabinet is damaged.
After the functionality of this product changes and repair by a service representative
is considered necessary.
7
English
StarBoard
T-17SXLG
Safe Handling
Careful thought was given to the cautions on this device and in this user’s guide. However,
unanticipated circumstances might occur. When operating this product, users themselves must
exercise caution as well as follow instructions.
WARNINGS
Warning Details
Page
Use the AC Adaptor supplied with this product.
Use only AC Adaptor or power cables specified by the manufacturer. Use of
improper adaptors or cables can damage the product or cause a fire.
P. 1-10
CAUTION
Warning Details
Page
Hold the body firmly and slide the stand slowly when adjusting it.
When adjusting the stand, if you pull up the lever without holding onto the body,
the body may move suddenly, resulting in unexpected injuries or damage to the
body.
P. 1-8
Use the screen at an easily viewable angle.
Use the screen at an easily viewable angle, taking into account external light and
ceiling lighting, which may reflect off the screen.
P. 1-8
NOTICE
Warning Details
Page
Be sure to install batteries correctly.
Do not install batteries with positive and negative terminals reversed, or use
batteries other than the type specified. It will cause pen malfunctions and excess
heat, or burns to the hand.
P. 2-5
Be sure to provide insulation during disposal.
Be sure to insulate the positive and negative terminals of the battery using
cellophane tape, or similar material when disposing of batteries. Disposing of
batteries without insulating them may lead to overheating, bursting, or ignition
due to shorting, resulting in personal injury or fire. Furthermore, be sure to follow
all local rules and regulations regarding proper battery disposal. If within the EU,
be sure to follow Batteries Directive. [Batteries directive (2006/66/EC)]
When changing the battery, be careful not to close the pen's rear
part too forcefully.
If too much force is applied when closing the rear part of the stylus pen, the pen
may be damaged.
8
P. 2-5
P. 2-6
English
StarBoard
T-17SXLG
Contents
1. Introduction ................................................................................................. 1-1
1.1 Preparations before Use ................................................................................................... 1-1
1.1.1 Product Overview...................................................................................................... 1-1
1.1.2 Features ..................................................................................................................... 1-1
1.2 Parts Check ...................................................................................................................... 1-2
1.3 Part Names and Functions................................................................................................ 1-3
1.3.1 Front Screen .............................................................................................................. 1-3
1.3.2 Front Switch Panel .................................................................................................... 1-4
1.3.3 Connector Panel ........................................................................................................ 1-5
1.3.4 Function Buttons ....................................................................................................... 1-6
1.4 Assembly and Setup ......................................................................................................... 1-7
1.4.1 Adjusting the Stand ................................................................................................... 1-7
1.4.2 How to Use the Pen Holder....................................................................................... 1-8
1.4.3 Connection Procedure ............................................................................................... 1-9
2. Usage Procedures ........................................................................................ 2-1
2.1 Turning the StarBoard On ................................................................................................ 2-1
2.1.1 For Windows User..................................................................................................... 2-1
2.1.2 For Mac OS User ...................................................................................................... 2-2
2.2 Using the Stylus Pen ........................................................................................................ 2-3
2.2.1 How to Use the Stylus Pen........................................................................................ 2-3
2.2.2 Basic Stylus Pen Operations...................................................................................... 2-3
2.2.3 Stylus Pen Settings .................................................................................................... 2-4
2.2.4 Changing the Battery in the Stylus Pen..................................................................... 2-5
2.2.5 Replacing the Stylus Pen Tip..................................................................................... 2-6
2.3 Using the OSD Menu ....................................................................................................... 2-7
2.3.1 OSD Buttons and Their Functions ............................................................................ 2-7
2.3.2 OSD Adjustment Options.......................................................................................... 2-8
3. Appendix ...................................................................................................... 3-1
3.1 Troubleshooting ............................................................................................................... 3-1
3.2 System Specifications ...................................................................................................... 3-4
3.3 How to Take Care of the StarBoard ................................................................................. 3-6
3.4 Consumables .................................................................................................................... 3-6
3.5 LCD Panel........................................................................................................................ 3-6
3.6 Provisions of Product Warranty ....................................................................................... 3-7
9
English
StarBoard
T-17SXLG
Introduction
1. Introduction
1.1 Preparations before Use
This section covers preparations before using the StarBoard. Please read this section
thoroughly if you are using the StarBoard for the first time.
1.1.1 Product Overview
StarBoard T-17SXLG is a convenient and easy-to-use tablet-type interactive electronic
board that lets you operate a PC with a stylus pen, and write text and images to a PC
screen in real time as well as simultaneously input those to the PC. Those features work
when the included software is set up on a PC connected to the StarBoard.
1.1.2 Features
{Write directly to the PC screen
Use the stylus pen just like a mouse to operate the PC on the screen displayed on the
LCD monitor. The StarBoard Software allows text and images to be written to the PC,
and allows the text and images to be input to the PC as digital data in real time. That
data can then be saved, printed, or otherwise manipulated.
{Use as soon as the PC is started up (For Windows)
The StarBoard can be used as soon as the PC is started up, by just installing the
StarBoard Software package included.
{Compatible with presentations in PowerPoint
Text and images can be written into presentation materials prepared in Microsoft
PowerPoint. That allows you to further enhance presentation expression. Presentations
can also be linked to remote meetings.
{Write on video images (For Windows)
Write text and images to screens of captured video. That allows for easy use of video
materials in classes and presentations.
{Eight function buttons
Standard functions used frequently in the StarBoard Software are assigned to the eight
function buttons located on the top left side of the StarBoard. Those buttons act as
shortcuts when using the software.
1-1
English
StarBoard
T-17SXLG
Introduction
1.2 Parts Check
After unpacking, make sure that all of the following parts are included.
Parts
No.
(1)
Name
Qty.
17-inch Tablet monitor
1
(2)
Stylus pen
1
(3)
AAA alkaline dry cell
1
(4)
Spare pen tips
2
(5)
AC adapter
1
(6)
Power cable
(*1)
(7)
RGB cable (1.8m)
1
(8)
USB cable (1.5m)
1
(9)
Audio cable (stereo mini-plug)
1
(10)
Pen tip replacement pin set
1
(11)
StarBoard Software x.x (DVD-ROM) (*2)
1
(12)
StarBoard T-17SXLG User’s Guide (this manual)
1
(13)
StarBoard Software x.x Installation Guide (*2)
1
(14)
Warranty Sheet
1
(*1) The quantity of power cable is depended on the region.
(*2) The term “x.x.” as used in this manual denotes the same version as the software which
is included with the accessories.
(1)
(2)
(3)
(4)
(5)
(6)
(7)
(8)
(9)
(10)
(11)
(12)
(13)
(14)
1-2
English
StarBoard
T-17SXLG
Introduction
1.3 Part Names and Functions
1.3.1 Front Screen
(1)
(4)
(5)
(3)
(2)
(1) LCD and tablet operating area
Receives text and graphical
information entered with the stylus
pen, and transmits the data to a PC.
(4) Front switch panel
These switches are used to turn the
power ON/OFF, enter OSD menu
settings, and adjust the volume.
(2) Stand (bottom of body and back)
The stand serves to hold the
StarBoard in place. The LCD angle
can be adjusted in the range of
approx. 20° to 70°.
(5) Function buttons
Eight standard functions used by the
StarBoard software are assigned to
these buttons. (For details on
function button initial settings, see
“1.3.4 Function Buttons” on page
1-6 of this User’s Guide.)
(3) Speakers
The supplied audio cable can be used
to connect to the PC to allow audio
output from the speakers.
1-3
English
StarBoard
T-17SXLG
Introduction
1.3.2 Front Switch Panel
(3)
(5)
(6)
(1)
(4)
(2)
(1) Power button
This button turns the StarBoard LCD
monitor ON/OFF.
(2) Power indicator
This indicator turns green when
power is supplied normally to the
StarBoard and an image signal is
detected. It turns red when no image
signal is output from the PC, or
when power saving mode is on.
(3) AUTO/SELECT button
This button is used to automatically
adjust the screen display and select
OSD menu options.
(4) Menu button
This button is used to display the
OSD menu. Press it after making
menu selections to apply those.
(5) (+) button
This button is used to toggle muting
ON/OFF. It is also used to select
OSD menu options and change
settings.
(6) (–) button
Brightness can be adjusted by the (+)
and (-) buttons after pressing the (-)
button.
This button is also used to select
OSD menu options and change
setting values.
For details on using the OSD menu, see “2.3 Using the OSD Menu” on page 2-6 of this
User’s Guide.
1-4
English
StarBoard
T-17SXLG
Introduction
1.3.3 Connector Panel
Top
Bottom
(5)
(4)
(1)
(2)
(3)
(4)
(5)
View of StarBoard Back Right Side
(1) Power port
The AC adapter is connected here.
(2) VGA input port
This port is used to connect a PC via
RGB cable to display images from
the PC.
(4) Audio input port
This port is used to output PC audio
from the StarBoard speakers. The
supplied audio cable is connected to
this port.
(5) USB port
A USB cable is connected here.
(3) VGA output port
This port is used to connect external
devices such as a projector via RGB
cable to output video displayed on
the StarBoard.
1-5
English
StarBoard
T-17SXLG
Introduction
1.3.4 Function Buttons
(1) ToolBar hide/un-hide
Hides/displays StarBoard Software
ToolBar.
(5) Topic list
Hides/displays the Topic List.
(6) Solid pen
Switches to solid pen.
(2) New blank page
Adds a new blank page.
(7) Fluorescent marker pen
Switches to fluorescent marker pen.
(3) Previous page
Displays the page before the
currently displayed page.
(4) Next page
Displays the page after the currently
displayed page.
(8) PC screen
Launches PC Operation mode, in
which operations on the PC screen
are done via the pen instead of the
mouse.
You can customize the shortcuts with the software for Windows. You cannot customize the
shortcuts with the software for MacOS. For details on using the function buttons, see the
StarBoardSoftware Function Button Settings Help.
1-6
English
StarBoard
T-17SXLG
Introduction
1.4 Assembly and Setup
Keep the following points in mind when installing the StarBoard.
Select a stable, flat location.
Avoid installing in locations that are dusty, extremely hot, cold, or humid. Also avoid
installing in locations exposed to direct sunlight.
1.4.1 Adjusting the Stand
Follow the procedure shown below to adjust the stand.
(1) Pull up the stand lever.
Stand
Lever
(2) Slide the stand to the desired angle, and release the lever.
1-7
English
StarBoard
T-17SXLG
Introduction
(3) Check that the lever and stand are secure.
CAUTION
Hold the body firmly and slide the stand slowly when adjusting it.
When adjusting the stand, if you pull up the lever without holding onto the body, the
body may move suddenly, resulting in unexpected injuries or damage to the body.
Use the screen at an easily viewable angle.
Use the screen at an easily viewable angle, taking into account external light and ceiling
lighting, which may reflect off the screen.
1.4.2 How to Use the Pen Holder
The T-17SXLG comes with a pen holder on the back side.
Store the stylus pen in the pen holder when not in use.
Insert vertically
1-8
English
StarBoard
T-17SXLG
Introduction
1.4.3 Connection Procedure
Follow the procedure below to connect the PC and StarBoard.
StarBoard
PC
(2)
(3)
(1)
(4)
(5)
(6)
To power outlet
(1) Connect the RGB cable to the VGA input port on the side of the StarBoard, and
tighten the screws to fasten. Connect the other end of the cable to the PC VGA
port, and tighten the screws to fasten.
(2) Connect the USB cable to the USB port on the side of the StarBoard. Connect the
other end of the cable to a USB port on the PC.
(3) Connect the audio cable to the audio input port on the side of the StarBoard.
Connect the other end of the cable to the audio output port on the PC. (Do this
only if you plan to use the StarBoard’s built-in speakers.)
(4) Connect the AC adapter connector to the StarBoard power connector.
(5) Connect the power cable to the AC adapter, then plug the power plug into power
socket.
(6) If outputting the StarBoard screen to external equipment, connect the RGB cable
to the VGA output port. Connect the other end of the cable to an input port on the
external video equipment.
1-9
English
StarBoard
T-17SXLG
Introduction
WARNING
Use the AC Adaptor supplied with this product.
Use only AC Adaptor or power cables specified by the manufacturer. Use of improper
adaptors or cables can damage the product or cause a fire.
How to install StarBoard Software
For details on how to install StarBoard software, see “StarBoard Software Installation”
in StarBoard Software x.x Installation Guide
Notice of USB cable
Some kind of USB chipset causes the function buttons doesn't work. In this case, try to
use the shorter USB cable (1.5m or shorter).
1-10
English
StarBoard
T-17SXLG
Usage
2. Usage Procedures
This section describes the basic procedures for using StarBoard. For information on using
advanced StarBoard features, see the StarBoard Software x.x. Installation Guide, or StarBoard
Software x.x Online Help.
2.1 Turning the StarBoard On
2.1.1 For Windows User
This section describes how to turn the StarBoard on for Windows user.
(1) Turn on the StarBoard power.
Push the power button
(2) Turn on the PC and allow Windows to start.
(3) The StarBoard Software starts automatically. (If the Startup checkbox was not
checked during the shortcut creation process when the software was installed, the
StarBoard Software will not start when Windows opens. In such cases, start the
StarBoard Software manually. For further details, see the StarBoard Software x.x
Installation Guide, or StarBoard Software x.x Online Help.)
Manual Startup
Either select Start → All Programs →
StarBoard Software, or double-click
the StarBoard Software icon on the desktop. (The StarBoard Software icon is not
created on the desktop unless the Desktop checkbox is selected during the shortcut
creation process when the software is installed.)
Notice when displaying screens at SXGA resolution
Be sure to set the monitor refresh rate to 60 Hz if displaying the StarBoard at SXGA
resolution (1280×1024). If used at a refresh rate other than 60 Hz, the pen may not
operate correctly due to noise from the LCD panel. (For details on how to make
settings, see your PC’s manual and other documentation.)
2-1
English
StarBoard
T-17SXLG
Usage
2.1.2 For Mac User
This section describes how to turn the StarBoard on for Mac user.
(1) Turn on the StarBoard power.
Push the power button
(2) Turn on the Mac and allow Mac OS to start.
(3) Select “Go” → “Applications” → “StarBoard Software” to start StarBoard Software.
(4) Select “MENU” on the StarBoard Software toolbar → “Settings” → “StarBoard”
→ “Check Connection”, and then check the connection.
If the StarBoard is not connected” message appears, StarBoard Software has not
detected the StarBoard. Check whether the StarBoard and PC are connected properly.
Connected
No Connection
If they are connected properly, the “StarBoard is connected” message appears. If the
indication does not change even though you have checked the connection, there is
likely to be some problem. For details, see “3. Appendix Troubleshooting” on page 3-1
in this user’s guide.
2-2
English
StarBoard
T-17SXLG
Usage
2.2 Using the Stylus Pen
This section describes how to use the StarBoard stylus pen.
2.2.1 How to Use the Stylus Pen
The stylus pen has a power switch. Battery life can be pronged by switching the power
switch OFF when not in use. To draw characters and figures using the stylus pen, set the
power switch of the stylus pen to the ON position.
ON/OFF switch
Push the switch
ON
OFF
2.2.2 Basic Stylus Pen Operations
The stylus pen can be used in the same way as a mouse. Under the stylus pen’s default
settings, the pen tip button is set to correspond to the left mouse button for Windows, to
the primary mouse button for Mac. When Windows or Mac OS is open, the pen tip button
may be used to perform the following mouse actions. The following xxxx/xxxx
description is for functions and operations in a Windows environment or Mac
environment.
• Clicking / Primary mouse button clicking
Press the pen tip against the display with a suitable amount of force and then release it
quickly.
• Double-clicking / Primary mouse button double clicking
Press the pen tip against the display with a suitable amount of force and then release it,
two times in a row.
• Dragging / Dragging
Press the pen tip against the display with a suitable amount of force and then move the
pen while keeping it pressed against the display (without releasing it from the display).
The permitted stylus pen input angle range is 30° in any direction from a position where
the stylus pen is perpendicular to the display surface. Note that if the pen is tilted at an
angle greater than 30°, its coordinates may not be input correctly.
2-3
English
StarBoard
T-17SXLG
Usage
2.2.3 Stylus Pen Settings
The stylus pen has one pen tip button, and two side buttons. Mouse actions can be
assigned to these three buttons. The default button settings are summarized in the
following table.
Button
User action
Corresponding mouse
action (Windows)
Corresponding mouse
action (Mac)
Pen tip
Press the pen tip against the
display.
Mouse left-click
Primary mouse button
click
Side
Button
No. 0
Press the button with the pen tip
slightly removed from the screen
(5 mm or less).
Mouse left double-click
Primary mouse button
double click
Side
Button
No. 1
Same as above.
Mouse right-click
Secondary button click
Pen tip
Side Button No. 1
Side Button No. 0
This function can only be changed in Windows.
For details on changing the button settings, see the StarBoard Software x.x Online Help.
2-4
English
StarBoard
T-17SXLG
Usage
2.2.4 Changing the Battery in the Stylus Pen
The stylus pen contains a single AAA alkaline dry cell battery. If the pen begins to
operate erratically (e.g., if pen input is cut off), change the battery as described below.
Note that battery life is approximately 1,800 hours under normal usage. If the residual
quantity of a battery decreases, the centre of a side button will light up red.
If the centre of a side button lights up red, change the battery as described below.
NOTICE
Be sure to install batteries correctly.
Do not install batteries with positive and negative terminals reversed, or use batteries other
than the type specified. It will cause pen malfunctions and excess heat, or burns to the hand.
Be sure to provide insulation during disposal.
Be sure to insulate the positive and negative terminals of the battery using cellophane
tape, or similar material when disposing of batteries. Disposing of batteries without
insulating them may lead to overheating, bursting, or ignition due to shorting, resulting
in personal injury or fire. Furthermore, be sure to follow all local rules and regulations
regarding proper battery disposal. If within the EU, be sure to follow Batteries Directive.
[Batteries directive (2006/66/EC)]
(1) Turn the stylus pen grip to separate the two halves.
(2) Remove the AAA alkaline dry cell battery contained in the grip, and insert a new cell
with the positive side facing the pen tip.
Negative side
Positive side
2-5
English
StarBoard
T-17SXLG
Usage
(3) Put the stylus pen back together.
NOTICE
When changing the battery, be careful not to close the pen’s rear part too
forcefully.
If too much force is applied when closing the rear part of the stylus pen, the pen may be
damaged.
2.2.5 Replacing the Stylus Pen Tip
When the stylus pen tip wears down and becomes too short, replace it as described
below.
(1) Using the special pin set, remove the stylus pen tip.
(2) Insert a new pen tip into the stylus pen.
2-6
English
StarBoard
T-17SXLG
Usage
2.3 Using the OSD Menu
The OSD menu is used when adjusting the StarBoard LCD screen. OSD is an abbreviation
for On-Screen Display. The OSD feature allows you to view and adjust the settings for the
display on the screen.
2.3.1 OSD Buttons and Their Functions
•Menu button
•(+) button
This button is used to display the
This button is used to toggle
OSD menu. Pressing it after
muting ON/OFF. It is also used to
making menu selections applies
select OSD menu options and
those selections.
change settings.
•AUTO/SELECT button
• (-) button
This button is used to
Brightness can be adjusted by the (+)
automatically adjust the screen
and (-) buttons after pressing the (-)
display and select OSD menu
button. This button is also used to select
options.
OSD menu options and change setting
values.
OSD Menu
■Adjustment procedure
(1) Press the Menu button to display the OSD menu.
(2) Use the (+) button and (-) button to select a menu item.
(3) Press the AUTO/SELECT button to confirm the selection.
(4) Use the (+) button and (-) button to adjust the value, and AUTO/SELECT to select that
value.
(5) To close the OSD menu, leave buttons un-pressed for a set amount of time (adjustable),
or select EXIT from the menu screen. (If closing by not pressing buttons, setting changes
made up to then will be applied when the OSD closes.)
2-7
English
StarBoard
T-17SXLG
Usage
2.3.2 OSD Adjustment Options
(1) BRIGHTNESS
Used to adjust screen brightness. (0-100)
(2) CONTRAST
Used to adjust colour contrast. The larger the value, the brighter the image will be. (0-100)
(3) LCD ADJUSTMENT
CLOCK
PHASE
H.POSITION
V.POSITION
RETURN
: Used to adjust screen size. (0-100)
: Used to adjust the sampling timing (phase) for converting the
analogue input signal to a digital input signal. (0-63)
: Used to change the horizontal position of the screen. (0-100)
: Used to change the vertical position of the screen. (0-100)
: Used to return to the previous page.
2-8
English
StarBoard
T-17SXLG
Usage
(4) COLOUR TEMPRATURE
Used to adjust the colour temperature of the screen.
(SRGB, 9300K, 7200K, 6500K, 5000K)
USER
: Used to adjust the red, green, and blue colours of the screen.
(0-100)
RETURN
: Used to return to the previous page.
(5) ECO MODE
Used to turn the ECO mode ON, and limit brightness setting from 0 to 20 to reduce power
consumption.
RETURN
: Used to return to the previous page.
(6) LANGUAGE
Used to select the display language. The following languages are available: Japanese,
English, French, German, Spanish, Italian, and Chinese.
RETURN
: Used to return to the previous page.
2-9
English
StarBoard
T-17SXLG
Usage
(7) OTHER SETUP
SMOOTH
: Used to adjust the smoothness of the image. (0-3)
OSD H.POSITION
: Used to adjust horizontal position of OSD window. (0-100)
OSD V.POSITION
: Used to adjust vertical position of OSD window. (0-100)
OSD TRANSPARENCY : Used to turn OSD window background transparency
ON/OFF.
OSD TIMEOUT
VOLUME
MODE MESSAGE
: Used to set the amount of time before the OSD menu closes
automatically. (0-60)
: Used to adjust the speaker volume. (0-100)
: Used to turn the screen resolution display ON/OFF.
RESET
RETURN
: Used to reset OSD menu settings to their default values.
: Used to return to the previous page.
(8) EXIT
Used to exit the OSD menu.
2-10
English
StarBoard
T-17SXLG
Appendix
3. Appendix
3.1 Troubleshooting
First, check adjustments and handling methods and check for poor cable connections.
Those are often the causes of problems when nothing is actually broken.
Screen display-related problems
In this case
PC screen does not
display on StarBoard.
Check this
Is the PC power on?
And do this
To deal with problem see the PC
manual and other documentation.
Is the RGB cable connected Connect the RGB cable correctly. (For
to the PC and StarBoard
details on how to connect, see “1.4.3
properly?
Connection Procedure” on page 1-9 of
this User’s Guide.)
For laptop PCs, is external Connect cable after starting up the PC,
(RGB) output selected?
or switch to external (RGB) output at
the screen display mode settings.
(Method of switching differs by PC.
For instructions, see the PC manual and
other documentation.)
Was LCD and monitor
Set so LCD and monitor are both
switching done right (may selected, or that just the monitor is
be assigned to a function
selected. (For details on selection, see
key)?
the PC manual and other
documentation.)
Other
Contact technical support.
StarBoard Software-related problems
In this case
StarBoard is not
recognized.
Check this
And do this
Is the USB cable connected Connect USB cable to PC. (For details
properly?
on how to connect, see “1.4.3
Connection Procedure” on page 1-9 of
this User’s Guide.)
Was system startup done in Start up system in proper order. (For
the proper order?
details on how to start up the system,
see ”2.1 Turning the StarBoard On” on
page 2-1 of this User’s Guide.)
StarBoard Software may be Uninstall StarBoard Software, and then
damaged or did not install reinstall. (For details on how to install
correctly.
StarBoard software, see “StarBoard
Software Installation” in StarBoard
Software x.x Installation Guide)
Other
Contact technical support.
3-1
English
StarBoard
T-17SXLG
Appendix
Stylus pen-related problems
In this case
Check this
And do this
Stylus pen does not operate. StarBoard Software may be Uninstall StarBoard Software, and
damaged or may not be
then reinstall. (For details on how to
installed correctly.
install StarBoard software, see
“StarBoard Software Installation ” in
StarBoard Software x.x Installation
Guide)
Is battery worn out?
Replace stylus pen battery.
(For details on how to change the
battery, see “2.2.4 Changing the
Battery in the Stylus Pen” on page 2-4
of this User’s Guide.)
Is pen tip worn down?
Check if the pen tip is worn down or
is too short.
(For details on how to replace the
stylus pen tip, see “2.2.5 Replacing
the Stylus Pen Tip” on page 2-5 of this
User’s Guide.)
Are there any electronic
This product is susceptible to
devices located nearby the electromagnetic noise, so use the
StarBoard such as
StarBoard away from devices that
microwave ovens or radio emit noise.
transmitters that emit
electromagnetic noise?
Other
Restart Windows / Mac OS and
StarBoard Software.
Contact technical support.
Stylus pen tip and pen
Did you calibrate the pen Calibrate the pen position correctly.
cursor positions do not
position correctly?
(For details on how to calibrate the
match.
pen, see “Calibration” in the
StarBoard Software x.x Installation
Guide)
Other
Contact technical support.
3-2
English
StarBoard
T-17SXLG
Appendix
Function button-related problems
In this case
Function buttons don’t
operate.
Check this
And do this
Is the USB cable connected Connect USB cable to PC. (For details
properly?
on how to connect, see “1.4.3
Connection Procedure” on page 1-9 of
this User’s Guide.)
Is the StarBoard Software Function button features require the
running?
StarBoard Software. Use them with
the StarBoard Software running. (For
details on how to use the StarBoard
Software, see the StarBoard Software
x.x Installation Guide.)
StarBoard Software may be Uninstall StarBoard Software, and
damaged or may not be
then reinstall. (For details on how to
installed correctly.
install StarBoard software, see
“StarBoard Software Installation” in
StarBoard Software x.x Installation
Guide.)
Some kind of USB chipset Try to use the shorter USB cable
causes the function buttons (1.5m or shorter).
doesn't work.
Are there any electronic
This product is susceptible to
devices located nearby the electromagnetic noise, so use the
StarBoard such as
StarBoard away from devices that
microwave ovens or radio emit noise.
transmitters that emit
electromagnetic noise?
Restart Windows / Mac OS and
Other
StarBoard Software.
Contact technical support.
3-3
English
StarBoard
T-17SXLG
Appendix
3.2 System Specifications
Item
Specification
Product name
StarBoard T-17SXLG
Model No.
95.64309G00x *, AH00131
Display
Driver type
Active-Matrix Liquid Crystal Display (TFT)
characteristics
Effective screen size
17 inches 337.920 mm (W)×270.336 mm (H)
Resolution
1280×1024 (SXGA)
Pixel pitch
0.264×0.264 mm
Standard colours
16,700,000 colours
Brightness
300 cd/m2
Contrast ratio
1000 : 1
Viewing angles
right 85°, left 85°, up 80°, down 80°
Digitiser
Input system
Electromagnetic induction
characteristics
Pen
Stylus pen
(Uses one AAA alkaline dry cell; battery life: approximately 1800
hours**)
Input/output
Coordinate resolution
0.05 mm
Reading accuracy
± 0.5 mm
Tracking speed
Approximately 125 points per second
Interface
USB interface (USB1.1)
Input
Dsub 15-pin (analogue RGB)
Output
Dsub 15-pin (analogue RGB)
Stereo mini-jack (stereo audio)
Speaker output
Stereo (1 W+1 W build-in amplifier)
Environmental
Temperature
During use: +10 – +35°C; in storage: -10 – +60°C
conditions
Humidity
During use: 30 – 80% (no condensation);
in storage: 10 – 80% (no condensation)
Power consumption / power supply
40 W or less (4W or less in power saving mode) /
AC adapter Input (AC 100 – 240 V, 50/60 Hz, 1 A)
Output (DC 12 V, 3.3 A)
External dimensions
395.0 (W)×375.0 (H)×57.0 (D) mm (without stand)
Weight
Approx. 5.2 kg
Stand adjustment
Adjustable in the range of 20° to 70°
* The term “x” as used in this manual denotes the model No. of the product.
** Battery life varies depending on the temperature and humidity of the usage environment.
3-4
English
StarBoard
T-17SXLG
Appendix
Compatible Modes
Standard
Resolution
Vertical Refresh (Hz)
Horizontal Scan (KHz)
IBM VGA
640×350
70
31.5
IBM VGA
640×400
70
31.5
IBM VGA
640×480
60
31.5
IBM VGA
720×400
70
31.5
VESA VGA
640×480
72
37.9
VESA VGA
640×480
75
37.5
VESA SVGA
800×600
56
35.1
VESA SVGA
800×600
60
37.9
VESA SVGA
800×600
72
48.1
VESA SVGA
800×600
75
46.9
VESA XGA
1024×768
60
48.4
VESA XGA
1024×768
70
56.5
VESA XGA
1024×768
75
60.0
VESA
1152×864
75
67.5
VESA SXGA
1280×1024
60
64
VESA SXGA
1280×1024
75*
80
Apple Mac LC
640×480
67
34.9
Apple Mac II
640×480
67
35.0
Apple Mac
832×624
75
49.7
Apple Mac
1024×768
75
60.2
Apple Mac
1152×870
75
68.6
* LCD supports this resolution, however, StarBoard doesn't support.
3-5
English
StarBoard
T-17SXLG
Appendix
3.3 How to Take Care of the StarBoard
Please clean your StarBoard periodically so it will continue to work for a long time.
(1) Cleaning and care
• Use a dry, soft cloth to clean the StarBoard display surface. Do not use
detergents.
• Use a diluted detergent without abrasives to clean the StarBoard cabinet area. Do
not use undiluted detergent; rather, mix with water and soak a soft cloth in the
mixture. Wring out cloth thoroughly before wiping.
• Be careful not to scratch the StarBoard surface with fingernails or other hard
objects. That or bumping the StarBoard can damage it.
• Never use gasoline, thinner, or other solvents. That can cause the cabinet to
degenerate and printed areas to peal off.
3.4 Consumables
(1) Pen tips for Stylus pen
(2) AAA alkaline dry cell
Enquire at the place of purchase or with technical support for information on how go get
replacements.
3.5 LCD Panel
(1) The LCD panel is made using extremely high-precision technology. However, some
dots may be constantly lit or dark.
(2) The backlight used in the LCD panel has a limited lifespan. Contact technical support
if the screen becomes dark, flickers, or will not light up.
3-6
English
StarBoard
T-17SXLG
Appendix
3.6 Provisions of Product Warranty
1. During the free warranty service period, if a malfunction occurs during normal use, the
malfunction will be corrected without charge, according to the provisions of the warranty.
Furthermore, if the customer registration card accompanying the warranty is not returned
to our company, the customer information will not be registered, so free repairs might be
unavailable. After receiving this product, please immediately fill out and return this
customer registration card.
2. The warranty coverage is as listed in the following table:
Product Name
StarBoard
Part Name
17-inch LCD monitor
+
Stylus pen
+
RGB cable
+
USB cable
+
AC adapter
+
Power cable
+
Audio cable
+
Stand
+
–
–
Replacement tip for Stylus pen
Other parts
Legend: +
–
Warranty Coverage
Covered by warranty (excluding wear and physical damage)
Not covered by warranty
3. Please refer to the warranty about this product’s warranty service period.
4. Even during the warranty period, there will be a repair charge in the following cases:
(1) If the registration card accompanying the warranty is not returned to our company.
(2) If the warranty is not presented.
(3) If specified fields on the registration card accompanying the warranty are not
completed, or if the wording has been changed without authorization.
(4) The warranty applies only to the original purchasers. (It does not apply to a third
party to whom the customer resold this product.)
(5) In the event of a malfunction or damage resulting from the customer’s improper
handling (e.g., a fall, impact, etc., caused by the customer during transportation or
movement).
(6) In the event of problems resulting from handling contrary to the handling and
precautions mentioned in this user’s guide.
(7) In the event of failure or damage resulting from abnormal voltages, pollution or
other natural disasters (e.g., fire, earthquake, lightning).
3-7
English
StarBoard
T-17SXLG
Appendix
(8)
In the event of a malfunction in this product caused by the connection to this
product of equipment other than the equipment specified by our company.
(9) In the event that there is no abnormality in this product, but a defect in a part other
than this product was detected or remedied.
(10) In the event of ordinary wear and tear, wear, deterioration, etc., of consumables,
even during normal use.
5. If this product malfunctions, review the contents of this user’s guide. If the problems
remain irreparable, contact technical support. Technical support will determine whether
or not the product must be repaired, so please contact them. If the customer sends the
product to our company without RMA (Return Merchandise Authorization) number, it
might not be covered by warranty.
6. As a rule, the customer is responsible for shipping charges required to send all or part of
the product for repair, etc. Our company will assume responsibility for the return
shipping to the customer.
7. This warranty does not cover labour fees for repair-associated equipment assembly or
disassembly.
8. Incidental damage caused by the failure of this product (e.g., loss of profit that should
have resulted from the use of this product) is outside the scope of this warranty.
9. The aforementioned provisions define this warranty, and they supersede those of all
express or implied warranties that include legal defect liability.
3-8
English