1
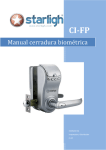
CI-FPPRO
Manual cerradura biométrica
STARLIGH SA
Importador y Distribuidor
CI-FPPRO
Manual de instalación cerradura biométrica CI-FPPRO STARLIGH
Contenido
Capitulo uno: Product Introduction ........................................................................ 3
1.1 Product Drawings .......................................................................................... 3
1.2 Scope of Application ..................................................................................... 4
1.3 Door Handing ................................................................................................ 5
1.4 Technical Parameters .................................................................................... 5
Capitulo dos: Operation .......................................................................................... 7
2.1 Basic Functions.............................................................................................. 7
2.2 Optional Function ......................................................................................... 8
2.3 Operation and Administration .................................................................... 10
Capitulo tres: Installation and Adjustment ........................................................... 15
3.1 Assembly Drawing -Mortise X6 ................................................................... 15
3.2 Assembly Drawing – Mortise X9 ................................................................. 15
3.3 Assembly Drawing – Single Latch ................................................................ 16
3.4 Installation................................................................................................... 16
3.5 Notes for Installation................................................................................... 22
3.6 Test and Adjustment ................................................................................... 23
Capitulo cuatro: Maintenance ............................................................................. 23
4.1 Routine Maintenance.................................................................................. 23
4.2 FAQ .............................................................................................................. 24
Capítulo cinco: After-Sales Service ....................................................................... 26
5.1 Warranty Principles ..................................................................................... 26
5.2 Packing List .................................................................................................. 26
5.3 List of Installation Tools ............................................................................... 28
Starligh SA. Santa Rosa 1501 (X5000ETE) Bº Alberdi. Córdoba
2
Manual de instalación cerradura biométrica CI-FPPRO STARLIGH
Product Introduction
1.1 Product Drawings
1.1.1 External View
1
9
2
3
10
11
12
13
14
15
16
4
5
6
7
17
18
8
1
2
3
4
5
Sliding cover
Nixie tube
Keypad
Fingerprint sensor
Lock body(outdoor)
10
11
12
13
14
6
7
8
Indicator light
Handle
Emergency
power
interface
Battery-box cover 1
15
16
17
Battery
Clear button
LCD
Keypad
Back lock body
(indoor)
Turn button
Pushing button
Handle
18
Screw cover
9
Starligh SA. Santa Rosa 1501 (X5000ETE) Bº Alberdi. Córdoba
3
Manual de instalación cerradura biométrica CI-FPPRO STARLIGH
1.1.2 Dimension
Front view
Side view
Back view
Side view
1.1.3 Product Features
Premium Security with Multiple Locking Methods for Multiple Users: The lock could be unlocked by
fingerprint, password or mechanical key override;
Wrong Try Lockout Delay Protection;
Automatic Locking (Clutch Mechanism) and Engaging deadbolt by Lifting Lever;
Robust and Flexible Mechanical Structure with Reversible Handing;
Anti Break-in/Damage Alarm Protection;
Award Winning Fast and Accurate Fingerprint Algorithm: BioSure 9.0.
Dual-circuit power supply system and control system offer more stable and high security.
1.1.4 Scope of Application
Perfect for Multi-Family, Apartment, Condominium Housing, Office Building, Government Building, Bank,
Court, Hospital and Warehouse.
Starligh SA. Santa Rosa 1501 (X5000ETE) Bº Alberdi. Córdoba
4
Manual de instalación cerradura biométrica CI-FPPRO STARLIGH
1.2 Door Handing
Left handed door: When you stand outside the door and the fixed hinges are on the left, the fingerprint lock
is then defined as left handed door, which is further divided into left (push) handed door and left (pull)
handed door.
Right handed door: When you stand outside the door and the fixed hinges are on the right, the fingerprint
lock is then defined as right handed door, which is further divided into right (push) handed door and right
(pull) handed door.
1.3 Technical Parameters
No.
Items
Technical Parameters
1
Static current
<30μA
2
Dynamic current
<200mA
3
Lifetime of battery for
fingerprint
5,000 times to unlock the door
4
Lifetime of battery for
password
6,000 times to unlock the door
5
Operating voltage
DC6V
6
Power supply
AA Battery
7
Emergency power supply
DC9V
Starligh SA. Santa Rosa 1501 (X5000ETE) Bº Alberdi. Córdoba
5
Manual de instalación cerradura biométrica CI-FPPRO STARLIGH
8
Low battery warning
4.8V±0.2V
9
control system
Double circuits
10
Password capacity
10
11
Fingerprint capacity
100
12
Password length
8 digits
13
Match time
≤ 1 second
14
Sensor resolution
500dpi
15
Contrast mode
1:N
16
FRR
≤1%
17
FAR
≤0.0001%
18
Search angle
360°
19
Fingerprint update model
Auto update
20
Light interference
Avoid strong direct light.
21
Operating temperature
-10℃~55℃
22
Operating humidity
10%~90%
23
Open door direction
Left handed and right handed
(Note: Parameters subject to change without prior notice)
Starligh SA. Santa Rosa 1501 (X5000ETE) Bº Alberdi. Córdoba
6
Manual de instalación cerradura biométrica CI-FPPRO STARLIGH
Operation
2.1
Basic Functions
2.1.1 Unlock Mode
Open door
by Fingerprint
Open door
By Password
Open door
by Key
Open door by
remote control
2.1.2 Full Engagement
Square deadbolt will be engaged by lifting the handle upwards.
Note: Additional deadbolt can be engaged by turning thumbturn inside and can’t be engaged from outside.
2.1.3 Passage Mode
Setting: After the registered user login, then press “#” , the passage mode will be activated and the lock will
be deactivated.
Note: the buzzer will sound long beep upon setting succeed and the LED indicator flash every 3 seconds.
Cancellation: Passage mode will be cancelled by unlocking with fingerprint or password, or by pulling the
handle upwards.
2.1.4 Alarm Functions
(1) Spring latch Alarm
If the door is not properly closed and the spring latch is not fully engaged, alarm will beep.
(2) Low-Voltage Alarm
When the batteries go flat, the buzzer will give off warning tone of “beep, beep……”, and the red indicator
will flash. Then you should replace batteries immediately.
Starligh SA. Santa Rosa 1501 (X5000ETE) Bº Alberdi. Córdoba
7
Manual de instalación cerradura biométrica CI-FPPRO STARLIGH
(3) Tamper Alarm
When the lock is tampered, the buzzer will give off alarm sound of “beep, beep……”
(4) Pseudo Password Alarm
Upon inputting the wrong password consecutively 3 times, the buzzer will give off alarm sound “beep,
beep……” and the keypad will automatically lockout for 15 minutes. A registered fingerprint could disarm the
alarming.
2.2
Optional Function
2.2.1 LCD
LCD function only available for the lock with LCD configuration.
(1) LCD Start-up Interface
ESC
Page down
Page up
OK
Input the administration password by page up/down button and press "OK" to confirm each input, then you
can enter the menu for management operation.
(2) Clock Setting
Set the current time by Page Up/Down button.
(3) Language Setting
Switch between English and Chinese by the Page Up/Down button .
Starligh SA. Santa Rosa 1501 (X5000ETE) Bº Alberdi. Córdoba
8
Manual de instalación cerradura biométrica CI-FPPRO STARLIGH
(4) Fingerprint Management Function
Increase & deleting fingerprints are available.
User ID with “*” mark means the fingerprint existed in the lock and can be deleted;
User ID without "*" mark means the User ID is available for new user.
(5) Password Management Function
Increase & deleting password are available.
User ID with “*” mark means the passwords existed in the lock and can be deleted;
User ID without "*" mark means the User ID is available for new user.
(6) Unlock record tracking
“View Log” can check the latest 200 pieces unlock logs; “Clear Log” will clear all unlock logs. In the logs: “PW”
means the logs unlock by password,
"FP"means the logs unlock by fingerprint.
Starligh SA. Santa Rosa 1501 (X5000ETE) Bº Alberdi. Córdoba
9
Manual de instalación cerradura biométrica CI-FPPRO STARLIGH
2.2.2 Unlock by Remote controller
The function is only available for the item equipped with remote controller.
Press the unlock button of the registered remote controller, the door will open;
Press the close button, the door will close.
The remote control distance is within 30 meters in open areas.
2.3
Operation and Administration
2.3.1 Administration Password/Fingerprints/Remote Controller
Objective
Phenomena (when operates
successfully)
Procedures
(1)Remove the battery cover;
Clear All
(2)Press and Hold down the
fingerprint button for 10
seconds.
Fingerprints
The buzzer sounds a long beep, the
nixie tube displays “00”, the fingerprint
acquisition lights on, and the green
①
indicator lights on.
(1)Remove the battery cover;
Reset
administration
password
Add user
password
(2) Press and Hold down the
password button for 10
seconds;
The buzzer sounds a long beep, the
keypad lights on and the number “0”
flashes on the nixie tub.
(3)Input administration
②
password;
(4)Press the # button.
The buzzer sounds a long beep.
(1)Input administration
password;
The buzzer sounds a long beep, and
the green indicator lights on.
②
(2)Input user password ;
Delete user
password
(3)Press the # button.
The buzzer sounds a long beep.
(1)Input administration
password;
The buzzer sounds a long beep, and
the green indicator lights on.
(2)Input the user ID need to
delete;
(3)Press the # button.
The buzzer sounds a long beep.
Add
fingerprint(1)
(1)Input administration
password;
The buzzer sounds a long beep, and
the green indicator lights on.
(administratio
n fingerprint
and user
(2)Press the # button;
The nixie tube displays a piece of user
ID.
Starligh SA. Santa Rosa 1501 (X5000ETE) Bº Alberdi. Córdoba
10
Manual de instalación cerradura biométrica CI-FPPRO STARLIGH
fingerprint)
(3)The lock will automatically
generate a piece of user ID ,
the user
ID display on the nixie
③
tube;
(4)Press the # button;
(5)Collect the fingerprint.
Add
fingerprint (2)
The fingerprint sensor lights on.
④
The buzzer sounds a long beep, and
the green indicator light is on.
(1)Verify the administration
fingerprint;
The buzzer sounds a long beep,the
motor rotates.
(2)Press the # button;
The nixie tube displays a piece of user
ID.
(3)The lock will automatically
generate a piece of user ID,
the user ID display on the nixie
tube;
(user
fingerprint
only)
(4)Press the # button;
The fingerprint acquisition lights on.
(5)Collect the fingerprint.
The buzzer sounds a long beep, and
the green indicator light is on.
(1)Input administration
password;
The buzzer sounds a long beep, and
the green indicator light is on.
(2)Press * button;
The nixie tube displays a piece of user
ID.
(3)Input the user ID which
need to be deleted;
The nixie tube displays the user ID
which need to be deleted.
(4)Press the # button.
The buzzer sounds a long beep, and
the green indicator light is on.
(1)Verify the administration
fingerprint;
The buzzer sounds a long beep, the
motor rotates.
Delete
fingerprint(2)
(2)Press * button;
The nixie tube displays a piece of user
ID.
(user
fingerprint
only)
(3)Input the user ID which
need to be deleted
The nixie tube displays the user ID that
you input to be deleted.
(4)Press the # button.
The buzzer sounds a long beep, and
the green indicator light is on.
Delete
fingerprint(1)
(administratio
n fingerprint
and user
fingerprint)
Objective
Procedures
Add remote
⑤
controller
Delete remote
controller
Phenomena (when operates
successfully)
(1)Input administration
password
The buzzer sounds a long beep, and
the green indicator light is on
(2)Press “9” button for 5
seconds
The buzzer sounds a long beep, and
nixie light displays “P0”
(3)Press any button on the
remote controller
The buzzer sounds long “beep……”
(1)Input administration
password
The buzzer sounds long “beep……” and
the green indicator is on.
(2)Press “7” button for 5
seconds
The buzzer sounds long “beep…..” and
nixie light displays “00”
Starligh SA. Santa Rosa 1501 (X5000ETE) Bº Alberdi. Córdoba
11
Manual de instalación cerradura biométrica CI-FPPRO STARLIGH
Important Note:
① The LED indicator and sounds instruction: When an operation succeed, the buzzer will sounds long beep,
and the green indicator light on; when an operation failed, the buzzer will sounds short beep, and the
red indicator lights on.
② The default admin password is 00123456. The password is composed of 8 digits, with 2 digits user ID
and 6 digits password. The user ID 00 is defaulted for administrator only, the user ID 01~09 for normal
user.
③ The User ID No. will be generated automatically by the system. Pressing “#” to confirm the new ID No.;
You can also input a new user ID No. manually.
④ Method to collect fingerprint: when the fingerprint sensor lights on, put finger on the sensor. When the
fingerprint sensor flash, take away the finger; repeat the operation for 3 times. The buzzer sounds long
beep and the green indicator is on, which means fingerprint be collected successful.
It is allowed max 10 remote controller, The user ID No. Is from P0 to P9.
2.3.2 Password/Fingerprints/Remote Controller Permission
Item
Amount
User ID
Permission
Administration
Password
1 group
00
Add/delete user password,
administration fingerprint and user
fingerprint
User password
9 groups
01-09
Open the door
Administration
fingerprint
1
00
Add /delete user fingerprint; open
the door
User fingerprint
99
01-99
Open the door
Remote controller
10
P0-P9
Open door, close door(the handle
has returned)
2.3.3 Unlock Method
Unlock
method
Unlock by
fingerprint
Procedure
Phenomenon (when the door is
opened successfully)
(1)slide up the
sliding cover
Fingerprint acquisition light is on.①
(2)testify the
registered
fingerprints
The buzzer sounds long “beep,
beep…” and displays the user ID②.
The green indicator light is on and the
motor rotates.
(3)push down the
handle to open the
door
Starligh SA. Santa Rosa 1501 (X5000ETE) Bº Alberdi. Córdoba
12
Manual de instalación cerradura biométrica CI-FPPRO STARLIGH
(1)slide up the
sliding cover
Unlock by
password
(2)input the
registered password
The buzzer sounds long “beep,
beep…” and displays the user ID. The
green indicator light is on and the
motor rotates.
(3)push down the
handle to open the
door
Unlock by
remote
controller
(1)press opening
button
The buzzer sounds long “beep,
beep…” and the green indicator light
is on.
(2)push down the
handle to open the
door
(1)open exterior
handle sliding
cover③
Unlock by
mechanical key
(2)insert the key
and
rotate it④
(3)push down the
handle to open the
door
I
Important Notice:
① Press# button also can activate the fingerprint sensor when it time out.
② When verify the administration fingerprint, the displays will show “00” and “FP”.
③ Cylinder Hole: The cylinder is inside the level, press down the switch and slid the cover, the cylinder will
appear(Refer the photos as below)
滑盖卡柱
前把手的反面
④ Method to rotate key: rotate the key by 90°, Then push the level downwards to unlock the door.
Starligh SA. Santa Rosa 1501 (X5000ETE) Bº Alberdi. Córdoba
13
Manual de instalación cerradura biométrica CI-FPPRO STARLIGH
2.3.4 Points of Fingerprint Collection
The fingerprint center contains most information of the image. When colleting the fingerprints during the
registration and verification, please press your finger correctly.
Method: Put your finger on the fingerprint collection window with moderate touch, and the finger should be
flat as much as possible as the following illustrations shows:
2.3.5 Use of Emergency Battery
In case of battery depletion, an external 9V battery (6F22,9V) could be used as an emergency power
supply. Connect it via power interface at the bottom of the front lock body to supply power and unlock the
door.
2.3.6 Battery Installation
①
Method to install batteries: unfasten the screws and open the battery box cover; put 4PCS AA1.5V
batteries into the battery box; put the cover back and fasten the screws.
②
Notice for the use of battery: The batteries should be taken out if the lock is unused for a long time; do
not mix the used and new batteries together; pay attention to the positive and negative poles of the
batteries; dispose the batteries in accordance with the local regulations for environment protection.
Starligh SA. Santa Rosa 1501 (X5000ETE) Bº Alberdi. Córdoba
14
Manual de instalación cerradura biométrica CI-FPPRO STARLIGH
Installation and Adjustment
3.1 Assembly Drawing -Mortise X6
13 12 11 10 09
01 Exterior lock body
02 Big square shaft
03 Door
04 Interior lock body
05 Lock cylinder
06 Striking plate
07 Striking box
08 Door frame plate
09 Screw
10 Top bar
11 Battery cover
12 Screw
13 Screw Plug
08 07 06
05
03 02 01
04
3.2 Assembly Drawing – Mortise X9
01.前锁体
02.门
03.后锁面固定板组合
04.十字槽半沉头螺钉
05.后锁体
06.十字槽半沉头螺钉
07.锁芯
08.天地杆
09.门扣板
10.门扣盒
11.门框
11
10 09
08 07 06
05
04
03
02
01
Starligh SA. Santa Rosa 1501 (X5000ETE) Bº Alberdi. Córdoba
15
Manual de instalación cerradura biométrica CI-FPPRO STARLIGH
3.3 Assembly Drawing – Single Latch
3.4 Installation
3.4.1 Installation-Mortise X6
(1) Step 1 Template of Lock
The product can be used on wooden doors and metal anti-burglar doors. The hole pattern figure is as follows
Door side centerline
centerline of top
and bottom bolt
centerline of Lock fix
The edge of door
(please following the 1:1 hole cutting template in the packing list):
centerline of handle
Template of door lock
(
(
: )
: : )
204020014
Starligh SA. Santa Rosa 1501 (X5000ETE) Bº Alberdi. Córdoba
16
Manual de instalación cerradura biométrica CI-FPPRO STARLIGH
(2) Step 2 Template of Strike Box
Drill the mounting hole of door striking case according to the following figure. The height should be in
accordance with the door lock.
(3) Step 3 Installation
(1) Fix the lock cylinder, top and bottom
bars to the door panel with screws.
Figure 1
Figure 2
(2) As shown in figure 2, pass the power
cord of lock body trough the hole to
behind the door and mount the big square
shaft to the door hole in alignment with
the cylinder bore, and connect the power
cord. Mount the square shaft of interior
lock body handle in alignment with the big
square shaft and the small knob in
alignment with the cylinder bore. Fix the
exterior and interior lock body with 4
screws through the holes behind. Then
cover the battery cover and decoration
cover of screw.
Starligh SA. Santa Rosa 1501 (X5000ETE) Bº Alberdi. Córdoba
17
Manual de instalación cerradura biométrica CI-FPPRO STARLIGH
(3) Mount the door striking box to the
door frame and mount the door stopper
plate and fix them with screws. Inspect
whether the lock cylinder can move
smoothly at last. See Figure 3.
Door striking box
门框盒
Door stopper门扣板
plate
Fixed用螺丝固定
with screws
门框frame
Door
Figure 3
3.4.2 Installation – Mortise X9
Up and down bolt
center line
Door center
(1) Step 1 Template of Lock
200
190
180
170
Lock Center core
160
Ø12
150
24.8
50
Ø8
Ø8
140
130
120
36
22
100
60
50
220
80
70
60
The edge of door
90
18
240.8
40
45
225
209
30
20
Ø36
93
10
20
49.7
10
69.9
0
Centeral line of handle
30
40
50
60
Ø36
53
70
80
50
90
Ø8
100
14
Ø8
(UNITS:mm)
110
Ø12
120
204020037
(SCALE:1:1)
Starligh SA. Santa Rosa 1501 (X5000ETE) Bº Alberdi. Córdoba
18
Manual de instalación cerradura biométrica CI-FPPRO STARLIGH
(2) Step 2 Template of Strike Box
A
木门用自攻螺钉固定
铁门用公制螺钉固定
15
2.5
88.8
95.8
162.8
240.5
26.5
18
截面A-A
A
(4) Step 3 Installation
(1) Insert the lock cylinder, top bumper
and bottom bumper into the door and fix
it with screws as shown in Figure 1.
天杆
用螺丝固定
地杆
1
2
电池盖
后锁体
3
前锁面固定板组合
4
前锁体
切断槽
5
AA
图
BB
图
电源线
8
右
R
螺钉装饰盖
6
大方轴
7
1 Battery cover
L
左
CC
图
2 Back lock body
Starligh SA. Santa Rosa 1501 (X5000ETE) Bº Alberdi. Córdoba
19
Manual de instalación cerradura biométrica CI-FPPRO STARLIGH
3 Fixing plate assembly of back lock body
4 Front lock body
5 Undercut groove
6 Decorative box cover
7 Big square shaft
8 Power cords
(2) If the door thickness is below 50mm(as shown in Figure A),cut from the
undercut groove with a sacksaw; if the door thickness is above 50mm, no need to
cut.
(3) As shown in Figure2, pass the power cords through the hole for it, and insert
the big square shaft into the hole of the lock cylinder, and connect the power
cords. Then fix it with 2 screws on the fixing plate of the back lock body surface.
(4) As shown in Figure B, the small square tongue must return to the lock body.
(5) As shown in Figure C, if open the door from the left, the turn button of the
front lock body will turn downward and the arrowhead point left; if open the
door from the right, the turn button of the front lock body will turn downward
and the arrowhead point right.
(6) Insert the turn button fork on the back lock body into the hole for the small
square tongue, and connect the power cords and fix it with 4 screws. Install
batteries, battery box cover and decorative box cover.
(7) Insert the door striking box and
door stopper plate into the door
frame, and fix them with 4 screws and
check as shown in Figure 3.
Then check if the lock-tongue can
extend and retract freely. The tapping
screws are for the wooden door, and
the metric screws are for the iron door.
门框盒
门扣板
用螺丝固定
门框
3.4.3 Installation – Single Latch
(1) Step 1 Template of Lock
21
? 10
8
20
50
19
The edge of door
60mm/70mm
18
7
17
16
6
15
14
30
12
40
Door side center line
13
5
11
4
10
9
8
3
Centerline of Lock fix
7
6
2
5
Centerline of handle
90
3
2
1
? 20
cm
inch
1
205.5
4
? 25
57.5
41
0
0
44.5
1
2
1
3
? 10
4
26
2
50
5
Template of door lock
6
7
204020025
(UNITS:mm)
(SCALE:1:1)
3
Starligh SA. Santa Rosa 1501 (X5000ETE) Bº Alberdi. Córdoba
20
Manual de instalación cerradura biométrica CI-FPPRO STARLIGH
(2) Step 2 Template of Strike Box
(3)Step 3 Installation
Figure 1
Figure 2
Figure 3
(1) Fix the lock cylinder as shown in
Figure 1.
(2) As shown in figure 2, pass the
power cord of lock body trough the
hole to behind the door and mount
the big square shaft to the door hole
in alignment with the cylinder bore,
and connect the power cord. Mount
the square shaft of interior lock body
handle in alignment with the big
square shaft and the small knob in
alignment with the cylinder bore. Fix
the exterior and interior lock body
with 4 screws through the holes
behind. Then cover the battery cover
and decoration cover of screw.
(3) Mount the door frame box to the
door frame and mount the door
striking plate and fix them with
screws. Inspect whether the lock
cylinder can move smoothly at last.
See Figure 3.
Starligh SA. Santa Rosa 1501 (X5000ETE) Bº Alberdi. Córdoba
21
Manual de instalación cerradura biométrica CI-FPPRO STARLIGH
3.5 Notes for Installation
① Check your door thickness before installation. Applicable door thickness for the lock: 40100mm(Mortise). 35~80mm(Single Latch)
② The interior level can be easy to configure the direction to left or right by push the button in the lock
back side.
Adjust the
把手方向
accordance
按需求调
requirement
handle in
with the
Push down
将此推钮
this button
向下推
Push down
1
下方
2
③ When fixing the front and back lock body, do not press the internal connecting cable.
④ During installation, please handle the door lock with care to avoid scratching the surface.
⑤ Before installing the lock cylinder 6 or lock cylinder9, check the direction of the latch bolt, if it is in the
wrong direction, unfasten the screws, and pull the latch bolt out and rotate it by 180 degree, then install it.
Rotation direction
Latch bolt mounting screw
Pull
Starligh SA. Santa Rosa 1501 (X5000ETE) Bº Alberdi. Córdoba
22
Manual de instalación cerradura biométrica CI-FPPRO STARLIGH
3.6 Test and Adjustment
To test and adjust the door lock according to the contents contained in Chapter 2 till the operation success
and lock working well.
Maintenance
4.1 Routine Maintenance
(1)
The lock face is prohibited from contacting with corrosive substances so as not to damage the
prevention layer of the lock face and affect the glossiness of lock face.
(2)
The handle is a key part of the door lock, and its smooth operation will directly influence the use of
the door lock. Never hang any objects on the handle.
(3)
If the door is deformed, the friction of the combination latch bolt into the door frame case will be
enlarged and the bolt cannot extend fully. The position of door striking plate should be adjusted accordingly
in this case.
(4)
In case that the fingerprint reader window is covered with dirt or wet air, clean it with a dry and soft
cloth.
(5)
When low battery alarm is on, please replace the batteries immediately to ensure the normal use of
door lock.
(6)
Please keep the mechanical key well stored.
(7)
Fingerprint reader surface is prohibited from scratching by any sharp objects including fingernail.
(8)
Finger should be placed flatwise in fingerprint reader surface for fingerprint registration.
(9)
If the rotation of lock is inflexible or the lock cannot keep maintain the correct position, you should
ask the professionals to fill the part of lock cylinder with mechanical lubricating oil.
(10)
Always keep the transmission part of the lock body with lubricant to maintain its smoothness and
extend the service life of the transmission part. It is recommended to inspect once every six months or one
year, and to check whether the fastening screws are loose, so as to ensure the fastening.
(11)
In the course of use of cylinder, apply a little graphite powder of pencil powder to the cylinder
groove regularly (six-month or one year) or when the key cannot plug out smoothly to ensure the key can
plug smoothly. However, to avoid adding any oil to lubricate so as to prevent the grease to stick the ball
spring and the lock cylinder cannot rotate and cannot be opened.
Starligh SA. Santa Rosa 1501 (X5000ETE) Bº Alberdi. Córdoba
23
Manual de instalación cerradura biométrica CI-FPPRO STARLIGH
4.2 FAQ
Problem
Cause
1. The fingerprint is
successfully
authenticated, and the
green indicator lights
up, but the door can
not be opened.
①The lock has installation
problem.
②The lock cylinder has
mechanical problem, the
lock cylinder cable is broken
or the cable is not installed
well.
①It is not the correct
mechanical key.
2. The door can not be
opened by the
mechanical key.
②The lock head is
damaged.
③The lock cylinder is
damaged.
④The clutch has
mechanical problem.
3. Turn the exterior
handle, the main lock
tongue can not be
inserted completely.
4. Authenticate the
effective password or
fingerprint, and the
status is normal, but the
motor does not work
and the door cannot be
opened.
①Dirt is bonded on the
oiled parts of the lock
cylinder and the lock
cylinder is blocked.
Ask a professional to check it.
Use the correct mechanical key.
Use other ways to open the
door, or ask a professional to
check the door lock and replace
the damaged parts.
Ask a professional to check it.
② The top and bottom
bumper is loosened.
①The wire is loosened.
②The motor has problems.
①The fingerprint is illegal.
5. When open the door
by fingerprint, the red
indicator lights up, the
buzzer sounds, and the
door can not be opened.
Solution
② The fingerprint has been
canceled.
Ask a professional to check it
and replace the damaged parts.
Use the registered fingerprint,
or open the door by password
or key.
③The finger has not been
in the right position.
Put the finger in the right
position and try again, o r open
the door by password or key.
④ The fingerprint has been
damaged.
Register another new
fingerprint (It is better to
register 2 or above fingerprints
for an user); or open the door
Starligh SA. Santa Rosa 1501 (X5000ETE) Bº Alberdi. Córdoba
24
Manual de instalación cerradura biométrica CI-FPPRO STARLIGH
by password or key.
⑤The finger is too dry or
too wet or too cold.
Wet or dry or warm your finger
to try again; or open the door
by password or key.
⑥Apply a lot of pressure,
and the fingerprint becomes
deformed.
⑦Apply little pressure and
the fingerprint does not
touch the window
completely.
Try again.
⑧Influence from the
sunlight.
Block the sunlight, and try
again.
①The batteries are used up
and the positive and
negative poles are reversed.
Open the door by the
Emergency power supply and
the mechanical key, and check
the batteries.
②After enter wrong
passwords 4 times, the
keypad is protected.
Enter another password 15
minutes later.
③The connecting cable
between the front lock body
and the back lock body is
loosened.
Open the door by the
mechanical key and ask a
professional to check.
7. The effective
password is entered or
the fingerprint is
verified, the motor
turns, but the exterior
handle turns idly, and
the door cannot be
opened.
①The level is not returned
back totally when verify the
password or the fingerprint.
Return the level and input
password or fingerprint to try
again.
②The screw for fixing the
square shaft has been
loosened.
Ask a professional to check the
lock.
8. The door is normally
opened or closed, but
cannot be used
normally.
①The clutch has problems.
6. The keypad has no
response.
②The screw for fixing the
square shaft has been
loosened.
Ask a professional to check the
lock.
Starligh SA. Santa Rosa 1501 (X5000ETE) Bº Alberdi. Córdoba
25
Manual de instalación cerradura biométrica CI-FPPRO STARLIGH
After-Sales Service
5.1 Warranty Principles
The company will provide lifetime maintenance for the products sold out. Within one year from the date of
purchase, the company will provide free warranty service; and for products upon expiry of warranty, the
company provides repair services with charge.
In case of one of the following cases, no free warranty service will be provided:
(1) No product warranty card or effective receipt of purchase is provided, or the warranty card and the
receipt of purchase do not comply with the product;
(2) Any damage caused by any human factor, including use under abnormal working environment, or
failure to follow the instruction manual in use;
(3) Dismantle the machine by personally, repair personally, convert the machine; maintenance under the
people other than authorized unit of our company or damage out of force majeure.
5.2 Packing List
No.
Items and Names
Amount
01
Front lock body
1
02
Back lock body
1
03
Mortise
1
04
Strike plate
1
05
Strike box
1
06
Big square shaft(Optional)
1
Cross recessed countersunk head screw
(optional) – applied to mortise X6
4
Cross recessed countersunk head screw
(optional) – applied to to mortise X9
2
Cross recessed countersunk head screw
(optional) – applied to single latch
4
Screws for fixing the lock cylinder and the
door stopper plate (optional) - applied to
4
07
08
Starligh SA. Santa Rosa 1501 (X5000ETE) Bº Alberdi. Córdoba
26
Manual de instalación cerradura biométrica CI-FPPRO STARLIGH
mortise X6.
Screws for fixing the lock cylinder and the
door stopper plate (optional) - applied to
mortise X9.
8PCS(metal door)/
6PCS(wooden door)
Screws for fixing the lock cylinder and the
door stopper plate (optional) - applied to
single latch
4
09
Front shim plate
1
10
Back shim plate
1
11
Mechanical key
1
12
User’s manual
1
13
Installation Template
1
14
Warranty card
1
15
Certificate of QC
1
16
Batteries (size AA)
8
17
Fixing plate of back lock body
1
18
Remote controller(Optional)
1
Starligh SA. Santa Rosa 1501 (X5000ETE) Bº Alberdi. Córdoba
27
Manual de instalación cerradura biométrica CI-FPPRO
CI
STARLIGH
5.3 List of Installation Tools
Hammer- 1
Pencil - 1
Screwdriver-1
Chisel -1
Knife-1
Hand drill-1
Angel square-1
Tape messure-1
messure
Alloy bit-ø12
Alloy bit-ø20
Ribbon saw-1
Extension lead-1
lead
Starligh SA. Santa Rosa 1501 (X5000ETE) Bº Alberdi. Córdoba
28