1
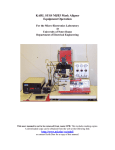
Karl Suss Scriber Operating Instructions
The Karl Suss scriber is used for precise cleaving of semiconductor substrates.
These instructions are provided as a reference only. You should familiarize
yourself with the user’s manual. The manual is quite good at describing the
operation of the tool. In addition, the on-screen instructions are easy to follow.
The scriber can handle scribing a wafer up to 4” in diameter. The units on the
scriber are set to microns. Do not ask us to change the units; we won’t do it.
The scriber can measure in 1-micron increments. The minimum space between
scribes is 20 microns and the maximum space is 10000 microns. The scriber
can make up to 40000 scribes in a 200x200 grid. If you try to make more
scribes, you will get an error message.
There are a few basic rules to remember when using the scriber:
• Record your use of the tool in the logbook.
• Do not try to scribe a sample while it is in a gel-pak. Use either wafer-bond or
the blue mylar film.
• Clean up your work area after use. Do not expect us to throw away your
trash for you.
• If you aren’t sure how to use the system, find someone who knows how. We
would rather answer many questions than try to repair the system because
someone didn’t know what they were doing.
• Some of the buttons are quite sensitive. You may press one twice without
meaning to. You will hear two beeps when you press a button twice. In
general, all you need to do is repeat the step twice and you will be fine.
• If you get error messages, refer to the user’s manual. If you still can’t figure
out what needs to be done, find someone in Dr. Lester’s group to help you.
• If you need to change any of the settings, make sure you return the settings
to their original positions.
1. Mount samples on blue sticky film or wafer-bond.
a. If your sample is large enough to cover the vacuum holes on the chuck,
you don’t have to use the blue mylar film.
b. Press lightly on back to make sure sample adheres to film.
c. Make sure that the film is cut so it will cover the vacuum holes on chuck.
d. Do not use a gel-pak.
e. Your sample thickness must be less than half the distance between
scribes. If it isn’t, thin your sample first or don’t complain when you can’t
scribe properly.
2. Turn on scribing unit.
a. Turn on electronics.
b. Turn on vacuum pump.
c. Turn up the screen intensity after approximately 30 seconds.
d. Record your name and date on the user log sheet along with as much
data as you can fill in.
3. Press “Load Wafer”
a. The chuck will initialize and then display should say to load wafer and
align. If not, stop and consult manual.
b. Load sample to cover the vacuum holes on the chuck.
c. Turn on vacuum switch to hold sample in place.
d. Move sample under microscope and align as needed, using the in, out,
left, right and rotation controls.
e. Once sample is aligned, press “Mark”.
4. Press “Diamond Adjust”
a. Press “Mark Chuck”
i. Move sample so that scribing tip will touch blue sticky film when
lowered.
ii. Press “Mark”.
iii. The scribe tip will lower, touch the blue mylar and set the zero
reference point for the system.
b. Press “Mark Wafer”.
i. Sometimes this button is very sensitive and can be inadvertently
pressed twice.
ii. Move sample so that scribing tip will touch sample when lowered.
iii. Press “Mark”.
iv. The scribe tip will lower and touch the sample to determine the wafer
thickness.
v. It is a good idea to check the thickness in several places to see how
uniform the sample thickness is. Each time you check the thickness,
you need to press “Mark Wafer”.
vi. Record at least one of these values on the log sheet.
c. Once the sample thickness is determined, press “Set Depth”.
i. Enter a number corresponding to how deep you want your scribes to
be.
ii. Scribes can be no more than 50% the thickness of the sample.
iii. Once the number has been entered, press “Set Depth” again to enter
the number.
d. Press “Return” to return to the main menu.
5. Press “M-scope Adjust”
a. Press “Align Wafer”
i. Align sample so that the scribe tip will come down on an unused corner
of the sample.
ii. Press “Mark”.
b. Press “Scribe Reference”
i. This instructs the machine to make a small mark (200µm long) on the
sample at the place you marked earlier.
c. Press “Mark Cross”.
i. The movement controls will now be activated so you can line up the
mark the machine made to the cross hairs on the microscope.
ii. See the user’s manual for exact positioning of the mark in reference to
the cross hairs.
iii. Press “Mark”.
iv. This tells the machine you are lined up with the reference mark.
d. Press “Test”
i. The machine will scribe another mark 20µm to the left of the first mark.
ii. Look in the microscope to verify that the marks are parallel and are
similar to the diagram in the user’s manual.
iii. If the marks are satisfactory, press “Return”. If not, repeat this step.
6. Press “Pattern Set”
a. Press “Block Left-Out”
i. This allows you to define one corner of the sample.
ii. Using the Left and Out control keys, align the sample so it is in the
lower left quadrant defined by the microscope cross hairs.
iii. Once aligned, press “Mark”.
b. Press “Block Right-In”
i. This allows you to define the second corner of the sample, on a
diagonal with the first corner.
ii. Using the Right and In control keys, align the sample so it is in the
upper right quadrant defined by the microscope cross hairs.
iii. Once aligned, press “Mark”.
c. Press “Define Scribe”
i. This lets you determine what type of scribe the machine will make.
ii. Press “Edge Scribe”
d. Press “Define Home”
i. The sample will move to the center of the area you “blocked”.
ii. This allows you to mark the center of the first scribe the machine will
make.
iii. Using the control keys, move the sample so that it is in the lower half
of the microscope as defined by the cross hairs. I also like to move
the sample so that one of the edges is in the microscope field of view
to maximize the usable area of the sample.
iv. Press “Mark” once you are satisfied with the position.
v. Sometimes, you will get an error message saying that the position
defined is not in the blocked area. The sample will return to
somewhere near the center of the blocked area. You need to
reposition the sample and press “Mark” again.
e. Press “Scribe Length”
i. This allows you to define the length of scribe the machine makes.
ii. The length of the scribe depends on the size of the sample, the
thickness of the sample and where the pattern is on the sample.
iii. Enter a number and press “Scribe Length” again.
f. Press “Map Horizntl”
i. This allows you to enter the distance between scribes and is
determined by the sample.
ii. Enter a number and press “Map Horizntl” again.
iii. The distance between scribes should not be greater than the wafer
thickness.
g. Press “Beeper Test” while looking in the microscope.
i. This allows you to look at the locations the system will scribe before it
begins scribing.
h. If the scribes are in appropriate locations, press “Start Scribe” to let the
machine scribe the sample. If not, press “Define Home” and repeat the
steps listed above.
i. Once the machine has finished scribing, it will beep at you. While looking
in the microscope, press “Examine Scribe”. The machine will show you
each scribe it has made.
7. Press “Return” twice.
a. Press “Load Wafer” to unload your sample.
b. Turn off the vacuum and remove sample from the vacuum chuck.
8. Put a new sample on if needed and repeat above steps.
9. When finished scribing your samples, turn off the system.
a. Turn down the intensity on the screen.
b. Turn off the vacuum pump and electronics.
c. Finish recording data in the logbook.