1
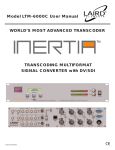
Model LTM-6000D User Manual
WORLD’S MOST ADVANCED TRANSCODER
MULTIFORMAT SIGNAL
TRANSCODER with DV/SDI
& TIMECODE INSERTION
© 2006 Laird Telemedia.
CE
LTM-6000D
ALL FORMAT TRANSCODER
TABLE OF CONTENTS
Package Contents & Warranty Information ..........................1
Product Specifications ......................................................1-2
The Laird Quality Assurance.................................................2
Front & Rear Panel Controls & Connections.....................3-4
LTM-6000D Overview ...........................................................5
Hookup & Powering Procedures ..........................................6
Apple & Windows User Notes ..............................................7
Deck Control (RS232/RS422), Time Code............................8
Using as a Stand-Alone Transcoder......................................8
Menu Controls & Operation ............................................9-13
System Applications / Typical Hook-Up Diagrams .............14
Avid Xpress DV 4.6 & Final Cut User Notes .......................15
Safety Precautions..............................................................16
800-898-0759 • 845-339-9555 • 2000 Sterling Road • Mount Marion, NY 12456 • www.lairdtelemedia.com
LTM-6000D
ALL FORMAT TRANSCODER
Warranty Information
Laird warrants your product to be free from malfunctions and defects in both materials and workmanship for one year from the date of purchase. Please see the enclosed warranty card for full details or your local dealer or Distributor for questions concerning the warranty.
Technical Support
Laird maintains a free user support web site to help with all of your technical support needs. Visit: www.laird-support.com
Getting Started
We recommend that you:
■ Unpack the equipment carefully and save the original box and packaging materials for possible future shipments.
■ Review the contents of this instruction manual.
In addition to the unit itself, the package should also contain:
■ AC Adaptor 12 V, 4 Pin XLR
■ 9-Pin RS422 Control Cable
■ Warranty Card
■ 1 Power Line Cable - USA
■ 9-Pin RS232 Control Cable
■ This Manual
■ 4 Non-Slip Feet
SPECIFICATIONS
VIDEO INPUTS/OUTPUTS
DV 1394 I/O:
SMPTE259M:SDI:
Composite Video:
S-Video:
Component:
DV25 8 bits: IEEE1394a Full Duplex Isochronous AV 400Mbps
DV25: DV/DV CAM / DVC Pro:
DV,DVCAM: NTSC 4:1:1, PAL 4:2:0
DVCPRO: NTSC-PAL 4:1:1
Digital Video I/O: SDI: (BNC), 75 ohm, 10-bit resolution, 270 MBit/sec
Inputs: 1 BNC SMPTE level digital
Outputs: 2 BNC SMPTE level digital
Inputs: 1 BNC 1.0V p-p into 75 ohms
Outputs: 2 BNC 1.0V p-p into 75 ohms
Inputs: 1 4-Pin Mini DIN, 75 ohms, Y: 1.0V p-p, C: 627mV p-p
Outputs: 2 4-Pin Mini DIN, 75 ohms, Y: 1.0V p-p, C: 627mV p-p
Inputs: 1 Set BNC x 3, 75 ohms, (Y, R-Y, B-Y), SMPTE level
Outputs: 2 Sets BNC x 3, 75 ohms, (Y, R-Y, B-Y) SMPTE level
AUDIO INPUTS/OUTPUTS
AES/EBU:
Analog:
Input: XLR: 2-7 V p-p across a 110 Ohm load 2 Channel 48 Khz/16 bit or 32 Khz/12 bit
Output: XLR: 2-7 V p-p across a 110 Ohm load 2 Channel 48 Khz/16 bit or 32 Khz/12 bit
Inputs: 1x 2-Channel Balanced XLR +0dBu nominal into 600 ohms
Outputs: 2x 2-Channel Balanced XLR +0dBu nominal into 600 ohms
- Page 1 800-898-0759 • 845-339-9555 • 2000 Sterling Road • Mount Marion, NY 12456 • www.lairdtelemedia.com
LTM-6000D
ALL FORMAT TRANSCODER
TIME CODE
VIDEO
CONTROL/DATA
POWER
ENVIRONMENTAL
SPECIFICATIONS
Standard operation LTC/VITC over IEEE1394/RS422
Input locked to Reference Video: BNC connector
SMPTE LTC/VITC Time Code: Encode/Decoded to IEEE1394
LTC In / Out: BNC / BNC
RS422 In: RS422 Standard Sony Machine Control
VITC In: BNC external or over Composite, YC, or Component inputs
VITC Out: BNC 1.0V p-p into 75ohms. Line selection of 13/15,16/18 or 20/22
Analog Decoder: Analog Composite, Component, Y/C to Digital Video
Analog Encoder: Digital ITU-R 656 to Analog Output: Composite, Component, Y/C –
[email protected]/60Hz - 625@50Hz
SDI Decoder: Equalizer, Descrambler, Deserializer – SMPTE 259 – 10-bit 4:2:2 Digital Video to
656 parallel output - 270Mbits
Embedded audio in SDI stream: EDH SDI control
SDI Encoder: Scrambler, serializer from 656 to SDI SMPTE 259 – 10-bit 4:2:2 SDI Cable driver for SDI cable
Internal Digital Video Buses: 656 Input Buses – 656 Output Bus DV 25Mbps over 1394 converted to
656 to video outputs
Genlock: Looping Genlock input using composite video or Blackburst 1Vp-p into 75ohms
Horizontal Phase Adjust Range: +/- 128 Pixels
Subcarrier Phase Adjust Range: 360°/256
Vertical Offset Adjust Range: 0-7 Lines
Compatibility Firmware:DVCAM, DVCPRO, WIN98/ME/2000/XP, FINAL CUT PRO, AVID XPRESS,
PROAVID NEWS CUTTER
Machine Control: Standard Sony Machine RS422 control protocol Bi-directional over Firewire
IEEE1394 6pin via 9pin DB9Female, using standard RS422 9pin cables
System Upgrades: Firmware upgrades via RS232 serial port DB9Male
Front Panel Control: Push-Button Switches and LCD select Main Menu Functions for all operations:
BACK-NEXT-DOWN-UP
Audio Level Control: Front panel vary audio encode level with VU meter display.
Power Requirements:12Volt DC @ 4A provided with product via 4PIN XLR connector Pin#1Ground, Pin#4 Hot.
1 Non-Captive UL/CE Linecords are provided with unit for 110/220 Volt AC Operation.
Certifications: Converter: FCC, CE External Power Unit: UL, CSA
Dimensions/Weight: 3.5”H (2RU) x 11”D x 19” W: EIA Rackmount; 8.5 Lbs. Less Shipping Carton
Operating Temp: +32°F to 110°F(0°C to 43°C)
Operating Humidity: 10% to 85%, Non-Condensing
Storage Temperature: -40°F to +150°F(-40°C to 65°C)
- Page 2 800-898-0759 • 845-339-9555 • 2000 Sterling Road • Mount Marion, NY 12456 • www.lairdtelemedia.com
LTM-6000D
ALL FORMAT TRANSCODER
FRONT PANEL FEATURES
You will notice that for such a powerful device, the front panel incorporates an efficient and uncluttered design. The
LTM-6000D also features a powerful menu operating system. The use of high-speed digital logic and dedicated audiovideo semiconductor technology allows the fast configuration of setups and equipment integration, which performs
well in broadcast facilities. The audio and video signals are all buffered in and out to provide proper line drive and cable
coupling. High quality A/V connectors are used for all input and output hardware connections.
1
6
2 3 4 5
7
8
9
10
1.) LCD Status Display
6.) Channel 1 LED Level Meter
2.) Menu Back Button
7.) Channel 2 LED Level Meter
3.) Menu Next Button
8.) Channel 1 Level Adjustment (BALANCED INPUT)
4.) Menu Down Button
9.) Channel 2 Level Adjustment (BALANCED INPUT)
5.) Menu Up Button
10.) Power On/Off Switch
- Page 3 800-898-0759 • 845-339-9555 • 2000 Sterling Road • Mount Marion, NY 12456 • www.lairdtelemedia.com
LTM-6000D
ALL FORMAT TRANSCODER
REAR PANEL FEATURES
10
9
1
1)
2)
3)
4)
5)
6)
7)
8)
9)
10)
11)
12)
2
3
4
11
5
6
Composite Video Input
YC Video Input
Component Y Input
Component B-Y Input
Component R-Y Input
SDI Signal Input
LTC Timecode Input
VITC Timecode Input
Balanced Audio Input Ch1
Balanced Audio Input Ch2
AES/EBU Audio Input
IEEE1394 DV Firewire I/O
23
22
7 8
12 13 14
15
13)
14)
15)
16)
17)
18)
19)
20)
21)
22)
23)
24)
25)
26)
27)
23
16 17
24
24
18 19 20
21
25 26
27
LTC Timecode Output
VITC Timecode Output
SDI Signal Output (A/B)
Composite Video Output (A/B)
YC Video Output (A/B)
Component Y Output (A/B)
Component B-Y Output (A/B)
Component R-Y Output (A/B)
Looping Genlock Input
AES/EBU Audio Output
Balanced Audio Output Ch1 (A/B)
Balanced Audio Output Ch2 (A/B)
RS232 Remote Control and Update Port
RS422 Machine Control
12V DC Power Input
POWER UP PROCEDURES:
To familiarize yourself with the menu functions it is advisable that you simply plug in the power supply and power up
the unit without any devices connected. The LCD display will illuminate and then cycle through its internal diagnostic
functions. After this is complete the factory default mode setting of DV DECODE will be displayed on the LCD.
By pressing the NEXT button, you will begin the function select operations. The LCD will display each function as you
advance through the menu. Study the menu tree on the next page to familiarize yourself with the LTM-6000D functions.
There are a few functions that merit special attention: PAL and NTSC have some special selections that are unique to
each other. This is outlined in the menu tree. In GENLOCK ON, there are selections for three related operations: Horizontal
Phase, Subcarrier and Vertical Offset.
- Page 4 800-898-0759 • 845-339-9555 • 2000 Sterling Road • Mount Marion, NY 12456 • www.lairdtelemedia.com
LTM-6000D
ALL FORMAT TRANSCODER
FAMILIARIZING YOURSELF WITH THE LAIRD LTM-6000D
The LAIRD LTM-6000D represents the finest in multi-format signal transcoding and conversion. Designed to fit seamlessly into any professional broadcast or post production media facility, the LTM-6000D will provide high quality performance and operation for years to come.
The product is designed as an integrated system to handle the demanding media environment where a variety of signal conversion and
transcoding requirements exist. The LTM-6000D also provides a bridge between analog and digital equipment to create a hybrid solution to
a fast moving evolution of signals from analog to digital.
The simple block diagram below is but a very basic representation of the technology operations that the LTM-6000D can perform. The unit
is built around the latest powerful IEEE1394 DV CODEC. One of the most common functions of the LTM-6000D is to provide the easy bidirectional conversion of analog to DV (1394). The LTM-6000D is the final result of many years of research and provides a flexible solution
as a signal bridge and beyond.
The LTM-6000D can also provide basic signal transcoding conversion between any standard analog and digital format signal. Thus, as a
stand–alone unit it can serve as a signal format transcoder and provide a very wide variety of daily operations.
Software is the key to the smooth integration of the LTM-6000D. It is self-diagnosing and will perform a complete system check every time
you power up the unit. The Operating System provides seamless navigation through the very flexible set-up and then goes one step further
to use adaptive firmware to work with all computers and NLEs. Settings are available for Windows, 2000, NT, XP, and Macintosh systems.
The LTM-6000D can also be configured to connect directly to any DV VTR or Camcorder. Firmware allows the unit to perfectly match any
DV device so that a “no compromise” operation is provided.
Carefully read and study this operations manual. It will guide you through the many features and performance settings of the LTM-6000D.
SDI
SMPTE259M-C
SDI
SMPTE259M-C
Component
Component
(R-Y)(B-Y)Y/YUV
(R-Y)(B-Y)Y/YUV
CVBS
CVBS
Y/C
Y/C
Balanced
ANY DIRECTION - ANY TIME
Balanced
AES/EBU
AES/EBU
IEEE1394
FireWire DV
IEEE1394
FireWire DV
LTC/VITC/RS422
TIMECODE
LTC/VITC
TIMECODE
- Page 5 -
800-898-0759 • 845-339-9555 • 2000 Sterling Road • Mount Marion, NY 12456 • www.lairdtelemedia.com
LTM-6000D
ALL FORMAT TRANSCODER
Cables and Wiring Guidelines
It is strongly recommended that you use only quality analog and digital cables for your connections to the LTM-6000D. The SDI on the LTM-6000D is standard SMPTE 259M-C and should be connected to digital coax for any distance over 6 feet. Use high quality true 75Ω BNC connectors and try to avoid using
adapters of any kind.
The AES/EBU is provided via an XLR connector and is a transformer coupled 110Ω driver. To adapt this to a BNC AES/EBU you must use a 110-75Ω adapter
such as the Connectronics AES/EBU1 or AES/EBU2. It is important to properly match the impedance of your signals.
Component (YUV) video signals should be wired with high-grade RG-59U shield cable using high-grade BNC connectors. Be certain to use exact equal lengths
for R-Y (V), B-Y (U) and Y signals. It would be advisable to use color-coded cables for easy identification during cabling.
The LTM-6000D can be used as a desktop device or in a EIA Rack mounted system. The only limitation is that the front panel LCD display must be viewed for
certain setup functions. For applications where the unit must be rack mounted away from operators RS232 Remote Control Software that runs in Windows
can be used. The software also has signal processing functions that are only available by using this software package. The RS-232 remote software does
have some operational limitations that will be covered later in this manual. The control software is available from the LAIRD TELEMEDIA website:
www.lairdtelemedia.com.
Power Options
The LTM-6000D was designed to be powered by a high-grade in-line switching power supply with a regulated output of 12Volts DC@ 4 AMPS Maximum. The unit may be powered by any such quality power supply
or 12 Volt Battery. The power entry is a standard 4pin XLR Male with pin#1 GROUND and Pin#4 POSITIVE
(HOT). Using any other source of power is not recommend, as it may damage the unit or cause it to malfunction.
Environmental Conditions
A cool ventilated operating environment must be provided for the LTM-6000D. It is advised that the unit not
be sandwiched between two heat-generating pieces of equipment. It would be wise to allow a 1RU space
above and below the unit. Do not place the LTM-6000D directly above a VTR. Some VTRs emit a high level
of RF from the head amplifier and this can be picked up by the LTM-6000D and cause interference. It is
advisable that the unit be at least 4RU away from any such device. High level of RF in the environment such
as certain medical or radio towers can cause interference. It is recommended that in such environments
proper shielding be provided for the unit.
Extreme heat and cold can also cause the unit to malfunction. Be certain that the unit is not exposed to harsh
temperature changes outside the specifications listed in this manual.
Dirt and ash can cause damage to any piece of precision equipment. Keep the unit in a clean, moisture and smoke free location. Follow the hazard warnings
provided at the end of this manual.
Power-Up Procedures
It is recommended that you have all devices properly wired before any power up is performed. Based on the nature of DV and DV devices, the proper sequence
must be followed: Power-up the LTM-6000D first and make sure it settles in its default mode: DV DECODE. Setup the LTM-6000D for the operation you require
and then power up the other DV device. Computer based DV devices such as Non-Linear Editors(NLEs) have to “see” a live DV DEVICE in order to properly
initialize the software. The LTM-6000D will be identified as a PHILLIPS DV DEVICE depending on your operating system and software. DO NOT HOT CONNECT IEEE1394 (FireWire) devices. This can cause damage to your device and the LTM-6000D. Be certain that the device is turned off before inserting or
removing connections. In the case of computer based NLEs it is advisable that the operating software such as edit software be offline or exited before any
connections are made.
- Page 6 800-898-0759 • 845-339-9555 • 2000 Sterling Road • Mount Marion, NY 12456 • www.lairdtelemedia.com
LTM-6000D
ALL FORMAT TRANSCODER
Using The LTM-6000D with WINDOWS
Your DV equipment such as a PC may be equipped with an OHCI compatible FireWire card. Assuming all connections are proper, the PC will
recognize the LTM-6000D as new hardware as soon as it is initialized. The LTM-6000D will be listed as a PHILLIPS DV Device. Make certain
that you have entered the proper Windows system compatibility selection from your Menu for Windows 98, 2000, NT and XP.
To verify that your LTM-6000D is operating as a basic DV conversion device you can connect a video and audio analog signal to the LTM-6000D
and follow the setup for DV ENCODE: Converting Analog to DV. from your Windows 2000 or XP desktop, double click on MY COMPUTER. The
window will open and you should see the LTM-6000D as a “Phillips DV Device or Camcorder”. This verifies that the LTM-6000D and the OHCI
FireWire card are working properly and Windows is recognizing the connection properly. This does not mean that your software will automatically work. Some software requires that certain “templates” be loaded before the DV device is online. Study your software manual and
follow any instructions provided for such operations.
Using The LTM-6000D with Apple/Macintosh
For Apple Mac based systems the LTM-6000D will be recognized as a DV DECK or VTR.
DV Decks and Camcorders
To interface with standard DV(IEEE1394)(FireWire) decks such as SONY DSR series, Panasonic DVCPRO and any other such device, simply
select the proper DV MODE OS in the menu setups. Select DV DECK for interface requirements between analog equipment & DV VTRs.
Other DV Transcoders
If there is a need to interface the LTM-6000D with another DV transcoding device, always choose the DV DECK mode for this operation. The
LTM-6000D was tested with several of the most popular DV transcoders for operation. If you should encounter a device that does not interface properly, please contact customer service.
Studio and Facility Integration
For system integration into larger facilities, it may be required to GENLOCK the LTM-6000D to provide system phasing to HOUSE REFERENCE.
The LTM-6000D can be GENLOCKED to standard CVBS video BLACKBURST. Once this feature has been activated, the LTM-6000D can be horizontally and Subcarrier timed for perfect house lock. There is an additional provision for vertical offset compensation which is a typical problem found in digital processing equipment.
DV Systems
RS422 Machine Control
The LTM-6000D is a industry standard IEEE1394 system which operates in DV/DVCAM for NTSC and DVCPro25 for PAL.
A 9-Pin D-Sub machine control port is provided for NLE machine control via FireWire (IEEE1394). This system will provide standard SONY
RS422 control protocol without the need for any external equipment. This control system is a pass-through protocol and simply passes the
NLE commands that are on the FireWire port and converts them to RS422 serial. The standard list of RS422 commands which are translated
are listed below:
STOP
PLAY
PAUSE
REVIEW
EJECT
SLOW FORWARD(.2X)
SLOW BACKWARD(.2X)
FAST FORWARD(10X)
FAST REWIND(10X)
CUE
STEP FORWARD
STEP BACKWARD
RECORD(EDIT)
RECORD PAUSE
- Page 7 800-898-0759 • 845-339-9555 • 2000 Sterling Road • Mount Marion, NY 12456 • www.lairdtelemedia.com
LTM-6000D
ALL FORMAT TRANSCODER
Time Code
The LTM-6000D will read and decode the time code stream from the RS422 data. Both LTC and VITC time code can be read, as well as, interpolated between
both formats. An asterisk will display on the lower right corner of the LCD panel that confirms that Time Code is being read and processed.
RS232 Commands
A 9pin D-Sub port is provided for two functions. The first is the provision for system upgrades and firmware debugging. The LTM-6000D is designed with
the very latest in on-board programmable software technology that allows updates, changes and re-programming via the RS232 port without having to open
the device. This gives the product high field reliability and serviceability by reducing the need to return the unit to the manufacturer for compatibility upgrades
and improvements.
The RS232 port is also used to remotely control the LTM-6000D and provide signal processing (PROC-AMP) features. The RS232 port uses standard 9pin
computer serial cables and can be operated up to 100 feet with proper shielded serial cable. The control software runs in Windows and can be downloaded
free of charge from the LAIRD website.
Stand-Along Signal Transcoding Operations
The LTM-6000D is designed around a highly advanced signal-processing block of technology. Utilizing the latest in firmware-based semi-conductors, the LTM6000D is built to perform as a stand-alone signal processor and converter for analog and digital signals. There is no need to connect a DV signal or device to
convert between SDI/AES and analog. The product is designed to output all formats once a particular format has been selected as the input signal. We refer
to this as FULL-TIME CONVERSION. For example: If you choose to convert SDI and AES/EBU signals to component, then the LTM-6000D will also output
Composite, YC, and Balanced Audio as well. The LTM-6000D will provide IEEE1394 (FireWire) bidirectional conversion in addition to all digital and analog format conversion functions.
Menu Navigation
Now that you are familiar with all the features and operational scenarios that are possible with the LTM-6000D, it is time to study and learn to navigate the
MENU. Power-up your product and first study and use the menu to get familiar with its operation. It not required that you connect any equipment to the product in order to practice the menus.
The Menu Buttons
The four buttons located below the LCD menu display are used to navigate through the menu and adjust the
settings of the LTM-6000D. This system has been designed to work very similar to a computer style menu.
Before trying the menu buttons it is advisable that you carefully study the MENU TREE pages in this manual. It is important to know all the very various settings that the 6000D allows the user-operator to control
in the setup of the LTM-6000D into a system.
BACK: Used to Back Out of a selection. This button will return you back to the previous level. If you have
decided to not engage a function, this button will “back” you out of it.
NEXT: Used to advance to the next menu function level. The UP and DOWN buttons are used in conjunction with this button and act as a cursor to navigate the menu choices. Once you have arrived at a menu
function choice, the NEXT button must be pressed again to SAVE the selected choice. Failure to press the
NEXT button the second time (after the DOWN-UP buttons) will result in the function not being saved and
you will be advanced to the next level of functions.
DOWN-UP: Used in conjunction with the NEXT button this button will advance your menu choices “down”
the tree of functions for the main function selected by the NEXT button. If you pass a selection, simply press
the UP button to move back to that function that was selected previously.
This manual provides a MENU graphic which shows in detail the entire menu entries and selections. It has been designed to
make it easy to understand the flexibility of the LTM-6000D. Study this graphic with the unit powered up and try the functions.
You will soon see how easy it is to use LTM-6000D.
- Page 8 800-898-0759 • 845-339-9555 • 2000 Sterling Road • Mount Marion, NY 12456 • www.lairdtelemedia.com
LTM-6000D
ALL FORMAT TRANSCODER
DECODE
MODE MENU
[NEXT] TO ENTER
[UP]
[DOWN]
Analog Audio
Out
[UP]
[DOWN]
[UP] / [DOWN]
OdB
to
-63dB
LTM-6000 D
Press Back / Next
[BACK] / [NEXT]
[NEXT] TO ENTER
To End
of Menu
Mode
[UP] / [DOWN]
Decode
or
Encode
ENCODE
MODE MENU
[NEXT] TO ENTER
[DOWN]
[UP]
Video
Input
[UP]
[DOWN]
[UP] / [DOWN]
CVDS
or
Y/C
or
Y Pb Pr (Y/U/V)
or
SD, SMPTE259M-C
- Page 9 800-898-0759 • 845-339-9555 • 2000 Sterling Road • Mount Marion, NY 12456 • www.lairdtelemedia.com
LTM-6000D
ALL FORMAT TRANSCODER
[NEXT] TO ENTER
Video
System
[UP] / [DOWN]
NTSC
or
PAL
[NEXT] TO ENTER
[UP] / [DOWN]
Balanced
[UP]
[DOWN]
Audio
Rate
or
32kHz / 12 bit
[UP]
[DOWN]
or
[NEXT] TO ENTER
[UP]
[DOWN]
Analog Audio
Out
[UP] / [DOWN]
OdB
to
-63dB
Subcarrier
Phase Offset
[UP] / [DOWN]
Ph: 0
to
Ph: 255
Off
[UP] / [DOWN]
48kHz / 16 bit
or
Studio
Genlock
[UP] / [DOWN]
On
[NEXT] TO ENTER
AES/EBU
ENCODE
[UP]
[DOWN]
[UP] / [DOWN]
DV / DV CAM
or
DVC Pro-25
DECODE
Audio
Input
DV
System
[NEXT] TO ENTER
[NEXT] TO ENTER
[NEXT] TO ENTER
[UP]
[DOWN]
This option appears
only when Studio
Genlock is ON
[NEXT] TO ENTER
[UP]
[DOWN]
Video
System
[UP] / [DOWN]
NTSC
or
PAL
- Page 10 800-898-0759 • 845-339-9555 • 2000 Sterling Road • Mount Marion, NY 12456 • www.lairdtelemedia.com
LTM-6000D
ALL FORMAT TRANSCODER
[NEXT] TO ENTER
Horizontal
Offset / Pixel
These options appear
only when Studio
Genlock is ON
[UP]
[DOWN]
[NEXT] TO ENTER
[NEXT] TO ENTER
Vertical Offset /
Lines
Output
Timecode
[UP]
[DOWN]
[UP] / [DOWN]
VO: 0
to
VO: 7
[UP] / [DOWN]
HO: -127
to
HO: 128
This option appears
only when Output
Timecode is ON
[NEXT] TO ENTER
[UP]
[DOWN]
VITC
Line Number
[UP] / [DOWN]
13 / 15
or
16 / 18
or
20 / 22
[UP] / [DOWN]
On
or
Off
DECODE
These options appear
only when Studio
Genlock is ON
[UP]
[DOWN]
ENCODE
DV
System
[UP] / [DOWN]
DV / DV CAM
or
DVC Pro-25
[NEXT] TO ENTER
[NEXT] TO ENTER
[NEXT] TO ENTER
[UP]
[DOWN]
Studio
Genlock
[UP]
[DOWN]
[UP] / [DOWN]
On
or
Off
Subcarrier
Phase Offset
[UP] / [DOWN]
Ph: 0
to
Ph: 255
[NEXT] TO ENTER
[UP]
[DOWN]
Horizontal
Offset / Pixel
[UP] / [DOWN]
HO: -127
to
HO: 128
- Page 11 800-898-0759 • 845-339-9555 • 2000 Sterling Road • Mount Marion, NY 12456 • www.lairdtelemedia.com
LTM-6000D
ALL FORMAT TRANSCODER
These options appear
only when Output
Timecode is ON
[NEXT] TO ENTER
Frame
Offset
[UP]
[DOWN]
DECODE
[UP] / [DOWN]
Offset: -4
to
Offset: +4
[NEXT] TO ENTER
Vertical Offset /
Lines
ENCODE
[UP] / [DOWN]
VO: 0
to
VO: 7
Time Code
Display
[UP]
[DOWN]
DISPLAYS THE
CURRENT
TIME CODE
ON THE LCD
This option appears
only when Studio
Genlock is ON
[UP]
[DOWN]
[NEXT] TO ENTER
[NEXT] TO ENTER
[UP]
[DOWN]
Input
Time Code
[UP] / [DOWN]
Yes
On Screen
Display
[UP]
[DOWN]
Drop
Frame
[UP] / [DOWN]
Yes
or
or
No
No
This option appears
only when Input
Timecode is ON
[NEXT] TO ENTER
[UP]
[DOWN]
Time
Code Type
[NEXT] TO ENTER
[UP] / [DOWN]
LTC
or
or
VITC
No
[NEXT] TO ENTER
[UP] / [DOWN]
Yes
[NEXT] TO ENTER
[UP]
[DOWN]
NTSC ONLY
or
RS-422
[NEXT]
VITC
Code Type
[UP] / [DOWN]
CVBS
or
Y/C
or
Y/U/V
or
External
- Page 12 800-898-0759 • 845-339-9555 • 2000 Sterling Road • Mount Marion, NY 12456 • www.lairdtelemedia.com
LTM-6000D
ALL FORMAT TRANSCODER
WARNING:
ALL USER SETTINGS
WILL BE LOST!
[NEXT] TO ENTER
LCD
Backlight
[NEXT] TO ENTER
Factory
Reset
[UP]
[DOWN]
[UP]
ARE YOU SURE?
Press any button other
than NEXT to Exit
[UP] / [DOWN]
On
or
Off
To Start
of Menu
DECODE
[NEXT] TO ENTER
Frame
Offset
[UP] / [DOWN]
Offset: -4
to
Offset: +4
ENCODE
These options appear
only when Input
Timecode is ON
[NEXT] TO ENTER
[NEXT] TO ENTER
[UP]
[DOWN]
Time
Code Display
[UP] / [DOWN]
DISPLAYS THE CURRENT
TIME CODE
ON THE LCD
WARNING:
ALL USER SETTINGS
WILL BE LOST!
[UP]
[DOWN]
LCD
Backlight
[UP] / [DOWN]
On
or
[NEXT] TO ENTER
[UP]
[DOWN]
Factory
Reset
[UP]
ARE YOU SURE?
Press any button other
than NEXT to Exit
Off
- Page 13 800-898-0759 • 845-339-9555 • 2000 Sterling Road • Mount Marion, NY 12456 • www.lairdtelemedia.com
LTM-6000D
ALL FORMAT TRANSCODER
SYSTEM APPLICATION DRAWINGS
DV TO ANALOG CONNECTIONS
DV I/O
Studio Reference (CVBS)
ANALOG TO DV CONNECTIONS
Balanced Audio CH 1
Balanced Audio CH 2
Component (YUV) Video
TimeCode
DV I/O
Balanced Audio CH 1
Balanced Audio CH 2
Component (YUV) Video
TimeCode
USING THE LTM-6000D WITH OTHER ROUTING EQUIPMENT
The LTM-6000D provides a professional transcoding interface for the demanding multimedia environment of modern
telecommunications facilities. Indicated below are a few application diagrams, which display the flexible and cost effective use of the LTM-6000D with other Laird products and various studio and production equipment.
Studio Reference (CVBS)
USING MULTIPLE SOURCES WITH THE LTM-6000D
DV I/O
Audio
YUV Video
Studio Reference (CVBS)
- Page 14 800-898-0759 • 845-339-9555 • 2000 Sterling Road • Mount Marion, NY 12456 • www.lairdtelemedia.com
LTM-6000D
ALL FORMAT TRANSCODER
Using The LTM-6000D with Avid Xpress DV 3.5.4
Note: Please be aware that this list has been compiled based on lab testing and user Feedback. It is not a document created by AVID or any official channel related to AVID TECHNOLOGIES.
1. Before starting the AVID application, the LTM-6000D should be set to its working settings, like
Encode/Decode Mode or DVCam/DVCPro-25.
2. Switching the LTM-6000D On and Off while the AVID XPress DV application is running should be avoided
as this can corrupt the driver and the connection integrity may be compromised.
3. Do Not switch between DVCam and DVCPro in Pal while the Xpress DV application is open.
4. Digital Cut: AVID XPress DV does not allow mixed clips coming from DVCam or DVCPro in one project, it
comes up with an error message.
5. When controlling a VTR through RS-422 directly from AVID via a serial cable connected to the PC/MAC, the
Firewire Control in the Deck Configuration MUST be disabled (deleting the Deck on the Firewire OHCI channel). The Conversion direction must be set manually directly at the converter. This must also be done, when
using no deck control. Failure to do this will result in AVID changing the DECODE and ENCODE mode on
the LTM-6000D.
6. During digital cut or previewing clips in the bin, the record Window must be closed. Otherwise AVID
XPress DV tries to switch the device on the firewire port that is not available, this causes a delay from up to
5 seconds before the playback starts.
7. The desktop play delay should be set to 13-15 frames for Pal, depending on the speed of the computer.
8. Be certain to check in the Audio Tools of AVID XPress DV the direction of the Audio channels. During
Record there must be an input and during Preview or Digital Cut there must be an output.
Using The LTM-6000D with Final Cut Pro HD Version 4.5
When using the LTM-6000D with Final Cut Pro HD Version 4.x, you must set the LTM-6000 OS setting to WINXP/98
rather than the instructed DV Deck setting when using Final Cut Pro Version 3.x.
TECHNICAL SUPPORT
For current support issues and answers to common questions, please visit the Laird support website at:
http://www.laird-support.com or call: 800-898-0759
- Page 15 800-898-0759 • 845-339-9555 • 2000 Sterling Road • Mount Marion, NY 12456 • www.lairdtelemedia.com
LTM-6000D
ALL FORMAT TRANSCODER
Safety Precautions
1. To prevent fire or shock hazard, do not expose this equipment to the environment of Humidity
and/or dust. Do not use this equipment in an unprotected outdoor installation or any area classified as a wet area.
2. The operating temperature of this product must be kept between -40°C and +95°C. Direct sunlight or an intense source of heat, direct or ambient, must not be introduced to the product either
by induction or contact.
3. Always keep the product on a stable and secure base or enclosure. Do not drop the product or
subject it to sudden heavy impact.
4. Provide adequate ventilation so that thermal characteristics do not cause an increase in product
temperature to resulting in overheating.
5. Do not clean the unit by using electrically conductive or corrosive chemicals. Always be certain
to unplug the unit from AC wall power before any major cleaning. Use a damp cloth only for
cleaning.
6. Do not subject the product to electrical mains power over voltage: The product must be used at
the rated supply voltages indicated on the product rear panel only.
7. Do not plug the product into an overloaded electrical outlet. This may result in fire or electrical
shock.
8. Object Ingress and Liquid Entry: Never insert or push sharp metal objects into the product or use
such devices for an attempt at opening or servicing the product. Servicing should be referred to a
trained and qualified technician only. Do not allow liquid of any type to enter the unit. Do not allow
the unit to be submersed in water as this may cause a shock hazard.
9. A trained qualified technician should perform all servicing of the unit. There are no serviceable
components within the unit for user access.
CE
All Laird Products are Manufactured in the USA by Laird Telemedia, Mount Marion, NY
FireWire, Apple and G4 are registered Trademarks of Apple Computer, Inc.
- Page 16 800-898-0759 • 845-339-9555 • 2000 Sterling Road • Mount Marion, NY 12456 • www.lairdtelemedia.com
LTM-6000D
ALL FORMAT TRANSCODER
NOTES
- Page 17 800-898-0759 • 845-339-9555 • 2000 Sterling Road • Mount Marion, NY 12456 • www.lairdtelemedia.com
2000 Sterling Road • Box 720
Mount Marion, NY 12456
800-898-0759 • 845-339-9555
Fax: 845-339-0231
www.lairdtelemedia.com