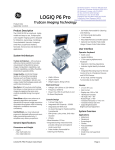
1
GE Healthcare
Quick Card
LOGIQ® e
Control Panel
1
15
2
14
6
7
13
5
3
9
4
12
10
11
8
LOGIQ e Quick Card
The Quick Card is a quick reference to operation. Please refer to Basic User Manual for detailed information.
2
1. Power
9. Depth/Zoom/Ellipse
2. Time Gain Compensation (TGC)
10. Start/Stop:
3. Patient
•SplitScreenLeft/Right
•Easy3DControls
•LOGIQview
4. Mode/Gain/Auto Optimize Keys:
•M-Mode(M)
•PulsedWaveDoppler
Mode(PW)
•ColorFlowMode(CF)
•B-Mode(B)
5. Steer/B-Steer+/Harmonics/PDI
11.Freeze
12. Programmable Print Keys
13. Utility
14. Alphanumeric Keyboard:
•UsetheKeyboardtoenter
patient information and
annotations
•FunctionKeys
6. Preset Key
7. End Exam
8. Imaging/Measurement Key:
•Cursor
•Clear
15.SoftKeyRotaryDial/Menu
Select Keys
•BodyMark
•Measure
•M/DCursor
•ScanArea
•Set/Pause
3
LOGIQ e Quick Card
The Quick Card is a quick reference to operation. Please refer to Basic User Manual for detailed information.
Scanning
Connecting the Probe
1. Handling the probe carefully, slide the connector straight into the port.
2. Lift the probe latch up into place.
Entering Patient Data
1. Press the Patient key [3].
2. EnterthepatientIDandName,a patient ID must be entered
in order to store your images—the system can be programmed
toautomaticallygeneratePatientID(utility>connectivity>select
Automatic generation of patient ID>save).
3. Exit the patient page by selecting Exit or pressing the B [4] or Freeze
[11] keys.
Selecting a Preset
1. Press the Preset key [6].
2. Use the pointer arrow to select the exam type that you will
be performing.
3. Press the Set key [8]. The system will go to the scan screen after
the preset is selected.
Measurements
1. Press the Measurement key [8]. A caliper will appear on the screen.
2. Place a caliper in the appropriate position and press the Set key.
LOGIQ e Quick Card
The Quick Card is a quick reference to operation. Please refer to Basic User Manual for detailed information.
4
3. A second caliper will appear.
4. Place the second caliper in the appropriate position and press Set.
A measurement box appears with the generic measurement
thatyouhavejustcompleted.Ifyouwantthemeasurementtobe
labeled with the name of the anatomy being scanned, begin the
measurement process by pressing the measurement key, choosing
theanatomyandlocationfromthelistprovidedonthelefthand
side or bottom of the image monitor.
5. A new caliper may appear for the next measurement. If
measurements are complete, press the Clear key [8] or Freeze
to exit the measurement function.
Annotating an Image
1. To add text to an image:
a. Begin typing on the keyboard; if a word appears, press the
Tab key on the keyboard to type the offered word (type and
tab feature).
b. Press the comment key (space bar) and type the desired word(s).
c. Press the Comment key and choose a word from the Comments
list with the pointer arrow and press the Set key.
2. To set the text on the screen, place the cursor in the desired location,
type the desired word(s) and press Set. Set text is yellow.
3. T oeditormovesettext,reselectthetextwiththecursor.Editable
text is green.
5
LOGIQ e Quick Card
The Quick Card is a quick reference to operation. Please refer to Basic User Manual for detailed information.
Color Flow
1. Press the CF key [4].
2. ThecolorboxappearsovertheB-Modeimage.
3. Usethetrackballtomovethecolorbox.
4. Press Scan Area key [8] once to size the color box and press once
moretomovethecolorbox.
Power Doppler Imaging
5. Press the PDI key [5].
6. ThecolorboxappearsovertheB-Modeimage.
7. Usethetrackballtomovethecolorbox.
8. Press the Scan Area key once to size the color box and press once
moretomovethecolorbox.
Pulsed Wave Doppler
1. Press the PW key [4].
2. TheDopplergateandB-ModeimageappearabovethePulsedWave
Dopplerspectraldisplay.
3. UsethetrackballtomovetheDopplergate.
4. Press Freeze and Measure to complete calculations.
LOGIQ e Quick Card
The Quick Card is a quick reference to operation. Please refer to Basic User Manual for detailed information.
6
Split Screen
1. Press the Start (L) key [10] to display the left side of the
imageasactive.
2. Press the Stop (R) key [10]. The left side of the screen will
befrozenandtherightsidewillbeactive.
3. Toggle between (L) and (R) to obtain the desired images
and then press Freeze.
4. Press both (L) and (R) keys at the same time; the image will
beliveonbothsidesofthescreen.
Print Keys (Default Settings)
1. Press P1tostoreimagestotheharddrive.
2. Press P2 to print images on the thermal paper printer.
3. Press P3tostoreimagesdirectlytoaUSBdrive/memory
stick or network.
End Exam
1. Press the Patient key [3].
2. Select New Patient.
3. Select Store All from the Unsaved Exam Data menu.
4. You are ready to begin the next exam.
7
LOGIQ e Quick Card
The Quick Card is a quick reference to operation. Please refer to Basic User Manual for detailed information.
B-ModeOptimization
Focus
Increasesordecreasesthenumberoffocalzonesormovesthefocal
zone(s) to the area of interest. Multiple focal zones can slow the frame
rate. Ensure that focal zones are centered to the anatomy of interest.
Benefit: Optimizes the image by increasing resolution for specific area.
Range Focus
Providesafocalzoneinthenearfield.
Benefit: Improves near field imaging, decreases vessel fill-in,
increases contrast and detail resolution, and provides
optimal imaging.
Auto Optimize
Optimizestheimagebasedonaspecificregionofinterestoranatomy
withintheB-Modeimage.
Benefit: Automatically optimizes the image based on specific anatomy.
LOGIQ e Quick Card
The Quick Card is a quick reference to operation. Please refer to Basic User Manual for detailed information.
8
Gray Maps
Varies the appearance of the shades of gray from black to white. Gray
Maps gradually change from the least amount of contrast or softest
appearing image to the greatest amount of contrast (most black and
whiteimage).ClearMapsprovideamoretransparentappearance.Ifyou
change the gray map you may need to change dynamic range, gain,
etc., to obtain the image appearance that you want.
Benefit: Optimizes the grayscale of the anatomy being visualized.
CrossXBeam
Combines three or more frames from different angles into
a single frame.
Benefit: Improved border definition, continuous boundaries
and interfaces, reduced speckle and “noise.”
Speckle Reduction Imaging
An embedded, adapted algorithm to reduce the unwanted effects
of speckle in the ultrasound image.
Benefit: Smoothes the image and reduces “noise.”
9
LOGIQ e Quick Card
The Quick Card is a quick reference to operation. Please refer to Basic User Manual for detailed information.
WeeklyCleaningMaintenance
The system requires weekly cleaning maintenance to function safely
and properly. Turn off system power before cleaning any part of the
system. If possible, disconnect the power source.
Note: Failure to perform required maintenance may result
in unnecessary service calls.
System Care and Maintenance
Moistenasoft,non-abrasivefoldedclothandwipedownthesystem
cabinet on all sides.
Note: Do not spray any liquid directly into the unit.
LCD Monitor
Use a soft, folded cloth to gently wipe the monitor face.
DoNOTuseaglasscleanerthathasahydrocarbonbase(suchas
Benzene, Methyl Alcohol or Methyl Ethyl Ketone) on monitors with
thefilter(anti-glarescreen).
Hardrubbingwillalsodamagethefilter.
Note: When cleaning the screen, make sure not to scratch the LCD.
LOGIQ e Quick Card
The Quick Card is a quick reference to operation. Please refer to Basic User Manual for detailed information.
10
Operator Controls
• Moistenasoft,non-abrasivefoldedclothwithamild,general
purpose,non-abrasivesoapandwatersolutionandwipedown
the operator control panel.
• Useacottonswabtocleanaroundthekeysorcontrols.
Useatoothpicktoremovesolidsbetweenkeysandcontrols.
Note: When cleaning the operator control panel, make sure not
to spill or spray any liquid on the controls, into the system cabinet,
or in the probe connection receptacle.
Note: In case of SARS, use bleach, alcohol, or Cidex in a normal
diluted form for cleaning/disinfecting the operator control panel.
Note: DO NOT use T-Spray or Sani-Wipes on the operator
control panel.
Printer
• Wipetheexternalsurfacesoftheunitwithasoft,clean,drycloth.
• Removestubbornstainswithaclothlightlydampenedwithamild
detergent solution.
Note: Never use strong solvents, such as a thinner or benzene, or
abrasive cleaners because they will damage the cabinet. No further
maintenance, such as lubrication, is needed.
To clean the surface of the print head:
Runthecleaningsheet(providedwiththeprinter)throughtheprinter.
11
LOGIQ e Quick Card
The Quick Card is a quick reference to operation. Please refer to Basic User Manual for detailed information.
Footswitch
• Moistenasoft,non-abrasivefoldedclothwithamild,general
purpose,non-abrasivesoapandwatersolution.
• Wipetheexternalsurfacesoftheunitthendrywithasoft,
clean cloth.
LOGIQ e Quick Card
The Quick Card is a quick reference to operation. Please refer to Basic User Manual for detailed information.
12
Parker Laborotary Inc.
Sonogel Vertriebs GmbH
Parker Laborotary Inc.
OK
OK
OK
OK
OK
4C-RS
OK
OK
OK
8C-RS
OK
OK
OK
OK
E8C-RS
OK
OK
OK
OK
OK
OK
OK
8L-RS
OK
OK
OK
OK
9L-RS
12L-RS
OK
OK
16L-RS
OK
OK
OK
i12L-RS
OK
OK
OK
OK
OK
OK
3S-RS
OK
OK
OK
OK
OK
OK
6S-RS
OK
OK
OK
i739-RS
t739-RS
-
-
-
-
-
-
4C-SC
4C-SC
Sonotech Inc.
OK
OK
LOGIQe Transducer Care
Aquasonics 100
Scan
Sonogel
Tyco/Healthcare
National Therapy Products Inc.
OK
OK
OK
< 20 minutes
< 30 minutes
OK
OK
< 30 minutes
OK
< 20 minutes
< 30 minutes
OK
OK
OK
OK
OK
OK
OK
OK
OK
OK
OK
OK
OK
OK
OK
OK
OK
OK
OK
< 25 minutes
< 15 minutes
< 50 minutes
< 15 minutes
OK
OK
< 30 minutes
OK
OK
OK
OK
OK
< 15 minutes
OK
OK
OK
< 30 minutes
< 20 minutes
OK
OK
OK
OK
OK
OK
OK
OK
OK
OK
OK
OK
OK
OK
Clear Image
Pharmaceutical Innovations
Wuxi Huali Industrial Company
OK
-
Kendall
Wavelength
Haiyin
OK
OK
T-Spray
OK
OK
OK
OK
OK
OK
OK
OK
OK
Pharmaceutical Innovations
Parker Laborotary Inc.
OK
OK
OK
OK
OK
T-Spray II
Transeptic Spray
Parker Laborotary Inc.
OK
OK
OK
OK
OK
Protex
Ecolab Inc.
OK
OK
OK
OK
OK
OK
Asepti-wipes II
Metrex
OK
OK
Septiwipes
PDI
OK
OK
OK
CaviWipes
Dr.Schumacher GmbH
OK
OK
Antec International
OK
OK
Cleanisept wipes
OK
OK
Sani-Cloth HB
Johnson & Johnson
OK
OK
OK
OK
OK
OK
OK
OK
< 30 minutes
< 30 minutes
OK
PeraSafe
Johnson & Johnson
Johnson & Johnson
OK
Dr.Schumacher GmbH
OK
OK
Cidex Plus
Cidex
Cidex OPA
OK
< 30 minutes
< 20 minutes
< 10 minutes
< 50 minutes
OK
OK
< 50 minutes
< 50 minutes
OK
OK
OK
OK
Schülke & Mayr
OK
Schülke & Mayr
OK
Gigasept AF
Gigasept FF
OK
OK
OK
< 15 minutes
OK
OK
Schülke & Mayr
OK
Regent Medical
OK
Hibitane
OK
OK
Gigasept FF neu
OK
OK
OK
OK
Metrex
OK
OK
OK
OK
Metrex
OK
OK
OK
OK
OK
OK
OK
OK
OK
OK
OK
MCC
Metrex
Ecolab Inc.
OK
Metricide 14
Metricide OPA Plus
MetriZyme
Ster Bac Blu
OK
Wavicide-01
http://www.gehealthcare.com/rad/us/probe_care.html
http://www.gehealthcare.com/rad/us/probe_care.html
LOGIQ e Quick Card
13
The Quick Card is a quick reference to operation. Please refer to Basic User Manual for detailed information.
TEE Probe Care Card (6T/6T-RS/6Tc/6Tc-RS/6Tv/9T/9T-RS)
LOGIQ e Quick Card
The Quick Card is a quick reference to operation. Please refer to Basic User Manual for detailed information.
14
15
LOGIQ e Quick Card
The Quick Card is a quick reference to operation. Please refer to Basic User Manual for detailed information.
©2011GeneralElectricCompany–Allrightsreserved.
GeneralElectricCompanyreservestherighttomakechanges
inspecificationsandfeaturesshownherein,ordiscontinue
the product described at any time without notice or obligation.
GE, GE Monogram, and LOGIQ are trademarks
of General Electric Company.
GEMedicalSystemsUltrasound&PrimaryCareDiagnostics,LLC,
a General Electric Company, doing business as GE Healthcare.
Europe
GE Healthcare
Beethovenstr.239
D-42655Solingen
T 49 212 2802 0
F49212280228
Asia
GE Healthcare Clinical
Systems ASIA
1105-1108MaxdoCenter
8XingYiRoad,Shanghai
200336
T 86 21 5257 4640
F862152080582
FormoreinformationcontactyourGERepresentativeat
8885265144orvisitusatwww.gehealthcare.com/ultrasound
GE Healthcare
9900InnovationDrive
Wauwatosa,WI53226
U.S.A.
www.gehealthcare.com
imagination at work
ULTP-0135-01.11-EN-US