1
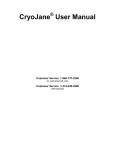
®
CryoJane User Manual
Customer Service 1-800-237-2772
(In continental US only)
Customer Service 1-201-343-1313
(International)
Instrumedics grants the purchaser of the CryoJane system
the rights to use the patented CryoJane (CFSA) materials
and process.
Patent # 4,545 831
2
CRYOJANE TAPE-TRANSFER
STEP-BY-STEP
INSTALLATION INSTRUCTIONS
The following items are required for installation:
Absolute Alcohol
1600 Watt Hair Dryer
Gauze
Gloves
01 Remove release paper
from ECU
02 Place ECU on top left
corner of cryostat
03 Using absolute alcohol and gauze
clean chamber wall
04 Heat left wall for Mech &
Oil Bath placement
05 Place Oil Bath towards the
rear of the left chamber wall
06 Route Oil Bath & Mech Cables
underneath Mech
*07 Place Mech in Chamber.
Place Mech low in chamber
near the front wall.
(Placement near the freeze
bar is ideal in most cryostats)
08 Route cables in door bar
09 Place door bar with cables
onto front chamber ledge.
If required attach Door Bar Support Strip
underneath door bar
3
10 Adhere Cable holders
along cryostat top outer wall
11 ECU Rear with Cable &
Power Connectors
12 Connect Mech, Oil Bath Cables to
ECU
& Power cord to the ECU and wall outlet
Turn the ECU on
13 Mech Cable
connected to ECU
14 External-Installation
Complete
Cryo-Vac Shown
15 Internal-Installation Complete
Cryo-Vac Shown
*The standard CryoJane Mech installation is shown in Fig. 07.
The Hacker/Bright OTF and Microm HM 560 cryostats require an S-Plate
Mech and separate mounting plate for installation.
S-Plate Mech for Hacker OTF and Microm HM 560 Cryostats
Mounting Plate locks onto S-Plate Mech.
Slide Nest Entrance
The entire assembly is adhered to the left cryostat wall as shown in Fig. 07.
Note:
The S-Plate Mech must have enough clearance from the front wall of the
cryostat for slides to enter the Slide Nest.
4
Table of Contents
Instrumedics Frozen Section Process Overview ……………
7
Freezing Process …………………………………………………………. 7
CryoJane Process ………………………………………………………… 7
CryoJane System Components ……………………………………..
8
CryoJane ECU …………………………………………………………….
9
CryoJane Mech Components ……………………………………….
10
CryoJane Operating Procedure ……………………………………
11
Background ………………………………………………………………. 11
Preparation ……………………………………………………………….. 11
Use ……………………………………………………………………….. 12
Steps for a Single Section ………………………………………… 12
Steps for Multiple Sections ………………………………………. 18
Summary of the Instrumedics Frozen Sectioning Process .
19
Special Fixation … … … … … … … … … … … … … … … … … … … … … …
20
Aqueous Fixation …… ………………………………………………….. 20
“Anhydrous” Fixation …………………………………………………….. 21
CryoJane Maintenance ………………………………………………..
22
ECU ……………………………………………………………………… 22
5
Mech …………………………………………………………………….. 22
Troubleshooting Guide … … … … … … … … … … … … … … … 23
Troubleshooting the Mech and ECU …………………………………….. 23
CryoJane Process Troubleshooting ………………………………………. 25
Troubleshooting Finished Slides …………………………………………. 27
Oil Bath Accessories Kit Components …………………………..
29
Oil Bath Accessory Kit Operating Procedure ……………….
30
Background ……………………………………………………………… 30
Preparation ………………………………………………………………. 30
Use ………………………………………………………………………
Storing a Tissue Block …………………………………………..
Sectioning a Stored Tissue Block ……………………………….
Oil Bath Accessory Kit Troubleshooting Guide …………..
6
31
31
31
32
Instrumedics Frozen Section Process Overview
Freezing Process - Conventional Freezing vs. Snap Freezing
In the conventional freezing method, the tissue is typically frozen at about -30°C. During
this relatively slow freezing process, the ice crystals that form are usually large compared
to cellular dimensions. These crystals can cause considerable displacement and structural
damage to the tissue.
The Gentle Jane device is designed to snap-freeze the tissue in approximately 8 - 10
seconds. The freezing agent can be liquid nitrogen, LN2 chilled isopentane, dry ice or a
thermoelectric cooler (Peltier device). The temperature at which the tissue is frozen
should be - 60°C or colder.
NOTE: Gentle Jane Snap-Freezing methods are described in a separate SnapFreezing User Manual.
CryoJane Process
The CryoJane process is built around three special methodologies:
1. The capture of an undistorted, thin, snap-frozen section on a special cold adhesive
tape.
2. The lamination of the captured section onto a cold glass microscope slide coated with
an ultraviolet light curable pressure sensitive adhesive.
3. The curing of the adhesive on the slide with an 8 millisecond ultraviolet flash, and the
subsequent removal of the adhesive tape, leaving a still frozen section firmly adhered
to the microscope slide.
The CryoJane system is designed to permit the facile application of these methodologies,
and can be adapted to virtually all model cryostats.
7
CryoJane System Components
FIGURE 1. CryoJane System Components
1. Mechanism (Mech). See CRYOJANE MECH COMPONENTS for details.
2. Electronics Control Unit (ECU). See CRYOJANE ECU for details.
3. ½ inch diameter Mech Cable (connected to the Mech)
4. Door Channel
5. 3 Shelf Unit
6. Hand Roller
7. Adhesive Coated Slides
8. Tape Windows
9. Knife Facet Wipers
10. AC Power Cord (not shown)
OPTIONAL EQUIPMENT:
11. Protective Oil Accessories Kit
(see Oil Bath Accessories Kit sections in this manual)
12. Cryo-Vac-Away System
8
(see Cryo-Vac-Away User Manual)
CryoJane ECU
1
5
7
2
4
3
6
Figure 3. CryoJane ECU - front and right side
Figure 2. CryoJane ECU - back
1. On/Off Switch
2. Pad LED
3. Power LED (or Bath LED if optional Oil Bath Accessory Kit is installed).
4. Flash/Pad Connector
5. Optional Oil Bath Connector
6. Fuses
7. AC Power Cord Connector
9
CryoJane Mech Components
FIGURE 4. CryoJane Mech Components
1. Blue Pad
2. Stainless Steel Spring Clip
3. Black Knob
4. Flash Tray
5. Lid
10
CryoJane Operating Procedure
Background
In conventional sectioning the operator usually guides the cut section over the knife using
a brush or an anti-roll device. Even with a skillful, steady hand, this step can be difficult,
especially if a 2 to 4 micron thick section is desired.
To mount the section, a room-temperature slide is touched to it. When contact is made
between the warm slide and the frozen section, instantaneous melting of the section
occurs, converting the ice crystals back into water. Surface tension causes the melted
section to adhere to the slide. When the ice melts, water fills the spaces formerly
occupied by the ice crystals, rehydrating the nucleoplasm and cytoplasm, causing
erythrocytes to lyse and soluble substances to be displaced. Flow of the melted solutions
can distort and displace fine structure. Often the melted section is then dried, during
which step, surface tension forces further distort, displace and collapse tissue structure.
Pathologists and clinicians have been trained to recognize normal and abnormal structure
against this background of degraded fine structure.
In contrast, the CryoJane process is designed specifically to avoid melting and air drying
and its associated artifacts. It uses a cold adhesive tape to support and capture the section
during the cutting step. The unthawed section on the tape is then transferred to a special
cold adhesive-coated slide. The section is not melted in the mounting step. The
adhesive coating on the slide is then polymerized, and the tape is peeled away, leaving the
section permanently anchored to the slide while still frozen.
Preparation
•
•
•
A day’s supply of Adhesive Coated Slides and Tape Windows should be in the
cryostat, chilled and ready for use.
The cryostat temperature should be -25°C to -30°C (depending on the cryostat
model).
The Pad light (left LED) on the ECU should be green.
11
•
The right LED should be red if it is labeled Power and green if it is labeled Oil Bath.
Use
Once a tissue specimen has been frozen and mounted in the microtome chuck, follow the
procedure outlined below.
Steps for a Single Section:
1. If the Cryo-Vac-Away is installed,
position the collection nozzle at the
knife edge and step on the foot switch
to automatically remove debris during
the trimming sequence. If the CryoNozzle
Vac-Away is not installed, trim the
block to the desired depth to obtain a
full block face and remove the debris
from the knife. Set the micrometer for
the desired section thickness and cut
two or three sections to be sure a full Figure 5. Block trimming and debris removal.
section will be cut.
2. Take a pre-cooled, pouched, Adhesive
Coated Slide, and while holding it
inside the cryostat chamber, remove
the glass slide from the pouch.
Figure 6. Adhesive coated slide in pouch.
.
12
3. Holding the Slide at the frosted end,
rapidly peel off the protective mylar
film which covers the adhesive and
discard it.
Figure 7. Peeling mylar from adhesive coated
slide.
4. Place the Coated Slide, adhesive-sideup, on the Blue Pad of the Mech by
slipping the frosted end of the slide
under the stainless steel Spring Clip.
Figure 8. Adhesive Coated Slide on Blue Pad.
5. Inside the cryostat, pick up a pink Tape
and peel away the protective film
covering the adhesive window. Discard
the protective film.
Figure 9. Exposing the Tape window.
13
6. Hold the Tape up by the narrow tab
with the adhesive side towards the
block face. Position the Tape in front of
the trimmed block so that the bottom
edge of the exposed adhesive is aligned
with the bottom edge of the block.
Place the Tape on the block face
making sure that the bottom wider tab
of the Tape overhangs the knife. NO
PORTION OF THE ADHESIVE
WINDOW SHOULD OVERHANG
THE BLOCK FACE.
TO
AVOID
MELTING
THE
SURFACE OF THE TISSUE DO
NOT TOUCH THE PORTION OF
THE TAPE THAT COVERS THE
BLOCK FACE.
Figure 10. Placing Tape on block face.
7. Using the cold Hand Roller, laminate
the Tape to the face of the block by
moving the Roller up and down one to
two times and then left to right one to
two times. Some pressure is required
for good adhesion. When finished,
place the Hand Roller back to its
original position inside the cryostat.
Figure 11. Laminating the Tape to the block face.
14
8. Turn the flywheel slowly and evenly to
cut a section. If a sharp knife is used,
the section captured on the Tape will be
flat, intact, uncompressed and as thin as
two microns. No need for a brush or
an anti-roll device!
Figure 12. Cutting the section.
9. Pick up the Tape at either tab and
transfer it to the Slide on the Blue Pad
making sure to keep it down inside the
cryostat to avoid melting the section.
Figure 13. Handling the cut section.
10. Position the Tape, section-side-down,
on the Adhesive Coated Slide. For
multiple sections refer to the Steps for
Multiple Sections.
15
Figure 14. Positioning the Tape on the Slide.
11. Use the cold Hand Roller to laminate
the Tape to the Slide. Apply even
pressure on the Roller and roll it over
the section under the Tape two or three
times
Figure 15. Laminating the section to the Slide.
12. Holding the frosted end of the Slide,
remove it from the Blue Pad and
transfer it into the Flash Tray. Gently
push the Slide in as far as it will go,
against the stop. (To check, lift the
Lid.) Close before actuating the flash.
Figure 16. Placing the slide into the Flash Tray.
13. Push and release the Black Knob to
actuate the UV flash. The UV cures the
adhesive on the Slide into a polymer,
anchoring the frozen section to the
Slide.
Figure 17. Curing the adhesive on the Slide.
16
14. Holding the frosted end, immediately
remove the cured Slide from the Flash
Tray. DO NOT TAKE THE SLIDE
OUT OF THE CRYOSTAT AT THIS
TIME AS THAT WILL CAUSE THE
SECTION TO MELT.
Figure 18. Removing the cured Slide.
15. Keeping the Slide deep inside the
cryostat chamber, carefully remove the
pink Tape to expose the frozen section
on the Slide.
Figure 19. Removing Tape from cured Slide.
16. Peel off the Tape diagonally and
downward to minimize the tension on
the section and to insure complete
transfer. Do not touch the section with
your fingers. Once removed, discard
the Tape.
The slide can now be:
17
a) fixed in the Instrumedics Aqueous
Fixative,
b) freeze-dried or freeze-substituted in
the cryostat before “anhydrous”
fixation,
Note: The section should be immersed
in the fixative inside the cryostat. Figure 20. Technique for removing Tape from
Fixation should then continue at room Slide.
temperature.
c) melted or air-dried and fixed with
the fixative of choice for your
protocol.
Steps for Multiple Sections:
17. Multiple sections can be positioned on
one Slide by placing the Tapes
perpendicular to the Slide. For small
tissue specimens, the Tape can be cut
into narrower strips. Follow Steps 5 - 9.
18. To cure the adhesive on the slide, lift
the Lid of the Mech and seat the Slide
on the Flash Tray. The Tape tabs will
overhang the Flash Tray.
Figure 21. Processing multiple sections.
18
19. Close the Lid and push and release the
Black Knob to actuate the UV flash.
Then lift the Lid, remove the Slide and
carefully peel away each strip of Tape
as described in Steps 15 and 16.
Figure 22. Curing multiple sections.
Summary of the Instrumedics Frozen Sectioning Process
Snap-freezing and embedding.
A blockholder is placed on the Gentle Jane snap-freezing device.
CryoGel or other embedding media is dispensed onto the blockholder
and a tissue specimen is positioned on top. The chilled heat extractor is
placed in its holder and released. When the heat extractor contacts the
specimen, the tissue and embedding medium is snap-frozen into a flat
block. The plane of the flat block face minimizes trimming. When
specimen shape or orientation are essential, the tissue is snap-frozen
using the Instrumedics CryoGel / Rubber Mold method.
FIGURE 23. To minimize ice-crystal
size, tissue is snap-frozen with a
chilled heat extractor.
Cutting
After the block is trimmed, a cold adhesive tape is adhered to the block
face. The tape supports and captures the section as it is being cut,
eliminating the need for a brush or anti-roll device.
FIGURE 24. A cold adhesive tape is
used to support the section as it is
being cut.
Transfer to Slide
A cold adhesive-coated slide is placed on a temperature-controlled pad.
The adhesive tape is placed section-side-down on the adhesive-coated
slide, and is laminated to the adhesive layer using a cold roller.
FIGURE 25. The still frozen section,
19
adhered to the tape is rolled onto the
cold adhesive-coated slide.
Curing the Adhesive Coating
FIGURE 26.
An ultraviolet flash
converts the adhesive coating into a
hard solvent-resistant plastic.
A flash of ultraviolet light passes through the slide to polymerize the
adhesive layer on the slide into a hard, solvent-resistant plastic, tightly
anchoring the section. to the slide.
Removal of Tape
FIGURE 27. The tape is removed.
Several options are available
The tape is peeled away leaving the still frozen section tightly bonded to
the plastic layer.
The slide can then be:
a) fixed in the Instrumedics Aqueous Fixative,
b) freeze-dried or freeze-substituted in the cryostat before “anhydrous”
fixation,
c) melted or air-dried and fixed with the fixative of your choice.
Special Fixation Protocols
Aqueous Fixative: THIS FIXATION SHOULD BE USED FOR ALL
HISTOLOGICAL STAINING OF CRYOJANE PREPARED SECTIONS.
This fixative melts and fixes the tissue simultaneously (direct controlled “melting”). Ice
crystal artifacts (holes) are masked. Nuclear morphology is usually excellent. Some cell
components are lost and most of the red blood cells are lysed.
1. PREPARATION OF AQUEOUS BUFFER
Dissolve Buffer-Salt Mix in 180 ml of water.
Buffer-Salt Mix is available from Instrumedics (Cat. #AB)
Store in refrigerator. Usable for at least 6 months.
2. PREPARATION OF AQUEOUS FIXATIVE
Add 20 ml of 25% glutaraldehyde to 30 ml of Aqueous Buffer.
Mix well.
Use at room temperature.
Discard after 1 week. (If using 50% glut. add 10 ml glut. and 10 ml water.)
CAUTION!
Contains Cacodylic Acid.
Avoid contact with fingers or skin.
Do not breathe dust from vial.
3. PROCEDURE
20
a) After the adhesive coating on slide has been polymerized, carefully peel off
the pink Tape.
b) To avoid uncontrolled melting and/or drying of the section, immediately bring
the room temperature aqueous fixative into the cryostat and immerse the slide
into the fixative. Dip 2-3 times.
c) Continue to fix for 15 to 30 seconds at room temperature.
d) Rinse the slide in water and proceed with a chosen staining protocol.
“Anhydrous” Fixation Protocol - To be used after “freeze-substitution” in a cold solvent
such as acetone at -30°C or colder.
“Anhydrous” fixation preserves most cellular components and is highly recommended
for routine stains. Note: Not recommended when ice crystal size is large and widespread
(poor freezing). In such cases the aqueous fixative protocol should be followed. An
“anhydrous” fixative contains a maximum of 30% water.
1. AN/DMF/Glut
Dimethylformamide (DMF)
Acetonitrile (or AN)
25% glutaraldehyde
Add H2O to make up to
Wait at least 1 our before use.
2. Formal-Ethanol
Ethanol (100% alc.)
Formaldehyde
35 ml
35 ml
10 ml (50% Glut - 5 ml)
100 ml
86 ml
14 ml
Bring the fixative into the cryostat and transfer the freeze-substituted slide directly from
the acetone bath into the fixative. Continue fixation at room temperature for 15 to 30
seconds. (Transfer is made within the cryostat to prevent condensation of water on the
cold slide prior to fixation.)
21
3. For very sensitive antigens:
DMF/Glut
Dimethylformamide
25% Glutaraldehyde
Add H2O to make up to
70 ml
1 ml
100 ml
Transfer the freeze-substituted slide directly from acetone to this fixative at +4°C for
30 to 60 seconds. This transfer must be made within the cryostat.
Following fixation, the slides are rinsed in water prior to staining.
REFER TO REAGENT MSDS FOR SAFE HANDLING
CryoJane Maintenance
ECU
• NOTHING SHOULD BE PLACED OR STORED ON TOP OF THE ECU! Any spills
which enter the ECU may severely damage the electronic components.
• To clean the ECU, wipe the surfaces with either a dry rag, or if necessary, an alcohol
wipe. ACETONE OR OTHER SOLVENTS WILL DAMAGE THE PLASTIC
SURFACES.
• Fuses can be replaced by unscrewing the two small fuse holders in the rear of the
ECU. Fuses should be 1 AMP SLO-BLO and ceramic core wound, (available from
Instrumedics).
DO NOT OPEN THE ECU! Only personnel authorized by Instrumedics should
service the ECU. Unauthorized opening of the ECU will void all warranties.
Unauthorized persons will assume all risks and responsibilities.
Mech
• All metal surfaces may be wiped with alcohol or chlorine solution.
• The Flash Tray should periodically be cleaned with alcohol to remove any adhesive
build-up.
• Care must be taken to avoid damaging the glass filter in the Flash Tray.
22
•
•
•
Liquid spills on the Mech should be wiped immediately. Electronic components in
the Flash Lamp may short circuit if exposed to liquids.
DO NOT IMMERSE THE MECH IN ANY SOLUTIONS.
To remove the Mech from the wall for decontamination or servicing, simply unscrew
the two screws shown below and then remove the Mech from the cryostat. The
Mech’s mounting plate will remain attached to the wall of the cryostat. (Tip: To avoid
losing the two screws, screw them into the holes in the mounting plate remaining on
the wall.) To reinstall the Mech, attach it to the mounting plate with the two screws.
Troubleshooting the Mech and ECU
♦ The LEDs (lights) on the ECU are not on.
Cause
Solution
Make sure the ECU is properly connected to an
electrical source. Make sure the On/Off
The ECU is not turned on.
Switch on the ECU is in the On position
(pushed in). If the LEDs are on that indicates
that the ECU has power.
Check the fuses on the back of the ECU and
One or both fuses in the back of the ECU are replace as needed. Use only 1AMP, SLOblown.
BLO, Ceramic Core Wound fuses (available
from Instrumedics).
Call Instrumedics’ 800 customer service
The ECU is malfunctioning.
number and arrange for servicing of the ECU
(1-800-237-2772). DO NOT OPEN THE ECU!
♦ The left LED (labeled Pad) always displays a solid red light.
Cause
Solution
The ½ inch diameter Flash/Pad Power Cable is Make sure the Flash/Pad Power Cable is
not connected properly.
properly connected to the ECU and to the Blue
23
Pad connector underneath the Mech.
Raise the cryostat temperature.
Call Instrumedics’ 800 customer service
number and arrange for servicing of the ECU
(1-800-237-2772). DO NOT OPEN THE ECU!
The temperature of the Blue Pad is too cold.
The ECU is malfunctioning.
♦ The left LED (labeled Pad) always displays a flashing red light.
Cause
Solution
The temperature of the Blue Pad is too warm.
Lower the cryostat temperature.
Call Instrumedics’ 800 customer service
number and arrange for servicing of the ECU
(1-800-237-2772). DO NOT OPEN THE ECU!
The ECU is malfunctioning.
ONLY IF THE OIL BATH OPTION IS INSTALLED:
♦ The right LED (labeled Oil Bath) is always red.
Refer to the Oil Bath Accessory Kit Troubleshooting Guide in this manual.
♦ The Flash does not go on when triggered.
Cause
Solution
Make sure the ECU is properly connected to an
electrical source.
Make sure the On/Off
The ECU is not turned on.
Switch on the ECU is in the On position
(pushed in). If the LED’s on the front of the
ECU are on, that indicates that the ECU is on.
The ½ inch diameter Flash/Pad Power Cable is Make sure the Flash/Pad Power Cable is
not connected properly.
properly connected to the ECU.
Check the fuses on the back of the ECU and
replace as needed. NOTE: If flash unit is
triggered more than 3 times in one minute,
One or both fuses in the back of the ECU are one or both fuses on the back of the ECU will
blown.
blow out and will need to be replaced. This is
a protective feature designed to prevent
overheating. Use only 1AMP, SLO-BLO,
Ceramic Core Wound fuses (available from
Instrumedics).
Check for ice build-up around the Black Knob
on the Mech and remove if found. If this
The Flash triggering mechanism is jammed.
problem
cannot
be
corrected,
call
Instrumedics’ 800 customer service number
24
and arrange for servicing of the triggering
mechanism (1-800-237-2772).
Call Instrumedics’ 800 customer service
number and arrange for servicing of the flash
unit (1-800-237-2772). DO NOT OPEN THE
FLASH UNIT!
Call Instrumedics’ 800 customer service
number and arrange for servicing of the ECU
(1-800-237-2772). DO NOT OPEN THE ECU!
The flash unit is malfunctioning.
The ECU is malfunctioning.
CryoJane Process Troubleshooting
The CryoJane process will not produce the desired results if the cryostat and/or the
microtome are malfunctioning. Both need to be serviced periodically. Check with the
manufacturer/dealer.
♦ The Tape does not adhere to the block face.
Cause
Solution
The protective film covering the adhesive is Peel away the protective film covering the
not removed.
adhesive window.
Check the temperature of the cryostat and
The block is too cold or too warm.
adjust if necessary. Chamber temperature
should generally be set between -25°C to -27°C
depending on the particular cryostat model.
There is moisture on the adhesive layer.
Use a fresh Tape.
♦ The Tape does not capture the section.
Cause
Solution
The microtome is not advancing.
The microtome is not advancing at the desired
thickness.
The knife angle is too small or too large.
Check the microtome and adjust.
Check the microtome and adjust. Cut two or
three sections before applying the Tape.
Adjust the knife angle between 3 and 5
25
degrees.
Use another Tape.
The Tape is defective.
♦ The Tape is cut during sectioning.
Cause
Solution
The block face is not flat.
Align and trim the block to obtain a flat face.
The adhesive on the Tape overhangs the block Position the Tape on the block so that no
and snags on the knife.
adhesive is exposed to the knife when cutting
the section.
The knife and/or the block are not be properly Check the knife and block for looseness and
tightened.
tighten all screws and clamps as needed.
♦ The captured section on the Tape is not intact.
Cause
Solution
If using a disposable blade, shift to a different
The knife is dull.
portion of the blade’s edge or replace the
blade. If using a stainless steel or tungstencarbide knife, sharpen the knife.
There is dirt on the Tape
Use a fresh, clean and cold Tape.
Bubbles form while laminating the Tape to the Apply the Tape “like wallpaper” to the block
block face.
face while laminating with the cold Roller. If
bubbles are still visible, reapply the Tape.
There is vibration in the microtome (thick/thin, Check the knife and block for looseness and
chatter, etc.)
tighten all screws and clamps as needed.
♦ The section on the Tape does not transfer properly to the Slide.
Cause
Solution
The mylar film on the Slide has not been Remove the mylar film.
removed.
The adhesive layer on the Slide is not facing Position the Slide on the Blue Pad so the
up.
adhesive layer faces up.
See the Mech and ECU Troubleshooting
The Slide is too cold or too warm.
Guide for the left LED on the ECU (labeled
Pad) always displaying either a solid red or
flashing red light.
26
Remove the Tape slowly and carefully, peeling
The Tape is not being removed properly.
it diagonally and downward to minimize the
tension on the section.
If using a disposable blade, shift to a different
The knife is dull.
portion of the blade’s edge or replace the
blade. If using a stainless steel or tungsten
knife, sharpen the knife.
A bubble may have formed when the Tape Apply the Tape “like wallpaper” to the Slide
was laminated to the Slide.
while laminating with the cold Roller.
Troubleshooting Finished Slides
♦ The polymerized adhesive picks up excessive red stain after H&E.
Cause
Solution
Eosin may be too acidic or too alcoholic. This Stain a shorter time, or use an aqueous eosin Y
may cause background staining.
at pH 5.0 - 5.2.
♦ There are chatter marks (“venetian-blind” effect, parallel to knife
edge) in the section.
Cause
Solution
There is looseness in the system
Check tightness of chuck. Clamp knife holder
and/or blade holder very tightly.
If using a disposable blade, shift to a different
portion of the blade’s edge or replace the
blade. If using a stainless steel or tungsten
knife, sharpen the knife.
Cut slowly without stopping. If motor drive is
used, set cutting speed slower.
The knife is dull.
Stop/start motion during cutting.
♦ There are tears in the section.
Cause
Solution
27
If using a disposable blade, shift to a different
The knife has a nick or defect on the cutting portion of the blade’s edge or replace the
edge.
blade. If using a stainless steel or tungsten
knife, sharpen the knife.
♦ Small clusters of cells (usually circular) are missing in the section.
Cause
Solution
Bubbles or debris was captured between the To avoid bubbles, apply Tape “like
adhesive Tape and the block face, or between wallpaper”. If bubbles are visible under the
the Tape and the coated Slide.
Tape on the block face, reapply the Tape. Use
clean Tape.
A hole in the block face may be due to groups This may be a defect in the tissue block.
of cells being “plucked-out” during or prior to Check the knife edge for dullness and correct.
sectioning.
Debris was caught between the Tape and Always remove all trimming debris from the
block, or between the Tape and the coated block face, and both the front and rear
Slide.
surfaces of the knife’s cutting edge before
sectioning.
♦ The section did not transfer completely.
See the CryoJane Process Troubleshooting Guide.
♦ There are holes in the nuclei and/or cytoplasm of the section.
Cause
Solution
Transfer the frozen block from the freezing
device rapidly to the cryostat to avoid thawing
the tissue.
Avoid finger contact with the central portion
of the Tape and/or Slide. Do not touch the
block face with your fingers (thumb). Do not
breath directly on the section. Keep Tapes and
Section may have melted and refrozen causing Slides inside the cryostat.
large ice crystals to grow. (This is the most
common problem.)
The Blue Pad temperature may be too warm See the Mech and ECU Troubleshooting
Guide.
ALL STEPS OF THE CryoJane PROCESS
MUST BE CARRIED OUT DEEP INSIDE
THE CRYOSTAT CHAMBER TO AVOID
WARM AIR CONTACTING AND MELTING
THE FROZEN SECTION.
28
Snap-freeze tissue at -60°C or colder. Using
Instrumedics’ Power Jane, or Stand Alone
Gentle Jane or Dewar Jane snap-freezers with
The initial freezing was poor (slow), causing liquid nitrogen produces the best results.
large ice crystals to grow. The section was Snap-freeze the thinnest practical specimen.
taken deep in the tissue block where the The sections uppermost in the block will have
freezing is the poorest.
the minimum ice crystal artifact.
Use Instrumedics’ Aqueous Fixative.
NOTE: Excellent results with freezesubstitution followed by “anhydrous” fixation
will occur only if the ice crystal size is
minimal.
29
Oil Bath Accessory Kit Components
FIGURE 28. Oil Bath Accessory Kit Components
1. Oil Bath
2. Oil
3. Oil Brush
4. Oil Bath Power Cable (not shown)
30
Oil Bath Accessory Kit Operating Procedure
Background
Virtually all embedding media are water based. When a frozen tissue specimen embedded
in such media is stored, over time the tissue and the medium will dehydrate and degrade.
The Oil Bath Accessory Kit enables the user to coat the block face with the protective Oil
that is maintained at -8°C in a bath inside the cryostat chamber. Coating the surface will
not melt the tissue in the block. The Oil has a freezing temperature of -10°C and will
instantly freeze on the block face. The frozen Oil coating prevents tissue and medium
dehydration for up to one year if stored in a -70°C freezer.
The Oil can also be used to repair a damaged block. A deformation or hole in the block
face may be filled with the Oil which will freeze. The frozen Oil has the property of an
embedding medium and can then be sectioned similarly to other media.
Preparation
•
•
•
•
•
The cryostat temperature should be -25°C to -30°C.
Make sure there is Oil in the Bath. If Oil is added to the Bath, wait 1 to 2 hours for the
Oil to reach its set temperature of -8°C.
The Oil inside the Oil Bath should be in a liquid state (not frozen).
The Oil Brush should be inside the Oil Bath.
The right LED on the ECU (labeled Oil Bath) should be green.
30
Use
A tissue block can be stored in a freezer at -70°C for up to 1 year once thoroughly coated
with the protective Oil.
THE BLOCK MUST NOT BE PERMITTED TO THAW AND REFREEZE DURING
STORAGE. THIS WILL DEGRADE THE QUALITY OF THE TISSUE IN THE
BLOCK
Storing a Tissue Block
To store (short term in the cryostat or long term in a freezer) a frozen tissue block follow
the procedure outlined below.
For Short Term Storage in the Cryostat
With the block in the cryostat, use the Oil
Brush to coat the block face with the Oil
from the Oil Bath.
For Long Term Storage in a -70°C
Freezer
With the block in the cryostat, use the Oil
Brush to coat the entire block with the Oil
from the Oil Bath. Apply generous
amounts of Oil.
Figure 29. Coating the block with Oil.
Sectioning a Stored Tissue Block
From Short Term Storage: Trim away the frozen layer of Oil to expose the tissue
specimen and proceed as usual.
31
Oil Bath Accessory Kit Troubleshooting Guide
♦ The Oil inside the Oil Bath is frozen.
Cause
Solution
Make sure the ECU is properly connected
to an electrical source. Make sure the
The ECU is not turned on.
On/Off Switch on the ECU is in the On
position (pushed in). If the LED’s on the
front of the ECU are on, that indicates that
the ECU is on.
The Oil Bath Power Cord is not connected Make sure the Oil Bath Power Cord is
properly.
properly connected to the ECU and the Oil
Bath.
One or both fuses on the back of the ECU Check the fuses on the back of the ECU
are blown.
and replace as needed. Use only 1AMP,
SLO-BLO, Ceramic Core Wound
(available from Instrumedics).
The cryostat temperature is too cold.
fuses
Raise the cryostat temperature.
Call Instrumedics’ 800 customer service
number and arrange for servicing of the
ECU (1-800-237-2772). DO NOT OPEN
THE ECU!
The ECU is malfunctioning.
♦ The Oil Bath LED always displays a solid red light.
Cause
Solution
The Oil Bath Power Cord is not connected Make sure the Oil Bath Power Cord is
properly.
properly connected to the ECU and the Oil
Bath.
The temperature of the Oil inside the Oil Raise the cryostat temperature.
Bath is too cold.
Call Instrumedics’ 800 customer service
The ECU is malfunctioning.
number and arrange for servicing of the
ECU (1-800-237-2772). DO NOT OPEN
THE ECU!
32
♦ The Oil Bath LED always displays a flashing red light.
Cause
Solution
The temperature of the Oil inside the Oil Lower the cryostat temperature.
bath is too warm.
Call Instrumedics’ 800 customer service
The ECU is malfunctioning.
number and arrange for servicing of the
ECU (1-800-237-2772). DO NOT OPEN
THE ECU!
33