1
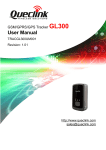
CDMA2000-1X Tracker GL300VC User Manual TRACGL300VCUM001 Version: 1.00 GL300VC User Manual Document Title GL300VC User manual Version 1.00 Date 2015-1-30 Status Release Document Control ID TRACGL300VCUM001 General Notes Queclink offers this information as a service to its customers, to support application and engineering efforts that use the products designed by Queclink. The information provided is based upon requirements specifically provided to Queclink by the customers. Queclink has not undertaken any independent search for additional relevant information, including any information that may be in the customer’s possession. Furthermore, system validation of this product designed by Queclink within a larger electronic system remains the responsibility of the customer or the customer’s system integrator. All specifications supplied herein are subject to change. k n i l l c a i e t u n Q fide n o C Copyright This document contains proprietary technical information which is the property of Queclink Limited., copying of this document and giving it to others and the using or communication of the contents thereof, are forbidden without express authority. Offenders are liable to the payment of damages. All rights reserved in the event of grant of a patent or the registration of a utility model or design. All specification supplied herein are subject to change without notice at any time. Copyright © Queclink Wireless Solutions Ltd. 2015 TRACGL300VCUM001 -1- GL300VC User Manual Contents Contents ............................................................................................................................................ 2 0. Revision history ............................................................................................................................. 3 1. Introduction .................................................................................................................................. 4 2. Product Overview.......................................................................................................................... 5 2.1. Appearance ........................................................................................................................ 5 2.2. Buttons/Mini USB Interface Description ............................................................................ 5 2.3. LEDs Description................................................................................................................. 6 2.4. External Power Interface .................................................................................................... 6 2.4.1 External DC Charger Interface .................................................................................. 6 2.4.2 External Battery Interface ........................................................................................ 7 2.5. Ignition Detection............................................................................................................... 7 2.6. External Input Interface...................................................................................................... 8 3. Getting Started .............................................................................................................................. 9 3.1. Parts List ............................................................................................................................. 9 3.2. Battery Charging................................................................................................................. 9 3.3. GL300VC External Cable Interface.................................................................................... 10 3.4. Turn on/Turn off ............................................................................................................... 10 4. Troubleshooting and Safety info ................................................................................................. 11 4.1. Troubleshooting ............................................................................................................... 11 4.2. Safety info......................................................................................................................... 11 k n i l l c a i e t u n Q fide n o C TRACGL300VCUM001 -2- GL300VC User Manual 0. Revision history Revision Date Author Description of change 1.00 2015/1/30 Abside Yu Initial k n i l l c a i e t u n Q fide n o C TRACGL300VCUM001 -3- GL300VC User Manual 1. Introduction The water resistant GL300VC is a powerful GPS/GNSS locator designed for lone worker, vehicle, pet and asset tracking applications. The thumb sized button makes this device ideal for applications requiring rapid notification of emergency alert or regular setting of geo-fences based on current location. Its built-in GNSS receiver has superior sensitivity and fast time to first fix. Its CDMA2000-1X allowing the GL300VC's location to be monitored in real time or periodically tracked by a backend server and mobile devices. Its built-in 3-axis accelerometer allows motion detection and extends battery life through sophisticated power management algorithms. System integration is straightforward as complete documentation is provided for the full featured @Track protocol. The @Track protocol supports a wide variety of reports including emergency, geo-fence boundary crossings, low battery and scheduled GPS/GNSS position. k n i l l c a i e t u n Q fide n o C TRACGL300VCUM001 -4- GL300VC User Manual 2. Product Overview 2.1. Appearance k n i l l c a i e t u n Q fide n o C 2.2. Buttons/Mini USB Interface Description Button /Mini USB Interface Description Power Key Function Key Mini USB interface TRACGL300VCUM001 Turn on GL300VC Turn off GL300VC when without charging. (If power key is enabled) Geo-Fence mode Long press the key to enable/disable Geo-Fence ID0 Geo-Fence in current position mode Long press the key to enable/disable Geo-Fence ID0. If enable Geo-Fence ID0, using the current position as the center of Geo-Fence 0. SOS mode (default) Long press the key to active SOS alarm Connect a 5V DC adapter can power GL300VC and charge the internal battery Connect a 3.7V Li-ion or Li-Polymer battery can power GL300VC Backend server developer or administrator can use the Data_Cable_M to configure GL300VC -5- GL300VC User Manual 2.3. LEDs Description There are three LED in GL300VC, the description as following. LED CELL LED GPS LED Event Searching network Network has been registered Power off SIM-PIN Locked Receives a valid protocol command <LED on> is 2 GPS has fixed GPS is in fixing GPS is on and GPS data wrong GPS is off If <LED on> is 0, 150 seconds later after powers on. <LED on> is 2 Power on and normal Charger inserted and charging completed Charger inserted and charging Power key was pressed and prepare to power off Abnormal Power low alert Power off or turn off the power light by command <LED on> is 2 State Fast flash Slow flash Dark Solid Turn on for 3 seconds Dark Solid Fast flash Slow flash Dark Dark k n i l l c a i e t u n Q fide n o C PWR LED Dark Dark Solid Fast flash Fast flash Fast flash Slow flash Dark Dark 2.4. External Power Interface 2.4.1 External DC Charger Interface The Pin2 on Mini-USB connector are used for charging and named as VCHG pin, It can be connected to a 5V DC power supply to power GL300VC and charge the internal battery. TRACGL300VCUM001 -6- GL300VC User Manual k n i l l c a i e t u n Q fide n o C 2.4.2 External Battery Interface The Pin 8 on Mini-USB connector is for external battery and named as EXTBAT pin, It can be connected to 3.7V Li-ion or Li-Polymer battery to power GL300VC. 2.5. Ignition Detection The Pin 7 on Mini-USB connector is for ignition detection when GL300VC is used in vehicle tracking application, It is named as IGN_IND pin. TRACGL300VCUM001 -7- GL300VC User Manual k n i l l c a i e t u n Q fide n o C Another easy way is to connect PIN7 to a power output in the fuse box of the vehicle which is only enabled after the vehicle is ignition on. For example: the power output for radio FM. 2.6. External Input Interface The Pin 5 on Mini-USB connector is a negative trigger input in newer hardware version, It is named as NSW pin. For negative trigger input the electrical conditions are: Logical State Active Inactive Electrical State 0V to 0.8V 1.7V to 32V or Open An input example is shown as following figures: TRACGL300VCUM001 -8- GL300VC User Manual Example of NSW pin connect to a panic button 3. Getting Started 3.1. Parts List Name Picture GL300VC Locater Remark The CDMA-1X/GPRS/GPS locator. k n i l l c a i e t u n Q fide n o C AC-DC Power Adapter (Standard accessory) It is used to charge the internal battery of GL300VC. GL300VC Data Cable (Optional accessory) It is the USB data cable which can be used for firmware upgrading and configuration. GL300VC External Cable (Optional accessory) It is the extend cable which include the charger interface and external battery interface on GL300VC. It also includes the ignition detection interface on the GL300VC. 3.2. Battery Charging Please connect AC-DC power adapter with GL300VC. Insert the AC-DC power adapter into the power socket. During charging, the PWR LED is flashing fast. When the battery is full charged, the PWR LED will be Ever-light. You can also charge the battery by USB cable which connects GL300VC with the PC. Charging time is about 5 hours. Note: Before the first time using GL300VC, please full charge the battery. TRACGL300VCUM001 -9- GL300VC User Manual 3.3. GL300VC External Cable Interface GL300VC External Cable is a cable with a Mini USB connector and six wires which include the external power interface, ignition detect and input interface for GL300VC. Please find the detail description in following table. Color RED Black Blue White Green k n i l l c a i e t u n Q fide n o C Name Remark External DC IN (5V) Please refer to 2.4.1 for detail Ground External Battery IN (DC 3.4V to 4.2V) Ignition Detect Please refer to 2.4.1 for detail Please refer to 2.4.2 for detail Please refer to 2.5for detail NSW(negative trigger input) Please refer to 2.6 for detail 3.4. Turn on/Turn off Turn on: Method 1: Press the Power key at least 3 seconds and release it to turn on GL300VC. At the same time, PWR LED will light on. Method 2: Connect device to charger or external battery, and it will turn on automatically, PWR LED will light on. Turn off: Method 1: Press the power key about 2 seconds; PWR LED will fast flash and then turn off, it indicates that GL300VC is turned off. The time of power off is depended on the quality of network. The maximum time of power off is 90 seconds. It is only valid to turn off when using internal battery. Please note the end-user can not power off GL300VC when the power key is disabled by protocol. Method 2: If using external battery, device will power turn-off when external battery disconnect. TRACGL300VCUM001 - 10 - GL300VC User Manual 4. Troubleshooting and Safety info 4.1. Troubleshooting Trouble Possible Reason Solution After GL300VC is turned on, the CDMA-1X LED flashes quickly always. The signal is too weak; GL300VC can’t register to the network. Please move GL300VC into place with good CDMA-1X coverage. Messages can’t be reported to the backend server by GPRS. APN is wrong. Some APN cannot visit the internet directly. Ask the network operator for the right APN. The IP address or port of the backend server is wrong. Make sure the IP address for the backend server is an identified address in the internet. The function of power key was disabled by AT+GTSFR. Enable the function of power key by AT+GTFKS. Unable to power off GL300VC if charger connected or using external battery. Disconnect charger or external battery, and try again. GL300VC is in power saving mode. Remove the Data_Cable_M, and plug it in again. After this operation, GL300VC will exit from power saving mode for 10 seconds. k n i l l c a i e t u n Q fide n o C Unable to power off GL300VC. No response from UART when configure GL300VC through UART Re-try GL300VC manager tool again, it will try to wake up device. GL300VC can’t get successful GPS fixing. The GPS signal is weak. Please move GL300VC to a place with open sky. It is better to let the top surface face to sky. (The same surface with indication LED) 4.2. Safety info Please do not disassemble the device by yourself. Please do not put the device on the overheating or too humid place, avoid exposure to direct sunlight. Too high temperature will damage the device or even cause the battery explosion. Please do not use GL300VC on the airplane or near medical equipment. TRACGL300VCUM001 - 11 -