1
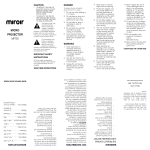
Location of parts and controLs
cHarGInG tHe Projector
1. Projector Lamp
1. The Projector is charged using the included AC Adapter.
2. Focus Wheel
2. The LED Indicator Light will illuminate Red to indicate the Projector is
currently charging and then revert to Green when the Projector is fully
charged.
3. MHL Cable (not shown)
4. AC Adapter (not shown)
5. HDMI Cable (not shown)
6. Micro HDMI Adapter (not shown)
7. Mini HDMI Adapter (not shown)
8. 5-pin to 11-pin micro USB Adapter (not shown)
Important: Fully charge the Projector internal battery before first use
(approximately 3 to 5 hours). The approximate run-time is 2 hours.
3. 3. A low battery icon will show on the screen when the Projector battery is
low. Use the included AC Adapter to charge your Projector. If the battery is
too low, the projector will automatically shut off.
set UP
1. Connect one end of the AC adapter to the Projector 12V port and plug the
other end into an electrical outlet.
2. Connect the HDMI cable (included) to the HDMI port and the other end to
your device.
note: You may need an adapter to connect your device to the HDMI cable.
Please review the included Compatibility Guide for more information.
3. Connect a speaker to the 3.5mm audio out jack, if desired.
9
10