1
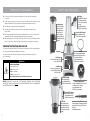
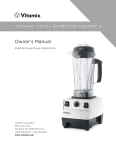
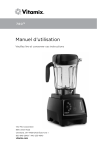
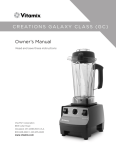
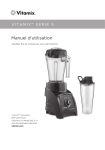
VITAMIX® S55
Owner’s Manual
Read and save these instructions
Vita-Mix® Corporation
8615 Usher Road
Cleveland, OH 44138-2103 U.S.A.
440.235.4840 / 800.848.2649
vitamix.com
CO N T E N TS A N D SY M B O L S
INTRODUCTION
CO N T E N TS
High Performance Gets Personal
Contents and Symbols.................................................................................................................................................................. 3
With four convenient pre-programmed settings and two container sizes, the S55 delivers the versatility of a
high-performance blender in a compact size.
Service and Registration..............................................................................................................................................................4
Explore your Personal Blending Cookbook to find dozens of healthy, whole-food recipes, as well as a few
indulgences for special occasions. The Kitchen Basics section offers techniques that will help simplify meal
prep, including how to chop, whip, purée, and more.
Important Safeguards................................................................................................................................................................... 5
Create a variety of recipes for enjoying at home or taking on the go. Beverages to Go is written specifically for
the 20-ounce container-turned-travel-cup. With other sections including Dressings, Soups, Sauces, and Frozen
Desserts, you’ll find the perfect dish for every course of every meal.
Control Panel................................................................................................................................................................................... 8
We’ve made it easier than ever to get started. Four pre-programmed settings take the guesswork out of
processing times, automatically shutting off when the cycle has completed. Icons pictured in each recipe will
help you quickly identify which program and container size are recommended for the task at hand.
Parts and Features......................................................................................................................................................................... 7
Blending in the 40 ounce (1.2 L) Container......................................................................................................................... 10
Tamper...............................................................................................................................................................................................11
Blending in the 20 ounce (0.6 L) Container.........................................................................................................................12
Because the features of the S55 make it unlike any other Vitamix blender, we ask that you read and
understand the following Getting Started guide and this owner’s manual before your first use.
Care, Cleaning and Troubleshooting.......................................................................................................................................13
S55 Programs
Warranty...........................................................................................................................................................................................14
Smoothie: Perfect for smoothies made with delicate, fresh ingredients
SY M B O L S
Power Blend: Made for tougher blends (think hearty greens, protein powder, firm veggies)
Dips and Spreads: When you want thick, smooth textures like hummus or cheese dips
Frozen Desserts: Ideal for ice creams and sorbets
Refer to the Personal Blending Cookbook that was included with your blender. For more recipes and
inspiration, visit vitamix.com.
Warning
Read and understand owner’s manual
Electrical shock hazard
Unplug while not in use, before cleaning, changing accessories or
approaching parts that move in use
Never touch moving parts
Do not immerse or place the motor base in water
Hot surface - DO NOT touch
2
3
I M P O RTA N T SA F E G UA R DS
S E RV I C E A N D R E G I ST R AT I O N
WARNING: To avoid the risk of serious injury when using your Vitamix® blender, basic safety
Vitamix Service
Record the model number and serial number of your Vitamix in the spaces provided below for future reference.
These numbers can be found on the bottom of the motor base.
Model Number
precautions should be followed, including the following.
READ ALL INSTRUCTIONS, SAFEGUARDS, AND WARNINGS BEFORE
OPERATING BLENDER.
1.
Read all instructions.
2.
This appliance is not intended for use by or near children or persons with reduced physical, sensory,
or mental capabilities or lack of experience and knowledge. Close supervision is necessary when any
appliance is used by or near children or incapacitated persons.
3.
To protect against the risk of electrical shock, do not put the blender base in water or other liquid.
Serial Number
Date of Purchase
4. Unplug the appliance from outlet when not in use, before putting on or taking off parts, and
before cleaning.
Purchased From
5.
Before returning this product for any reason, including repair, first contact Vitamix Customer Service at
1.800.848.2649 or 1.440.235.4840 or email: [email protected].
6. DO NOT operate any appliance with a damaged cord or plug or after the appliance malfunctions,
or is dropped or damaged in any manner. Contact 440.235.4840 at once for examination, repair,
replacement, or electrical or mechanical adjustment.
Product Registration
If you purchased your Vitamix® machine directly from the Vita-Mix® Corporation your product was registered
at the time of purchase and your machine’s warranty has been activated.
Your machine is not yet registered with Vitamix if you:
Avoid contacting moving parts.
7.
Alteration or modification of any part or component of the blender assembly, including the use of any
part, component, or accessory that is not a genuine authorized Vitamix part, may cause fire, electric
shock, or injury.
8.
DO NOT attempt to defeat the interlock.
1.
Purchased from a retail or wholesale store
9. The use of attachments not expressly authorized or sold by Vitamix for use with this blender, including
canning jars, may cause fire, electric shock, or injury.
2.
Received your machine as a gift
10. DO NOT blend hot liquids in the 20 ounce (0.6 L) container.
3.
Are not the original owner of the machine
11. DO NOT use the 20 (0.6 L) or 40 ounce (1.2 L) container, blade base, seals or lids in the microwave.
Enjoy faster and easier service in the future by taking a few minutes to register your Vitamix machine today.
Choose one of these easy ways to register your machine:
12. When blending hot liquids or ingredients in the 40 ounce (1.2 L) container, spray or escaping steam may
cause scalding and burns. Keep hands and other exposed skin away from the lid opening to prevent
possible burns.
1.
Online at vitamix.com/warranty
13. If your machine is equipped with a variable speed functionality, always start at lowest speed setting.
2.
Email: [email protected]
14. DO NOT use the appliance for purposes other than its intended use.
3.
For persons without internet access, call 1.800.848.2649 or 1.440.235.4840, press option 1 and then
option 1 again.
15. DO NOT fill the containers beyond the maximum capacity. The 40 ounce (1.2 L) container should not be
more than two-thirds full (26 ounces) when the tamper is used during blending.
Your warranty may be honored by Vita-Mix® Corporation.
16. DO NOT use outdoors.
Failure to register your machine will not diminish your warranty rights.
17. DO NOT let cord hang over edge of table or counter or make contact with hot surfaces, including
the stove.
18. Keep hands and utensils out of 40 ounce (1.2 L) container while blending to reduce the risk of
severe injury to persons or damage to the blender. The tamper can be used during blending in the
40 ounce (1.2 L) container. A rubber scraper or spatula may be used, but only when the blender is
not running.
19. Blades are sharp. Handle or remove the blade base from either container with extreme care to
avoid injury.
4
5
I M P O RTA N T SA F E G UA R DS
PA RTS A N D F E AT U R E S
Flip-Top Lid
The seal MUST be in place to
avoid leaks when using the
20 ounce (0.6 L) container as
a to-go cup.
(top rack dishwasher safe,
DO NOT use in a microwave)
20. To reduce the risk of injury, never place the blade base on the motor base unless assembled to
the container.
21. DO NOT leave foreign objects, such as spoons, forks, knives or the lid plug, in either container as this will
damage the blades and other components when starting the machine and may cause injury.
22. Never attempt to operate the blender with damaged blades.
23. Never attempt to operate the blender without the seal in place between the blade base and
either container.
24. The lid and lid plug MUST be firmly in place when blending with the 40 ounce (1.2 L) container. The lid
plug should be removed only when adding ingredients and when using the tamper.
25. When making nut butters or oil-based foods, do not process for more than one minute after the mixture
starts to circulate in the container. Processing for longer periods can cause dangerous overheating.
Overflow Opening
is located on the back
of the motor base. It
directs liquid away
from the motor in
case of a leak. If you
experience leaks, refer
to Tips and Techniques
on page 9.
20 ounce (0.6 L) Container
(top rack dishwasher safe,
DO NOT use in a microwave)
IMPORTANT INSTRUCTIONS FOR SAFE USE
This product is intended for HOUSEHOLD USE ONLY and is not intended to be used for commercial purposes.
Do not leave your Vitamix blender unattended when operating.
Any repair, servicing, or the replacement of parts must be performed by Vitamix or an authorized
service representative.
WARNING
Electrical Shock Hazard.
Use grounded outlet only.
DO NOT remove ground.
DO NOT use an adapter.
DO NOT use an extension cord.
Failure to follow instructions can cause death or electrical shock.
NOTICE: THE FAILURE TO FOLLOW ANY OF THE IMPORTANT SAFEGUARDS AND THE IMPORTANT
INSTRUCTIONS FOR SAFE USE IS A MISUSE OF YOUR VITAMIX BLENDER THAT CAN VOID YOUR WARRANTY
AND CREATE THE RISK OF SERIOUS INJURY.
Seals
Motor Base
Two seals are supplied with your
blender. Refer to page 9 for more
information about seals.
(top rack dishwasher safe)
DO NOT use in a microwave)
Pulse Feature
is to the left of the stop position
on the Control Knob
Control Knob
is used to select programs or to
control the blade speed from
1 to 10 (low to high)
Spill-Proof Vented Lid
with removable lid plug
(top rack dishwasher safe)
DO NOT use in a microwave)
Interchangeable Blade Base
is used to blend in with the 20 ounce (0.6 L)
and 40 ounce (1.2 L) containers
(top rack dishwasher safe)
DO NOT use in a microwave)
40 ounce (1.2 L) Container
shatter-resistant container
(top rack dishwasher safe,
DO NOT use in a microwave)
Interlock Tab
Both containers have two
interlock tabs that must be
positioned in the cutouts in
the motor base for the motor
to operate.
6
Tamper
is used to maintain circulation by preventing
air pockets in the 40 ounce (1.2 L) container.
See page 11.
(top rack dishwasher safe)
7
TIPS AND TECHNIQUES
CO N T R O L PA N E L
Seals
S55
3
1
4
2
During the Blend
There are two seals supplied with your blender. The seals are
interchangeable and their uses are:
•
During the blend - place a seal on the blade base attaching the
blade base to either container.
•
To travel - place a seal on the flip-top lid before attaching to the
20 ounce (0.6 L) container.
Seal
Blade Base
The seals are used to avoid leaks and spills. If you experience leaking:
1.
Power Indication: When the stop symbol (O) brightens, this indicates that the machine is plugged in
and power is flowing. Unplug the machine whenever it will be left unattended.
The stop symbol on the control panel will behave in these ways:
Slow flash – machine is plugged in but the container is not properly in place on the motor base.
Solid (no flash) – machine is plugged in, the container is in place, and the machine is ready to blend.
Fast flash – error caused by one of the following:
A. The motor base is plugged in while the control knob is not in the stop position (O).
B. The container was placed on the machine while the control knob was not pointed at the stop
symbol (O).
C. The container was removed from machine while operating (could include lifting the container away
from the motor base and the interlock tabs losing contact with the base during tamping).
If the container is lifted or rocked from the motor base during blending, the machine will turn off
automatically. To continue, place the container back on the motor base. Push in on the center of the
control knob to start the blades.
2. Control Knob: Allows you to select a program or use variable speed from 1 to 10 (low to high).
To begin, rotate the control knob counterclockwise from the stop symbol to select a program or
clockwise from the stop symbol to the desired variable speed setting. Push in on the center of the knob
to activate the blades. When blending with a program, allow the blender to blend through the cycle and
stop on it’s own. When using variable speed, push in on the center of the control knob again to stop the
blades. Rotate the control knob back to the stop symbol.
•
Make sure the seal is in place on the blade assembly before
attaching to either container.
•
Thread the blade base onto the container and until it stops. Try to
thread a little further to make sure it is tight.
Keep the seals clean, allow to air dry between uses and keep in a safe
place to avoid losing them.
To Travel
Flip-top Lid
SCALE 1.000
Seal
Ingredients
•
Cut ingredients into 1-inch pieces.
•
Cubed ice blends better than crushed ice.
•
The order to add ingredients to each container is important. Place ingredients into each container in the
order they appear in the recipe.
•
Do not fill the 40 ounce (1.2 L) container more than two-thirds full (approximately 28 ounces) when
blending thick texture recipes (e.g., hummus or nut butters). This allows room at the top of the container to
use the tamper, to add liquid to the blend if necessary and will reduce the chances of overheating the unit.
SCALE 1.000
Remember: Always follow guidelines in the recipe to ensure the best blend quality. Operating at a lower speed
than suggested in the recipe can cause the motor to overheat. Blend for the full processing time suggested in
the recipe. The smaller blades will take a bit longer than larger Vitamix machines.
•
If ingredients are not flowing easily through the blades, use the tamper in the 40 ounce (1.2 L) container,
or add more liquid to the blend. DO NOT overfill.
3. Pulse (
): Rotate the control knob to the counterclockwise to the pulse position. Push in on the
center of the control knob to activate the blades. The machine will blend at 50% of high speed for as
long as it is held in this position.
4. Programs: Your blender is equipped with four program settings. Rotating the control knob
counterclockwise from the stop symbol allows you to select a program for Smoothies ( ),
Power Blends ( ), Dips and Spreads (
) and Frozen Desserts ( ). Program blending speeds and
duration vary and will stop automatically at the end of the program. To begin a program, rotate to the icon
and then press in on the center of the control knob to activate the blades. To stop, push in again on the
center of the control knob. Rotate the control knob back to the stop symbol when done.
8
9
BLENDING IN THE 40 OUNCE
( 1 . 2 L ) CO N TA I N E R
TA M P E R
CAUTION
WARNING
Parts will become hot with extended use.
Rotating blades can cause damage.
DO NOT touch the drive socket in the underside of the blade base or the drive spline
inside the motor base.
Lids and tampers are not interchangeable between different Vitamix machines, container
styles, types, or sizes. Always use the tamper that was supplied with your machine.
When blending hot liquids in the 40 ounce (1.2 L) container, escaping
steam, splashes or contents may scald.
DO NOT put hands, spatulas, etc. in the container while the machine is running or while
the container is still on the base.
To secure the contents, lock the lid and lid plug securely in place prior to blending hot
liquids in the 40 ounce (1.2 L) container.
Rotating blades can cause severe injury.
DO NOT reach into container while machine is running.
To avoid damage or personal injury, DO NOT use the 40 ounce (1.2 L)
container (including the blade base, seal, lid and lid plug) in the microwave.
This icon corresponds to suggested recipes for the 40 ounce (1.2 L) container in your cookbook.
1.
To begin, put a seal onto the bottom thread of the blade
base. The seal should fit snugly and evenly around the thread.
2.
Thread the blade base onto the 40 ounce (1.2 L) container
in a clockwise direction just until tight. Do not overtighten
or leaking can occur.
3.
Load the 40 ounce (1.2 L) container according to
the recipe.
4. Put the lid onto the 40 ounce (1.2 L) container.
Make sure that the tabs on the lid snap onto
the container.
5.
Insert the lid plug into the opening in the lid.
Turn the lid plug counterclockwise to lock.
Pull up on the lid plug to make sure it is secure.
The tamper should easily fit into the lid opening and not come in contact with the blades no matter how you
move the tamper inside the container. If the tamper you are using touches the blades at any angle, DO NOT
use that tamper. Contact Vitamix Customer Service at 1.800.848.2649 or 1.440.235.4840 to order a new
tamper, appropriate for use with your 40 ounce (1.2 L) container.
Important for use
Hold onto the container handle while tamping.
Seal
DO NOT rock or tip the container on the motor base while
tamping. If the container comes off of the motor base, put
the container back onto the motor base and press in on the
center of the control knob to start the blades.
Blade Base
40 ounce (1.2 L)
Container
Ice and Frozen Ingredients
Fruits and Veggies
The tamper that was supplied with your blender is the correct tamper to use in the 40 ounce (1.2 L) container.
DO NOT use any other Vitamix tampers in the 40 ounce (1.2 L) container.
SCALE 1.000
Leafy Greens
Dry Goods (grains, seasonings, powders)
Liquids (water, juice, yogurt)
Blade Base
6. Set the 40 ounce (1.2 L) container onto the
motor base with the container handle facing you.
The interlock tabs on the 40 ounce (1.2 L) container will lower into the cutouts in the motor base.
7.
Begin blending by slowly rotating the control to the desired program, variable speed setting or to pulse.
Once you are at the setting you would like to start blending on, push the knob in to start the blades.
Follow the recipe guidelines to finish the blend.
8.
Wait until the blades come to a complete stop before removing the lid or the container from the
motor base.
Tamper
Tamper Splash Disk
Lid
The tamper splash disk and lid prevent the tamper from
hitting the blades when the lid is in place.
The 40 ounce (1.2 L) container should not be more than
two-thirds full (28 ounces) if using the tamper during
the blend.
To avoid overheating, DO NOT use the tamper for more than
30 consecutive seconds.
Container
Handle
Blades
Holding the tamper straight up and down may not help the
ingredients circulate. If necessary, point the end of the tamper
toward the container walls. DO NOT try to force the tamper
deeper into the container.
9. Empty the container. Unthread the blade base from the container in a counter-clockwise direction.
10
11
C A R E , C L E A N I N G A N D T R O U B L E S H O OT I N G
BLENDING IN THE 20 OUNCE
( 0. 6 L ) CO N TA I N E R
CARE AND CLEANING
Containers, Lids, Lid Plug, Tamper, Blade Base and Seals
WARNING
Parts will become hot with extended use.
DO NOT touch the drive socket in the motor base or the drive spline in the blade base.
To avoid damage or personal injury, DO NOT use the 20 ounce (0.6 L)
container (including the blade base or flip-top lid) in the microwave.
•
Are top rack dishwasher safe. The parts may become damaged if
they are not washed on the top rack.
•
Remove the blade base from the container after blending. Clean the
threads on the blade base and the seal thoroughly to avoid ingredient
build up between blends. Ingredient build up might cause problems
when trying to remove the blade base from the container if it has
been attached and allowed to sit for a long period of time.
DO NOT blend hot liquids in the 20 ounce (0.6 L) container.
This icon corresponds to suggested recipes for the 20 ounce (0.6 L) container in your cookbook.
Motor Base
1.
1.
WARNING
To begin, put a seal on the bottom thread of the blade base.
The seal should fit snugly and evenly around the thread.
Seal
2.
Load the 20 ounce (0.6 L) container according to the recipe.
Blade Base
3.
Thread the blade base onto the 20 ounce (0.6 L) container in
a clockwise direction just until tight. DO NOT overtighten or
leaking can occur.
Electrical shock hazard.
Disconnect power before cleaning machine. Do not immerse or
place the motor base in water.
Failure to follow instructions can cause death or electrical shock.
4. Invert the 20 ounce (0.6 L) container so the blade
assembly is on the bottom. Place the container on
the motor base. The interlock tabs on the 20 ounce
Liquids (water, juice, yogurt)
(0.6 L) container will lower into the cutouts in the
Dry Goods (grains, seasonings, powders)
motor base.
5.
Begin blending by slowly rotating the control to the
desired program, variable speed setting or to pulse.
Once you are at the setting you would like to start
blending on, push the knob in to start the blades.
Follow the recipe guidelines to finish the blend.
20 ounce (0.6 L)
Container
SCALE 1.000
Soft Fruits and Veggies
Leafy Greens
7.
Invert the 20 ounce (0.6 L) container. Unthread the blade base from
the container in a counter-clockwise direction.
8.
Put a seal on the flip-top lid. The seal should fit snugly and evenly
around the bottom thread of the flip-top lid.
2.
Wash the outside surface with a damp soft cloth or sponge, which has been rinsed in a mild solution of
liquid detergent and warm water.
3.
Thoroughly clean the control knob so it works freely. Moisten a cotton swab with a household degreaser
or cleaner and clean the grooves around the control.
4. Moisten a cotton swab and wipe out the overflow opening at the back of the motor base.
Ice and Frozen Ingredients
6. Wait until the blades come to a complete stop before removing the
container from the motor base.
5.
Immediately dry all surfaces. Polish surfaces with a soft cloth.
T R O U B L E S H O OT I N G
Flip-top Lid
Automatic Overload Protection
Seal
9. Thread the flip-top lid onto the 20 ounce (0.6 L) container in a clockwise direction until just tight.
DO NOT overtighten or leaking can occur.
10. To open the flip-top lid, hold the container with one hand, press the two tabs on lid with the other hand
and lift up to release.
SCALE 1.000
12
Unplug the power cord.
Your Vitamix machine is equipped with automatic overload protection. This built-in feature is designed to
protect the motor and prevent your machine from overheating. When engaged, the automatic overload
protection will cause the motor to shut off and possibly emit a light odor. If the motor shuts off, turn the
control knob back to the stop symbol (O) and let the blender sit for 45 minutes to cool.
Do not fill the 40 ounce (1.2 L) container more than two-thirds full (approximately 28 ounces) when blending
thick texture recipes (e.g., hummus or nut butters). This allows room at the top of the container to use the
tamper, to add liquid to the blend if necessary and will reduce the chances of overheating the unit.
13
WA R R A N T Y
Full 5-Year Machine Warranty
1.
PRODUCT REGISTRATION.
Vita-Mix® Corporation (“Vitamix”) strongly encourages you to register your purchase. You can register
online at vitamix.com/warranty; or by calling our Customer Service Department at 1.800.848.2649
or 1.440.235.4840. Failure to register your product purchase will not diminish your warranty rights.
However, registering your purchase will allow Vitamix to better serve you with any of your customer
service needs.
2.
WHO CAN SEEK WARRANTY COVERAGE.
This Warranty is extended by Vitamix to the owner of this Machine for personal household use only.
This Warranty does not apply to products used for commercial, rental or re-sale purposes. Should
ownership of the machine change during the 5-year period, please update the Machine’s owner
information at vitamix.com/warranty.
3.
WHAT IS COVERED.
Vitamix warrants to the owner that if this Machine (a “Machine” consists of a motor blender base and
any containers purchased together) fails within 5 years from the date of purchase due to a defect in
material or workmanship or as a result of normal wear and tear from ordinary household use, Vitamix
will, within 30 days of receipt of the returned product, repair the failed Machine or component part of
the Machine free of charge.
If, in Vitamix’s sole discretion, the failed Machine or component part of the Machine cannot be repaired,
Vitamix will elect to either (A) replace the Machine free of charge or (B) refund the full purchase price to
the owner, unless Vitamix receives prior written notice of the owner’s preference.
4. WHAT IS NOT COVERED.
This Warranty does not apply to Machines that have been used commercially or in non-household
applications. This Warranty does not cover cosmetic changes that do not affect performance, such as
discoloration or the effects of the use of abrasives or cleaners or food build up. This Warranty is only
valid if the Machine is used and maintained in accordance with the instructions, warnings and safeguards
contained in the owner’s manual.
WA R R A N T Y
5. WHAT VOIDS THIS WARRANTY.
Abuse, misuse, negligent use, alteration of the Machine, exposure to abnormal or extreme conditions, or
failure to follow the operating instructions will void this Warranty.
The Warranty is also void if repairs to the Machine or any component part of the Machine are performed
by someone other than either Vitamix or an authorized Vitamix Service Provider or if any component
part of a Machine subject to this Warranty is used in combination with a motor base, container, or any
other part or accessory that is not expressly authorized by Vitamix.
6. HOW TO OBTAIN RETURN AUTHORIZATION UNDER THIS WARRANTY.
In the event that the Machine or any component part of the Machine needs service or repair, please call
Vitamix Customer Service at 1.800.848.2649 or 1.440.235.4840. You will be asked to provide a date of
purchase and proof of purchase for any product that has not been registered with Vitamix. For product
subject to this Warranty you will be provided with a return authorization number, up-to-date shipping
instructions and a pre-paid return pick up label. Vitamix will pay standard shipping costs on the return of
a Machine or component part for warranty service and repair and for return shipment of the product to
you after the warranty repair or replacement. Purchaser is responsible for the costs of special shipping
requests.
Within the U.S.A. and Canada, this Warranty is honored directly through the Vita-Mix® Corporation.
United States
Canada
Vita-Mix® Corporation
Vita-Mix® Corporation
8615 Usher Road
200-1701 Shepherd Street East
Cleveland, Ohio 44138-2199
Windsor, Ontario N8Y 4Y5
1.800.848.26491.800.848.2649
[email protected]@vitamix.com
You will be deemed to have accepted the returned product “as is” upon delivery unless you notify Vitamix of
any problem, including shipment damage, within 48 hours of delivery.
Vitamix will not be responsible for the cost of any unauthorized warranty repairs.
REPAIR, REPLACEMENT OR REFUND OF THE PURCHASE PRICE ARE THE EXCLUSIVE REMEDIES OF
PURCHASER AND THE SOLE LIABILITY OF VITAMIX UNDER THIS WARRANTY. NO EMPLOYEE OR
REPRESENTATIVE OF VITAMIX IS AUTHORIZED TO MAKE ANY ADDITIONAL WARRANTY OR ANY
MODIFICATION TO THIS WARRANTY WHICH MAY BE BINDING UPON VITAMIX. ACCORDINGLY,
PURCHASER SHOULD NOT RELY UPON ANY ADDITIONAL STATEMENTS MADE BY ANY EMPLOYEE
OR REPRESENTATIVE OF VITAMIX. IN NO EVENT, WHETHER BASED ON CONTRACT, INDEMNITY,
WARRANTY, TORT (INCLUDING NEGLIGENCE), STRICT LIABILITY OR OTHERWISE, SHALL VITAMIX
BE LIABLE FOR ANY SPECIAL, INDIRECT, INCIDENTAL OR CONSEQUENTIAL DAMAGES, INCLUDING,
WITHOUT LIMITATION, LOSS OF PROFIT OR REVENUE.
SPECIAL INTERNATIONAL INSTRUCTIONS
If a machine was purchased within the U.S.A. or Canada
but is currently outside the U.S.A. or Canada,
all shipping and resulting taxes and duties are at the owner’s expense.
Call 1+1.440.235.4840 or email [email protected] for more details.
Some states do not allow limits on warranties. In such states, the above limitations may not apply to you.
Outside the U.S.A. and Canada, other warranties may apply.
14
15
P R O D U C T S P E C I F I C AT I O N S
Vitamix S55
Electrical:
120 V, 60 Hz, 7 A
Uses a U.S.A. three–prong grounded cord.
Dimensions:
Width: 6 inches (15.2 cm)
Depth: 9 inches (22.9 cm)
Height: Motor base only - 8 inches (20.3 cm)
20 ounce (0.6 L) container - 7.5 in. (19.1 cm)
40 ounce (1.2 L) container - 8 in. (20.3 cm)
When applicable:
To see the complete line of Vitamix® products,
visit vitamix.com
Vita-Mix® Corporation
8615 Usher Road
Cleveland, OH 44138-2103 U.S.A.
440.235.4840 / 800.848.2649
vitamix.com
©2014 Vita-Mix Corporation. No part of this publication may be reproduced or transmitted in any form or by any
means or stored in a database or retrieval system without the written permission of the Vita-Mix Corporation.
111499_A 11/14 ENG/FRC