1
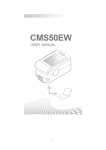
RX150a Wireless Pulse Oximeter for Animals Ver 1.2 I User Instructions This Manual is written and compiled in accordance with the council directive MDD93/42/EEC for medical devices and harmonized standards. In case of modifications and software upgrades, the information contained in this document is subject to change without notice. The Manual describes, in accordance with the RX150a Veterinary Pulse Oximeter’s features and requirements, main structure, functions, specifications, correct methods for transportation, installation, usage, operation, repair, maintenance and storage, etc. as well as the safety procedures to protect both the user and equipment. Refer to the respective chapters for details. Please read the User Manual carefully before using this product. The User Manual which describes the operating procedures should be followed strictly. Failure to follow the User Manual may cause measuring abnormality, equipment damage and human injury. The manufacturer is NOT responsible for the safety, reliability and performance issues and any monitoring abnormality, animal injury and equipment damage due to users' negligence of the operation instructions. The manufacturer’s warranty service does not cover such faults. Owing to the forthcoming renovation, the specific products you received may not be totally in accordance with the description of this User Manual. We would sincerely regret for that. This product is medical device, which can be used repeatedly. WARNING: It is recommended that the sensor should not be applied to measured part for over 2 hours, as the device may disrupt microcirculation on the body part. Be advised that the device cannot be clipped on the edema and tender tissue. Do not stare directly at the LED lights as he light (the infrared is invisible) emitted from the device is harmful to the eyes. Please refer to the correlative literature about the clinical restrictions and caution. This device is not intended for treatment. The User Manual is published by ReFleX Wireless Inc. All rights reserved. II Contents 1. SAFETY ..............................................................................................................................................1 1.1 OPERATION PROCEDURES .............................................................................................................1 1.2 WARNING......................................................................................................................................1 1.3 CAUTIONS .....................................................................................................................................2 2. INTRODUCTION ..............................................................................................................................3 2.1 INTENDED USE..............................................................................................................................3 2.2 KEY FEATURES .............................................................................................................................3 2.2 APPLICATION AND SCOPE..............................................................................................................3 2.3 ENVIRONMENT REQUIREMENTS ....................................................................................................3 3. SYMBOLS, CONTROLS, DISPLAY, AND INDICATOR .............................................................4 3.1 FRONT PANEL ...............................................................................................................................4 3.2 REAR PANEL .................................................................................................................................5 4. SETUP OF THE RX150A ..................................................................................................................5 4.1 LIST OF COMPONENT ....................................................................................................................6 4.2 CONNECT RX150A SENSOR PROBE TO RX150A PULSE OXIMETER ................................................6 4.3 INACCURATE MONITOR MEASUREMENTS .....................................................................................7 5. BATTERY OPERATION ..................................................................................................................7 5.1 BATTERY POWER ..........................................................................................................................7 5.2 BATTERY INDICATOR .....................................................................................................................7 5.3 BATTERY CHARGING .....................................................................................................................7 5.4 BATTERY INSTALLATION ...............................................................................................................8 6 RX150A OPERATION.......................................................................................................................9 6.1 TURN ON RX150A ........................................................................................................................9 6.2 MENU OPERATIONS: ....................................................................................................................10 6.3 ENABLE PULSE SOUND ............................................................................................................... 11 6.4 SET ALARM LIMIT ...................................................................................................................... 11 6.5 DISABLE/SUSPEND AUDIBLE ALARM .......................................................................................... 11 6.6 ADJUST LED DISPLAY BRIGHTNESS ...........................................................................................12 6.7 ENABLE DATA RECORDING (UNDER REVISION) ..........................................................................12 6.8 ENABLE BLUETOOTH COMMUNICATION .....................................................................................12 6.9 CHANGE USER ID......................................................................................................................12 6.10 CHANGE SCREEN ORIENTATION ..................................................................................................12 6.11 EXIT MENU .................................................................................................................................12 6.12 SOFTWARE OPERATION ...............................................................................................................12 6.13 CAUTIONS ...................................................................................................................................12 6.14 CLINICAL RESTRICTIONS .............................................................................................................13 7. RX150A SENSOR PROBES AND ACCESSORIES .....................................................................13 8. PERFORMANCE CONSIDERATION ..........................................................................................13 9. TROUBLESHOOTING...................................................................................................................14 9.1 CORRECTIVE ACTIONS ................................................................................................................14 9.2 EMI (ELECTROMAGNETIC INTERFERENCE) ................................................................................14 9.3 TECHNICAL ASSISTANCE .............................................................................................................15 III 10. MAINTENANCE ...........................................................................................................................16 10.1 RETURN THE RX150A.................................................................................................................16 10.2 TO RETURN THE RX150A............................................................................................................16 10.3 SERVICE ......................................................................................................................................16 10.4 PERIODIC SAFETY CHECKS .........................................................................................................16 10.5 CLEANING ..................................................................................................................................16 11. MENU STRUCTURE ....................................................................................................................18 12. PRINCIPLE OF OPERATION .....................................................................................................19 13. SPECIFICATIONS ........................................................................................................................20 14. KEY SYMBOLS .............................................................................................................................21 15. DEVICE FUNCTIONS ..................................................................................................................22 APPENDIX ...........................................................................................................................................23 IV 1. Safety 1.1 Operation Procedures Check the main unit and all accessories periodically to look for visible damages that may affect patient’s safety and monitoring performance. It is recommended that the device be inspected once a week, and when a damage is observed, stop using the device. Technical maintenance must be performed by qualified service engineers ONLY. The device cannot be used together with devices not specified in User’s Manual. Only the accessory that appointed or recommendatory by manufacture can be used with this device. The product is pre-calibrated at the factory. 1.2 Warning Warnings are identified by the WARNING symbol shown above. Warnings alert the user to potential serious outcomes, such as death, injury, or adverse events to the animal or user. Explosive hazard—DO NOT use the oximeter in environment with inflammable gas such as some ignitable anesthetic agents. DO NOT use the oximeter while the testee measured by MRI and CT. The animal allergic to rubber cannot use this device. Follow the local laws and regulations when disposing a defective instrument, its accessories and packaging (including battery, plastic bags, foams and paper boxes). Please ensure that all items are present in the package prior using the device. Only accessories and probe approved or manufactured by the manufacturer to prevent damages to the pulse oximeter. Please choose the battery chargers that are compliant with the requirements of IEC 60601-1 The device only works with the compatible probe. The RX150a is not defibrillator-proof. However, it may remain attached to the animal throughout defibrillation or while an electrosurgical unit is in use. The measurements may be inaccurate throughout the defibrillation, or use of an electrosurgial unit, and shortly thereafter. To avoid shock, the caregiver should not hold the RX150a while using a defibrillator on an animal. To ensure accurate performance and prevent device failure, do not subject the RX150a to extreme moisture, such as direct exposure to rain. Such exposure may cause inaccurate performance or device failure. Do not lift the RX150a by the sensor or extension cable because the cable could disconnect from the monitor and the monitor may drop on the patient. 1 1.3 Cautions Cautions are identified by the CAUTION symbol shown above. Cautions alert the user to exercise care necessary for the safe and effective use of the RX150a handheld pulse oximeter. All combinations of equipment must be in compliance with IEC Standard 60601-1-1 systems requirements. Keep the oximeter away from dust, vibration, corrosive substances, explosive materials, high temperature and moisture. If the oximeter gets wet, please stop operating it. When it is carried from cold environment to warm or humid environment, please do not use it immediately. DO NOT operate keys on front panel with sharp materials. High temperature or high pressure steam disinfection of the oximeter is not permitted. Refer to User Manual in the relative chapter (7.1)for instructions of cleaning and disinfection. Do not have the oximeter immerged in liquid. When it needs cleaning, please wipe its surface with medical alcohol by soft material. Do not spray any liquid on the device directly. When cleaning the device with water, the temperature should be lower than 60oC. The animal hair which is too long or too thick may affect the measure value. Please insert hair thin part enough into the probe, or remove the hair from the body part which will be measured. Proper measurement should take less than 5 seconds; how this may change depending on each individual’s pulse rate. Please take the measure when the waveform on screen becomes stabilized to ensure the accuracy of the readings. If some abnormal conditions appear on the screen during test process, pull out the measured part and reinsert to restore normal use. The device has normal useful life for three years counting for its first day of use. This device has an alarm function. Please refer to chapter 6.1 as reference. The device has audible alert which is sounded when the highest or lowest limit are reached. The device has the function of alarming, this function can either be paused, or closed (default setting).To turned on this menu operation please check the chapter 6.1 as a reference. The device may not work for all animals. Stopping using the device if the device is unable to obtain stable readings. 2 2. Introduction WARNING: Do not make any clinical judgments based solely on the RX150a. The monitor is intended only as an adjunct in patient assessment. It must be used in conjunction with clinical signs and symptoms. 2.1 Intended Use The pulse oxygen saturation is the percentage of HbO2 in the total Hb in the blood, also known as the O2 concentration in the blood. It is an important bio-parameter for the respiration. A number of diseases relating to respiratory system may cause the decrease of SpO2 in the blood. Furthermore, some other causes such as the malfunction of body's self-regulation, damages during surgery, and the injuries caused by some medical checkup would also disrupt oxygen supply in animal body. Some of the corresponding symptoms are vertigo, impotence, vomit etc. Serious symptoms might bring danger to animal's life. Therefore, prompt information of animal's SpO2 can help doctors to discover the potential danger, and is of great importance to clinicians. To operate the Pulse Oximeter simply clip the probe on the animals’ tongue or ear and the photoplethysmogram, heart rate and oxygen saturation will display on the LED screen of the device. 2.2 Key Features A. B. C. D. Easy to operate using the buttons located next to the LED screen. Rechargeable battery Low power consumption. Support wireless data transmission of raw photoplethysmogram. 2.2 Application and Scope The Pulse Oximeter measures pulse oxygen saturation and pulse rate through animal's tongue or ear and body-parts that can be clipped by the sensor. It is designed to be used in both clinical and ambulatory settings. However, it is recommended that the device is only used when the animal is under anesthesia.) Warning: The problem of over-estimation may occur when the animal is suffering from toxicosis which caused by carbon monoxide. Thus, the device is not recommended to be used under this circumstance. 2.3 Environment requirements Storage Environment a) Temperature :-40oC~+60 oC b) Relative humidity :5%~95% c) Atmospheric pressure :500hPa~1060hPa Operating Environment a) Temperature:10 oC ~40 oC b) Relative Humidity :30%~75% 3 c) Atmospheric pressure:700hPa~1060hPa 3. Symbols, Controls, Display, and Indicator 3.1 Front Panel This section identifies the symbols, controls, displays, and indicators on the RX150a. Figure 1: RX150a Front Panel Table 1: RX150a Front Panel Description Index Name Screen Orientation/ 1 Scroll Down Menu 2 Alarm Mute/ 3 Scroll Up Alarm Indicator 4 SpO2 5 Pulse Beat Sound 6 Pulse Rate 7 Battery Indicator 8 Pulse Amplitude 9 Power Button 10 Waveform Screen 11 Probe Jack 12 SpO2 Upper Limit 13 SpO2 Lower Limit 14 Description Push this button to change the screen orientation (up/down) Or use it to scroll down in the settings menu Push this button to access the settings menu Push this button to mute the alarm for 60 seconds Or use it to scroll up in the settings menu To indicate if the alarm is on, off or temporarily muted Oxygen Saturation Reading To indicate if the pulse beat sound is on/off To indicate the number of pulse per minute To show the current battery status To indicate the normalized pulse strength Push it for 2 seconds to turn on/off the device To show the photoplethysmogram (Heart Waveform) This is where the sensor is connected Upper Limit Alarm Thresh Hold (set in the Alarm Menu) Lower Limit Alarm Thresh Hold (set in the Alarm Menu) 4 3.2 Rear Panel Figure 2: RX150a back panel Table 2: RX150a Back Panel Description Index Name Battery Cover 1 USB Port 2 Device Label 3 4 Speaker Hole 4. Setup of the RX150a Description Slide this cover to open/close the battery cover Use this port to charge the Lithium Polymer Battery The label contains the technical specifications, manufacturing details and certification information. The is where the alarm speaker is mounted. WARNING: To ensure patient safety, do not place RX150a in any position that might cause it to fall on the patient. WARNING: As with all medical equipment, carefully route patient cables to reduce the possibility of patient entanglement or strangulation. WARNING: Ensure that the speaker is clear of any obstruction and that the speaker holes are not covered. Failure to do so could result in an inaudible alarm tone. WARNING: Disconnect the RX150a and the sensor probe from the patient throughout magnetic resonance imaging (MRI) scanning. Induced current could potentially cause burns. WARNING: To ensure accurate performance and prevent device failure, do not subject RX150a to extreme moisture, such as direct exposure to rain. Such exposure may cause inaccurate performance or device failure. WARNING: Do not use an RX150a, a sensor probe, or cables that appear damaged. WARNING: Do not lift the RX150a by the sensor or extension cable because the cable could disconnect from the monitor and the monitor may drop on the patient. WARNING: Use only the RX150a extension cable with the RX150a. Do not attach any cable that is intended for computer use to the RX150a sensor port. Do not connect any device other than a ReFleX-approved sensor probe to the RX150a sensor connector. 5 4.1 List of Component Table 3: List of Components Quantity Name RX150a Pulse Oximeter 1 RX150a Sensor Probe 1 Rechargeable Battery 1 Instruction Manual 1 1 Quick Start Guide Description A hand held pulse oximeter designed for Veterinarians An oximetry probe designed for RX150a only A rechargeable 1050mA Lithium Polymer Battery The instruction manual is contained in the mini-CD or is downloadable on www.reflexwireless.com This is a simplified version of the instruction manual 4.2 Connect RX150a sensor probe to RX150a pulse oximeter WARNING: Pulse oximetry readings and pulse signals can be affected by certain ambient environmental conditions, RX150a sensor application errors, and certain patient conditions. See the appropriate sections of the manual for specific safety information: • Safety Information on page 1. • RX150a Sensor Performance Considerations on page 89. • RX150a Sensors and Accessories on page 71. Caution: Use only ReFleX-approved RX150a and, if needed, the approved extension cable. Figure: RX150a Sensor Port Table 4: Sensor Port Index Name Sensor Port 1 Description The place to connect the RX150a sensor probe 6 4.3 Inaccurate Monitor Measurements Physiological conditions, medical procedures, or external agents that may interfere with the monitor’s ability to detect and display accurate measurements include: incorrect application of the RX159a sensor probe placement of the RX159a sensor probe on an extremity with a blood pressure cuff, arterial catheter, or intravascular line excessive patient activity intravascular dyes, such as indocyanine green or methylene blue externally applied coloring agents, such as nail polish, dye, or pigmented cream 5. Battery Operation WARNING: Dispose of battery in accordance with local ordinances and regulations. 5.1 Battery Power The RX150a uses rechargeable Lithium Polymer battery to power the monitor. Depending on usage, the battery can last from 5 hours to 40 hours per each charge cycle. The battery will drain faster if the Bluetooth connectivity is switched on. 5.2 Battery Indicator Below are the five battery statuses: Power supply by battery only, and battery status is full Battery status is not full Battery status is at the verge of self-shutdown Low power alarm indication When charging the battery during device power-off, battery status will show on the screen for 60 seconds. To re-display the battery status simply pushes one of the buttons next to the LED screen (except the power on/off). WARNING: If the alarm function is on, the device will provide high-priority alarm signal when the battery is in low power status. Intermittent alarm will occur and the battery icon turns red in the state of flashing. High priority indicating that immediate response by the operator is required. 5.3 Battery Charging There are two battery charging methods: a) Connect the device to a computer using the USB Cable. b) Connect the device to the enclosed DC power adaptor using the USB Cable 7 5.4 Battery Installation i. Turn off the power. ii. Pull the battery compartment latch downward toward the bottom of the monitor, and remove the battery access door. iii. Install the Lithium Polymer Battery as shown in Figure 2. 8 6 RX150a Operation The parameters of the device are set at the factory according to Table 2. The parameters may be set on an individual basis by the clinician. Parameters remain in effect until changed by the user. Table 5: Default Parameter Settings Parameter %SpO2 Upper Alarm Limit %SpO2 Lower Alarm Limit Pulse Rate Upper Alarm Limit Pulse Rate Lower Alarm Limit Alarm Pulse Beep LED Display Brightness Data Recording Wireless ID Value Range 85~100 0~99 50~254 0~150 On/Off On/Off 1~3 On/Off On/Off Any four alpha numeric characters Default 99 85 150 50 Off Off 3 Off Off User (can only be set using RX150a software) 6.1 Turn on RX150a 6.1.2 Discussion The software version appears in the monitor display each time when it successfully completes the power-on self-test. Write the number down so it is available when you request technical assistance. Caution: During the Power-On-Self-Test immediately after power-up, confirm that the LED display and icons are shown and the monitor speaker sounds a one-second tone. WARNING: If do not hear the pass tone, do not use the RX150a 6.1.2 Procedure 1. Press the Power Button for two seconds 2. See the opening screen with the software version number located on the lower right hand corner 3. Wait for 60 seconds for the data to become stabilized if the device has not been used for over two hours. 9 6.1.3 RX150a Sensor Probe Attached The monitor shows two dashes in the %SpO2 and Pulse Rate displays as it searches for a valid pulse. For optimal performance allow the monitor to search and lock onto a pulse for approximately 10 seconds. When a valid pulse is detected, the monitor begins monitoring and displays patient parameters. Movement of the intensity bar indicates that real-time data is displayed. Continue to listen for the pulse beep tone as the monitor is used. If it does not sound with each pulse, it indicates one of the following: • pulse beep volume is off • speaker/audio has malfunctioned • signal is corrupted • RX150a has stopped functioning When an OXIMAX sensor is attached to the monitor and applied to a patient, and loses the pulse signal, the monitor displays [- - / - -] (two dashes and two dashes) and displays the Pulse Search icon as shown on the monitor. 6.2 Menu operations: Press the "menu button" as shown in figure 6 to modify various device settings, such as alarm, pulse indicator, backlight, data storage, and user ID ….The procedure is as follows: Figure 6. Main Menu Interface 10 6.3 Enable Pulse Sound On the main menu, press the up/down button to select "Pulse Sound", then select the pulse sound indication state (on/off) by pressing the "menu button", press “on” to start the function, and press “off” to close it. 6.4 Set Alarm Limit On the main menu, press the "up button" or "down button" to highlight the "Alarm" item ,then press the "menu button" to enter the alarm setting menu as shown below (figure 7): Figure 7. Alarm Setting Menu a. The highest/lowest alarm limit setting Use the up/down button to select the parameter that you wish to change, then press the "menu button" again to obtain the input screen as shown in figure 8, then press the up/down button to increase or decrease the value. One reach the desired value, press the "menu button" to confirm the setting. Warning: If the alarm function is on, the device will provide medium-priority alarm signal when the data of SpO2 or pulse rate is beyond the limit. Intermittent alarm will occur and the measurement shows in yellow. Warning: Medium priority indicating that prompt operator response is required. Warning: When operating at the beginning, put animal's tongue or ear, and setup the SpO2 ALM HI lower than the current measured value, then the machine will start alarm. The pulse rate alarm test is the same with the above. Figure 8. b. The alarm state setting Press the up/down button to highlight "Alarm", then choose the alarm state (on/off) by pressing the "menu button", select “on” to start the alarm function, and choose “off” to close it for good. 6.5 Disable/Suspend Audible Alarm a) Alarm including the alarm of measure data's going beyond the limits, the alarm of 11 low-voltage, the alarm of probe out of position. b) When alarm is on, press the "alarm pause button" to suspend the alarm temperately. The alarm will resume in about 60s. c) To turn off the alarm permanently, press the menu key on the device and change the alarm setting. 6.6 Adjust LED Display Brightness On the main menu, press the up/down button to highlight "Brightness", and then press the "menu button" to adjust the brightness of screen. 6.7 Enable Data Recording (Under Revision) 6.8 Enable Bluetooth Communication Turn on the Wireless Feature, and then go connect to the device using your Android or iOS device using the passcode “7762”. 6.9 Change USER ID The user can modify device ID by "AQWave". AQwave is current available in Android and PC. MAC and iOS version will be release in December 2012. 6.10 Change Screen Orientation On the measuring interface, press the "screen change button" to change the display orientation. 6.11 Exit Menu On the main menu, press the up/down button in order to move the menu choice bar to "Exit", and then press the "menu button" again to exit. 6.12 Software Operation Please connect the device with computer by a USB Cable or Bluetooth connection, and then follow the instruction specified in the software applications. For Android applications, they can be downloaded via Google Play (search keyword: AQWave). As for the PC software please download it on www.aqwave.com. 6.13 Cautions Please check if the device is functioning properly prior each use. Attach the sensor probe at the appropriate locations, such as the one illustrated in figure 5 to ensure device reading accuracy. The SpO2 sensor and photoelectric receiving tube should be arranged in a sequence such that the subject’s arteriole is in between the light emitter and the light sensor. 12 The SpO2 sensor should not be used at a location or limb tied with arterial canal or blood pressure cuff or at a site where intravenous injection is applied. Do not fix the SpO2 sensor with adhesive as it may be affected by venous pulsation and produces inaccurate measure of SpO2 and pulse rate. Excessive ambient light may affect the measuring result. This includes fluorescent lamp, dual ruby light, infrared heater, direct sunlight and etc. Strenuous action of the subject or extreme electrosurgical interference may also affect the accuracy of the sensor reading Please clean and disinfect the device after each use according to the User Manual 10.4. 6.14 Clinical restrictions a) Since the measure is taken on the basis of arteriole pulse, substantial pulsating blood flow of subject is required. A subject with weak pulse due to shock, low ambient/body temperature, major bleeding, or use of vascular contracting drug, the SpO2 waveform (PLETH) will decrease. In this case, the measurement will be more sensitive to interference. b) For those with a substantial amount of staining dilution drug (such as methylene blue, indigo green and acid indigo blue), or carbon monoxide hemoglobin (COHb), or methionine (Me+Hb) or thiosalicylic hemoglobin, and some with icterus problem, the SpO2 determination by this monitor may be inaccurate. c) The drugs like dopamine, procaine, prilocaine, lidocaine and butacaine may also be a major factor resulted in serious error of SpO2 measure. d) As the SpO2 value serves as a reference value for judgment of anemic anoxia and toxic anoxia, some animals with serious anemia may also report good SpO2 measurement. 7. RX150a Sensor Probes and Accessories 8. Performance Consideration 13 9. Troubleshooting Warning: If you are uncertain about the accuracy of any measurement, check the patient's vital signs by alternate means; then make sure the RX150a is functioning correctly. Warning: There are no user-serviceable parts inside the RX150a. The cover should only be removed by qualified service personnel. Caution: Do not spray, pour, or spill any liquid on the RX150a, its accessories, connectors, switches, or openings in the enclosure as this may damage the monitor. 9.1 Corrective Actions Issues The SpO2 and Pulse Rate are not shown or not stabilized after 10 seconds Corrective Action(s) • Check the sensor directions to determine if an appropriate sensor is being used and if it is applied properly. Check sensor and extension cable connections. Test the sensor on another subject. Try another sensor or extension cable. • Perfusion may be too low for the monitor to track the pulse. Check the patient. Use the monitor on yourself. Change the sensor site. Try another sensor. • Interference due to patient activity may be preventing the monitor from tracking the pulse. Keep the patient still, if possible. Verify that the sensor is securely applied and replace it, if necessary. Change the sensor site. • The sensor may be too tight, there may be interference due to ambient light, or the sensor may be on an extremity with a blood pressure cuff, arterial catheter, or intravascular line. Reposition sensor, as necessary. • Electromagnetic interference may be preventing the monitor from tracking the pulse. Remove the source of interference. • Ensure that the Power button is fully depressed. • The batteries may be missing, discharged, or oriented incorrectly. Install new batteries. The LED display Please recharge the battery. suddenly turns off. The device operation 1. Please recharge the battery time appears to be 2. Please contact the local service center. shortened There is no response to the Power button. 9.2 EMI (Electromagnetic Interference) Caution: This device has been tested and found to comply with the limits for medical devices to the EN60601-1-2, (second edition), and the Medical Device Directive 93/42/EEC. These limits are designed to provide reasonable protection against harmful interference in a typical medical installation. Due to the proliferation of radio-frequency transmitting equipment and other sources of electrical noise in healthcare environments, it is possible that high levels of such interference due to close proximity, or strength of a source, may result in disruption of performance of this device. Examples 14 of noise sources in healthcare environments that could cause electromagnetic interference are: • electrosurgical units • cellular phones • mobile two-way radios • electrical appliances • high-definition television The monitor is designed for use in environments in which the pulse can be obscured by electromagnetic interference. During such interference, measurements may seem inappropriate or the monitor may not seem to operate correctly. Disruption may be evidenced by erratic readings,cessation of operation, or other incorrect functioning. If this occurs, the site of use should be surveyed to determine the source of this disruption, and the following actions taken to eliminate the source: • Turn equipment in the vicinity off and on to isolate the offending equipment. • Reorient or relocate the interfering equipment. • Increase the separation between the interfering equipment and this equipment. The monitor generates, uses, and can radiate radio frequency energy. If it is not installed and used in accordance with these instructions, the monitor may cause harmful interference with other devices in the vicinity. 9.3 Technical Assistance For technical information and assistance, or to order parts or a service manual, contact ReFleX Wireless’s Technical Service Department at: [email protected] Or call your local ReFleX Wireless representative. The service manual includes block diagrams and a parts list required by qualifieid personnel when servicing the RX150a. Be sure to provide the software version number of the monitor when you request technical assistance. The software version appears in the monitor display each time when it successfully completes the power-on self-test. Write the number down so it is available when you request technical assistance. 15 10. Maintenance Warning: There are no user-serviceable parts inside the RX150a. The cover should only be removed by qualified service personnel. Caution: The institution should follow local government regulations and recycling instructions regarding disposal or recycling of the batteries and RX150a components or end of life of the monitor. Caution: The RX150a will not operate with dead batteries. Recharge the battery or install a new battery. 10.1 Return the RX150a Contact ReFleX Wireless’s Technical Service Department at: [email protected] for shipping instructions including a Returned Merchandise Authorization (RMA) number. Unless otherwise instructed by ReFleX Wireless’s Technical Service Department, it is not necessary to return the sensor probe or other accessory items with the RX150a. 10.2 To return the RX150a 1. Pack the monitor in its original shipping carton. If the original carton is not available, use a suitable carton with appropriate packing material to protect it during shipping. 2. Return the monitor by any shipping method that provides proof of delivery. 10.3 Service Warning: There are no user-serviceable parts inside the RX150a. The cover should only be removed by qualified service personnel. The monitor requires no calibration. If service is necessary, contact qualified service personnel or your local ReFleX Wireless Representative. 10.4 Periodic Safety Checks It is recommended that the following checks be performed every 24 months: • inspect the equipment for mechanical and functional damage • inspect the safety relevant labels for legibility 10.5 Cleaning Caution: Do not spray, pour, or spill any liquid on the RX150a its accessories, connectors, switches, or openings in the enclosure as this may damage the monitor. You can surface-clean and disinfect the RX150a monitor and the sensor probe. 16 To surface-clean the monitor: use a soft cloth dampened with either a commercial, nonabrasive cleaner, or a solution of 70% alcohol in water lightly wipe the surfaces of the monitor To disinfect the monitor: • use a soft cloth saturated with a solution of 10% chlorine bleach in tap water To clean and disinfect a reusable sensor probe: • read the directions for use enclosed with the sensor probe Each sensor probe model has cleaning and disinfecting instructions specific to that sensor. 17 11. Menu Structure 18 12. Principle of operation This pulse oximeter is powered by lithium polymer battery. In addition to viewing the data on the built-in OLED display, data can also be transmitted via Bluetooth to other portable electronic devices, such as computers, tablet or smart phones. The device algorithm is based on the absorption difference of red and infrared light by oxy-hemoglobin (HbO2) and deoxy-hemoglobin (Hb) and the Lambert Beer Law. The device design is based on photo oximetry and volumetric pulsatile flow mohnitoring technique. By transmitting two different wavelength of light through a fingertip, pulsatile flow signals are collected using a photo detector. The signal is then processed via the on-board microcontroller and the result is displayed on the built-in OLED screen. Figure 1. The data is collected at the sampling frequency is 120Hz. Upon processed by the main board, the processed data is then displayed. To transmit the data wireless via Bluetooth, the wireless feature in the device menu needs to be enabled using the menu key next to the device display. Alarm feature can also be activated via the same menu. 19 13. Specifications A. Measurement of SpO2 Measuring range: 0%~100% Accuracy: When the SpO2 measuring range is 70%~100%,the permission of absolute error is ±2%; below 70% unspecified B. Measurement of pulse rate Measuring range:30bpm~250bpm Accuracy: ±2 bpm or ±2% (select larger) C. Resolution SpO2 : 1%, Pulse rate: 1bpm. D. Measurement Performance in Weak Filling Condition: SpO2 and pulse rate can be shown correctly when pulse-filling ratio is 0.4%. SpO2 error is ±4%, pulse rate error is ±2 bpm or ±2% (select larger). E. Resistance to surrounding light: The deviation between the value measured in the condition of man-made light or indoor natural light and that of darkroom is less than ±1%. F. Power supply requirement: : 3.6 V DC ~ 4.2V DC. G. Optical Sensor Red light (wavelength is 660nm, 6.65mW) Infrared (wavelength is 880nm, 6.75mW) H. Adjustable alarm range: SpO2 : 0%~100% Pulse Rate: 0bpm~254bpm 20 14. Key Symbols Symbols Description Warning – See User Manual The pulse oxygen saturation (%) PRbpm Pulse rate (bpm) Close the alarm sound indication forever Pause the alarm sound indication Open the alarm sound indication Close the pulse sound indication Open the pulse sound indication Power on/off button Alarm pause button/up button Menu button Screen change button/down button BFType application part SN Serial number 1. The measured part falls off ( no measured part inserted) 2. Probe error 3. Signal inadequacy indicator IPX1 Ingress of liquids rank WEEE (2002/96/EC) 21 15. Device Functions Information Display Mode The Pulse Oxygen Saturation(SpO2) 2-digit digital TFT display Pulse Rate(PR) 3-digit digital TFT display Pulse Intensity (bar-graph) bar-graph TFT display SpO2 Parameter Specification Measuring range 0%~100%, (the resolution is 1%). Accuracy 70%~100%: ±2% , Below 70% unspecified. Average value Calculate the Average value in every 4 measure value. The deviation between average value and true value does not exceed 1%. Pulse Parameter Specification Measuring range 30bpm~250bpm, (the resolution is 1bpm) Accuracy ±2bpm or ±2% (whichever is greater) Average pulse rate Average pulse rate is computed based on every four cardio-beat per cycle. The deviation between average value and true value does not exceed 1% Safety Type Interior Battery, BF Type application part Pulse Intensity Range Continuous bar-graph display indicates the pulse strength. Battery Requirement Voltage 3.7 rechargeable lithium battery × 1 Battery working life Charge and discharge no less than 500 times. Power Adapter Input Voltage 100 to 240 VAC, 50/60 Hz Output voltage 5 VDC 22 Output current 250mA Output power 1.25 W Oximeter Probe Wavelength:660nm 880nm Dimensions and Weight Dimensions 87(L) × 45(W) × 22(H) mm Weight About 175 g (with the lithium battery*1) Appendix State Alarm condition delay Alarm signal generation delay Low voltage alarm 1s 20ms Spo2 alarm 330ms 20ms Pulse rate alarm 330ms 20ms Probe error alarm 16ms 20ms 23 Front Panel, 4 24