1
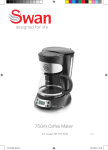
NEGATIVE & SLIDE TO SD SCANNER – FS351N
USER MANUAL
Thank you for purchasing your Neostar Film and Slide to SD Scanner.
Please read and retain these instructions for future reference.
Extra 3-packs of Slide or Negative Holders are available to purchase
directly from the www.neostar-electronics.co.uk website or from your
local retailer, or call us to place order 0845 555 4444.
RoHS
Compliant
CONTENTS
Safety Precautions
Page 1
Features & Package
Page 2
Description of parts
Page 3
Loading Slides
Page 4
Loading Negatives
Page 5
Proper Operation Sequence
Page 6
Operation Guide
Page 6
Capture Picture
Page 7
Mirror Image/Rotation
Page 7
Main Menu
Page 8 – 12
Product Specification
Page 13
Warranty and Service
Page 14
Warranty Conditions
Important: Do not expose this product to rain or moisture
to preserve the life of your product.
Caution: Do not disassemble this unit. To prevent this risk of
electric shock, do not remove cover.
Ventilation: The device should be situated so that its location
or position does not interfere with its proper ventilation. For
example, the unit should not be situated on a bed, sofa, rug or
similar surface that may block the ventilation openings.
Heat: The device should be situated away from sources of high
heat such as radiators or stoves.
Cleaning: We strongly suggest using a clean, dry, non-alcohol
cotton swab to clean the glass surface periodically to produce
a clear image.
Non use period: The USB cord for the device should be
unplugged from the computer when the unit is left unused for
a long period of time.
USB overloading: Do not overload the USB connections on
your computer. If you have too many devices connected to
your computer such as a wireless mouse, Media player, Mobile
phone or other USB powered devices. There may not be
enough power for the film scanner to operate properly.
Servicing: The user should not attempt to service the device
beyond those means described in the operating instructions.
All other servicing should be referred to qualified person.
Film Holder: The design of film holder follows ISO standard.
In some cases the holes on the film will not match exactly to
alignment of the holder. This is caused by a non-standard
camera. In this case, there will be a small black line on the
edge of the frame that can easily be cropped out using photo
editing software.
This product is fully-warranted against defective materials
and manufacturing faults for a period of Twelve Months from
The date of registered purchase under the following
provisions:
1. This warranty is non-transferable and does not cover
damage to products caused by accident, rental, abuse and
other public disturbances in any way.
2. This warranty becomes invalid if the serial number has
been removed, defaced,changed or alterations have been
made and equipment is repaired or alteration changed by
any other unauthorized dealers.
3. The dealer's invoices and this warranty card take effect
when they have been Verified.
This warranty invalid under following conditions:
A. Warranty card is altered or defaced;
B. Serial Number sticker don't accord with its original state;
C. Unauthorized repair or modifications to the product.
D. Accidents, abuse, improper installation, any improper
manner and unauthorized repair.
E. using unmatched power supply / voltage;
F. Using mismatch operation manual
G. Abnormal worn and tear;
H. Corrosion, rusting or stains;
I. Any losses, damages, defects and malfunctions caused
force majeure, fire and civil unrest.
The warranty enter into effect once the customers agree to
abide by the terms and conditions of warranty
Environmental protection: do not dispose in the normal household
waste, Dispose directly with the purchaser, us as the manufacturer or
take to your local recycling centre. Visit www.neostar-electronics.co.uk
or www.recyclenow.com
Customer Service: for technical advice visit the www.neostarelectronics website or call us on 0845 555 4440 (calls charged at local
rate for UK BT customers; other network charges may vary).
14
Product Specification
Size
Weight
Sensor
Effective resolution
Storage media
Sensitivity
Lens
Focus range
Still image
87mmL*86.5mmW*102.5mmH
about 300g
5Mega Pixels CMOS Sensor
5 Mega Pixels
SD card, compatible SDHC card
auto
fixed focus F/6.0, F=6.34mm
5.6cm
format: JPEG , resolution: 5M, 10M
( interpolation)
Zoom
no
Display
2.36” TFT
TV output format
NTSC/PAL
Light sources
backlight compensation( 3LED)
auto
White balance
Exposure compensation auto and also manual adjust via menu
Interface
MSDC: USB2.0
Auto turn on
no
Power
DC 5V
Windows Vista, XP, Windows 7
Operation system
Intel Pentium 42.8GHz above
CPU
512MB above
Memory
Video card
64MB or high top video card
Transmission connection standard USB2.0 or above
Hard disk capacity
at least 200MB
yes
User manual
yes
Adapter
yes
Positive board holder
Negative board holder
yes
yes
Brush
yes
USB cable
13
Features
--Stand alone film scanner, without the need to connect to a PC
--Powered by USB connection to PC or via AC mains power
adapter
--Two-way insertion for negative & slide film holder or entire
rolls of film
--High resolution 5Mega pixel CMOS sensor
--Scan both 35mm old/new negative and slide films
--With TV output(lead supplied) it can connect to TV
◆Film scanner
◆USB cable
◆Negative Film holder
◆Positive slide holder
◆AC/DC adapter
◆User's Manual
◆AV cable
◆Brush
NOTE: You will occasionally need to clean the backlight panel
using the cleaning brush provided. Lay the film scanner main
body on its side, insert the brush into the side slot and clean
the backlight panel. This will help remove dust from the
scanner and will lead to cleaner, better scanned images.
Note: choosing English, German, Italian, Spanish, Traditional
Chinese, Simplified Chinese, Japanese, French according to
user's need.
Resolution
5M or 10M can be chosen after enter into subordinate menu
of resolution
Storage
A: after connecting the main unit to PC and turn on scanner,
then enter into the menu
B: Selecting USB MSDC by pressing left / right key. The
pictures scanned can be found in PC when the scanner
screen turn off
C: preview and read picture on PC
Connect to TV
Insert the black end of the AV cable into the scanners TV
output, then connect other end of cable to your televisions
AV IN interface. You then need to use your TV remote control
to find the channel which the scanner will appear on, you
should see the LCD display appear on your TV!
Delete/ Return
If there are pictures that you have scanned but would like to
delete,then select playback mode from main menu,select
image you wish to delete, when you are viewing the image
press ‘menu’ button and scroll through the onscreen options
until you select ‘delete’; when you have selected delete press
‘Ok’.
OK
0000
OK
5M
SD
Language Setting
④ exit: return to playback mode from subordinate menu
⑤ return : back to capture picture mode from playback mode
Adjust and Save Picture
After enter into playback mode, then press menu key to enter
into subordinate menu of playback, Choosing picture rotation
degree, then press OK key for making sure. After finished
operation, exit to subordinate menu or return to capture
picture mode according to need.
OK
OK
OK
JPG
0/0
①.B&W film: choose B&W if there is B&W film in holder
②. Slide film: choose slide film if there is slide film
in holder
③.Negative film: choose negative film if there is negative film
in holder
Exposure Compensation
Press menu key to enter into main menu to choose
exposure compensation on shooting mode, then setting
exposure value of scanning picture.
Quick Start Guide
1. Load film or negative film to holder
2. Insert holder to scanner
3. Provide power to the scanner (using mains power lead
supplied, or using USB lead connected to PC)
4. Press power button to turn on scanner
5. Press scanning button to start scanning
6. Operate according to onscreen instruction main menu
7. After finishing working, take storage card out and
playback on a computer, digital photo frame etc, or take
them to be printed
8.Files can also be dragged from the SD card to the PC/Mac
using USB connection (for safe permanent storage)
Quick Menu Guide
Playback Mode
After enter into playback mode from menu , image will be
shown on screen automatically. Images can be scrolled through
by pressing either left or right arrow keys.
MENU
①
JPG
0/0
②
④
③
⑤
Subordinate menu of playback
①.rotation +90 : capture picture, then rotate 90degree
②.rotation -90: capture picture, then rotate90degree
③.delete: delete picture from memory card
1.Capture picture mode: A (select slide, negative, black
and white ) B: exposure compensation (see page
9 for details)
2.Playback mode – playback your scanned images.
3.Resolution: Select 5mega/ 10megapixel (interpolated)
4.Language setting: English, French, German, Italian,
Spanish, Traditional Chinese, Simplified Chinese, Japanese.
5.Storage: MSDC mode (mass storage – SD memory card)
Capture Picture
0000
0000
5M
SD
When image quality (5MP / 10MP)
has been selected, the image can
be captured (takes about 2 seconds
per scan). Enter into main menu to
choose shooting mode to set slide
style and EV value (exposure value).
SD
5M
INT
0000
0000
shooting mode
scanning amount available
resolution
sign to card
Rotation
5M
SD
5M
SD
Press right key(rotation), the image will be
altered from up to down
Main Menu
Capture picture mode
Mirror Image/ Rotation
If you need to mirror image or rotate image when picture has
been scanned, you can press left key/ right key to adjust it,
then capture picture.
0000
0000
Press menu key to enter into main menu to choose slide
style on shooting mode. Choose needed image type like
positive film, negative film, B&W.
Mirror
image
5M
SD
Slide style
5M
SD
Press left key (mirror image), the image will be altered from
left to right
7
8