1
Positioning & Comfort
-
-
-
-
Use stable, high-backed chairs with sufficient comfort and support. Check that they
do not squeak.
Sit up well and within range of the microphone. In a couch there is tendency for
people to lean back and fall out of range of the microphone. Moreover voice quality
may also be affected as the diaphragm is more compressed.
Position yourself, as interviewer, opposite the interviewee. Avoid leaning over a
coffee table, which will become uncomfortable over time; a dining table is a better
height.
It is a good idea to have water glasses handy, especially for long interviews. Ensure
any crockery or glassware is cushioned beneath (e.g. by a tablecloth or folded
napkin) to muffle sounds of drinks being put down.
It is also a good idea to have tissues handy should the interview lead to emotional
memory recall for the interviewee.
Have a sense of how long you estimate the interview to take. Plan with the
interviewee to take breaks as necessary.
Supporting documentation
Have your notes and a notepad in front of you. Interviews conducted with reference
to maps, photo albums, letters or diaries are best videoed rather than recorded, but
you can introduce items verbally and photograph them if necessary.
Before you record
-
-
-
Check the basic functions of your recording equipment, by making a test recording in
the room you will interview in. This allows you to be sure the recorder is working,
and that the sound levels are correct for the environment.
Use mains power in preference to batteries. However, should it be necessary to use
battery power, ensure you have a sufficient number of fully-charged batteries for your
recording equipment. This may include both the recorder and the microphone(s). A
fully-charged battery will normally give only four hours’ recording time. Begin each
interview with new batteries.
Make time to have an informal “warm up” chat before commencing the interview.
Beginning the interview
-
-
-
After pressing record, clearly identify your recording by introducing yourself and the
veteran by name, stating the date and location of the recording, and briefly
mentioning the topics of the interview. If the interview is part of a project, include this
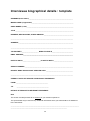
information. You may like to use the template included in this guide.
Allow time for both of you to warm up, particularly if you are not closely acquainted
with your interviewee. Questions about his or her background, such as place of birth,
place of enlistment and number of family, can assist in this as well as providing
excellent contextual information for the interview.
Ask background questions in chronological order. When you feel sufficient rapport
has been established, you can begin to broach the more important or personally
sensitive topics.
10