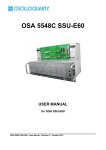
Download OSA5225 rev-g16
Transcript
OSA 5225
GPS NTP Server
USER MANUAL
Model 945.522.5xx
OSA-5225
User Manual
Revision G
October 2011
This page has been intentionally left blank
OSA-5225
User Manual
Revision G
October 2011
ii
What's new in this revision
v Add SNMP management console installation section 7.3
v Add Oscilloquartz MIB identifier section 7.1
OSA-5225
User Manual
Revision G
October 2011
iii
This page has been intentionally left blank
OSA-5225
User Manual
Revision G
October 2011
iv
Contents
Table of Contents
1.
2.
3.
4.
Page
INTRODUCTION .................................................................................................................1-1
1.1
About this Manual ..................................................................................................1-3
1.1.1
Copyright Notice .........................................................................................1-3
1.2
Reading Guide ........................................................................................................1-4
1.3
Safety Instructions .................................................................................................1-5
1.4
Warranty..................................................................................................................1-8
1.5
Certification ............................................................................................................1-9
PRODUCT OVERVIEW ..................................................................................................... 2-11
2.1
Introduction ..........................................................................................................2-13
2.2
Dimensions ........................................................................................................... 2-14
2.3
Front Panel............................................................................................................ 2-15
2.3.1
Display & Switches ................................................................................... 2-15
2.4
Rear Panel ............................................................................................................. 2-15
2.4.1
Redundant 17-72VDC Connector ............................................................. 2-16
2.4.2
230 VAC Connector ........................................................................... 2-16
2.4.3
Stamp Contents ........................................................................................ 2-16
2.4.4
Alarm Connector ....................................................................................... 2-17
2.4.5
IRIG B DCLS/Sine Wave/ PPS Output ...................................................... 2-18
2.4.6
ASCII Output............................................................................................. 2-18
2.5
OSA 5225 Configuration ...................................................................................... 2-19
QUICK START ....................................................................................................................3-1
3.1
Quick Installation....................................................................................................3-3
3.1.1
Check the Package Content ....................................................................... 3-3
3.1.2
Connection .................................................................................................3-4
3.2
Configuration ..........................................................................................................3-5
3.2.1
Output Card Configuration .......................................................................... 3-5
3.3
Basics......................................................................................................................3-6
3.3.1
The NTP protocol........................................................................................3-6
3.3.2
Synchronization Concepts .......................................................................... 3-7
3.3.3
Optional OSA NTP Software ....................................................................... 3-9
3.3.4
The OSA 5225 Time Base ........................................................................ 3-12
FULL SET-UP ..................................................................................................................... 4-1
4.1
Network Configuration ...........................................................................................4-3
4.1.1
Default Configuration ..................................................................................4-3
4.1.2
Changing Network Parameters ................................................................... 4-3
4.1.3
Network Integration .....................................................................................4-4
4.2
Output Cards Configuration ..................................................................................4-5
4.2.1
Introduction .................................................................................................4-5
OSA-5225
User Manual
Revision G
October 2011
v
Contents
4.2.2
4.2.3
4.2.4
4.3
5.
6.
7.
8.
9.
Default Configuration ..................................................................................4-5
Changing the Settings.................................................................................4-6
NTP Server Output Card Configuration ....................................................... 4-6
Output Code Format...............................................................................................4-7
4.3.1
RS232, RS485, RS422 Cards ..................................................................... 4-7
4.3.2
AFNOR/IRIG-B NFS87500 ......................................................................... 4-8
4.3.3
DCF and TDF Time Code Description....................................................... 4-10
FRONT DISPLAY INTERFACE ...........................................................................................5-1
5.1
Overview .................................................................................................................5-3
5.2
Start-up Conditions ................................................................................................5-3
5.3
Time Display ...........................................................................................................5-4
5.4
Minor Alarms Conditions .......................................................................................5-5
5.5
Major Alarm Conditions .........................................................................................5-5
WEB INTERFACE ...............................................................................................................6-1
6.1
Presentation............................................................................................................6-3
6.2
Description of the WEB Interface .......................................................................... 6-4
6.2.1
Main Screen ...............................................................................................6-4
6.2.2
Standard Setup ...........................................................................................6-5
6.2.3
State Setup .................................................................................................6-7
6.2.4
NTP Setup ..................................................................................................6-7
6.2.5
Input Setup ............................................................................................... 6-10
6.2.6
Output and Display Setup ......................................................................... 6-13
SNMP ..................................................................................................................................7-1
7.1
SNMP Overview ......................................................................................................7-3
7.1.1
General Description ....................................................................................7-3
7.2
Software Information MIB ......................................................................................7-4
7.3
SNMP Management Console .................................................................................7-8
7.3.1
Configuration ..............................................................................................7-8
7.3.2
SNMP Trap Verification ............................................................................ 7-12
SPECIFICATIONS ...............................................................................................................8-1
8.1
Input Specifications ...............................................................................................8-3
8.2
Oscillator Stability ..................................................................................................8-3
8.3
Outputs ...................................................................................................................8-4
8.4
Remote Functions ..................................................................................................8-5
8.5
NTP Characteristics ...............................................................................................8-5
8.6
General Specifications ...........................................................................................8-6
MAINTENANCE & TROUBLESHOOTING .......................................................................... 9-1
9.1
OSA-5225
Output Card Switches Verification ........................................................................ 9-4
vi
User Manual Revision G October 2011
Contents
9.1.1
9.1.2
9.1.3
Address Switches .......................................................................................9-4
Output Signal Format Modification for Pulses & IRIG-B DCLS Cards ......... 9-5
Input Signal Format Modification for Pulses & IRIG-B DCLS Cards ............ 9-6
9.2
Troubleshooting .....................................................................................................9-7
9.3
Oscilloquartz Contact Information ........................................................................ 9-9
9.3.1
Technical Assistance ..................................................................................9-9
9.3.2
Sales ..........................................................................................................9-9
APPENDIX A : ORDERING INFORMATION .............................................................................. A-1
DOCUMENT HISTORY .................................................................................................................... I
OSA-5225
User Manual
Revision G
October 2011
vii
List of Figures
List of Figures
Page
Figure 2-1 Rack Dimensions ...................................................................................................... 2-14
Figure 2-2 Front Panel ............................................................................................................... 2-15
Figure 2-3 Rear Panel Connectors............................................................................................. 2-15
Figure 2-4 Redundant 17-72VDC connector .............................................................................. 2-16
Figure 2-5 230 VAC Connector .................................................................................................. 2-16
Figure 2-6 Alarm Connector ....................................................................................................... 2-17
Figure 2-7 IRIG-B DCLS Connectors ......................................................................................... 2-18
Figure 3-1 NTP Protocol .............................................................................................................. 3-6
Figure 3-2 Clock Correction ......................................................................................................... 3-7
Figure 3-3 Network Dialog ........................................................................................................... 3-8
Figure 3-4 NTP Client Software States ........................................................................................ 3-9
Figure 3-5 NTP Server States .................................................................................................... 3-10
Figure 3-6 Time Base Clock Adjustment .................................................................................... 3-12
Figure 4-1 IRIG-B Frame Format ................................................................................................. 4-8
Figure 4-2 BIT Encoding .............................................................................................................. 4-9
Figure 4-3 DCF/TDF Time Code ................................................................................................ 4-10
Figure 5-1 Front Display............................................................................................................... 5-3
Figure 6-1 WEB Interface Access ................................................................................................ 6-3
Figure 6-2 Input Date Settings ................................................................................................... 6-10
Figure 6-3 Local Time on Input .................................................................................................. 6-11
Figure 6-4 Autonomy ................................................................................................................. 6-12
Figure 6-5 Security Threshold .................................................................................................... 6-12
Figure 6-6 Output Configuration ................................................................................................. 6-14
Figure 6-7 AFNOR / IRIG-B Fine Configuration ......................................................................... 6-15
Figure 7-1 SNMP MIB example.................................................................................................... 7-7
OSA-5225
User Manual
Revision G
October 2011
viii
List of Tables
List of Tables
Page
Table 2-1 OSA 5225 Configuration ............................................................................................ 2-19
Table 4-1 Output Card Types ....................................................................................................... 4-5
Table 4-2 ASCII Frame Fields ...................................................................................................... 4-7
Table 6-1 Set-up Parameters ....................................................................................................... 6-9
Table 8-1 Input Specifications ...................................................................................................... 8-3
Table 8-2 Oscillator Stability ........................................................................................................ 8-3
Table 8-3 Output Specifications ................................................................................................... 8-4
Table 8-4 Monitoring Specifications ............................................................................................. 8-5
Table 8-5 NTP Characteristics ..................................................................................................... 8-5
Table 8-6 General Specifications ................................................................................................. 8-6
Table 9-1 Output Switch Addresses ............................................................................................. 9-4
Table 9-2 Output Signal Format ................................................................................................... 9-5
Table 9-3 Input Signal Format ...................................................................................................... 9-6
OSA-5225
User Manual
Revision G
October 2011
ix
List of Procedures
List of Procedures
Page
Procedure 3-1 Quick Install Connection ....................................................................................... 3-4
Procedure 4-1 Changing Network Parameter............................................................................... 4-3
Procedure 7-1 Firmware Version Verification ............................................................................... 7-6
Procedure 7-2 SNMP Management Config. ............................................................................... 7-11
Procedure 7-3 SNMP Trap Verification. ..................................................................................... 7-13
OSA-5225
User Manual
Revision G
October 2011
x
Introduction
Chapter
1.
Introduction
Including :
v About this Manual
v Reading Guide
v Safety
v Warranty
v Certification
OSA-5225
User Manual
Revision G
October 2011
1-1
Introduction
This page has been intentionally left blank
OSA-5225
User Manual
Revision G
October 2011
1-2
Introduction
1.1 About this Manual
This manual has been designed to provide basic and detailed information for the correct
use and operation of the OSA 5225. It summarizes the overall equipment concept and
theory of operation, describes the hardware itself and provides information related to
installation, operation and maintenance.
It is intended for the use of the following types of users:
1.1.1
Systems Engineers:
An overview of the equipment concept and theory of
operation.
Installation Engineers:
Detailed technical information and procedures for
correct installation, operation, configuration and
commissioning as well as equipment specifications
and maintenance guidelines.
Maintenance Engineers:
Information on troubleshooting, maintenance and
equipment technical data.
Copyright Notice
Copyright © 2011 Oscilloquartz SA
All Rights Reserved
The Oscilloquartz product described in this book is furnished under a license
agreement and may be used only in accordance with the terms of the agreement.
The contents and information in this document are provided in connection with
Oscilloquartz products. No license, expressed or implied by estoppels or otherwise, to
any intellectual property rights is granted by this document. Except as provided in
Oscilloquartz SA’s Terms and Conditions of Sale for such products.
This document is exclusive property of Oscilloquartz SA and may not, in whole or in
part, be copied, photocopied, reproduced, modified, translated, reduced to any
electronic medium or machine-readable, stored in a retrieval system, or transmitted in
any form without prior consent in writing from Oscilloquartz SA, Brévards 16, 2002
Neuchâtel 2, Switzerland.
Every effort has been made to ensure the accuracy of this guide. However,
Oscilloquartz SA makes no warranties with respect to this documentation and
disclaims any implied warranties of merchantability and fitness for a particular
purpose. Oscilloquartz SA shall not be liable for any errors or for incidental or
consequential damages in connection with the furnishing, performance, or use of this
manual or the examples herein.
Oscilloquartz SA may make changes to specifications and product descriptions at any
time, without notice.
OSA-5225
User Manual
Revision G
October 2011
1-3
Introduction
1.2 Reading Guide
Special icons, attracting your attention, precede important and/or critical information in this
document. Hereafter are explanations of each icon.
CAUTION
This symbol is extremely important and must not be neglected. It precedes
information or procedures regarding installation, operation or maintenance.
Follow all steps or procedures, as instructed, to avoid any damage to
equipment or serious personal injury.
ELECTRICAL SHOCK HARZARD
This warning symbol is extremely important and must not be neglected. It
indicates that there are dangerous high voltages present inside the
enclosure of this product and precedes important warnings to avoid any risk
of fire or electrical shock that could lead to serious personal injury or loss of
life.
ESD CAUTION
Electrostatic Discharge (ESD) must be avoided so as not to damage or
destroy static sensitive components.
Note:
A note symbol informs the reader that additional information on the related
subject is provided in order to simplify a described task, suggest other
references or even just simplify an explanation.
Recommendation:
Recommendations advise the user on manufacturer tested methods and
procedures proven valuable for correct use and optimum equipment results.
OSA-5225
User Manual
Revision G
October 2011
1-4
Introduction
1.3 Safety Instructions
IMPORTANT SAFETY INSTRUCTIONS.
DO NOT DISCARD, READ BEFORE OPERATING
GENERAL
Exercise extreme care when handling any electronics equipment as it
contains precision parts that can be damaged by improper handling.
Avoid touching connector pin surfaces. Foreign matter deposited on contact
surfaces can cause corrosion, and eventually lead to degradation of
performance. In addition, do not use abrasives to clean contact/pin surfaces.
FIRE
For continued protection against risk of fire, ensure that only the specified
fuse type and rating are used. Fuse specifications are contained in this
previous section, and the label on the unit’s front panel.
ESD CAUTION
Electrostatic Discharge (ESD) must be avoided so as not to damage or
destroy static sensitive components in the OSA 5225. Please observe
proper ESD handling procedures. Use an approved anti-static bracelet in
accordance with company practice.
WATER AND MOISTURE
Do not place containers with liquids such as coffee, water, sodas, etc. on
this unit. Do not operate this equipment in a wet environment.
HEATING
Do not install this product near heat sources such as radiators, air ducts,
areas subject to direct, intense sunlight, or other products that produce heat.
OSA-5225
User Manual
Revision G
October 2011
1-5
Introduction
GROUNDING
EARTH CONNECTION IS ESSENTIAL BEFORE CONNECTING TO THE
SUPPLY.
The OSA 5225 shelf must be connected to Earth Ground (common bounding
network (DC-C)). The wire used for the connection must be a minimum of
AWG16.
Ensure that all other devices connected to the 5225, are connected to
protective (earth ground). (Grounding one conductor of a two-conductor
outlet is not sufficient.)
Any interruption of the protective (grounding) conductor (inside the
equipment) or disconnecting the protective earth terminal is likely to make
this equipment dangerous. Intentional interruption is prohibited.
POWER
Make sure the power sources are compatible with the power inputs of the
equipment. Verify that the correct fuses are installed. The equipment's
protective earth terminals must be connected to the protective conductor of
the (mains) power cord or the station earth. The mains plug shall only be
inserted in a socket outlet provided with a protective earth contact. The
protective action must not be negated by the use of an extension cord
(power cable) without a protective conductor (grounding).
Make sure that only fuses with the required rated current and of the specified
type (normal blow, time delay, etc.) are used for replacement. The use of
repaired fuses and the short-circuiting of fuse holders must be avoided.
Whenever it is likely that the protection offered by fuses has been impaired,
the equipment must be made inoperative and be secured against any
unintended operation
OSA-5225
User Manual
Revision G
October 2011
1-6
Introduction
POWER CORD PROTECTION
The power supply cord for this product should be routed or installed in such
a manner to protect it from being walked on or pinched. The unit should be
powered down completely before connecting or disconnecting the power
cable. The power cord should be removed before moving the unit. The
power cord must be placed near an easily accessible unobstructed socket
outlet.
CLEANING
Connected and running equipment can only be dusted using a soft dry cloth.
ONLY WITH, AUTHORIZED PERMISSION, OUT OF SERVICE &
UNPLUGGED equipment can be cleaned with a soft cloth slightly moistened
with a mild detergent solution. Do not use liquid cleaners, aerosols, abrasive
pads, scouring powders or solvents, such as benzine or alcohol. Ensure the
surface cleaned is fully dry before reconnecting power.
SERVICING AND MODIFICATIONS
To avoid dangerous electric shock, do not perform any servicing or
modifications other than what is recommended in this User Manual. Do not
attempt to gain access to areas of the unit where dangerous voltages are
present. Refer servicing to qualified service personnel.
DAMAGE REQUIRING SERVICE
•
Refer servicing to qualified service personnel under the following
conditions:
• When the power supply cord is damaged.
• If liquid has been spilled into the enclosure of the unit.
• If the product does not function normally by following the instructions
in the User’s Manual. Adjust only those controls that are covered by
the operating instructions. Improper adjustment of other controls may
result in damage and will often require rework by a qualified
technician to restore the product to its normal operation.
• If the product has been damaged in any way.
When the unit displays a negative, distinct change in performance.
OSA-5225
User Manual
Revision G
October 2011
1-7
Introduction
1.4 Warranty
This Oscilloquartz product carries a warranty which commences from date of dispatch
from factory. Unless agreed otherwise or stipulated differently on the original
acknowledgement of order, the duration of the warranty is twenty four months.
It applies to demonstrably faulty material or poor workmanship, but excludes batteries.
Oscilloquartz shall bear only the cost of repair or replacement in its own premises. Should
this not be possible for reasons beyond our control, all additional costs are at customer
expense.
Repairs under warranty carry either the balance of the original warranty or a six months
warranty, whichever is longer.
Damages resulting from natural wear, improper maintenance, failure to observe the
operating instructions, excessive strain, unsuited consumption material as well as
improper environmental and mounting conditions are excluded from this warranty.
The warranty expires if the customer or a third party modifies or repairs the product
without Oscilloquartz's prior written consent or if the customer does not take immediate
steps to prevent the damage from becoming more serious; likewise, if insufficient time is
provided for repair or replacement.
The customer will not be entitled to other warranty claims. Oscilloquartz is not liable for
consequential damage.
OSA-5225
User Manual
Revision G
October 2011
1-8
Introduction
1.5 Certification
EQUIPMENT CERTIFICATION:
Oscilloquartz equipment is tested according to well-defined procedures. Appropriate
testing and inspection takes place at the component, board, equipment and system levels.
The company maintains in-house cesium standards that are continuously compared to
UTC. Before any equipment is released, it must satisfy the relevant tests and inspection
schedules. The equipment is then issued with a "Certificate of Conformity" that
guarantees its conformance with the relevant performance criteria.
The OSA 5225 Server is designed to be compliant to:
• EMC
EN 55022: 2007 (class B)
EN 55024: 1999 + A1 2002 + A2: 2003
• SAFETY
EN 60950-1: 2007
• ROHS
Compliant
A variety of Oscilloquartz products are certified world-wide. For details, please refer to our
web site at www.oscilloquartz.com
COMPANY CERTIFICATION:
•
Certified since 1998 by the Swiss Accreditation Service and Swiss Federal
Office of Metrology as an accredited laboratory for time and frequency.
•
Certified ISO 9001 since 1994 and ISO 14001 since 2000 by The Swiss
Association for Quality and Management Systems (SQS)
OSA-5225
User Manual
Revision G
October 2011
1-9
Introduction
This page has been intentionally left blank
OSA-5225
User Manual
Revision G
October 2011
1-10
Product Overview
Chapter
2.
Product Overview
Including :
v Introduction
v Dimensions
v Front Panel
v Rear Panel
v OSA 5225 Configuration
OSA-5225
User Manual
Revision G
October 2011
2-11
Product Overview
This page has been intentionally left blank
OSA-5225
User Manual
Revision G
October 2011
2-12
Product Overview
2.1 Introduction
This document is a user’s guide for the OSA 5225 Time Node. The OSA 5225 is an
accurate time center, easily configurable with its outputs and dual synchronization input
(such as GPS, NTP, IRIG B AC, IRIG B DC) and dual power supply (230/115VAC and
20-60VDC).
The purpose of the OSA 5225 is to synchronize one or several product using a
synchronization signal, such as IRIG B DC, IRIG B AC, NTP, DCF or configurable Pulse
(PPS, PPM…), RS232, RS422, RS485. Using the OSA 5225 provides several
advantages:
•
The installed network architecture can be used with the well-known
protocols Ethernet+TCP/IP
•
Simplified set-up
•
Easy remote configuration and diagnostics
•
The unit is a 19” 1U rack that can be easily installed
•
It provides up to 12 configurable outputs
•
4 configurable and independent outputs per card
Note:
Jump directly to section Quick Start page for quick installation.
OSA-5225
User Manual
Revision G
October 2011
2-13
Product Overview
2.2 Dimensions
The rack is a standard 19” 1U rack.
424 mm
1U = 44 mm
482 mm
263 mm
Figure 2-1 Rack Dimensions
OSA-5225
User Manual
Revision G
October 2011
2-14
Product Overview
2.3 Front Panel
2.3.1 Display & Switches
Reset
Display Switch
Display
Figure 2-2 Front Panel
2.4 Rear Panel
This section contains a description of the different connectors of the OSA 5225. All the
plugs are located on the backside of the product.
Ground
Ethernet
GPS antenna (SMA connector, with TNC Adapter)
230 VAC
18-72
VDC
Optional outputs (NTP/IRIG-B/RS232/PPS)
10 MHz
output
Factory
default
Dry contact output - Power and Sync. Alarm
Second synchronization input
1 PPS
output
Figure 2-3 Rear Panel Connectors
OSA-5225
User Manual
Revision G
October 2011
2-15
Product Overview
2.4.1 Redundant 17-72VDC Connector
+
-
Figure 2-4 Redundant 17-72VDC connector
2.4.2
230 VAC Connector
N
L
PE
Figure 2-5 230 VAC Connector
2.4.3 Stamp Contents
The stamp that identifies the product is localized on the backside or on the top of the
product. It contains the following information :
OSA-5225
•
Company Name: OSCILLOQUARTZ
•
Equipment Reference: OSA 5225
•
Ordering number: A0xxxxx
•
Serial Number: nnnnnn
User Manual
Revision G
October 2011
2-16
Product Overview
2.4.4 Alarm Connector
Pins 3 & 4 Power alarm (without polarity)
Pins 1 & 2 Synchronization alarm (without polarity)
Figure 2-6 Alarm Connector
Alarm conditions:
PWR: Power Alarm: Pin 3 and 4
SYNC: Synchronization alarm: Pin 1 and 2
Power Alarm condition: The alarms configuration is monitoring by HTTP
- NEVER, 220VAC failure, VDC failure, running on battery.
Input Alarm condition: The alarms configuration is monitoring by HTTP
- NEVER, IN1 or IN2 failure, IN1 and IN2 failure
OSA-5225
User Manual
Revision G
October 2011
2-17
Product Overview
2.4.5 IRIG B DCLS/Sine Wave/ PPS Output
Output 1
Output 2
Output 3
Output 4
Figure 2-7 IRIG-B DCLS Connectors
2.4.6 ASCII Output
4 outputs on DB9 connector:
1
2
3
4
5
6
7
8
9
OSA-5225
User Manual
RS232
TX4
GND
TX1
GND
GND
TX3
TX2
GND
N.C.
Revision G
RS485 / RS422
TX4TX1+
TX1TX4+
TX3+
TX3TX2TX2+
N.C.
October 2011
2-18
Product Overview
2.5 OSA 5225 Configuration
FIRST INPUT CLOCK REFERENCE
GPS receiver – (antenna + cable not provided)
None
SECOND INPUT CLOCK REFERENCE
IRIG B/AFNOR NFS 87500 – 1000Hz
IIRIG B/AFNOR NFS 87500 DCLS
NTP
None
POWER SUPPLY
20-60 VDC and 230 VAC/50-60Hz
20-60 VDC and 115 VAC/50-60Hz
OPTION GPS ANTENNA
None
OUTPUT EXTENSION (3 maximum + U)
NTP/SNTP
4 outputs AFNOR NFS 87500/IRIGB 1000HZ
4 outputs PPS,PPM, PPH, PP2S, DCF (TTL,
differential TTL, Phototransistor)
4 outputs DCLS (TTL, differential TTL,
Phototransistor)
4 outputs Serial ASCII RS 232
4 outputs Serial ASCII RS 422, RS485
SMPTE
Table 2-1 OSA 5225 Configuration
OSA-5225
User Manual
Revision G
October 2011
2-19
Product Overview
This page has been intentionally left blank
OSA-5225
User Manual
Revision G
October 2011
2-20
Quick Start
Chapter
3.
Quick Start
Including :
v Quick Installation
v Configuration
v Basics
OSA-5225
User Manual
Revision G
October 2011
3-1
Quick Start
This page has been intentionally left blank
OSA-5225
User Manual
Revision G
October 2011
3-2
Quick Start
3.1 Quick Installation
This part contains the minimum information for the set-up of the OSA 5225.
3.1.1 Check the Package Content
The package must contain the following items:
•
The unit itself: a 19” 1U rack. The name of this product is OSA 5225 GPS NTP
Server which is written on the front side of the rack.
•
A power supply cable
•
SMA to TNC adaptor
•
A network cable
•
A CDROM that contains set-up and management tools.
Recommendation:
Contact our local representative or the Oscilloquartz Customer
Support Service if one of the items above isn’t in the package.
OSA-5225
User Manual
Revision G
October 2011
3-3
Quick Start
3.1.2 Connection
Recommendation:
It is highly recommended that to know the serial number (written on
identification stamp), the localization and a short description for the unit.
STEP
ACTION
1
Connect the synchronization outputs to the equipment (see the Rear
Panel section for more information). Connect the ground stud to a
suitable ground building.
2
Connect the OSA 5225 to the network using the network cable.
3
Connect the OSA 5225 to a power supply using the power supply cable
when it is present.
The system should work immediately if there is a DHCP server on the
network.
Procedure 3-1 Quick Install Connection
Recommendation:
Fill-in the physical localization for each unit. This is possible using the
TimeNetMng tool localized on the CD-ROM. For more information, see
the Changing Network Parameters section.
OSA-5225
User Manual
Revision G
October 2011
3-4
Quick Start
3.2
Configuration
OSA 5225 is configured in factory to automatically get an IP address. Two mechanisms
are used:
•
If a DHCP server is present on the network, the OSA 5225 gets an address
automatically. This ensures that the IP address is compatible with the
network
•
If no DHCP server is present, the OSA 5225 automatically takes an IP
address using the AutoIP mechanism. In this case, the address is in the
range 169.254.x.y (where x and y are in the 0..255 range). If both server
and client have started in this mode, they should work correctly together
but their IP addresses may be incompatible with other products on the
network. 1
If no DHCP server is present, or manual network configuration is preferred, use the
TimeNetMng tool on the CDROM to change the network parameter. Please refer to part
Changing Network Parameters for more information.
Recommendation:
Don’t hesitate to contact the network administrator for the configuration of the
OSA 5225. He can help in optimizing the network installation.
3.2.1 Output Card Configuration
The default configuration for all the output cards is to deliver UTC time. The time
received from the NTP server is directly sent to the output.
Each card can be configured to output several local times. This configuration is done
through a WEB browser (see the Output Cards Configuration section).
1
For example, if it is not possible to configure the OSA 5225/DCLS from a WEB navigator.
OSA-5225 User Manual Revision G October 2011
3-5
Quick Start
3.3 Basics
This part contains a description of the basic concepts of the OSA 5225. It helps to
understand the behavior of the unit under various circumstances.
The OSA 5225 contains a NTP server. It can contain an NTP client software designed for
good-level precision and security. This NTP software is tightly coupled to a SNMP agent
that allows high-level management and supervision of the OSA 5225.
3.3.1 The NTP protocol
NTP (Network Time Protocol) is a network protocol that allows the time
synchronization of different equipments through a TCP/IP+Ethernet network. The
communication is based on a client/server dialog. The OSA 5225 acts as the server
and all the equipment to be synchronized act as clients.
Each time, a client needs to be synchronized, it asks the time to the server. The client
application should integrate several computations to compensate the transmission
delays over the network.
Depending on the client software, a precision close to some milliseconds can be
expected. The OSA 5225 with the NTP client option guarantees accuracy better than
the ms.
Request time
TCP/IP+Ethernet
network
Return time
NTP client
Figure 3-1 NTP Protocol
OSA-5225
User Manual
Revision G
October 2011
3-6
Quick Start
The time information exchanged through the network is the UTC Time (GMT+0). A
client (for example a PC) must convert this time using its own time-zone information
(and eventually by applying day saving correction).
The NTP protocol has reserves for security by implementing an encryption system:
each exchanged frame can be encrypted using the protocols DES and MD5.
In addition to the OSA NTP client software for Windows, you can found several NTP
client programs for a variety of hardware on the site:
www.ntp.org/software
3.3.2 Synchronization Concepts
3.3.2.1
Clock Correction Principles
The objective of the synchronization is to make two clocks indicating the same time.
In the case of NTP based synchronization, the NTP client clock must indicate the
same time than the NTP server clock.
To perform this synchronization, the NTP client software permanently compares the
two clocks and computes the following information:
• Offset:
It’s the difference between the time of the server clock and the time of the client
clock. For example, if the server clock indicates 2:10:13 and the client clock
indicates 2:11:14, the offset is –1:01;
• Drift:
It’s the frequency difference between the two clocks. When drift is not null and
without clock correction, the offset between the two clock increase or decrease
depending on the drift sign. 2
The following figure shows how the evolution of the two clocks with or without drift:
server time
Drift is null :
server time
client time
client time
Evolution during time
server time
server time
Drift is constant :
client time
client time
Figure 3-2 Clock Correction
2
There are several reasons for the presence of a drift between two clocks: generally the drift is due to the
temperature difference between the two clocks.
3-7
OSA-5225 User Manual Revision G October 2011
Quick Start
The objective of the synchronization of a NTP client to a NTP server is to reduce as
much as possible the drift and the offset. The accuracy and stability of the client clock
is tightly coupled to the efficiency of the reduction process.
3.3.2.2
Network Dialog
The real drift and offset of the OSA 5225 clock related to the NTP server are
estimated from a measured offset. This offset is computed by subtracting the client
clock date from the server clock date.
Periodically, the client estimate current offset from the server. This measure is done
using a message-passing mechanism as shown on following figure:
client side
Network
server side
Query server date
Return current server date
Receive reply date
Figure 3-3 Network Dialog
On a LAN, it takes some milliseconds between the time when the client asks for the
date and the time when it receives the reply. This time is due to transmission delay on
the network. It can vary because of network load or NTP server load. Worse, the
transmission time from client to server is generally not the same that the one from the
server to client.
Actually, on a large period of time, the difference of sum of client-server and serverclient transmission delays is zero. The NTP client algorithm implemented in the OSA
5225 is designed to compensate transmission delay and to average the measures.
3.3.2.3
Working with Several Servers
The NTP client software has the ability to work with several NTP servers (up to 3
servers). When not enough reply is received from a server or this server doesn’t reply
or reply too slowly, the NTP client software uses another one.
OSA-5225
User Manual
Revision G
October 2011
3-8
Quick Start
3.3.3 Optional OSA NTP Software
To use the OSA 5225 to synchronize a PC, Windows Time must first be set in manual
or disabled mode to prevent Windows NTP Server to load in priority (this tool is
located in the services tools).
This is to be done with the Network Administrator's permission.
3.3.3.1
NTP Client Software States
Here are the different states of the NTP client software:
Searching servers
Starting
Learning
environment
Auto-detection
Learning
environment
Learning
Enable outputs
No reply
Tracking
Commuting
Commutation OK
Figure 3-4 NTP Client Software States
Here is a description of these states:
OSA-5225
•
Starting:
The software is starting, it initializes and check the hardware if needed.
•
Auto-detection:
Server auto-detection is activated. The NTP client tries to find OSA servers. At
least one detected server is required to leave this state.
•
Learning:
The NTP client software has found one or several servers (auto-detection
activated) or works with configured servers. In this state, the software learns
network properties. About 2 minutes are required to complete this stage.
User Manual
Revision G
October 2011
3-9
Quick Start
•
Tracking:
Normal behavior, the NTP client permanently evaluate its offset and drift with the
server.
•
Commuting:
Not enough reply received from current server, trying another server.
3.3.3.2
The NTP Server States
The following figure shows the different states of the NTP server:
Run autonomously
Idle
Startup
Locked
Rescaling
Failure
Rescaled/Tracking
Autonomous
Figure 3-5 NTP Server States
OSA-5225
User Manual
Revision G
October 2011
3-10
Quick Start
Here is a short description of the different states:
OSA-5225
•
Idle
Just after the power-on.
•
Startup
The NTP software is waiting for hardware information. It doesn’t reply to NTP
clients requests.
•
Rescaling
The NTP software has received both the date and the PPS from the hardware.
The phase difference is too important. The NTP software doesn’t reply to NTP
clients requests and try to reduce the phase difference.
•
Rescaled/Tracking
The phase difference is small enough. The NTP server is now operational. It
replies to NTP clients’ requests. Moreover, it still tries to reduce the phase
difference if possible (tracking mode).
•
Failure
At any time, the NTP software can enter this state if it doesn’t receive a correct
date or the PPS from the hardware and cannot guarantee a good accuracy on its
internal clock.
•
Synchronized
Means time server is lock on the PLL. The offset between client and server is
very low.
•
Synthetized
Means time server is locking on the PLL because the offset between client and
server is few tenths of milliseconds. This state depends on several parameters,
time since power on, synchronization time, reference server stability used,
dissymmetry NTP request between go and return
•
Autonomous
When there is no time code at the input and that the OSA 5225 can guarantee a
good accuracy.
•
Locked
When the NTP software enters this state, it doesn’t reply to clients’ requests. The
software enters this state when it detects a large phase difference that will
overlap the security threshold value or when the user manually locks the server.
In this state, the unit continues on its own time base until the date becomes lower
than the threshold value again, or until a reboot.
•
Run autonomously (Free Running)
The NTP server runs without using the time source code. This mode is useful for
test procedure when no time source is available, but the time stability is
dependant of the quartz present on hardware.
User Manual
Revision G
October 2011
3-11
Quick Start
3.3.4 The OSA 5225 Time Base
The core of the time base is an high accurate OCXO. The mechanism to adjust the
clock of the time base with the synchronization input depends on the time difference
between the input clock and the time base clock (∆clocks) .
Step (µs/s)
1000µs/s
50µs/s
0,1µs/s
0 ,02µs/
0
1
50
∆clocks (µs)
Figure 3-6 Time Base Clock Adjustment
For example whether ∆clocks is inferior to 1µs, the algorithm increase or decrease
the frequency of the clock time base by 0,02µs/s step.
In event of ∆clocks is superior to 1ms (1000µs), the step is 1000µs/s.
OSA-5225
User Manual
Revision G
October 2011
3-12
Full Set-up
Chapter
4.
Full Set-up
Including :
v Network Configuration
v Output Cards Configuration
v Output Code Format
OSA-5225
User Manual
Revision G
October 2011
4-1
Full Set-up
This page has been intentionally left blank
OSA-5225
User Manual
Revision G
October 2011
4-2
Full Set-up
4.1
Network Configuration
4.1.1 Default Configuration
The OSA 5225 is configured to automatically take an IP address from a DHCP server.
At startup, the unit broadcasts a DHCP query to get an IP address. This query
contains a DHCP name. There are two cases:
•
If a DHCP server is installed on the network, it record the DHCP name and return
an IP address. The OSA 5225 starts working with this address.
•
If no DHCP server is installed, the OSA 5225 automatically uses a default IP
address in the range 169.254.x.y (where x and y are between 0 and 255).
The default SNMP name of the unit (that can be seen from a SNMP browser or from
a WEB browser) is OSA5225nnnnnn with nnnnnn, the serial number on 6 digits.
4.1.2 Changing Network Parameters
Use the TimeNetMng tool provided on the CDROM to configure the unit:
STEP
ACTION
1
Insert the CDROM in the drive. Start the TimeNetMng tool that is
localized in the "Software" directory.
2
The TimeNetMng tool displays automatically the OSA products installed
on the network. Each line contains information about one connected
product.
3
Double-click on the line related to the unit to be configured.
4
Set the network parameters and physical localization and click the Set!
button.
Procedure 4-1 Changing Network Parameter
OSA-5225
User Manual
Revision G
October 2011
4-3
Full Set-up
4.1.3 Network Integration
Network settings do not have to be changed in the following cases:
•
A DHCP server is present and there is enough reserved IP address for the
product.
•
No DHCP server is present but, but access to the unit through its WEB or
SNMP interface is not needed. In this case, the AutoIP mechanism will
automatically affect an IP address but this address will probably be
incompatible with the network. If several products work with AutoIP, they
could work together.
Some DHCP servers have the capacity to register the unit in the DNS. In this case,
the registered name is the DHCP identifier. Then, access to the unit from the WEB or
SNMP browser is possible. For example, to assign the DHCP name ntpsrv1 to the
OSA 5225, simply type ntpsrv1 in the address field of the WEB browser.
If there are several products to install, it is highly recommended to follow the following
steps:
•
Note the serial number and physical localization of each product during the
installation and connection.
•
On a PC, connected on the same network as the products, start TimeNetMng.
All the OSA products should appear with their serial number. Set the network
parameter and localization using the document filled at previous step.
•
OSA-5225
The document should be kept for further reference.
User Manual
Revision G
October 2011
4-4
Full Set-up
4.2 Output Cards Configuration
4.2.1 Introduction
The OSA 5225 is provided with up to 3 output cards in 1U. Each output card is tightly
synchronized on either the NTP time code received from the NTP server or the GPS
or the IRIG B input card. Each card acts as a kind of translator that receives time from
the main synchronization source and output specific time code.
Currently, there are 9 kinds of cards:
NTP/SNTP Ó
4 outputs AFNOR NFS 87500/IRIGB 1000HZ Ó
4 outputs PPS,PPM, PPH, PP2S, DCF (TTL, differential TTL, Phototransistor) Ó
4 outputs PPS,PPM, PPH, PP2S, DCF (TTL, differential TTL, Static Relay) Ó
4 outputs DCLS (TTL, differential TTL, Phototransistor) Ó
4 outputs DCLS (TTL, differential TTL, Static Relay) Ó
4 outputs Serial ASCII RS 232 Ó
4 outputs Serial ASCII RS 422, RS485 Ó
SMPTE Ó
Table 4-1 Output Card Types
4.2.2 Default Configuration
At expedition from OSA factory, all the output cards are configured to output UTC
time and time is constant all along the year (no Day Saving Time correction). The
display is managed as an output card and can be configured in the same way.
Important Note:
The signal format on PPS cards and DCLS cards can be changed to
TTL, differential TTL (RS422) or phototransistor / static relay
(depending of the card type). See the Output Card Switches
Verification section.
OSA-5225
User Manual
Revision G
October 2011
4-5
Full Set-up
4.2.3 Changing the Settings
Open the WEB site of the OSA 5225 (see the WEB Interface section.). Click on the
button. The current configuration of the unit appears on the screen.
In this screen each card can be tuned independently (see the Output and Display
Setup section). After changing the settings, click on the
button. The
modification should appear immediately at the outputs or on the display.
4.2.4 NTP Server Output Card Configuration
An NTP server output card can be added to the OSA 5225. In this way, different local
networks can be synchronized on several NTP servers, synchronizing themselves on
the same hardware reference.
The NTP server card must be configured in the same manner as the OSA 5225. Its
default network configuration is DHCP mode with identifier OSAnnnnnn with
nnnnnn, the serial number on 6 digits.
The default SNMP name of the NTP server (that can be seen from a SNMP browser
or from a WEB browser) is OSA5225nnnnnn with nnnnnn, the serial number on 6
digits.
To change the network parameters of the NTP server card, use the TimeNetMng tool
(see the Changing Network Parameters section). Like the OSA 5225, the NTP server
output card provides a WEB page for fine configuration (see the WEB Interface
section) and a SNMP MIB for supervision through the network.
OSA-5225
User Manual
Revision G
October 2011
4-6
Full Set-up
4.3 Output Code Format
4.3.1 RS232, RS485, RS422 Cards
The default configuration is shown below:
•
STX D
The ASCII frame is a 23 characters frame with following format:
A
Y
D D /
M M /
Y
Y
H H :
M M :
S
S
CR
Here is a description of the different fields of this frame:
Field
Size
Value/Meaning
STX
1
A single byte which value is 2 – mark the beginning of the frame.
DAY
3
The day in the week in a human-readable way (MON for Monday, TUE
for Tuesday, WED for Wednesday, THU for Thursday, FRI for Friday,
SAT for Saturday, SUN for Sunday
DD
2
Day in the month on two characters ASCII (01-31)
MM
2
Month in the year on two characters ASCII (01-12)
YY
2
Year on two characters ASCII (00 for 2000 – 99 for 2099)
HH
2
Hours on two characters ASCII (00 to 23)
MM
2
Minutes on two characters ASCII (00 to 59)
SS
2
Seconds on two characters ASCII (00 to 59)
CR
1
A single byte which value is 13 decimal – marks the end of the frame
Table 4-2 ASCII Frame Fields
OSA-5225
User Manual
Revision G
October 2011
4-7
Full Set-up
4.3.2 AFNOR/IRIG-B NFS87500
4.3.2.1
Frame Format
Figure 4-1 IRIG-B Frame Format
OSA-5225
User Manual
Revision G
October 2011
4-8
Full Set-up
4.3.2.2
Bit Encoding
The signal is modulated only on ‘B’ card. The ‘T’ card output signal has TTL level.
Figure 4-2 BIT Encoding
OSA-5225
User Manual
Revision G
October 2011
4-9
Full Set-up
4.3.3 DCF and TDF Time Code Description
Details of message transmitted over a full minute :
"0" synchronization bits
year
8
4
10
20
40 80
P3
M
control bits
0
2
1
10
8
month
4
2
1
4
day of week
2
(1= monday ; 7= sunday)
1
20
10
8
10
50
J+1 =JF
JF
ES
E/H
HE
HH
"0"
"1"
20
40
4
day of month
1
2
1 P2
20
2
30
10 8
40 20
4 2 1 P1
10
8
4
minutes
hours
KEY:
J
JF
ES
E/H
HE
HH
P1, P2, P3
Current day
State holiday
Standby transmitter used
Indicates a seasonal changeover on the next hour
Summer time
Winter time
Parity bits
Figure 4-3 DCF/TDF Time Code
OSA-5225
User Manual
Revision G
October 2011
4-10
Front Display Interface
Chapter
5.
Front Display Interface
Including :
v Overview
v Start-up Conditions
v Time Display
v Minor Alarms Conditions
v Major Alarm Conditions
OSA-5225
User Manual
Revision G
October 2011
5-1
Front Display Interface
This page has been intentionally left blank
OSA-5225
User Manual
Revision G
October 2011
5-2
Front Display Interface
5.1 Overview
The front display interface can display up to 16 characters. Two buttons provide display
configuration and global reset. The OSA 5225 uses the front display to show current time
and different alarm conditions.
Switch display mode
accuracy/satellites
Reset the unit
Figure 5-1 Front Display
5.2 Start-up Conditions
During start-up, the time and date of the OSA 5225 are not valid and are not displayed.
The following texts appear:
OSA-5225
•
When the device is started, all the dots on the display are lit.
•
During hardware initialization, the following text is displayed:
•
Then, the IP address of the product appears.
•
If there is no time code at the input, the OSA 5225 displays the following message:
User Manual
Revision G
October 2011
5-3
Front Display Interface
5.3 Time Display
When no alarm is present and time code is present at the input of the OSA 5225, the
current time of the server is permanently displayed.
•
When display is configured to show UTC time, the following information is
alternatively displayed:
IN1 FRI
IN1 07 OCT.
•
Using the mode button, displays either the accuracy or the number of GPS satellites
07 satellites
OR
> 20us
> 1 us
OCXO WARM UP
OCXO LOCK
OSA-5225
User Manual
Revision G
October 2011
5-4
Front Display Interface
5.4 Minor Alarms Conditions
There are two possible minor alarms. These alarms are displayed alternatively with the
date:
•
When there is no time code at the input and the OSA 5225 can guarantee enough
accuracy on its internal clock, the following text is displayed:
•
When the time difference is too important, the OSA 5225 tries to rescale its clock
and display Rescaling.
5.5 Major Alarm Conditions
•
OSA-5225
Without time code and when the OSA 5225 can’t guarantee accuracy, it stops
delivering time on outputs or NTP and displays the following text:
User Manual
Revision G
October 2011
5-5
Front Display Interface
This page has been intentionally left blank
OSA-5225
User Manual
Revision G
October 2011
5-6
WEB Interface
Chapter
6.
WEB Interface
Including :
v Presentation
v Description of the WEB Interface
OSA-5225
User Manual
Revision G
October 2011
6-1
WEB Interface
This page has been intentionally left blank
OSA-5225
User Manual
Revision G
October 2011
6-2
WEB Interface
6.1 Presentation
The OSA 5225 can be configured and supervised through a WEB interface. This interface
provides the following features:
•
Management of network parameters;
•
Management of SNMP parameters;
•
Management and diagnostic of server software itself;
•
Management and diagnostic of output cards.
Each OSA 5225 has its own WEB server that delivers WEB pages.
To access the WEB site, type-in the address of the OSA 5225 in the address field of the
WEB browser (as shown below) and validate the input. 3
Figure 6-1 WEB Interface Access
3
If the OSA 5225 has been configured in DHCP mode and the server automatically registers the DHCP
name in the DNS, the DHCP name can also be used instead of the IP address.
6-3
OSA-5225 User Manual Revision G October 2011
WEB Interface
6.2 Description of the WEB Interface
6.2.1 Main Screen
This is the screen that appears when accessing the WEB site of the OSA 5225. The
first four buttons on the left of the screen provide an access to the following panels:
1. Standard: information about the product and configuration of network
parameters. See the next section.
2. State : Current working state of the product
3. SNMP: configuration of SNMP parameters;
4. NTP: diagnostic and configuration of the NTP software behavio;
5. Input: offset from input time code, autonomy and autonomous running mode
configuration.
6. Output: diagnostic and configuration of output cards and display;
7. Download : Download a new software release
The
button updates immediately the OSA 5225 configuration. The
configuration is stored permanently in an EEPROM.
WARNING
Some parameters cannot be modified without restarting the OSA 5225.
When changing these kind of parameters and clicking on the
button, the OSA 5225 restarts with the new parameters and
needs some seconds before re-enable its output and generate NTP
code.
OSA-5225
User Manual
Revision G
October 2011
6-4
WEB Interface
6.2.2 Standard Setup
When clicking the Standard button, the network parameters and unit information are
displayed.
In the top of the panel, the network parameters and the WEB access password can
be controlled. In the bottom of the panel, information about the unit is displayed.
6.2.2.1
Network Parameters
WARNING
When clicking on the
button after changing one or several
network parameter(s), the OSA 5225 must restart to use the network
parameters. During the reset and a few seconds after, the outputs and
the NTP output are deactivated.
Here are the different parameters:
4
•
IP mode
Indicate if the OSA 5225 works with a fixed IP (set in the field IP address) or use
DHCP protocol (the DHCP identifier is set in the field DHCP identifier).
•
IP address
Indicate the network address affected to the unit. An IP address is made of four
numbers separated by a dot. Each number range from 0 to 255.
•
DHCP identifier
Identifier to be used when the OSA 5225 is configured in DHCP mode. This
identifier has 8 letters maximum.
•
Network submask
Indicates the width of the network used. For example, a network submask
255.255.255.0 indicates that only the last number change (in the example above,
address in the network can change between 192.168.10.1 to 192.168.10.254) 4.
•
Gateway address
If the OSA 5225 needs to communicate with products outside the local network, a
gateway must be indicated.
•
Without gateway
Check this box if there is no gateway on the network (or if it is not used).
When configuring several units to communicate on the same network, the network submask must be the
same.
6-5
OSA-5225 User Manual Revision G October 2011
WEB Interface
6.2.2.2
Product Information
Here is a description of the product information area:
•
Hardware è Serial number
Displays the OSA serial number of the unit. This is a 6 digits number which is the
same than the one stamped on the bottom or background of the rack.
•
Hardware è Product code
Displays the OSA base code of the product without option.
•
Ethernet Interface è (MAC) Address
Indicates the Medium Access address of the Ethernet interface of the OSA 5225.
•
Firmware è Version/Release Date
Version of the software running in the OSA 5225.
•
Last reboot reason
A text indicating why the OSA 5225 has restarted the last time.
6.2.2.3
WEB Site Access Protection
To protect access to the parameters of the OSA 5225, specify a password. This is
done by entering the password twice in the area Enter password and Confirm
password (the same password in both areas).
WARNING
The name of user is user.
Once a password is set, it will be required at the next connection.
OSA-5225
User Manual
Revision G
October 2011
6-6
WEB Interface
6.2.3 State Setup
The standard state of the unit is displayed :
•
State : Current state of the unit (Free running, tracking….)
•
Synchronization : Current state of the synchronization (Input 1 is waiting,
Input 1 is synchronizing…)
6.2.4 NTP Setup
When clicking the NTP button, the configuration of the NTP server software of the
OSA 5225 is displayed.
6.2.4.1
Description
Here is the short description of the different fields:
•
STRATUM level
the stratum value to be stored in the NTP messages sends to the NTP clients.
•
Reference ID
A 4 letters identifier that gives information about the time reference. This value
is put in the appropriate field in the NTP frame
When not synchronized
Define the effect on some NTP fields when the OSA 5225 is not
synchronized 5. The possible values are LI&STRATUM unchanged,
STRATUM=0,LI unchanged, STRATUM unchanged, LI=3(11b),
STRATUM=0, LI=3(11b)
The OSA 5225 with NTP client option can be synchronized on up to three NTP
servers. In fact, the NTP software uses only one server at the same time but can
commute to another server when there is no or not enough reply.
The NTP configuration panel shows what is the synchronization mode used by the
server or selected by the NTP software. It also shows the servers defined by the user
or detected by the software.
5
Time code is not present (server is autonomous) or the received time-code indicates that external
synchronization is lost
OSA-5225 User Manual Revision G October 2011
6-7
WEB Interface
Different servers used for synchronization and the current synchronization mode could be
change by the user.
Four modes can be selected:
-
Auto-detection
Sync one server
Sync two redundant servers
Sync three redundant servers
Auto detection mode indicate than the OSA 5220 scan, try and use servers present on your
network and use the more appropriate synchronization mode. In fact, the IP address server
can be add.
6.2.4.2
OSA-5225
Synchronization mode and IP address server
User Manual
Revision G
October 2011
6-8
WEB Interface
When selecting the checkbox Auto-detection, the OSA 5225 tries to use the NTP
servers present on the network and use the more appropriate synchronization mode.
If not the checkbox Auto-detection is not selected, it is necessary to indicate the
synchronization mode and the NTP servers to be used.
The following table can help in selecting the more appropriate parameters:
One server
# of NTP
servers used
1
Two servers
2
Three servers
3
Mode
Description
Use only one server for synchronization
Use the first server at startup. If this server
fails, commute to the second server. If this
server fails, commute to the first one and so
on…
Use the first server at startup. If this server
fails, commute to the second server. If this
server fails, commute to the third one and
so on…
Table 6-1 Set-up Parameters
OSA-5225
User Manual
Revision G
October 2011
6-9
WEB Interface
6.2.5 Input Setup
When clicking on the Input button, the input configuration of the OSA 5225 is
displayed.
6.2.5.1
Time Base
Run Autonomously
This box can be checked to set the OSA 5225 to run autonomously, independently of
the time on input. Set the actual date like shown below and validate the date by
pressing
Figure 6-2 Input Date Settings
NOTE
This mode is useful for client-server synchronization tests, or if there is
no synchronization source. However, the date is not exact, and the
accuracy is not guaranteed.
OSA-5225
User Manual
Revision G
October 2011
6-10
WEB Interface
6.2.5.2
Input 1 or Input 2
Local Time on Input
In some cases, the unit is not synchronized on an UTC time source but on a local
time source for example. It is then necessary to configure the time zone from the
Greenwich Mean Time (GMT), and the Day Saving Time policy of the source.
For example in Switzerland, the local time is UTC+1 hour in winter and UTC+2 in
summer. Here is the needed configuration:
Offset from UTC : +1h00
DST : European Union
When using UTC time source, keep the “Local time on input” checkbox unchecked.
Figure 6-3 Local Time on Input
Manual / Automatic Transmission Delay Compensation
The transmission delay compensation can be used to compensate the IRIG-B cable
length or GPS repeater for example.
Set the value in microsecond if the delay is known. In automatic mode, the
transmission delay of an input is calculated with its constant phase from the driving
input. If the driving input is in automatic, its compensation delay will be null, as it is the
reference for the unit.
OSA-5225
User Manual
Revision G
October 2011
6-11
WEB Interface
Autonomy
Figure 6-4 Autonomy
If the time source is lost, the unit can work in autonomous mode. When the autonomy
time end is reached, the unit stops providing time on its outputs or NTP time. The
autonomous duration can be chosen or set to infinite duration.
Security Threshold
Gives the maximum phase difference (in seconds) allowed on the time source before
locking the NTP server software. This field is initialized to “inactivated”.
Figure 6-5 Security Threshold
OSA-5225
User Manual
Revision G
October 2011
6-12
WEB Interface
Leap Second Policy and NTP Frame LI Indicator
If a leap second occurs at the 1st of January or the 1st of July of the current year, the
unit can be programmed to insert a leap indicator (LI) in its NTP frames or DCF
frames (when a DCF output card is present). This indicator will be active one day in
advance for NTP, and one hour in advance for DCF, and will be automatically reset
on the 1st of January or the 1st of July.
Note that the unit will proceed to a leap second only when the jump is received from
the external synchronization source.
Available values :
no additional second
last minute as 61 seconds
last minute as 59 seconds
6.2.6 Output and Display Setup
When clicking on the Output button, the configuration of the output of the OSA 5225
is displayed.
This panel shows a synthetic view of the outputs of the unit. The display is considered
as an output and is driven by a display card. An OSA 5225 can contain up to 3 output
cards (4 for the DCLS) plus the display card.
The display and each output of each output card can be configured
INDEPENDENTLY. When an output card is not present or in failure, its box doesn’t
appear.
At this time, there are 9 kinds of output cards:
NTP/SNTP
4 outputs AFNOR NFS 87500/IRIGB 1000HZ
4 outputs PPS,PPM, PPH, PP2S, DCF (TTL, differential TTL, Phototransistor)
4 outputs PPS,PPM, PPH, PP2S, DCF (TTL, differential TTL, Static Relay)
4 outputs DCLS (TTL, differential TTL, Phototransistor)
4 outputs DCLS (TTL, differential TTL, Static Relay)
4 outputs Serial ASCII RS 232
4 outputs Serial ASCII RS 422, RS485
SMPTE
OSA-5225
User Manual
Revision G
October 2011
Ó
Ó
Ó
Ó
Ó
Ó
Ó
Ó
Ó
6-13
WEB Interface
6.2.6.1
Standard Output Configuration
Description and hardware version of the card.
Disables the output
Daylight Saving Time Policy
Offset to apply to UTC time
Figure 6-6 Output Configuration
The previous picture shows the configuration panel for an AFNOR/IRIG-B. In addition,
the description contains identification and version of the program embedded in the
output card (there, it’s the program NTP4DCL1, version 0539).
Each output card can be configured independently through the following parameters :
•
Output Deactivation
Except the display, all the output cards can be deactivated. The deactivation
has the following effects :
o
o
o
•
For ASCII+TOP card, the time frame is not generated and the TOP
outputs are in the open state;
For AFNOR output, the carrier is not modulated.
The ALARM output doesn’t generate warning signal.
Time Zone
The “Time Zone” is a time offset that can be added or subtracted from the time
received through the NTP protocol (which is UTC time) to generate local time.
For example in Switzerland, local time is GMT + 1:00.
OSA-5225
User Manual
Revision G
October 2011
6-14
WEB Interface
•
Day Saving Time
In addition to the Time Zone, many countries apply a Day Saving Time
correction. The year is made of two areas: in summer time, 1 hour more is
added to the time (after Time Zone correction), in winter time only the Time
zone correction is applied. Don’t forget to select the appropriate country in the
WEB interface.
Here are the different DST policies :
European Union
Start: Last Sunday in March at 1 am UTC
End: Last Sunday in October at 1 am UTC
USA / Canada / Mexico /
St. Johns / Bahamas / Turks /
Caicos
Start: First Sunday in April
End: Last Sunday in October
Start: Last Sunday in October
End: Last Sunday in March
Start: Last Sunday in March at 2 am local time
End: Last Sunday in October at 2 am local time
Australia – Standard
Russia
6.2.6.2
Fine Output Configuration
Some output cards provide specific configuration :
ASCII + PPS Fine Configuration :
The period and the width of the pulse can be configured. For example DCF top, PPS ,
PPM.
AFNOR / IRIG-B Fine Configuration :
Choose the frame format : Afnor, IRIG-B or IRIG-B + binary second.
Figure 6-7 AFNOR / IRIG-B Fine Configuration
OSA-5225
User Manual
Revision G
October 2011
6-15
WEB Interface
SMPTE CONFIGURATION :
The SMPTE output code format can be configured here. The user bit field ban be customized or
automatically filled with the date. The time of the SMPTE code can be rescaled every second on
the device time base, or at a specific time of the day.
OSA-5225
User Manual
Revision G
October 2011
6-16
SNMP
Chapter
7.
SNMP
Including :
v SNMP Overview
v Software Information MIB
v SNMP Management Console
OSA-5225
User Manual
Revision G
October 2011
7-1
SNMP
This page has been intentionally left blank
OSA-5225
User Manual
Revision G
October 2011
7-2
SNMP
7.1 SNMP Overview
7.1.1 General Description
The very standardized SNMP protocol provides a means to get information and
alarms from the OSA 5225.
Alarms are sent to a SNMP browser localized on a computer identified by its IP
address. Up to 8 IP Trap address can be specified that allows the alarm monitoring
from 8 different computers.
The SNMP screen settings allow configuring the main elements of such alerts :
•
IP address(es) for sending alerts (traps)
•
Product Name (for information)
•
System location (for information)
•
System contact (for information)
The generated alerts (traps) and the MIB are in v2c format.
Much of the current MIB activity occurs in the portion of the ISO branch defined by
object identifier 1.3.6.1 and dedicated to the Internet community. Under this
community, there is the private branch, which contains the Enterprises branch in
which, private companies can define their own MIB’s.
Oscilloquartz is officially identified under this branch with the number 5551.
The following tree shows where Oscilloquartz is identified within the Management
Information Tree.
1 = OSI
1.3 = ISO Identified, organisation
1.3.6 = US DOD
1.3.6.1 = Internet
1.3.6.1.4 = Private
1.3.6.1.4.1 = Enterprises
1.3.6.1.4.1.5551 = Oscilloquartz
OSA-5225
User Manual
Revision G
October 2011
7-3
SNMP
7.2
Software Information MIB
The necessary MIB files are located in the SNMP folder at the root of this CD-ROM.
Please read the "MIB_information.txt" file which provides important information for
choosing the correct MIB file in association to the OSA 5225's firmware.
The OSA 5225 firmware version is noted in the unit's FAT (Factory Acceptance Test)
which is delivered with the unit.
The firmware version can also be verified using web access connection as described in
the following procedure.
STEP
OSA-5225
ACTION
1
Power On the 522x and connect RJ45 cable on the connector.
2
Use Time Network Manager to detect 522x IP address
3
Open a web access and insert the IP address and press enter.
User Manual
Revision G
October 2011
7-4
SNMP
STEP
4
OSA-5225
ACTION
If necessary enter: user or password
User Manual
Revision G
October 2011
7-5
SNMP
STEP
5
ACTION
Click on the Standard Menu
Procedure 7-1 Firmware Version Verification
OSA-5225
User Manual
Revision G
October 2011
7-6
SNMP
The following print screen is an example of one of the recent MIB versions.
Figure 7-1 SNMP MIB example
OSA-5225
User Manual
Revision G
October 2011
7-7
SNMP
7.3 SNMP Management Console
This section provides examples of management console equipment integration using the
"Castle Rock" program and an OSA 5201 unit.
7.3.1 Configuration
STEP
ACTION
1
Launch the SNMP SERVER software
2
Insert the computer IP address
3
Copy the MIB file provided on this CD-ROM to the PC.
In this example: C:\Program Files\SNMPc Network Manager\mibfiles
OSA-5225
4
Add the OSA 5225 using: Insert -> Map Object -> Device
5
Introduce the equipment IP address, the label and other parameters if
necessary.
User Manual
Revision G
October 2011
7-8
SNMP
STEP
6
ACTION
Change the access properties.
Insert -> Map Object -> Device
7
OSA-5225
Value public: Read/Write community
Install MIB file Select: Config -> MIB
database
User Manual
Revision G
October 2011
7-9
SNMP
STEP
8
OSA-5225
ACTION
Configure the SNMP server for trap SNMP reception and/or other. Four
addresses can be defined for this program. Select Tools -> Mib Browser
User Manual
Revision G
October 2011
7-10
SNMP
STEP
ACTION
9
Select trapDestTable enter IP address and click on Set
10
The server or other computer will receive the SNMP trap. The next
section describes how check the completed configuration.
Procedure 7-2 SNMP Management Config.
OSA-5225
User Manual
Revision G
October 2011
7-11
SNMP
7.3.2 SNMP Trap Verification
To validate communication between the server SNMP and the equipment, two
possibilities are describe below
7.3.2.1
First method
STEP
1
OSA-5225
ACTION
Select Tools Poll Obect…
User Manual
Revision G
October 2011
7-12
SNMP
7.3.2.2
Second method
STEP
1
ACTION
Generate an event on the equipment, for example remove the GNSS
cable
Procedure 7-3 SNMP Trap Verification.
OSA-5225
User Manual
Revision G
October 2011
7-13
SNMP
This page has been intentionally left blank
OSA-5225
User Manual
Revision G
October 2011
7-1
Specifications
Chapter
8.
Specifications
Including :
v Input Specifications
v Oscillator Stability
v Outputs
v Remote Functions
v General Specifications
OSA-5225
User Manual
Revision G
October 2011
8-1
Specifications
This page has been intentionally left blank
OSA-5225
User Manual
Revision G
October 2011
8-2
Specifications
8.1
Input Specifications
GPS Antenna INPUT
Input Connectors
Type
Specifications
SMA with TNC adaptor
• Frequency: 1575.42MHz
• Impedance: 50 Ohms
• Acquisition sensitivity -130dBm
Table 8-1 Input Specifications
8.2
Oscillator Stability
OSCILLATOR Model
Holdover Stability
(at 25°C)
Stability Versus
Temperature
(-0°C to 60°C)
Accuracy
Ageing
after 30 days of continuous
operation
In-service adjustments
Life time
-10
5e10
-8
1e10
-9
<10
-10
2e10 /day
None required
> 15 years
Table 8-2 Oscillator Stability
OSA-5225
User Manual
Revision G
October 2011
8-3
Specifications
8.3
Outputs
STANDARD OUTPUTS
10 MHz
Specifications
•
•
•
•
Level:
-1.5dBm to 7dBm @ 50ohms
Impedance: 50Ω
Connector: BNC
Rear panel location
1 PPS
Level:
1.7Vpp ± 20% @ 50ohms
Rise time and fall time <10ns
Puls Width: 1ms
• Impedance: 50Ω
• Connector: BNC
• Rear panel location
Specifications
•
SNMP, HTTP
Specification
•
Connector: RJ-45
•
Number:
Network type:
Accuracy:
Connector:
1
Ethernet 10/100 Base-T
+/- 20 µs Typical
RJ-45
Numbers:
Type:
Protocole:
Level:
Accuracy:
Connector:
4
IRIG-B
AFNOR NFS 87500
2.2Vpp to 8,8Vpp
20 µs (1000Hz)
8 pins
OPTIONAL OUTPUTS
NTP
Specifications
•
•
•
IRIG-B / AFNOR NFS
Specifications
•
•
•
•
•
•
IRIG-B / DCLS
Specifications
•
•
•
•
•
Numbers
4
Type:
TTL, differential TTL, or configurable pulse
(PPS, DCF…)
Rise time:
10ns, accuracy: 100ns
Accuracy:
500 µs
Connector:
8 pins
ASCII (RS422/RS485)
Specifications
•
•
•
•
Numbers
Type:
Accuracy:
Connector:
4
RS422, RS485, unidirectional
500 µs
DB9
Numbers
Type:
Accuracy:
Connector:
4
RS232 unidirectional
500 µs
DB9
ASCII (RS232)
Specifications
•
•
•
•
Table 8-3 Output Specifications
OSA-5225
User Manual
Revision G
October 2011
8-4
Specifications
8.4
Remote Functions
MONITORING AND ALARMS
HTTP (RFC 2616), RJ45
TELNET (RFC 854 to 861), RJ45
SNMP + MIB II (RFC 1213), RJ45
DHCP (RFC 2131), RJ45
UDP / TCP Time protocol (RFC 868), RJ45
IPv4 and IPv6*
*Contact Oscilloquartz for availability.
Two static relay alarms (Power supply and synchronization)
Management
Alarms
TM
128 bits RSA MD5 encryption
HTTPS with management of up to 8 REALMS*
SSL V3 and TSL V1 and certificate mgmt*
IPSec*
*Contact Oscilloquartz for availability.
Electrical Outputs
Table 8-4 Monitoring Specifications
8.5
NTP Characteristics
REQUESTS
RPS
•
•
Examples of ∆t
for different
NTP clients
•
•
•
•
Up to 800 RPS per NTP port without MD5 enabled
Up to 400 RPS per NTP port with MD5 enabled
Windows 2000 ∆t : 28800s
up to 23 million clients
Windows XP ∆t : 3600 to 604000s
2 to 480 million clients
Windows 2003 ∆t : 900s
up to 700'000 clients
Common NTP/SNTP client soft : 60s max
up to 48000 clients
Table 8-5 NTP Characteristics
Note:
RPS : Number of requests per second
∆t : Number of seconds between two requests per second sent by the
NTP/SNTP client
Number of clients = RPS x ∆t
OSA-5225
User Manual
Revision G
October 2011
8-5
Specifications
8.6
General Specifications
DC POWER SUPPLIES
Configuration
Input Voltage
Power Consumption
AC POWER SUPPLY
Input Voltage
Power Consumption
Electrical Autonomy
Environmental
Environment
Operating Temperature
Storage Temperature
Humidity
CE & RoHs
EMC
Safety
RoHs
MECHANICAL
Mounting
Size
h x w x d mm (in.)
Weight
Connector Access
Fully redundant power supply "inputs"
20 to 60 VDC
Warm-up :
~ 40W
Steady state :
~ 38W
230 VAC or 115VAC
max. : 0.5A 50-60Hz
typ. :
20mA plus 2mA per output
Warm-up :
~ 40W
Steady state :
~ 38W
Typical 2 hours on internal NiMH battery, 5 to 7 years lifetime.
Storage: as specified in ETS 300 019-1-1, class 1.1
Transportation: as specified in ETS 300 019-1-2, class 2.2
Operation: as specified in ETS 300 019-1-3, class 3.2
Vibration : as specified In ETS 300 019-2-1, -2, & -3.
+0° to +50°C (+32° to 122°F)
-40° to +70°C (-40° to 151°F)
5 to 95% non condensing.
EN 55022 class B
EN 55024
EN60950-1
Compliant to 2002/95/EC of 27/01/03
19" rack mount.
19" 1U: 44mm (1.73’’) x 482mm (19’’) x 263mm (10.35’’)
~ 2.3 kg (5 lbs) excluding packing.
Rear access.
Table 8-6 General Specifications
OSA-5225
User Manual
Revision G
October 2011
8-6
Maintenance & Troubleshooting
Chapter
9.
Maintenance & Troubleshooting
Including :
v Output Card Switches Verification
v Troubleshooting
v Oscilloquartz Contact Information
OSA-5225
User Manual
Revision G
October 2011
9-1
Maintenance & Troubleshooting
This page has been intentionally left blank
OSA-5225
User Manual
Revision G
October 2011
9-2
Maintenance & Troubleshooting
This section provides information about preventive maintenance
ESD CAUTION
To avoid electrostatic discharge (ESD) damage to components in the OSA
5225, observe the appropriate electrostatic discharge (ESD) precautions and
procedures.
CAUTION
To avoid damage, under no circumstances should the interior of the unit be
allowed to come in contact with water. To avoid electromagnetic discharge
and damage to the circuitry, never attempt to clean the unit with a vacuum.
Note:
If you encounter problems during any of the following procedures, contact
our Customer Services. Keep the unit’s original packaging for re-shipping
the product. If the original packaging has been discarded, contact the
Customer Services Department for assistance.
OSA-5225
User Manual
Revision G
October 2011
9-3
Maintenance & Troubleshooting
9.1 Output Card Switches Verification
9.1.1 Address Switches
To add an output card or if an output seems to be in failure (does not appear in the
WEB page), open the device and verify the switch configuration on the output cards:
Output 1
Output 2
(the nearest of
Output 3
Output 4
(the furthest of
the supply card)
the supply
card)
1 output
1
2
3
4
5
6
7
8
1
2
3
4
5
6
7
8
1
2
3
4
5
6
7
8
1
2
3
4
5
6
7
8
1
2
3
4
5
6
7
8
1
2
3
4
5
6
7
8
1
2
3
4
5
6
7
8
1
2
3
4
5
6
7
8
1
2
3
4
5
6
7
8
2
outputs
3
outputs
4
outputs
1
2
3
4
5
6
7
8
Table 9-1 Output Switch Addresses
CAUTION
The 8th switch of each card allows testing the card by forcing the signal on
output. It MUST be turned OFF again after testing.
OSA-5225
User Manual
Revision G
October 2011
9-4
Maintenance & Troubleshooting
9.1.2 Output Signal Format Modification for Pulses &
IRIG-B DCLS Cards
The Pulses and AFNOR NFS87500/IRIG-B DCLS outputs cards can provide several
formats :
•
TTL
•
Differential TTL (RS422)
•
Phototransistors or static relays, depending on the card type.
OFF
ON
SW1
Output 4
SW2
SW3
SW1
Output 3
SW2
SW3
.
.
.
Signal format
For each output
SW2
SW1
SW1
Phototransistor
or static relay
RS422 /
differential TTL
TTL
ON (Right)
ON (Right)
ON (Right)
ON (Right)
OFF (Left)
OFF (Left)
OFF (Left)
OFF (Left)
OFF (Left)
Table 9-2 Output Signal Format
OSA-5225
User Manual
Revision G
October 2011
9-5
Maintenance & Troubleshooting
9.1.3 Input Signal Format Modification for Pulses &
IRIG-B DCLS Cards
The OSA 5225 (with the AFNOR NFS87500/IRIG-B option) can accept several kinds
of AFNOR NFS87500/IRIG-B input signals depending on the configuration of the
main board switches.
9.1.3.1
OSA 5225 Main Board Switches
Motherboard :
Input 2 – Time code
1
AFNOR DCLS
AFNOR SINE WAVE
IEEE1344 DCLS
IEEE1344 SINE WAVE
IRIG-B DCLS
IRIG-B SINE WAVE
NTP
None
2
3
Input option
card present
ON
ON
X
X
OFF
OFF
ON
ON
OFF
OFF
ON
ON
OFF
ON
OFF
ON
OFF
ON
YES
YES
YES
YES
YES
YES
X
X
X
X
OFF
ON
NO
NO
AFNOR / IRIG-B input option card
Switchs
DCLS – TTL DCLS – RS422 Sine wave
(differential
TTL)
OFF
ON
SW1
SW2
1
ON (Right)
OFF (Left)
OFF (Left)
2
ON (Right)
ON (Right)
OFF (Left)
SW4
3
ON (Right)
ON (Right)
OFF (Left)
SW5
4
ON (Right)
ON (Right)
OFF (Left)
SW6
5
ON (Right)
OFF (Left)
OFF (Left)
SW7
6 – load
ON / OFF
7 – inversion
ON / OFF
OFF (Left)
Left/Right
OFF (Left)
Left/Right
Left/Right
OFF (Left)
SW3
Table 9-3 Input Signal Format
OSA-5225
User Manual
Revision G
October 2011
9-6
Maintenance & Troubleshooting
9.2 Troubleshooting
This section tries to answer the most frequent questions concerning the use of the OSA
5225 NTP unit. First, ensure that the TimeNetManager software is installed on the
computer.
I made a « Scan now ! » with TimeNetManager but I cannot see the unit ?
1. Verify the cable connection. If Ethernet LEDs are visible, the upper-left LED should be
green. Otherwise, there should be a network connection or power supply failure.
2. If using several VLAN (Virtual Local Area Network), verify that the unit is on the same
VLAN as the computer.
3. Connect the computer directly to the unit using a cross cable. In DHCP mode, the unit
automatically takes an address in the range 169.254.x.y if it does not find a DHCP
server. Change the computer IP address in this range, with a network mask of
255.255.0.0.
I cannot open the configuration WEB page ?
1. First, is the unit reachable with TimeNetManager?
è YES
The computer and the unit should have the same IP range and the same network
mask.
è NO
See previous question.
2. Has the page been found by the browser (the loading begins but fails after a while) ?
è NO, PAGE NOT FOUND
If using “Internet Explorer”, go to :
Tools à Internet Options à Connections à Network Parameters
The browser should not use a proxy; uncheck all checkboxes.
OSA-5225
User Manual
Revision G
October 2011
9-7
Maintenance & Troubleshooting
è YES
WEB page is reachable, but the browser is unable to load it. Open a TELNET
session:
Telnet < ip address> 9999
Password : gtmt
Proceed to a “Factory Default”, then “Quit and save”. Refresh the WEB page.
An output is not visible in the configuration WEB page ?
1. Press ‘F5’ to refresh the WEB page, and go back to output panel. If the output is still
missing, see next point.
2. Open a TELNET session:
Telnet < ip address> 9999
Password : gtmt
Proceed to a “Factory Default”, then “Quit and save”. Refresh the WEB page.
3. If the output is still missing, open the unit. Check the black cables connections and
the switches configurations (see Output Card Switches Verification).
The screen displays “no time code!” or “NO TIME CODE!” ?
1. “NO TIME CODE!” : verify the time source because the unit is not synchronised.
2. “no time code!” with the date : if the unit receives a time code, verify in the input
panel of the configuration WEB page that “run autonomous” is not checked.
Recommendation:
Contact a local representative, or the Oscilloquartz Customer Support Service
for any service inquiries and advice on Timing issues and inquiries.
OSA-5225
User Manual
Revision G
October 2011
9-8
Maintenance & Troubleshooting
9.3 Oscilloquartz Contact Information
9.3.1
Technical Assistance
For technical assistance, contact the following:
9.3.1.1
International
Oscilloquartz SA
Customer Support & Services
16, Rue de Brévards
2002 Neuchâtel 2
SWITZERLAND
Tel: +41-32-722-5555
Fax: +41-32-722-5578
e-mail: [email protected]
9.3.2
Sales
For sales assistance, contact the following:
9.3.2.1
International
Oscilloquartz SA
Sales & Marketing
16, Rue de Brévards
2002 Neuchâtel 2
SWITZERLAND
Tel: +41-32-722-5555
Fax: +41-32-722-5556
e-mail: [email protected]
OSA-5225
User Manual
Revision G
October 2011
9-9
Maintenance & Troubleshooting
This page has been intentionally left blank
OSA-5225
User Manual
Revision G
October 2011
9-10
Ordering Information
Appendix A:
Ordering Information
The OSA 5225 is not field configurable. Internal Cards are fixed and cannot be interchanged when
the shelf is installed on a rack. There are no internal field-replaceable components. The shelves
are constructed to a fixed order and shipped for field installation. Therefore, only accessories can
be ordered as spare or replaceable parts.
Please contact Oscilloquartz for configurations and ordering.
OSA-5225
User Manual
Revision G
October 2011
A-1
Ordering Information
This page has been intentionally left blank
OSA-5225
User Manual
Revision G
October 2011
A-2
Document History
Document History
Project N°
Document Type
Version
Author
Revision
Last Up-date
Creation
:
:
:
:
:
:
:
5225
User Manual
English
OSA
G
10.10.2011
28.04.2008
REVISION
A
B
DATE
28.04.2008
18.06.2008
06.11.2008
C
D
E
23.02.2009
27.04.2009
26.05.2009
F
09.08.2010
G
10.10.2011
OSA-5225
User Manual
Revision G
CORRECTIONS
- Creation based on previous 5220/5225 manual
- Change type of cable for PC-unit connection
- Add chapter for SNMP
- Up-date photos and drawings
- Change OSA USA office address
- Correct minor typographical errors and page set-up
- Up-date operating temperature range
- Up-date rear panel photo and connections
- Add ASCII connector pin description
- Change Telnet IP address in troubleshooting section
- Up-date SNMP chapter
- Add "Firmware version verification" procedure
- Up-date MIB file association information
- Add SNMP configuration
- Add NTP server states
- Add NTP setup
- Add NTP characteristics (specs)
- Add SNMP management console installation
- Add Oscilloquartz MIB identifier
October 2011
I


