1
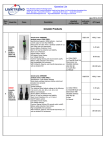
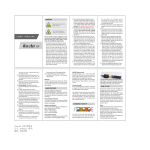
3 IN ONE VAPORIZER DELUXE USER MANUAL SAFETY AND WARRANTY GUIDE SAFETY DISCLAIMERS Read the following safety recommendations before using the Randy’s 3-In-ONE DELUXE vaporizer. Please keep this user manual in a safe place for further reference. Do not allow children, women who are pregnant or breast feeding, and those with life threatening illnesses to use this device. The manufacturer is not responsible for any damage or personal injury caused by inappropriate, incorrect, or irresponsible use of this device. Randy’s 3-In-ONE DELUXE vaporizer is not a medical device and is not intended to diagnose, cure, treat or prevent any diseases or other conditions. If you have any health problems, consult your doctor before using the Randy’s 3-In-ONE DELUXE vaporizer. The Randy’s 3-In-ONE DELUXE device is not intended to administer medicinal or illegal products of any kind and doing so voids the warranty. Any illegal use of this device could subject the user to sever penalties, and/or imprisonment under the law of your jurisdiction. TABLE OF CONTENTS Introduction…………………………………………...………………………………………...…………………...3 General Information…………………………………………...…………………………………...……………...3 Starter Kit Contents…………………………………………...………………………………………….………...3 Overview - Randy’s 3-In-ONE DELUXE …………………………………………...…………………………..4 Overview - Chambers…………………………………………...……………………………..…………………..4 Overview - Accessories…………………………………………...……………………………...………………..5 Activating…………………………………………...………………………………………………………………....5 LCD Display and Charging Options…………………………………………...…………………..…………...6 Preparing the Dry Herb Chamber…………………………………………...…………………………………..6 Loading the Dry Herb Chamber…………………………………………...…………………………………....7 Using the E-Juice Atomizer…………………………………………...…………………………………………..7 Using the Wax Chamber…………………………………………...………………………………………………8 Cleaning the Dry Herb Ceramic Filter…………………………………………...……………………………..8 Cleaning and Maintenance…………………………………………...…………………………………………..9 Removing the Spring and Filter…………………………………………...………………………………..…...9 Replacing the Spring and Filter…………………………………………...…………………………….……...10 Warning and Warranty…………………………………………...………………………………………..……...10 Tips…………………………………………...………………………………………………………………………….11 Commonly Used Herbs…………………………………………...………………………………………………..11 INTRODUCTION We invite you to step into the many layers of our atmosphere with the new Randy’s 3-In-ONE DELUXE vaporizer, one of the world’s smallest portable vaporizers. Utilizing the most advanced technology available, we have developed the ultimate vaporizer. No need for butane with the Randy’s 3-In-ONE DELUXE advanced vaporizing system. Simply charge and fill your Randy’s 3-In-ONE DELUXE vaporizer and you are ready to vape in style! GENERAL INFORMATION Congratulations on purchasing one of the smallest and greatest portable vaporizers that this generation has ever seen! Created by utilizing advanced technology and expertise. Randy’s 3-In-ONE DELUXE is a vaporizer like no other. Randy’s 3In-ONE DELUXE heats and vaporizes your herbs to achieve ultimate results. Easy and discreet to use, Randy’s 3-In-ONE DELUXE works in all conditions including a windy day on your boat, a rainy afternoon at the park, on top of a mountain, or just sitting on your couch! After a short charge time of two hours your device is ready to use. Simply fill your device’s ceramic heating chamber with your herbs, press down on the power button, and a short inhale is all you need to start enjoying your Randy’s 3-In-ONE DELUXE vaporizer. STARTER KIT CONTENTS 1-Randy’s 3-In-ONE DELUXE Battery 1-Ceramic Heating Chamber (Dry Herb) 1-E-Liquid Cartomizer 1-Wax Coil Head 1-Spring 2-Mesh Filters 2-Ceramic Filters 1-Metal Mouthpiece 1-Smell Resistant Cap 1-Cleaning Brush Tool 1-Packing Tool 1-Wall Adapter 1-USB Charger 1-User’s Manual OVERVIEW — RANDY’S 3 IN ONE 1. Rechargeable Battery With Hit Counter & Battery Meter 2. Adjustable Airflow Dial on Chamber 3. Metal and Ceramic Screen (inside) 4. Metal Mouthpiece 5. Smell Resistant Cap 1. 2. 3. 4. 5. OVERVIEW — CHAMBERS 1. Ceramic Heating Chamber (Dry Herb) 3. 2. Wax Coil Head 1. 2. Each chamber has a dial to adjust airflow. Turn it left for less airflow and right to increase airflow. Note: For dry herb chamber, by adding a 7mm glass honeycomb screen (available at randys.com) between the heating coil and the dry herb will greatly help in keeping the dry herb from combustion and aid in ease of vaporizing. OVERVIEW — ACCESSORIES 1. Wall Adapter 2. USB Charger 3. Cleaning Brush Tool 4. Packing Tool 1. 2. 3. 4. ACTIVATING The Randy’s 3-In-ONE DELUXE is programmed with a locking feature. If pressing the button does not activate the device, it may be in lock mode. To lock (or unlock), quickly hit the button 5 times in a row. We recommend you keep the device locked when not in use so it is not accidentally activated (such as when it is in your pocket). With your Randy’s 3-In-ONE DELUXE ready for use, hold the power button down for 2 seconds to activate the heating element. With the power button still held down, put your mouth over the mouth piece and inhale lightly. Note: the Randy’s 3-In-ONE DELUXE is powerful enough to vaporize and combust. If vaporizing is desired a shorter hold time is recommended. If combusting is desired, a longer hold time is recommended. There is a bit of an art to hold times verses inhaling times that must be mastered by each individual to develop the perfect amount of smoke desired. Your Randy’s 3-In-ONE DELUXE will automatically shut off after 9 seconds of the button being continuously held down. A wait time of 3 seconds is needed before activating again. LCD DISPLAY AND CHARGING OPTIONS The LCD display will show an image of a full battery when the battery is fully charged. The battery image will disappear as the battery is used up. When empty, recharge the battery (see below). There is also a counter which measures the number of times the Randy’s 3-In-ONE DELUXE has been activated for use. The counter resets when the battery is recharged. We pride ourselves on the long battery life! Charging Options: 1. USB Charger – connects directly into any USB port 2. Wall Adapter – works with the USB charger 3. LCD Display 1. 2. 3. PREPARING THE DRY HERB CHAMBER Initial charge: We recommend charging the batter for at least 6 hours on the first charge. This will condition the battery for future battery lifespan. Recharging: Let battery deplete fully, if possible before recharging. Charge your Randy’s 3-In-ONE DELUXE Battery for at least 2 hours. While charging, you will see a red light on the Charger. The light will turn green when the battery is fully charged. How to load your Dry Herb Chamber: 1. Remove the chamber connector from the ceramic heating chamber. 2. Fill the ceramic heating chamber with your herb of choice. Use the packing tool to gently pack the chamber (do not over pack). Herb does not have to be finely ground, but should be loose and broken apart. 3. Screw the chamber connector back onto the ceramic heating chamber. The device is now ready to use. LOADING THE DRY HERB CHAMBER 1. Herb goes in this part of the chamber. 2. If over-packed, use a toothpick instead of enclosed packing tool, as to not damage the coils. 3. If ceramic screen and spring get dirty use the same method to gently remove excess herb. 4. Each chamber has a dial to adjust airflow. Turn it left for less airflow and right to increase airflow. (see page 5) Note: Do not touch coils with any tools! 1. USING THE E-JUICE ATOMIZER 1. Unscrew the mouthpiece from the clear atomizer. 2. Fill the chamber with up to 1.6ml of your favorite E-Juice (we recommend Randy’s USA made E-juice) by tilting the atomizer at a slight angle for dripping (1). 3. Screw the mouthpiece back on and screw the e-juice atomizer onto the battery. 4. Allow 1 to 2 minutes for absorption before you begin vaporizing. 5. be sure the battery is not in lock mode (To unlock press button 5 times quickly) and be sure the battery is fully charged (see page 6). 6. Press and hold button for 2 seconds to activate the battery and continue holding the button as you inhale. 7. Each chamber has a dial to adjust airflow. Turn it left for less airflow and right to increase airflow. (see page 4) 1. USING THE WAX CHAMBER 1. Connect the wax chamber to the battery securely. Do not attach the mouthpiece to the wax chamber yet. 2. Apply your desired wax to the wax chamber to about 3/4 full. 3. Connect the mouthpiece to the wax chamber. 4. Be sure the battery is not in lock mode 5. Press and hold button for 2 seconds to activate the battery and continue holding the button as you inhale. (To unlock press button 5 times quickly) and be sure the battery is fully charged. (see page 6) 6. Each chamber has a dial to adjust airflow. Turn it left for less airflow and right to increase airflow. (see page 4) CLEANING THE DRY HERB CERAMIC FILTER Cleaning Ceramic Filter: 1. Use a paper clip or pin to clean out holes. 2. Wipe clean with cloth (Randy’s Green Label Cleaner, not included, can be used to clean more thoroughly). Cleaning Rubber Mouthpiece: 1. Use a cotton swab of Randy’s Soft bristle Pipe cleaner, not included, to clear the passage and hole of the rubber mouthpiece. 2. With the mouthpiece with a damp paper towel. Cleaning Mesh Filter: 1. Wipe with warm water. Or wipe with Randy’s Black Label Cleaner, not included, and then rinse with water. 2. Dry with a paper towel and wipe off any excess debris. CLEANING AND MAINTENANCE After using the Randy’s 3-In-ONE DELUXE vaporizer several times, the filter may get clogged resulting in a difficult draw or a lower amount of vapor being released. Cleaning Ceramic Chamber: 1. Disconnect from the battery. 2. Use the brush tool to gently clean the walls of the heating chamber. Do not push all the way down and touch the heating element! REMOVING SPRING AND FILTER 1. Remove the mouthpiece from the chamber connector. 2. Unscrew the chamber connector from the ceramic heating chamber. 3. Turn the chamber connector upside down and the mesh filter should fall out easily. Use the end of the packing tool if necessary. 4. To remove the spring from the chamber connector, hold the spring at the highest part possible, twist counter clockwise and quickly pull it through the smaller opening of the chamber connector. 5. The spring is very delicate. If it is stretched from the original size, it should be replaced. 6. Randy’s 3-In-ONE DELUXE is designed to pack herbs as needed. REPLACING THE SPRING AND FILTER 1. Place the spring, smaller end first, into the chamber connector. Gently putt through the other side until it’s secure in its place. 2. Place the mesh filter tool to press the filter inside the chamber. 3. Use the packing tool to press the filter inside the chamber 4. Screw the chamber connector to the ceramic heating chamber. 5. Insert the ceramic filter into the mouthpiece. 6. Connect the mouthpiece to the chamber connector. Make sure the mouthpiece is pushed all the way into the chamber connector. If the mouthpiece does not go all the way down then the mesh filter is not laying flat and needs to be adjusted. WARNING AND WARRANTY Do not fill the dry herb heating chamber with any stems, seeds or liquid. Doing so will cause damage to the Randy’s 3-In-ONE DELUXE vaporizer and void the warranty. Do not touch the metal spring for at least one minute after use, as it will be hot. Do not drop your Randy’s 3-In-ONE DELUXE vaporizer. Do not put your Randy’s 3-In-ONE DELUXE vaporizer in water or any other liquid. Do not put any objects into the opening of your device. Guarantee Products are guaranteed for sixty days from the delivery date. We will not guarantee products that have been damaged through improper use or intentionally damaged. Touching the coils with anything other than vaporizing materials will void the warranty (do not touch tools to coil). TIPS For best results, do not pack the ceramic heating chamber too tightly with your herbs. This will ensure air flow passage for even heating. Please remember to hold the power button down for at least two seconds before inhaling to activate the heating element. Between uses, wait three seconds before reactivating the device. In the event that vapor is not being released, use the packing tool to gently rotate the herbs within the chamber. For best results, break the herbs by hand or grind with Randy’s Grinder Card, not included. Be sure to remove all stems or seeds before filling the heating chamber. COMMONLY USED HERBS Passion Flower Eucalyptus Hops Peppermint Lavender Damaina Lemon Balm Clary Sage Thyme Rosemary www.randys.com