1
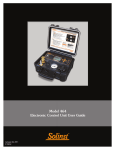
Manual Groundswell Jennifer West, MSc. PGeo. Groundwater Coordinator Table of Contents Introduction to Groundswell ....................................................................................................... 3 Equipment .................................................................................................................................. 6 Components ............................................................................................................................... 7 Before you head out ................................................................................................................... 7 Step by Step Well Monitoring ..................................................................................................... 8 Finding the Well and Heading Out .......................................................................................... 8 Opening the Well .................................................................................................................... 8 Collecting a Water Level Measurement .................................................................................. 8 Setting Up the Base Station.................................................................................................... 9 Uploading Water Level Data ................................................................................................... 9 Sending Files to Groundswell Coordinator .............................................................................13 Appendix A – Quick Start Instruction Manual for Solinst Levelogger Gold .................................14 Appendix B – Instruction Manual for Water Level Recorder ......................................................15 Appendix C – Groundswell Field Forms ....................................................................................16 Date updated: May 2012, Jennifer West 2 Introduction to Groundswell Currently, provincial monitoring wells are located in 25 of the 42 surface watersheds in the province. Ideal distribution of wells would see at least one well in every watershed, and also in areas of high development. Expanding the provincial network would provide information about groundwater resources in more areas of the province. In particular, some regions are facing development or industry issues and are in dire need of information about their aquifers. The cost of adding observation wells in every community, installing and maintaining dataloggers in each well, and visiting them regularly is prohibitive. Groundswell is creating a community-based groundwater monitoring network of wells which will cover more of the province, and provide vital watershed information to local communities. By identifying monitoring wells and unused drinking wells that would be appropriate for monitoring, and pairing them with community groups in the local area, a new network of low-cost monitoring is achievable. Groundwater monitoring in Nova Scotia currently uses the provincially run Groundwater Observation Well Network (GOWN). Established in 1965, the network measures groundwater quality and levels, to assess the impact of human activities on groundwater and long term trends associated with issues such as climate change. The network consists of 39 monitoring wells distributed across the province. Each well is equipped with electronic data loggers which collect groundwater level measurements every hour. The wells are visited by a field technician twice per year in order to assess the data loggers and compare the manual water level to the digital measurement. Some wells are also fitted with telemetry units, which send the data to a central computer. This extra 3 equipment is installed in hard-to-reach sites, and allows the field technician to visit them less frequently. Water samples are also periodically collected from the wells to assess groundwater quality. Nova Scotia Environment (NSE) provides all of the data collected from these wells to the public using an online database. Users can download long term groundwater data for any of the wells. Additionally, yearly reports are completed to review activities in the network, and highlight water level or quality changes which were recorded at each well. 4 Groundswell has identified several community environmental groups who are interested in monitoring groundwater resources in the Halifax Regional Municipality. These groups have been given one or two wells to monitor on a regular basis, and will provide the data to the Groundswell project. Data is provided on a publicly accessible website. Community groups will visit wells in their area on a regular schedule to assess the data-logger, collect a water level measurement, and upload the data. The Groundswell project aims to (a) build an awareness of groundwater issues; (b) create a continuous water level dataset for more communities; (c) increase understanding of provincial groundwater aquifers; and (d) increase the number of wells in the province using an affordable monitoring framework. The purpose of this manual is to provide community groups with guidance during their well monitoring. The manual includes a monitoring equipment checklist, and a step-by-step guide to measuring water level, uploading datalogger information and submitting data to the project coordinator. It also includes a troubleshooting section for accessing the well, operating the equipment, navigating the software, and uploading the data. 5 Equipment The Groundswell project uses Solinst Levelogger Gold dataloggers and barologgers, and Solinst Water Level Meters, which are generously loaned to Groundswell by Nova Scotia Environment. Instruction manuals for these instruments are included in the appendices of this manual. The water level recorders are stored in secure locations at or close to the offices of each organization. The equipment must be signed out following a monitoring schedule, which is accessible to group volunteers who are participating in monitoring activities. The equipment is assigned to each community group but is the property of the Ecology Action Centre. It is the responsibility of each community group to (a) (b) (c) (d) provide a safe, secure storage location for the equipment; maintain the equipment in good order (keep it clean, dry, etc); maintain a schedule of monitoring, and identify where the equipment is at all times; keep all the equipment together and provide it to monitoring volunteers in a transportable case or kit; and (e) provide reimbursement to Ecology Action Centre for loss of the machine if the equipment malfunctions due to mis-use, mis-handling, or mis-storage. It is the responsibility of the Ecology Action Centre to (a) provide maintenance services on the equipment when necessary; (b) provide troubleshooting when the equipment is not functioning; and (c) provide insurance on the equipment and replace the equipment if it fails because of reasonable wear. 6 Components Note: the dataloggers are never removed from the well. They have already been installed, so you don’t have to take them to or from the site. You will not see the logger because it is suspended in the well. You will only see the logger port, sticking out of the top of the well after it is opened. Before you head out Prior to beginning a site visit and well monitoring event, the following checklist should be reviewed to ensure all necessary equipment and tools are on hand. Directions to well Water level recorder USB cable Key to padlock on well Gloves Folding table 7 Laptop (charged) with Levelogger software, installed, with drivers Groundswell manual Field Form Cell phone (recommended) Camera (optional) Step by Step Well Monitoring Well monitoring consists of two simple steps: 1. taking a manual water level measurement with the water level recorder, and 2. uploading the automatic water level measurements from the datalogger and the barologger. Finding the Well and Heading Out Don’t monitor during inclement weather. The upload process is not time sensitive - it is best to wait for good weather and not jeopardize the equipment, the well, or the laptop. Make sure you have a map of the well site if you are unfamiliar with the location. Let the Groundswell coordinator know you will be monitoring if you think you will need her help (if it’s your first time, for example). Opening the Well If the well is locked, use the key for the padlock and open the well cap. Place the well cap beside the well, with the padlock in the cap (so it won’t get lost). When you open the well, you will find two cords, with ports for the Levelogger (LL) and the Barologger (BL). Remove these ports and let them dangle out of the well. Collecting a Water Level Measurement 1. Set the water level recorder (WLR) next to the well. Remove the WLR user manual from the case, and review the use of the tape guide. 2. Remove the tape guide from the back of the WLR, and clip it to the well. Insert the leg of the WLR into the tape guide, and rest the other leg on the casing of the well. 3. Unscrew the lock to allow the spool to spin freely. Turn the probe on by turning the power dial clockwise all the way. Press the power test button to be sure it is working (it will beep when you press the button). 4. Carefully remove the probe, and insert it into the well, allowing the probe to drop into the well in a controlled fashion (not free falling, as it might hit and damage the loggers suspended in the well). When the WLR beeps, the probe has contacted water in the well. 8 5. Stop lowering the probe. The WLR will keep beeping until you reel it back to above the water line. Carefully adjust the WLR measuring tape by hand until the probe is just touching the water line. The depth to water is measured as the distance from the top of the casing of the well to the point at which the probe starts to beep. 6. Record the measurement on the WLR measuring tape, at the top of the tape guide, on the Groundswell Form to 3 decimal places (e.g. 2.582 m). Turn the WLR off and reel in the probe, being careful not to let the tape tangle or twist. Secure the probe to its holder, secure the spool with the side screw. Setting Up the Base Station When possible, bring all supplies from your car to the monitoring site before starting the monitoring. Turn your laptop on. Take out your field form. Uploading Water Level Data Choose one of the ports and connect the cord from the logger to the laptop USB port. Open the Solinst program (follow download instruction at www.solinst.com, under Downloads). In the top centre of the window: ‘Com Port Selection’ should have something selected, possibly COM PORT 1 or USB SERIAL PORT (depends on computer). 9 Figure 1. 10 Click on the “Receive Settings from Datalogger” button ( ). If the connection is successful, the logger will appear on your screen, with settings filled in (A non-running levelogger is shown here): Figure 2. Never click on the stop sign (shown in the lower right, here it is not active). Click the ‘Data Control’ tab (refer to Figure 1). To download the data from the logger, select the sub-tab (if it is not already selected), and then click on ‘Download Data’ ( ‘All Data’. The data will be presented in a table and graph. 11 ), and select Figure 3. To save the data, click the ‘Save File As’ icon ( ) and input desired name for the saved file (use the Project ID for the filename, for example ‘GS 103 BL’). Figure 4. 12 The data will be saved in a ___.xle (or .lev) format. As a backup, next click on ‘Export Data’ ( ), and save the data in the same location as the .xle file. Use the same name format as above. Disconnect the datalogger from the laptop. Open the folder where the files were saved and verify that they were uploaded. Take the other port hanging out of the well, and connect it to the computer. Follow the same procedures as above starting at “Receive Settings from Datalogger”. When you are finished with both loggers, you can pack everything up, secure the well, and leave the site!! Congratulations, you are finished the field component! Sending Files to Groundswell Coordinator Files should be sent to the project coordinator at your earliest convenience. Here are the files to send: Raw barologger and levellogger files, e.g. “GS 101 LL 2012-04-01.xle” and “GS 101 BL 201204-01.xle” Scanned field form (or filled out digitally) e.g. “GS 101 Field form 2012-05-15.pdf” (or “GS 101 Field form.doc” Any photos of the well that you think are important are also welcome. TA-DA!! You have finished monitoring your well! Thank you! 13 Appendix A – Quick Start Instruction Manual for Solinst Levelogger Gold (full manual available online) 14 Appendix B – Instruction Manual for Water Level Recorder 15 Appendix C – Groundswell Field Forms 16 GROUNDSWELL GROUNDWATER LEVEL RECORDING FIELD REPORT GROUNDSWELL ID:_________________DATE:_______________________________________________ TIME: (24HOUR)___________________ WEATHER:___________________________________________ ☐ DATA DOWNLOADED FILE NAME:___________________________________________ WATER LEVEL RECORDER MEASUREMENT: _________________________________________________ (DID YOU USE THE TAPE GUIDE? YES NO) COMMENTS: ____________________________________________________________________________ ____________________________________________________________________________ ____________________________________________________________________________ ____________________________________________________________________________ ____________________________________________________________________________ ____________________________________________________________________________ ____________________________________________________________________________ ____________________________________________________________________________ ____________________________________________________________________________ ____________________________________________________________________________ ____________________________________________________________________________ ____________________________________________________________________________ TECHNICIAN’S NAME(S):________________________________________________________________ 17