1
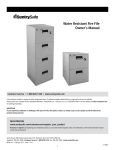
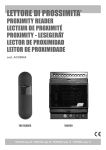
SAFE FEATURES
®
MODEL: PS-10-B-12
Instructions
NOTE: You can store your Key #, Serial # and
Combination on Stack-On’s SECURE web site –
www.stack-on.com under Service.
Storing your Key # or Combination will provide
instant access to this important information should
you ever lose your keys or your combination.
Only you will have access to this information.
1.
2.
3.
4.
5.
6.
7.
8.
9.
Knob to open and close door
Red indicator light
Four number key pad
Green indicator light
Fingerprint scanner
ENTER button
Key lock cover plate
Red Reset button
Battery compartment
Serial #:
Your Combination #:
IMPORTANT
Record your combination number.
Record the serial number from the tag on the
door front.
Keep keys and combination in a secure place
away from children.
DO NOT STORE KEYS OR YOUR COMBINATION
INSIDE SAFE
Hardware Included:
(4) M6 x 50 mm (2” long) Lag Screws
(4) Washers
(4) M6 x 40 mm (1-1/2” long) Plastic masonry anchors
Tools Required:
Drill
10 mm Wrench
3/8” (9.5 mm) masonry drill bit for drilling into masonry
3/16” (5 mm) drill bit for drilling into wood and wall studs
Safe Opening Options
You can open your safe using your
recorded fingerprint. Up to 32 fingerprints
can be recorded.
You can also open your safe using the
number key pad which you will program
with your own combination.
The safe also has a back up key for
emergency opening and for opening the
safe for the first time.
40346-1306
1
24
GETTING STARTED
When you first receive your safe you will need
to open the door with the key in order to
install the batteries. Batteries are included
and are located inside the safe.
To open the door with the key, first remove cover
plate (7) by sliding it down. Insert the key and
turn counterclockwise. Hold the key in the open
position and turn the knob to the right to open
the door.
NOTE: This key has also been provided in case
you lose or forget your security code or the
batteries run low. If you lose your key, you may
purchase a replacement key by referencing the
serial number located on the front of the door.
See section regarding replacement keys for
further information.
Locate the (4)-AA batteries inside the safe. Open
the battery compartment (9) on the back of the
door and install the batteries as shown. Close the
battery compartment.
PROGRAMMING YOUR OWN
ELECTRONIC COMBINATION
● When you first receive your safe your
factory preset code is 1-2-3-4.
● For security you must change the preset
code after opening the safe.
● Record this new combination on this form
or store your combination on our secure
website at www.stack-on.com under Service.
If you write down your combination you must
keep this information in a secure place, away
from children, not inside this safe.
1. Press the “1” key for 5 seconds until the
green light goes on.
2. Enter the current code (which is 1-2-3-4
from the factory for the first time) and
press the ENTER button
.
● After the “beep” enter your new
4 to 8 digit code and press the
ENTER button
.
Key lock
access
● Enter your new code again and
press the ENTER button
. After
the “beep” your new code will be set.
3. With the door open, try your new code
by entering it on the key pad followed
by the ENTER button
. Turn the
knob to the right to open the door.
NOTE: The knob must be turned all the
way to the left before trying to unlock the
safe using the combination. If you
change the batteries your new code will
be retained.
Battery installation
40346-1306
2
24
RECORDING FINGERPRINTS
TIPS FOR RECORDING FINGERPRINTS
● When you first receive your safe there
are no recorded fingerprints.
● In order to improve the rate of fingerprint
identification please follow these suggestions:
● You can record up to 32 different
fingerprints for opening the safe.
1. Press the Red Reset button on the
inside of the door. Two “beeps” will
sound and a red light will glow around
the fingerprint scanner.
2. Place your finger on the fingerprint
scanner. Two “beeps” will sound.
● The fingerprint has been
successfully recorded if there is
one extra “beep” and the green
light flashes.
● The fingerprint has not been
recorded if there are two extra
“beeps” and both lights flash.
Try recording again from step 1.
Locate the safe at a height that allows
easy access to the fingerprint scanner.
Record several of your fingerprints in
case you sustain a cut or an injury to a
finger you have scanned.
When scanning, use moderate finger
pressure (not too hard or light) on the
scanner. Center your finger on the
scanner. Use a similar pressure and
finger location on the scanner when
opening the safe.
For smaller hands we recommend using
the thumb and middle finger.
Do not use the fingerprint scanner under
bright lights.
If your hands are dry, breathe on your
finger tips to improve the scan.
If your hands have oil, lotion or are dirty
the fingerprints may not scan correctly.
Correct
Incorrect
40346-1306
3
24
OPENING THE SAFE USING YOUR
FINGERPRINT
and a red
1. Press the ENTER button
light will glow around the fingerprint
scanner.
2. Place your finger on the scanner with
the same position and pressure you
used to record your fingerprint.
● The scan has been successful if
there is one “beep” and the green
light flashes.
● The scan has not been successful
if there are two “beeps” and both
lights flash. Try again from step 1.
3. Turn the knob to the right to open
the door.
NOTE: The knob must be turned all the
way to the left before trying to unlock the
safe using the fingerprint scanner. If you
change the batteries your recorded
fingerprints will be retained.
CLEARING THE MEMORY
● Follow these steps to erase all
recorded fingerprints and change the
combination back to the factory preset
code 1-2-3-4.
1. Press and hold down the Red Reset
button on the inside of the door for about
5 seconds and continue holding while
the green light flashes for about 12
times.
2. After the “beep” sounds and the green
light flashes, all the recorded finger prints
and your personal electronic combination
will be erased.
NOTE: The safes electronic combination
has now been changed back to the
factory preset code 1-2-3-4.
NOTE: For security you must
reprogram your combination after
resetting the safe to the factory
preset code.
BATTERY REPLACEMENT
LOCKING THE SAFE
● See also the section “GETTING
STARTED” at the beginning of these
instructions.
To lock the safe, close the door and turn the
knob to the left to the 12:00 position.
● NOTE: Do not mix old and new
batteries. Do not mix alkaline, standard
or rechargeable batteries.
NOTE ON LOCKING THE SAFE: Because
the locking mechanism is deactivated for
approximately 3 to 6 seconds after the
combination is entered, wait a minimum of
6 seconds from the time the combination is
entered to lock the safe. Also, when
locking the safe, always make sure the
knob is turned completely to the left to the
12:00 position. If the knob is not turned to
the 12:00 position during the locking
process, the locking mechanism will not
lock.
This safe uses 4 - AA batteries. Under
normal use, batteries will last about 1 year.
When the battery is low, a red light will come
on warning you that the battery is low while
you are using the safe.
To replace the batteries, open the battery
compartment on the back of the door and
install all new batteries as shown in the
beginning of these instructions.
40346-1306
4
24
SELECTING A LOCATION
The safe must be mounted to a wall
stud, and a permanent shelf or the
floor. For optimal safety and security,
the safe should be installed in an
isolated, dry and secure area.
Secure the safe to a wall stud, and a
permanent shelf or floor, using the predrilled
mounting holes in the safe.
SECURING THE SAFE
NOTE: The safe must be secured to a
wall stud on one side of the safe in the
top and bottom holes in the back of the
safe so that it is anchored to the wall stud
in two locations. Wall anchors should be
used on the other side. The safe should
also be mounted to a permanent shelf or
the floor. Use the hardware provided or
consult your harware retailer for
fastening hardware for your particular
mounting surfaces.
NOTE: This safe must be mounted to a
wall stud, and a permanent shelf or the
floor. Failure to do so will compromise
the safety and security of the safe.
Mark the holes to be used. Drill the
appropriate diameter and depth of pilot
holes depending on the type of hardware
being used and the mounting surface.
THE SAFE SHOULD ALWAYS BE
KEPT OUT OF THE REACH OF
CHILDREN.
NOTE ON LOCKING THE SAFE: The safe
needs to be in an upright position, as
shown in figure 1, for the locking
mechanism to function properly. Failure
to mount the safe in the correct upright
position will compromise the safety and
security of the safe.
Secure the safe with the fasteners.
(Figure 2)
Figure 2
Figure 1
40346-1306
5
24
MAINTENANCE
Tools Required:
Phillips screwdriver
5mm Allen wrench
If the door of the safe starts to rub on the
door frame, open the door per the
instructions above.
By the door hinges you will find a threaded
stem. Use an Allen Wrench to tighten the
threaded stem. This will realign the door.
Do not use glass cleaners or sprays on
this safe. Clean with a damp cloth.
IMPORTANT
Keep keys and your combination number in a
secure place, away from children. Keep this
record of your serial number and combination in a
secure place separate from your safe. To order a
replacement key set, follow the instructions on the
attached form.
STACK-ON PRODUCTS COMPANY
P.O. BOX 489
WAUCONDA, IL 60084
40346-1306
6
24
R
Key Request
“This is not a Registration Form”
NOTE: You can store your Key #, Serial # and Combination on Stack-On’s SECURE web site – www.stack-on.com under
Service. Storing your Key # or Combination will provide instant access to this important information should you ever lose
your keys or your combination.
Only you will have access to this information.
Verification of ownership is required in order to receive replacement key for your security product.
In order to receive a replacement key to your security product:
1.
Complete the following form and send to Stack-On Products.
2.
Send a copy of your valid driver’s license along with the form.
3.
Send a copy of the receipt showing the original purchase.
4.
Security product owner must sign form.
5.
Owner’s signature must be notarized.
6.
Send $10.00 for replacement key. Personal Check, MasterCard, or Visa accepted.
7.
Send completed information to:
Stack-On Products Company
1360 N. Old Rand Road
P.O. box 489
Wauconda, IL 60084
Serial Number______________________
Key Number (if applicable) _______
Unit Dimensions________________________________________
Unit Description___________________________________________________________
Owner’s Name ____________________________________ Date Purchased___/___/____
Owner’s Address ___________________________ Unit or Apt Number _________________
City ___________________________ State _______________ Zip Code________________
Telephone Number: (____)___________________ Fax Number: (____)___________________
Owner’s Email Address: ________________________________________________________
Owner’s Signature __________________________ Notary Signature________________
Notary Commission Expires: _____/_____/_____ Notary Stamp
SERVICE REQUESTED
Key Replacement:
$10.00 charge for this service
Yes
No
Credit Card Information (Please circle one) MasterCard
Visa
Expiration Date: ___/___/___ Card Number:______________________________________
Credit Card Identification Number (Located on back of card, last 3 digits on signature strip)_________
9/07
40346-1306
7
24
R
LIMITED THREE YEAR WARRANTY
STEEL SAFES
Stack-On Products Co. (“Stack-On”) Steel Safes are warranted to be free from defects in
material and workmanship for a period of three (3) years from the date of original purchase by a
consumer. This warranty extends to the initial consumer only.
If you believe there is a defect in material or workmanship in your Steel Safe during the
three-year warranty period, please contact our customer service department, by regular mail or
email at the address listed below, and include with your correspondence proof of purchase
information and the model number of the safe.
Stack-On Products Company
1360 North Old Rand Road
Wauconda, IL 60084
[email protected]
If Stack-On is properly notified during the three-year warranty period and, after inspection
confirms there is a defect, Stack-On will, at its sole option, provide repair parts or exchange the
product at no charge, or refund the purchase price of the product.
THIS WARRANTY DOES NOT COVER ANY PRODUCT, OR ANY PART OF ANY PRODUCT,
WHICH HAS BEEN SUBJECT TO EXCESSIVE USE, ACCIDENT, NEGLIGENCE, ABUSE OR
MISUSE, INCORRECT MAINTENANCE, ALTERATION OR REPAIR BY ANYONE OTHER
THAN STACK-ON. IN ADDITION, THIS WARRANTY DOES NOT COVER ANY ACCESSORIES
OR PARTS USED WITH OR IN THE PRODUCT WHICH ARE NOT INCLUDED WITH THE
ORIGINAL PURCHASE.
THIS WARRANTY IS EXCLUSIVE AND EXPRESSLY IN LIEU OF ALL OTHER WARRANTIES
EXPRESSED OR IMPLIED INCLUDING THE WARRANTIES OF MERCHANTABILITY AND
FITNESS FOR A PARTICULAR PURPOSE, WHICH ARE HEREBY DISCLAIMED AND
EXCLUDED. STACK-ON SHALL NOT BE SUBJECT TO ANY OTHER OBLIGATIONS OR
LIABILITIES. STACK-ON NEITHER ASSUMES NOR AUTHORIZES ANY OTHER PERSON TO
ASSUME FOR IT, ANY OTHER LIABILITY IN CONNECTION WITH THE SALE OF
STACK-ON’S STEEL SAFES.
STACK-ON WILL NOT, UNDER ANY CIRCUMSTANCES, BE LIABLE TO THE INITIAL
CONSUMER FOR ANY INCIDENTAL, CONSEQUENTIAL, SPECIAL, EXEMPLARY, OR
PUNITIVE DAMAGES ARISING OUT OF THE PURCHASE OR USE OF ANY STACK-ON
PRODUCTS, INCLUDING THE SAFES.
STACK-ON’S LIABILITY FOR ANY BREACH OF THIS WARRANTY SHALL BE LIMITED
EXCLUSIVELY TO REPAIR OR REPLACEMENT OF THE DEFECTIVE PRODUCT, AS
DESCRIBED ABOVE, OR A REFUND OF THE PURCHASE PRICE OF THE PRODUCT.
IN NO EVENT SHALL STACK-ON’S OBLIGATION UNDER THIS WARRANTY EXCEED THE
PRICE OF THE PRODUCT.
THIS WARRANTY GIVES YOU SPECIFIC LEGAL RIGHTS. YOU MAY ALSO HAVE OTHER
RIGHTS WHICH VARY FROM STATE TO STATE.
40346-1306
8
24
CARACTÉRISTIQUES DU
COFFRE-FORT
®
MODELE: PS-10-B-12
Instructions
NOTE : Vous pouvez enregistrer les renseignements
relatifs à vos nº de clés, nº de série et à vos
combinaisons sur le site Web sécurisé de Stack-On –
www.stack-on.com, à la rubrique Service.
L’enregistrement de vos nº de clés ou de vos
combinaisons vous permet d’accéder instantanément à
ces renseignements essentiels, en cas de perte d’une
clé ou d’oubli d’une combinaison.
Vous seul pourrez accéder à ces informations.
1.
2.
3.
4.
5.
6.
7.
8.
9.
Bouton pour ouvrir et fermer la porte
Voyant rouge
Clavier à quatre chiffres
Voyant vert
Lecteur d’empreintes digitales
Touche ENTRÉE
Plaque couverture de la serrure à clé
Bouton de réinitialisation rouge
Compartiment à piles
No de série :
No de combinaison :
IMPORTANT
Enregistrer le numéro de combinaison.
Enregistrer le numéro de série inscrit sur la plaque
de la porte avant.
Conservez les clés et la combinaison dans un
endroit sûr, loin des enfants.
NE PAS CONSERVER LES CLÉS OU LA
COMBINAISON DANS LE COFFRE.
Matériel inclus:
(4) M6 x 50 mm (2 "de long) tirefonds
(4) Rondelles
(4) M6 x 40 mm (1-1/2 "de long) ancres de maçonnerie en plastique
Outils requis:
Percer
10 mm Clé
3/8” (9.5 mm) foret à maçonnerie pour percer dans la
maçonnerie
3/16” (5 mm) foret pour le perçage dans le bois et les
montants du mur
Options d’ouverture du coffre-fort
L’enregistrement de vos empreintes digitales
vous permettra d’ouvrir le coffre-fort. Il est
possible d’enregistrer jusqu’à 32 empreintes
digitales.
Il est également possible d’ouvrir le coffre-fort
à l’aide du clavier numérique que vous
programmerez à l’aide de votre propre
combinaison.
Le coffre-fort est également doté d’une clé de
dépannage pour les urgences et pour ouvrir
le coffre-fort la première fois.
40346-1306
9
24
POUR COMMENCER
POUR COMMENCER
À la réception de votre coffre-fort, vous
devrez ouvrir la porte avec la clé afin
d’installer les piles. Les piles sont incluses et
se trouvent à l’intérieur du coffre-fort.
Pour ouvrir la porte avec la clé, retirez le
couvercle (7) en le faisant glisser vers le bas.
Insérez la clé et tournez dans le sens antihoraire.
Maintenez la clé en position ouverte et tournez le
bouton vers la droite pour ouvrir la porte.
POUR PROGRAMMER VOTRE
COMBINAISON ÉLECTRONIQUE
● Lorsque vous recevez votre coffre-fort,
le code préréglé en usine est 1-2-3-4.
● Pour des raisons de sécurité, vous
devez changer le code préréglé après
l’ouverture.
● Enregistrer cette nouvelle combinaison
sur ce formulaire ou de ranger votre
combinaison sur notre site sécurisé à
www.stack-on.com sous Service. Si vous
écrivez votre combinaison, vous devez
conserver ces informations dans un
endroit sûr, loin des enfants, et non pas à
l'intérieur de ce coffre-fort.
REMARQUE : Cette clé sert également en cas
de perte ou d’oubli de votre code de sécurité, ou
si les piles sont déchargées. Si vous perdez
votre clé, vous pourrez acheter une clé de
rechange à l’aide du numéro de série inscrit à
l’avant de la porte. Consultez la section à la fin
des présentes instructions pour plus de détails
sur les clés de rechange.
1. Appuyez sur la touche « 1 » pendant
5 secondes, le témoin vert s’allume.
Repérez les piles AA (4) à l’intérieur du
coffre-fort. Ouvrez le compartiment à piles (9) et
insérez les piles de la manière illustrée. Fermez
le compartiment pile.
2. Entrez le code actuel (qui correspond
au préréglage initial en usine 1-2-3-4 et
appuyez sur la touche
ENTRÉE.
● Après le signal sonore, entrez votre
nouveau code de 4 à 8 chiffres et
appuyez sur la touche
ENTRÉE.
● Entrez votre nouveau code une
fois de plus et appuyez sur la
touche
ENTRÉE. Après le
signal sonore, votre nouveau code
est enregistré.
Accès à la
serrure à clé
3. Essayez votre nouveau code en
utilisant le clavier numérique suivi de
la touche
ENTRÉE. Tournez le
bouton vers la droite pour ouvrir la
porte.
REMARQUE: Le bouton doit être
tourné complètement vers la gauche
avant de tenter de déverrouiller le
coffre-fort à l’aide de la combinaison.
Votre nouveau code est conservé si
vous remplacez les piles.
Installation des piles
40346-1306
10
24
POUR ENREGISTRER DES
EMPREINTES DIGITALES
CONSEILS POUR ENREGISTRER LES
EMPREINTES DIGITALES
● À la réception de votre coffre-fort aucune
empreinte digitale n’est enregistrée.
● Vous pouvez enregistrer jusqu’à 32
différentes empreintes digitales pour ouvrir le
coffre-fort.
● Veuillez suivre les suggestions ci dessous
pour augmenter le taux d’identification des
empreintes digitales :
1. Appuyez sur le bouton de réinitialisation
rouge à l’intérieur de la porte. Deux signaux
sonores retentissent et un témoin rouge
s’allume autour du lecteur d’empreintes
digitales.
2. Placez votre doigt sur le lecteur
d’empreintes digitales. Deux signaux
sonores retentissent.
● L’empreinte digitale est enregistrée
avec succès si un signal autre sonore
retentit et que le témoin vert clignote.
● L’empreinte digitale n’est pas
enregistrée si deux autres signaux
sonores retentissent et que les deux
témoins clignotent. Recommencez
l’enregistrement à l’étape 1.
Placez le coffre-fort à une hauteur qui
permet un accès facile au lecteur
d’empreintes digitales.
Enregistrez plusieurs de vos empreintes
digitales en cas de coupure ou de blessure
au doigt que vous avez numérisé.
À la lecture, appuyez votre doigt
modérément (ni trop fortement ni trop
légèrement) sur le lecteur. Centrez votre
doigt sur le lecteur. Utiliser une pression
semblable et placez toujours votre doigt au
même endroit sur le lecteur.
Nous recommandons l’utilisation du pouce
ou du majeur pour les personnes qui ont
de petites mains.
N’utilisez pas le lecteur d’empreintes
digitales sous une lumière vive.
Si vos mains sont sèches, soufflez sur le bout
de vos doigts pour améliorer la lecture.
Si vos mains sont huileuses, enduites de
lotion ou sales, le lecteur peut ne pas lire vos
empreintes digitales correctement.
Correct
Incorrect
40346-1306
11
24
OUVRIR LE COFFRE-FORT À L’AIDE
DES EMPREINTES DIGITALES
1. Appuyez sur la touche
ENTRÉE et un
témoin rouge s’allume autour du lecteur
d’empreintes digitales.
2. Placez votre doigt sur le lecteur au même
endroit et en utilisant la même pression
qu’à l’enregistrement de votre empreinte
digitale.
● La lecture est correcte si un signal
sonore retentit et que le témoin vert
clignote.
● La lecture n’est pas correcte si deux
signaux sonores retentissent et que les
deux témoins clignotent. Recommencez
à l’étape 1.
3. Tournez le bouton à la droite pour ouvrir
la porte.
REMARQUE: Le bouton doit être tourné
complètement à la gauche avant de
tenter de déverrouiller le coffre-fort à
l’aide du lecteur d’empreintes digitales.
L’enregistrement de vos empreintes
digitales est conservé si vous changez
les piles.
POUR VIDER DE LA MÉMOIRE
● Suivez les étapes ci après pour
supprimer toutes les empreintes digitales
enregistrées et remettre la combinaison au
code préréglé en usine (1-2-3-4).
1. Appuyez sur le bouton de réinitialisation
rouge et tenez le enfoncé à l’intérieur de la
porte pendant environ 5 secondes,
continuez de le maintenir jusqu’à ce que le
témoin vert clignote environ 12 fois.
2. Après le retentissement du signal sonore
et le clignotement du témoin vert, toutes
les empreintes digitales enregistrées ainsi
que votre combinaison électronique
personnelle seront effacées.
REMARQUE : La combinaison
électronique du coffre-fort est maintenant
changée pour le code préréglé en usine
(1-2-3-4).
REMARQUE: Pour plus de sécurité, vous
devez reprogrammer votre combinaison
après la réinitialisation du coffre-fort à
code préréglé en usine.
POUR REMPLACER LES PILES
BLOCAGE DE LA SÉCURITÉ
Pour verrouiller le coffre-fort, fermez la porte et
tournez le bouton vers la gauche à la position
12:00.
NOTE SUR LE BLOCAGE SÉCURITAIRE:
Parce que le mécanisme de verrouillage est
désactivé pendant environ 3 à 6 secondes
après le regroupement est entré, attendre
un minimum de 6 secondes à partir du
moment où l'association est entré pour
verrouiller le coffre-fort. En outre, lors du
verrouillage du coffre-fort, toujours
s'assurer que le bouton est tourné
complètement vers la gauche à la position
12:00. Si le bouton n'est pas allumé à la
position 12:00 pendant le processus de
verrouillage, le mécanisme de verrouillage
ne se verrouille pas.
● Consultez également la rubrique
« POUR COMMENCER » au début
de ces instructions.
● NOTA : Ne mélangez pas les
vieilles piles et les piles neuves. Ne
mélangez pas les piles alcalines,
standard ou rechargeables.
Ce coffre-fort utilise 4 piles AA. Dans des
conditions d’utilisation normale, les piles
durent environ un an.
Lorsque les piles sont faibles, un voyant
rouge s’allume pour vous prévenir quand
vous utilisez le coffre-fort.
Pour remplacer les piles, ouvrez le
compartiment à piles situé à l’arrière de la
porte et installez de nouvelles piles comme
au début de ces instructions.
12
40346-1306
24
CHOISIR L’EMPLACEMENT
La sécurité doit être monté sur un
poteau de cloison, et une étagère
permanente ou le plancher. Pour plus
de sécurité et une sécurité optimale,
la sécurité doit être installé dans un
endroit isolé, sec et sécuritaire.
LA SÉCURITÉ DOIT TOUJOURS
ÊTRE HORS DE PORTÉE DES
ENFANTS.
FIXER LE COFFRE-FORT
NOTE: Ce coffre-fort doit être monté sur
un poteau mural, et une étagère
permanente ou le sol. Ne pas le faire
risque de compromettre la sécurité et la
sûreté du coffre-fort.
NOTE SUR LA FERMETURE DU COFFRE:
Les besoins sécuritaires d'être dans une
position verticale, comme le montre la
figure 1, le mécanisme de verrouillage
pour fonctionner correctement. Le défaut
de monter le coffre-fort dans la position
verticale correcte compromettre la
sécurité et la sûreté du coffre-fort.
Fixez le coffre-fort à un poteau mural, et une
étagère permanent ou au sol, en utilisant les
trous de montage pré-percés dans le coffre.
NOTE: Le coffre-fort doit être fixé à un
montant de mur sur un côté de la sécurité
dans les trous en haut et en bas à l'arrière
du coffre-fort de sorte qu'il est ancré au
montant de mur à deux endroits.
Chevilles doivent être utilisés sur l'autre
côté. La sécurité doit également être
montée sur une étagère permanente ou le
plancher. Utilisez le matériel fourni ou
consulter votre revendeur harware pour
la fixation matérielle de vos surfaces de
montage particulier.
Marquer les trous à utiliser. Percer au
diamètre et à la profondeur appropriée
des trous de guidage en fonction du type
de matériel utilisé, et la surface de
montage.
Fixez le coffre-fort avec les fixations.
(Figure 2)
Figure 2
Figure 1
40346-1306
13
24
ENTRETIEN
Outils nécessaires:
tournevis cruciforme
5mm Clé Allen
Si la porte du coffre frotte sur le cadre,
ouvrez la porte selon les directives plus
haut.
Près des charnières de la porte se trouve
une tige filetée. Resserrez la tige à l'aide
d'une clé Allen. Cela permettra de
réaligner la porte.
N’utilisez pas de nettoyant pour verre
ou de pulvérisateur sur ce coffre-fort.
Nettoyez le à l’aide d’un chiffon humide.
IMPORTANT
Gardez vos clés et votre combinaison en lieu sûr,
hors de la portée des enfants. Conservez le
présent document portant le numéro de la clé et
la combinaison dans un endroit sûr, à l’écart de
votre coffre-fort. Pour obtenir un jeu de clés de
remplacement, suivez les directives sur le
formulaire joint.
STACK-ON PRODUCTS COMPANY
P.O. BOX 489
WAUCONDA, IL 60084
40346-1306
14
24
R
Demande de clé
" Ceci n'est pas un formulaire d'inscription "
NOTE : Vous pouvez enregistrer les renseignements relatifs à vos nº de clés, nº de série et à vos combinaisons sur le site Web
sécurisé de Stack-On – www.stack-on.com, à la rubrique Service.
L’enregistrement de vos nº de clés ou de vos combinaisons vous permet d’accéder instantanément à ces renseignements
essentiels, en cas de perte d’une clé ou d’oubli d’une combinaison.
Vous seul pourrez accéder à ces informations.
Il faut procéder à une vérification du contrôle de possession avant de vous envoyer une clé de
remplacement .
Pour recevoir une clé de remplacement:
1.
Remplissez le formulaire qui suit et faites-le parvenir à Stack-On Products.
2.
Envoyez une copie de votre permis de conduire valide avec le formulaire.
3.
Envoyez une copie du reçu indiquant l'achat original.
4.
Le propriétaire de l'armoire de sécurité ou du coffre-fort doit signer le formulaire.
5.
La signature du propriétaire doit être notariée.
6.
Envoyez 10 $ pour une clé de remplacement. Ce montant peut être
payé par chèque, MasterCard ou Visa.
7.
Envoyez tous les renseignements à :
Stack-On Products Company
1360 N. Old Rand Road
P.O. Box 489
Wauconda, IL 60084
No de série______________________
Numéro de clé (le cas échéant) ________________
Dimensions de l'unité________________________________________________________
Description de l'unité___________________________________________________________
Nom du propriétaire _____________________________________ Date d'achat ___/___/____
Adresse du propriétaire ___________________________ No d'appartement _____________
Ville ___________________________ Province _______________ Code postal___________
Téléphone: (____)_____________________ Télécopieur: (____)________________________
Courriel du propriétaire: ________________________________________________________
Signature du propriétaire _______________________ Signature du notaire________________
Mon mandat expire le: _____/_____/_____ Sceau du notaire
SERVICE DEMANDÉ
Clé de remplacement:
Frais de 10 $ pour ce service
Oui
Non
Renseign. carte de crédit (encerclez votre choix) MasterCard
Visa
Date d'expiration: ___/___/___ Numéro de la carte:______________________________________
Numéro d'identification de la carte de crédit (figurant à l'endos de la carte, trois derniers chiffres sur la bande de
signature)_________
9/07
40346-1306
15
24
R
GARANTIE RESTREINTE DE TROIS ANS
COFFRES D’ACIER
Les coffres d’acier de Stack-On Products Co. (« Stack-On ») sont garantis exempts de défauts
de matériel ou de fabrication pour une période de trois (3) ans à partir de la date de l’achat
original par un consommateur. Cette garantie ne touche que le premier acheteur seulement.
Si vous croyez que votre coffre d’acier montre un défaut de matériel ou de fabrication au cours
de la période de garantie de trois ans, veuillez communiquer avec notre service à la clientèle,
par courrier postal ou courriel, aux adresses énumérées plus bas, sans oublier d’inclure les
renseignements sur la preuve d’achat et le numéro de modèle du produit.
Stack-On Products Company
1360 North Old Rand Road
Wauconda, IL 60084
[email protected]
Si Stack-On a été adéquatement avisée du problème au cours de la période de garantie de
trois ans et, qu’après inspection, elle confirme le problème, Stack-On fournira les pièces de
réparation ou échangera le produit sans frais, ou remboursera le prix d’achat du produit.
LA PRÉSENTE GARANTIE NE S’APPLIQUE PAS AUX PRODUITS, OU À TOUTE PIÈCE
D’UN PRODUIT, QUI ONT ÉTÉ ENDOMMAGÉS À LA SUITE D’UN USAGE EXCESSIF,
ACCIDENTEL, NÉGLIGENT, ABUSIF, D’UNE MAUVAISE UTILISATION, D’UN ENTRETIEN
INCORRECT, D’ALTÉRATIONS OU DE RÉPARATIONS PAR QUICONQUE AUTRE QU’UN
REPRÉSENTANT DE STACK-ON. EN OUTRE, CETTE GARANTIE NE S’APPLIQUE À
AUCUN ACCESSOIRE OU PIÈCE UTILISÉS AVEC LE PRODUIT OU DANS LE PRODUIT ET
QUI NE FONT PAS PARTIE DE L’ACHAT ORIGINAL.
CETTE GARANTIE EST EXCLUSIVE ET REJETTE FORMELLEMENT TOUTE AUTRE
GARANTIE EXPRIMÉE OU SUGGÉRÉE, Y COMPRIS LES GARANTIES DE QUALITÉ
MARCHANDE ET D’ADAPTATION À UNE FIN PARTICULIÈRE, QUI, PAR LA PRÉSENTE,
SONT DÉSAVOUÉES ET EXCLUSES. STACK-ON NE SERA PAS ASSUJETTIE À TOUTE
AUTRE OBLIGATION OU RESPONSABILITÉ. STACK-ON N’ASSUME, NI N’AUTORISE
PERSONNE D’AUTRE À ASSUMER POUR ELLE, UNE QUELCONQUE RESPONSABILITÉ
RELIÉE À LA VENTE DES COFFRES D’ACIER DE STACK-ON.
EN AUCUNE CIRCONSTANCE, STACK-ON NE SERA RESPONSABLE ENVERS LE CLIENT
INITIAL DE TOUT DOMMAGE, CONSÉCUTIF, INDIRECT, SPÉCIAL, EXEMPLAIRE OU
PUNITIF PROVENANT DE L’ACHAT OU DE L’UTILISATION DE TOUT COFFRE D’ACIER DE
STACK-ON.
LA RESPONSABILITÉ DE STACK-ON POUR TOUTE VIOLATION À CETTE GARANTIE SE
LIMITERA EXCLUSIVEMENT À LA RÉPARATION OU AU REMPLACEMENT DU PRODUIT
DÉFECTUEUX, TEL QUE DÉCRIT PLUS HAUT, OU AU REMBOURSEMENT DU PRIX
D’ACHAT DU PRODUIT.
L’OBLIGATION DE STACK-ON EN VERTU DE LA PRÉSENTE GARANTIE N’EXCÉDERA
JAMAIS LE PRIX DU PRODUIT.
LA PRÉSENTE GARANTIE VOUS ACCORDE DES DROITS LÉGAUX PRÉCIS. VOUS
POUVEZ POSSÉDER D’AUTRES DROITS QUI VARIENT SELON LES ÉTATS.
16
24
40346-1306
CARACTERÍSTICAS DE SU CAJA FUERTE
®
MODELO: PS-10-B-12
INSTRUCIONES
NOTA: Usted puede almacenar su Numero de Llave y
su Nymero de Combinacion en el web site SEGURO
de - www.stack-on.com bajo la opcion que dice
Servicio
Al almacenar su Numero de Llave y Numero de
Combinacion en este web site le proporcionara acceso
instantanio ha esta informacion importante en caso de
que usted pierda sus llaves o numero de combinacion.
Nadamas usted tendra acceso ha esta informacion
1.
2.
3.
4.
5.
6.
7.
8.
9.
Manijera para abrir y cerar su caja fuerte
Luz indicadora roja
Teclado con cuatro números
Luz indicadora verde
Explorador e Escaner para huella digital
Boton para entrar a la caja fuerte
Tapadera e Placa para la cerradura
Botón Rojo para Reajustar
Compartamento para las Pilas/Baterías
Numero de Serie #
Su Numero de Combinacion #
IMPORTANT
Registre tambien el número de combinación.
Registre el número de serie que aparece en la
etiqueta en frente de la puerta.
Mantenga las llaves y la combinación en un lugar
seguro lejos de los niños.
NO GUARDE LAS LLAVES O SU NUMERO DE
COMBINACIÓN ADENTRO DE LA CAJA
FUERTE.
Hardware incluido:
(4) M6 x 50 mm (2 "de largo) tirafondos
(4) Arandelas
(4) M6 x 40 mm (1-1/2 "de largo) de plástico anclajes de
mampostería
Herramientas necesarias:
perforar
Llave de 10 mm
Mampostería de 3/8 "(9,5 mm) broca para taladrar en
mampostería
3/16 "(5 mm) broca para taladrar en madera y vigas de la pared
Opciones para Abrir su Caja Fuerte
Usted puede abrir su caja fuerte usando su
huella digital registrada. Usted podra registrar
hasta 32 huellas digitales.
Tambien tiene la opcion de abrir su caja fuerte
usando el teclado electronico, que usted podra
programar con su propia combinación.
La caja fuerte también viene equipada con una
llave de emergencia para abrir su caja fuerte
por primera vez o abrir su caja fuerte
rapidamente en cazo de emergencia.
40346-1306
17
24
PARA COMENZAR
Cuando usted primero reciba su caja fuerte
usted tendra que abrir la puerta con las llaves
para instalar las baterías/pilas. Las
baterías/pilas vienen incluidas y están
situadas adentro de la su caja fuerte.
Para abrir la puerta con la llave, primero quite la
tapa (7), presionando hacia abajo. Inserte la
llave y dé vuelta a la izquierda. Mantenga la llave
en la posición abierta y gire la perilla hacia la
derecha para abrir la puerta.
NOTA: Esta llave se le ha proporcionado en caso
de que usted pierda o olvide que su código de
seguridad o si las baterías/pilas estan bajas. Si
usted pierde su llave, usted puede comprar una
llave de reemplazo refiriéndose al número de
serie situado en el frente de la puerta. Vease las
instruciones hacia el final de estas ojas con
respecto a llaves de reemplazo.
Localice las (4) – baterías/pilas AA por dentro de
la caja fuerte. Abra el compartamento (9) para
las batería/pilas encontrado la parte posterior de
la puerta, y instale las baterías/pilas como se
muestra. Cierre el compartimento de las
batería/pilas.
PROGRAMANDO SU PROPIA
COMBINACIÓN ELECTRÓNICA
● Cuando usted reciba su caja fuerte su
código para la caja fuerte pre-progaramado
por la fábrica es 1-2-3-4.
● Para mayor seguridad usted debe cambiar
el código pre-programado después de abrir su
caja fuerte.
● Anote esta nueva combinación en este
formulario ni guarde la combinación de
nuestro sitio web seguro en
www.stack-on.com en Servicio. Si usted
escribe su combinación debe mantener esta
información en un lugar seguro, lejos de los
niños, no dentro de este seguro.
1. Presione la tecla “1” por 5 segundos
hasta que se encienda la luz verde.
2. Introduzca el código actual (que es
1-2-3-4 pre-programado por la fabrica),
y presione la tecla/boton que dice
ENTER
.
● Después de la “señal e sonido
(bip)” introduzca su código personal
de 4 a 8 dígitos y presione la
tecla/botón que dice ENTER
.
● introduca su código personal otra
vez y presiona la tecla/botón que dice
ENTER
. Después de la “señal e
sonido (bip)” su código personal
quedara grabado en el sistema de su
caja fuerte.
Acceso para
la cerradura
3. Intente su código personal presionando
los numeros en el teclado seguido por el
botón que dice ENTER
. Luego dé
vuelta a la manijera hacia la derecha
para abrir la puerta.
NOTA: La manijera tiene que dar vuelta
completemente hacia la izquierda antes
de tratar de abrir la caja fuerte usando
la combinacion. Si usted cambia las
baterias/pilas su codigo personal
quedara grabado en el sistema del
teclado.
Instalación de las Baterías/Pilas
40346-1306
18
24
GRABANDO SUS HUELLAS
● Cuando usted primero reciba su caja fuerte
no vendra con ninguna huella digital
registrada.
● Usted puede registrar hasta 32 diversas
huellas digitales para abrir la caja fuerte.
SURGERENCIAS PARA LA GRABACION
DE HUELLAS DIGITALES
● Para mejorar la identificación de su huella
digital favor de seguir las siguientes
sugerencias:
1. Presione el botón Rojo de Reajuste que se
Localice la caja fuerte a una altura que le
permitira fácil acceso al explorador/escaner
de su huella digital.
2. Coloque su dedo en el explorador/escaner y
Registre varias huellas digitales (usando
diferentes dedos) en caso de que usted sufra
una cortada o lesión a el dedo que usted ha
explorado/escaneado.
encuentra por el interior de la puerta. Dos
“sonidos (bip)” sonarán y una luz roja brillará
intensamente alrededor del
explorador/escaner.
dos “sonidos (bip)” sonaran.
● La huella digital se ha registrado con
éxito si hay un “sonido (bip) adicional” y la
luz verde relampaguella.
● La huella digital no se ha grabado e
registrado si hay dos “sonidos (bip)
adicionales” y ambas luces relampaguellan.
Intente otra vez la grabacion e registración
de huellas comenzando con el paso
numero1.
Al explorar/escanear, utilice una presión
moderada del dedo (no demasiado fuerte o
demasiado leve) sobre el explorador/escaner.
Céntre el dedo en el medio del
explorador/escaner. Utilice la misma presion y
localizacion de dedo en el explorador/escaner
para abrir su caja fuerte.
Para manos pequeñas recomendamos el uso
del dedo pulgar y de el dedo de en medio.
No utilice el explorador/escaner de huella
digital bajo luces brillantes e fuertes.
Si sus manos estan secas, respire en los
puntos de sus dedos para mejorar la
exploración/escan.
Si sus manos tienen aceite, loción o estan
sucias pueda ser que sus huellas digitales no
se imprimiran en la explorer/escaner
correctamente.
Correcto
Incorrecto
40346-1306
19
24
VACIAMIENTO DE MEMORIA
ABRIENDO SU CAJA FUERTE
USANDO SUS HUELLA DIGITALES
1. Presione la tecla/botón que dice ENTER
y
una luz roja illuminara alrededor del
explorador/escaner.
2. Coloque su dedo en el explorador/escaner en
la misma posición y presion que utilizó para
grabar su huella digital.
● La exploración/escan ha sido grabada
con exito si hay un “sonido (bip)” y la luz
verde relampaguea.
● La exploración/escan no ha sido exitosa
si hay dos “sonidos (bip-bip)” y dos luces
relampaguean. Intente otra vez la
grabacion e registración de huellas
comenzando desde el paso numero1.
3. Dé vuelta a la manijera hacia la derecha para
abrir la puerta.
NOTA: La manijera debe de dar vuelta
completamente hacia lado izquierdo antes de
intentar ha abrir la caja fuerte usando el
explorador/escan de huella digital. Si usted
cambia las baterias/pilas sus huellas quedara
grabadas en el sistema digital.
● Sigue estos pasos para borrar todas
las huellas digitales registradas y para
cambiar la combinación de nuevo a la
combinacion preestablecida por la
fabrica (código 1-2-3-4).
1. Presione y mantenga el botón rojo de
reajuste que se encuentra en el interior de
la puerta por 5 segundos y continúe
sosteniendolo mientras que la luz verde
relampaguee’ 12 veces.
2. Después del “sonido (bip)” y la luz verde
relampaguee’ todas las huellas digitales
grabadas e registradas y su combinación
electrónica (personal) serán borradas.
NOTA: La combinación electrónica de su
cajas fuertes ha sido cambiado e regresada
de nuevo al código 1-2-3-4 (la combinacion
pre-programado por la fábrica).
NOTA: Por razones de seguridad usted
debe reprogramar su combinación
después de restablecer la seguridad en
el código de fábrica.
REEMPLAZO DE LA BATERÍA
BLOQUEO DEL SEGURO
Para cerrar la caja fuerte, cerrar la puerta y
girar la perilla hacia la izquierda a la posición
de las 12:00.
NOTA DE BLOQUEO DEL SEGURO: Debido
a que el mecanismo de bloqueo está
desactivado durante aproximadamente 3 a
6 segundos después de la combinación se
ingresa, espere un mínimo de 6 segundos
a partir del momento en que se entró en la
combinación para cerrar la caja fuerte.
Además, al cerrar la caja fuerte, siempre
asegúrese de que el mando se gira
completamente a la izquierda a la posición
de las 12:00. Si el botón no se gira a la
posición de las 12:00 durante el proceso de
bloqueo, el mecanismo de bloqueo no se
bloquearán.
● Vease también la sección “PARA
COMENZAR” al principio de estas
instrucciones.
● NOTA: No mezcle las pilas nuevas
con las vejas. No mezcle las pilas
alcalinas con las recargables.
Esta caja fuerte requiere 4 – baterías/pilas
de tipo AA. Bajo uso normal, las
baterías/pilas durarán cerca de 1 año.
Cuando las baterías/pilas esten bajas, una
luz roja se ensiendera advirtiendole que las
baterías/pilas estan bajas mientras que
usted este utilizando la caja fuerte.
Para substituir las baterías/pilas, abra el
compartimiento de batería/pilas encontrado
en la parte posterior de la puerta e instale
baterías/pilas nuevas según las
indicaciones encontradas al principio de
20
estas instrucciones.
24
40346-1306
SELECCIÓN DE UNA LOCALIZACIÓN
La seguridad debe ser montado en
una viga de la pared, y un estante
permanente o el suelo. Para la
seguridad y protección óptima, la
caja fuerte se debe instalar en una
zona aislada, seco y seguro.
EL SEGURO SIEMPRE SE DEBE
MANTENERSE FUERA DEL
ALCANCE DE LOS NIÑOS.
PARA FIJAR LA CAJA FUERTE
NOTA: Esta seguridad debe montarse en
un poste de la pared, y un estante
permanente o el suelo. De lo contrario,
pondrá en peligro la seguridad de la caja
fuerte.
NOTA SOBRE ELBLOQUEO DEL
SEGURO: Las necesidades de seguro
para estar en una posición vertical, como
se muestra en la figura 1, para el
mecanismo de bloqueo para funcionar
correctamente. El no montar la caja de
seguridad en la posición vertical correcta
pondrá en peligro la seguridad de la caja
fuerte.
Asegure la caja fuerte a un poste de la
pared, y un estante permanente o piso,
utilizando los orificios de montaje perforados
en la caja fuerte.
NOTA: La caja fuerte debe estar
asegurado a un poste de la pared en un
lado de la caja de seguridad en los
orificios superior e inferior en la parte
posterior de la caja fuerte de modo que
se ancla al montante de la pared en dos
lugares. Soportes de pared se deben
utilizar en el otro lado. La caja de
seguridad también se debe montar en un
estante permanente o el suelo. Utilice los
accesorios suministrados o consulte a su
distribuidor harware para la fijación de
hardware para sus superficies de montaje
en particular.
Marque los orificios que se utilizarán.
Perforar el diámetro y la profundidad
adecuada de los agujeros piloto en
función del tipo de hardware que se
utiliza y la superficie de montaje.
Asegure la caja fuerte con los
sujetadores. (Figura 2)
Figura 2
Figura 1
40346-1306
21
24
MANTENIMIENTO
Herramientas necesarias:
Phillips destornillador
Llave Allen de 5mm
Si la puerta de la caja fuerte comienza a
raspar el marco de la puerta, abra la puerta
según las instrucciones.
Cerca de las bisagras encontrará un tubo
ranurado. Utilice una llave Allen para
apretar este tubo. Esto le vuelva a alinear
la puerta.
No utilice limpiadores de cristal o
aerosoles en esta caja fuerte. Limpie su
caja fuerte con un paño húmedo
nadamas.
IMPORTANTE
Mantenga las llaves y su número de la
combinación un lugar seguro, lejos de niños.
Mantenga este expediente con su número de
serie y combinación un lugar seguro aparte de su
caja fuerte. Para pedir un reemplazo para la
llave, siga las instrucciones en la hoja attada.
STACK-ON PRODUCTS COMPANY
P.O. BOX 489
WAUCONDA, IL 60084
40346-1306
22
24
R
Solicitud de Llave
"Este no es un Formato de Registro"
NOTA: Usted puede almacenar su Numero de Llave y su Nymero de Combinacion en el web site SEGURO de www.stack-on.com bajo la opcion que dice Servicio
Al almacenar su Numero de Llave y Numero de Combinacion en este web site le proporcionara acceso instantanio ha esta
informacion importante en caso de que usted pierda sus llaves o numero de combinacion. Nadamas usted tendra acceso ha
esta informacion
Requerimos verificación del propietario para procesar esta solicitud de llave de su gabinete de
seguridad.
Para poder recibir su llave de reemplazo de su gabinete de seguridad:
1.
Llene y envíe esta solicitud a Stack-On Products.
2.
Envíe copia de su licencia de conducir junto con la solicitud.
3.
Envíe copia del recibo mostrando la fecha original de compra.
4.
El propietario del gabinete de seguridad o de la caja fuerte deberá firmar la solicitud.
5.
La firma del propietario deberá estar notariada.
6.
6. Envíe $10.00USD (dólares) para obtener una llave de reemplazo.
Aceptamos cheques personales de E.U.A., MasterCard o Visa.
7.
Envíe la información completa a:
Stack-On Products Company
1360 N. Old Rand Road
P.O. Box 489
Wauconda, IL 60084
Número de Serie______________________ Número de Llave (si aplica) ______________
Dimensiones de la Unidad_____________________________________________________
Descripción de la Unidad______________________________________________________
Nombre del Propietario ______________________________ Fecha de Compra___/___/____
Dirección (propietario) _____________________________ No. Interior _________________
Ciudad ________________________ Estado _______________ C.P.________________
No. Teléfono: (____)___________________ No. Fax: (____)___________________
Correo Electrónico del Propietario: ______________________________________________
Firma del Propietario __________________________ Firma del Notario________________
Fecha de Vencimiento de
la Comisión del Notario: _____/_____/_____ Sello del Notario
SERVICIO SOLICITADO
Reemplazo de Llaves
- Costo de $10.00USD por este servicio
Si
No
Información de su tarjeta de crédito (Favor de Indicar Una):
MasterCard
Visa
Fecha Vencimiento: ___/___/___ No. Tarjeta:_______________________________
Código de Seguridad (Al dorso de la tarjeta- - últimos 3 dígitos impresos en el área de firma)__________
40346-1306
23
24
R
GARANTÍA LIMITADA DE TRES AÑOS
CAJAS FUERTES DE ACERO
Las Cajas Fuertes de Acero de Stack-On Products Co. (“Stack-On”) están garantizados como libres
de defectos de materiales y hechura durante un período de tres (3) años a partir de la fecha de compra
original de un consumidor. Esta garantía se aplica al consumidor inicial solamente.
Si usted considera que existe un defecto de material o hechura en su Caja Fuerte de Acero durante
el período de garantía de tres años, comuníquese con nuestro departamento de servicio a clientes por
correo regular o correo-e en la dirección indicada abajo, e incluya con su correspondencia la información
de constancia de compra y el número del modelo del producto.
Stack-On Products Company
1360 North Old Rand Road
Wauconda, IL60084
[email protected]
Si se notifica debidamente a Stack-On durante el período de garantía de tres años y, después de la
inspección se confirma que existe un defecto, Stack-On, a su exclusiva opción, proporcionará piezas de
repuesto o cambiará el producto sin cargo, o reembolsará el precio de compra del producto.
ESTA GARANTÍA NO CUBRE NINGÚN PRODUCTO O NINGUNA PARTE DE UN PRODUCTO QUE HA
ESTADO SUJETO A USO EXCESIVO, ACCIDENTE, NEGLIGENCIA, ABUSO O MAL USO,
MANTENIMIENTO INCORRECTO, ALTERACIÓN O REPARACIÓN POR CUALQUIER TERCERO
QUE NO SEA STACK-ON. ADICIONALMENTE, ESTA GARANTÍA NO CUBRE ACCESORIOS O
PIEZAS USADAS CON O DENTRO DEL PRODUCTO QUE NO ESTÁN INCLUIDOS CON LA COMPRA
ORIGINAL.
ESTA GARANTÍA ES EXCLUSIVA Y EXPRESAMENTE EN LUGAR DE CUALQUIER OTRA
GARANTÍA EXPRESA O IMPLÍCITA, INCLUSIVE LAS GARANTÍAS DE COMERCIABILIDAD E
IDONEIDAD PARA UN PROPÓSITO ESPECÍFICO, QUE POR ESTE MEDIO SE DESCONOCEN Y
EXCLUYEN. STACK-ON NO ESTARÁ SUJETO A NINGUNA OTRA OBLIGACIÓN O
RESPONSABILIDAD. STACK-ON NO ASUME NI AUTORIZA A NINGUNA OTRA PERSONA QUE
ASUMA EN SU NOMBRE, CUALQUIER OTRA RESPONSABILIDAD EN RELACIÓN CON LA VENTA
DE UNA CAJA FUERTE DE ACERO.
STACK-ON NO SERÁ BAJO NINGUNA CIRCUNSTANCIA RESPONSABLE ANTE EL
CONSUMIDOR INICIAL POR DAÑOS INCIDENTALES, CONSECUENTES, ESPECIALES,
EJEMPLARES O PUNITIVOS QUE SURGIESEN DE LA COMPRA O EL USO DE CUALQUIER CAJA
FUERTE DE ACERO.
LA RESPONSABILIDAD DE STACK-ON POR CUALQUIER VIOLACIÓN DE ESTA GARANTÍA ESTARÁ
LIMITADA EXCLUSIVAMENTE A LA REPARACIÓN O EL REEMPLAZO DEL PRODUCTO
DEFECTUOSO, SEGÚN SE DESCRIBE ARRIBA, O EL REEMBOLSO DEL PRECIO DE COMPRA DEL
PRODUCTO.
LA OBLIGACIÓN DE STACK-ON BAJO ESTA GARANTÍA BAJO NINGUNA CIRCUNSTANCIA
EXCEDERÁ EL PRECIO DEL PRODUCTO.
ESTA GARANTÍA LE CONFIERE DERECHOS LEGALES ESPECÍFICOS. ES POSIBLE QUE
TAMBIÉN TENGA OTROS DERECHOS, QUE VARÍAN DE UN ESTADO A OTRO.
40346-1306
24
24