Download 1 - Sa Toma AG
Transcript
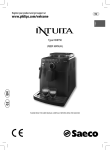
ENGLISH
02
02
EN
Type SUP041E
OPERATING INSTRUCTIONS
Read these operating instructions carefully before using the machine.
1
1
7
8
2
3
4
5
6
10
11
12
9
13
14
15
16 17
•2•
18
19
20
22
23
24
21
25
2
3
4
5
6
7
8
9
10
11
12
13
•3•
SAFETY INSTRUCTIONS
or feet. Do not let the power cord hang freely
from tables or shelves.
Never allow water to come into contact
with any of the electrical parts of the machine: danger of short circuit! Hot water
and steam may cause scalding!
Intended Use
The machine is intended to be used in small offices/organisations only.
The appliance is not to be used by persons
(including children) with reduced physical,
mental or sensory abilities or with scarce experience and/or expertise, unless they are supervised by a person responsible for their safety,
or they are instructed by this person on how to
properly use the machine.
Power Supply
The machine must be connected to the power
supply by the service provider, in accordance
with its specifications.
Power Cord
Never use the machine if the power cord is defective.
Report any defects in the cord and/or plug to
the service provider immediately. Do not pass
the power cord around corners, over sharp
edges or over hot objects and keep it away
from oil. Do not use the power cord to carry
or pull the machine. Do not pull out the plug
by the power cord or touch it with wet hands
•4•
For the Safety of Others
Ensure that children cannot play with the machine and/or the packaging materials. Never
direct the jet of hot water and/or steam towards yourself or others. Do not touch the hot
water wand with bare hands. Always use the
handles or knobs provided.
Danger of Burns
Do not touch the hot water wand and/or the
coffee/beverage dispensing spout.
Fire Safety Precautions
In case of fire, use carbon dioxide (CO2) extinguishers. Do not use water or dry powder extinguishers.
Suitable Location for Operation
and Maintenance
The machine should be installed by the service
provider in accordance with the safety regulations in force at the time of installation.
The machine may only be moved by the service
provider.
Do not use the machine outdoors.
Avoid placing open flames and/or incandescent objects near the machine so as not to
damage or melt the machine housing. Do not
use in places where the temperature may drop
to a level equal to and/or lower than 0°C. If the
machine has been exposed to such conditions
alert the service provider, who will carry out a fect the correct operation of the milk brewing
system.
safety check.
Cleaning
Before cleaning the machine, the power button
must be switched to OFF (0) and the plug must
be removed from the power socket. Wait for the
machine to cool down. Never immerse the machine in water! It is strictly forbidden to tamper
with the internal parts of the machine. Do not
clean the machine using a jet of water.
The appliance and its components must be
cleaned and washed following a period of inactivity.
Storing the Machine
If the machine is to remain inactive for a long
time, turn it off and unplug it. Store the machine in a dry place, out of the reach of children. Keep it protected from dust and dirt.
Repairs / Maintenance
In case of breakdown, defect or a suspected
fault resulting from a fall, immediately remove
the plug from the power socket and alert the
service provider or specialised technician.
Never attempt to operate the machine if it is
Using Milk (where available)
faulty. Only the service provider and/or techniMilk must be used and stored in accordance cian may service or repair the machine.
with the instructions given on the manufacturer's original packaging.
We accept no liability for use of milk unsuitable
for human consumption.
Milk must be kept cold, as high temperatures
will make it turn sour - this is a natural characteristic of milk. For this reason, the Cappuccinatore must be cleaned after each use, as
described in the manual.
For thorough cleaning, the Cappuccinatore can
be detached and disassembled, and its parts
can be put into a dishwasher (not of professional type).
Washing component parts in the dishwasher
may cause Cappuccinatore surfaces to tarnish
or the graphics to fade, especially if harsh detergents are used.
This circumstance is normal and does not af-
•5•
Machine Use - User Manual
CONTENTS
1 GENERAL INFORMATION ...................................... 7
1.1 Intended Use of the Machine .......................................7
1.2 How to Read the Manual..............................................7
1.3 How to Use these Operating Instructions .....................7
1.4 Machine Identification .................................................7
1.5 Technical Specifications ...............................................8
1.6 Residual Risks ..............................................................8
2 MACHINE COMPONENTS ...................................... 8
2.1 Control Panel Description ............................................9
3 USING THE MACHINE .......................................... 9
3.1 Filling the Water Tank...................................................9
3.2 Filling the Coffee Bean Hopper.....................................9
3.3 Turning on the Machine .............................................10
3.4 Warm-up and Rinsing ................................................10
3.5 Rinse/Self-Cleaning Cycle...........................................10
3.6 Eco-friendly: Stand-by ...............................................11
3.7 Adjusting the Dispensing Spout .................................11
3.8 Adjusting the Aroma (Coffee Strength) ......................11
3.9 Coffee Brewing ..........................................................11
3.10 Adjusting the Coffee Length ......................................12
3.11 Emptying the Coffee Grounds Drawer .......................12
3.12 Dispensing Steam / Preparing a Cappuccino ..............13
3.13 Dispensing Hot Water.................................................14
4 USING THE MACHINE WITH CREDITS .................. 14
5 USER PROGRAMMING........................................ 14
5.1 Machine Functions .....................................................15
5.2 Programming Machine Functions ..............................15
6 CLEANING AND MAINTENANCE ........................... 16
6.1 Cleaning the Pannarello .............................................16
6.2 Cleaning the Coffee Grounds Drawer..........................17
6.3 Cleaning the Drip Tray ................................................17
6.4 Brew Group - Weekly Cleaning ...................................17
7 MACHINE WARNINGS ........................................ 20
8 HANDLING AND STORAGE.................................. 22
8.1 Handling ....................................................................22
8.2 Storage ......................................................................22
•6•
9 INSTALLATION .................................................. 22
9.1 Safety Instructions ....................................................22
9.2 Stop Functions ...........................................................23
9.3 List of Accessories ......................................................23
9.4 Assembly-Siting.........................................................24
9.5 Disposal of Packaging ................................................24
9.6 Filling the Water Tank.................................................24
9.7 Filling the Coffee Bean Hopper...................................24
9.8 Electrical Connection..................................................25
9.9 Turning on/off the Machine .......................................25
9.10 First Use - Use After a Long Period of Inactivity ..........25
9.11 Measuring and Adjusting Water Hardness .................26
9.12 "INTENZA+" Water Filter ...........................................26
9.13 Adjusting the Coffee Grinder ......................................28
10 MACHINE PROGRAMMING ................................. 29
10.1 Accessing the Programming Mode.............................29
10.2 Programming Controls ...............................................30
10.3 Programming Menu...................................................30
10.4 Setting the PASSWORD ..............................................32
10.5 Setting Credits ...........................................................33
11 CLEANING AND MAINTENANCE ........................... 34
11.1 Cleaning Intervals ......................................................34
11.2 Brew Group Lubrication .............................................34
11.3 Descaling ...................................................................35
12 MACHINE DISPOSAL .......................................... 38
13 TROUBLESHOOTING .......................................... 38
Machine Use - User Manual
1
1.1
GENERAL INFORMATION
Intended Use of the Machine
This machine automatically brews:
- Coffee and espresso coffee using coffee beans;
- Hot beverages using hot water and/or steam dispensed via
the dispensing spout;
- Milk-based beverages using the supplied Pannarello and/or
Cappuccinatore (where required).
The elegant machine housing has been designed for use in small
offices, businesses and institutions.
Important.
Misuse voids all forms of warranty, releasing the
Manufacturer from any responsibility for damage to property or personal injury.
The following are considered misuse:
- any use other than the intended use and/or employing methods other than those described in this manual;
- any operation on the machine in breach of the instructions provided in this manual;
- any use following tampering with machine components and/or alteration of its safety mechanisms;
- use of the machine outdoors.
In such cases the user shall bear the costs of repair.
1.2
How to Read the Manual
Various kinds of warning signs are used in this manual to highlight the different hazard or competence levels.
The warning triangle indicates
important instructions for the
safety of the machine's users.
Carefully follow these instructions to avoid serious injury!
Various warning signs are used in this manual to indicate the
competences of each user.
User:
A person who uses the machine to brew beverages
and who can clean the machine, where instructed
to do so in the manual. Users are NOT allowed to
perform operations which are the competence of
the Service Provider/Supply Operator or Technician. On detecting machine failures and/or faults,
users should contact the Service Provider only.
Service Provider/Supply Operator:
Company or person responsible for normal machine installation, start-up and suspension of
service. On detecting machine failures, the Service Provider should request the assistance of the
maintenance technician.
Technician: Personnel qualified to perform unscheduled
maintenance and to service the machine.
Technicians may carry out all operations described
in this manual without requiring explicit authorisation.
This warning sign is used to highlight information
that is particularly important in order to guarantee the best performance of the machine.
1.3
How to Use these Operating Instructions
This manual constitutes an integral part of the
machine and should be read carefully. It contains
information regarding installation, maintenance and
proper use of the machine.
Always refer to this manual before any operation.
Keep these operating instructions in a safe place and make them
available to anyone who may use the coffee machine. If this
manual is lost or damaged, a copy should be requested from the
service provider immediately. For further information or if you
experience problems not completely or sufficiently covered in
these instructions, please contact the service provider.
1.4
Machine Identification
The machine is identified by the model name and serial number
shown on the special plate.
The plate contains the following information:
• Name of the Manufacturer
• CE marking
• Machine model
• Serial number
• Year of manufacture
• Some technical specifications:
- Power supply voltage (V);
- Power supply frequency (Hz);
- Electrical power consumption (W).
Note: When contacting the Service Provider, always refer to this plate, and to the machine's specific data shown on it.
•7•
Machine Use - User Manual
1.5
Technical Specifications
Technical Specifications
Power Supply and Nominal Voltage-Power Rating
See plate attached to the back of the appliance
Machine Housing Material
Metal - Thermoplastic Material
Size (w x h x d)
215 x 370 x 429 (mm)
Weight
approx. 8 kg
Power Cord Length
1.2 m
Water Tank Capacity
2.5 litres
Coffee Grounds Drawer Capacity
15 grounds
Control Panel
On the front
A-weighted Sound Pressure Level
Less than 70 dB
Pump Pressure
Max. 1.5 MPa (15.0 bar)
Operating Conditions
Minimum temperature: above 10°C
Maximum temperature: below 40°C
Maximum humidity: below 95%
Safety Devices
Boiler pressure safety valve
Safety thermostat
Subject to engineering and manufacturing changes due
to technological improvements.
1.6
Residual Risks
The dispensing outlet has no guards to prevent accidental hand
contact with coffee, hot beverages and/or steam.
•8•
2
MACHINE COMPONENTS
Note: The “key to components” includes all machine models; check which one matches your machine. Certain functions may not be available.
1 Water tank lid
2 Water tank
3 Control panel
4 Full drip tray float
5 Cup holder grill
6 Drip tray
7 Coffee bean hopper lid
8 Coffee bean hopper
9 Coffee grounds drawer
10 Brew Group
11 Coffee residues drawer
12 Service door
13 Steam wand + rubber grip for Pannarello
14 Coffee dispensing spout
15 Pannarello
16 Chassis plug
17 ON/OFF button
18 "Espresso" button
19 "Brew" button
20 "Aroma" button
21 "Stand-by" button
22 "Steam" button
23 "Hot Water" button
24 "MENU" button
25 Display
Machine Use - User Manual
2.1
Control Panel Description
Note: All possible controls are described here.
Refer to the following sections for the operating
3
USING THE MACHINE
Before using the machine, check that the water tank and the coffee bean hopper are filled and that the machine is properly clean.
modes.
3.1
Filling the Water Tank
Reference - Description
18 "ESPRESSO" button
When this button is pressed an espresso coffee is brewed.
Before turning on the machine, the water tank should be filled
with fresh drinking water.
19 "BREW" button
When this button is pressed a cup of coffee is brewed.
Warning! Before using the machine for the first
time, wash the water tank carefully. Fill the water
tank with fresh drinking water only. Hot or carbonated
water, as well as other liquids, will damage the machine.
20 "Aroma" button
When this button is pressed the Aroma of the coffee to be
brewed can be selected.
21 "Stand-by" button
When this button is pressed, the machine Stand-by mode is
activated.
22 "Steam" button
When this button is pressed, the machine starts dispensing
steam.
23 "Hot Water" button
When this button is pressed hot water is dispensed.
24 "MENU" button
When this button is pressed the user menu can be accessed,
which allows programming of certain parameters relating to
machine operation.
25 LCD Display
Displays the machine status and alarm signals, and guides the
user through the steps required to operate the machine.
1 (Fig.04, page 3) Remove the lid from the water tank.
2 (Fig.05, page 3) Remove the tank; lift it using the inside
handle.
3 (Fig.06, page 3) Rinse it and fill with fresh water, making
sure that the (MAX) level indicated in the tank is not exceeded.
4 Insert the water tank back into its seat and refit the lid.
3.2
Filling the Coffee Bean Hopper
Before turning on the machine, check that the hopper contains a
sufficient quantity of coffee beans.
Warning! Only coffee beans must be put into the
coffee bean hopper. Ground coffee, instant coffee
or any other object may damage the machine.
1 (Fig.03, page 3) Remove the coffee bean hopper lid.
Note: The hopper may feature a different safety
system according to the regulations applicable in
the country of use of the machine.
2 Slowly pour the coffee beans into the hopper.
If the water tank is not inserted, check that no coffee beans fall into the tank compartment. If this
happens, remove them to avoid any malfunctions.
3 Refit the coffee bean hopper lid.
•9•
Machine Use - User Manual
3.3
Turning on the Machine
4 When completed, the machine is ready for use.
GREEN
Warning! Connection to the power supply should
be carried out exclusively by the service provider!
Before turning on the machine, ensure that the plug is correctly
inserted in the power socket.
2 After carrying out a check cycle, the machine goes into
Stand-by mode and the " " button (21) blinks.
3 To turn on the machine simply press the "
" button (21).
Note: Once the warm-up is complete, the machine
performs a rinse cycle of the internal circuits. A
small amount of water is dispensed during this process.
Wait for this cycle to be completed.
3.4
Warm-up and Rinsing
YELLOW
1 Upon start-up, the machine activates the warm-up phase.
Wait until it is completed.
Note: If the machine is being used for the first
time or after a long period of inactivity, contact
the Service Provider to start it up.
3.5
Rinse/Self-Cleaning Cycle
This cycle allows the internal coffee circuits to be rinsed with fresh
water. The cycle is carried out:
• At machine start-up (with cold boiler);
• After priming the circuit (with cold boiler);
• During the Stand-by preparation phase (if at least one coffeebased product has been brewed);
• When turning off the machine, after pressing the " "
button (21) (if at least one coffee-based product has been
brewed).
A small amount of water will be dispensed to rinse and heat all
the machine parts; in this phase this icon is displayed.
YELLOW
1 To turn on the machine, move the power button on the back
of the machine to "I" (Fig.02, page 3).
Note: The progress bar indicates that the machine
is warming up the system.
YELLOW
2 Once the warm-up is complete, the machine performs a rinse
cycle of the internal circuits.
Note: The progress bar indicates that the machine
is performing the rinse cycle of the system.
3 A small amount of water is dispensed from the coffee dispensing spout. Wait for the cycle to end.
Note: The cycle can be stopped by pressing the "
" button (18).
• 10 •
Wait for the cycle to finish automatically. The dispensing process
can be stopped by pressing the "
" button (18).
Machine Use - User Manual
3.6
Eco-friendly: Stand-by
3.8
Adjusting the Aroma (Coffee Strength)
The machine is designed for energy saving. The machine automatically turns off after 30 minutes of inactivity.
Choose your favourite coffee blend and adjust the amount of coffee
to be ground according to your personal taste. You can also select
the pre-ground coffee function.
Note:
During the turning off phase, the machine will perform a rinse cycle if a coffee product has been brewed.
Time can be programmed according to your needs (see
instructions in chapter 5).
Note: Selection must be made prior to selecting
coffee.
-
To turn the machine on again, simply press a button on the
control panel (if the power button is set to "I"). In this case the
machine will go through the rinse cycle only if the boiler is cold.
3.7
Adjusting the Dispensing Spout
3.9
Coffee Brewing
To brew coffee, press and release:
” button (18) to brew an espresso coffee; the fol1 the “
lowing icon is displayed;
GREEN
Most of the cups on the market can be used with this coffee machine.
The height of the dispensing spout may be adjusted to better fit the
dimensions of the cups that you wish to use.
Three choices are possible by pressing the (20) “ ” button. Each
time the button is pressed, the aroma changes by one degree, according to the selected amount:
= mild aroma
= medium aroma
= strong aroma
or
Manually move the dispensing spout up or down to adjust its
height.
The recommended positions are:
- When using small cups (Fig.07, page 3);
- When using large cups and/or latte macchiato cups (Fig.09,
page 3).
Two cups can be placed under the dispensing spout to brew two
cups of coffee at the same time (Fig.05, page 3).
GREEN
” button (19) to brew a coffee; the following
the “
icon is displayed;
Then the brewing cycle starts:
Press the desired button once to brew 1 cup of coffee.
Press the desired button twice consecutively to brew 2 cups of
coffee.
Note: To brew 2 cups of coffee, the machine automatically grinds and doses the correct amount of
coffee. Brewing two coffees requires two grinding cycles
and two brewing cycles, carried out automatically by the
• 11 •
Machine Use - User Manual
GREEN
machine; the display shows the 2 cups icon.
The “ ” button (18) has now been programmed. Each time it
is pressed, the machine will brew the same amount of espresso
coffee that has just been programmed.
Note: To program the “ ” button (19), the same
steps should be followed.
2 Once the prebrewing cycle is complete, coffee begins to come
out of the dispensing spout.
3 Coffee brewing stops automatically when the set level is
reached. However, the coffee brewing process can be stopped
manually by pressing the "
" button (18).
Note: The machine is set to brew a true Italian espresso coffee. This feature may slightly lengthen
the brewing time, allowing the intense coffee flavour to
develop fully.
You should always use the “ ” button (18) to stop brewing coffee when the desired amount of coffee is reached even when you
are programming the “ ” button (19).
3.11 Emptying the Coffee Grounds Drawer
Note: This operation must be performed with the
machine turned on.
The machine will indicate when the coffee grounds drawer has
reached its maximum capacity.
RED
3.10 Adjusting the Coffee Length
The machine allows the amount of brewed coffee to be adjusted
according to taste and cup size.
Each time the “ ” button (18) or the “ ” button (19) is
pressed, the machine brews a pre-set amount of coffee. Each button may be individually programmed for a specific brew setting.
The following procedure describes the “ ” button (18) programming.
In this case the machine does not allow coffee to be brewed.
In order to continue to brew coffee, the coffee grounds drawer
must be emptied of used coffee.
1 Place a cup under the coffee dispensing spout (Fig.07, page 3).
GREEN
2 Press and hold the “ ” button (18) until the “MEMO”
icon appears on the display, then release the button. The machine
is now in programming mode.
1 Make sure that the dispensing spout is positioned upwards
(Fig.09, page 3).
GREEN
The machine starts brewing coffee.
3 When the “STOP” icon is displayed, press the “ ” button
(18) as soon as the desired amount of coffee is reached.
• 12 •
2 Turn the Pannarello to the left.
3 Remove the drip tray.
4 (Fig.13, page 3) Remove the coffee grounds drawer and
empty out the coffee grounds in a suitable container.
Machine Use - User Manual
Note: It is advisable to also empty the drip tray
(see section 6.3).
RED
RED
Only when the display shows the following icons in sequence:
may the coffee grounds drawer be inserted into the machine. After inserting the drawer, the display shows the icon:
Note: To make a good quality cappuccino, use cold
milk (~5°C / 41°F) with a protein content of at
least 3%. Whole milk or skimmed milk may be used depending on individual taste.
Note: When you plan to dispense steam right after
switching on the machine or after brewing a coffee, some water still present in the circuit may need to be
dispensed first. To do this, press the “ ” button (22) to
dispense steam for a few seconds. Thereafter press the “
” button (18) to stop dispensing. Continue with step 2.
2 Place the Pannarello inside the container with the milk
(Fig.10, page 3). Press the " " button (22).
The machine is now ready to brew coffee.
3.12 Dispensing Steam / Preparing a Cappuccino
The machine can dispense steam quickly and easily with the
touch of a button.
Danger of scalding! Dispensing may be preceded
by small jets of hot water. The Pannarello may
reach high temperatures. Never touch it with bare hands.
Use the appropriate protective handle only.
Important Note: Immediately after using steam,
clean the Pannarello as described in section 6.1.
1 Fill 1/3 of a container with cold milk.
YELLOW
3 After preheating, the machine starts dispensing steam.
GREEN
GREEN
2 The machine needs time to preheat.
4 In this phase, froth the milk as desired or heat the beverage to
the required temperature.
Note: Froth the milk by gently swirling the container and moving it up and down.
5 To conclude the steam dispensing process, press the "
ton (18).
" but-
Note: After having pressed the “ ” button (18)
it will take a few seconds before the machine
stops dispensing steam completely.
• 13 •
Machine Use - User Manual
YELLOW
3.13 Dispensing Hot Water
Danger of burning! Dispensing may be preceded
by small jets of hot water. The Pannarello may
reach high temperatures: Do not touch it with bare hands.
Use the appropriate protective handle only.
1 Place a container under the Pannarello (Fig.10, page 3).
2 Press the "
" button (23) to start dispensing hot water.
YELLOW
3 The machine needs time to preheat.
4 After preheating, the machine starts dispensing hot water.
Note: The dispensing of hot water and steam is
not subject to credit; it can always be performed
provided that there is water in the tank.
Each service provider decides independently how to manage the
granting and recharging of credits to allow the machine to be
used.
5
USER PROGRAMMING
Certain machine parameters can be programmed to improve the
brewing of a desired product, and to better manage machine
operation.
” button (24) to access the machine's main
YELLOW
GREEN
1 Press the “
menu.
5 To stop the hot water dispensing process, press the “ ” button (18). After dispensing, remove the container with hot water.
4
USING THE MACHINE WITH CREDITS
Note: This option can be enabled or disabled by
the service provider.
GREEN
The machine is designed to manage coffee brewing by means of a
credit system. The number of coffee cups brewed is limited to the
number of credits granted by the service provider.
When no credits remain, no more cups of coffee can be brewed.
When fewer than 31 credits are left in the machine, the icon “$”
is displayed. In this case, contact the service provider to restore
the credits.
When no credits remain, the following icon is displayed and the
machine stops brewing coffee.
• 14 •
The first screen appears, which allows the coffee brewing temperature to be changed.
The buttons change their function when in programming
mode:
-
the “
” button (18) = (+) increases the value
-
the “ ” button (20) = (-) decreases the value
-
the “
” button (24) = ( or OK) selects or confirms
-
the “
” button (22) = (ESC) exits or cancels
Machine Use - User Manual
5.1
Machine Functions
YELLOW
The following functions can be programmed:
Coffee Temperature
4 Press the “ ” (18) and “ ” (20) buttons to increase or decrease the value of the function.
YELLOW
YELLOW
This function allows you to adjust the coffee brewing temperature.
Timer (stand-by)
5 When the display value is changed, the “OK” message appears. Press the " " button (24) to confirm the change.
6 Press the “
” button (22) to exit the programming mode.
GREEN
YELLOW
This function adjusts the time taken for the machine to go into
stand-by mode after the last brewing.
Contrast
YELLOW
This function allows you to adjust the contrast of the display to
better view the messages.
5.2
Note: The machine will automatically exit the programming mode if you do not press any button for
3 minutes. The values that have been changed but not
confirmed won’t be saved.
Programming Machine Functions
In this example, how to program the display contrast is shown.
Proceed in the same way to program the other functions.
The programming menu can only be accessed when the machine
is on and shows this display.
1 Press the “
” button (24) to access programming mode.
YELLOW
2 The main screen will be displayed.
3 Press the “ ” button (24) to scroll the pages until the display contrast function is displayed.
• 15 •
Machine Use - User Manual
6
CLEANING AND MAINTENANCE
As some of the parts of the appliance come in contact with water
and coffee during normal use, it is important to clean the appliance regularly.
Neglecting to regularly clean the appliance will ultimately cause
it to stop working properly, and in this case repair is not covered
under warranty.
Warning. Before undertaking any maintenance
and/or cleaning operation, turn off the machine,
unplug it and wait for it to cool down.
Non-removable parts and the machine itself must be cleaned,
when not otherwise specified, using only cold or lukewarm water,
with a non-abrasive sponge and a damp cloth.
•
•
•
•
•
•
•
•
Cleaning can only be carried out when the machine is cold
and unplugged.
Use a soft, damp cloth to clean the machine.
Do not use direct jets of water.
Do not immerse the machine in water or place any of its parts
in a dishwasher.
Do not use sharp objects or harsh chemical products (solvents) for cleaning.
Do not dry the machine and/or its parts using a microwave
and/or standard oven.
All parts requiring cleaning are easily accessible, so no tools
are needed.
Periodic maintenance and cleaning will keep the machine in
good working order for a longer time and ensure compliance
with basic hygienic standards.
Warning. The machine and its parts should in any
case be cleaned every week.
6.1
Cleaning the Pannarello
Warning. Before performing this operation, make
sure that the wand is cold: Danger of burns!
Daily cleaning
It is important that you clean the Pannarello daily or after each
use as it preserves hygiene and ensures perfect milk froth consistency.
After frothing the milk, a small quantity of hot water must be
dispensed into a container.
Remove the external part of the Pannarello and wash it with lukewarm water.
Weekly Cleaning
The weekly cleaning is more thorough, since you need to disassemble all the Pannarello components.
The following cleaning operations are required:
1 Remove the external part of the Pannarello. Wash it with
lukewarm water.
The appliance and its parts should be cleaned and
washed following a period of inactivity.
2 Remove the upper part of the Pannarello from the steam/
hot water wand.
• 16 •
Machine Use - User Manual
6.4
Brew Group - Weekly Cleaning
The Brew Group should be cleaned whenever the coffee bean hopper
is filled, or at least once a week.
1 Turn off the machine by switching the power button to the
"O" position and remove the plug from the socket.
2 Remove the drip tray and the coffee grounds drawer.
3 Wash the upper part of the Pannarello with fresh water.
4 Clean the steam/hot water wand of the Pannarello with a
wet cloth to remove milk residues.
5 Put the upper part back into the steam/hot water wand
(make sure it is completely inserted).
6 Reassemble the external part of the Pannarello.
6.2
Cleaning the Coffee Grounds Drawer
The coffee grounds drawer is to be emptied and cleaned whenever indicated by the machine. To carry out this operation, refer
to section 3.11.
6.3
3 Open the service door.
Cleaning the Drip Tray
Empty and clean the drip tray every day. Perform this operation
also when the float is raised.
1 Remove the drip tray and the coffee grounds drawer as described in section 3.11.
2 Empty the drip tray and wash it.
4 Remove the Brew Group: pull it by the handle and press the
«PUSH» button. The Brew Group must be washed with lukewarm
water only. Do not use detergent.
3 Refit the coffee grounds drawer and insert the drip tray into
the machine.
• 17 •
Machine Use - User Manual
5 Wash the Brew Group with lukewarm water and carefully
wash the upper filter. Before placing the Brew Group in its seat,
ensure that there is no water left in the brewing chamber.
If the coffee residues drawer is not correctly positioned, the brew group may not fit into the machine.
6 Remove the coffee residues drawer and wash it thoroughly.
9 Ensure that the Brew Group is in the rest position; the two
reference signs must match.
7 Clean the inside of the machine with a damp cloth.
If they do not match, proceed as described in step (10).
10 Ensure that the lever is in contact with the brew group base.
8 Insert the coffee residues drawer in its seat and ensure that
it is correctly in place.
11 Make sure that the hook which locks the Brew Group is in
the correct position; to check its position firmly press the "PUSH"
button.
• 18 •
Machine Use - User Manual
12 Insert the Brew Group into its seat again until it locks into
place, WITHOUT pressing the "PUSH" button.
13 Insert the coffee grounds drawer and the drip tray. Close the
service door.
• 19 •
Machine Use - User Manual
7
MACHINE WARNINGS
This chapter describes all the warning messages that the machine may display to the user, and the actions that can and/
or must be performed by the user.
Warning Signals (Yellow Colour)
How to Reset the Message
The machine is in warm-up phase to brew beverages or dispense hot water.
The machine is performing the rinse phase. Wait until the machine has completed
the cycle.
The "Intenza" water filter must be replaced with a new one. Contact the service
provider.
The brew group is being reset due to machine reset.
Refill the coffee bean hopper with coffee beans and restart the cycle.
The machine is performing circuit priming.
The machine is out of credits. In this case, only hot water and steam may be dispensed.
To brew coffee, contact the service provider to restore the credits.
The machine requires a descaling cycle.
When this message is displayed, it is still possible to use the machine, but its correct
operation might be affected.
Damage caused by failure to descale the machine is not covered by warranty.
Contact the service provider.
• 20 •
Machine Use - User Manual
Warning Signals (Red Colour)
How to Reset the Message
Insert the drip tray and the coffee grounds drawer into the machine and close the
service door.
Fill the coffee bean hopper.
This icon appears for 5 seconds, from when the machine detects that it has finished
the coffee to be ground.
After this time the message "Refill the coffee bean hopper with coffee beans and
restart the cycle" appears. (See Warning Signals (Yellow Colour)).
The brew group must be inserted into the machine.
Empty the coffee grounds drawer.
Fill the water tank.
Exx
Turn off the machine. Turn it back on after 30 seconds. Try this 2 or 3 times. If this
signal appears again, contact the service provider and quote the code shown on
the display.
• 21 •
Machine Installation - Service Provider Manual
8
HANDLING AND STORAGE
All the operations described in chapter 8 must
be performed exclusively by the service provider
or a specialised technician, who shall organise
all the operating steps and use only suitable means to ensure strict compliance with the safety regulations in force.
8.1
•
•
Handling
During handling and transportation, the machine must be kept in
an upright position, according to the instructions printed on the
packaging. Care should be taken during lifting and positioning.
Do not shake the machine.
•
Make sure that nobody is standing in the area
during load lifting and handling. In difficult conditions, assign suitable personnel to monitor all movements.
8.2
Storage
The machine should be stored in accordance with the following
conditions:
- Minimum temperature: above 4°C;
- Maximum temperature: below 40°C;
- Maximum humidity: below 95%.
The machine is packed in cardboard and expanded polystyrene
packaging.
Warning. Due to the total weight of the packaged
product, do not stack more than three machines
on top of each other. The machine should be stored in its
original packaging, in a dry and/or dust-FREE place.
9
INSTALLATION
All the operations described in chapter 9 must
be performed exclusively by the service provider
or a specialised technician, who shall organise
all the operating steps and use only suitable means to ensure strict compliance with the safety regulations in force.
9.1
•
•
Safety Instructions
Read the entire instruction manual carefully.
The machine should be connected to the mains according to
the safety regulations in force in the country where the machine is used.
• 22 •
•
•
Connection to the drinking water network (for water-network supplied machines) should be made in compliance with
the safety regulations in force in the country where the machine is to be used.
The socket to which the machine is connected should be:
- compatible with the type of plug installed on the machine;
- suitably sized to comply with the data on the plate attached to the bottom of the appliance;
- connected to an efficient earthing system.
The power cord should not:
- come into contact with any type of liquid: danger of
electric shocks and/or fire;
- be crushed and/or come into contact with sharp surfaces;
- be used to move the machine;
- be used if damaged;
- be handled with damp or wet hands;
- be wound in a coil when the machine is in use;
- be tampered with.
If the power cord is damaged, it must be replaced by the
manufacturer or an authorised service centre, or in any case
by a person with a similar qualification.
It is forbidden to:
- Install the machine other than as described in Chapter 9,
or outdoors.
- Install the machine in a location where water jets may
be used.
- Disable the safety features installed by the manufacturer.
- Use the machine close to flammable and/or explosive
materials.
- Leave plastic bags, polystyrene, nails, etc., within the
reach of children, as they are potential hazards.
- Allow children to play near the machine.
- Use spare parts other than those recommended by the
manufacturer.
- Make any technical modifications to the machine.
- Immerse the machine in any kind of liquid.
- Wash the machine using a jet of water.
- Use the machine in any manner other than as described
in this manual.
- Install the machine on top of other appliances.
- Use the machine in explosive or harsh environments, or
with high concentrations of dust or oily substances suspended in the air.
- Use the machine in an environment in which a risk of fire
exists.
- Use the machine to dispense products other than those
it is designed for.
Machine Installation - Service Provider Manual
•
•
•
Before cleaning the machine, ensure the plug is disconnected
from the power socket; do not wash it with fuel and/or solvents of any kind.
Do not place the machine near heating equipment (such as
heaters or radiators).
In case of fire, use carbon dioxide (CO2) extinguishers. Do not
use water or dry powder extinguishers.
9.2
Stop Functions
Lubricating oil: to lubricate the
Brew Group at periodic intervals (see
section 11.2).
Descaling solution: to remove limescale
build-up in the water circuit caused by normal
use.
The machine can be stopped by means of the power button.
9.3
List of Accessories
9.3.1 List of Accessories Supplied
Manual: instructions on how to use the machine.
"Intenza +" water filter: to remove any
unpleasant flavours in the water and reduce water hardness. This will improve
machine use.
Power cord: to connect
the machine to the mains.
Grinder adjustment key: for coffee grinder adjustment.
9.3.2 List of Optional Accessories
Water hardness test: quick test to
determine the actual hardness of the
water used to prepare beverages; this
test is of fundamental importance to
set the water hardness in the machine.
Cleaning brush: to remove the coffee grounds
from the service compartment.
• 23 •
Machine Installation - Service Provider Manual
9.4
Assembly-Siting
The machine should not be installed outdoors or
in environments in which jets of water or steam
are used.
The presence of magnetic fields or proximity to
electrical machines which generate interference
could cause the electronic controls of the machine to
malfunction. At temperatures close to 0°C, internal parts
containing water are at risk of freezing. Do not use the
machine under these conditions.
To ensure correct and efficient performance of the appliance,
comply with the following recommendations:
• room temperature: 10°C - 40°C;
• maximum humidity: 90%;
• the site should be suitably prepared for the installation of the
machine;
• the surface on which the machine is installed should be level,
solid and stable, with a gradient of max. 2°;
• the location should be adequately lit, ventilated and clean,
and the power socket should be easily accessible.
Access to the machine and the plug should be kept
clear at all times, in order to allow users to easily
reach them and to leave the area immediately if required.
The following illustration shows the required access distances:
• to the keypad on the front of the appliance;
• to the service units in the event of malfunction.
After placing the packaged product near the installation site, proceed as follows:
• ensure that the packaging has not been tampered with during transport and that the original packaging is intact and
closed;
• open the packaging;
• check the condition and model of the machine;
• check the content of the accessories bag enclosed with the
machine (see "9.3 List of Accessories");
• remove the machine from its original packaging;
• remove any remaining packaging from the machine;
• lift the machine and place it in the designated area.
9.5
Disposal of Packaging
After opening the outer box, it is recommended that the packaging materials are separated according to type and disposed of in
accordance with the regulations in force in the country of use.
We recommend keeping the outer box for future
transfers or transportation.
9.6
Filling the Water Tank
Before turning on the machine, the water tank should be filled
with fresh drinking water.
Warning! Before using the machine for the first
time, wash the water tank carefully. Fill the water
tank with fresh drinking water only. Hot or carbonated
water, as well as other liquids, will damage the machine.
Refer to section 3.1. to carry out the procedure correctly.
9.7
Filling the Coffee Bean Hopper
Before turning on the machine, check that the hopper contains a
sufficient quantity of coffee beans.
Warning! Only coffee beans must be put into the
coffee bean hopper. Ground coffee, instant coffee
or any other object may damage the machine.
Refer to section 3.2. to carry out the procedure correctly.
• 24 •
Machine Installation - Service Provider Manual
This operation must only be performed by specialised technical personnel or by the service provider.
The machine is designed to work with single-phase voltage
matching the rating indicated on the identification plate (section
1.4 "Machine Identification").
Before plugging in the machine, make sure that the power button
is switched to "0".
The Service Provider makes and is responsible for the electrical
connection of the machine.
The machine should be connected to the mains using the plug
installed on the power cord, in accordance with:
• The Laws and Regulations in force at the place and time of
installation;
• The information shown on the technical specifications plate
on the side of the machine.
Warning: The electric socket which the appliance
is connected to should be easily accessible by the
user, in order to allow it to be easily disconnected from
the mains when necessary.
It is forbidden to:
• Use extensions of any kind.
• Replace the original plug.
• Use adapters.
9.9
Turning on/off the Machine
The machine can be turned on/off by pressing the button located
to the rear of the machine (Fig.02, page 3).
9.10 First Use - Use After a Long Period
of Inactivity
For a perfect Espresso: Rinse the coffee circuit if using the
machine for the first time or after a long period of inactivity.
These simple operations will allow you to always brew excellent
coffee. They have to be performed:
A) At first start-up;
B) When the machine remains inactive for a long time (more
than 2 weeks).
9.10.1 At First Start-up
To turn on the machine simply press the " " button (21). The
control panel indicates that the circuit must be primed.
1 Place a large container under the dispensing spout (Fig.11,
page 3).
YELLOW
Electrical Connection
The machine automatically starts circuit priming. It will then carry
out the warm-up and rinse cycle as described in section 3.4.
9.10.2 After a Period of Inactivity
1 Empty the water tank, wash and rinse it and fill it with fresh
water (see section 9.6).
2 Place a large container under the dispensing spout (Fig.11,
page 3).
3 Press the "
" button (19) to start the brewing procedure.
4 The machine will brew coffee through the dispensing spout
(Fig.11, page 3); wait until the procedure is complete and empty the container.
5 Repeat the operations from step 2 to step 4 three times, then
continue with step 6.
6 Place a container under the steam/hot water wand (Fig.10,
page 3).
" button (23) to start dispensing HOT WATER.
7 Press the "
Dispense water until the no water icon is displayed.
RED
9.8
8 When the hot water dispensing procedure is complete,
empty the container.
• 25 •
Machine Installation - Service Provider Manual
9 Fill the water tank again up to the MAX level.
5 Press the “
played:
” button (24) until the following menu is dis-
YELLOW
The machine is now ready for use.
9.11 Measuring and Adjusting Water Hardness
Measuring water hardness is very important in order to correctly
manage the "INTENZA+" filter and the frequency with which the
machine must be descaled.
1 Immerse the water hardness test strip in water for 1 second.
Note: The test strip is only valid for one measurement.
2 Check how many squares change colour and refer to the table.
Note: The machine is supplied with standard adjustments, suitable for most uses.
6 Press:
the " " button (18) to increase the value
or
the " " button (20) to decrease the value.
7 Press the "
" button (24) to confirm the selected change.
After adjusting water hardness, install the filter (Intenza+), as
described in the following section. Then, exit programming mode
as described in section 10.2.
9.12 "INTENZA+" Water Filter
Hardness 4
Water is a key element for a good espresso coffee. It should therefore always be filtered in a professional manner. That is why all
Saeco machines can be equipped with the INTENZA+ filter. This
filter is easy to use and its sophisticated technology is effective
in preventing limescale build-up. This way, water will always be
perfect and will give a much more intense aroma to your espresso
coffee.
Hardness 3
Hardness 2
Hardness 1
3 The numbers correspond to the settings indicated in the following machine adjustments.
HARDNESS 4 (hard)
HARDNESS 3 (medium)
HARDNESS 2 (soft)
HARDNESS 1 (very soft)
YELLOW
4 Switch to programming mode as described in section 10.1.
The descaling filter should be replaced whenever
indicated by the machine. Before descaling, remove the anti-scale filter from the water tank.
Measuring water hardness is very important in
order to correctly manage the "INTENZA+" water
filter and the frequency with which the machine must be
descaled.
1 Remove the "INTENZA+" water filter from its packaging. The
filter should be set according to the measurements performed to
set water hardness.
Use the water hardness test strip provided with the machine. Set
the "Intenza Aroma System" as specified on the filter packaging
(see section 9.11).
• 26 •
Machine Installation - Service Provider Manual
4 Put the filter into the empty tank. Press it to its limit stop.
A = Soft water
B = Hard water (standard)
C = Very hard water
5 Fill the tank with fresh drinking water and reinsert it into the
machine.
6 Switch to programming mode as described in section 10.1.
YELLOW
2 Immerse the "INTENZA+" water filter vertically in cold water
(with its opening positioned upwards) and delicately press its
sides so as to let the air bubbles out.
” button (24) until the following menu is dis-
YELLOW
7 Press the “
played:
3 Remove the tank from the machine and empty it. Remove
the small white filter from the tank and store it in a dry place
sheltered from dust.
8 Press the “ ” button (18) to select “ON” and press the “
” button (24) to confirm.
9 Exit the programming menu and dispense about half the
water tank content to activate the filter.
10 Fill the water tank again up to the MAX level with fresh drinking water.
• 27 •
Machine Installation - Service Provider Manual
9.12.1 Replacing the “Intenza+” Water Filter
If the filter is already installed and the machine indicates that it
must be replaced, proceed as previously described.
1 Press and turn the grinder adjustment knob one notch at a
time. You will taste the difference after brewing 2 to 3 cups of
coffee.
YELLOW
When accessing the programming page, the “RESET” option will
also be available.
Select this option to reset the alarm.
9.12.2 Removing the “Intenza+” Water Filter
YELLOW
If the filter is installed in the machine and you want to remove it,
access the programming page and select the “OFF” option.
Note: It is important to reinstall the small white
filter that was previously removed while installing the “INTENZA+” water filter.
9.13 Adjusting the Coffee Grinder
Warning! Do not pour ground and/or instant coffee into the coffee bean hopper. Do not put any
material other than coffee beans into the hopper. The
coffee grinder contains moving parts that may be dangerous. Do not insert fingers and/or other objects. Turn off
the machine by pressing the ON/OFF button and remove
the plug from the socket before carrying out any type of
operation inside the coffee bean hopper.
Only turn the grinder adjustment knob inside
the coffee bean hopper when the ceramic coffee
grinder is in use.
This adjustment can be carried out by pressing and turning the
grinder adjustment knob inside the coffee bean hopper, using the
coffee grinder adjustment key provided with the machine.
• 28 •
2
1
The reference marks indicate the grind setting. You can set different degrees of grind with the following references:
1 - Fine Grind
2 - Coarse Grind
Machine Installation - Service Provider Manual
10 MACHINE PROGRAMMING
All the operations described in chapter 10 must
be performed exclusively by the service provider
or a specialised technician, who shall organise
all the operating steps and use only suitable means to ensure strict compliance with the safety regulations in force.
The specialised technician or the service provider can change
some of the machine operating parameters to suit the needs of
the users.
button (22) and the “
seconds.
The menus should be PASSWORD-protected.
The PASSWORD will not be requested if set on the
default value (0000). It should be changed upon
1st use to prevent unauthorised access. After this change,
it should be entered again at each access, every time the
display shows:
0 0 0 0
”
YELLOW
PSW
10.1 Accessing the Programming Mode
Proceed as follows to access programming mode.
1 With the machine turned on, press and hold the “
Note: After 3 minutes of inactivity, the machine
will exit programming mode and return to standard operating mode.
CONFIRM
” button (23) at the same time for 5
Refer to section 10.4 on how to set the PASSWORD.
To enter the password:
1 Press the " " (18) or " " (20) button to set the desired
number.
2 Press the “ ” button (24) to move on to the next number
(when it gets to the end it will start again from the beginning).
3 Repeat steps 1 and 2 until the set password has been entered.
4 Press the “ ” button (21) to confirm and to access programming mode.
YELLOW
2 The following screen is displayed:
3 Press the “
” button (21) to access programming mode.
Note: The above mentioned procedure can only be
used to access the programming menu when the
machine has reached operating temperature. To execute
certain programmes (e.g. DESCALING), the machine will
manage the procedure automatically and warm up according to the manufacturer's settings.
• 29 •
Machine Installation - Service Provider Manual
10.2 Programming Controls
When the machine menus are accessed, the buttons on the keypad take on new functions.
" "change" button (18)
This button allows the parameters to be changed when they are displayed.
" " "change" button (20)
This button allows the parameters to be changed when they are displayed.
“
” button (24) (Scroll parameters / OK)
This button allows the user to:
1 scroll through the menu pages;
2 confirm the parameter/value after changing it.
"
" "ESC" button (22)
This button allows the user to exit without changing the edited or selected
parameter.
Note: Press it repeatedly to exit programming mode.
"
10.3 Programming Menu
This menu manages certain machine operation parameters.
Coffee temperature
This function adjusts the coffee brewing temperature.
Timer (stand-by)
This function adjusts the time taken for the machine to go into stand-by mode after the last brewing.
Contrast
This function allows you to adjust the contrast of the display to better view the messages.
Water hardness
This function adjusts the water hardness setting according to the area where you live.
1 = very soft water
2 = soft water
3 = hard water
4 = very hard water
For more details please see the “Measuring and Adjusting Water Hardness” chapter.
"INTENZA+" Water Filter
This function manages the “INTENZA+” water filter.
For more details, see the chapter about filter handling.
• 30 •
Machine Installation - Service Provider Manual
Descaling cycle
This function activates the descaling cycle.
Credit management
This function activates credit management.
0 0 0
CONFIRM
Credit charging
This function activates credit charging.
Note: This function is visible only if the "Credit management" function is
set to "YES".
Coffee grounds drawer full alarm
This function enables/disables the alarm which warns the user that the coffee grounds drawer needs
to be emptied.
Note: Disabling this alarm may cause machine malfunctions, since the coffee grounds may
block the Brew Group.
PASSWORD
Password
This function activates the password used to access machine programming mode.
SET PSW
0 0 0 0
CONFIRM
COUNTER COFFEE
XX
Password setting
This function changes the password used to access machine programming mode.
Note: This function is only displayed if the "Password" function is set to
"YES".
Coffee counters
This function allows you to check how many coffee cups have been brewed; the number is shown
above the letters (XX). The number cannot be reset.
Factory settings
This function resets the factory parameters, where a malfunction occurs.
• 31 •
Machine Installation - Service Provider Manual
The PASSWORD must be set by the service provider in order to
prevent access by unauthorised personnel who could change the
machine settings and cause malfunctions.
To set the PASSWORD, proceed as follows:
YELLOW
1 Switch to programming mode as described in section 10.1.
” button (24) until the following menu is dis-
PASSWORD
YELLOW
2 Press the “
played:
To enter the password:
7 Press the " " (18) or " " (20) button to set the desired
number.
8 Press the “ ” button (24) to move on to the next number
(when it gets to the end it will start again from the beginning).
9 Repeat steps 7 and 8 until the set password has been entered.
10 Press the "
exit the menu.
" button (21) to confirm the password and to
Note: You can exit the change menu at any time
without saving the setting by pressing the “ ”
button (22).
Note: If "NO" is selected from the "PASSWORD"
menu, the saved password will be cancelled.
PASSWORD
PASSWORD
4 Press the "
YELLOW
" button (18) or the " " button (20) to select
" button (24) to confirm.
PASSWORD
YELLOW
3 Press the "
"YES".
CHANGE PSW
5 The option "CHANGE PSW" will be displayed, which will allow
the password to be set.
6 Press the “
word.
” button (21) to confirm and to set the pass-
0 0 0 0
CONFIRM
• 32 •
YELLOW
SET PSW
YELLOW
10.4 Setting the PASSWORD
Machine Installation - Service Provider Manual
10.5 Setting Credits
Credits can be set to allow coffee to be brewed under the strict
control of the service provider.
8 Press the “ ” button (24) to move on to the next number
(when it gets to the end it will start again from the beginning).
To set the credits, proceed as follows:
YELLOW
1 Switch to programming mode as described in section 10.1.
2 Press the “
played:
To charge credits:
7 Press the " " (18) or " " (20) button to set the desired
number.
” button (24) until the following menu is dis-
9 Repeat steps 7 and 8 until the desired number of credits has
been entered.
Note: You can exit the change menu at any time
without saving the setting by pressing the “ ”
button (22).
" button (18) or the " " button (20) to select
YELLOW
3 Press the "
"YES".
" button (24) to confirm.
YELLOW
4 Press the "
Note: If "NO" is selected from the "CREDITS" menu,
the charged credits will remain in the memory
even though they will not be counted each time a coffee
is brewed.
YELLOW
YELLOW
10 Press the " " button (21) to confirm the number of credits
and to exit the menu.
SET CREDITS
5 The option "SET CREDITS" will be displayed, which will allow
the number of credits to be manually entered.
” button (21) to confirm and to access the credit
0 0 0
YELLOW
6 Press the “
charging page.
CONFIRM
• 33 •
Machine Installation - Service Provider Manual
11 CLEANING AND MAINTENANCE
All the operations described in chapter 10 must
be performed exclusively by the service provider
or a specialised technician, who shall organise
all the operating steps and use only suitable means to ensure strict compliance with the safety regulations in force.
11.1 Cleaning Intervals
For improved efficiency, it is advisable to carry out the cleaning
and maintenance operations indicated in the following table.
11.2 Brew Group Lubrication
Lubricate the Brew group after approximately 500 cups of coffee
or once a month.
The grease to lubricate the brew group and the complete "Service
Kit" can be purchased at your local dealer or at authorised service
centres.
Before lubricating the brew group, clean it under running water
as described in the "Brew Group - Weekly Cleaning" chapter.
1 Lubricate the brew group guides using Saeco grease only.
Operation to be carried out
When an
alert is
shown
Every
week
Every
month or
500 brewing cycles
Emptying and cleaning
the coffee grounds drawer
Water tank cleaning
Brew group cleaning
Brew group lubrication
Coffee bean hopper
cleaning
Descaling
• 34 •
Apply the grease evenly on both side guides.
Machine Installation - Service Provider Manual
2 Also lubricate the shaft.
Use the Saeco descaling product only. Its formula has been specifically designed to ensure better machine performance and operation for its whole operating life. If correctly used, it also avoids
alterations in the brewed product.
The descaling solution and the complete "Maintenance Kit" may
be purchased at your local dealer or at authorised service centres.
Warning! Never drink the descaling solution or any
products brewed until the cycle has been completed. Never use vinegar as a descaling solution.
1 Turn on the machine by pressing the ON/OFF button. Wait for
the machine to complete the rinse and warm-up process. Remove
the Pannarello end part.
3 Insert the Brew Group into its seat again until it locks into
place, WITHOUT pressing the "PUSH" button.
4 Insert the coffee grounds drawer and the drip tray. Close the
service door.
Warning! Remove the "Intenza" filter before adding the descaling solution.
2 Switch to programming mode as described in section 10.1.
11.3 Descaling
YELLOW
Limescale is a natural part of the water used for machine operation.
It needs to be removed regularly as it may clog the water and coffee circuit of your appliance.
Perform this operation before your appliance stops working due
to clear maintenance neglect.
3 Press the “
played:
” button (24) until the following menu is dis-
YELLOW
The advanced electronics shows on the machine display (with
clear icons) when descaling is needed. Just follow the steps described below.
• 35 •
Machine Installation - Service Provider Manual
” button (18) to start the DESCALING cycle.
YELLOW
4 Press the “
Note: If this option is confirmed, the whole cycle
must be completed. Press the " " button (22)
to exit.
Note: Use a container of at least 1.5 litres capacity.
YELLOW
5 Pour the entire contents of the bottle of Saeco concentrated
descaling solution into the machine's water tank.
YELLOW
10 Press the “ ” button (20).
6 Fill with fresh drinking water up to the level marked by the
"CALC CLEAN" icon.
If you do not have a container of this capacity,
pause the cycle by pressing the “ ” button (18),
empty the container, place it back in the machine and restart the cycle by pressing the “ ” button (18).
11 At this point, the machine will start dispensing the descaling
solution at intervals (the bar shows the cycle progress).
RED
12 When the solution in the tank is finished, empty and rinse
the tank with fresh drinking water, as indicated by the machine.
7 Place the tank back in the machine.
8 Drain any liquids from the drip tray and place it back into the
machine (see section 6.3).
9 Place a container under the steam/hot water wand and another one under the dispensing spout.
• 36 •
13 Empty the containers used to collect the liquid dispensed by
the machine.
14 Remove any liquids from the drip tray and insert the tray
back into the machine.
Machine Installation - Service Provider Manual
15 Place a container under the steam/hot water wand and another one under the dispensing spout.
21 Once the rinse cycle is complete, the machine carries out the
warm-up and rinse cycle to be ready for product brewing.
16 Rinse the water tank thoroughly and fill it again with fresh
drinking water up to the MAX level.
22 Empty the containers used to collect the liquid dispensed by
the machine and reassemble the dispensing spout.
17 Insert the tank into the machine.
23 Empty the drip tray and place it back.
YELLOW
24 The machine is now ready for use.
18 Press the “
cycle.
25 Reassemble the Pannarello end part.
” button (18); the machine performs the rinse
RED
Note: The rinse cycle can be paused by pressing
the " " button (18). To resume the cycle, press
the " " button (18) again. This allows you to empty the
container or to leave the machine unattended for a short
time.
19 When this icon is displayed, the water tank is empty. Repeat
steps 13 to 18. Then continue with step 20.
GREEN
20 When the amount of water needed for the rinse cycle has
been completely dispensed, this icon is displayed.
Press the "
-
Note:
The descaling solution must be disposed of according
to the manufacturer's instructions and/or regulations
in force in the country of use;
After completing the descaling cycle, wash the brew
group as described in the "Weekly Cleaning of the
Brew Group" section in the "Cleaning and Maintenance" chapter;
When the descaling cycle is complete, the drip tray must be emptied.
" button (22) to quit the descaling cycle.
Note: The two rinse cycles are performed in order
to have the circuit cleaned with a preset amount
of water and ensure proper machine operation. If the water tank is not filled up to MAX level, the machine might
require three or more cycles.
• 37 •
Machine Installation - Service Provider Manual
12 MACHINE DISPOSAL
In compliance with art. 13 of the Italian Legislative Decree dated
25 July 2005, no. 151 "Implementation of the Directives 2002/95/
EC, 2002/96/EC and 2003/108/EC on the restriction of the use of
certain hazardous substances in electrical and electronic equipment, as well as waste disposal".
The symbol of the crossed-out wheeled bin
on the appliance or its packaging indicates that the product must be disposed
of separately from other waste at the end of its operational life.
The user must therefore take the appliance to be disposed of to
a suitable recycling centre for electronic and electrotechnical
equipment, or alternatively hand it over to the vendor on a one
on one exchange, when purchasing a new appliance of similar
type. Separating this product for subsequent recycling, treatment
and environmentally-friendly disposal will help prevent potential
environmental and health risks, and allow the materials which
make up the appliance to be re-used and/or recycled. Incorrect or
irresponsible disposal of this product could lead to administrative
sanctions being imposed on the user in accordance with current
regulations.
13 TROUBLESHOOTING
Machine actions
The machine does not turn on.
Causes
The machine is not connected to the electric
network.
The drip tray gets filled although no Sometimes water is drained automatically by
water is drained.
the machine into the drip tray to manage the
rinsing of the circuits and ensure optimum
machine performance.
The
coffee grounds drawer has been emptied
The red icon is always displayed on
with
the machine off.
the machine.
The coffee is not hot enough.
No hot water or steam is dispensed.
The cups are cold.
The beverage temperature in the programming menu is set on LOW.
The hole of the hot water/steam wand is
clogged.
Coffee does not have enough crema The blend is unsuitable, coffee is not freshly
(see note).
roasted or the grind is too coarse.
The machine takes a long time to The machine circuit is clogged by limescale.
warm up or the amount of water dispensed is too little.
• 38 •
Solutions
Connect the machine to the electric network.
This is a standard operating procedure.
The coffee grounds drawer must always be
emptied with the machine on. Wait until
icon is displayed before refitting
the
the drawer.
Preheat the cups with hot water.
Make sure that the temperature in the programming menu is set on NORMAL or HIGH.
Clean the hole of the steam wand using a
pin.
Make sure that the machine is off and
has cooled down before performing
this operation.
Change coffee blend or adjust the grind setting as explained in the chapter “Adjusting
the Coffee Grinder”.
Descale the machine.
Machine actions
The brew group cannot be removed.
Causes
The brew group is out of place.
Solutions
Turn on the machine. Close the service door.
The brew group automatically returns to the
initial position.
The coffee grounds drawer is inserted.
Remove the coffee grounds drawer before
removing the brew group.
The machine grinds the coffee beans There is no water.
Fill the water tank and prime the circuit
but no coffee is dispensed (see
(chapter "First Use - Use After a Long Period
note).
of Inactivity").
The brew group is dirty.
Clean the brew group (see "Weekly Cleaning of the Brew Group" chapter).
The circuit is not primed.
Priming the circuit ("First Use - Use After a
Long Period of Inactivity" chapter).
This might occur when the machine is auto- Brew some cups of coffee.
matically adjusting the dose.
The dispensing spout is dirty.
Clean the dispensing spout.
The coffee is too weak (see note).
This might occur when the machine is auto- Brew some cups of coffee.
matically adjusting the dose.
Coffee is dispensed slowly (see note). The coffee grind is too fine.
Change coffee blend or adjust the grind as
explained in the chapter “Adjusting the Coffee Grinder”.
The circuit is not primed.
Priming the circuit ("First Use - Use After a
Long Period of Inactivity" chapter).
The brew group is dirty.
Clean the brew group (see "Weekly Cleaning of the Brew Group" chapter).
Coffee leaks out of the dispensing The dispensing spout is clogged.
Clean the dispensing spout and its holes.
spout.
Note: These problems can be considered normal if the coffee blend has been changed or if the machine has just been
installed.
Please contact our consumer care help line on the phone number listed on the last page of this document for any problems not covered in the above table, or when the suggested solutions do not solve the problem.
• 39 •
02
EN
- Rev.00 15-09-13
02
The manufacturer reserves the right to make changes without prior notice.


