1
Limited Warranty
a better prescription for pain
• Empi warrants all of their manufactured products to be free
from defects in workmanship and materials for three years.
• Battery charger bases, rechargeable batteries,carry cases,
lead wires, electrodes and other accessories are warranted to
be free from defects in workmanship and materials at the time
of delivery.
• Empi will repair or replace, at its facility, any product found to
be defective within the warranty period. This warranty does
not apply to any product damaged by misuse, or repaired or
altered by anyone other that Empi, Inc.
IF 3WAVE
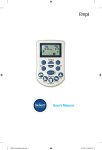
IF 3WAVE® USER’S MANUAL
• This warranty is in lieu of any or all other warranties, expressed
or implied. No person is authorized to bind Empi to any
representation of warranty other than those specifically set
forth herein.
NOTE: The warranty period begins with the date of purchase
from the manufacturer.
Pain
Management
Rehabilitation
Edema
Reduction
Read This Manual Carefully Before
Operating Your IF 3WAVE®
Empi, Inc.
205 Highway 22 East
Clear Lake, SD 57226
For more information call 1.800.328.2536 or visit www.empi.com
All Rights Reserved.
926940 Rev F © Empi, 02/14
Caution: Federal law restricts this device to sale by or on the order of a physician.
™
®
Empi, Inc.
ISO Certified 13485/12.96
© Empi, 2/14 All Rights Reserved.
Table of Contents
Introduction.............................................................................. 5
How the IF 3wave System Works.................................................................... 5
About this Manual............................................................................................ 7
Prescribing Information ......................................................... 9
Indications....................................................................................................... 9
Contraindications........................................................................................... 10
Warnings.................................................................................................. 10
Cautions .................................................................................................. 11
Adverse Effects ........................................................................................ 12
Quick Reference..................................................................... 13
Running a Therapy Session........................................................................... 13
Changing a Therapy Session......................................................................... 13
Ending a Session Prior to the End of Therapy ............................................... 14
System Components ............................................................. 15
Contents of the Standard Package................................................................ 15
Device...................................................................................................... 16
Device Physical Features .............................................................................. 17
LCD Screen ............................................................................................. 17
Operating Buttons.................................................................................... 17
Battery Compartment .............................................................................. 17
Output Jacks ........................................................................................... 17
Rechargeable Batteries ............................................................................ 18
Charger Base........................................................................................... 18
Power Adaptor......................................................................................... 19
Lead Wires............................................................................................... 19
Reverse Splitter........................................................................................ 20
Electrodes................................................................................................ 21
Reusable, Self-adhering Electrodes ................................................... 22
Disposable, Multi-day Electrodes....................................................... 23
Carbon Rubber Electrodes ................................................................ 23
Carrying Case .......................................................................................... 24
Documentation......................................................................................... 24
Belt Clip ................................................................................................... 24
IF 3wave User’s Manual
926940_IF3Wave_Guts_Fr.indd 1
1
2/27/14 8:57 PM
Table of Contents
Operation ............................................................................... 25
Overview....................................................................................................... 25
Installing the IF 3WAVE Battery...................................................................... 26
Charging the Battery...................................................................................... 28
Battery LED Indicator................................................................................ 28
Storing the Battery......................................................................................... 29
Connecting the Lead Wires to the Electrodes ............................................... 29
Connecting the Lead Wires to the Device ..................................................... 31
Preparing the Skin for a Therapy Session ..................................................... 32
Applying the Electrodes to the Skin .............................................................. 32
Using the Device for a Therapy Session......................................................... 34
Running IF, NMES, and PDC Treatment Programs......................................... 35
Running IF/NMES Combination Treatment Program.................................. 38
Adjusting Amplitude During Treatment ..................................................... 40
Ending a Therapy Session........................................................................ 40
Caring for the IF 3WAVE System ................................................................... 42
Understanding Special Display Messages...................................................... 42
Battery Indicator and Battery Low ............................................................ 42
Open Lead............................................................................................... 44
Finding the Software Version and Serial Number............................................ 45
Using the Belt Clip......................................................................................... 46
Attaching the Tab...................................................................................... 46
Attaching the Belt Clip.............................................................................. 47
Clinician Setup ....................................................................... 49
Function Buttons and Making Selections ..................................................... 49
Function Buttons...................................................................................... 49
Making Selections.................................................................................... 50
Entering the Setup Mode .............................................................................. 51
Entering the Password ............................................................................. 51
System Selection Setup ........................................................................... 52
Stimulation Modalities.................................................................................... 53
Selecting the Stimulation Modality............................................................ 53
Stimulation Program Selection Screen...................................................... 54
Setting up IF Programs.................................................................................. 54
IF Preset Treatments................................................................................. 55
IF Continuous Treatment........................................................................... 56
IF Sweep Treatment ................................................................................. 58
Setting up NMES Programs........................................................................... 59
NMES Preset Treatments ......................................................................... 59
NMES Manual Treatments........................................................................ 60
2
926940_IF3Wave_Guts_Fr.indd 2
IF 3wave User’s Manual
2/27/14 8:57 PM
Table of Contents
NMES Simultaneous or Alternative Treatments......................................... 61
NMES LAG Treatment.............................................................................. 62
NMES Single Channel Treatment.............................................................. 63
Setting up Combination IF/NMES Programs ................................................. 64
Setting up PDC Programs ............................................................................ 65
Selecting the Language (English) .................................................................. 67
Editing Programs........................................................................................... 67
Edit Program List ..................................................................................... 68
Edit Program Setup.................................................................................. 69
Enabeling/Disabeling System Sound ............................................................ 70
Enable or Disable the Auto Lock.................................................................... 70
Displaying the Serial Number ........................................................................ 71
Specifications ........................................................................ 72
General Specifications ................................................................................. 72
IF Mode Specification ................................................................................... 73
IF Mode ................................................................................................... 73
IF Preset Program..................................................................................... 74
IF Continuous Program ........................................................................... 75
IF Sweep Program.................................................................................... 75
NMES Mode Specification ............................................................................ 76
NMES Preset Program.............................................................................. 77
PDC Mode Specification................................................................................ 77
IF/NMES Combination Mode Specification ................................................... 78
IF/NMES Combination Preset Treatments................................................. 79
Troubleshooting ..................................................................... 80
Glossary ................................................................................. 82
Index ....................................................................................... 84
Replacement Parts................................................................ 87
Symbols .................................................................................. 88
IF 3wave User’s Manual
926940_IF3Wave_Guts_Fr.indd 3
3
2/27/14 8:57 PM
Notes
4
926940_IF3Wave_Guts_Fr.indd 4
IF 3wave User’s Manual
2/27/14 8:57 PM
Introduction
Introduction
Congratulations! Your physician has prescribed Empi’s IF 3WAVE system to
help you with pain management and rehabilitation therapy. Empi is dedicated
to helping you regain your active lifestyle—from our field sales representatives
training you how to use the system, to our patient coordinators following up
with you. We make your success our goal.
How the IF 3WAVE System Works
The IF 3WAVE is a digital, dual channel, interferential (IF) current device.
Modalities also included are neuromuscular electrical stimulation (NMES), pulse
direct current (PDC), and IF/NMES combination stimulation. The device sends
electrical impulses through the skin. These impulses stimulate the nerves or
muscle fibers. The IF 3WAVE is used by a variety of patients, in conjunction with
other forms of therapy, to treat acute and chronic pain, edema, muscle spasms,
and increase muscle strength and retard muscle disuse atrophy.
The operating components of the system are: the IF 3WAVE device, lead wires,
electrodes and charger base. The IF 3WAVE device is battery-operated,
lightweight and portable. It features an LCD user interface screen and easy to use
push buttons. The lead wires connect the device to electrodes, which are placed
on the skin. The device is then used to send cycles of electrical stimulation through
the lead wires and electrodes into the skin. When combined, the components
complete an electrical circuit, allowing current to flow through the skin, delivering
the desired treatment stimulation.
IF 33wave
User’sManual
Manual
F
WAVE
IF
E User’s
926940_IF3Wave_Guts_Fr.indd 5
56
2/27/14 8:57 PM
Introduction
IF 3wave Stimulator
Electrodes
Lead Wires
Charger Base
Main Operating Components
Consult your healthcare professional (clinician) if you have specific questions
or problems regarding the use of the device. They are most familiar with your
situation and are the best source of additional guidance. This system should be
used only under proper medical supervision and only as described by this manual.
Before using your IF 3WAVE system, please read all of the indications,
contraindications, warnings and precautions in the Prescribing Information section.
76
926940_IF3Wave_Guts_Fr.indd 6
IFIF3wave
3WAVEEUser’s
al
User’sManual
Manua
2/27/14 8:57 PM
Introduction
About This Manual
This manual describes the IF 3WAVE system and provides instructions for
using it. Please read the entire manual carefully.
IMPORTANT: The IF 3WAVE screens are provided in English, Spanish (USA),
and French (Canada). If the operator cannot read these languages, all
instructions must be read and discussed in the operator’s native language.
IMPORTANT : Les écrans IF 3WAVE sont traduits en anglais, espagnol
(Amérique du sud) et français (Canada). Si l’opérateur ne peut lire ces langues,
toutes les instructions doivent être lues et discutées dans la langue maternelle
de l’opérateur.
IMPORTANTE: Las pantallas de IF 3WAVE se proporcionan en inglés, español
(EE.UU.) y francés (Canadá). Si el operador no puede leer ninguno de estos
idiomas, todas las instrucciones deberán leerse y comentarse en la lengua
materna del operador.
IF 33wave
User’sManual
Manual
F
WAVE
IF
E User’s
926940_IF3Wave_Guts_Fr.indd 7
78
2/27/14 8:57 PM
Notes
8
926940_IF3Wave_Guts_Fr.indd 8
IF 3wave User’s Manual
2/27/14 8:57 PM
Prescribing Information
In general, stimulation should be used under medical supervision for adjunctive
therapy in the management of specific conditions.
The following information is contained in this section:
•
•
•
•
•
Indications
Contraindications
Warnings
Precautions
Adverse Effects
Indications
Interferential (IF) stimulation can be used for the following applications:
•
•
•
•
•
Relieve acute pain
Relieve and manage chronic pain
Relax muscle spasms
Maintain and increase range of motion
Increase local blood circulation
Neuromuscular electrical stimulation (NMES) can be used for the
following applications:
•
•
•
•
•
Relax muscle spasms
Prevent or retard disuse atrophy
Increase local blood circulation
Re-educate muscles
Maintain or increase range of motion
Pulsed direct current (PDC) stimulation can be used for the following applications:
•
•
•
•
•
•
Reduce edema (under negative electrode)
Reduce muscle spasm
Increase local blood circulation (under negative electrode)
Retard or prevent disuse atrophy
Facilitate voluntary motor function
Maintain or increase range of motion
IF 3wave User’s Manual
IF
F 3WAVEE User’s Manual
926940_IF3Wave_Guts_Fr.indd 9
9
10
2/27/14 8:57 PM
Prescribing Information
Contraindications
Cardiac pacemakers – Do not use this device if the patient has a demand-type
cardiac pacemaker or any implanted defibrillator.
Transcerebral stimulation – Do not apply electrical stimulation transcerebrally
T
(through the head).
Carotid sinus – Do not use electrical stimulation over the carotid sinus
(neck) nerves.
Unknown etiology
y – Do not use this device when pain syndromes are
undiagnosed. Use only after origin of pain has been diagnosed.
Warnings
Supervised use – This device should be used under the continued supervision
of a physician.
Long-term effects – The long-term effects of chronic use of electrical stimulation
are unknown. Electrical stimulation devices do not have any curative value.
Symptomatic treatment – This device is a symptomatic treatment and, as
such, suppresses the sensation of pain, which would otherwise serve as a
protective mechanism.
Central origin pain – Electrical stimulation is not effective for central origin
pain such as headache.
y – The safety of using electrical stimulation during pregnancy or
Pregnancy
birth has not been established.
Neck stimulation – Severe spasm of the laryngeal and pharyngeal muscles
may occur when the electrodes are placed across the neck or mouth. This may
be strong enough to close off the airway or cause breathing difficulty.
stimulation – Do not apply electrical stimulation
T
Transthoracic
transthoracically (through the chest area) in that the introduction of
electrical current into the heart may cause cardiac arrhythmias.
Skin and vascular problems – Do not use this device over infected areas,
skin eruptions, or areas of decreased sensation.
Cancer patients – Do not use this device over known cancerous sites.
Heart disease – Precaution should be taken prior to using electrical stimulation
on patients suspected of having heart disease.
10
11
926940_IF3Wave_Guts_Fr.indd 10
IF 3wave User’s Manual
al
IF 3WAVEE User’s Manua
2/27/14 8:57 PM
g Information
Prescribing
High frequency surgical devices – Simultaneous connections of a patient to
a high frequency surgical device may result in burns at the site of the electrodes
and possible damage to the device.
Damage from liquids – Do not immerse the device in water or other liquids.
Lead connection – Do not connect the lead wires to an AC power source or
other equipment not specified as safe for the lead wires.
Cautions
Heart Disease – Use caution prior to using this device on patients suspected
of having heart disease.
Epilepsy – Use caution for patients with suspected or diagnosed epilepsy
when using this device.
Hemorrhages – Use caution when there is a tendency to hemorrhage, such
as following acute trauma or fracture.
Postsurgical use – Use caution following recent surgical procedures when
muscle contraction may disrupt the healing process.
Uterus – Do not use electrical stimulation over a menstruating or pregnant uterus.
Sensory loss – Do not use electrical stimulation where sensory nerve damage
is present by a loss of normal skin sensation.
Unequal electrode size – Using different size electrodes together can cause
skin irritation or increased stimulation intensity under the smaller electrode.
Some programs may require the use of different sized electrodes for treatment.
Skin irritation – If patient experiences skin irritation due to electrical
stimulation or the electrical conductive medium used, remove the electrodes,
discontinue stimulation and consult the clinician. Irritation may be reduced
by an alternative conductive medium or an alternative electrode placement.
Isolated cases of skin irritation may occur at the site of electrode placement
following longterm application.
Prescription – Use electrical stimulation only in the prescribed manner and for
the prescribed diagnosis.
Effectiveness
– Effectiveness is highly dependent upon patient selection by a
f
clinician qualified in the management of pain or rehabilitation.
IF
F 33wave
WAVE
E User’s Manual
IF
User’s Manual
926940_IF3Wave_Guts_Fr.indd 11
1112
2/27/14 8:57 PM
Prescribing Information
Keep out of reach of children – Keep this device out of reach of children.
If the patient is a child, make sure he/she is properly supervised during the
electrical stimulation.
Leads and electrodes – Use the device with only the leads and electrodes
provided for use by the manufacturer. Use only the electrode placements and
stimulation settings prescribed by your practitioner.
Electrode usage – Other market-released electrodes may be used as
recommended by your practitioner.
IF Mode - It is advisable not to use electrodes smaller than 4 sq. in. (25 sq. cm)
when the device is used in IF mode at higher amplitude settings to prevent
skin burn and irritation. It is recommended that, at a minimum, 2” x 2” square
electrodes are used when the device is operated in IF mode.
PDC Mode - It is advisable not to use electrodes smaller than 6 sq. in.
(37.50 sq. cm) at the treatment area when the device is used in PDC mode
at higher amplitude settings to prevent skin burn and irritation. In addition,
it is advisable to use only carbon based electrodes at the treatment area
when the device is used in PDC mode. It is recommended that, at a minimum,
2” x 4” carbon based, oval electrodes are used at the treatment area, and, at a
minimum, a 5” x 8” rectangle, dispersive electrode is used at the dispersive area.
Microwave or radio frequency sources – Operation in close proximity,
such as 3 feet (1 meter), to shortwave or microwave therapy equipment may
produce instability in the device output and may shut the device off.
Electronic equipment – Electronic monitoring equipment (such as ECG and
ECG alarms) may not operate properly when electrical stimulation is in use.
Machinery operation – Patient should never operate potentially dangerous
machinery such as power saws, automobiles, etc. during electrical stimulation.
Flammable – Do not use the device in an environment where flammable or
explosive fumes may exist.
External use – This device is for external use only.
Adverse Effects
Skin irritation, inflammation, and electrode burns beneath the electrodes are
potential adverse reactions.
12
13
926940_IF3Wave_Guts_Fr.indd 12
IFIF3wave
3WAVEE User’s
User’s Manual
Manua
al
2/27/14 8:57 PM
Quick Reference
When you are very familiar with the operation of the IF 3WAVE system, use
the following steps as a quick reference to operate the device. For more
information, refer to the Operation section in this manual.
Running a Therapy Session
1. Wash and dry the skin areas where you will be applying the electrodes.
Use skin prep if necessary.
2. Connect the lead wire(s) to the electrodes and the device.
3. Apply the electrodes to your skin.
button to display the Program screen.
4. On the device, press the
The last program used will be highlighted. If no change is desired,
wait 10 seconds and the highlighted program will operate.
5. Use the Ch1 and Ch2 and/or buttons to set the amplitude
for each channel, as directed by your clinician.
6. When the therapy program ends, the device shuts off automatically.
Otherwise, press the
to shut the device off.
button twice quickly, within two seconds,
Changing a Therapy Session
1. Follow steps 1 through 4 in Running a Therapy Session above.
2. To select a new program, press the Ch1
desired therapy program.
3. Press the Ch2
or
or
button to highlight the
button to select a program.
4. Use the Ch1 and/or Ch2 and buttons to set the amplitude for each
channel, as directed by your clinician.
5. When the therapy program ends, the device shuts off automatically.
Otherwise, press the
to shut the device off.
IF 3wave User’s Manual
F 3WAVEE User’s Manual
IF
926940_IF3Wave_Guts_Fr.indd 13
button twice quickly, within two seconds,
13
14
2/27/14 8:57 PM
Quick Reference
Ending a Session Prior to the End of Therapy
1. Press the
button twice quickly, within two seconds,
to shut the device off.
2. Unclip the belt clip from your clothing.
3. Disconnect the lead wire(s) from the device.
4. Disconnect the lead wire(s) from the electrodes.
5. Remove the electrodes from your skin. Follow the instructions on the
electrode package for storing electrodes. If necessary, use adhesive
remover to remove any remaining adhesive (or gel) from your skin.
6. Optionally, use skin cream or lotion to moisturize your skin after
removing the electrodes.
7. Optionally, remove the battery from the device prior to storing.
8. Store the components in the carrying case.
14
15
926940_IF3Wave_Guts_Fr.indd 14
IFIF3wave
3WAVEE User’s
User’s Manual
Manua
al
2/27/14 8:57 PM
System Components
Contents of the Standard Package
The IF 3WAVE system contains the following components:
IF 3wave
Stimulator
Rechargeable Batteries
Power Adaptor
Charger Base
Lead
Wires (2)
Reverse Splitter
Belt Clip
Electrodes
Carrying Case
Main Components
Additional components: IF 3WAVE User’s Manual and medical documentation.
You may receive an
alternate charger.
The modem base and the telephone
jack on this style of charger are no
longer available.
IF
User’sManual
Manual
F 33wave
IF
WAVE
E User’s
926940_IF3Wave_Guts_Fr.indd 15
1516
2/27/14 8:57 PM
System Components
Device
The IF 3WAVE is a battery-operated electrical stimulator. The device has preset
programs and treatment programs that can be customized by a clinician.
C1 Increase Button
C1 Decrease Button
On/Off Button
LCD
Ch1 Decrease Button
Ch2 Decrease Button
Stimulator Front View
Battery Compartment
Ch2 Output Jack
Ch1 Output Jack
Belt Clip Tab Receptacle
Stimulator Back View
17
16
926940_IF3Wave_Guts_Fr.indd 16
3WAVEE User’s
al
User’s Manual
Manua
IFIF3wave
2/27/14 8:57 PM
System Components
Device Physical Features
LCD Screen
This is the area that displays the therapy settings as you program and
use the stimulator.
Operating Buttons
These are the buttons you use to program your therapy settings, such as
selecting the treatment program and intensity.
•
•
•
•
•
On/Off – used to turn the stimulator on and off.
Ch1 Increase – used to increase the intensity (amplitude) of the
electrical impulses sent through the channel 1 output jack.
Ch1 Decrease – used to decrease the intensity (amplitude) of the
electrical impulses sent through the channel 1 output jack.
Ch2 Increase – used to increase the intensity (amplitude) of the
electrical impulses sent through the channel 2 output jack.
Ch2 Decrease – used to decrease the intensity (amplitude) of the
electrical impulses sent through the channel 2 output jack.
Battery Compartment
The device holds one rechargeable battery. The battery clips into the
compartment only one way.
Output Jacks
The output jacks are where you connect the lead wires. The output jack labeled
Ch1 is the channel 1; Ch2 is the channel 2. Each jack is shaped like an old-fashioned
keyhole. Each lead wire has a corresponding plug that matches the shape of the
jack. Position the plug so that its shape matches the jack pattern. Forcing the
plug into the jack incorrectly could cause damage to the device.
F 33wave
WAVE
IF
E User’s Manual
IF
User’s Manual
926940_IF3Wave_Guts_Fr.indd 17
18
17
2/27/14 8:57 PM
System Components
Rechargeable Batteries
The IF 3WAVE is supplied with two rechargeable Lithium ion batteries. The device
uses only one battery at a time. While one battery is in use, the other can be
recharged in the charger base.
Charger Base
The charger base serves one purpose:
• Charges the battery
The battery charger recharges the device’s battery. The charger base is
supplied with a power adaptor.
Power Adaptor
Battery Channel
Charger Base
18
19
926940_IF3Wave_Guts_Fr.indd 18
IFIF3wave
3WAVEE User’s
al
User’s Manual
Manua
2/27/14 8:57 PM
201800, does not disable your alarm equipment. If you have questions about
If yourwill
home
is specially
wired
for alarm equipment
it’s connected
to the
what
disable
your alarm
equipment,
consult yourand
telephone
company
or
telephone
line,
ensure
the
installation
of
this
equipment,
Charger/Modem
Base
qualified installer.
201800, does not disable your alarm equipment. If you have questions about
what
will disable
your alarm equipment, consult your telephone company or
Power
Adaptor
qualified installer.
System Components
The power adaptor supplies power to the charger base to recharge
Adaptor
thePower
batteries.
power adaptor
supplies
The
Telephone
Line
Cordpower to the charger base to recharge
the batteries.
The telephone cord connects the charger/modem base to your telephone jack.
Telephone Line Cord
Lead Wires
The telephone cord connects the charger/modem base to your telephone jack.
Lead wires are wires that connect the device to the electrodes. They carry the
electrical
Lead pulses
Wiresfrom the device to the electrodes on your skin. You must have an
electrode on both the red (+) and the black (-) pins for the device to work properly.
Lead wires are wires that connect the device to the electrodes. They carry the
electrical pulses from the device to the electrodes on your skin. You must have an
electrode on
both the red (+) and the black (-) pins for the device to work properly.
Pins
Pins
Pins
Plugs
Lead Wires
Lead Wires
Lead Wires
21
IF 3WAVEE User’s Manua
al
21
IF 3WAVEE User’s Manua
al
IF 3wave User’s Manual
926940_IF3Wave_Guts_Fr.indd 19
19
2/27/14 8:57 PM
System Components
Reverse Splitter
The reverse splitter is connected to the lead wires when using two channel
PDC (Pulse Direct Current). The black pins from both Ch1 and Ch2 must be
connected to the female connectors on the reverse splitter. The pin connector
on the reverse splitter should be connected to the large dispersive electrode
for the device to work properly. The reverse splitter is not used for one channel
PDC treatments.
Reverse Splitter
Splitter
Reverse
Reverse Splitter
Re
Reverse Splitter Connected to Electrodes
IF
F 320
WAVE
E User’s Manual
926940_IF3Wave_Guts_Fr.indd 20
22
IF 3wave User’s Manual
2/27/14 8:57 PM
p System Components
Electrodes
Use the device with only the leads and electrodes provided for use by the
manufacturer. Use only the electrode placements and stimulation settings
prescribed by your practitioner.
Other market-released electrodes may be used as recommended by your practitioner.
IF Mode - It is advisable not to use electrodes smaller than 4 sq. in. (25 sq. cm)
when the device is used in IF mode at higher amplitude settings to prevent
skin burn and irritation. It is recommended that, at a minimum, 2” x 2” square
electrodes are used when the device is operated in IF mode.
PDC Mode - It is advisable not to use electrodes smaller than 6 sq. in. (37.50
sq. cm) at the treatment area when the device is used in PDC mode at higher
amplitude settings to prevent skin burn and irritation. In addition, it is advisable
to use only carbon based electrodes at the treatment area when the device
is used in PDC mode. It is recommended that, at a minimum, 2” x 4” carbon
based, oval electrodes are used at the treatment area, and, at a minimum, a
5” x 8” rectangle, dispersive electrode is used at the dispersive area.
A variety of electrode styles can be used, including the following types:
•
•
•
Reusable, self-adhering
Disposable, multi-day
Carbon rubber
Refer to the following subsections and the information on the electrode
packages for use and care information for each electrode type. Following these
instructions will maximize their effectiveness and longevity.
Inspect your electrodes before every use. Replace electrodes as needed.
Reusable electrodes may cause slight skin irritation, lose adhesion and deliver
less stimulation if overused.
If you need additional electrodes, contact Empi at 1-800-328-2536.
IF23
3wave User’s Manual
926940_IF3Wave_Guts_Fr.indd 21
21 al
IF 3WAVEE User’s Manua
2/27/14 8:57 PM
System Components
Connector for Inserting
Lead Wire Pin
Adhesive Pad
Reusable, Self-adhering
Self-adhering Electrodes
Electrodes
Reusable,
NOTE: The large, single electrode (Dispersive Electrode) is used for one
channel and two channel PDC treatments. Before using, please refer to the
Setting Up PDC Programs in the Clinician section.
Reusable, Self-adhering Electrodes
Empi offers a complete line of reusable, self-adhering electrodes, which are
available in a variety of sizes and shapes.
T use these electrodes:
To
1. Attach the electrode to the lead wire.
2. Remove the protective backing from the electrode surface.
Do not throw away the protective backing because it is reused
after the treatment session has been completed.
3. Place the tacky surface to the prescribed skin area by pressing the
electrode firmly against the skin.
T remove your electrodes:
To
1. Lift the corner of the electrode and gently remove it from the skin.
2. Apply the protective backing to the tacky side of the electrode.
Place the electrode on the side of the protective backing that is
labeled with the word, On.
3. Store the electrodes in the resealable pouch or a plastic bag.
Caution
Do not pull on the electrode wire. Doing so may damage the wire and eletrode.
To prolong the life of these electrodes, apply a drop of tap water to the tacky
side when they show signs of drying out or of losing their stickiness. This can
be done before use or storage.
IF
F 3WAVEE User’s Manual
22
926940_IF3Wave_Guts_Fr.indd 22
24
IF 3wave User’s Manual
2/27/14 8:57 PM
System Components
Disposable, Multi-day Electrodes
Empi offers a complete line of disposable, multi-day electrodes, which are
available in a variety of sizes and shapes.
T use these electrodes:
To
1. Attach the lead wire to the electrode. If nesessary, moisten the pin on
the lead wire to make insertion easier.
2. Remove the liner from the tape patch and discard.
3. Apply the electrode to the prescribed skin area.
4. Replace electrodes that do not adhere properly to the skin or that fail
to deliver proper stimulation.
Carbon Rubber Electrodes
Some carbon rubber electrodes require a conductive medium, such as a
conductive gel, while others have self-adhering gel already in place.
T use these electrodes:
To
1. Remove the backing from the center of the electrode tape patch
and attach it to the back of the electrode. The raised portion of the
electrode should protrude through the tape.
2. Moisten the lead wire pin to make insertion easier.
3. Insert the metal pin from the lead wire into the hole on the back
of the electrode.
4. Identify the side of the electrode to be attached to your skin, and cover
its entire surface with electrode gel (if necessary).
5. Remove the rest of the tape backing.
6. Position the electrode over the prescribed skin area and press the tape
and electrode firmly onto the skin.
Warning
Do not moisten the lead wire pin in your mouth. Doing so can cause severe
injury or death.
Caution
Do not pull on the electrode wire. Doing so may damage the wire and electrode.
IF 25
3wave User’s Manual
926940_IF3Wave_Guts_Fr.indd 23
23 al
IF 3WAVEE User’s Manua
2/27/14 8:57 PM
System Components
Carrying Case
A carrying case is included to help protect the IF 3WAVE system and keep
it clean. Store your device and its components in the case when they are
not in use.
Documentation
Read and understand this user’s manual carefully before operating the IF 3WAVE
device. The device is provided in English, Spanish (USA), and French (Canada).
If you have questions or cannot read these languages, contact your clinician.
Belt Clip
A belt clip is provided so that the IF 3WAVE unit can be securely clipped to a belt
or other clothing, allowing you to go about your activities.
Notes
IF
F 324
WAVE
E User’s Manual
926940_IF3Wave_Guts_Fr.indd 24
IF 3wave User’s Manual
26
2/27/14 8:57 PM
Operation
Overview
Caution
United States Federal Law restricts this device to sale by or on the order of a
physician or licensed practitioner.
This section includes the following instructions for performing a therapy session.
Perform these instructions in the order they are presented:
•
•
•
•
•
•
•
Installing the IF 3WAVE’s Battery
Connecting the Lead Wires to the Electrodes
Connecting the Lead Wires to the Device
Preparing the Skin for a Therapy Session
Applying the Electrodes to the Skin
Using the Device for a Therapy Session
Ending a Therapy Session
This section also includes the following instructions:
•
•
•
•
•
•
Charging the Battery
Storing the Battery
Caring for the IF 3WAVE System
Understanding Special Display Messages
Finding the Software Revision and Serial Number
Using the Belt Clip
Before operating the IF 3WAVE System, read the previous sections of this manual
that describe the system and its features. To gain the maximum benefit from
your IF 3WAVE System, carefully follow your clinician’s instructions and use the
system for only the specific symptoms detailed by your clinician. If you have
any questions or problems, or experience any new symptoms or painful areas,
contact your physician, therapist, or clinician for appropriate diagnosis and
treatment. They are most familiar with your specific situation and are the best
source of additional guidance.
User’sManual
Manual
IF
FIF33wave
WAVE
E User’s
926940_IF3Wave_Guts_Fr.indd 25
25
28
2/27/14 8:57 PM
Operation
Installing the IF 3WAVE Battery
The IF 3WAVE operates with a removable, rechargeable Lithium ion battery. Two
are supplied with the device. Additional batteries can be ordered by contacting
Empi at 1-800-328-2536. For information about charging the battery, refer to
Charging the Battery in this Operation section.
Install the battery before using the device. Recharge the battery whenever the
Battery Low message appears in the device’s LCD screen. For information
about the display messages, refer to Understanding Special Display Messages
in this Operation section.
Warnings
•
•
Do not connect the device to any electrical outlet.
Do not attempt to remove moisture from the battery with heat.
Excessive heat can cause the battery to explode, catch fire and
leak chemicals.
Failure to observe these warnings can result in severe personal injury or death
or cause damage to the device and battery.
Cautions
•
•
•
•
•
•
•
Do not use other battery types. Use only Empi battery,
Part Number 360102, which is designed for the system.
When storing the batteries for long periods of time,
they should be charged at least every six months.
Replace a battery that has been immersed in water or liquid.
Never heat the battery or throw it into a fire.
Fully drain the electrical charge from the battery before recharging.
If the battery is leaking a liquid, do not touch the liquid with bare skin.
Dispose of the battery according to current federal, state
and local regulations.
Failure to observe these precautions can result in injury, damage to the device
and battery, or the environment.
Return used batteries to:
Empi
205 Hwy. 22 East
Clear Lake, SD 57226
26
29
926940_IF3Wave_Guts_Fr.indd 26
IFIF3wave
3WAVEE User’s
al
User’s Manual
Manua
2/27/14 8:57 PM
Operation
To install the battery into the device:
1. Place the device face down in the palm of your hand.
2. Slide the battery into the battery channel until it clicks. The Empi label
on the battery should be facing down.
Insert
Battery Installation
Caution
Never force the battery into the battery channel or charger base.
Forcing it can damage the device and battery.
User’sManual
Manual
IF
FIF33wave
WAVE
E User’s
926940_IF3Wave_Guts_Fr.indd 27
27
30
2/27/14 8:57 PM
Operation
Charging the Battery
The battery must be removed from the IF 3WAVE and placed in the
charger base to charge it. Fully charge the battery approximately 4.5
hours before using it again. It is a good practice to drain the batteries
completely before recharging them.
LED Battery
Indicator
Power Jack
Battery Charger Base
Caution
Never force the battery into the battery channel. Forcing it can damage the
charger base and battery.
Battery LED Indicator
Bright green
No green (light off)
Red
Orange
Battery is charging.
Battery recharge is complete.
Battery is defective. Charger shuts down.
Remove battery and call technical support.
Battery is overheating. Charger shuts down
until battery is cool.
T charge the battery:
To
1. Plug the power adapter into a standard 110 Vac outlet and the
connector jack into the charger base.
2. Slide the battery into the battery channel on the charger base until
it clicks. Make sure the Empi label on the battery is facing down.
28
31
926940_IF3Wave_Guts_Fr.indd 28
IFIF3wave
3WAVEE User’s
User’s Manual
Manua
al
2/27/14 8:57 PM
Operation
3. When the green LED shuts off, remove the battery from the
charger base.
4. Unplug the power adapter.
Storing the Battery
The battery should be removed from the device when it is stored for long
periods of time (more than two weeks). All batteries should be stored in the
carrying case. Store all batteries in a dry location at 50 to 86 °F (10 to 30 °C)
and away from direct sunlight.
Rechargeable batteries slowly lose their charge in storage so they should be
recharged every six months. The batteries can loose their capacity to hold
a charge when they are stored for long periods of time. You can renew their
capacity by charging and discharging them several times. If your battery does
not retain a charge during standard operation, contact Customer Service at
1-800-328-2536 to purchase a new one.
Connecting the Lead Wires to the Electrodes
T connect the lead wire(s) to the electrodes:
To
1. Decide if you are using one lead wire (two electrodes) or two lead wires
(four electrodes). Follow your clinician’s instructions.
2. Locate the pins at the ends of the lead wire(s). If necessary, refer to the
illustration in the System Components section.
3. Locate the pin insertion points on two or four electrodes as necessary
and do one of the following.
•
•
•
On a reusable, self-adhering electrode, the insertion point is at the
loose end of the wire attached to the electrode, as shown in the
next illustration.
On a disposable, multiple-day electrode, the insertion point is a
small hole on the top of the electrode. There are two holes; use
only one of them.
On a carbon rubber electrode, the insertion point is a small hole
on the top of the electrode. There are two holes; use only one of them.
IF 33wave
User’sManual
Manual
IF
F
WAVE
E User’s
926940_IF3Wave_Guts_Fr.indd 29
2932
2/27/14 8:57 PM
Operation
NOTE: Refer to Reverse Splitter in the System Components section for complete
instructions on connecting the lead wires to the electrodes with the reverse
splitter when using PDC programs C1/2 pdc+red active and C1/2 dc–red active.
Electrode Connection to Lead Wire
NOTE: Refer to the electrode package for complete instructions.
4. With the electrodes still attached to the protective backing (reusable and
disposable electrodes only), insert one lead wire pin into each electrode’s
insertion point. Insert the pins entirely so that no metal shows.
NOTE: If using disposable or carbon rubber electrodes, moisten the lead wire
pin to make insertion easier. Connect only one lead wire to each electrode.
Warnings
Do not moisten lead wire pin in your mouth. Doing so can cause severe
injury or death.
30
33
926940_IF3Wave_Guts_Fr.indd 30
IFIF3wave
User’s Manua
Manual
3WAVEE User’s
al
2/27/14 8:57 PM
Operation
Connecting the Lead Wires to the Device
To connect the lead wire(s) to the device:
1. Locate the plug(s) at the end of the lead wire(s). If necessary, refer to
the illustration in the System Components section.
2. Locate the output jacks at the bottom of the device. They are labeled
Ch1 for channel 1 and Ch2 for channel 2.
Output Jacks
Lead Wire Connection to the Device
3. Insert one lead wire plug into each output jack. If using only one lead
wire, use the Ch1 output jack.
NOTE: The lead wire plugs and jacks are key-shaped. Match the shapes when
inserting the plugs.
User’s Manual
IF
FIF33wave
WAVE
E User’s Manual
926940_IF3Wave_Guts_Fr.indd 31
31
34
2/27/14 8:57 PM
Operation
Preparing the Skin for a Therapy Session
Proper preparation of the skin covered by the electrodes allows more stimulation to
reach targeted tissues, prolongs electrode life and reduces the risk of skin irritation.
To prepare your skin at the electrode placement sites:
1. Determine the placement sites for the electrodes.
Follow your clinician’s instructions.
NOTE: Your clinician generally has you place the electrodes above and below
(or surrounding) the area of pain or along the “pain path” of your arm or leg.
2. Wash the area with mild soap and water (do not use alcohol).
Rinse and dry thoroughly.
3. Trim excess body hair from the area with scissors (do not shave).
4. Optionally, apply skin prep to the area to form a protective barrier
on your skin.
Applying the Electrodes to the Skin
1. Make sure the device is off.
2. Depending on the type of electrodes being used, do one of the
following to prepare the first electrode for application.
•
Reusable, self-adhering electrodes – remove the protective
backing from the electrode and save the protective backing for reuse.
DO NOT pull on the electrode’s wire to remove the protective backing;
rather bend the backing and peel the electrode from the backing.
NOTE: If reusable electrodes begin to dry out or lose their stickiness,
apply a drop of tap water to the adhesive side.
(This can be done before use or storage).
•
Disposable, multi-day electrodes – using the tabbed edge, remove
the protective backing from the electrode. Discard the backing.
32
35
926940_IF3Wave_Guts_Fr.indd 32
IFIF3wave
3WAVEE User’s
al
User’s Manual
Manua
2/27/14 8:57 PM
Operation
•
Carbon rubber electrodes –
a)
Remove and discard the center backing from the tape patch
and attach the tape patch to the top of the electrode. The raised
portion of the electrode should protrude through the tape.
b) If necessary, cover the entire bottom surface of the electrode with
electrode gel.
c)
Remove and discard the rest of the tape backing.
3. Place the adhesive (gel) surface of the electrode on the skin placement
site prescribed by your clinician.
4. Press the entire surface of the electrode into place, making sure it is secure.
5. Repeat steps 2 through 4 for all electrodes.
NOTES:
•
•
Inspect the electrodes before each use.
Position the electrodes with a minimum of 1 inch between them; do
not let them touch each other. Do not reposition the electrodes while
the device is turned on.
•
Do not place electrodes on cut, broken, or irritated skin. If skin irritation
develops, immediately discontinue device use, remove the electrodes,
and contact your clinician.
•
For long-term stimulation, change electrode sites whenever possible.
Contact your clinician for new placement sites.
•
Replace self-adhesive electrodes that do not adhere well or fail to
deliver proper stimulation.
•
Do not overuse reusable electrodes. Doing so may cause skin irritation,
loss of adhesion, and weak stimulation.
•
Do not refrigerate electrodes. Keep them from heat sources. Refer to
the electrode packaging for information about electrode use and care.
•
For descriptions of the electrode types, refer to Electrodes in the
System Components section.
•
For more information about electrode placement, visit: www.empi.com.
Caution
As the electrode size gets smaller (below the standard 2 sq. in. or 4 sq. in.
(25 sq. cm ), the tendency for skin irritation increases.
IF
FIF33wave
WAVE
E User’s
User’sManual
Manual
926940_IF3Wave_Guts_Fr.indd 33
36
33
2/27/14 8:57 PM
Operation
Using the Device for a Therapy Session
After inserting the battery, connecting the electrodes, connecting the lead wires,
preparing the skin and applying the electrodes, you are ready to begin your
therapy session.
Refer to the following illustration for button identification as you read the
instructions. For more information about the buttons, refer to Device Physical
Features in the System Components section of this manual.
Ch1 Increase
Ch2 Increase
On/Off
Ch1 Decrease
Ch2 Decrease
Device Buttons
NOTES:
•
•
The clinician can set the language that is displayed on the screen.
If you need the device set up in another language, ask your clinician.
The languages are English, Spanish (USA), and French (Canada).
The following steps include selecting a program and setting
the channel intensities. Read through the steps before actually
performing them.
34
37
926940_IF3Wave_Guts_Fr.indd 34
IFIF3wave
3WAVEE User’s
al
User’s Manual
Manua
2/27/14 8:57 PM
Operation
•
•
•
•
The device stores the last program used. To start the last program
used, simply turn the device on and wait for the Programs screen
to appear. The program will start automatically.
If you change the mode during a therapy session, the amplitude
returns to zero and must be reset. See the appropriate instructions
for your treatment.
The IF 3WAVE has an auto locking feature that prevents accidental
amplitude adjustment in the IF, NMES, and PDC treatment programs.
The clinician may enable or disable this feature for each program.
If a message screen appears, refer to Understanding Special
Display Messages in this section.
Running IF, NMES, and PDC Treatment Programs
Follow these procedures for all programs EXCEPT the IF/NMES combination
treatment program. The IF/NMES combination procedures are provided in a
later section of the manual.
NOTE: While performing the following steps, if you do nothing for two minutes,
the device will shut off automatically. If this happens, start over with step 1.
T run most therapy programs:
To
1. Press and release the
button to turn the device on. Two
title screens briefly appear on the display for 5 seconds and then the
Program List screen appears. The last program used is highlighted and
will automatically begin after 10 seconds if no other program is selected.
Program Selection Screen
IF
FIF33wave
WAVE
E User’s
User’sManual
Manual
926940_IF3Wave_Guts_Fr.indd 35
38
35
2/27/14 8:57 PM
Operation
With the Program List screen displayed, immediately use either the
Ch1 or buttons to select a different therapy program.
3. Press the Ch2 or buttons to select the program.
The Selected Program screen appears. The treatment time shows how
much time is left in the treatment session and the amplitude is set at
zero for both channels.
Selected Program Run Screen
NOTES: If you do nothing for 10 seconds, the highlighted program runs.
If you choose the wrong program, shut the device off and start over with
step 1.
Last Used Program Screen
36
39
926940_IF3Wave_Guts_Fr.indd 36
IF 3wave User’s Manual
IF 3WAVEE User’s Manua
al
2/27/14 8:57 PM
l
Operation
4. To adjust the amplitude, do one of the following.
a.
IF or PDC Treatments – Use the Ch1 or Ch2 and
buttons to set the amplitude for both channels, as directed
by your clinician.
b. NMES Treatment – Use the Ch1 and Ch2 and buttons to set
the amplitude for each channel, as directed by your clinician. The
amplitude for each channel can be different.
As you adjust the amplitude, the bar on the screen changes to show
the amplitude level. The numeric value is also displayed. The program
starts 3 seconds after you stop making amplitude adjustments.
NOTES: Adjust the amplitude until it is comfortable—the stimulation should not
cause discomfort.
30 seconds after you adjust the amplitude, the settings will lock to prevent
accidental changes. To make adjustments, see Adjusting Amplitude During
Treatment in this Operation section.
At the end of the session, the screen displays a message, Program Completed,
and the device will shut down in 15 seconds.
Program Complete Screen
IF 3wave User’s Manual
IF
F 3WAVEE User’s Manual
926940_IF3Wave_Guts_Fr.indd 37
37
40
2/27/14 8:57 PM
Operation
Running IF/NMES Combination Treatment Program
The IF/NMES program combines two treatment modes. The treatment begins
with the IF program and then changes to a NMES program. When the NMES
program ends, the IF program repeats. Each program runs 20 minutes and the
total treatment time is 60 minutes.
T start an IF/NMES therapy session:
To
1. Press and release the
button to turn the device on. Two title
screens briefly appear in the display and then the Program List screen
appears. The last program used is highlighted.
Program Selection Screen
2. With the Program List screen displayed, immediately use either the Ch1
or buttons to highlight the desired therapy program.
3. Press the Ch2 or buttons to select the program.
The Selected Program screen appears. The treatment time shows how
much time is left in the treatment session and the amplitude is set at
zero for both channels.
Selected Program Run Screen
38
41
926940_IF3Wave_Guts_Fr.indd 38
IFIF3wave
3WAVEE User’s
al
User’s Manual
Manua
2/27/14 8:57 PM
Operation
NOTES: If you do nothing for 10 seconds, the highlighted program runs.
If you choose the wrong program, shut the device off and start over
with step 1.
Previously Used Program Screen
4. Use the Ch1 and 2 Increase and Decrease buttons to set the amplitude
for each channel, as directed by your clinician. As you adjust the
amplitude, the bar on the screen indicates the set amplitude relative
to the maximum available (100%). The numeric value is also displayed.
NOTES: Adjust the amplitude until it is comfortable—it should not be
uncomfortable. 30 seconds after you adjust the amplitude, the settings will
lock to prevent accidental changes. To make adjustments, see
Adjusting Amplitude During Treatment in this Operation section.
5. At the end of the IF program (20 minutes), the amplitude returns to
zero. Within two minutes, you must set the amplitude for the NMES
program which runs for 20 minutes.
6. At the end of the NMES program, the IF program repeats (20 minutes)
and its amplitude returns to the previous IF amplitude setting. You do
not have to reset it.
At the end of the session, the screen displays a message, Program Completed,
and the IF 3WAVE will shut down in 15 seconds.
User’sManual
Manual
IF
FIF33wave
WAVE
E User’s
926940_IF3Wave_Guts_Fr.indd 39
39
42
2/27/14 8:57 PM
Operation
Adjusting Amplitude During Treatment
When you start an IF, NMES, PDC, or IF/NMES Combination treatment, you set
the amplitude and the program starts, the amplitude locks at the desired setting
after 30 seconds. If you wish to change the amplitude, follow these steps.
T adjust the amplitude during treatment:
To
NOTE: The auto lock feature may be disabled by the clinician.
1. If the device is locked, press and hold both Ch1 and Ch2
2 seconds.
buttons for
2. Adjust the amplitude as desired. The setting will lock again after 30 seconds.
Key Unlock Screen
Ending a Therapy Session
After the therapy time expires, the device shuts off automatically. A message
screen appears telling you the program is complete. You can also end a
treatment session before it is completed by pressing the
button twice within
2 seconds.
T end a therapy session:
To
1. Ensure that the unit is off.
2. Disconnect the lead wire(s) from the device.
3. Disconnect the lead wire(s) from the electrodes.
40
43
926940_IF3Wave_Guts_Fr.indd 40
IFIF3wave
3WAVEE User’s
User’s Manual
Manua
al
2/27/14 8:57 PM
Operation
4. Depending on the type of electrodes being used, do one of the
following to remove the electrodes from your skin:
•
•
•
Reusable, self-adhering electrodes – Remove the electrodes
one at a time, placing each one on the saved protective backing
as you remove it (adhesive side down). DO NOT pull on the
electrode wires; gently peel the electrodes from your skin.
Place the electrodes in their original, re-sealable plastic bag.
Disposable, multi-day electrodes – Leave these electrodes on
for the number of days instructed by your clinician. When required,
remove each electrode by lifting one edge and then peeling the
electrode from your skin. Discard the electrodes.
Carbon rubber electrodes – Remove each electrode by lifting
one edge of the tape patch and then peeling the patch from
your skin. Clean and store the electrodes according to the
manufacturer’s instructions.
5. If necessary use adhesive remover to remove any remaining adhesive
from your skin. Wash the skin area with mild soap and water (do not use
alcohol). Optionally, use skin cream or lotion to moisturize your skin. For
more information about adhesive remover and skin cream, refer to Skin
Care Samples in the System Components section of this manual.
6. Optionally, remove the battery from the device. See Installing the
Battery in this Operation section
7. Store the components in the carrying case.
To end a therapy session prior to the end of a program:
1. Press and release the
button twice. After pressing the button once,
a screen appears asking you to confirm that you want to shut the
power off. Press the button again. The device shuts off.
2. Follow steps 2 through 7 to end a therapy session above.
IF
F 33wave
WAVE
E User’s
IF
User’sManual
Manual
44
41
Operation
Caring for the IF 3WAVE System
Clean the outside of the device and lead wires as needed with a damp cloth
and mild soap. Never immerse the device or lead wires in water, alcohol, or
other fluids. Do not use cleaning fluids or solvents to remove stains or dirt.
These liquids may damage the plastic case and lead wires.
Store all the operating components in the carrying case.
Understanding Special Display Messages
Battery Indicator and Battery Low
Fully Charged
Battery Indicator
New Battery
The battery indicator appears on most screens in the upper right corner. When
the battery is fully charged, the indicator is completely shaded black. As the
device is used, the shaded area of the indicator becomes smaller.
NOTE: The approximate battery life of the IF 3WAVE is 10 hours to half intensity
(amplitude) and 3 hours at full intensity.
42
45
926940_IF3Wave_Guts_Fr.indd 42
IFIF3wave
3WAVEE User’s
User’s Manual
Manua
al
2/27/14 8:57 PM
Operation
Low Battery
Indicator
Battery Low Message
When the Battery Low message appears, use the device until it automatically
shuts off. When the battery is completely depleted, a message appears on
the screen informing you that the device will shut down. When the device
automatically shuts off, the program must be restarted when a charged battery
is installed. The device returns to start-up.
IF
User’sManual
Manual
IF
F 33wave
WAVE
E User’s
926940_IF3Wave_Guts_Fr.indd 43
4346
2/27/14 8:57 PM
Operation
Open Lead
Check Leads Message
If a lead wire becomes disconnected or an electrode becomes separated from
the skin, a message tells you to check the leads and electrodes, as shown
above. Ensure that the leads are properly connected. When they are properly
connected, a message appears indicting recovery and the therapy session
continues where it left off.
Recovery Screen
44
47
926940_IF3Wave_Guts_Fr.indd 44
IFIF3wave
3WAVEEUser’s
User’sManual
Manua
al
2/27/14 8:57 PM
Operation
Finding the Software Version and Serial Number
When you turn on the IF 3WAVE, two title screens appear. The first screen
displays the Empi logo and the second screen displays the device’s logo and
the version number of the software. In addition, you can display the serial
number of the device. This is useful when you need to report the number for
Technical Service.
Number 2
Button
IF 3WAVE with Function Button Cover Removed
To display the device’s serial number:
1. Make sure the device is off.
2. Lift the cover on the front of the device to access the function buttons.
3. Press and hold the number 2 button.
4. While holding the number 2 button, press and release the
button.
5. When the Serial Number screen appears in the display, release the
number 2 button.
6. Turn the device off.
User’sManual
Manual
IF
FIF33wave
WAVE
E User’s
926940_IF3Wave_Guts_Fr.indd 45
45
48
2/27/14 8:57 PM
Operation
Using the Belt Clip
The IF 3WAVE is supplied with a belt clip so that you can clip the device to your
clothing, allowing you to receive your treatment while going about your daily activities.
The belt clip’s locking tab allows you remove the device from the belt clip.
Attaching the Tab
You will need to attach the tab to the device. Refer to the illustration below as
you follow the steps.
T attach the tab to the device:
To
1. Lay the IF 3WAVE face down on a soft cloth.
2. Position the tab in the round depression so that the two scores are
vertical to the length of the device.
3. Insert the supplied Phillips screw into the hole and tighten, but do not
over tighten. The tab should be snug.
Attaching the tab to the IF 3WAVE
46
53
926940_IF3Wave_Guts_Fr.indd 46
IFIF3wave
3WAVEE User’s
al
User’s Manual
Manua
2/27/14 8:57 PM
Operation
Attaching the Belt Clip
You can leave the belt clip on your clothing and attach and detach the
IF 3WAVE from the clip.
To attach the IF 3WAVE to the belt clip:
1. Squeeze the belt clip so that it opens and slip it onto your belt or clothing.
2. Position the IF 3WAVE so that it is parallel to the clip.
3. Slide the tab down into the slot until it clicks.
4. Rotate the device so that it hangs freely on the clip.
To remove the IF 3WAVE from the belt clip:
1. Rotate the device so that it is parallel to the clip.
2. Press the release button at the top of the belt clip downward.
3. While pressing the button, slide the device upward.
4. Release the button.
IF 3wave User’s Manual
IF
F 3WAVEE User’s Manual
926940_IF3Wave_Guts_Fr.indd 47
47
54
2/27/14 8:57 PM
Notes
48
926940_IF3Wave_Guts_Fr.indd 48
IF 3wave User’s Manual
2/27/14 8:57 PM
Clinician Setup
Function Buttons and Making Selections
Function Buttons
Clinician Setup
This setup section is intended for the health care professional (clinician), and
access is protected with a password. In some cases, patients are granted
access to the setup so that they can adjust their treatment. The setup displays
are used to set up the desired treatment programs, select the desired display
language, and edit existing treatment programs.
Four function buttons, numbered 1 through 4, are used for the setup. Open the
protective cover to access them. Icons on the LCD directly above the buttons
indicate the function of each button. Buttons without a function designation on
the LCD are not used for that screen.
Function Buttons
1 through 4
Function Buttons With Protective Cover Removed
The button’s function may change with various screens. These functions are:
•
Scroll (Downward pointing arrow or Double Arrows) –
Scrolls through the listed choices. When the last item in the list is
reached, it returns to the top of the list. The button must be pressed
and released to advance to the next item listed.
•
Select – Selects the highlighted option, puts it into the program
memory, and then goes to the next item or display.
•
Back – Returns to the previous screen.
•
Up – Used when editing programs. It moves the highlighted program
upward in the program list.
IF
F
WAVE
E User’s Manual
IF 33wave
User’s Manual
926940_IF3Wave_Guts_Fr.indd 49
4956
2/27/14 8:57 PM
Clinician Setup
Clinician Setup
Value – Scrolls through a list of predefined values for the highlighted
item. It starts at the top of the list, continues through the list, and returns
to the top of the list. When the list has less than 15 choices, the clinician
must press and release the button. For longer lists, the button can be
pressed and held to advance through the list.
•
•
•
•
Save – Saves the treatment program and places it on the Program List screen.
Yes – Used after saving a treatment program. If selected, it returns to
the Select Stim Type screen.
No – Used after setting up a treatment program. If selected, it returns
to the Program List screen.
Delete – Deletes a program when editing the Edit Program List screen.
Highlighted
Option
Select
Back
Value
Scroll
Sample LCD Icons
Making Selections
Many screens offer options to choose from. The first option on a screen is
highlighted when the screen is entered. Use the Scroll button to highlight an
option and then press the Select button.
57
50
926940_IF3Wave_Guts_Fr.indd 50
ua
3WAVEEUser’s
User’sManual
Manua
al
IF IF
3wave
2/27/14 8:57 PM
Clinician Setup
To enter the setup screens, with the IF 3WAVE off, press and hold the Start
button for more than five seconds. When the Setup Input Password screen
appears release the button.
Entering the Password
The Password Card provides a code for the clinician to access the device
setup functions.
Clinician Setup
Entering the Setup Mode
Using the Function buttons, enter the password and then press the
Select button. A Password Acceptance screen appears and then the
Setup screen appears.
Password Input Screen
If the password is not accepted after three attempts, the patient’s Program List
screen appears. If the clinician is unable to access the Setup Mode with the
password, contact Empi at 1-800-328-2536.
NOTE: The setup password is provided on a separate card and packaged with
the device. The card should be removed from the package before giving the
unit and documentation to the patient. Keep the password in a safe place such
as the patient’s medical file.
IF
User’sManual
Manual
IF
F 3wave
3WAVEE User’s
926940_IF3Wave_Guts_Fr.indd 51
5158
2/27/14 8:57 PM
Clinician Setup
Clinician Setup
System Selection Setup
From this screen, the clinician can choose from a list of options.
Setup Selection Screen
•
•
•
•
52
59
Select Stim Type – This option allows the clinician to select the type
of stimulation program he or she wants to set up.
Select Language (English) – The default language is English. This
option allows the clinician to change the language to English, Spanish
(USA), or French (Canada).
Edit Programs – This option allows the clinician to delete existing
programs from a list or edit existing ones. The IF 3WAVE stores up to ten
programs in the Program List.
System Sound – This option allows the clinician to enable or disable
units sound.
IF IF
3wave
ua
3WAVEEUser’s
User’sManual
Manua
al
Clinician Setup
The IF 3WAVE system offers four stimulation modalities:
•
•
•
•
IF
NMES
Combination (IF/NMES)
PDC
Each modality offers a variety of programs such as preset, continuous, sweep
and manual. Each program offers treatments for conditions such as low back
pain, neck pain, spasm reduction and quadriceps re-education.
Clinician Setup
Stimulation Modalities
Selecting the Stimulation Modality
The Select Stimulation Type screen displays the four stimulation modalities. To
access the desired modality, use the Scroll button to highlight it and press the
Select button.
Select Stimulation Type Screen
IF 3wave User’s Manual
IF
F 3WAVEE User’s Manual
926940_IF3Wave_Guts_Fr.indd 53
53
60
2/27/14 8:57 PM
Clinician Setup
Clinician Setup
Stimulation Program Selection Screen
If a “Program list is full” message appears on the Select Stimulation Type
screen, the clinician will need to delete an existing program from the Program
List in order to add another program. The maximum number of saved programs
is 10. Press the Back button to return to the previous screen. To delete a
program, refer to Edit Programs in this Clinician Setup section.
Program List Full Message Screen
Setting Up IF Programs
The IF (interferential) program offers three types of treatments:
•
•
•
Preset
Continuous
Sweep
IF Program Type Selection Screen
54
61
926940_IF3Wave_Guts_Fr.indd 54
IF 3wave
Manual
ua
IF 3WAVEUser’s
E User’s
Manua
al
2/27/14 8:57 PM
Clinician Setup
IF Preset Treatments
•
•
•
•
•
•
•
Low Back Pain
Neck Pain
Knee Pain
Shoulder Pan
Clinician Setup
Setup
Clinician
The IF Preset screen lists preset treatments available for the patient. Preset
treatment parameters are not adjustable. The preset treatment programs include:
Wrist Pain
Ankle Pain
IC Pain
IF Preset Treatment Selection Screen
To select an IF Preset treatment program:
1. Using the Scroll button, highlight the desired treatment.
2. Press the Select button.The program’s treatment time and amplitude
screen appears. The amplitude is set at zero, which the patient adjusts
following the clinician’s direction.
The Program’s Treatment Time and Amplitude Screen
IFF 3wave
User’sManual
Manual
3WAVEE User’s
926940_IF3Wave_Guts_Fr.indd 55
5562
2/27/14 8:57 PM
Clinician Setup
Clinician Setup
3.
Press the Save button. Saving a program puts it in the Program List.
A screen appears and asks if another program should be added.
Program is Saved Message Screen
4. Do one of the following:
Y button to go back to the Select Stim Type screen.
a. Press the Yes
b. Press the No button to go to the Setup screen.
NOTE: To return to the Setup screen, press and release the
button
twice within two seconds and press again to turn the device on. Refer to
Running IF, NMES and PDC Treatment Program in the Operation section.
The IF Continuous treatment delivers interference frequency with a fixed beat,
which the clinician sets. This screen lists the Hz frequency and the treatment
time. Each of these can be edited. Refer to the Specifications section for mode
specifications.
IF Continuous Setup Screen
56
63
IF 3wave User’s Manual
ua
IF 3WAVEE User’s Manua
al
Clinician Setup
To set the Continuous parameters:
1. With the parameter highlighted, press the Value button to scroll
through the preset values until the desired one is found.
2. Press the Select button. The next parameter is highlighted.
3. Repeat steps 1 and 2 to set each parameter. When finished, the program’s
treatment time and amplitude screen appears. The amplitude is set at
zero, which the patient adjusts following the clinician’s direction.
The Program’s Treatment and Amplitude Run Screen
4. Press the Save button. Saving a program puts it in the Program List.
A screen appears and asks if another program should be added.
5. Do one of the following.
Y button to go back to the Select Stim Type screen.
a. Press the Yes
b. Press the No button to go to the Setup screen.
button
NOTE: To return to the Setup screen, press and release the
twice within 2 seconds and press again to turn the device on. Refer to
Running IF, NMES and PDC Treatment Program in the Operation section.
IF
F 3wave
3WAVEE User’s
User’sManual
Manual
5764
Clinician Setup
When the clinician enters the screen, the first parameter is highlighted.
Clinician Setup
Clinician Setup
IF Sweep Treatment
The Sweep treatment modulates the beat frequency over a range. It ramps up
from minimum to maximum and ramps down from maximum to minimum for
the set amount of time.
This screen lists the frequency range in Hz, the modulating cycles in seconds
(time), and the treatment time in minutes. The clinician can edit each of these.
Refer to the Specifications section for mode specifications.
IF Sweep Setup Screen
To set the Sweep parameters:
When the clinician enters the screen, the first parameter is highlighted.
1. With the parameter highlighted, press the Value button to scroll
through the preset values until the desired one is found.
2. Press the Select button. The next parameter is highlighted.
3. Repeat steps 1 and 2 to set each parameter. When finished, the
program’s treatment time and amplitude screen appears. The
amplitude is set at zero, which the patient adjusts following the
clinician’s direction.
4. Press the Save button. Saving a program puts it in the Program List.
A screen appears and asks if another program should be added.
5. Do one of the following.
Y button to go back to the Select Stim Type screen.
a. Press the Yes
b. Press the No button to go to the Setup screen.
NOTE: To return to the Setup screen, press and release the
button twice
within two seconds and press again to turn the device on. Refer to
Running IF, NMES and PDC Treatment Program in the Operation section.
58
65
926940_IF3Wave_Guts_Fr.indd 58
IF IF
3wave
ua
3WAVEEUser’s
User’sManual
Manua
al
2/27/14 8:57 PM
Clinician Setup
Clinician Setup
Setting Up NMES Programs
The NMES (Neuromuscular Electrical Stimulation) offers two treatments.
Refer to the Specifications section for mode specifications.
•
•
Preset
Manual Set
NMES Program Selection Screen
NMES Preset Treatments
This screen lists preset treatments available for the patient. Preset treatment
parameters are not adjustable. The preset choices are:
•
•
•
•
•
•
Low Back
Neck/Shoulder
Mid Low/Back
Trigger Point
Quadriceps Strengthening
Quadriceps Re-education
NMES Preset Treatment Selection Screen
IF
User’sManual
Manual
IF
F 3wave
3WAVEE User’s
926940_IF3Wave_Guts_Fr.indd 59
5966
2/27/14 8:57 PM
Clinician Setup
Clinician Setup
To select a NMES Preset treatment:
When the clinician enters the screen, the first treatment is highlighted.
1. Scroll to highlight the desired treatment.
2. Press the Select button. The program’s treatment time and amplitude
screen appears. The amplitude of each channel is zero, which the
patient adjusts following the clinician’s direction.
3. If the program is suitable, press the Save button. Saving a program
puts it in the Program List. A screen appears and asks if another
program should be added.
4. Do one of the following.
a. Press the Yes
Y button to go back to the Select Stim Type screen.
b. Press the No button to go to the Setup screen.
NOTE: To return to the Setup screen, press and release the
button
twice within two seconds and press again to turn the device on. Refer to
Running IF, NMES and PDC Treatment Program in the Operation section.
NMES Manual Treatments
The clinician sets up and stores one manual muscle stimulation treatment.
These programs can be set up using a single channel output or two channel
outputs. From this screen the following treatments can be edited:
•
•
•
•
Simultaneous
Alternative
LAG
Single Channel
NMES Manual Program Selection Screen
60
67
926940_IF3Wave_Guts_Fr.indd 60
IF 3wave User’s Manual
ua
IF 3WAVEE User’s Manua
al
2/27/14 8:57 PM
Clinician Setup
The clinician sets the Ramp Up, On Time, and Ramp Down parameters for
each channel. Then the Pulse Width, Pulse Rate, Off Time, and Treatment time
are set. Refer to the Specifications section for mode specifications.
NOTE: The screens and set up procedure for the Simultaneous and Alternative
programs are the same.
Clinician Setup
NMES Simultaneous or Alternative Treatments
NMES Simultaneous Set Channel 1 Screen
Top Portion
Bottom Portion
NMES Simultaneous Setup Screens
To set the Simultaneous and Alternative parameters:
1. Highlight the appropriate treatment on the NMES Manual screen and
press the Select button. The program’s Set Ch1 screen appears, and
the first parameter is highlighted.
2. Press the Value button to scroll through the preset values until the
desired one is found.
3. Press the Select button. The next parameter is highlighted.
IF
User’s Manual
Manual
IF
F 3wave
3WAVEE User’s
926940_IF3Wave_Guts_Fr.indd 61
6168
2/27/14 8:57 PM
Clinician Setup
p
Clinician Setup
4.
Repeat steps 2 and 3 to set the values for all parameters. When finished,
the program’s treatment time and amplitude screen appears. The amplitude
is set at zero, which the patient adjusts following the clinician’s direction.
5. Press the Save button. Saving a program puts it in the Program List.
A screen appears and asks if another program should be added.
6. Do one of the following.
Y button to go back to the Select Stim Type screen.
a. Press the Yes
b. Press the No button to go to the Setup screen.
button
NOTE: To return to the Setup screen, press and release the
twice within two seconds and press again to turn the device on. Refer to
Running IF, NMES and PDC Treatment Program in the Operation section.
NMES LAG Treatment
On the first screen, the clinician sets the Ramp Up, On Time, Ramp Down, and
Off Time parameters for Channel 1. The same parameters, plus Lag Time, for
Channel 2 are set. Finally the Lag parameters are set. Refer to the Specifications
section for mode specifications.
Bottom Portion
T Portion
Top
NMES LAG Setup Screen
To set the LAG parameters:
1. Highlight the LAG treatment on the NMES Manual screen and press
the Select button. The NMES LAG Set Ch1 screen appears.
2. Press the Value button to scroll through the preset values until the
desired one is found.
62
69
IF IF
3wave
ua
3WAVEEUser’s
User’sManual
Manua
al
Clinician Setup
3. Press the Select button. The next parameter is highlighted.
5. Press the Save button. Saving a program puts it in the Program List.
A screen appears and asks if another program should be added.
6. Do one of the following.
Clinician Setup
4. Repeat steps 2 and 3 to set the values for all parameters. When
finished, the program’s treatment time and amplitude screen
appears. The amplitude is set at zero, which the patient adjusts
following the clinician’s direction.
Y button to go back to the Select Stim Type screen.
a. Press the Yes
b. Press the No button to go to the Setup screen.
button twice
NOTE: To return to the Setup screen, press and release the
within two seconds and press again to turn the device on. Refer to
Running IF, NMES and PDC Treatment Program in the Operation section.
NMES Single Channel Treatment
On this screen, the Ramp Up, On Time, Ramp Down, Off Time, and Pulse
Width parameters are set up. Refer to the Specifications section for mode
specifications.
NMES Single Channel Setup Screen
To set the Single Channel parameter:
1. Highlight the Single Channel treatment on the NMES Manual screen
and press the Select button. The NMES Single Ch Set screen appears
and the first parameter is highlighted.
2. Press the Value button to scroll through the preset values until the
desired one is found.
IF
User’s Manual
Manual
IF
F 3wave
3WAVEE User’s
926940_IF3Wave_Guts_Fr.indd 63
6370
2/27/14 8:57 PM
Clinician Setup
Clinician Setup
. Press the Select button. The next parameter is highlighted.
4. Repeat steps 2 and 3 to set the values for all parameters. When
finished, the program’s treatment time and amplitude screen appears.
The amplitude is set at zero, which the patient adjusts following the
clinician’s direction.
5. Press the Save button. Saving a program puts it in the Program List.
A screen appears and asks if another program should be added.
6. Do one of the following.
a. Press the Yes
Y button to go back to the Select Stim Type screen.
b. Press the No button to go to the Setup screen.
NOTE: To return to the Setup screen, press and release the
button
twice within two seconds and press again to turn the device on. Refer to
Running IF, NMES and PDC Treatment Program in the Operation section.
Setting Up Combination IF/NMES Programs
The combination of IF and NMES programs offers two preset treatments which
are not adjustable. Refer to the Specifications section for mode specifications.
•
•
COMBO Low Back
COMBO Neck
Combination IF/NMES Treatment Selection Screen
7164
926940_IF3Wave_Guts_Fr.indd 64
IF IF
3wave
ua
3WAVEEUser’s
User’sManual
Manua
al
2/27/14 8:57 PM
Clinician Setup
To set the combination IF/NMES treatments:
2. Press the Select button. The program’s treatment time and amplitude
screen appears. The amplitude is set at zero, which the patient adjusts
following the clinician’s direction.
3. Press the Save button. Saving a program puts it in the Program List.
A screen appears and asks if another program should be added.
Clinician Setup
1. Highlight the desired treatment on the COMBO (IF/NMES) screen.
4. Do one of the following.
Y button to go back to the Select Stim Type screen.
a. Press the Yes
b. Press the No button to go to the Setup screen.
NOTE: To return to the Setup screen, press and release the
button
twice within two seconds and press again to turn the device on. Refer to
Running IF, NMES and PDC Treatment Program in the Operation section.
Setting Up PDC Programs
The PDC (Pulsed Direct Current) offers four treatments. The treatment may be
run using one or two channels. When using two channels, both channels deliver
a net DC output. Refer to the Specifications section for mode specifications.
NOTE: If only one treatment area is required, select the C1 pdc+red active or
C1 pdc–red active program and connect the lead wire to the Ch1 output jack.
•
•
Channel 1 PDC (+)
Channel 1 PDC (–)
PDC Treatment Selection Screen
IF
User’s Manual
Manual
IF
F 3wave
3WAVEE User’s
926940_IF3Wave_Guts_Fr.indd 65
6572
2/27/14 8:57 PM
Clinician Setup
Clinician Setup
NOTE: If two treatment areas are required, select the C1/C2 pdc+red active or
C1/C2 pdc–red active program and connect both lead wires to the device in the
Ch1 and Ch2 output jacks. Refer to Reverse Splitter in the Components section.
•
•
Channels 1 and 2 PDC (+)
Channels 1 and 2 PDC (–)
To set the PDC (+) or PDC (–) parameters:
The setup procedures are the same for the Channel 1,
and Channels 1 and 2 treatments.
1. Highlight the desired treatment on the PDC Programs screen and press the
Select button. The program’s treatment time parameter screen appears.
2. Press the Value button to set the treatment time.
3. Press the Select button. The program’s treatment time and amplitude
screen appears. The amplitude is set at zero, which the patient adjusts
following the clinician’s direction.
4. Press the Save button. Saving a program puts it in the Program List.
A screen appears and asks if another program should be added.
5. Do one of the following.
a. Press the Yes
Y button to go back to the Select Stim Type screen.
b. Press the No button to go to the Setup screen.
NOTES:
button twice within
To return to the Setup screen, press and release the
two seconds and press again to turn the device on. Refer to Running IF,
NMES and PDC Treatment Program in the Operation section.
The large single electrode (Dispersal Electrode) is used for one channel and
two channel PDC treatments.
The reverse splitter is connected to the lead wires when using two channel
PDC. The black pins from both Ch1 and Ch2 must be connected to the female
connectors on the reverse splitter. The pin connector on the reverse splitter
should be connected to the large dispersive electrode for the device to work
properly. The reverse splitter is not used for one channel PDC treatments.
66
73
926940_IF3Wave_Guts_Fr.indd 66
IF IF
3wave
ua
3WAVEEUser’s
User’sManual
Manua
al
2/27/14 8:57 PM
Clinician Setup
The default language is English. The IF 3WAVE can be used and programmed in
English, Spanish (USA), and French (Canada). When the desired language is
selected, all functions are displayed in that language. The IF 3WAVE can be set
up in one language and then changed for a patient who reads one of the other
languages.
Clinician Setup
Selecting the Language (English)
Select Language Screen
To choose a different language:
1. Scroll to the desired language.
2. Press the Select button.
Editing Programs
Editing Programs
From this screen, you can choose from two options:
•
•
Edit Program List – Allows you to delete programs from the
Program List screen.
Edit Program Setup – Allows you to edit existing programs in the
Program List screen.
Edit Programs Screen
IF
User’s Manual
IF
F 33wave
WAVE
E User’s Manual
926940_IF3Wave_Guts_Fr.indd 67
6774
2/27/14 8:57 PM
ClinicianSetup
Setup
Clinician
Clinician Setup
Edit Program List
The Program List holds up to 10 programs. These can be a combination of
preset and custom programs. All programs, except the IF Continuous Treatment
program, can be deleted from the list. The IF Continuous program is always at
the top of the list. The order in which the programs are listed can be changed.
Edit Program List Selection Screen
To delete a program from the list:
1. On the Setup screen, highlight Edit Programs and press the Select
button. The Edit Programs screen appears.
2. Highlight Edit Program List and press the Select button.
The Edit Program List screen appears with a list of current programs.
3. Highlight the program you want to delete and press the Delete button.
4. When finished, press the Back button to return to the Edit Program
List screen.
5. To return to the Setup screen, press the Back button again.
T move a program up in the list:
To
1. On the Setup screen, highlight Edit Program List and press the
Select button. The Edit Program List screen appears with a list of
current programs.
2. Highlight the program you want to move up and press the Up button.
3. When finished, press the Back button to return to the Edit Program
List screen.
4. To return to the Setup screen, press the Back button again.
68
75
926940_IF3Wave_Guts_Fr.indd 68
IF IF
3wave
ua
3WAVEEUser’s
User’sManual
Manua
al
2/27/14 8:57 PM
Clinician Setup
The clinician can edit existing programs without having to delete the program and
setting it up again. This feature can also be used to edit an existing program and
save it as a new program. The parameters of preset treatments cannot be edited.
Clinician Setup
Edit Program Setup
Edit Program Setup Screen
To edit an existing program:
1. On the Setup screen, highlight Edit Programs and press the Select
button. The Edit Program Setup screen appears.
2. Highlight Edit Program Setup and press the Select button. The Edit
Program Setup screen appears with a list of current programs.
3. Highlight the program to be edited and press the Select button.
A screen with the parameters for the selected program appears.
4. Edit the settings as needed. For assistance, see the appropriate
procedures in this section. After completing the last screen, a screen
prompts whether to save the program or edit another one.
. Do one of the following:
a.
Highlight Save Changes and press the Select button.
This saves the program with the same name.
b. Highlight Save as New and press the Select button.
This saves the program with a new name.
c.
Highlight Back to Edit Program and press the Select button.
This returns to the Edit Program List screen.
When completed, a message screen appears confirming that the
program was saved.
IF
User’sManual
Manual
IF
F 33wave
WAVE
E User’s
926940_IF3Wave_Guts_Fr.indd 69
6976
2/27/14 8:57 PM
Clinician Setup
Clinician Setup
Enabling/Disabling System Sound
1. On the Setup screen, highlight System Sound and press the
select button. Available options appears and ON is highlighted
2. Press the Arrow button to select the desired option
3. When completed press the Select button
Enable or Disable the Auto Lock
The auto lock feature prevents accidental changes to the amplitude output
during treatment. It locks the amplitude 30 seconds after the patient has set
it. The patient can unlock the setting temporarily to adjust the amplitude. By
default, the auto lock feature is enabled for the IF and PDC programs and
disabled for the NMES program.
Auto Lock Function Screen
To enable or disable the auto lock:
1.
With the IF 3WAVE turned off, press and hold the Ch1 button while turning
the device on. The Auto Lock Function screen appears.
2. Use the Ch1
or
buttons to highlight the parameter.
3. Use the Ch2 or buttons to toggle between
On and Off.
Note: Change will be applied at next power up.
4. When finished, turn the device off.
IF
F 3WAVEE User’s Manual
70
926940_IF3Wave_Guts_Fr.indd 70
78
IF 3wave User’s Manual
2/27/14 8:57 PM
Clinician
Setup
ClinicianSetup
Clinician Setup
Displaying the Serial Number
Each IF 3WAVE has its own serial number, which should be recorded.
Device Serial Number Screen
To display the serial number:
1. With the IF 3WAVE turned off, press and hold the Function 2 button
while turning the device on. The Device Serial Number screen appears.
2. When finished, turn the device off.
Notes
IFIF
F3wave
3WAVEE User’s
User’s Manual
Manual
926940_IF3Wave_Guts_Fr.indd 71
71 80
2/27/14 8:57 PM
Specifications
General Specifications
Parameters
Device Specifications
Dimensions
3.89 x 6.33 x 1.42 in. (9.7 x 16.0 x 3.6 cm)
Weight
12 oz. (350 gm) with battery
Power Source
3.6 Vdc rechargeable Lithium ion battery, 3000 mAh.
Electrical Protection
Rating
Type BF equipment, battery-operated
Lead Wire Rating
Complies with 21 CRF Part 898
(performance standards for electrode lead wires)
Ambient Operating
Temperature: –4 to 104 °F (–20 to 40 °C)
T
Conditions
Relative Humidity: 65% ± 20%
Atmospheric Pressure: 700 to 1060 hPa (0.69 to 1.05 atm)
Shipping and Storage
Temperature: –4 to 95 °F (–20 to 35 °C)
Condition (1 year)
r
Relative Humidity: 65% ± 20%
Atmospheric Pressure: 700 to 1060 hPa (0.69 to 1.05 atm)
IF
F72
3WAVEE User’s Manual
926940_IF3Wave_Guts_Fr.indd 72
IF 3wave User’s Manual
82
2/27/14 8:57 PM
Specifications
ModeSpecification
Specification
IFIFMode
IF Mode
Parameters
Device Specifications
Waveform
Biphasic square wave, zero DC
125 µs
IF Waveform
Output Frequency
Channel 1 – Fundamental frequency: 4000 Hz fixed
Channel 2 – Selectable frequency: 4001 to 4150 Hz
Interference frequency: 1 to 150 Hz
Pulse Width
125 µs at 4000 Hz, 120.5 ms at 4150 Hz
Maximum Charge
12.5 µ Coulombs (sum of two channels)
Per Pulse
Output Current
0 to 50 mA constant voltage into 500
load,
selectable in 1 mA increments
Output Voltage
0 to 25 V into 500
IF83
3wave User’s Manual
926940_IF3Wave_Guts_Fr.indd 73
load, 0 to peak
73 al
IF 3WAVEE User’s Manua
2/27/14 8:57 PM
Specifications
Specifications
IF Preset Program
Preset
Treatment
Treatment
Time
Low Back
Pain
40 min.
Neck Pain
40 min.
Knee Pain
40 min.
Shoulder Pain
40 min.
Wrist Pain
40 min.
Ankle Pain
40 min.
IC Pain
40 min.
F 374
WAVE
IF
E User’s Manual
926940_IF3Wave_Guts_Fr.indd 74
1st 20 min.
2nd 20 min.
1st 20 min.
Sweep Frequency
Range 1 Hz
Increment
60 Hz to 150 Hz
5 Hz to 10 Hz
60 Hz to 150 Hz
2nd 20 min.
1st 20 min.
2nd 20 min.
1st 20 min.
2nd 20 min.
1st 20 min.
1 Hz to 10 Hz
60 Hz to 150 Hz
1 Hz to 10 Hz
60 Hz to 150 Hz
1 Hz to 10 Hz
80 Hz to 150 Hz
2nd 20 min.
1st 20 min.
2nd 20 min.
1st 20 min.
1 Hz to 10 Hz
100 Hz to 150 Hz
1 Hz to 10 Hz
2nd 20 min.
10 Hz
Treatment
Segment
100 Hz
Sweep Ramp
Time
24 sec. up 24
sec. down
24 sec. up 24
sec. down
24 sec. up 24
sec. down
24 sec. up 24
sec. down
24 sec. up 24
sec. down
24 sec. up 24
sec. down
—
IF 3wave User’s Manual
84
2/27/14 8:57 PM
Specifications
IF Continuous Program
Parameters
Device Specifications
Interference (Beat)
1 to 150 Hz, selectable in 1 Hz increments
Frequency
4000 to 4150 Hz
Treatment time
10 to 60 minutes, selectable in 10 minute increments
Sweep
Program
IF IF
Sweep
Program
Program
Sweep
Frequency
Range
1
1 to 150 Hz
2
1 to 10 Hz
3
30 to 70 Hz
4
80 to 150 Hz
IF85
3wave User’s Manual
926940_IF3Wave_Guts_Fr.indd 75
Cycle Time
(Selectable)
6 sec. up / 6 sec. down
12 sec. up / 12 sec. down
24 sec. up / 24 sec. down
6 sec. up / 6 sec. down
12 sec. up / 12 sec. down
24 sec. up / 24 sec. down
6 sec. up / 6 sec. down
12 sec. up / 12 sec. down
24 sec. up / 24 sec. down
6 sec. up / 6 sec. down
12 sec. up / 12 sec. down
24 sec. up / 24 sec. down
Treatment Time
10 to 60 min.
in 5 min. increments
10 to 60 min.
in 5 min. increments
10 to 60 min.
in 5 min. increments
10 to 60 min.
in 5 min. increments
75 al
IF 3WAVEE User’s Manua
2/27/14 8:57 PM
Specifications
NMES Mode Specification
Parameters
Device Specifications
Waveform
Biphasic square wave, zero DC
NMES Waveform
Output Frequency
10 to 80 Hz, selectable in 5 Hz increments
Pulse Width
70 to 300 µs, selectable in 10 µs increments
Maximum Charge
30 µ Coulombs
Per Pulse
Output Current
0 to 100 mA constant current into 1000
in 1 mA increments
Output Voltage
0 to 100 V into 1000
Ramp Up Time
0 to 10 seconds in 1 second increments
OnTime
1 to 30 seconds in 1 second increments
Ramp Down Time
0 to 10 seconds in 0.5 second increments
Off Time
1 to 60 seconds in 1 second increments
LAG Time
0 to 15 seconds in 1 second increments
Treatment Time
10 to 60 minutes in 5 minute increments
IF
F 376
WAVE
E User’s Manual
926940_IF3Wave_Guts_Fr.indd 76
load, selectable
load, 0 to peak
IF 3wave User’s Manual
86
2/27/14 8:57 PM
Specifications
Specifications
p
NMES
Preset
Program
NMES
Preset
Program
Preset
Treatment
Treatment
Time
Frequency
Pulse
Width
Low Back Spasm
M d Specification
Specificatio 300 µs
PDConMode
Ramp Up
Time
On
Time
Ramp
Down
Time
Off Time
2 sec.
8 sec.
2 sec.
2 sec.
Neck/Upper Back
Spasm Reduction
20 min.
50 Hz
150 µs
3 sec.
6 sec.
3 sec.
2 sec.
Mid/Low Back
Strengthening
15 min.
35 Hz
300 µs
2 sec.
10 sec.
2 sec.
10 sec.
Trigger Point
Therapy
30 min.
50 Hz
300 µs
3 sec.
10 sec.
3 sec.
10 sec.
Quadriceps
Strengthening
15 min.
50 Hz
300 µs
3 sec.
10 sec.
3 sec.
10 sec.
Quadriceps
Re-eductation
15 min.
50 Hz
300 µs
3 sec.
10 sec.
3 sec.
30 sec.
PDC Mode Specification
Parameters
Device Specifications
Waveform
Biphasic square wave, net zero DC
Triphasic square wave, time average DC component
300 µA maximum
PDC Biphasic Waveform
IF873wave User’s Manual
926940_IF3Wave_Guts_Fr.indd 77
77al
IF 3WAVEE User’s Manua
2/27/14 8:57 PM
Specifications
PDC Triphasic Waveform
Output Frequency
Biphasic 278 Hz
Triphasic 222 Hz
Pulse Width
60 µs
Maximum Charge
Per Pulse
6 µ Coulombs
Output Current
0 to 100 mA constant current into 1000
in 1 mA increments
Output Voltage
0 to 100 V into 1000
Ramp Up Time
0 to 90% maximum of set output at a rate of 10 mA
per seconds 95 to 100% maximum of set output in next
5 minutes
On Time
18 to 48 minutes selectable at 5 minute increments
Ramp Down Time
Maximum to 0 for last 7 minutes
Treatment Time
30 to 60 minutes, selectable at 5 minute increments
78
IF
F 3WAVEE User’s Manual
926940_IF3Wave_Guts_Fr.indd 78
load, selectable
load, 0 to peak
IF 3wave User’s Manual
88
2/27/14 8:57 PM
Specifications
IF/NMES Combination Mode Specification
IF/NMES Combination Preset Treatments
Preset
Treatment
Total
Treatment Time
First 20 Minutes Second 20 Minutes
IF Mode
Sweep: 60 to
120 Hz
Low Back
60 min.
Ramp: 6 sec. up
6 sec. down
IF Mode
Sweep: 60 to
120 Hz
Neck
60 min.
Ramp: 6 sec. up
6 sec. down
IF 89
3wave User’s Manual
926940_IF3Wave_Guts_Fr.indd 79
NM Mode
80 Hz
300 us Pulse Width
Ramp:
Up 2 sec.
On 8 sec.
Down 2 sec.
Off 2 sec.
NM Mode
80 Hz
300 us Pulse Width
Ramp:
Up 3 sec.
On 6 sec.
Down 3 sec.
Off 2 sec.
Last 20 Minutes
IF Mode
Sweep: 5 to 10 Hz
Ramp: 12 sec. up
12 sec. down
IF Mode
Sweep:1 to 10 hz
Ramp: 12 sec. up
12 sec. down
79 al
IF 3WAVEE User’s Manua
2/27/14 8:57 PM
Troubleshooting
Problem
Possible Cause
Solution
Stimulation weak, even
at maximum intensity
Old or dried out
electrodes
Replace electrodes
Stimulation weak
with fresh batteries
Poor electrode contact
Reapply electrodes,
secure firmly
Worn electrodes
Replace electrodes
Poor electrode
contact
Reapply electrodes
secure firmly
Damaged or worn lead
wires and/or electrodes
Replace lead wires
and/or electrodes
Batteries drained
Replace/recharge
batteries
Therapy time complete
Restart stimulator
Stimulation weakens
within minutes after start
Normal “adaptation”
response
Increase intensity
Unintentional muscle
contractions
Intensity too high
Decrease intensity
Stimulation
uncomfortable
Intensity too high
Decrease intensity
Improper electrode
placement
Reposition electrodes
Poor electrode contact
Reapply electrodes,
secure firmly
f
Stimulation ineffective
Improper electrode
placement
Reposition electrodes
“Open” message
displayed for one
or both channels
Damaged, worn or
loose lead wires
Replace or resecure
lead wires
Electrodes not
properly applied
Reapply electrodes,
secure firmly
“Battery Low”
message displayed
Weak battery
Replace/recharge
batteries
Display won’t come on
when power is turned on
Weak battery
Replace/recharge
battery
Stimulation stops
80
IF
F 3WAVEE User’s Manual
926940_IF3Wave_Guts_Fr.indd 80
IF 3wave User’s Manual
90
2/27/14 8:57 PM
Troubleshooting
Problem
Possible Cause
Solution
Unable to turn device
off
f during treatment
Improper shut down
procedure
button
Press
twice, rapidly
LED battery indicator
does not illuminate
during charging
Battery not in
charger base
Slide battery into
charger base
firmly
Charger base not
plugged in
Plug power adaptor into
110 Vac outlet
If problems continue, call Empi’s Technical Service department
at 1-800-328-2536.
IF 91
3wave User’s Manual
926940_IF3Wave_Guts_Fr.indd 81
81 al
IF 3WAVEE User’s Manua
2/27/14 8:57 PM
Glossary
This Glossary contains definitions of terms and abbreviations that apply to the
IF 3WAVE system and are used within this manual.
Term
Definition
Alternate treatment
The output of channels 1 and 2 operate at different times.
Amplitude
The level of output.
Chronic pain
Continuous, long-term pain.
Clinician
Licensed health care professional such as physician, nurse,
or physical therapist.
Continuous
stimulation
An output mode used by the patient to adjust the
stimulation to a maximum comfort level.
Electrode
A medium used to apply electric current.
Frequency
The number of pulses per second used to describe pulsed
electrical currents.
IF
Interferential modality. A type of electrotherapy that uses two
separate electrical frequencies to stimulate large impulse nerve
fibers. Helps relieve pain and increase fluid movement.
L
LAG
treatment
The output for channel 2 starts after the output of channel 1.
LCD
Liquid Crystal Display. The user interface where all messages
and information appears. The user uses this to interact
with the stimulator.
Modality
The stimulation type. IF, NMES, Combination of IF and
NMES, and PDC.
NMES
Neuromuscular Electrical Stimulation modality. The use of
electrical stimulation to contract a muscle. The treatment
output cycle for each channel occurs simultaneously.
Off time
The time period of the treatment where there is no stimulation.
Patient
The person who is undergoing medical investigation or treatment.
PDC
Pulsed Direct Current modality.
Program type
The type of program available within a modality such as
sweep, continuous, manual set, and preset.
Ramp down
Time period of the treatment that decreases from the level
that the patient set during continuous stimulation down to
no stimulation.
82
IF
F 3WAVEE User’s Manual
926940_IF3Wave_Guts_Fr.indd 82
IF 3wave User’s Manual
92
2/27/14 8:57 PM
Glossary
Term
Definition
Ramp up
Time period of the treatment that increases from no
stimulation to the level that the patient set during
continuous stimulation.
Simultaneous
treatment
The output for channels 1 and 2 start at the same time.
Single Channel
treatment
Output is at only channel 1.
Treatment time
The total time the patient is receiving treatment from the device.
Treatment type
The type of treatment within a program type such as for low
back pain, neck pain, and quadriceps reduction.
IF 3wave User’s Manual
93
926940_IF3Wave_Guts_Fr.indd 83
83
a8:57
l PM
IF 3WAVEE User’s 2/27/14
Manua
Index
A
Adjusting amplitude 40
IF, PDC, and NMES programs 35
Applying electrodes 32
Attaching belt clip 47
Attaching belt clip tab 46
Auto lock 37
enable and disable 70
B
Back button 49
Batteries 15
Battery
charging 28
installing 26
LED indicator 28
storing 29
Battery compartment 17
Battery indicator 42
Belt clip 14, 24, 46
Belt clip, attaching 46
Belt clip tab 46
Button identification 34
C
Carbon rubber electrodes
applying to skin 33
connecting lead wire 30
Care, IF 3WAVE system 42
Carrying case 24
Changing a therapy session
quick reference 13
Charger base 18
Charging the battery 27
Cleaning 42
Clinician setup 49
Combination IF/NMES setup 64
Components 15–25
batteries 18
battery compartment 17
belt clip 24
carrying case 24
documentation 24
IF 3WAVE 16
lead wires 19
password card 51
power adaptor 19
skin care 41
84
926940_IF3Wave_Guts_Fr.indd 84
Connections
lead wires to device 31
lead wires to electrodes 29
D
Delete button 50
Deleting a program 68
Disable auto lock 70
Display serial number 71
Disposable, multi-day electrodes,
connecting lead 29
E
Editing program list 68
deleting and moving 68
Editing program setup 69
Editing programs 67
Electrode description
carbon rubber 23
disposable, multi-day 21
reusable/self-adhering 21
Electrodes
applying to skin 32
connecting lead wires 30
Enable auto lock 70
Ending therapy session 40
quick reference 14
Entering password 51
Entering setup mode 51
F
Function buttons 49
G
General specifications 72
Glossary 82-86
IF 3wave User’s Manual
2/27/14 8:57 PM
Index
I
N
IF mode specification 73
IF program setup 51
IF setup
continuous treatment 56
preset treatments 55
sweep treatment 58
IF treatment program, running 35
IF/NMES combination. See Combination
IF/NMES setup
IF/NMES combination mode
specification 79
IF/NMES combo program, running 38
Input password 51
Installing the battery 26
NMES mode specification 76
NMES program setup 59
NMES setup
alternative treatment 59
lag treatment 62
manual set treatments 60
preset treatments 59
simultaneous treatment 61
single channel treatment 63
NMES treatment programs 37–39
No button 50
L
Language
setup 67
user instructions 7
Lead wires
connecting to device 31
connecting to electrodes 29
reverse splitter 20
LED indicator
battery 28
M
Making selections, setup 49
Messages
battery indicator 43
low battery 43
open lead 44
program completed 37, 39
recovery 44
Modalities 53
Modality selection 53
Moving a program 68
Multiple-day electrodes 32
IF 3wave User’s Manual
926940_IF3Wave_Guts_Fr.indd 85
O
Open lead 44
Operation overview 25
Output jacks 17
P
Password
card 51
entering 51
PDC program setup 65
PDC treatment programs 37–39
Preparation, skin for therapy 32
Program, editing 67
Program list, edit 68
Program list full message 61
Program setup
combo IF/NMES 64
IF 54
NMES 59
PDC 65
Q
Quick reference 13
85
2/27/14 8:57 PM
Index
R
T
Reusable, self-adhering electrodes
applying to skin 32
connecting lead wire 31
Reverse splitter 20
Running
IF program 35
IF/NMES combo program 38
NMES program 35
PDC program 35
Running therapy session 35
quick reference 13
Therapy, ending a session 14
Troubleshooting 80
S
Save button 50
Screen
Auto Lock Function 70
Combo (IF/NMES) 64
Device Serial Number 71
Edit Program List 67
Edit Program Setup 67
Edit Programs 67
IF Continuous 56
IF Preset 55
IF Programs 54
IF Sweep 58
Input Password 51
Last Used Program 36
NMES LAG 62
NMES Manual Set 60
NMES Preset 59
NMES Programs 59
NMES Simultaneous 61
NMES Single Channel 63
PDC Programs 65
Program List 35
Program Name
Battery indicator 42
Check leads 44
Key unlock 40
Program Complete 37
86
926940_IF3Wave_Guts_Fr.indd 86
U
Up button 49
Using belt clip 24
Using Charger base
charging the battery 28
Using the IF 3WAVE 34
V
Value button 50
Y
Yes button 50
IF 3wave User’s Manual
2/27/14 8:57 PM
Replacement Parts
The following replacement parts can be ordered from Empi at 1-800-328-2536:
Part
Part Number
IF 3WAVE Stimulator
7110S
Battery- Lithium Ion Rechargable
(North America Only)
360102
Carrying Case
370000 series
Charger Base
(North America Only)
201800
Power Supply
590029
Electrodes - Optional
Refer to Clinic Services
Lead Wires
620000 series
Reverse Splitter
620049
User’s Manual
926940
IF33wave
User’sManual
Manual
IF
F
WAVE
E User’s
926940_IF3Wave_Guts_Fr.indd 87
87
98
2/27/14 8:57 PM
Notes
Caution
Federal Law (USA) restricts this device to sale by or on the order of a physician
(or licensed practitioner).
The following symbols are located on the back of the IF 3WAVE stimulator:
IEC 417-5333 Type BF Applied Part
IEC 348 Attention, consult accompanying documents
Lead wires comply with the Performance Standard for
electrode lead wires (21 CFR part 898)
Electronic Testing Lab, indicates product meets US and
Canadian product safety standards
Susceptible to electro-static charge
CSA
Canadian Standards Association
This device complies with UL 60601-1 and CSA C22.2 No.601-1-M90.
Empi
ISO Certified 13485/12.96
© 2014 Empi 1/14
All Rights Reserved.
88
99
926940_IF3Wave_Guts_Fr.indd 88
IF 3wave User’s Manual
IF 3WAVE User’s Manual
2/27/14 8:57 PM