Download User`s Manual 9000i

Transcript
Owner’s Manual
9357106
Issue 1.1 US
Nokia is a registered trademark of Nokia Corporation, Finland.
©1995-1997 Nokia Mobile Phones Ltd. All rights reserved.
Nokia Mobile Phones operates a policy of continuous improvement. Therefore, we reserve the right to make changes and improvements to any of the
products described in this guide without prior notice.
Nokia Mobile Phones is not responsible for any loss of data, income or any consequential damage howsoever caused.
Geoworks ® application software and GEOS® operating system software copyright © 1990-1996 Geoworks. All rights reserved. United States Patent
5,327,529.
Hardware and software floating point math library copyright © 1984-1991 Dimensions Research, Inc.
ROM-DOS operating system software copyright © 1989-1993 Datalight, Inc.
This product includes software developed by the University of California, Berkeley and its contributors. Copyright 1979, 1980, 1983, 1986, 1988, 1989,
1991, 1992, 1993, 1994 The Regents of the University of California. All rights reserved. The software is provided by The Regents and contributors “as is”
and any express or implied warranties, including, but not limited to, the implied warranties of merchantability and fitness for a particular purpose are
disclaimed. In no event shall The Regents or contributors be liable for any direct, indirect, incidental, special, exemplary, or consequential damages
(including, but not limited to, procurement of substitute goods or services; loss of use, data, or profits; or business interruption) however caused and on
any theory of liability, whether in contract, strict liability, or tort (including negligence or otherwise) arising in any way out of the use of this software,
even if advised of the possiblity of such damage.
The GEOS® software of this product includes Nimbus Q from Digital Typeface Corp. and typefaces from URW, GmbH.
This device contains Embedded BIOS(TM) software Copyright 1995 General Software, Inc. Embedded BIOS and General Software are trademarks of
General Software, Inc.
This device contains TrueFFS(R) Flash File System software Copyright 1995 M-Systems Flash Disk Pioneers Ltd. TrueFFS is a registered trademark of MSystems Flash Disk Pioneers Ltd., and the TrueFFS(R) Flash File System software is protected by US Patent No. 5,404,485.
Class 1 fax drivers copyright © 1992-1995 Global Village Communication, Inc.
HP Database Engine Version 1.0 copyright © Hewlett-Packard Company 1994. All rights reserved.
The PPP software is copyright © 1991, 1992, 1993, 1994 Morning Star Technologies, all rights reserved. It contains software developed at Carnegie
Mellon University, which is copyright © 1989 Carnegie Mellon University, all rights reserved. It contains software developed at the University of
California, Berkeley, which is copyright © 1989 Regents of the University of California, all rights reserved. It contains software that is copyright © 1990,
RSA Data Security, Inc., all rights reserved.
C-client Internet mail routines original version copyright 1988 by the Leland Stanford Junior University, copyright 1995 by the University of Washington.
The University of Washington and the Leland Stanford Junior University disclaim all warranties, express or implied, with regard to this software,
including without limitation all implied warranties of merchantability and fitness for a particular purpose, and in no event shall the University of
Washington or the Leland Stanford Junior University be liable for any special, indirect or consequential damages or any damages whatsoever resulting
from loss of use, data or profits, whether in an action of contract, tort (including negligence) or strict liability, arising out of or in connection with the
use or performance of this software.
This product includes software based in part on the work of the independent JPEG group.
CellularWare is a trademark of Nokia Mobile Phones.
AT is a trademark of Hayes Microcomputer Products, Inc.
Hayes is a registered trademark of Hayes Microcomputer Products, Inc.
Microsoft and MS-DOS are registered trademarks and Windows is a trademark of Microsoft corporation.
Geoworks® and GEOS® are Registered Trademarks of Geoworks, and GeoDOS is a Trademark of Geoworks in the United States of America and other
countries.
The products described in this manual conform to the European Council directives EMC Directive (89/336/EEC) and TTE Directive (91/263/EEC).
9357106
Issue 1.1 US
FOR YOUR SAFETY Read these simple
guidelines. Breaking the rules may be
dangerous or illegal. More details are
included in Chapter 16 "Important
safety information" on page 16-1.
ROAD SAFETY COMES FIRST Don’t
use the communicator while driving;
park!
SWITCH OFF IN HOSPITALS Follow
any regulations or rules. Switch off
near medical equipment.
USE SENSIBLY Use only in the normal
position (to ear). Don’t touch the antenna unnecessarily.
SWITCH OFF WHEN REFUELING
Don’t use the phone interface at a
refueling point.
SWITCH OFF NEAR BLASTING Always
follow special regulations. Don’t use
near chemicals, fuel, etc.
MAKING CALLS VIA THE PHONE
INTERFACE Close the cover and switch
on the phone interface. Enter the phone
number, including the area code, then
press
. To end a call press
. To
answer a call press
.
SWITCH OFF PHONE INTERFACE IN
AIRCRAFT Mobile phones can cause
interference. Using them in an aircraft
is illegal.
QUALIFIED SERVICE FACILITY Only
qualified service personnel should repair
or install equipment. Use only approved
accessories and batteries.
INTERFERENCE All mobile phones may
get interference which could affect
performance.
EMERGENCY CALLS Close the device
cover. If the phone interface is not on,
switch it on (press the
key). Hold
briefly to clear the display. Enter the
emergency number, then press
.
Give your location and mobile number.
Do not end the call until told to do so.
MAKE BACKUP COPIES Remember to
make backup copies of all important
data.
INFRARED PRECAUTIONS Do not
point the IR beam at anyone’s eye or allow it to interfere with other IR devices.
CONNECTING TO OTHER DEVICES
When connecting the communicator to
any other device, read its user’s guide
for detailed safety instructions. Do not
connect incompatible products.
Table of contents
Table of contents
1.
Introduction . . . . . . . . . . . . . . . . . . . . . . . . . . . . 1-1
Things to remember . . . . . . . . . . . . . . . . . . . . . . . . . . . . . . . . . 1-2
2.
Getting started . . . . . . . . . . . . . . . . . . . . . . . . . . 2-1
First start-up . . . . . . . . . . . . . . . . . . . . . . . . . . . . . . . . . . . . . . . 2-1
SIM card . . . . . . . . . . . . . . . . . . . . . . . . . . . . . . . . . . . . . . . . . . 2-2
Connectors . . . . . . . . . . . . . . . . . . . . . . . . . . . . . . . . . . . . . . . . 2-4
Battery . . . . . . . . . . . . . . . . . . . . . . . . . . . . . . . . . . . . . . . . . . . 2-5
Communicator interface . . . . . . . . . . . . . . . . . . . . . . . . . . . . . 2-7
Communicator applications . . . . . . . . . . . . . . . . . . . . . . . . . . 2-9
Indicators . . . . . . . . . . . . . . . . . . . . . . . . . . . . . . . . . . . . . . . . 2-10
Special features . . . . . . . . . . . . . . . . . . . . . . . . . . . . . . . . . . . 2-12
Useful settings information . . . . . . . . . . . . . . . . . . . . . . . . . . 2-15
3.
Contacts . . . . . . . . . . . . . . . . . . . . . . . . . . . . . . . 3-1
Contacts settings . . . . . . . . . . . . . . . . . . . . . . . . . . . . . . . . . . . 3-1
Contact cards . . . . . . . . . . . . . . . . . . . . . . . . . . . . . . . . . . . . . . 3-2
Records . . . . . . . . . . . . . . . . . . . . . . . . . . . . . . . . . . . . . . . . . . . 3-4
4.
Telephone . . . . . . . . . . . . . . . . . . . . . . . . . . . . . . 4-1
Telephone settings . . . . . . . . . . . . . . . . . . . . . . . . . . . . . . . . . . 4-1
Making a call . . . . . . . . . . . . . . . . . . . . . . . . . . . . . . . . . . . . . . 4-4
Conference call . . . . . . . . . . . . . . . . . . . . . . . . . . . . . . . . . . . . . 4-7
5.
Fax . . . . . . . . . . . . . . . . . . . . . . . . . . . . . . . . . . . 5-1
Fax settings . . . . . . . . . . . . . . . . . . . . . . . . . . . . . . . . . . . . . . . . 5-1
Sending faxes . . . . . . . . . . . . . . . . . . . . . . . . . . . . . . . . . . . . . . 5-3
Received faxes . . . . . . . . . . . . . . . . . . . . . . . . . . . . . . . . . . . . . 5-5
6.
Short messages . . . . . . . . . . . . . . . . . . . . . . . . . 6-1
SMS settings . . . . . . . . . . . . . . . . . . . . . . . . . . . . . . . . . . . . . . . 6-2
Sending messages . . . . . . . . . . . . . . . . . . . . . . . . . . . . . . . . . . 6-3
Received messages . . . . . . . . . . . . . . . . . . . . . . . . . . . . . . . . . . 6-5
Business cards . . . . . . . . . . . . . . . . . . . . . . . . . . . . . . . . . . . . . 6-6
7.
Internet . . . . . . . . . . . . . . . . . . . . . . . . . . . . . . . 7-1
Table of contents
Internet glossary . . . . . . . . . . . . . . . . . . . . . . . . . . . . . . . . 7-2
Internet settings . . . . . . . . . . . . . . . . . . . . . . . . . . . . . . . . 7-3
E-mail . . . . . . . . . . . . . . . . . . . . . . . . . . . . . . . . . . . . . . . . 7-5
E-mail settings . . . . . . . . . . . . . . . . . . . . . . . . . . . . . . . . . . . . 7-5
Sending e-mail . . . . . . . . . . . . . . . . . . . . . . . . . . . . . . . . . . . . 7-6
Receiving e-mail . . . . . . . . . . . . . . . . . . . . . . . . . . . . . . . . . . . 7-9
World Wide Web . . . . . . . . . . . . . . . . . . . . . . . . . . . . . . 7-11
WWW settings . . . . . . . . . . . . . . . . . . . . . . . . . . . . . . . . . . . . 7-11
Hotlist . . . . . . . . . . . . . . . . . . . . . . . . . . . . . . . . . . . . . . . . . . 7-12
Connecting to WWW . . . . . . . . . . . . . . . . . . . . . . . . . . . . . . 7-13
Telnet . . . . . . . . . . . . . . . . . . . . . . . . . . . . . . . . . . . . . . . 7-16
Define Telnet connections . . . . . . . . . . . . . . . . . . . . . . . . . . 7-16
Terminal . . . . . . . . . . . . . . . . . . . . . . . . . . . . . . . . . . . . . 7-18
Define Terminal connections . . . . . . . . . . . . . . . . . . . . . . . . 7-18
8.
Notes . . . . . . . . . . . . . . . . . . . . . . . . . . . . . . . . . 8-1
Notes settings . . . . . . . . . . . . . . . . . . . . . . . . . . . . . . . . . . . . . 8-1
Sending documents . . . . . . . . . . . . . . . . . . . . . . . . . . . . . . . . . 8-3
Printing documents . . . . . . . . . . . . . . . . . . . . . . . . . . . . . . . . . 8-4
9.
Calendar . . . . . . . . . . . . . . . . . . . . . . . . . . . . . . . 9-1
Calendar settings . . . . . . . . . . . . . . . . . . . . . . . . . . . . . . . . . .
Monthly schedule . . . . . . . . . . . . . . . . . . . . . . . . . . . . . . . . . .
Daily schedule . . . . . . . . . . . . . . . . . . . . . . . . . . . . . . . . . . . . .
Weekly schedule . . . . . . . . . . . . . . . . . . . . . . . . . . . . . . . . . . .
Calendar booking . . . . . . . . . . . . . . . . . . . . . . . . . . . . . . . . . .
To-do list . . . . . . . . . . . . . . . . . . . . . . . . . . . . . . . . . . . . . . . . .
9-1
9-1
9-2
9-4
9-5
9-6
10. System . . . . . . . . . . . . . . . . . . . . . . . . . . . . . . . 10-1
System settings . . . . . . . . . . . . . . . . . . . . . . . . . . . . . . . . . . . 10-1
Security . . . . . . . . . . . . . . . . . . . . . . . . . . . . . . . . . . . . . . . . . 10-2
User data . . . . . . . . . . . . . . . . . . . . . . . . . . . . . . . . . . . . . . . . 10-5
Fax modem . . . . . . . . . . . . . . . . . . . . . . . . . . . . . . . . . . . . . . 10-5
Connecting to a PC . . . . . . . . . . . . . . . . . . . . . . . . . . . . . . . . 10-6
File transfer . . . . . . . . . . . . . . . . . . . . . . . . . . . . . . . . . . . . . . 10-7
Install/Remove software . . . . . . . . . . . . . . . . . . . . . . . . . . . . 10-8
Backup/Restore . . . . . . . . . . . . . . . . . . . . . . . . . . . . . . . . . . . 10-9
Import/Export contacts . . . . . . . . . . . . . . . . . . . . . . . . . . . . . 10-9
Import/Export calendar data . . . . . . . . . . . . . . . . . . . . . . . 10-10
Data removal . . . . . . . . . . . . . . . . . . . . . . . . . . . . . . . . . . . . 10-10
Table of contents
Memory . . . . . . . . . . . . . . . . . . . . . . . . . . . . . . . . . . . . . . . . . 10-11
About this product . . . . . . . . . . . . . . . . . . . . . . . . . . . . . . . . 10-11
11. Extras . . . . . . . . . . . . . . . . . . . . . . . . . . . . . . . 11-1
Text Web . . . . . . . . . . . . . . . . . . . . . . . . . . . . . . . . . . . . . . . . . 11-1
Calculator . . . . . . . . . . . . . . . . . . . . . . . . . . . . . . . . . . . . . . . . 11-2
Clock . . . . . . . . . . . . . . . . . . . . . . . . . . . . . . . . . . . . . . . . . . . . 11-3
Composer . . . . . . . . . . . . . . . . . . . . . . . . . . . . . . . . . . . . . . . . 11-5
Converter . . . . . . . . . . . . . . . . . . . . . . . . . . . . . . . . . . . . . . . . 11-7
Wireless Data Backup . . . . . . . . . . . . . . . . . . . . . . . . . . . . . . 11-8
12. Document outbox . . . . . . . . . . . . . . . . . . . . . . . 12-1
13. Phone interface . . . . . . . . . . . . . . . . . . . . . . . . 13-1
Display indicators . . . . . . . . . . . . . . . . . . . . . . . . . . . . . . . . . . 13-2
Making a call . . . . . . . . . . . . . . . . . . . . . . . . . . . . . . . . . . . . . 13-3
Receiving a call . . . . . . . . . . . . . . . . . . . . . . . . . . . . . . . . . . . 13-3
Sending DTMF tones . . . . . . . . . . . . . . . . . . . . . . . . . . . . . . . 13-3
Using memory . . . . . . . . . . . . . . . . . . . . . . . . . . . . . . . . . . . . . 13-4
Menu shortcuts . . . . . . . . . . . . . . . . . . . . . . . . . . . . . . . . . . . 13-6
Detailed menus list . . . . . . . . . . . . . . . . . . . . . . . . . . . . . . . . 13-8
Help . . . . . . . . . . . . . . . . . . . . . . . . . . . . . . . . . . . . . . . . . . . . 13-15
14. Troubleshooting . . . . . . . . . . . . . . . . . . . . . . . . 14-1
Communicator activation and system trouble . . . . . . . . . . . 14-1
Establishing communication . . . . . . . . . . . . . . . . . . . . . . . . . 14-2
Connectivity and printing . . . . . . . . . . . . . . . . . . . . . . . . . . . 14-4
Miscellaneous . . . . . . . . . . . . . . . . . . . . . . . . . . . . . . . . . . . . . 14-5
15. Care and maintenance . . . . . . . . . . . . . . . . . . . 15-1
Warranty information . . . . . . . . . . . . . . . . . . . . . . . . . . . . . . 15-1
16. Important safety information . . . . . . . . . . . . . . 16-1
Facts about wireless data transmission . . . . . . . . . . . . . . . . 16-3
17. Index . . . . . . . . . . . . . . . . . . . . . . . . . . . . . . . . . . I-1
Chapter 1 - Introduction
1-1
1. Introduction
Congratulations on purchasing the Nokia 9000i
Communicator, the versatile communications
tool you need to stay connected to the office
when you are out. The Nokia 9000i Communicator, with a mobile phone, messaging device, Internet access terminal and palmtop organizer all
in one compact unit, is more than just the sum
of its components. The communicator applications are designed to work together to provide
you with the information you need when you
need it, where you need it.
This introduction helps you understand how the
Nokia 9000i Communicator operates.
Chapter 2 ”Getting started” on page 2-1 helps
you to begin using the Nokia 9000i Communicator by explaining the “start up procedure” as well
as outlining the special features. A list of commonly used functions and their corresponding
pathways is found at the end of Chapter 2.
The rest of this manual deals with the communicator interface applications and the phone interface functions.
If you are an experienced mobile phone and mobile office user, read at least this introductory
chapter and the "Getting started" chapter. Basic
information about the communicator applications is always available in the context sensitive
help, which can be activated by pressing the Help
button on the communicator interface keyboard.
The phone and communicator interfaces
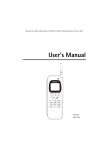
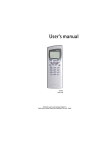
The Nokia 9000i Communicator has two interfaces. The phone interface (Figure 1-1) is on the
Figure 1-1: Phone interface
Figure 1-2: Communicator interface
1-2
device cover, and the communicator interface
(Figure 1-2) is under the cover.
The word “interface” emphasizes the fact that
both of these two aspects of the Nokia 9000i
Communicator use the same resources and work
closely together — they are not separate devices.
For example, when placing a call from the phone
interface, although you may be scrolling the keys
on the keypad or performing a search with the
communicator cover closed, the search engine
will be searching the information within the
communicator interface.
IMPORTANT! Do not switch on the phone
interface when mobile phone use is prohibited or when it may cause interference or
danger (see Chapter 16 ”Important safety
information” on page 16-1.
The phone interface is designed for quickly making and receiving calls. It looks and operates like
other Nokia mobile phones (except that the earpiece and microphone are on the backside of the
device). The phone interface is switched on and
off by pressing the
button on the cover.
Things to remember
The communicator interface has many organizer
and communications applications. The QWERTY
keyboard, command buttons and large display
make using the applications easy. The communicator interface has no power on/off button; it
self-activates when you open the cover and deactivates when you close the cover.
FCC/Industry Canada Notice
Your communicator may cause TV or radio interference (e.g., when using the phone in close
proximity of receiving equipment). The FCC/Industry Canada can require you to stop using your
communicator if such interference cannot be
eliminated. If you need assistance, contact your
home network operator.
This device complies with part 15 of the FCC
rules. Operation is subject to the condition
that this device does not cause harmful
interference.
Caution: Changes or modifications not expressly
approved by Nokia could void the user’s authority
to operate the equipment.
Things to remember
Services
In order to utilize the communication capabilities
of the Nokia 9000i Communicator, you may have
to subscribe to certain services, such as fax, SMS
or data services, separately. If the service requires
a separate phone number or specific settings for
any of these services, they must be stored in the
communicator’s settings. For example,
• To send and receive faxes, your network must
support fax service and your SIM card must
be activated for fax service.
• To use the communicator as a fax modem,
your network must support data service and
your SIM card must be activated for data
service.
• Internet access also requires that data service
is supported by the network you are using and
activated for your SIM card. In addition, to
access the Internet, you must have obtained
an Internet Access Point from an Internet
service provider (contact your retailer for
details).
Access codes
The communicator uses several access codes to
protect against unauthorized use of your communicator and the SIM card. You can make changes
to the lock code, PIN and PUK codes from the
communicator interface in the Security application by pressing Settings. The PIN and PUK codes
can also be changed via the phone interface using
Menu 5.
Chapter 1 - Introduction
The Internet applications use passwords and user
names to protect from unauthorized use of your
Internet services. To change the password for an
Internet access point, go to the Internet main
screen, press Settings, scroll to Internet access
and press Change, then press Edit and scroll to
Password. To change an e-mail password, go to
the E-mail main screen, press Settings, scroll to
Remote mailbox settings, then scroll to Remote
mailbox password.
The access codes you need most often are the
lock code (provided in the sales package) and the
Personal Identity Number (PIN) code (provided
with the SIM card). The access codes are described in more detail in Chapter 10 "System:
Security" on page 10-2. See also Chapter 13
"Phone interface: Detailed menus list - Security
options (Menu 5)" on page 13-11.
Contact information
All the contact information (names, addresses,
phone numbers, e-mail addresses, etc.) you store
goes into the Contacts directory. Each application and interface has its own view of the Contacts directory. The information shown depends
on the information the selected application can
use. For example, when you are making a call via
the phone interface, you can view the name and
the phone number(s) of the contact – possible
fax numbers, e-mail addresses, job titles, etc.,
are not shown.
You can customize your contact information
according to your preferences, see Chapter 3
"Contacts: Contact cards - Customizing contact
cards" on page 3-3. Customizing only affects
new contact information; existing contacts will
not be affected. If you customize your contact
card template in an early phase, you will not
have to edit your contact cards manually.
Texts
With the communicator interface’s text editor,
you can create new texts in many applications
1-3
(Notes, Fax, SMS, E-mail, Calendar). The editor,
however, works in each application in a way that
corresponds to the sending format of that application. For example, because short messages
cannot contain text formatting, the SMS editor
removes text formatting before opening any document. For this reason, the text editor is called
Note editor in the Notes application, E-mail editor
in the E-mail application, and so on.
Document outbox
To help with wireless data transmission, the
communicator has an outgoing communications
manager called the Document outbox. When you
send faxes, short messages and e-mail, they always go first to the Document outbox. The Outbox prepares your fax, short message or e-mail
and then sends it through the phone interface. If
the phone interface is off or the network signal
strength is inadequate, the document will not be
sent until the phone interface is switched on and
the signal strength is sufficient. You do not have
to worry about whether the phone or fax called
might be off or busy: after the first attempt, the
Document outbox tries to send the document
nine more times. A document will remain in the
Document outbox until it is successfully sent or
you cancel the send.
The Document outbox can be accessed in the Fax,
SMS, E-mail and Notes applications’ main views,
where it is shown at the bottom of the folders list.
The Document outbox is discussed in more detail
in Chapter 12 "Document outbox" on page 12-1.
There is no Document inbox. When you receive
faxes, short messages or download e-mail, they
go directly in their own received document folders. Each application shows a received document
folder containing documents that can be viewed
within that application. For example, the Fax application shows a Received faxes folder; the
E-mail application shows a Received e-mail folder.
Chapter 2 - Getting started
2-1
2. Getting started
When you open the sales package, check that it
contains the following:
• Nokia 9000i Communicator
• This User’s Manual and the combined Quick
Guide and Accessories Guide
• Extended Li-Ion Battery, see the Accessories
Guide
• Adapter, see the Accessories Guide
• Rapid Travel Charger, see the Accessories
Guide
• Nokia Connectivity software on diskette (see
Chapter 10 "System: Connecting to a PC" on
page 10-6)
• CD-ROM containing add-on software
• RS-232 Adapter Cable, see the Accessories
Guide
• A sticker with the communicator’s serial
number and the lock code (see Chapter 10
"System: Security" on page 10-2)
IMPORTANT! The communicator lock code, used
for various settings, can only be found on the yellow sticker in the sales package. Keep your lock
code in a safe place.
For information about other Nokia 9000i Communicator accessories, see the Accessories Guide.
This chapter covers the following topics:
• How to install a valid SIM card, see "SIM
card: Installing the SIM card" on page 2-3.
• How to supply power to the communicator,
see ”Connectors” on page 2-4 and ”Battery”
on page 2-5.
• How to personalize your communicator, see
”First start-up” on page 2-1.
• How the communicator operates, see
”Communicator interface” on page 2-7 and
”Communicator applications” on page 2-9.
• ”Special features” on page 2-12 contains
information about the common features of
all the applications.
• ”Shortcuts” on page 2-13 explains the
shortcuts of the document applications.
Note: In this User’s Manual, the command
names appear in bold and item names,
entries and values shown in the application area are in italics.
First start-up
The first start-up allows you to set your home
location, the time and date, and your personal
information.
Note that whenever you open the communicator
cover after having removed and replaced the
battery, you will see a welcome screen while the
device performs a self-test. The following steps,
however, occur only the first time the communicator is activated, or after it has been reformatted.
To change any of the following settings after the
initial start-up, see "First start-up: Changing
start-up settings" on page 2-2.
• Install the SIM card and switch on the phone
interface before opening the communicator
interface. In most locations, this will configure
the settings for your voice mail and the SMSC.
SIM card installation is described in "SIM card: Installing the SIM card" on page 2-3. If you do not
have a SIM card yet, ignore this step. Although
2-2
you do not need a SIM card to use the communicator interface, a SIM card is required to send and
receive calls and documents.
‚ Open the cover. This activates the communicator interface.
ƒ Use the scroll keys on the left of the screen to
scroll to your home location in the list, then
press the button on the right of the screen
next to the command OK.
„ Use the arrow keys to navigate and the backspace key to erase, and accept or change the
date shown, then press OK. Date format is
mm-dd-yy.
… Accept or change the time shown and press OK.
† Enter your personal user data and press OK.
The start-up procedure is now completed.
Changing start-up settings
You may change any of these settings at any
time after the initial start-up.
To change the Home location, Date or Time:
• Press the Extras application key.
‚ Scroll to Clock and press Select.
SIM card
ƒ Press Settings.
Home location: Highlight Home location and
press Change. Type the first letter of the
state you want or scroll through the list.
Highlight your state and press OK.
Time: Highlight Time, and enter the time.
Note: To change between the 12 and 24 hour
clock or alter the date format, go to the
System application, press Settings, highlight Preferences and select Change. You
may set the time and date format as well
as the unit of measure from this screen.
Date: Highlight Date, and enter the date.
„ Select Close, then Close again to return to
the Extras main menu.
To change the User data:
• Press the System application key.
‚ Highlight User data and press Select.
ƒ You may change any information in your user
data from this screen.
„ Select Close to return to the System application main menu.
SIM card
A SIM (Subscriber Identity Module) card is a
“smart chip” that is used with all handsets operating on GSM networks. The SIM contains all the
information the GSM1900 network needs to
identify the network user and also performs specific functions required by the network. Among
other things, the SIM card contains subscriber
and billing information, makes periodic location
updates with the network, and provides enhanced security features.
The SIM card can also store contact information.
The number of contacts that can be stored on a
SIM will vary from manufacturer to manufacturer. The SIM memory is referred to as Memory A,
and the phone memory as Memory B. You can
copy contact information from one memory loca-
tion to the other using the phone interface
Menu 8 3, see Chapter 13 "Phone interface: Detailed menus list - Memory functions (Menu 8)"
on page 13-13.
A valid SIM card (supplied by your network operator) is required for making and receiving calls.
The network operator may prevent the use of the
communicator with any other but the operator’s
own SIM cards. If an unacceptable SIM card is
inserted, the message INVALID SIM CARD will be
displayed. Should this happen, contact your retailer or network operator.
Note: Keep all SIM cards out of small children’s
reach.
Chapter 2 - Getting started
SIM card contents
Normally, a new SIM card will not contain any
contact information. After the personalization
procedure, if the SIM does contain stored names
or numbers, you will be asked if you want to
copy the SIM card contents into the communicator’s memory. If the phone interface is
switched off, the question will be asked the next
time the phone interface is on and you activate
the communicator interface.
If you do not want to copy this information, or
want to do so at a later time, answer no. You
may copy information between SIM and phone
memory locations via the phone interface.
Note: All phone numbers copied from the SIM
memory to phone memory will go to the
Tel field of the contact cards. To send SMS
messages, the recipient’s phone number
must be in the Tel (GSM) field. Be sure all
GSM numbers are in the Tel (GSM) field.
(see Chapter 3 "Contacts: Contact cards Customizing contact cards" on page 3-3).
Installing the SIM card
Before installing the SIM card, close the device
cover and switch off the phone (use
):
• Remove the battery: Press the catch (1) at the
bottom of the battery (2) and lift away the
battery (Figure 2-1).
2-3
‚ Slide the card into the SIM card slot
(Figure 2-2). Make sure that the metal
contacts of the SIM card are facing down
and the bevelled corner is on the right side.
Figure 2-2: SIM installation
When the SIM card is properly inserted into the
SIM card slot, the bevelled corner will remain
visible (Figure 2-3).
Figure 2-3: Installed SIM card
When you are sure that the SIM card is correctly
installed, replace the battery:
• Insert the battery so that the side with the four
metal connector plates goes in first (Figure 2-4).
Figure 2-4: Inserting the battery
‚ Push the battery down towards the catch un-
Figure 2-1
til it clicks into place. Make sure the battery
is properly installed before switching on the
power.
2-4
Note: The battery does not fit into place if the
SIM card is not correctly installed. Do not
force the battery into place! Check that
Connectors
you have inserted the SIM card into the
slot as described above.
Connectors
(1) IrDA-SIR infrared port for connecting to a PC
or a printer (Figure 2-5). For more information
on infrared connections, see Chapter 10 "System:
Connecting to a PC" on page 10-6.
(2) Antenna connector for car installation
(Figure 2-5).
Figure 2-5: Ir port and antenna connector
(3) System connector for car installation and for
the adapter (Figure 2-6)
(4) Adapter for connecting the charger and the
RS-232 cable to the communicator. The connector on the left side (5) of the adapter is for the
RS-232 cable plug and the one on the right (6)
is for the charger plug (Figure 2-6).
Figure 2-6: Adapter connector
Chapter 2 - Getting started
2-5
Battery
Your Nokia 9000i Communicator is powered by a
rechargeable Lithium-Ion battery. The Extended
Li-Ion Battery provides up to three hours of talk/
fax/terminal time or up to 30 hours of standby
time. Use only batteries approved by the communicator manufacturer.
Charging the battery
Use only those chargers approved by the communicator manufacturer for charging a Lithium-Ion
battery. The communicator can be used during
charging. To charge a battery with the adapter
and a charger:
• Insert the battery.
‚ Attach the adapter to the bottom of the communicator as shown in Figure 2-7. Insert the
curved pin into the right-hand side aperture
at the end of the communicator. Push the left
side of the adapter gently towards the communicator until the left locking pin engages.
(If you try to force the adapter into place upside down, you may accidentally break off the
curved guiding pin.)
Figure 2-7: Attaching the adapter
ƒ Connect the charger lead to the adapter, as
shown in Figure 2-8.
Note: You must have the adapter in order to
charge the unit.
Figure 2-8: Charger lead
„ Connect the charger to an 120 V AC wall outlet. If the phone interface is switched on, the
CHARGING message appears on the display
and segments of the battery indicator bar on
the right-hand side of the phone interface display will start scrolling. (Charging information
is also shown on the communicator interface
display, see ”Indicators” on page 2-10.)
… When the battery is fully charged, the battery
indicator bar will stop scrolling and display
five solid bars. You may remove the adapter
from the communicator:
† Hold down the release button on the left side
of the adapter (Figure 2-7), and turn the
adapter away from the communicator.
When the charge is low and only a few minutes
of operation time remain, a warning tone will be
heard, and the message BATTERY LOW will be repeated at regular intervals on the display. When
the charge level becomes too low for operation,
the RECHARGE BATTERY message will be displayed, accompanied by a warning tone. If you
do not connect the communicator to a charger,
the communicator automatically switches itself
off. If the tones have been switched off, only the
display messages will appear (see Chapter 13
"Phone interface: Detailed menus list - All
sounds (Menu 10)" on page 13-15).
2-6
Battery
Note: No information or user data will be lost if
the battery is removed or completely
discharged. User data is automatically
retained by the flash memory and is
unaffected by the status of the battery.
Always keep a charged battery in the communicator. Keeping the battery charged maximizes the
lifetime of the backup battery supplying power to
the communicator’s real-time clock. In the unlikely event that the backup battery is drained, it
may be replaced by qualified personnel.
Using the battery
Always close the device cover before removing
the battery. Closing the cover automatically
saves all data.
Use only batteries approved by the communicator
manufacturer. With approved chargers and accessories, the battery can be charged continuously.
The battery need not be fully discharged before
recharging. When a charger is not in use, disconnect it from the power source.
The battery can be charged and discharged hundreds of times, but it will eventually wear out.
When the operation time (talk-time and stand-by
time) is noticeably shorter than normal, it is time
to buy a new battery.
Temperature extremes will affect the ability of
your battery to charge: it may require cooling or
warming first.
Factors affecting battery operation time:
• Whether both interfaces are in use.
• Radio signal strength.
• Various phone settings.
• Length of the communicator interface’s
screen power-down period (set in System
application’s settings, see Chapter 10
"System: System settings" on page 10-1).
Note:
• Use the battery only for its intended purpose.
• Never use any charger or battery which is
damaged or worn out.
• Do not short circuit the battery. Accidental
short circuiting can occur when contact with
a metal object (coin, paperclip or pen) causes
direct connection of the + and - terminals of
the battery. This could occur when you carry
a spare battery in your pocket or purse. Short
circuiting the terminals may damage the
battery or the connecting object.
• Leaving the battery in hot or cold places, such
as in a closed car in summer or winter conditions, will reduce the capacity and battery
lifetime. Try to keep the battery between
+59°F (+15°C) and +77°F (+25°C). A hot or
cold battery may temporarily not work, even
when the battery is fully charged. Li-Ion
batteries’ performance is particularly limited
in temperatures below +32°F (0°C).
• Dispose of used batteries in accordance with
local regulations. Recycle! Do not dispose of
batteries in a fire!
Chapter 2 - Getting started
2-7
Communicator interface
Figure 2-9: Communicator interface
To activate the communicator interface press the
cover lock catch and open the cover (Figure 2-9).
The applications are run in the middle of the display. The indicators (Figure 2-10) show application and system-related information (see
”Indicators” on page 2-10). The commands always
relate to the column of four command buttons on
the right side of the display cover.
Commands — The column of four command buttons to the right of the display.
The communicator display will activate automatically when the cover is opened and automatically
power down when the cover is closed.
Scroll bar — Indicates your relative position
within the display text.
Communicator display
Display — The screen where applications are run.
Indicators — Show application and system related
information (see ”Indicators” on page 2-10).
Selection frame — The highlighted line within a
menu area. You can select items by moving
the selection frame with the scroll buttons to
the left of the display or the up/down arrow
keys on the keyboard (see ”Keyboard” on
page 2-11).
Scroll buttons — To the left of the display. Use
the scroll buttons to navigate up and down
through the display text.
Search field — At the bottom of the display text
area. When the search field appears, you can
search for items by entering text in the
search field.
Select the item you want, then press the appropriate command button. For example, to view the
contact information for an individual in the list of
contacts, select the individual, then press Open.
2-8
Communicator interface
Figure 2-10: Communicator display
Communicator interface conventions
The following figures illustrate certain communicator interface conventions (Figure 2-11, 2-12).
Figure 2-12: Example of a pop-up box
(3) When a pop-up box appears, choose an item
and press OK or Cancel.
Figure 2-11: Example of commands
(1) When a command appears dimmed, the command cannot be used.
When a setting with
next to it is selected,
pressing Change toggles the value (e.g. on/off)
or opens a pop-up box (Figure 2-12).
(2) When a value appears on a dotted line with a
cursor, enter a new value manually via the
keyboard.
When a setting with
next to it is selected,
pressing Change opens a new settings view.
When you press a command with next to its
name, as in Records (Figure 2-10), only the
command set changes.
Chapter 2 - Getting started
2-9
Communicator applications
The nine colored application buttons across the
top of the communicator interface keyboard are
used to start the corresponding applications (described in the following chapters of this manual).
Tel. — Telephone is used for managing voice
calls.
Fax — Fax enables you to send any of your
own documents as a fax. Received faxes can
be read or forwarded.
SMS — Short Message Service enables you to
send short text messages. Received short messages can be read, forwarded or replied to.
Internet — Internet applications include Internet and modem-based applications: E-mail,
World Wide Web, Telnet and Terminal (VT100
compliant).
Contacts — Contacts is used for managing
your contact information: names, numbers
and addresses. You can exchange contact
information as business cards via the SMS
application.
Notes — Notes is used for text editing, printing and document management. You can also
send documents as short messages, faxes or
e-mail from the Notes application.
Calendar — Calendar contains an appointment book and a to-do list. You can set
alarms and attach memos to events.
System — System contains desktop connectivity, security and other system-related
applications.
Extras — The Extras application group includes Text Web, Calculator, Clock, Composer,
Converter, and Wireless data backup.
Using the applications
When the cover is opened, the application which
was active when you closed the cover appears in
the state in which you left it. However, if you
have made or answered a voice call via the
phone interface and switch to the communicator interface by opening the device cover, the
Telephone application activates automatically,
see Chapter , "Telephone".
To switch to another application, press the corresponding application button. You can do this
even during an active call.
Note: You need not “exit” any application before
starting another. All inactive applications
are run in the background until they are
activated again. If the battery is removed
or completely discharged, all data will be
saved, and the applications will return to
their default states.
Information need not be specifically saved (there
is no “Save” command). The Nokia 9000i Communicator saves all data automatically.
To send or receive with any of the communications applications, remember that the phone interface must be switched on and in a service
area with adequate GSM1900 network signal
strength.
2-10
Indicators
Indicators
The application icon and the application name
show the currently active application, i.e., the
application you are in at the moment.
The icons which appear on the Call status and Inbox/Outbox indicator rows, change according to
the application and current situation. The battery
level and field strength indicators are the same as
are shown on the phone interface display when
the phone interface is on (see Chapter 13 "Phone
interface: Display indicators" on page 13-2).
Application icon
necting to a PC" on page 10-6.
– The communicator is being used as a
fax modem, see Chapter 10 "System:
Fax modem" on page 10-5.
– The communicator is being used in
the silent service mode, see Chapter
4 "Telephone: Telephone settings"
on page 4-1.
– The communicator is in flight mode.
– The communicator is trying to establish an infrared connection, see
Chapter 10 "System: Connecting to
a PC" on page 10-6.
Application name
– An infrared connection has been
established.
Call status
Inbox/Outbox
Battery level
Field strength
– The infrared connection is obstructed.
Call status
– You have a voice call and the handsfree loudspeaker and microphone are
on. In handsfree use, you can talk to
the phone from a short distance
away (see Chapter 4 "Telephone:
Telephone settings" on page 4-1).
– A voice call with the handsfree off
(the loudspeaker and microphone
are muted).
– An open data connection, see Chapter 7 ”Internet” on page 7-1.
– The communicator is receiving or
sending a fax, see Chapter 5 ”Fax”
on page 5-1.
– The communicator is connected to a
PC, see Chapter 10 "System: Con-
Inbox/Outbox
– Inbox (left half). You have received a
fax, short message or e-mail (if your
Remote mailbox is capable of sending this information). Received faxes
and short messages go in the application’s received documents folder.
To retrieve new e-mail, you must
connect to your Remote mailbox, see
Chapter 7 "Internet: Receiving e-mail
- Reading e-mail" on page 7-9.
– Outbox (right half), the sending
buffer contains all unsent messages:
see Chapter 12 ”Document outbox”
on page 12-1.
– Time and date are shown when the
Call status and Inbox/Outbox rows
are empty. Time and date can be
adjusted in the Clock settings, see
Chapter 11 "Extras: Clock - Clock
settings" on page 11-5.
Chapter 2 - Getting started
2-11
Battery level
Keyboard
– Battery is low. The battery should be
recharged.
– Battery is charging (the bar scrolls
until it is fully charged). The outlet
plug icon indicates that the communicator is connected to an external
power source (usually a wall outlet).
– Battery is fully charged (five bars
displayed).
Field strength
– The communicator is connected to a
GSM1900 network. When all five
indicator bars are shown, radio signal reception is good. If the signal
strength is not good, you can try to
improve reception by moving the
phone slightly or by using the communicator in the hands free mode.
– The phone interface is on, but the
communicator is outside of a network coverage area.
– The phone interface is off. The communicator cannot send or receive calls
or messages (via either interface).
In addition to the normal character and number
keys, the keyboard has a number of special keys,
as shown in Figure 2-13.
1. Application buttons
The row of nine buttons at the top of the keyboard (starting from Tel.) activate the corresponding applications.
2. Escape (ESC)
To cancel an action, you can either press Cancel
or the escape key. The escape key can only be
used when Cancel is among the available commands. All information notes (like a received fax
notification) shown on the display can also be
dismissed with the escape key (instead of pressing the OK command).
3. Tab
Use the tab key to navigate in screens which require you to move from field to field (like the
User data page). When editing your own texts,
the tab key moves the cursor to the next tab
stop.
4. Shift
When you press the shift key and then a letter
key, an uppercase letter is inserted in front of the
cursor. The shift key does not need to be held
down at the same time as the desired letter key;
Figure 2-13: Keyboard
2-12
Special features
once you have pressed the shift key, the next key
press always generates a shifted character. In
most text editors, the shift and arrow keys (see
number 7 in Figure 2-13) can be used to select
text (see "Special features: Settings and Menus"
on page 2-13).
The arrow keys can be used to move the cursor
or the selection frame (in the same way as the
scroll keys). In some applications, the arrow keys
have special functions (see "Special features:
Settings and Menus" on page 2-13).
5. Control (Ctrl)
8. Enter
Pressed together with certain keyboard keys, the
control key generates shortcut commands which
can be used in most viewers and text editors, see
"Special features: Shortcuts" on page 2-13.
When the cursor is shown, pressing Enter moves
the cursor to the beginning of the next line or
adds a new line. The Enter key can also be used
to select contacts and contact information in the
Contacts directory and to open folders and documents. When information notes (like a missed call
notification) are shown, you may press Enter instead of the OK command. In options and settings, when a value can be toggled, you may press
Enter instead of Change.
6. Character (Chr)
The character key is used to generate characters
not on the communicator keyboard. A single
press of the character key opens the special
character table. Some special characters are also
printed on the keyboard as the third (green)
character. These characters and certain other
characters can be generated by pressing and
holding the character key while pressing the corresponding key, see Chapter 8 "Notes: Notes settings - Special characters" on page 8-3.
7. Arrow keys
9. Help
Press the Help key to activate a context-sensitive
help.
Special features
Communicator help
The texts in the Help section deal with issues relating to the feature or application that was on
the display when the Help button was pressed.
The application icon on the left side of the screen
represents the application where help was requested. If no special help is available for that
topic, a list of available application topics is
shown instead.
To view the list of all help topics for the current
application, press Application topics. The following commands are available:
To open the selected topic, press Open.
To show common Help topics, press General
topics.
To return to the active application, press Close.
To view the list of general communicator topics,
press General topics. The following commands
are available:
To open the selected topic, press Open.
To return to the active application’s help
topics list, press Application topics.
To return to the active application, press
Close.
If the help topic that you wanted was not among
the topics of the current application or General
topics, close Help, start the correct application
and press the Help button again.
Multi-select function
Where multi-selection is available, you can select
several items at once. The commands you use affect all of the items selected. Multi-selection
works in most lists: for example, you can select
Chapter 2 - Getting started
several contacts and delete them at once in the
Contacts directory, or select several documents
and transfer them to your PC at the same time in
the System application.
2-13
Note: Some of the shortcuts use a control key
(Ctrl) combination and others use a character key combination (Chr).
There are two ways to select multiple items:
Shortcut
Function
1. Select the item and press Ctrl+space bar
Ctrl-C (copy)
Ctrl-X (cut)
Ctrl-V (paste)
Copies selected text
Cuts selected text
Pastes selected text
Ctrl-Z (undo)
Cancels most recent
operation
If you want to select every item in a list, press
Ctrl+A. If you want to remove the selection,
press Ctrl+A again or the ESC button.
Ctrl-B (bold)
Ctrl-I (italic)
Ctrl-U (underline)
Applies bold
Applies italics
Applies underlining
Settings and Menus
Ctrl-T (time)
Ctrl-D (date)
Adds current time
Adds current date
Ctrl-M (user name)
Adds user’s name
Ctrl-H (home)
Ctrl-E (end)
Moves cursor to beginning
or end of document
Chr-left arrow
Chr-right arrow
Moves cursor to beginning
or end of line
Chr-up arrow
Chr-down arrow
Moves cursor to top or
bottom of a page
Shift-up/down/right/
left arrow
While Shift is held down,
each arrow key press highlights one text character or
line
Shift+Chr+up
Shift+Chr+down
arrow
Selects text page by page
inside a document
Ctrl+space bar
Ctrl+A
Multi-select
Select all
or
2. Press and hold Shift and move down the list with
the arrow keys. To remove an item from the selection, scroll to the item and press Ctrl+Space bar.
Most applications have Settings as one of the
main view commands. The values of these settings will be used as defaults for that application.
Options chosen elsewhere affect only the document, card or item which is active or being sent.
Most applications also have Menu as one of the
commands. When you press Menu, a pop-up box
opens listing a number of new commands which
will vary, depending on the application you are in.
Shortcuts
There are several shortcuts you can use in the
document applications (SMS, Fax, E-mail, Notes).
The following table lists the available shortcuts.
Naming a document
When you close a new document for the first
time, you will be asked to enter the name of the
document in the input field. The communicator
will suggest a name for the document. The name
can be seen highlighted in the input field.
2-14
Special features
Figure 2-14: Received communications note
Received communications
When you open the cover of the communicator
and have new received faxes, short messages,
unsent documents or missed calls, a note will be
shown (Figure 2-14).
To read received documents or to check your
missed calls, select the corresponding item on
the list and press View.
The note can be dismissed by pressing Cancel.
The same notice is only shown once.
Chapter 2 - Getting started
2-15
Useful settings information
The following chart contains settings information for various features of your communicator. All
paths take you from the application main view. Following the conventions of the User’s Manual, the
command names appear in bold, and item names, entries and values shown in the application area
are in italics.
How to...
Application
Path
Set voice mailbox number
Telephone
Settings, Other settings
Set ringing tones and volume
Telephone
Settings, Ringing settings
Set calling card number and access
code
Telephone
Settings, Calling card settings
Activate flight mode
Telephone
Settings, Other settings
Set font, margins, etc. for Fax
Fax
Write fax, Style
SMS
Settings, SMSC phone number1
SMS
Business cards, open the card, Options
Define Contact card template
Contacts
Menu, Settings, Contact card template
Define Internet access point2
Internet
Settings, Internet access, New2,
(Advanced settings2)
Define remote mailbox information3
Internet
E-mail, Settings, Remote mailbox
settings3
Set SMSC phone
SMS messages)
number1
(to send
Set fields to be included when sending
business cards via SMS
Create folders
Notes
(open any folder), Menu, Create folder
User data (set own information)
System
User data
Set distinct ringing tones for individual applications
System
Settings, System sounds, Application
tones
Set time and date format (mm-dd-yy,
dd.mm.yy)
System
Settings, Preferences
Set time and date
Extras
Clock, Settings
Reset home location
Extras
Clock, Settings
1. You may obtain this information from your network operator.
2. You may obtain this information from your Internet service provider.
3. You may obtain this information from your remote mailbox provider (either an Internet service
provider, or your own company).
Chapter 3 - Contacts
3-1
3. Contacts
The Contacts Application
Nokia HelpLine Canada
The Contacts application allows you to:
• Create, edit and manage all contact information: phone numbers, addresses, speed
dials, etc.
• View records of all incoming/outgoing calls
(see ”Records” on page 3-4).
1-888-22-NOKIA (1-888-226-6542)
The Telephone, Fax, SMS and E-mail applications
all use information found in the Contacts
application.
From the Contacts main view, press Menu to see
the list of options associated with the Menu
command.
Nokia HelpLine
Delete — Deletes the contact card (or cards) that
are currently selected.
You will find the Nokia HelpLine contact cards
for both the USA and Canada in the Contacts
directory. The Nokia HelpLine answers questions
and offers instructions over the phone.
The HelpLine numbers are as follows:
Nokia HelpLine USA
1-888-NOKIA2U (1-888-665-4228)
HelpLine hours are Monday thru Friday, 8:00 AM
- 7:00 PM Eastern time.
HelpLine hours are Monday thru Friday, 8:00 AM
- 9:30 PM, and Saturday, 8:30 AM - 4:30 PM
Eastern time.
Contacts Menu
Copy card — Copies the contact card that is currently selected.
Directory info — Displays the number of contacts
and speed dials as well as the amount of memory
in use by the Contact data and the Contact
record data.
Settings — Allows you to modify the contact
card template and set the contact communication record duration.
Contacts settings
To customize the Contacts settings:
• Press Menu in the Contacts main view.
‚ Select Settings.
Contact card template — The contact card template defines which fields are included in all new
contact cards you create. You can modify the
contact card template to customize your contact
cards. Changes made to the template affect all
new, but not existing contact cards. You cannot
enter text into the template’s fields.
Record duration — The Record duration settings
define how long communication data will be listed
in the General and Individual record lists. The possible values are: Zero / 10 days / 30 days (default)
/ 1 Year / User defined: days (0 – 365 days).
To change the Contact card template:
• Highlight Contact card template and press
Change.
‚ To add a field, press Add field. Scroll to the
field type and press OK.
3-2
ƒ To change the label name press Change
Contact cards
‚ Choose the duration you want and press OK.
label. Choose the new label and press OK.
The contact manager will keep a record of all
incoming and outgoing communication for
the length of time you specify.
„ When your contact card template is satisfactory, press Close.
To change the Record duration:
ƒ When you are satisfied with the Record duration, press Close.
• Highlight Record duration and press Change.
Contact cards
Contacts directory
The main view within the Contacts application is
the Contacts directory.
The Contacts directory is a list of all contact
cards in alphabetical order, according to the
name in each contact card’s Name field.
To create a new contact card:
• Press New in the Contacts main view.
‚ Enter your information.
To open an existing contact card:
• Locate the card you want to view.
‚ Press Open.
Locate a contact in one of two ways:
1. Scroll the contact list – Using the scroll
buttons, move up and down within the list
until the contact you are searching for is
highlighted.
or
2. Use the search field – Enter text into the
search field. Search looks for matches in the
Name, Company, and Address fields. The
search results can be cleared by deleting
characters one by one from the search field
with the backspace key.
or
2. From the Contacts application main view:
• Scroll to the card you want to delete.
‚ Press Menu.
ƒ Select Delete.
From the Contacts application main view you
may use multi-select (Ctrl+space bar or
Shift+scroll key) to delete more than one card at
a time. Press Ctrl+space bar again to deselect or
Esc to deselect all.
Editing contact cards
In order to enter new and edit existing contact
information in the various fields, the contact
card must first be open.
To move from one field to another, use the scroll
or arrow keys.
If you press Menu in an open contact card, the
following commands become available:
Copy card — Creates a copy of the current
card.
Copy contents — Copies the contents of the
card to a clipboard. You can add this information to faxes, notes and other documents
by pressing Ctrl-V.
Delete a contact card in one of two ways
Delete — Deletes the opened card.
1. Open the contact card:
• Press Menu.
‚ Select Delete.
Next card and Previous card — Opens the
next or the previous card in the list respectively.
Chapter 3 - Contacts
3-3
Figure 3-1: Contact card
Copy to hotlist — Copies the URL field of the
contact card to the WWW hotlist (see Chapter 7 "Internet: Hotlist" on page 7-12).
You may delete or add lines to the Address and
Note fields by using the delete or enter keys. To
save changes and go back to the Contacts directory main view, press Close.
The +, #, *, p, w, -, [space] characters
The communicator allows you to insert special
tones or pauses within a string of numbers for
communications that require more complex
input.
You can enter numbers and the following characters in the Tel, DTMF and Fax fields.
Tel field: +, #, *, p, w, -, [space]
DTMF field: #, *, p, w, -, [space]
Fax field: +, -, [space]
You may also enter these characters in alternate
Tel, DTMF and Fax fields - for example, Tel (office).
For information on the functions of these characters see table 3-1.
When storing phone numbers or DTMF (touch
tone) sequences, you can use hyphens and spaces
to customize the appearance. This will not affect
the way the numbers or DTMF tones will be dialed.
The “+” character
When sending SMS messages, some GSM1900
networks require that a “+” (plus) character precede the area code and phone number. As the
communicator has a specific place for GSM telephone numbers (Tel (GSM)), it is recommended
that you enter all GSM phone numbers in the
format:
+1-area code-7 digit number.
Customizing contact cards
To remove or add fields, or edit the field labels of
a contact card:
• Open the contact card you want to edit.
‚ Press Fields (see Figure 3-1).
If you want to modify the field settings of all
future contact cards, you must edit the contact
card template, see ”Contacts settings” on page
3-1.
To add a field, press Add field.
A pop-up box opens, listing the available
fields. Select a field and press OK. There can
only be one Name, Job title, Company and
Note field.
Note: The Tel/Fax field is for alternating calls (see
Chapter 4 "Telephone: Conference call Alternating calls" on page 4-8). The Password field is for the calendar booking password (see Chapter 9 "Calendar: Calendar
booking - Booking password" on page 9-5).
To delete a field, press Delete field
The currently selected field will be deleted.
The Name field cannot be deleted.
To change the field label, press Change label.
Select one of the predefined labels or scroll
down to the user-defined field and write the
label text, e.g., Car or Modem, and press OK
Note: You can only send short messages to
3-4
Records
phone numbers stored in the Tel (GSM)
fields. Make sure that GSM numbers are
listed in this field.
Speed dials
The Speed dials command (see Figure 3-1) lets
you assign speed dials to eight phone numbers.
Number 1 is reserved for calling your voice mailbox (see Chapter 4 "Telephone: Making a call Calling your voice mailbox" on page 4-6). For information on how to use the speed dials, see
Chapter 13 "Phone interface: Using memory Dialing shortcuts" on page 13-5.
To set speed dials:
• Press Speed dials in an opened contact card.
All phone number fields of the contact card
are shown.
‚ Select a field to which you want to assign a
speed dial and press Change. Select a location and press OK.
To change or remove speed dials:
• Select the speed dial you want to change or
remove and press Change.
‚ Move the selection frame to the location you
want to use and press OK. If you want to remove a speed dial location, choose None and
press OK.
Storing DTMF tones
The Dual Tone Multi Frequency (DTMF) tones are
the touch tones you hear when you make a call.
DTMF tones allow you to communicate with
voice mailboxes, computerized telephony systems, etc. For information on how to send DTMF
tones, see Chapter 4 "Telephone: Conference call
- Sending DTMF tones" on page 4-8, and Chapter
13 "Phone interface: Sending DTMF tones" on
page 13-3.
If you use only DTMF tones to make a call
(e.g., calling your bank for automated balance
information), you can create a contact card for
the DTMF contact that will facilitate the call and
allow you to enter a string of numbers, such as
your personal identification code.
If you use both voice and DTMF tones, you can
customize an existing contact card to include
the DTMF tones you will be using.
To store a DTMF sequence:
• Use the Tel field. Enter the telephone number,
then one of the DTMF special characters,
then the DTMF sequence. You may want to
change the field label (with Change label) to
recognize the DTMF contact.
‚ Or, use a separate DTMF field. Add a DTMF
field in the contact card and enter the DTMF
sequence.
The DTMF special characters are listed in the
following table:
Character
Function
* and #
May be used if the DTMF service
requires them
p (pause)
Inserts a pause of 2.5 seconds in
front of, or between, DTMF digits
w (wait)
When the “w” character is
stored in a sequence, the rest of
the sequence is not sent until
you press Send again in the
Telephone application.
Table 3-1
Records
The Contacts application Record function allows
you to view all communications as one of two
records: a General record or an Individual record.
You can use the General record (Figure 3-2) to
create a new contact card.
Chapter 3 - Contacts
3-5
Figure 3-2: General record
The records contain the following information
listed in chronological order:
• Number contacted (inbound or outbound).
• Type of call (voice, SMS, fax, data).
• Inbound/outbound call.
• Date and time of call.
• Duration of call.
The General record lists all communications,
while the Individual record lists only communications relating to the individual contact you
have selected.
To access the records:
• Press Records in the Contacts main view.
The command set changes.
‚ Select the desired record type by pressing
either Individual record or General record.
To erase the contents of the record:
• Press Clear list. This will permanently erase
the information contained in the list.
‚ A pop-up box opens to let you define which
communication records will be deleted (measured in days). Items cleared in the General
record will be reflected in the Individual
record, and vice versa.
To create a new contact card from the General
record:
• Open the General record.
‚ Select a communication contact and press
Create card. If the contact card already
exists, the command is dimmed.
To view only certain communication types:
• Open the General record and press Filter.
‚ Select the communication type you want to
view and press OK.
Note: Contact cards cannot be created for data
calls. Remote mailbox, Terminal and Internet connections are recorded as data calls.
SIM and phone memory
The communicator contains contact information
accessible from either the phone interface
(when the cover is closed) or the communicator
interface (when the cover is open). You may copy
contact information between these interfaces
only from the phone interface (see Chapter 13
"Phone interface: Detailed menus list - Memory
functions (Menu 8)" on page 13-13.
If a new SIM card is inserted into the communicator the existing contact information located on
the SIM (Memory A) may copied into the communicator memory (Memory B) using the communicator interface. When you open the cover, you will
be prompted to confirm the copying of the SIM
memory contents into the Contacts directory, as
described in Chapter 2 "Getting started: SIM card"
on page 2-2. Select Cancel if you do not want to
copy the SIM memory.
Here are a few points about copying the SIM
memory to the phone memory and vice versa.
Copying memory: SIM to phone
• The Contacts application will create the same
number of new contact cards in the phone as
3-6
the number of memory locations in use on
the SIM.
The phone numbers from the SIM card memory
locations will appear in the Tel field of the
contact card.
If the number you have copied is a GSM number,
be aware that you will need to edit the field label
in the Contacts application from the communicator interface in order to send SMS messages to
this contact. The SMS directory offers only those
contacts with Tel(GSM) numbers as possible
recipients to your SMS, and dims all other
contacts.
Copying memory: Contacts directory to
SIM
• The contact names in your directory may not
fully fit in the SIM card’s memory. Note that
only the first 10 characters of the name will
be stored.
Records
Entering contact information
via the phone interface
Entering new or editing existing contact names
and phone numbers via the phone interface will
create a new contact card in the Contacts directory (see Chapter 13 "Phone interface: Using
memory - Storing information via the phone interface" on page 13-5).
When you store or copy phone numbers via the
phone interface, the phone number will appear in
the Contacts directory’s Tel field (not the
Tel(GSM) field). In order to send SMS messages,
the recipient’s GSM phone number must be stored
in the Tel(GSM) field. You will need to edit this information from the communicator interface.
Whenever you enter or edit numbers from the
phone interface, check that the phone numbers
are in the correct fields in the contact card.
Chapter 4 - Telephone
4-1
4. Telephone
To make phone calls, the following requirements
must be met:
• An activated SIM card must be inserted.
• The phone interface must be switched on.
For a description of the phone interface keys and
especially the
button, see Chapter 13 ”Phone
interface” on page 13-1.
Note: The phone interface keys are not functional when the device cover is open.
The Telephone application is activated by pressing the Tel. application button on the keyboard.
Some of the telephony operations explained
here can be made via the phone interface.
Note the following Telephone properties:
• Opening or closing the cover does not affect
active phone calls.
• If you have made a voice call via the phone
interface and you open the cover, the Telephone application starts automatically. You
can continue the call after activating the
handsfree mode (see ”Telephone settings” on
page 4-1).
• When you make a call via the communicator
interface, the handsfree mode is activated
automatically.
Note: In some US networks, to make a long distance call to another GSM phone you
need to add +1 and the area code in front
of the phone number. Please check with
your network operator.
Telephone settings
To view the Tel. application settings:
Press Settings in the Telephone main view. A list
of several settings groups will open:
Ringing settings
Voice call forward
Voice call restrictions
Call waiting
Calling card settings
Single number settings
Other settings
To change the settings:
• Select a group and press Change to open it.
‚ Select a setting and press Change to open it.
For network services such as call forward, call
restrictions or call waiting, you must request the
setting status from the network with the Get
status command. See the following sections for
details.
Ringing settings
All sounds — Ring (default), Beep, Silent or Silent
for. The All sounds setting determines the incoming call alert and all other alarms. The Silent
for setting lets you preset the length of time you
want the silent mode to be active. You may want
to use this setting so you do not forget to turn
the ringing tone back on after a meeting, for example. When sounds are set to Silent, Beep, or
Silent for, the call status indicator shows the
text SILENT. This setting affects both interfaces.
An incoming call is always indicated by a note,
regardless of the chosen setting.
4-2
Telephone settings
Ringing volume — This setting adjusts the ringing volume (1 is the lowest, 5 the highest).
Forward when phone is busy — Incoming calls are
forwarded only when the phone interface is busy.
Ringing tone — You can choose from among the
list of ringing tones stored in the communicator.
To compose your own ringing tones, see Chapter
11 "Extras: Composer" on page 11-5.
Forward when not answered — Incoming calls
are forwarded when you do not answer them.
Voice call forward, call
restrictions and call waiting
The network services call forward, call restrictions and call waiting, may not be supported by
all operators, and may be options you will have
to subscribe to.
Information about the status of these services is
stored in the network. Therefore, the current settings are not shown until you request the information from the network.
• To see the value of the selected mode, press
Get status. While the communicator is
making a request to the network, a query
note is shown on the display. After a
successful request, the new value will appear
on the settings list.
• To cancel all call forwards or restrictions,
press Cancel call forward or Cancel call
restrictions.
When call forward is active and you make a call,
a text message is shown on the phone interface
display, reminding you that your incoming calls
will be forwarded to another phone number. The
text will appear only if your network operator
supports this feature.
Voice call forward
The voice call forward network service allows you
to direct your incoming voice calls to another
phone number (fax forward is activated via the
Fax application settings).
Forward if not reachable — Incoming calls are
forwarded when the phone interface is switched
off or outside of the network service area.
After pressing Change, the following options become available:
To — Enter the number to which you want to
forward your calls.
To voice mailbox — Calls will be forwarded to
your voice mailbox. The phone number of the
voice mailbox must be set in Other settings.
Off — Calls are not forwarded.
Voice call restrictions
The voice call restrictions network service allows
you to place restrictions on outgoing and incoming voice calls (fax restrictions are activated in the
Fax application settings and data restrictions are
activated in the Internet application settings).
Activating call restrictions or changing the restrictions settings requires the restrictions password,
which you obtain from the network operator. Once
you have the restrictions password, you can
change it in the Security settings (the Security application is found in the System main view).
The available restrictions modes are:
All outgoing calls — Calls cannot be made.
All international calls — Calls cannot be made to
foreign countries.
International except home country — When outside North America, calls can be made only within the current country and to your home country,
i.e., the country where your home network operator is located.
Note: The network will store the number to
which your calls are forwarded, even if
you deactivate call forward.
All incoming calls — Calls cannot be received.
Choose a forwarding mode:
Note: In some networks, emergency numbers
(e.g., 911 or other official emergency
numbers) may be possible even when calls
are restricted.
Forward all calls — All incoming calls are
forwarded.
Incoming calls when abroad — Calls cannot be
received when you are outside North America.
Chapter 4 - Telephone
Call waiting
Call waiting is a network service which must be activated through your network operator before you
can use it (see ”Telephone settings” on page 4-1).
When the voice call waiting network service is on,
the network will notify you of a new incoming
voice call while you have a call in progress.
If your network allows you to view the caller’s
phone number, the phone number (or name) of
the caller, and the text WAITING will be displayed.
To use call waiting (i.e. put one call on hold and
answer the other call) from the communicator
interface:
• Select the incoming call and press Answer
call. The previous call will be put on hold
automatically.
To use call waiting from the phone interface:
• Simply press the
button.
This will place the current call on hold and activate the incoming call. To go back and forth between calls, press the
key.
Calling card settings
To view the calling card settings you must enter the
lock code. The lock code is individual to the communicator and is included in the sales package.
Card in use — Allows you to determine which
card you want to use.
Calling cards — Allows you to edit or delete existing cards or add new ones.
To enter a calling card number:
Note: Have your lock code ready to open the
calling card settings.
• In the Tel. application main view, press
Settings.
‚ Scroll down to Calling card settings and press
Change.
ƒ Enter your lock code and press OK.
„ Select Calling cards and press Change, then
press New. Enter the following information.
Card name — Enter the calling card name.
Dialing sequence — Press Change to view the
options. Choose the sequence of numbers
4-3
that your calling card uses, and press OK.
Access number — Enter the access number, or
the prefix number.
Card number — Enter your card number.
… Press Close when you have entered the required information.
† Press Close twice more to return to the Tel.
application main view.
Single number settings
In some networks you have the same phone
number for all your voice, fax and data calls. If
you want to receive any calls, you must set your
phone to some answering mode. The available
modes are Voice, Fax, Data and Voice/Fax.
Other settings
Call cost display — This setting turns the charge
counter on or off. The counter is shown only if
the network operator supports this feature.
Speakerphone when cover opened — When you
have a voice call and this setting is Off, each time
you open the cover, you must press the Audio on
command before you can use the communicator
in the handsfree mode. If you change this setting
to On, the handsfree mode is activated automatically after the cover is opened.
Flight mode — The flight mode (Figure 4-1) prevents you from accidentally turning on your
phone interface in an aircraft.
IMPORTANT! Never use the phone interface
when in an aircraft. If the aircraft personnel
allow use of the communicator interface, you
MUST activate the flight mode. The flight
mode will allow use of the communicator
interface only and will prevent use of the
phone interface.
Be aware that all communications applications
(Telephone, Fax, SMS, E-mail, Internet) require
use of the phone interface.
With the flight mode active, you may read previously downloaded e-mail, write e-mail, notes,
short messages, faxes, or update your calendar.
Once you have left the aircraft, you can turn off
the flight mode by pressing Exit flight mode,
4-4
Making a call
Figure 4-1: Flight mode
turn on the phone interface by pressing , and
your short messages, faxes and mail will be sent
automatically once the communicator receives a
GSM1900 network signal.
When the communicator is in the flight mode,
emergency calls must be made from the phone
interface:
• Press . The phone interface will read
FLIGHT MODE ACTIVE.
‚ While the FLIGHT MODE ACTIVE text is visible
(for approximately five seconds) you can dial
the emergency number (e.g. 911).
ƒ Press
.
Voice mailbox number — Set a new or change
the current voice mailbox phone number. You
can call your voice mailbox by pressing Voice
mailbox in the Telephone main view.
Note: Your network operator may be able to update your voice mailbox number via a special SMS message. Contact your network
operator for details.
Speakerphone audio control
The audio control enables you to adjust the volume level and to activate the communicator’s
loudspeaker for handsfree operation.
Note: The speakerphone audio control can only
be adjusted during a call.
In the handsfree mode, you can speak and listen to
the phone from a short distance away when the
cover is open. This function is not available when
the cover is closed (except in a car installation).
The Tel. application setting Audio when cover
opened (see ”Telephone settings” on page 4-1),
determines whether the handsfree operation is
activated automatically after you open the cover. To activate the handsfree operation manually, press the Audio on command button.
To adjust the speakerphone volume or turn audio
off:
• When in a call with the speakerphone activated, press Audio control. A new set of options will appear.
Audio off — Turns the speakerphone audio
off.
Audio on — Activates the speakerphone.
Volume + — Increases the volume.
Volume - — Decreases the volume.
Close — Closes the screen and returns you to
the previous screen.
‚ Choose the option you want.
The indicator in the audio control view shows
the chosen volume level.
Making a call
There are three ways to make a call:
1. Use the search field:
Simply enter the phone number using the
number keys across the top of the keyboard.
Chapter 4 - Telephone
4-5
The number will be written to the search
field. Press Call.
Answering a call
or
When you receive a call, a note about the incoming call will be shown on the screen. If you already
have a contact card for the person calling you (as
in Figure 4-3), that caller will be identified by his/
her name (if supported by the network).
2. Use the telephone directory:
The Tel. application main view shows the telephone directory (Figure 4-2) whenever a call is
not in progress. Contact cards that do not contain any phone numbers appear dimmed and
cannot be selected. (Phone numbers can be
added to contact cards in the Contacts
application.)
Choose a contact in the telephone directory,
either by scrolling or by searching (type text in
the search field), and press Call. If the contact
has more than one phone number, a pop-up
box listing all phone numbers will open.
Choose a number from the list and press Call.
or
3. Use the recent calls list:
• Press the Recent calls command.
‚ Select one of the recent calls lists (dialed,
received or missed calls) and press Open.
ƒ Select a number from the list and press
Call.
Once you have made the call, you can now close
the cover and continue the call using the phone
interface, unless you want to use the handsfree
mode.
Note: When you open one of the lists and select
a contact, Copy number copies the phone
number to a clipboard where it can be
copied to documents by pressing Ctrl+V. If
you press Clear all lists in the recent calls
view, all the information in the lists is
deleted. This action cannot be undone.
There are two ways to answer a call:
1. Press Answer in the note that appears when
you receive an incoming call.
or
2. Close the device cover and answer the call via
the phone interface (by pressing
).
Note that you cannot have two active calls at the
same time: the previous active call is automatically put on hold when you answer a waiting call
(the network service “Call waiting” must be
activated).
If you do not want to take the voice call, press End
call. The caller will then hear a “line busy” tone.
Calling card call
A phone calling card is a credit or debit card
especially for phone charges. The calling card
service you subscribe to is most often separate
from your mobile phone service. A calling card
may be especially useful when making long distance calls while traveling, to benefit from the
discounted rates offered by certain calling card
companies.
.
Figure 4-2: Telephone directory
4-6
To make a call with a calling card:
• Select a contact from the Telephone directory.
‚ Press Call and hold the button down for more
than three seconds until the command
changes into Calling card call.
ƒ When you release the button, wait for a tone
and then press OK.
You can also make a calling card call from the
phone interface by pressing and holding
for more than 3 seconds. After the tone, press
OK and proceed normally.
Managing calls
When you have made a call, information about
the call is shown on the display within a frame
(see Figure 4-3). In addition to a call in progress,
it is possible to have both a call on hold and a
call waiting to be answered. A conference call,
which can contain up to five remote participants, is handled as a single call.
To switch between multiple calls, use the scroll
or arrow keys. The command buttons change according to the selected call’s status. Press Activate to change the held call into an active call.
Call information may include the following:
• Caller ID: the name or phone number of the
caller (if available).
• Call status:
ACTIVE — A connection has been established
and a call is in progress.
ON HOLD — A connection has been established and you have placed the active call on
hold.
WAITING — Someone is trying to call you but
the connection has not been established
(i.e., the caller hears a ringing tone).
AUDIO OFF — The speakerphone audio is set to
Off. Although the cover is open, the speakerphone does not activate.
Making a call
• Call timer: displays time expired since the
beginning of the call and also counts time
spent on hold.
• Call cost counter: shows the cumulative cost of
the call (if this network service is available and
the call cost setting is on). Call costs are calculated according to the currency or charging
units set in the phone interface (see Chapter 13
"Phone interface: Detailed menus list Duration and cost (Menu 6)" on page 13-12).
To end a call, select the call you want to end and
press End call.
Making a new call during an
active call
You have the option of making another call
while you have call in progress. To make a new
call during an active call:
Press New call and make the new call normally.
To cancel the new call, press Cancel.
If you have an active call and a call on hold, you
cannot make new calls before either dropping a
call or merging them into a conference call.
Calling your voice mailbox
To call your voice mailbox, simply press Voice
mailbox in the Tel. application main view. If you
have not stored your voice mailbox number in
the communicator, you will be asked for it at this
time.
You can also call your voice mailbox from the
phone interface:
1. Press 1 and then
.
or
2. Go to Menu 2 1 (Listen to voice messages) and
press Select.
Chapter 4 - Telephone
4-7
Figure 4-3: Call information
Conference call
As conference calling is a network service, contact your local network operator to check if this
service is available. In a conference call, you and
up to five remote persons can hear each other
simultaneously.
To create a conference call:
• Make the first call normally.
‚ Once this person has answered, make a call
to the second participant, by pressing New
call. The first person will be put on hold
automatically.
ƒ When the second person answers, the command button changes to Call commands.
„ To join the first participant in the call, press
Call commands and choose the Conference
call option from the pop-up box.
… If you want to include a new person in the
conference call, repeat this operation. When
all participants have been included in the
conference call, the best voice quality is
achieved by closing the cover and continuing
the call via the phone interface.
To end the call with a conference call participant:
• Press Conference commands.
‚ Select one caller from the list of participants
(Figure 4-4) and press Drop.
To return to the previous view, press Close.
To talk privately to one of the conference call
participants:
• Press Conference commands.
‚ Select a participant from the list of participants and press One to one.
The conference call is now split into two
calls: the one-to-one call is the active call
and the conference is on hold.
Once you have finished the private conversation, you can add the person back into the
conference call by pressing Conference call.
4-8
Conference call
Figure 4-4: Conference call
Voice call transfer
The voice call transfer is a network service that
enables you to connect two voice calls together
and disconnect yourself from both calls.
Note: The transfer operation can be made only if:
1. You have one call on hold.
2. You have one call active.
3. All calls are voice calls (fax or data calls
cannot be transferred).
4. None of the calls is a conference call.
There are two ways to transfer voice calls from
the phone interface:
1. Press 4 followed by
.
or
2. Press and hold the Menu key for a second.
Choose the Transfer option in the menu and
press OK, or press Quit to cancel.
To transfer from the communicator interface:
• When you have one call on hold and another
call active, press Call commands.
‚ Choose the option Transfer call and press OK.
Alternating calls
During an alternating call, you may change the
mode of the call from voice to fax. Alternating
calls can be made to a fax mailbox, for example:
you initiate the call as a voice call, but it changes
into a fax call when your fax mailbox starts to
send you your faxes.
To make alternating calls you need to add a special Tel/Fax field to the contact cards of the services of your alternating calls (see Chapter 3
"Contacts: Contact cards - Customizing contact
cards" on page 3-3).
You can also change a voice call into a fax call by
pressing Change mode. Alternating calls cannot
be put on hold or incorporated into a conference
call.
Sending DTMF tones
The Dual Tone Multi Frequency (DTMF) tones allow you to communicate with voice mailboxes,
computerized telephony systems, etc.
You can use the digits 0 - 9, as well as the
characters p, w, * and # (for information on the
functions of these characters, see Chapter 3
"Contacts: Contact cards - Storing DTMF tones"
on page 3-4).
To send a DTMF sequence when you have an
active call:
1. Press the digits at the top of the communicator interface keyboard. Each keystroke will
generate a DTMF tone which will be transmitted directly.
or
2. Press Send DTMF. A list of stored DTMF sequences is shown (for information on how to
store DTMF sequences, see Chapter 3 "Contacts: Contact cards - Storing DTMF tones"
on page 3-4).
Chapter 4 - Telephone
4-9
Select a DTMF sequence. You can edit the sequence, or, if there are no stored sequences,
you can manually enter the DTMF string into
the field.
• The phone interface must be on.
• You must be within network coverage area.
Press Send to send the DTMF sequence
shown in the input field, at the bottom of the
display.
If you want to make a voice call, you can either
wait until the data/fax call ends, or you can end
the data/fax call by starting to make a call normally. When you press Call, you will be asked if
you want to end the data call. Press End data
call to confirm.
Incoming faxes, short
messages and data
To receive faxes, short messages and incoming
data:
While a data/fax connection is active (check the
call status indicator), you cannot make calls.
Chapter 5 - Fax
5-1
5. Fax
Activate the Fax application by pressing the button labeled “Fax” on the communicator interface
keyboard.
To send and receive faxes the following requirements must be met:
• The phone interface must be on.
• The network you are using must support fax
calls.
• Your SIM card must be activated for fax
service.
When sending or receiving a fax, the FAX indicator appears in the display’s indicator row.
The Fax application main view shows:
• Own texts folder — Includes created faxes,
short messages, memos, notes and e-mail
stored on the communicator.
• Received faxes folder — Contains received
faxes.
• Document outbox — See Chapter 12
”Document outbox” on page 12-1.
Contact your network operator for details.
Fax settings
To view the Fax application settings:
Press Settings in the Fax main view. A list of
settings will open. These are the default
sending options for your faxes.
To change the settings:
Select a setting and press Change to open it.
The fax settings are:
Cover page — Header (default) / Separate page /
None.
Header — The cover page contents (To/From,
Fax numbers, etc.) will be included at the top
of the first page of the fax.
Separate page — The first page of the fax will
contain only the cover page contents.
None — No cover page information will be
attached to the fax. The first page of the document will be the first page of your fax.
Begin sending — Immediately (default) / At
[time] Lets you choose when the fax is sent.
Immediately — The fax is sent right away.
At [time] — You can determine the time when
the fax is sent. This option may enable you to
take advantage of cheaper calling times.
Receive resolution — Standard / Fine (default).
Standard — The fax will be received using 200
(width) x 100 (height) dots per inch resolution.
Fine — The fax will be received using 200 x
200 dpi resolution. Receiving faxes with fine
resolution will take longer and requires approximately twice as much memory as with
standard resolution.
Send resolution — Standard / Fine (default).
Sending faxes with fine resolution takes longer
and temporarily requires more free memory than
when using standard resolution
Logo file — None (default) / [File name]. Enables
you to add your company’s logo to the fax cover
page. Although the logo is not shown when viewing the Cover page, it will appear on the sent fax.
None — No logo is attached to the fax.
5-2
[File name] — All the available gif and jpg
files in the Downloaded files folder are listed
here. Select which one you want to attach to
the fax.
Signature file — None (default) / [File name].
Allows you to add your signature to the fax cover
page. The signature is placed under the Remarks
field.
None — No signature is attached to the fax.
[File name] — All the available GIF and JPEG
files in the Downloaded files folder are listed
here. Select which one you want to attach to
the fax.
Fax restrictions and Fax forwarding — These are
supplementary services, like normal call restrictions and call forwarding. Fax restrictions allow
you to prevent certain outgoing and incoming
faxes. Fax forwarding allows you to forward incoming faxes to another fax. For more information and instructions on how to change
forwarding and restrictions settings, see Chapter
4 "Telephone: Telephone settings - Voice call
forward, call restrictions and call waiting" on
page 4-2.
Resend — All pages (default) / Missed pages.
Allows you to choose which pages will be sent
again if the fax sending has failed and the document outbox tries to send the fax again.
ECM (in reception) — On (default)/ Off. When
ECM (Error Correction Mode) is On, any faxes
containing errors are automatically received
again until the defects are corrected. This may
prolong the fax call.
Fax polling — On / Off (default). Some networks
provide a service which allows you to make a fax
call to a number specified by the network, then
receive certain information by fax. Contact your
network operator for further details.
Note: When you set Fax polling to On, Fax
polling becomes one of the commands in
the Fax main view.
Fax settings
Menu
Within the Fax application main view are the
Own texts and Received faxes folders, along with
the Document outbox.
Both folders have a Menu command, which provides the following options:
Write fax — This option is available only inside the Own texts folder.
Rename — With this option you can rename
the selected subfolder or document.
Copy — If you select Copy, you can choose a
folder into which the document is copied.
Move — With Move you can select in which
folder to move the document.
Create folder — This option allows you to
make a new subfolder.
If any of these commands is not available, the
command will be dimmed. To read a document in
either the Own texts and Received faxes folders:
• Select a folder and press Open.
‚ Select a document from the folder’s document
list and press Open.
To delete a document:
• Select a folder and press Open.
‚ Select a document from the folder’s document
list and press Delete.
To create a new document:
• Press Write fax in the Fax main view. A new
document is created in the Own texts folder
and the fax editor opens.
‚ Enter text from the keyboard.
Chapter 5 - Fax
5-3
Figure 5-1: Fax cover page
Fax cover page
The fax cover page contains To and From fields,
and a Remarks field (Figure 5-1). You may edit any
of these entries as well as write a message in the
Remarks field. The From fields are always filled in
automatically according to the information in the
System application’s User data card (see Chapter
10 "System: User data" on page 10-5).
Sending faxes
You can send any previously created (or received)
document as a fax, or you can create a new one.
You can send faxes from the:
• Fax application
• Notes application (see Chapter 8 "Notes:
Sending documents" on page 8-3)
• Calendar application (see Chapter 9 "Calendar:
Daily schedule - Memos" on page 9-3)
To write a new fax:
• Press the Fax application button.
‚ Press Write fax in the Fax main view.
ƒ Write the fax contents in the opened editor.
„ Press Recipient. The directory containing
your contact cards will open.
Select your recipient.
The Fax cover page will appear on the screen.
You may add any remarks to the cover page
in the Remarks area.
When you are ready to send, press Send.
To send your own previously created text as a
fax:
• Select the Own texts folder in the Fax main
view and press Open.
‚ Select a document and press Open.
ƒ Press Recipient to access the Contacts
directory.
„ Select your recipient and press Send as
described above.
To forward a received fax:
• Select the Received faxes folder in the Fax
main view and press Open.
‚ Select a fax and press Open.
ƒ Press Forward to access the fax directory,
Select your recipient, and Send your fax. By
forwarding your faxes or other documents to
the nearest fax machine, you can obtain a
printout of your documents.
Note: Forward options allows you to select the
specific pages you want to send (All pages,
This page, or Pages ___ ). Choose Pages to
enter the page numbers (first through last,
e.g., 3-5) that you want to forward.
5-4
Sending faxes
Figure 5-2: Fax directory
To add a logo or signature to the fax cover page:
The logo and/or signature you want to include
must be in JPEG or GIF image format in the
Downloaded files folder. You will need to transfer the image from your PC to the communicator. For information on file transfer, see Chapter
10, "System: File transfer - Transferring files to
the communicator" on page 10-8.
• Press Settings in the Fax application main
screen.
‚ Scroll to Logo file or Signature file and press
Change. A pop-up box will open listing the
files contained in the Downloaded files folder.
ƒ Highlight the file you want included as the
logo or signature and press OK.
„ Press Close to exit the settings. All your faxes
will now contain the images you have specified.
Fax directory
The Fax directory contains all the contacts of the
Contacts directory, but the names of contacts
who have no fax number are dimmed and cannot
be selected. To edit stored contact information
and add a fax number, switch to the Contacts
application. When you are ready to choose a
recipient in the Fax directory, select a contact
(by scrolling or searching) and press Select
(see Figure 5-2).
• If a contact has several fax numbers, a popup box opens. Choose a number from the list
and press Select. The fax cover page will
open.
• To enter the recipient’s name and fax number
manually, press Enter number. The fax cover
page will open.
• To obtain the recipient’s name and fax
number from the recent fax numbers list,
press Recent numbers. You will see a list
containing the fax numbers you have
recently had contact with. Choose a number
and press Select. The cover page will open.
Note: If you press Clear both lists in the recent
numbers view, all the information in the
lists is removed. When you open one of
the lists and select a contact, Copy number copies the fax number to a clipboard
where it can be copied to documents by
pressing Ctrl+V.
Fax cover page and send
options
To adjust fax sending options for the current fax,
press Send options. Changing these settings will
only affect the fax you have currently open.
Cover page
Send resolution
Logo file
Signature file
Begin sending
Resend pages
ECM
All options for sending the current fax are
described in ”Fax settings” on page 5-1.
Chapter 5 - Fax
5-5
Received faxes
To receive a fax, the following requirements
must be met:
• You must have subscribed to fax service with
your network operator.
• The phone must be on.
• You must have adequate signal strength.
All faxes will be received automatically, and
will go to the Received faxes folder. While a
fax is being received, the FAX indicator appears on the indicator row. If you do not wish
to receive the fax, close the cover and press
on the phone interface.
When a new fax has been received, you will hear
a tone (unless the system is set to silent service
mode) and a note is shown on the screen. Unread
faxes in the Received faxes folder are marked
with .
2. Select the Received faxes folder and press
Open. Select the fax and press Open.
The fax viewer opens (Figure 5-3). You can use
the scroll or the keypad arrow keys to scroll the
fax up or down. The left and right arrow keys can
be used for horizontal scrolling when the fax
page is being zoomed.
To delete the viewed fax, press Delete.
To zoom the viewed fax, press View. A new set
of commands will appear.
Pressing Zoom in enlarges the view of the
document on the screen. The view can be
scrolled horizontally with the left and right
arrow keys.
Pressing Zoom out reduces the image.
To rename the selected fax, open the Received
faxes folder, press Menu and choose Rename.
Pressing Rotate rotates the viewed fax 90
degrees clockwise with each press of the
command button.
To delete the selected fax, open the Received
faxes folder and press Delete.
To return the previous commands, press
Back.
There are two ways to read a received fax:
1. When you receive a note informing that you
have received a fax, press View. To read the
fax later, press Cancel.
Note: A list of shortcuts for viewing faxes (and
other operations) can be found in Chapter
2 "Getting started: Special features - Settings and Menus" on page 2-13.
or
Figure 5-3: Example of a received fax
Chapter 6 - Short messages
6-1
6. Short messages
Activate the Short Message Service (SMS) application by pressing the button labeled “SMS” on
the communicator interface keyboard.
To send and receive SMS the following requirements must be met:
• Short Message Service (SMS) must be
supported by the network you are using.
• Your SIM card must be activated for SMS.
• You must store the Short Message Service
Center (SMSC) phone number in the SMS
application’s settings.
Your network operator may be able to send a
special SMS to your communicator which will set
the SMSC number for you. Contact your network
operator for details.
The Short Message Service enables you to send
and receive short alphanumeric text messages of
up to 160 characters over the GSM network. If
the message is longer, it will be sent as several
messages.
The advantages of short messages are: sending is
practically instantaneous, messages can be sent
or received even during a voice or data call and
messages can be read in any GSM mobile phone
that has the capability. The SMSC (Short Message Service Center) will take care of delivering
the message even if the receiving phone is off at
the time of sending.
The SMS main view shows the following folders
plus the Document outbox.
• Own texts — Texts that you have written.
• Received messages — Messages you have
received (see ”Received messages” on page 6-5).
• Standard messages — Your message templates
(see ”Standard messages” on page 6-5).
• Business cards — All contact cards in the
Contacts directory (see ”Business cards” on
page 6-6).
• Info messages — Informational messages
sent by the network (see ”Info messages” on
page 6-6).
• Delivery reports — Information about the
status of sent messages.
• Document outbox — Described in Chapter 12
”Document outbox” on page 12-1.
Note: You can only send short messages to
phone numbers stored in Tel (GSM) fields.
Be sure to write down the area code as
well as the phone number.
Menu
Within the Own texts, Received messages, Info
messages folders, the Menu command will open
a pop-up box with the choices:
Write message
Rename
Copy
Move
Create folder
Menu options are standard for the Fax, SMS,
Internet, and Notes applications. For more detailed information on Menu options, see Chapter
5 "Fax: Fax settings - Menu" on page 5-2.
If any of these choices is not possible, the choice
will be dimmed.
6-2
SMS settings
SMS settings
To view the SMS application settings:
Press Settings in the SMS main view. The list
of default settings will open.
To change the settings:
Select a setting and press Change to open it.
The settings you define here will be used until
you change them again.
Note: If your network does not support these
features, keep the setting on the default
(usually “No” or “None.”)
The SMS settings are:
Reply via same SMSC — Yes / No (default). This
network service allows the recipient of your
short message to reply using your Short Message
Service Center. By setting this option to Yes, you
allow the recipient to reply to your message,
even if she/he does not subscribe to the Short
Message Service (provided that she/he has the
means to type a reply message).
Validity period — 1 h / 6 h / 24 h (default) / One
week / Maximum. If the recipient of a message
cannot be reached within the set validity period,
the message is deleted from the message center.
If Maximum is chosen, the validity period is set
to the maximum value allowed by the SMSC.
Message conversion — None (send as a normal
short message, default) / Fax / X.400 / Paging /
E-mail / ERMES / Speech (message synthesized
from a short message). In order to receive a converted message, the recipient must have an appropriate terminal device available. For example,
if you choose the Fax format, the recipient must
have a fax machine or similar device connected
to the number. As Message conversion is a network service, please, contact your local network
operator to check if this service is available.
SMSC phone number — In order to be able to
send short messages, you must enter the SMSC
(Short Message Service Center) phone number
here.
Request delivery report — Yes/No (default).
When this is set to Yes, the status of the sent
message (Delivered, Pending, Failed) is shown in
the Delivery reports folder. As Request delivery
report is a network service, please, contact your
local network operator to check if this service is
available.
Receive info messages — Yes / No (default)/ Index.
If your network supports this feature, it will send
you information about various topics. If you
choose Index, the network will send you a list of
topics, and you can select on what kind of topics
you want to receive information.
Note: In order to receive info messages, your local
network operator must support Cell Broadcast. Contact your network operator for
details and availability.
Info service mode— Display and save (default)/
Display only / Save only. If this is set to Display
and save, messages are displayed and saved in
the folder. If you select Save only, info messages
are not displayed but saved in the folder. If you
select Display only, messages are displayed but
not saved.
The Info messages folder is emptied every time
the communicator is rebooted (e.g. the battery is
removed and replaced).
Info service topics — Message topics vary according to the operator. You can define here
what type of messages you want to receive.
For more information about Info messages, contact your service provider.
Send options
To adjust the sending options for the current
message, press Send options in the screen that
appears just after you have chosen the recipient.
The send options are:
• Reply via same SMSC — Yes / No (default)
Chapter 6 - Short messages
6-3
• Validity period — 1h / 6h / 24h (default)/ One
week / Maximum
• Message conversion — None (default)/ Fax /
X.400 / Paging / E-mail / ERMES / Speech
• Request delivery report — Yes / No (default)
Use number
Press Change to set a new value for the current
message.
To use a received number:
• Open the received message that contains the
phone number you want to call and press
Menu, then Use number. The first number or
set of numbers contained in the SMS message will be highlighted.
‚ Press Next number to toggle from one number set to the next.
ƒ When the number you wish to call is highlighted, press Call. The telephone application
will open automatically to process the call.
Sending contact cards
When sending contact cards from the communicator, you can set which fields will be sent with
the following key strokes:
• From the SMS main view, scroll to Business
cards and press Open.
‚ Scroll to the cards you want to send and press
Open, then Options. The fields you wish to
send should be set to On. When the fields are
set, press Close.
ƒ Choose the Recipient and Send the message.
You may make a phone call to the sender of a
message as well as call a number that you have
received via an SMS message.
Editing SMS messages
When you open a text containing formatting,
you will be asked whether you wish to make a
copy of the text (press Copy), or edit the original
text (press Edit). Editing will undo the formatting of the original text.
Sending messages
Short messages can be created and sent from
the following applications:
• SMS
• Notes (see Chapter 8 "Notes: Sending documents" on page 8-3)
• Calendar applications (see Chapter 9 "Calendar:
Daily schedule - Memos" on page 9-3).
To create and send a new short message:
• Go to the SMS application main view.
‚ Press Write message to open the short
message editor.
The short message in the editor resembles a postcard. A character counter indicating the number
of characters typed and number still available (see
Figure 6-1) appears at the top of the editor.
In a received SMS message, the time and date
the message was sent are shown below the
sender’s name or number. When the message is
ready to be sent, press Recipient. The Short
Message directory opens. .
6-4
Sending messages
Figure 6-1: Creating a new short message
SMS directory
The SMS directory contains all the contacts in
the Contacts directory, but the names of contacts who have no Tel(GSM) number are dimmed
and cannot be selected. To edit stored contact
information and add a Tel(GSM) number, switch
to the Contacts application.
To select a recipient (three options):
1. Select a contact from the SMS directory by
scrolling or searching and press Select. The
contact must have a phone number in the Tel
(GSM) contact card field.
or
2. Enter the phone number manually. Press Enter
number to display the sending view. Enter the
destination number.
or
3. Press Recent numbers to see a list of recent
short message numbers (sent and received).
Scroll down to a contact and press Select.
You may use multi-select (Ctrl+space bar) to send
a message to more than one person at once, see
Chapter 2 "Getting started: Special features Multi-select function" on page 2-12.
Once your recipient is entered, press Send.
Note: In the Recent numbers view, Clear both
lists deletes all information from the lists.
When you open one of the lists and select
a contact, Copy number copies the GSM
number to a clipboard where it can be
copied to documents by pressing Ctrl+V.
When the message is ready to be sent, press Send.
If the message is longer than 160 characters, it
will be sent as two or more short messages.
The message goes to the Document outbox that
sends the message as soon as possible (see Chapter 12 ”Document outbox” on page 12-1).
To adjust the sending options for the current
message, press Send options. Press Change to
set a new value for the current message. The
send options (Reply via same SMSC, Validity
period, Message conversion and Request delivery
report) are the same as the SMS settings, see
”SMS settings” on page 6-2.
To send previously created documents:
• Go to the SMS application main view.
‚ Select the Own texts folder, and press Open.
The display will show all of the documents in
the Own texts folder.
ƒ Select Open to open a document or a folder.
You may edit the note freely.
„ When the message is ready to be sent, press
Recipient. The SMS directory will open.
… You may Select your recipient from the SMS
directory, enter the number manually (press
Enter number), or view the numbers available from the Recent numbers lists.
† After having selected the recipient, press
Send.
To forward a received message:
• Select the Received messages folder and
press Open.
Chapter 6 - Short messages
‚ Select a message and press Open. With the
message opened, press Menu and select the
Forward option.
ƒ When the message is ready to be sent, press
Recipient. The SMS directory will open.
„ You may Select your recipient from the SMS
directory, enter the number manually (press
Enter number), or view the numbers available from the Recent numbers lists.
6-5
‚ Once your recipient is entered, press Send.
To reply to a received message:
• Select the Received messages folder and
press Open.
‚ Select a document and press Open, then
Reply.
ƒ When the message is ready, press Send.
Received messages
To receive short messages the following requirements must be met:
• Service must be available from the network
operator.
• Phone interface must be on.
• You must be within network coverage area.
All messages are received automatically and go
to the Received messages folder.
When a new short message has arrived, a tone
will sound (unless the system is set to silent service mode) and an information note is shown on
the display (both the phone interface as well as
the communicator interface).
A received short message can be a normal short
message, business card (see ”Business cards” on
page 6-6), Service cards, or notification of a voice
message in your voice mailbox. In the Received
messages folder, unread received messages are
marked with
and unread received business
cards are marked with
.
To read a received message:
When you receive a note informing you about
a received short message, press View to read
the message immediately.
To read the short message later, press Cancel
to dismiss the received short message note.
When you are ready to read messages you
have received, open the Received messages
folder, select the message and press Open.
When you press Menu in an opened received
message, the following options be come available:
Use number — Allows you to call to a phone
number contained by the message.
Reply (Copy text) — This option allows you to include the contents of the received message in
the new message.
Forward — You can forward the received message.
Copy URL — You can copy a received URL address
to the WWW hotlist.
Standard messages
You can store frequently used short messages as
standard messages, instead of writing a new
message. Standard messages are stored in the
Standard messages folder.
When a standard message has been opened in
the short message editor, the text STANDARD
MESSAGE on the right top half of the card distinguishes between a normal message and a
standard message.
When you open the Standard messages folder,
you have the following options: Open, Menu,
Delete and Close.
Menu allows the option to Write message,
Rename, Copy, Move, and Create folder.
Delete erases the selected standard message
from the standard message list.
6-6
Business cards
Info messages
Info messages can be displayed as they are received, saved in the Info messages folder, or both.
Network operators may have a service that sends
informative notifications via GSM Short Message
Service. In order to receive Info messages, your
local network operator must support this service.
Contact your network operator for details and
availability.
To define info message topics, see ”SMS settings”
on page 6-2.
Message topics vary according to the operator.
Business cards
The business card is a special short message containing personal information about a contact,
just like a normal business card. You can send
any contact card as a business card.
Business cards sent from a device that supports
the Nokia 9000i Communicator contact card
format can be saved directly as new contact
cards in the Contacts directory:
• Press Menu in an opened received business
card and select Create card.
• The option Use number allows you to make a
phone call to any phone number in the
business card.
When you have received a business card, press
Reply to send your own business card to the
sender.
To send a contact card as a business card:
• Go to the SMS application main view.
‚ Open the Business cards folder.
ƒ Select a business card and press Open. The
contact information is retrieved from the
Contacts directory, unless you choose your
own business card, in which case the information is retrieved from the System application’s User Data card. Press Options to define
which fields to include (and show) in the
business card (Figure 6-2). In the options
view, Change toggles the fields on or off.
„ Press Recipient to select a recipient for the
business card. Send the message normally, as
described in the section ”Sending messages”
on page 6-3.
Note: When a business card you send is received
with the Nokia SMS Manager 1.1 software, the label texts of Tel fields are added
to the phone numbers. The label texts
must be removed before the phone numbers can be used.
Figure 6-2: Receiving a business card via SMS
Chapter 7 - Internet
7-1
7. Internet
The Internet applications are used to access
computerized information services via a data
call. To obtain access to the Internet, the following requirements must be met:
• Data calls must be supported by the network
you are using.
• Data service must be activated for your SIM
card (contact your network operator for
details).
• You have obtained an Internet Access Point
(IAP) from an Internet service provider.
Contact your retailer for details.
• You have entered the proper Internet
settings.
Activate the Internet application by pressing the
Internet button on the communicator interface.
From the Internet main view, select an application by scrolling and pressing Select.
With one Internet application active, you can
quickly switch to another by pressing the Internet button.
To close an active application, press Close.
Nokia IAP Info Online
Your Internet service provider may be able to
configure the access point for you via a special
SMS message. This message adds a new entry to
the list of defined Internet access points and
configures the settings for you.
When you receive the SMS message, you will be
asked to accept the settings. When you choose
Accept, the communicator will automatically
enter all the Internet settings in the appropriate
places.
Internet applications
E-mail — An electronic mail application which
lets you send and receive messages all over
the world using the Internet network.
World Wide Web (WWW) — A hypertext-based
system for finding and accessing resources
on the Internet network.
Telnet — Allows your communicator to connect to
computers which provide terminal services
through the Internet.
Terminal — Allows your communicator to connect
to computers, like mainframe computers,
which provide direct dial-in terminal services.
Both the Telnet and Terminal applications
emulate the VT100 terminal.
For online Information about Internet connectivity, go to the Internet application and select
WWW. From the Hotlist, highlight Access Point
Info- Retrieve Now! and press Retrieve. To connect to this Web site, you do not need to have an
Internet service provider, but you must have your
SIM card activated for data service.
Note: Depending on the network configuration
and load, establishing an Internet connection may take up to one minute (or even
longer).
Getting Internet service
When you want to disconnect, press Hang up.
Information concerning settings must be obtained from the Internet service provider.
Disconnection from the Internet will generate a
note on the display and cause the data call indicator to disappear.
Your service provider will give you instructions
on how to enter the Internet settings. Follow the
instructions carefully.
7-2
Internet glossary
Cookies
Cookies are little nuggets of information, given
by the server to the user, to store session information between the times the user visits the
same web site. When a user accepts cookies,
the server is able to store and use information
about the user’s actions on the visited web site.
Although the cookies are used by the server,
they are stored in the communicator.
Domain name and Host name
The terms “domain name” and “host name”
are sometimes, slightly inaccurately, used
synonymously. In a fully qualified domain
name (e.g., www.forum.nokia.com), the first
part of the name is the name of the host and
the following parts are names of domains the
host belongs to. Each host name corresponds
to a certain IP address (see below). Host
names are used because they are easier to remember than IP addresses.
Hypertext Markup Language (HTML)
A language used to define WWW documents’
appearance and content.
Hypertext Transfer Protocol (HTTP)
A document transfer protocol used in the
WWW system.
Images (Inline, External)
An inline image lies within a retrieved web
page; external images, which are often much
larger, must be viewed separately.
Internet Access Point (IAP)
Where your communicator connects to Internet by way of a data call. An Internet service
provider can be, for example, a commercial Internet service provider or your own company.
Internet Mail Access Protocol, version 4
(IMAP4)
A protocol used for accessing the remote
mailbox.
Internet Protocol (IP) address
All computers and other devices connected to
Internet using the Internet Protocol have
their own individual addresses. The address
consists of four groups of numbers separated
by periods: for example, “131.227.21.167.”
Multipurpose Internet Mail Extensions
(MIME)
A standard Internet format which permits including multiple mail objects in a single message. The mail objects can be, for example,
formatted multifont text messages and nontextual elements, such as images and audio
fragments.
Plug-in
An application that can be downloaded from
the WWW, used to display a document that
the WWW application itself cannot show.
Point to Point Protocol (PPP)
A common networking software protocol
making it possible for any computer with a
modem and a phone line to connect directly
to the Internet.
Post Office Protocol, version 3 (POP3)
Another common mail protocol that can be
used for accessing a remote mailbox.
Protocol
A formal set of rules that govern how data is
transferred between two devices.
Proxy
In some networks, the connection between
the WWW application and the resource you
want to connect to is blocked by a firewall.
The firewall protects the internal network
from unauthorized external access. A proxy is
an intermediary program which enables access through the firewall. A proxy can also
serve as a network “cache,” which speeds up
the downloading process.
Chapter 7 - Internet
7-3
Simple Mail Transport Protocol (SMTP)
An Internet protocol governing the transfer
of electronic mail.
cation in the Internet and in the TCP/IP
networks.
TCP Port
SSL (Secure Sockets Layer)
A security protocol that prevents eavesdropping, tampering, or message forgery over the
Internet.
SSL support is available as add-on software.
Check the material delivered in the sales package, or contact the Nokia HelpLine or http://
www.forum.nokia.com for further information
about latest SSL support.
Identifies the data port of the destination
computer.
Uniform Resource Locator (URL)
Link information required by the WWW service
to connect to a given WWW host computer.
The URL usually starts with http:// followed by
www. For example, the Forum.Nokia home
page can be found at: http://www.forum.nokia.com. URLs are often referred to with
phrases like “Home page location,” “Site location,” “can be found at... .”
Transmission Control Protocol/Internet
Protocol (TCP/IP)
A protocol that governs the data communi-
Internet settings
To access the Internet settings main view (Figure
7-1), go to the Internet applications main view
and press Settings.
Fixed 9600 b/s — Fixed data transmission rate
is used. If you experience problems with establishing a data call, try this option.
Note: The Internet settings apply to all Internet
applications.
Custom — When a data call is established,
the modem is first set to the factory defaults
and then initialized according to the string
you enter here. For Terminal connections, see
”Define Terminal connections” on page 7-18.
To define Internet settings:
¿ In the Internet settings main view choose
Internet access and press Change.
‚ To define a new Internet access point, press
New. To modify or change an existing one,
press Edit.
The Internet settings are:
Modem initialization — Allows you to define
your communicator’s modem settings.
Autobauding (default) — The data transmission rate is determined automatically.
Compression — On/Off (default). Speeds up
data transfer (e.g. mail sending or receiving)
when supported by the the remote (PPP)
server.
Data call restrictions — Initiates a data call restrictions dialog, similar to that in the Telephone
application (see Chapter 4 "Telephone: Telephone settings - Voice call forward, call restrictions and call waiting" on page 4-2). To see the
current restriction mode, press Get status. To
cancel all restrictions, press Cancel data
restrictions.
Internet access — Lists the defined Internet access points. You can define individual settings
for each Internet access point. If there are no defined access points, you will not be able to connect to the Internet. Press New to define a new
access point. Press Edit to change the settings of
an existing access point. Press Delete to remove
an access point.
7-4
Figure 7-1: Internet settings
The Internet access settings are:
Provider name — The Internet service provider’s
name which appears on the access point list.
Phone number — Telephone number of the
Internet access point.
User name — Used in the PPP authentication
process if required by the Internet service
provider.
Prompt password: Yes / No (default) — If you
must enter a new password every time you
log on to a server, or you do not want to save
the password, change this setting to Yes.
Password — Used in the PPP authentication
process if required by the Internet service
provider.
Advanced settings — Opens a new view
where you can make further adjustments for
a specific Internet access point, if required:
Modem initialization — Enter any modem
initialization string containing AT commands here, if needed. This initialization
string is executed after the initialization
string you define in the Internet settings.
Login customization — None (default),
Manual. Some Internet access points do
not automatically enable PPP. In such
cases you need to choose either Manual,
as it allows you to enter manually your
login name and password over a terminal
connection, or press New in the pop-up
box, to write and save a new login script.
If you choose None, your password and
user name are automatically taken from
the Internet access point settings.
For more information on login scripts, see
the scripts.txt file on the diskette supplied
with the communicator.
IP address — The communicator’s own IP
address.
Default gateway — The IP address of the
system that is a gateway out of the local
network.
Network mask — Shows which portion of
the communicator’s IP address identifies
the network.
Primary nameserver — The IP address of
the primary nameserver.
Secondary nameserver — The IP address of
the secondary nameserver.
You may define numerous Internet access points,
as well as specify one to be used whenever making a connection to a particular server.
Chapter 7 - Internet
7-5
E-mail
The Nokia 9000i Communicator e-mail system is
compliant with the Internet standards SMTP,
IMAP4, POP3, MIME1 and MIME2.
E-mail is started in the Internet main view by
selecting E-mail and pressing the Select command button. The E-mail main view shows the
following folders:
Own texts — Contains the texts you have created
with the communicator. The listed documents
may contain formatted text, but the text will
appear in the editor without formatting.
Received e-mail — Contains e-mail retrieved
from the remote mailbox (see ”Receiving e-mail”
on page 7-9).
Remote mailbox — Your electronic mailbox service, which receives all your e-mail, is called the
remote mailbox. This service may be offered by a
GSM network operator, your company, or a commercial Internet service provider. The mail protocol used between the communicator and the
remote mailbox is IMAP4 or POP3. Required
mailbox and Internet Access Point settings are
described in ”E-mail settings” on page 7-5.
Document outbox — The communicator’s outgoing
communications manager (see Chapter 12 ”Document outbox” on page 12-1).
E-mail settings
Be sure to define your Internet access point as
described in ”Internet settings” on page 7-3.
mail. This setting determines the font used in the
e-mail editor/viewer.
To alter the E-mail settings:
¿ Go to the E-mail main view.
‚ Press Settings.
Sending settings — Changing this setting opens
a new set of options, described below.
To change one of the following items, select it
and press Change.
Internet access — Refers to the Internet access
point you will use to send and receive e-mail. To
define new or edit existing Internet access point
(see ”Internet settings” on page 7-3).
Show header fields — None / Basic (default) / All.
The term “header field” refers to the information
given at the top of a fax or e-mail message. This
setting controls which header fields you will see
when you open your received e-mail. All will
show all possible fields; Basic will show the
Date, From, To and Subject fields; None will not
show any header fields (the sender and the subject are still shown in the message name).
Font — URW Mono / URW Roman / URW Sans
(default). Choose the font you prefer for your
Own e-mail address — A standard Internet
format address. The address must contain the
@ character. This entry is obligatory if Internet mail services are to be used. Replies to
your messages will be sent to this address.
Sending host — The IP address or host name
of the computer which sends your Internet
mail.
Send e-mail — Immediately (default) / Upon
request / During next connection. Choose
Immediately to send e-mail automatically,
Upon request if you want to write several mail
messages and send them at your convenience,
or During next connection if you want your
mail sent the next time you make a connection
to the Internet access point that your mailbox
uses (see "Sending e-mail: Send e-mail upon
request" on page 7-8).
7-6
CC: own e-mail address — Yes / No (default).
If the setting is Yes, the mail will be automatically sent to the address defined in Own
e-mail address.
MIME character encoding — On (default) / Off.
MIME encoding allows another MIME compliant e-mail system to read the character set
used in your communicator. Only when text
containing special characters (e.g. á, ä, ß) is
sent to a non MIME compliant e-mail reader
should the MIME encoding be turned off.
When MIME encoding is off the special characters are automatically converted to ASCII
characters: ‘ä’ becomes ‘a’ and so on.
Remote mailbox settings — Changing this setting opens a new set of options, described below.
Your remote mailbox service provider will supply
you with the required information.
Remote mailbox user name and Remote mailbox password — These may be required to connect to the server and to open your mailbox.
The password characters appear as asterisks
(*) on the display. A user name and password
stored here will be automatically offered to
the server. You will only have to enter your
user name and password if you have stored
them incorrectly (in this case, you will be
prompted when you connect to the remote
mailbox).
Pressing Cancel, or entering your user name
and password incorrectly three times will terminate the connection to the remote mailbox. For information on how to change the
Sending e-mail
Remote mailbox password, contact your Remote mailbox service provider.
Receiving host — The IP address or host name
of the computer that receives your Internet
mail.
Remote mailbox folder — INBOX is the default folder name for your incoming e-mail.
Do not change this name without consulting
with your remote mailbox service provider.
This option is only available when the remote
mailbox protocol is IMAP4.
Remote mailbox protocol — IMAP4 (default) /
POP3. Your remote mailbox must support one
of these protocols in order to access your remote mail. Choose the e-mail protocol your
mailbox service provider recommends.
Retrieve headers – All (default) / Recent. Determines whether all e-mail headers or just the
headers for e-mail received since the last connection will be retrieved. It is possible to have
old or unread e-mail (that you have chosen not
to download or delete) in the remote mailbox.
Retrieve attachments – Yes (default) / No.
Determines whether possible e-mail attachments are downloaded or not. Text attachments are always downloaded. This option is
only available if the remote mailbox protocol
is IMAP4.
Delete retrieved — Yes / No (default). Determines whether downloaded e-mail will be
automatically deleted from the remote mailbox. All downloaded e-mail goes to the remote mailbox as well as the Received mail
folder.
Sending e-mail
E-mail can be sent either via the Internet, Notes
(see Chapter 8 "Notes: Sending documents" on
page 8-3) or Calendar applications (see Chapter 9
"Calendar: Daily schedule - Memos" on page 9-3).
To create new e-mail:
¿ Press Write e-mail in the E-mail main view.
An empty e-mail editor opens.
‚ Write the message. You can apply a style (i.e.,
format the text) within the E-mail settings.
Chapter 7 - Internet
7-7
Figure 7-2: Sending e-mail
¬ When the message is ready to be sent, press
 Press Menu and select Reply. If the received
Recipient (Figure 7-2). The e-mail directory
will open and you may select an address from
the list or manually enter the address on the
line provided (see "Sending e-mail: E-mail directory" on page 7-7).
mail message is a MIME document, only the
first text part is included in the reply.
Ð When the reply is ready to be sent, press Send.
The e-mail envelope opens (see Figure 7-3).
To send previously created documents:
¿ Select the Own texts folder in the E-mail
main view and press Open.
¡ Select a document and press Open. The document is loaded in the e-mail editor using the
font chosen in E-mail settings.
If the document contains text formatting,
before you can edit the document, you will be
asked if you want to edit the original (and
lose all formatting) or create a copy in the
Own texts folder and edit the copy instead.
Choose either Copy, Edit or Cancel.
¬ When the document is ready to be sent, press
Recipient to open the E-mail directory (see
"Sending e-mail: E-mail directory" on page 7-7).
Select the recipient or enter the e-mail address
and press Send. Your mail will go to the Document outbox.
Reply / Forward e-mail
To reply to received mail:
À Select the Received mail folder and press
Open.
¡ Select a message and press Open. A new set
of commands appears
To forward received mail:
¿ Select the Received mail folder and press
Open.
¡ Select a message and press Open. The mail
message will open.
¬ Press Menu, and select Forward. The e-mail
editor opens. The contents of the message you
are forwarding will be included in the new
message. If the received e-mail message is a
MIME document, only the first text part is
copied to the forwarded message and may be
edited. Any MIME attachments are included in
the forwarded message, but they are not
visible in the editor.
Ð When the message is ready to be sent, press
Recipient to open the E-mail directory.
E-mail directory
The E-mail directory contains all the contacts of
the Contacts directory, but the names of contacts who have no e-mail address are dimmed
and cannot be selected. To edit stored contact
information and add an e-mail address, switch
to the Contacts application.
To select a recipient listed in the E-mail directory:
7-8
Sending e-mail
• Move the selection frame over the contact’s
name and press Select. To select more than one
recipient, use multi-select (Ctrl+space bar).
The e-mail envelope will open if the contact has
only one e-mail address. If the contact has several
e-mail addresses, a pop-up box opens, listing the
available addresses. Select an address and press
Select to open the e-mail envelope (Figure 7-3).
To enter the recipient’s address manually, press
Enter e-mail address.
E-mail envelope
The E-mail envelope opens whenever you are
about to send e-mail (Figure 7-3). The command
buttons and their functions are as follows:
Send — Sends e-mail to the document outbox,
provided all address fields are correct.
Send options — Sets options for sending the
current e-mail message.
Send e-mail: Immediately (default), Upon request or During next connection (see "Sending e-mail: Send e-mail upon request" on
page 7-8).
CC: own e-mail address — Yes / No (default)
(see ”E-mail settings” on page 7-5).
You can also manually enter standard Internet
addresses. The basic format of an Internet address
is mailbox@domain. Multiple addresses in the To
and CC fields must be separated by a comma.
Cancel — Allows you to cancel the send. You will
be asked to confirm this action, as all information (To, CC, etc.) will be deleted from the E-mail
envelope.
To add attachments to the current message:
Scroll down to Attachments and press Attachments. A list of attachments opens. To add documents to the list, press Add. You can select
documents from the Own texts and Downloaded
files folders. To remove documents from the attachment list, press Remove. When all the desired attachments are in the list, press Close.
Send e-mail upon request
When you have several e-mail messages to send,
you may want to use the Upon request or the
During next connection option (set in E-mail
settings)– instead of the default Immediately
option – so that you may send all your e-mail
during the same data call.
To send several messages at once:
MIME encoding: On (default) or Off (see ”E-mail
settings” on page 7-5).
¿ Write your e-mail and select the recipient.
¡ Press Send options.
¬ Select Send e-mail setting, and press Change.
Add recipient — Displayed as a choice if the cursor is over the To or CC fields. You may enter an
address in either the To or the CC field, whichever
was selected when Add recipient was pressed.
Highlight a contact from the E-mail directory, and
press Select.
and choose either Upon request (you choose
the time and initialize the sending) or During
next connection (your mail will be sent the
next time you make an connection to the Internet access point that your remote mailbox
uses).
Figure 7-3: E-mail envelope
Chapter 7 - Internet
When you press Send in the E-mail envelope, the
e-mail message will go to the Document outbox,
but will not be sent immediately (see Chapter 12
”Document outbox” on page 12-1).
7-9
To send Upon request:
¿ In the E-mail main view, scroll down to the
Document outbox and press Open.
¡ Press Start to send your e-mail. All e-mail
with the Upon request status will be sent
with one command (and one data call).
Receiving e-mail
Your incoming e-mail is received by the remote
mailbox (Figure 7-4). If your Remote mailbox
server is capable of sending you special short
messages, you will hear a tone (unless the system is set to silent service mode) and see a note
when new e-mail arrives in your remote mailbox.
In the remote mailbox, unread messages are
marked with
, messages with attachments
with
and deleted messages with .
The E-mail and Internet access point settings
must be configured correctly (see ”Internet settings” on page 7-3).
is downloaded, the connection to the remote
mailbox is closed the E-mail main view returns.
To download a selected message:
Select the mail message(s) you wish to download
and press Retrieve selected. After mail has been
downloaded, the Remote mailbox view returns.
To delete/undelete an e-mail message:
Select a message and press Delete or Undelete.
The messages will be deleted when you exit the
remote mailbox.
To disconnect from the remote mailbox:
To connect to the Remote mailbox:
¿ Go to the E-mail main view.
¡ Scroll the selection frame to the Remote
mailbox.
¬ Press Connect.
Press Hang up. If you have messages marked as
deleted, you will be prompted to confirm the deletion. The connection to remote mailbox closes,
and the E-mail application main view returns to
the display.
The communicator will establish a connection to
your remote mailbox and download the mail
headers you specified in the E-mail settings
(Retrieve all is the default). The mail headers
contain information about the incoming e-mail,
such as the sender’s name and e-mail address,
the time it was sent and subject of the mail.
Reading e-mail
Once you have connected to the remote mailbox,
you can retrieve and delete e-mail. If the Delete
retrieved setting is set to Yes, (see ”E-mail settings” on page 7-5), retrieved messages are
marked as deleted. These messages will be retained in the Received mail folder, and marked as
deleted in the Remote mailbox.
To download new e-mail:
Press Retrieve new. All new e-mail is downloaded
to the Received mail folder. After all new e-mail
Downloaded e-mail is stored in the Received
mail folder.
To read your e-mail:
¿ Go to the E-mail main view and scroll down
to Received mail and press Open.
The Received mail view shows a list of received
mail messages. E-mail messages that have not
yet been opened in the communicator are
marked with
.
‚ Highlight the e-mail you want to read and
press Open. The command buttons available
when reading e-mail are shown in Figure
7-5, and are explained in ”Sending e-mail” on
page 7-6.
7-10
Receiving e-mail
Figure 7-4: Remote mailbox
To set the amount of information shown in the
header fields, go to the E-mail main view, select
Settings, and scroll down to Show header fields.
From the Received mail folder, when you open a
received e-mail the following command buttons
are displayed:
Menu — Opens up a pop-up box with the reply
and forward options:
Reply (include text) — Reply to an e-mail and
include the received mail in your reply.
Reply — Reply to an e-mail without including
the received mail in your reply.
Reply all (include text) — Reply to all persons
who received the e-mail and include the received mail in your reply.
Reply all — Reply to all persons who received
the e-mail without including the received
mail in your repl.y
Forward — Forward a received e-mail (the received e-mail along with any attachments
will be sent).
Scroll to any of these and press Select.
Attachments — Lists all MIME attachments
(text, image, audio, video or application). If no
attachments are contained in the message, this
command is dimmed. When viewing the list of
attachments you may select an attachment and
choose from the following options:
View will open and display the attachment
provided there is enough memory and a
viewer associated with the attachment.
Save will save the attachment in the Downloaded files folder.
Close returns you to the previous screen.
Delete — Will delete the open e-mail message.
Close — Will return you to the previous screen.
Figure 7-5: Reading e-mail
Chapter 7 - Internet
7-11
World Wide Web
To connect to the World Wide Web, you need:
• Your SIM card activated for data service
• An account with an Internet service provider.
To open the World Wide Web (WWW) application:
¿ Go to the Internet application main view.
¡ Select WWW and press Select.
To exit the WWW application, press Hang up in
the WWW main view (the Hotlist). This will end
the data call and close the WWW application.
WWW settings
To see the WWW settings, press the Settings
command button in the WWW main view. To
change the setting, select it and press Change.
Internet access point— Contains your current Internet settings. Although the Proxy settings may
be left blank, an Internet access point must be
defined before you can make an Internet connection (see ”Internet settings” on page 7-3).
Changing the Internet access point sets the default for subsequent connections.
Internet access — To change the Internet
access point, highlight Internet access and
press Change. Choose from among the access
points you have defined in the Internet settings (see ”Internet settings” on page 7-3) by
highlighting it and pressing OK, then Close.
This will set your default WWW Internet access point.
Proxy settings allow you to use a proxy (a
brief description of the proxy is included in
”Internet glossary” on page 7-2). The HTTP
proxy server name and HTTP port must be
defined before using the proxy.
HTTP proxy – The hostname of the HTTP
proxy server.
Proxy port – The port number that the
proxy server uses.
No proxy for – You may define domains for
which the proxy must not be used. Domain
names are delimited by commas (for exam-
ple, nokia.com, cal.edu). You may specify
the domains as accurately as you wish.
Autodisconnect time — 2 min, 3 min (default), 5
min, Maximum. Determines the length of time the
communicator will be connected to the WWW in
an idle state before automatically disconnecting.
Show e-mail address — Yes (default) / No. Show
e-mail address includes your e-mail address
with the Retrieve request when retrieving a
WWW page. The e-mail address is defined in the
E-mail application settings.
Autoload images — Yes / No (default). If the
autoload images option is Yes, inline (JPG or GIF)
images on the WWW page are downloaded
automatically. When the setting is No, WWW
pages are downloaded without the images and
shown much faster.
Clear cache and history — Yes (default) / No.
Most recently downloaded WWW pages are kept
in the communicator’s temporary memory,
called the cache. If Clear cache and history is set
to Yes, the WWW cache, history list and cookie
file (see below) are automatically emptied after
you exit the WWW application. If Clear cache
and history is set to No, the cache stores as
much information as possible. When you restart
the WWW application, the most recently stored
information can be retrieved from the cache and
history list without making a new data call.
7-12
URL entry box visible – Yes (default) / No. When
Yes is chosen, the URL entry box is shown in the
WWW browser main view, and the URL is read
from the entry box. When the option is No, the
URL is read from the Hotlist.
Hotlist
Accept cookies – Yes / No (default. Determines
whether the cookies functionality is enabled.
Plug-ins — Contains a list of installed plug-ins. See
"Connecting to WWW: Plug-ins" on page 7-15.
Hotlist
The WWW main view shows the Hotlist (a list of
predefined WWW page locations), with the
name of the Internet access point in the status
line. Below the Hotlist is the URL entry field
which shows the address of the last visited
WWW page.
To view a page:
¿ Select an entry in the Hotlist or enter an
address in the URL entry field (use the backspace key to delete the address shown).
¡ Press Retrieve.
To add a new Hotlist item:
¿ Press Define. A new set of commands is
activated.
¡ Press New.
¬ Enter the Item name you want for your new
Hotlist item, then tab to the URL field.
Ð Enter the HTTP address (e.g., www.nokia.com).
ƒ The Autoselect IAP field is for those who
want to use a specific Internet access point
(IAP) to connect to a certain web site. If you
have no preferences about which IAP is used,
leave the Autoselect IAP at Yes. To specify an
IAP, tab to Autoselect IAP and choose No.
You may then tab down to the Internet access field, press Change, and select from
among the predefined access points.
Ý Press Close to exit the Define hotlist item
screen.
ý Press Back to return to the WWW main view.
URL addresses begin by default: “http://,” but the
prefix “file:///” can also be used. The WWW application checks that the syntax of the URL you
enter is correct. If a prefix is missing, “http://”
will be added automatically.
To edit the Hotlist:
¿ In the WWW main view, press Define. A new
set of commands is activated.
¡ Scroll to the Hotlist item you wish to edit,
and press Edit.
¬ Make your changes and press Close to exit
the Edit hotlist item screen.
Ð Press Back to return to the WWW main view.
To delete a Hotlist entry:
¿ In the WWW main view, press Define.
¡ Scroll to the hotlist item you wish to delete,
and Press Delete. You will be asked to confirm this action.
You may select more than one item to be deleted by using the multi-select function, Ctrl
+ space bar (see Chapter 2 "Getting started:
Special features - Multi-select function" on
page 2-12).
¬ After deleting the selected item, press Back
to return to the WWW main view.
Chapter 7 - Internet
7-13
Connecting to WWW
¿ Select a WWW page from the Hotlist or enter
a URL address in the URL entry field (see
"Connecting to WWW: Navigating in WWW"
on page 7-14).
¡ Press Retrieve.
If the WWW page has been downloaded and remains in the communicator’s temporary working
memory (or “cache”), the page is retrieved from
there. If not, the page is downloaded from the
Internet by making a data call to the selected
Internet access point.
After the WWW page has been downloaded, the
following commands are available (Figure 7-6):
Go activates the WWW navigation commands
(see "Connecting to WWW: Navigating in
WWW" on page 7-14).
Save activates a new set of commands:
Copy text/Copy image copies the text (or
image) on the opened page into the Downloaded files folder. Possible text formatting is
retained in the copy.
You can retrieve WWW pages stored on the
communicator by using the prefix “file:///”.
Add to hotlist adds on the Hotlist a link
pointing to this WWW page.
Some servers have access restrictions which require a valid user name and password before a
document can be downloaded. The communicator will store the passwords and user names that
you enter to gain access to those domains, and
submit them automatically the next time you
connect to the same domain. If the automated
login does not succeed, you will be asked to enter the information manually.
Copy HTML saves the HTML code of the currently opened WWW page or inline image
into the Downloaded files folder and adds to
the hotlist a link pointing to this WWW page
(see "Connecting to WWW: Locally stored
WWW pages" on page 7-14).
Note: Stored passwords to individual web sites
are removed when the communicator is
rebooted (i.e., when the battery is removed and replaced).
The downloaded WWW page is loaded in the
WWW browser. The status line on top of the display shows the status of the connection, the title
of the document and how many bytes of the
document file have been received.
To reload a web page, press Ctrl+R.
Back returns the previous set of commands.
Off line ends the data call and disconnects from
the Internet. Once you are off line, this command changes to On line.
You may choose to use the Off line function, for
example, to read copied text off line. The copied
text can be read or edited (see Chapter 8 "Notes:
Notes settings - Editing" on page 8-2).
To reconnect to the Internet, press On line.
While you are off line, commands Retrieve, Retrieve image or Previous, or other applications
may also return you to on line.
Close returns you to the Hotlist.
Figure 7-6: Downloaded WWW page
7-14
Connecting to WWW
Locally stored WWW pages
To store downloaded WWW pages locally (i.e., on
your communicator):
¿ From the WWW page you have retrieved, press
Save. A new set of commands is activated.
¡ Press Copy source.
Hotspots (such as selection lists, text entry fields
and reset/submit buttons) enable you to input
information into the World Wide Web.
Use the scroll buttons to scroll the view and to
choose hyperlinks and hotspots. Each scroll key
press selects the nearest hyperlink or hotspot, or
moves the view one line up or down.
The current WWW page HTML code will be
stored in the Downloaded files folder and a link
pointing to this WWW page will be added on the
hotlist.
The following commands may be available in
this view, depending on the hyperlink or hotspot:
Locally stored WWW pages are marked by
in the Hotlist.
Retrieve image — Loads an image.
To view or edit the HTML code of the saved
WWW page:
¿ Go to the Notes application.
¡ Scroll down to the Downloaded files folder.
¬ Open the document to view the code.
If you want to view the document as it would
appear in the World Wide Web, open the document in the WWW application. A locally stored
WWW page is opened in the WWW browser by
using the prefix “file:///” (note: three slashes)
instead of “http://” (two slashes).
Navigating in WWW
If there are hyperlinks or hotspots in the part of
the WWW document shown in the application
window, one will always be selected (see Figure
7-7). Hyperlinks are links to other documents or
images, used to send or receive information from
the World Wide Web.
Retrieve — Follows a hyperlink (usually downloads text).
Press — Available when a hyperlink choice
should be made by pressing a button.
Change — Activates various items, such as check
boxes.
Previous — Opens the previously visited WWW
page. The command is dimmed if there is no previous page.
Index — Activates the Navigation index view.
You may select a previously downloaded WWW
page from the Navigation index list and press
Retrieve. The index contains the most recently
retrieved documents (and their URLs – shown in
the URL entry box). After the maximum list
length is reached, older pages are deleted one by
one as new ones are stored
If you wish to clear the list, choose Clear now.
All the items in the Navigation index and the
cache will be deleted.
Back — Returns the WWW browser commands.
Figure 7-7: WWW Hyperlinks
Chapter 7 - Internet
Viewing images
Images within retrieved WWW pages are called
inline images. By default, inline images will not
be downloaded with the WWW page (see the
option Autoload images in the WWW settings),
but will be displayed as icons. To download an
image, select the icon and press Retrieve image.
Inline images can also be image maps. An inline
image map acts like a hyperlink. A retrieved an
selected image map contains a cursor which can
be moved with the arrow keys. When you press
Retrieve, the pixel coordinates of the cursor are
sent to the URL, and the corresponding WWW
page is downloaded.
Images that are separate documents and not
part of a hypertext document are called external
images. When an external image is downloaded,
it is viewed separately from the hypertext document in the image viewer.
There are two external image viewer commands.
Copy image copies the external image in the
Downloaded files folder with its server-given
name, and View allows you to Zoom in and
Zoom out. The Image viewer is similar to the Fax
viewer (see Chapter 5 "Fax: Received faxes" on
page 5-5).
Plug-ins
The Nokia 9000i Communicator is capable of
accepting software plug-ins which can increase
web browser functionality.
7-15
To download a plug-in:
¿ Move the cursor over the hypertext link that
points to the plug-in and press Retrieve.
¡ Press Install. If there is sufficient memory
available, the plug-in will be installed.
Installed plug-ins can be removed in the
Plug-ins list in the WWW settings.
Downloading add-on
software
The WWW application can be used to install
software applications on your communicator.
¿ Go to the WWW site where the add-on software package exists.
¡ Select the hypertext link that points to the
add-on software package.
¬ Press Retrieve to download the package.
After the software package has been successfully
downloaded, the software installation view
opens.
Ð Press Install to install the software.
The downloaded software will appear among the
Extras applications.
Caution: Beware of viruses. Install into the
Nokia 9000i Communicator only software you
have obtained from sources which offer adequate protection against viruses.
7-16
Define Telnet connections
Telnet
To activate the Telnet application:
¿ Go to the Internet applications main view.
¡ Scroll down to Telnet and press Select.
The Telnet application is used to make a connection to a remote computer via the Internet.
The Telnet application is similar to the Terminal
application, in that both applications emulate
the VT100 terminal display (see Figure 7-8).
The display occupies the left side of the screen
(screen size is 80 characters in 24 lines).
Once a Telnet connection is established, you
must (in most cases) enter your login name and
password in order to be able to use the services
provided by the host computer. The Telnet main
view shows all pre-defined Telnet hosts.
To connect with a pre-defined Telnet host, select
a host and press Connect (see "Define Telnet
connections: Telnet commands" on page 7-16).
To create new or edit existing connections, press
Define (see "Define Telnet connections" below).
Define Telnet connections
To create new or edit existing connections:
Go to the Telnet main view and press Define.
The defined Telnet connections will appear.
To edit an existing connection, press Edit.
To define a new Telnet connection, press New.
To delete the selected connection, press Delete.
Pressing Edit or New opens the Define Telnet
connection view, where you can define the
following settings:
Connection name — Edit an existing or enter a
new connection name. The name can be defined
freely.
Destination host — Edit an existing or enter a
new connection address. The host is identified by
either a numeric IP address or a correct textual
host name.
Internet access — Select a service provider from
those currently defined. To change the preferred
service provider, press the Change command
button.
Backspace key — Defines whether the keyboard
backspace key is used as a backspace (BS - default) or delete (DEL ) key.
Telnet commands
When you have connected to the remote system,
the following commands become available:
Keys
Texts
Zoom in / Zoom out
Hang up
Press Keys to emulate the VT100 special keys
which are not available on the communicator
keyboard. The special keys include:
• Four programmable function keys (PF1-4).
• All VT100 application keypad keys (numbers
1-9, minus, comma, period, dash, enter).
• The following VT100 functions: reset
terminal, Ctrl-\, Ctrl-], Ctrl-~.
Chapter 7 - Internet
7-17
Figure 7-8: Telnet connection
In a Telnet connection, these special keys include
the following commands (can be used in remote
systems that support them):
Interrupt — For interrupting the current process on the remote computer.
Skip command output — To prevent command output from being displayed on the
screen.
Are you there? — For enquiring whether the
remote system is still running (if the execution of a task seems to take too long).
The selected special character is entered to the
left of the cursor by pressing Insert. The inserted
special characters send a control signal to the
remote computer – they are not displayed on the
screen.
Press Zoom in if the whole emulated screen and,
consequently, character size is too small. The
Zoom out command returns the unzoomed view.
When the view is being zoomed, the scroll keys
can be used to switch between the upper and
lower parts of the terminal screen.
Press Texts to activate the text transfer commands (see "Define Telnet connections: Text
transfers" on page 7-17).
Press Hang up to close the connection to the
host, end the data call and return to the Telnet
application main view.
The scroll up/down buttons can be used for
scrolling the view. Scrolling does not affect the
cursor position. Pressing any keyboard key returns the view to the cursor position.
Text transfers
The text transfer function enables you to download (capture) or upload (send) texts between a
host computer and the communicator. This feature can be used, to send pre-written e-mail
messages to the company mainframe computer,
or copy received e-mail and read it later off line.
Once you have connected to the host, press
Texts in the Telnet or Terminal main view to
access the Text transfer view.
To send text to the host computer:
¿ Press Send text.
¡ Open one of the folders shown and select the
document you want to send and press Send.
While the text is being uploaded, the keyboard is
inactive.
To copy text from the host computer:
¿ Prepare the text reading application on the
host.
¡ Press Capture text. All interaction with the
host will be recorded in a file in the Downloaded files folder. Control characters, except
line changes, will not be stored.
¬ Press Stop capture to end the text capture
process.
Press Back to return to the previous set of
commands.
7-18
Define Terminal connections
Terminal
To activate the Terminal application:
¿ Go to the Internet applications main view.
¡ Scroll down to Terminal and press Select.
The Terminal application is used to connect
directly (not via Internet) to a remote computer
by way of a data call.
The Terminal main view shows defined Terminal
connections. The Terminal application is similar
to the Telnet application, in that both applications emulate the VT100 terminal display
(see Figure 7-8). The display occupies the left
side of the screen (screen size is 80 characters in
24 lines).
Select the host and connection initiation procedures the same way for a Terminal connection as
for a Telnet connection. To connect with a selected pre-defined Terminal connection, press
Connect (see "Define Terminal connections: Terminal connection" on page 7-19). To create new
or edit existing connections, press Define (see
"Define Terminal connections" below).
Define Terminal connections
Go to the Terminal main view and press Define.
The defined Terminal connections will appear.
Data bits — Enter the service/host specific communication parameter: 7/8 (default).
To edit an existing connection, press Edit.
Parity — Enter the service/host specific communication parameter: None (default)/ Odd/ Even.
To define a new Terminal connection, press New.
To delete the selected connection, press Delete.
Pressing Edit or New opens the Define Terminal
connections view (Figure 7-9):
Connection name — Edit an existing or enter a
new connection name. The name can be defined
freely.
Stop bits — Enter the service/host specific communication parameter: 1 (default)/2.
Local echo — Controls whether characters typed
from the communicator keyboard are echoed to
the communicator interface display (i.e., locally)
or to the remote host computer: On (echoed locally)/ Off (echoed to the remote host – default).
Phone number — Enter the phone number to access the service. The phone number may include
spaces and hyphens.
Figure 7-9: Define terminal connections
Chapter 7 - Internet
Modem initialization — Any modem initialization
string containing AT commands may be entered
here, if needed. The initialization string in the
Internet settings (Modem initialization: Custom
view) is executed first, then the modem initialization string.
Backspace key — Defines whether the keyboard
backspace key is used as a backspace (BS - default)
or delete (DEL ) key.
Terminal connection
When you have connected to the remote system,
the following commands become available:
Keys
Texts
Zoom in / Zoom out
Hang up
Press Keys to emulate the VT100 special keys
which are not available on the communicator
keyboard. The special keys include:
• Four programmable function keys (PF1-4).
7-19
• All VT100 application keypad keys (numbers
1-9, minus, comma, period, dash, enter)
• The following VT100 functions: reset
terminal, Ctrl-\, Ctrl-], Ctrl-~.
The selected special character is entered to the
left of the cursor by pressing Insert.
Press Texts to activate the text transfer commands (see "Define Telnet connections: Text
transfers" on page 7-17).
Press Zoom in if the whole emulated screen is
too small. The Zoom out command returns the
unzoomed view. When the view is being zoomed,
the scroll keys can be used to switch between
the upper and lower parts of the terminal screen.
Press Hang up to close the connection to the
host, end the data call and return to the Terminal
application main view.
The scroll up/down buttons can be used for
scrolling the view. Scrolling does not affect the
cursor position. Pressing any keyboard key
returns the view to the cursor position.
Chapter 8 - Notes
8-1
8. Notes
Figure 8-1: Notes application main view
Notes is used for writing notes and managing
various documents stored on the communicator.
All folders as well as the Document outbox are
shown in the Notes main view. Folders within
the Notes main view are (see Figure 8-1):
Own texts — Created e-mail, faxes, short
messages, notes and memos.
Received faxes — Received faxes
Received messages — Received SMS messages.
Received e-mail — Received e-mail messages.
Downloaded files — Documents downloaded
with the Internet applications.
Document outbox — Documents waiting to
be sent.
Notes is the only application which allows direct
printing.
Notes settings
To change the note editor’s default settings:
• Press Settings in the Notes application main
view.
‚ Select a setting and press Change to open it.
The settings are the default values for the text
options and margins in the note and fax editors,
and are valid until they are changed again in the
Settings view.
Font: URW Roman / URW Sans (default) / URW
Mono
Size: 10 points / 12 (default) / 14 / 18 / 24 / 36 /
User defined
Margins — Opens a new view where you can
define values for the following (the unit of
measure is chosen in the Preferences of the
System application’s settings):
Top margin (default 2.54 cm / 1 inch)
Bottom margin (default 2.54 cm / 1 inch)
Left margin (default 2.54 cm / 1 inch)
Right margin (default 2.54 cm / 1 inch)
8-2
Menu
Each folder has a Menu command, which provides the following options:
Write note — This option is available only
inside Own texts folder.
Rename — With this option you can rename
the selected subfolder or document. Memos
cannot be renamed.
Copy — If you select Copy, you can choose a
folder into which the document is copied.
Move — You can move documents from one
folder to another. Memos cannot be moved.
Create folder — This option allows you to
make a new subfolder.
To read a document in any of the above folders:
• Select a folder and press Open.
‚ Select a document from the folder’s document list and press Open.
Editing
When you open a document, the document is
opened in the appropriate editor or viewer
(received faxes are opened in the fax viewer,
downloaded figures in the image viewer, etc.).
The available commands vary according to the
editor/viewer.
If the opened document is very large (dozens of
pages), the time required before the document
opens and can be scrolled or edited is longer
than with smaller documents.
Documents that open in the Note editor can be
directly edited and formatted. To format the text,
press Style. The following options are available:
Font — URW Roman / URW Sans (default) /
URW Mono (true type fonts)
Size — 10 / 12 (default)/ 14 / 18 / 24 / 36 /
User defined (measured in points)
Bold (Ctrl-B) — On / Off (default)
Italics (Ctrl-I) — On / Off (default)
Notes settings
Underlined (Ctrl-U) — On / Off (default)
Justification — Left (default) / Centered /
Right / Full
Margins — Opens a new view where you can
choose a value (default is 2.54 centimeters/
1 inch) for the top, left, right and bottom
margins. The unit of measurement is chosen
in the System settings (see Chapter 10 "System: System settings" on page 10-1).
A new style setting affects all new text from the
cursor point forward. The margin settings, however, apply to the whole document. To change
the settings permanently, you must do it in the
main view settings (see Chapter 10 "System:
System settings" on page 10-1).
Created and downloaded
texts
All created documents, as well as downloaded
and captured texts (see Chapter 7 "Internet:
Connecting to WWW" on page 7-13, and ”Text
transfers” on page 7-17), can be opened in the
Notes editor.
Read-only documents
Received e-mail and ASCII text files (transferred
to the communicator with the File transfer application, see Chapter 10 "System: File transfer"
on page 10-7) are read-only documents. Readonly documents themselves cannot be edited,
but an editable copy can be created:
• Open a read-only document – the contents
are shown as plain ASCII text.
‚ In the opened read-only document, press any
character key. You will be asked if you want
to create an editable copy.
ƒ Press Create to close the original file and
copy its contents to a new, created text file.
DOS file will be deleted after an editable copy
has been created.
„ Edit the new created note normally.
Chapter 8 - Notes
Received faxes and
downloaded figures
The contents of a received fax cannot be converted into text or edited. Opening a fax activates the fax viewer (see Chapter 5 "Fax:
Received faxes" on page 5-5) and opening an
image activates the image viewer (see Chapter 7
"Internet: Connecting to WWW - Navigating in
WWW" on page 7-14).
Note: A list of shortcuts is included in Chapter 2
"Getting started: Special features - Settings and Menus" on page 2-13.
Special characters
The special character key Chr (on the keyboard)
is used to create letters that are not included in
the keyboard. The character key can always be
used when you are able to enter characters from
the keyboard. The case of the inserted special
character is determined by whether the Shift or
Caps lock key has been pressed.
8-3
To enter special characters from the character
table:
• Press and release the Chr key and a special
character table opens on the screen.
‚ Move the selection frame over the desired
special character with the arrow keys, scroll
buttons or by pressing a keyboard key.
ƒ Press the Insert command button to close the
character table and to insert the selected
character to the left of the cursor.
To insert special characters from the keyboard:
Press and hold the Chr key while simultaneously pressing a key with a special character printed on the key as the third (green)
character. The special key will be inserted on
the display.
Special characters can also be generated using
certain unmarked keys which are associated with
the special character, for example, “a”. If you hold
the Chr key down and press the “a” key, you will
produce an “à”. Continue to hold the Chr key and
press the “a” key repeatedly to scroll through the
list of characters associated with “a”.
Sending documents
When you send a document in the Notes application, you can choose whether to send the document as a fax, e-mail or short message.
• Open one of the document folders or
subfolders.
‚ Open one of your documents.
ƒ Press the Print/Send command button to
open a pop-up box listing printing and different sending options.
„ Select the option you want and press Select.
To print the file, select Print. The print commands
view opens. Printing will be described in more
detail in ”Printing documents” on page 8-4.
To send as a fax, select Send as fax. The fax contacts directory opens. The sending procedure
from this point on is similar to that described in
Chapter 5 "Fax: Sending faxes" on page 5-3.
To send as a short message, select Send as SMS.
The sending procedure is similar to that described in Chapter 6 "Short messages: Sending
messages" on page 6-3.
To send as e-mail, select Send as e-mail. The
sending procedure is similar to that described in
Chapter 7 "Internet: Sending e-mail" on page 7-6.
8-4
Printing documents
Printing documents
Printing is possible only from the Notes application, using an IrDA compatible infrared port.
The communicator supports direct printing to
the HP LaserJet 5P, a PCL printer, and the HP LaserJet 5MP, a Postscript printer. Other printers
may be used if the proper printer drivers are first
downloaded onto the communicator. These
printer drivers may be installed with the Install/
Remove software function found in the System
application.
For more information on the printers supported,
read the readme.txt file on the diskette supplied
in the communicator sales package, or see the
Club.Nokia home page at www.club.nokia.com.
After the communicator has checked that you do
not already have an active PC connection, it
starts to scan for a printer. Because you can only
have one active connection, you cannot print
while you are transferring files from the communicator to a PC. If the printer cannot be found, a
failure note is shown and the editor view returns. If the correct printer is found, the printer
driver is selected automatically and the printing
view shows the name of the document and the
selected printer.
„ Press Start to start printing.
Printing problems
For specific information on the printer you are
using, please refer to the manufacturer’s User’s
Guide.
Though the communicator may detect a connected printer, certain complications might still
occur.
To establish an infrared connection:
• Make sure that the communicator’s infrared
port faces the infrared port of the printer.
‚ Keep the infrared connection clear. In the
event the infrared connection is obstructed for
too long (for example, something is moved between the infrared sensors or the communicator is moved), printing is interrupted.
ƒ To print a document, open the document,
press Print/Send and select Print.
If the printer found is not recognized:
Select the correct printer driver manually.
You can choose another printer after pressing
Printers.
If the printer found is not recognized, and the
communicator does not have the correct driver
for the printer, you can try to print the document
using one of the available printer drivers.
Chapter 9 - Calendar
9-1
9. Calendar
In the Calendar application, you can see your
calendar of scheduled events, keep a list of tasks
in the To-do list, set calendar alarms and link
memos to events (see "Daily schedule: Memos"
on page 9-3).
The Calendar main screen contains your monthly
schedule along with the events of a selected day.
From this screen, the command buttons are:
Day — Shows the list of events for the selected day.
Week — Shows a week at a time as well as the
events of a selected day.
To-do — Allows you to make a list of tasks as
well as prioritize your list.
Menu — Opens a pop-up box with the following
choices:
To-do list
View month /View week*
Today
Next month/week/day (Ctrl-N)*
Previous month/week/day (Ctrl-P)*
Settings
* These menu choices vary according to the
screen you are in when you press Menu.
Calendar settings
To check the Calendar application settings, press
Menu and select Settings. You will see the following options:
Booking password — Used to protect your calendar from receiving scheduled events from anyone
except those who have your password (see "Calendar booking: Booking password" on page 9-5).
When a password is written in the field, all characters appear as asterisks.
Default alarm leadtime — 10 minutes (default).
Used when you set an alarm to an event. The
alarm will go off 10 minutes before the scheduled time of an event, unless you specify otherwise here.
Monthly schedule
The monthly schedule shows the days of the
month in columns according to the week number.
• Today’s date (April 3rd) is shown in a frame
(see Figure 9-1) within the monthly schedule.
• The currently selected date is indicated by the
black frame and white number (April 24th).
• Days that have scheduled events are indicated
by a grey bar to the left of the day (e.g., April
16th).
• If the whole day has been reserved, there is a
dark grey bar to the left of the day (e.g., April
14th).
9-2
Daily schedule
Figure 9-1: Monthly schedule
• Edit the schedule of a day by highlighting the
date using the scroll keys and pressing Day.
• Events which are not be associated with a
specific time are indicated with a horizontal
bar in the daily schedule (e.g., Mom’s birthday
in Figure 9-1).
To enter an event in the monthly schedule:
• Use the scroll or arrow keys to move the selection frame and move the cursor over the
date of the event.
‚ Type the event description. A screen for the
event details will open automatically.
ƒ Press Close to close the event details. The daily
schedule screen will then open. Press Close
again to return to the monthly schedule.
To write yourself reminders of important matters,
press To-do.
Daily schedule
Activate the daily schedule by pressing Day when
in the monthly schedule screen. The daily events
will be displayed, starting with the first event of
the day. Here you may edit the contents of event
entries.
Calendar icons in the daily schedule:
— Attached alarms
— Bookings
— Memos
— Recurring events
— Annual events
The symbol appears next to the event’s name
(see Figure 9-2). For each event, only the symbol
with the highest priority is shown (the symbols
will appear in the order listed above).
To add events:
• Move the selection frame over the starting
time of the event.
‚ Type the event on the dotted line.
If you want to add an event without a start time,
write the event, press Details and remove the
start time. The event will be shown with a hyphen.
To delete events:
Select the event and press Delete. If you delete (or edit) repeating events, you will be
asked if you want to apply the changes to all
or only to the current event.
To adjust the details of the selected event:
Press Details. A new screen opens, allowing you
to adjust the following details:
Description — The description of the event.
Reserve (___ whole day(s)) — Indicates the
number of days required for an event.
Start date — The date the event starts. The
default date is the selected day. The year is
always given using two digits.
Chapter 9 - Calendar
9-3
Figure 9-2: Daily schedule
Start time — The time the event starts. The
default start time is the selected time row in
the daily events list.
End date — The date the event ends (optional).
End time — The time the event ends (optional).
Alarm — You can set an alarm for the selected event (see "Daily schedule: Alarms" on
page 9-3).
Frequency — Lets you define how often the
event repeats. The options are Once only
(default) /Daily /Weekly /Monthly /Annually/
Every other week/Working days.
Repeat until date — Indicates the last date of
the event.
Event sent to — A list of all the people to
whom you have sent the current event as a
request or a reservation (see ”Calendar booking” on page 9-5). The list shows the status of
the sent event:
Accepted means that the recipient has accepted the event request.
Discarded indicates that the recipient has
discarded the event.
No reply means that no information has
been received.
Forced means that the event has been
sent as a reservation.
Confirmed means that the recipient has
received a reservation and confirmed it.
If you press Cancel event in the Event sent to
screen, the event is cancelled from the recipient’s calendar.
Memos
To attach memos to an event:
• In the daily schedule screen, move the selection frame over the correct event and press
Details.
‚ Press Memo to open the notepad. In the notepad, you can:
• Press Print/Send to print or send the memo
as a fax, SMS or e-mail (see Chapter 8
"Notes: Sending documents" on page 8-3,
and ”Printing documents” on page 8-4).
• Press Style to format text (see Chapter 8
"Notes: Notes settings - Editing" on page 8-2).
• Press Delete to delete the memo.
Press Close to link the memo to the selected
event.
Alarms
Alarms are set in the daily schedule by pressing
the Details command button and then selecting
the Alarm option. The alarm will be attached to
the currently selected event.
You can choose the alarm tone in the System application’s System sounds settings (see Chapter
10 "System: System settings" on page 10-1).
To set alarms that are not related to any calendar
event, use the Clock application (in the Extras application group), see Chapter 11 "Extras: Clock Alarm clock" on page 11-3.
9-4
Weekly schedule
The alarm options are:
None (default) / At start time / . . . minutes
before event (enter a value).
An active alarm is indicated by an icon in the
daily schedule (in Figure 9-2, the 8:00 event).
When the alarm occurs, an alarm note is shown
on both the phone and communicator interface
displays.
The alarm sound can be turned off by pressing
any key. If you have set the communicator to
silent mode (in the System application’s System
settings), only the alarm note will be shown.
Weekly schedule
The weekly schedule shows one week at a time.
• Today’s date is outlined by a square frame
(Tuesday 17th June, in Figure 9-3).
• The currently selected time box is shaded
(Thursday 19th June, 12:00, in Figure 9-3).
• All the events are marked with grey bars
according to their start and end times. The
bars are thinner if the events of the day
overlap (Friday 20th June, in Figure 9-3).
• If the whole day has been reserved for an
event, all the time boxes are marked with a
dark grey bar (Tuesday 17th in Figure 9-3).
To open the daily schedule, press Day; to open
the monthly schedule, press Month.
You can use the scroll buttons and arrow keys to
scroll within a day in the weekly schedule.
To enter an event in the weekly schedule:
• Move the cursor over the date of the event.
‚ Type the event description. A details screen
will open automatically.
ƒ Press Close to close the event details. The
daily schedule will then open. Press Close to
return to the weekly schedule.
If you scroll to a time box containing an event, the
bar across the bottom of the weekly schedule will
show the basic details of the event. The numbers
to the right of the event description indicate the
number of events that are contained within that
time frame (e.g., “2/3” means that you are seeing
the details of the second of three events).
If a time box contains more than one event, you
may view the basic details of each event in the
time box by pressing Tab. Press Shift+Tab to go
to the previous event.
Figure 9-3: Weekly schedule
Chapter 9 - Calendar
9-5
Calendar booking
Calendar booking enables you to send event requests or reservations to other communicator
calendars using special SMS messages.
The name or number of the recipient is added to
the Event sent to list (see "Calendar booking:
Canceling and changing bookings" on page 9-5).
Note: The difference between an event request
and an event reservation is that the recipient may decide whether to accept or
discard an event request, but event
reservations can only be accepted.
Receiving requests
Booking password
Sending event reservations requires that you
know the recipient’s booking password. If you
know the recipient’s booking password, add it to
the recipient’s contact card (in the Contacts application). The communicator checks the password field of the recipient’s contact card before
sending a reservation.
You can give your own booking password to
those who may send reservations to your calendar. If you do not set a password, your communicator accepts all reservations.
Define your booking password (by default you
have no password) in the Calendar settings, see
”Calendar settings” on page 9-1.
The booking password is not needed when you
send event requests.
Making requests and
reservations
• Select an event or write a new one in the Calendar’s daily schedule.
‚ In the details screen that follows, press Calendar booking and select whether to make
the booking a request or a reservation.
Calendar event request — Recipient has the
option to accept or deny a request.
Calendar event reservation — Recipient must
accept a reservation.
ƒ Send as SMS opens the SMS directory where
you can select the recipient.
„ Press Send to send the booking.
When you receive an event request, a note
appears on the display showing the details of the
event, and the name or number of the sender.
If you press Accept or Deny, your communicator
sends a reply to the sender informing about your
decision. Accepted events are moved to your
calendar.
The request you have received can be dismissed
by pressing Cancel and choosing Yes.
Receiving reservations
When you receive an event reservation, a note appears on the display giving the details of the
event. When you press OK, the reservation is
moved to your calendar. If you press Confirm, the
event is moved to the calendar and a confirmation note is sent to the sender of the reservation.
Old events are not removed when new events are
added, even if they have the same date and time.
Canceling and changing
bookings
There are two ways to cancel bookings that you
have sent to other peoples’ calendars:
1. Delete the event from your own calendar.
Your communicator will check the Event sent
to list and send a special SMS to any remote
calendars that share the event, deleting the
event in the remote calendars as well.
or
2. Select a recipient in the Event sent to screen
and press Cancel event.
To change a booking that you have sent:
Press Details and make the necessary changes.
The changes are sent via special SMS to the calendars of the persons to whom you originally
sent the booking.
9-6
To-do list
To-do list
To access the To-do list:
1. Press To-do in the monthly or weekly schedule.
or
2. Press Menu in any of the schedules.
The To-do list is a list of tasks that are not connected to any specific time or day. After a calendar alarm has occurred, you have the opportunity
to move the event to the To-do list by pressing the
Move to To-do list command button.
To change the status of the selected task:
• Press Priority. A pop-up box opens.
‚ Change the status of the entry to High priority
or Normal priority (default), or mark the task as
Completed (as task number four in Figure 9-4).
To create a new To-do item, press New. A new
empty entry field is added at the end of the
To-do list.
To remove the currently selected entry from the
list, press Delete.
The entries in the To-do list are numbered, and
they can be given high or normal priority. High
priority entries are always shown at the top of
the list (see Figure 9-4).
Figure 9-4: To-do list
Chapter 10 - System
10-1
10. System
The System applications are started by pressing
the System application button, selecting an application in the System main view and pressing
Select. If one System application is active, you
must close it by pressing Close in the application’s main view before you can start another.
The Nokia 9000i Communicator’s applications
for PC connectivity include:
• File transfer
• Install/Remove software
• Backup/Restore
• Import/Export contacts
• Import/Export calendar data
The Security application lets you determine the
level of system security and change security
codes (see ”Security” on page 10-2).
IMPORTANT! Remember to make backup
copies of all important data.
Note: When one of the PC connection applications or the fax modem application is
activated, the communicator consumes
more power than normally. To extend the
battery operation time, these applications
should be closed when they are not in use.
Figure 10-1: System application
System settings
System settings includes all system-related
permanent settings.
To view the System settings:
• Press Settings in the System application
main view.
‚ Select a feature and press Change.
The settings features are:
Contrast control — The contrast view shows a
test figure and a set of commands which can be
used to adjust the figure. The ’+’ command button increases the contrast. The ‘–’ command button performs the opposite function. When the
setting is satisfactory, press OK.
Screen power-down period — (default is 5 minutes.) The screen power-down period sets the
10-2
time period after which the display will power
down if the device remains inactive. This feature
saves the battery and increases the communicator’s operation time. The time-out value can be
between 2 to 15 minutes. The screen powerdown cannot be turned off.
System sounds — System sounds are warning and
error tones, arriving message tone, key click tones
and alarm sounds. The available settings are:
All sounds — Ring (default)/ Beep / Silent/
Silent for. The All sounds setting affects incoming call alerts and other alarms on both
interfaces, with the exception of clock alarm.
With Silent for, the communicator remains in
Silent mode until the time you have entered
there has passed (use 24-hour time format).
Ringing volume — Level 1/2 (default)/3/4/5.
Ringing tone — You can select one of the
tones in the pop-up box or compose a special
ringing tone for your telephone in the Extras
application.
Key click — Off / Quiet (default)/ Loud.
Warning tone — On (default) / Off.
Application tones — Calendar alarm, Clock
alarm, Received fax, Received SMS, Received
e-mail.
Security
For each of these individual settings you can
set a specific ring type. You would then be
able to tell by the ring whether you have received a fax or a short message, for example.
The clock alarm will sound regardless of the
communicator’s status. For example, when a
phone call is active and the communicator is
used in handsfree operation, all sounds except
the clock alarm are automatically turned off.
Preferences — Preferences let you change date
and time formats and the measurement unit. The
preferences list contains the following items:
Date format
October 25, 1997, can be shown as:
dd.mm.yy : 25.10.97
mm-dd-yy: 10-25-97
yy.mm.dd: 97.10.25
Time format — 24 hour / AM/PM.
Two o’clock in the afternoon can be shown as:
14:00
2:00 PM
Unit of measure — Choose either Centimeter
or Inch as the basic unit of measure
Security
Locking the communicator
To prevent outgoing calls from being made, you
can lock the communicator in the Security application’s main view.
To use the Lock system key in System security,
the Autolock period setting (defined in System
security, Settings) must be set to On.
Highlight Autolock period and press Change.
Enter the correct lock code (provided in the sales
package) to change the setting status.
If autolock is on, the communicator will lock
automatically after the defined inactivity period.
Press Lock system to lock the device manually at
any time.
You can also lock the system from the phone interface Menu 5 8 (see Chapter 13 "Phone interface: Detailed menus list - Security options
(Menu 5)" on page 13-11).
Unlocking the communicator
After the communicator has been locked, it cannot be used until the correct lock code is given.
Incoming voice calls can, however, be answered
via the phone interface.
Note: When the communicator is locked, it may
be possible to make a call via the phone
interface to the emergency number programmed into your phone (e.g., 911 or
other official emergency number).
Chapter 10 - System
10-3
Figure 10-2: Security settings
Press Settings in the Security main view to see
the security settings list (Figure 10-2):
The value of the current setting is shown next to
the item (except that the codes are shown as
asterisks, *). These items can be adjusted by
pressing Change (see the following sections).
Pressing Close will close the security settings
view and return to the Security main view.
To change the security settings:
• Select the setting and press Change.
‚ If you are prompted for a code, enter it and
press OK.
ƒ Choose a new value.
If you are changing a code, you will be prompted
for the current code and then the new code
twice. The code cannot be changed if the respective security feature is not in use.
Note: Avoid using codes that are similar to
emergency numbers to prevent accidental dialing of the emergency number.
PIN code request — On (default) / Off
If you set the PIN (Personal Identity Number)
code request on, the system requests the
code every time the phone interface is turned
on (by pressing
). You can also turn the
PIN code request on or off in the phone interface Security options menu (Menu 5 1). This
setting cannot be changed if the phone interface is switched off.
Note: Some SIM cards do not allow you to turn
the PIN code request off.
IMPORTANT! If you enter the PIN code incorrectly three times in a row, you will need a PUK
(PIN Unblocking Key) code to unblock the SIM
card. When the SIM card is blocked, you cannot make or receive any calls (including faxes,
short messages, e-mail, etc.), except emergency calls. Otherwise, the communicator can be
used normally. If you misplace or forget your
PIN code, contact your network operator.
Autolock period — Autolock off (default) / 1 / 2 /
5 / 10 / 15 minutes
This setting determines the security time-out
period, after which the system will lock. The
timer is reset by any input, calls or data
transfer/printing activity.
SIM change security – On / Off (default)
When active, this security option checks
whether the SIM card in the communicator
has been changed. The check is made every
time the phone interface is switched on. The
SIM change security option can also be activated in the phone interface Security options
menu (Menu 5 2).
If the SIM card has been changed and the
new SIM card has not previously been used
with your communicator, the communicator
locks itself until the lock code, supplied with
the communicator sales package, is correctly
entered. The communi-cator recognizes five
different SIM cards as the owner’s cards.
PIN code
When the phone interface is switched on,
this setting allows you to change the PIN
code. The changing procedure is described at
10-4
the beginning of this "Security" section. The
new PIN code must be 4 to 8 digits long. The
PIN code can also be changed in the phone interface Security options menu (Menu 5 6 2).
The PIN code is supplied with the SIM card
(i.e., the network operator who activates your
SIM will give you the PIN code). When the
PIN code request is enabled, the code is required each time the phone interface is
switched on. The PIN code request must be
turned on to change the code.
Lock code
This setting allows you to change the lock
code. The changing procedure is described at
the beginning of this "Security" section. The
new code must be 5 digits long. The lock code
can also be changed in the phone interface
Security options menu (Menu 5 6 1).
•
•
•
•
•
The lock code is needed to:
Lock the communicator (except when the
autolock period is in use).
Unlock the communicator.
Change the SIM change security setting.
Turn the Autolock period on or off.
Open the Telephone application calling card
settings.
You can find the lock code on a sticker in the
sales package of your communicator. Keep it
secret and in a safe place, separate from the
communicator.
Note: If you enter an incorrect lock code (you
will get a code error message) several
times in succession, or misplace or forget
your lock code, the communicator must
be sent back to the dealer to unlock the
device.
Network password
The network password is needed to change
call restrictions, see Chapter 4 "Telephone:
Telephone settings" on page 4-1. You obtain
Security
the password from your network operator
when you subscribe to the service.
When the phone interface is switched on, the
setting in the security section allows you to
change the network password. The new code
must be 4 digits long. The network password
can also be changed in the phone interface
Security options menu (Menu 5 6 4).
If the password is changed correctly, the
communicator requests the network to perform the desired operation.
Other codes
PIN2 code (4 to 8 digits)
The PIN2 code can only be changed in the
phone interface Security options menu
(Menu 5 3).
The PIN2 code is supplied with some SIM
cards. The PIN2 code is required to access
some functions, such as call charging unit
counters, which must be supported by the
SIM card. If you enter a wrong PIN2 code
three times in succession, the PIN2 code is
disabled and cannot be used any more.
PUK and PUK2 codes (8 digits)
The PUK is supplied with all SIM cards. This
code is required when you want to change a
disabled PIN code. If you enter a wrong PUK
code ten times in succession, the SIM card is
rejected and you cannot make or receive any
calls, except emergency calls. Contact your
network operator for a new SIM card.
The PUK2 code is supplied with some SIM
cards. The code is required when you want to
change a disabled PIN2 code. If you enter a
wrong code ten times in succession, you will
not be able to access the functions which require the PIN2 code. To utilize these functions, contact your network operator for a
new card.
Chapter 10 - System
10-5
User data
The User data card contains your personal information. You can freely edit the information in
the Name, Company, Job title, Address, Tel, Fax,
Tel(GSM), Fax(GSM), E-mail and URL fields.
The User data will automatically be included in
the the corresponding fields of the fax cover
page within the Fax application. Likewise, the
SMS application uses this information when you
send your own business card.
Fax modem
The Nokia 9000i Communicator can be used as a
9600 bps PC fax modem if:
• Data calls are supported by the network you
are using.
• This service is activated for your SIM card.
• You have the proper fax driver software (for
either cable or infrared connection) installed
on your PC.
The fax driver software can be found on the
Nokia Communications Server diskette that
comes with the sales package. For more information, see the readme.txt file included
on the diskette, or consult the user's guide of
your computer on how to install new modems. If you want to receive data calls, your
SIM card also needs a data number. Contact
your network operator for details.
To use the communicator as a fax modem via infrared:
• Make sure you have loaded the Microsoft infrared drivers onto your PC, and that the software is runnning.
‚ Make sure you have downloaded the fax modem software for infrared from the Nserver
diskette onto your PC.
‚ Connect the communicator to the PC via an
infrared link as described in ”To establish an
infrared connection:” on page 10-6.
ƒ Wait until the connection is established, and
then press Activate in the Fax modem main
view. This will change the communicator to a
fax modem. When the communicator is used
as a fax modem, the call status indicator
shows the text MODEM.
„ To stop using communicator as a fax modem,
press Disable.
Operations of a modem can be controlled by AT
commands and S-registers. These commands
give the advanced user an opportunity to control
all the features of the modem. However, it is not
always necessary to enter the AT commands
manually. Most PC communications applications
have a user-friendly interface that hides the AT
commands from the user. Should you need to
enter the commands manually, consult the documentation of the PC application that you are
using.
A list of the common AT commands (based on
the ETSI 07.07 standard) supported by the Nokia
9000i Communicator are available as an ASCII
text file on the diskette that came with the sales
package of your communicator.
When the communicator is used as a fax modem,
its normal communication features are disabled
(otherwise, the applications remain functional).
If an active PC connection is idle for longer than
20 minutes, the fax modem mode is automatically disabled to conserve power. However, when
the communicator is connected to an electrical
outlet (for example, while charging a battery),
the time-out is not active.
10-6
To change the Fax modem settings:
• Press Settings.
‚ Select Connection type: Infrared (default,
recommended)/ Cable.
Connecting to a PC
cations for backup, file transfer, export/import
and software installation purposes. The functionality of a cable connection when the communicator is used as a fax modem is not
guaranteed.
The cable connection is intended for use with
the communicator’s own PC connectivity appli-
Connecting to a PC
To use the PC connectivity features found in the
System application (such as File transfer, Backup
/Restore, etc.), the Nserver connectivity software,
provided on a diskette in the communicator sales
package, must be running on your PC. The software requires Microsoft Windows 3.1 (or later) or
Windows NT 3.51 (or later) and an available serial
port. To use an infrared connection, your PC must
be running Windows 95 with an IrDA compatible
infrared port. See the readme.txt file on the diskette supplied in the communicator sales package
for more information for more information.
To install the connectivity software on your PC:
Windows 3.1
• Insert the diskette in your disk drive.
‚ In the Program Manager of your Windows,
click on the “File” menu.
ƒ Click on menu item “Run” and type a:\server\server in the command line.
„ Press Enter.
… Follow the instructions shown on the screen.
(If you do not want to change the installation
directory, simply press OK when prompted.)
Windows 95
• Insert the diskette in your disk drive.
‚ In the Start menu, select “Run” and type
a:\server\server in the command line.
ƒ Press OK.
„ Follow the instructions shown on the screen.
To establish a connection
The IrDA software (infrared driver) must be installed and running on your PC in order to estab-
lish an infrared connection. This software is
available from the Microsoft web site.
The default IrDA port for the software is COM4;
however the physical port may be COM1 or
COM2.
To establish an infrared connection:
• Make sure that the communicator’s infrared
port faces the infrared port of the PC (or
printer). Keep the infrared link clear – check
the infrared indicators in the indicator area,
(see Chapter 2 "Getting started: Indicators"
on page 2-10). In the event the infrared link
is obstructed for too long (for example,
something is moved between the infrared
sensors or the communicator is moved), the
operation is interrupted.
‚ Start the connectivity software (Nserver) on
the PC. Check that the COM port reported by
the connectivity software is correct.
To establish a serial cable connection (the RS-232
adapter cable is included in the sales package):
• Connect the adapter to the communicator (for
instructions on how to do this, see Chapter 2
"Getting started: Connectors" on page 2-4).
‚ Connect the 9-pin adapter end of the RS-232
cable to the COM port of the PC and the other
end to the adapter (into the connector on the
left side of the adapter).
ƒ Start the connectivity software (Nserver) on
the PC. Check that the COM port reported by
the connectivity software is correct.
After the connectivity software is running and
you have established a connection to the PC, you
Chapter 10 - System
can start the communicator’s connectivity applications. When the PC connection is active, the
call status indicator shows the text PC-CONN. If
the connection to the PC cannot be created, check
the settings in the connectivity application. You
must define the COM port and the PC drive or
path correctly.
10-7
Note: Making or answering phone calls during a
PC connection is not recommended as it
might disrupt the operation.
IMPORTANT! Remember to make backup copies
of all important data.
File transfer
To select the serial connection type (infrared or
cable) and the PC drive used, press Settings in
File transfer application’s main view.
To connect to a PC:
• Make sure that the connectivity software
(Nserver) has been installed on your PC and is
running (see ”Connecting to a PC” on page
10-6).
‚ Make sure the settings are correct for either
cable or infrared, etc.
ƒ Press Connect to PC in the File transfer main
view.
When you are connected to a PC, there are two
system windows on the communicator interface
display. The left window shows the folders on the
communicator (the same folders as seen in the
Notes main view) and the right window shows the
contents of the selected PC directory. The currently active window has a thick frame and the
selection frame is inside the active window.
You can change the active window by pressing
the Change window command button, or the tab
key. In addition, the left and right arrow keys can
be used to activate the left or right window
(these keys do not toggle the active window: the
left arrow always activates the communicator
window and the right arrow the PC window).
The following files can be transferred:
Text files — Nokia 9000i Communicator text
files transferred to a PC can be read and
edited in a PC environment with standard
Windows or MS-DOS text editors. PC text
files can be read and edited in the communicator, just as well.
Graphics files (figures) — When transferring
files from a PC to the communicator, files with
the extensions JPG and GIF are considered as
graphics files. Graphics files transferred to the
communicator can be viewed with the image
viewer.
Transferring files from the
communicator
To transfer files to and from the communicator,
you must open both the correct PC directory and
communicator folder. When the File transfer
view opens for the first time, all of the communicator’s folders are closed. Files can be copied
to or from an opened folder only. You can open
a file by pressing the enter key.
After the connection type and PC drive have
been selected in the settings, and you are connected to the PC:
If the PC directory shown in the right window is
not the directory to which you want to copy the
file(s), you must change it.
Change the PC directory:
• Press the right arrow key to activate the PC
window.
‚ If necessary, press Close to close the current
directory.
ƒ Press Open to open the correct directory.
„ Press Change window (or the left arrow key)
to activate the communicator window.
10-8
… Press Open to open the folder containing the
file(s) you want to transfer.
Select a file by moving the selection frame
over it. If the file you want is in a different
folder, press Close and select another folder.
If you want to copy more than one file, use
multi-selection (Ctrl+space bar) or repeat the
procedure from step 1.
† Press Copy to PC to start file transfer.
Before files can be copied to a PC, you must
change the name of the copied file to a PC compatible format. The File transfer application will
suggest a name, but you can also enter it yourself. The name may contain eight characters and
the extension three characters.
Transferring files to the
communicator
Install/Remove software
• Press the left arrow key to activate the communicator window.
‚ Select the correct destination folder and
press Open.
ƒ Press Change window to activate the PC
window.
„ Press Open to open the directory containing
the file(s) you want to transfer. The window
shows the subdirectories and then the files in
alphabetical order. Open a subdirectory, if
necessary, then select the file by moving the
selection frame over it.
… Press Copy from PC to start the file transfer.
If you want to copy more files, repeat the
procedure from step 1.
To terminate the connection to the PC, press
Disconnect.
After the connection type and PC drive have
been selected in the settings:
Install/Remove software
The Install/Remove software application enables
you to install communicator software from a PC
and to remove the software from the communicator later.
The Install/Remove software main view displays
the serial connection type and the PC drive used.
Press Settings to change the connection type or
to redefine the PC drive used. The connection type
is changed by pressing Change. The directory
name and path can be edited manually.
Before using this application, make sure that the
connectivity software (Nserver) has been installed on your PC (see ”Connecting to a PC” on
page 10-6).
ƒ Select the software you want to install with
the selection frame and press Install.
When installation is complete, the confirmation
note tells you under which application button
the software was installed (destination cannot
be selected). If an application already exists
which has the same name as the software to be
installed, you will be asked to confirm the replacement operation by pressing Replace or to
cancel it with Cancel.
To remove software:
• Press Remove to search for removable soft-
• Start the Nserver software.
‚ Press Install in the Install/Remove software
ware on the communicator. The amount of
free space on your communicator is also
displayed.
‚ Select the software you want to remove and
press Remove.
view. The communicator starts to search for
software to install from the designated PC
drive. If installable software is found, it will
be listed on the screen.
Note: The set of applications which are on the
communicator at the time of purchase
cannot be removed.
To install software:
Chapter 10 - System
Caution: Beware of viruses. Install into the Nokia
9000i Communicator only software you have
10-9
obtained from sources which offer adequate
protection against viruses.
Backup/Restore
The Backup/Restore application enables you to
make backups of various data on your communicator, as well as restore to the communicator data
you have saved. Data is backed up in sets which
are stored in separate directories on the PC.
When data is backed up, the previous contents of
the backup directories will be deleted. If you want
to keep the previous backup set, you should copy
the files to another directory on the PC, or change
the backup directory in the Backup/Restore settings before making a new backup.
When data is restored, only files with similar names
in the destination folder will be overwritten.
Press Settings to change the connection type or
the path to the PC directory.
The sets of data you can back up are:
All data — (default) Backing up all data means
backing up your communicator exactly as it is
at the moment (except for the Call records in
the Contacts application and applications’
settings).
Documents — Document backup covers all
documents in the application folders that can
be opened for viewing (except contact cards
and Call records).
Contacts — The contact directory backup file
cannot be edited. If you want to edit the Contacts database contents, use the Import/Export
contacts application (see the next section).
Calendar — The data in your calendar can be
backed up and restored.
Before using this application, make sure that the
connectivity software has been installed on your
PC and is running (see ”Connecting to a PC” on
page 10-6).
Press Backup or Restore to start the respective
operations. The backup directory will be created
if necessary.
While backup is being made/restored, the communicator’s other applications cannot be used.
To interrupt the operation, for example, to make
an emergency call, press Cancel and then confirm by pressing Interrupt.
Import/Export contacts
The Import/Export contacts application allows
you to export contact cards to a PC and import
them back to the communicator. The contact information is exported to the PC as a single ASCII
text file, contacts.txt, which can be edited as any
ASCII file. If you edit the contents of the file, you
should be very careful not to delete accidentally
any record or field definition strings, placed inside brackets [ ]. Do not delete any of the brackets, either. It is always a good idea to back up
your data before doing any editing.
Instead of an ASCII file, you can open the exported contact information in an application or
database compatible with the Nokia 9000i Communicator’s contact card format.
The main view shows the connection type used
and the default path in the PC. To change the
connection settings, press Settings.
Before using this application, make sure that the
connectivity software has been installed on your
PC and is running (see ”Connecting to a PC” on
page 10-6).
10-10
To import contacts:
Press Import in the Import/Export contacts
main view.
When the data in the defined PC directory
has been copied to the communicator, you
will be asked to confirm the conversion of the
imported data as contact cards.
The imported contacts will be added to your
Import/Export calendar data
contacts directory.
To export contacts:
Press Export in the Import/Export contacts
main view.
If a file with the default name (contacts.txt)
already exists on the PC, the existing file will
be overwritten.
Import/Export calendar data
The Import/Export calendar data application allows you to export calendar data (events, event
details and to-do list) onto a PC and import it
back to the communicator. The calendar data is
exported to the PC as a single ASCII text file, calendar.txt. You can edit the calendar data the
same way as exported contact cards. Note that
memos attached to the events are referenced in
the calendar.txt file, but not exported (to export
memos, use the File Transfer application).
To import calendar data:
Press Import in the Import/Export calendar
data main view. When the data in the defined
PC directory has been copied to the communicator you will be asked to confirm the conversion of the imported data as calendar
data.
The main view shows the connection type used
and the default path in the PC. To change the
connection settings, press Settings.
To export calendar data:
Press Export in the Import/Export calendar
data main view.
If a file with the default name (calendar.txt)
already exists on the PC, the existing file will
be overwritten.
Before using this application, make sure that the
connectivity software has been installed on your
PC and is running (see ”Connecting to a PC” on
page 10-6).
Note: The imported calendar data will replace
all your current calendar data.
Data removal
The Data removal application comes in handy if
you want to remove personal information from
the communicator, for example, before lending
it to someone else. This way you do not need to
remove data one by one.
Before any data is removed, you must enter the
lock code (see "Security"). When deleting calendar data, you can choose to delete all calendar
data or only events that occur before a given
date.
The removable data is arranged in four groups:
All data, Calendar data, Documents, Contacts
and speed dials
If you want to restore your communicator in the
same state it was in at the time of purchase, see
Chapter 14 ”Troubleshooting” on page 14-1.
Select the desired data group in the normal way
by moving the selection frame and press Delete.
Note: Even if you choose the All data option,
your Internet settings will not be erased.
Chapter 10 - System
10-11
Memory
This view shows the amount of available free
memory for storing data and for installing new
software.
Pressing Details will open up a list of folders and
other data in the communicator and the amount
About this product
This view displays information about the Nokia
9000i Communicator.
of memory each of them uses. The list is updated
every time it is opened.
If the memory is getting low, you should delete
some documents. Before deleting, you can send
them or transfer them to a PC.
Chapter 11 - Extras
11-1
11. Extras
The Extras application group contains:
• Text Web
• Calculator
• Clock
• Composer
• Converter
• Wireless Data Backup
To start one of the applications, select an application and press Select.
With one Extras application active, you can
quickly switch to another by pressing the Extras
button.
To close an active application, press Close.
Text Web
With Text Web you can retrieve information from
the Internet, using SMS. Such information can
include for example flight schedules, weather reports and stock news. You can also access services
provided by your network operator and Nokia.
As Text Web is a network service, please, contact
your local network operator to check if this service is available.
The Text Web main view includes the following
items:
• Nokia services
• Operator services
• (User-defined services)
• Saved forms
To select one of these services, choose the service
with the scroll or arrow keys and press Select.
To change the access numbers of Nokia and Operator services, or to change, add or delete service access points that you have defined yourself,
press Settings.
Nokia services
The contents are maintained by Nokia, and they
cannot be changed. Nokia updates the contents
from time to time with special short messages.
Although Nokia provides the services offered,
they can only be accessed if your network supports this feature.
Operator services
The Operator services allows the network operator to provide various services to their subscribers.
The operator-specific items may vary from subscriber to subscriber, and are updated by the network operator.
User-defined services
User-defined services are services you choose to
enter and will not appear in the text Web main
screen until you have defined them. The name you
enter into the menu will be the name of the service.
To define new service access points, press Settings
in the Text Web main view. Press New to open an
empty service information card. Enter the name of
11-2
Calculator
the service, the server number (SMSC phone number for this service) and the access number.
The commands in the browser are:
To retrieve information:
• In the Text Web main view, scroll to one of
the service access points that you have defined and press Select.
‚ Enter in the space provided a word (keyword)
that describes the type of information you
are looking for.
If you press Get keywords, you will receive a
list of available keywords. History list contains previously used keywords.
ƒ To send the keyword, press Send. When you
receive a reply from the service provider, the
TTML browser opens up. Press the arrow keys
in the browser to move from one hotspot to
another.
Retrieve/Change — Retrieve will appear if the
selected hotspot is a hyperlink. When the command is Change, you can tick off boxes and
buttons.
Send — To send the form, press Send.
Menu — To add the form to the Saved forms list,
select Save form. To copy the text to Downloaded
files folder, select Copy text.
Saved forms
Saved forms grants you quick access to Internet
services. You can add items to Saved forms list
from the other services.
To open the selected form, press Open. The TTML
browser opens up with the same commands as
above.
To rename a service, press Rename in the Saved
forms main view.
Calculator
The Calculator contains an entry field at the bottom of the screen and above it, a “tape” where
previous calculations can be seen (if any). The
tape can be scrolled using the scroll or up/down
arrow keys. The most recent calculations are
shown at the bottom of the tape.
The results of the calculations appear in bold. In
the case of a syntax error, the calculation remains in the entry field for editing. As long as
you have not pressed “Enter” or “=”, you can
move in the calculation string with the arrow
keys and edit the string
Pressing Clear list will erase previous calculations from the calculator tape. The maximum
number of characters per calculation is 100.
The maximum length of the calculator tape is
100 lines.
Figure 11-1: Calculator
Chapter 11 - Extras
All data and calculation commands are entered
from the keyboard. The following characters can
be used for the corresponding operations:
(space)
can be entered, ignored in
the calculation
What percent of 50 is 10?
10 / 50% = 20
addition
–
subtraction
*
multiplication
/
division
= or Enter
The following examples demonstrate the principles for calculating percentages with Calculator:
decimal point
+
()
Calculating percentages
How much is 20% of 1000?
1000 * 20% = 200
Numbers 0 to 9
. (period)
11-3
parenthesis
What would be a 22% markup of 500?
500 + 22% = 610
What would be a 17.5% discount of 500?
500 - 17.5% = 412.5
How much is 20%?
20% = 0.2
sum
C
clears the entry field
%
percent calculation
Clock
The Clock shows the time and date in your home
location, as well as in other locations throughout the world. The Clock also includes an alarm
clock.
ton on the Communicator interface, the alarm
will sound again (the alarm interval is set in the
clock settings) for five times or until you press
the OK button.
The “Alarm active” symbol and time of the alarm
are shown only if an alarm is active.
Note: If your communicator is locked when the
alarm goes off, the first key press turns
the alarm off, but the alarm will go off
again until you unlock the communicator
and press the OK button on the communicator interface.
Alarm clock
The Alarm clock is activated with the Alarm
clock command in the Clock main view. The
alarms will occur according to the home location
time (note this when in a different time zone,
e.g. when roaming).
An alarm can be set to occur within the next 24
hours. Alarms that occur later than this are set
in the Calendar application.
When the alarm sounds, it can be turned off by
pressing any phone interface or communicator
interface key. If the alarm is not turned off or it
is turned off by pressing other than the OK but-
When the alarm sounds, it can be turned off by
pressing any phone interface or communicator
interface key.
To set an alarm:
• Press + or - to adjust the time shown in the
alarm clock display. Each press changes the
time by one minute, but if you hold the button down a while longer, the time will start
to change in steps of 15 minutes.
‚ Press OK to accept the set alarm.
11-4
Clock
Figure 11-2: Clock
There can only be one active alarm. If an alarm
is already active, the command names are different. A counter on the lower right side of the
screen shows how much time remains to the
time of the alarm.
• Press Change alarm time if you want to
readjust the time of the alarm.
‚ Press Delete alarm to cancel the alarm.
World time
World time (Figure 11-3) is activated with the
World time command in the Clock main view
(see Figure 11-2).
The Home box shows the name of the currently
selected home location, time, date and whether
daylight saving time is in use.
The Destination box shows the same information
for the currently selected destination, as well as
the area code or international call prefixes needed
to make a call from the home location to the
destination.
The world map shows the currently selected destination in the world map in cross hairs.
To select the destination:
Press Set destination, and select a city from
the list. You can also type the first letter of
the city to move the cursor to the first city
name beginning with that letter.
Editing the cities database
Press Location in the world time view to open a
view of the Cities list.
To make changes to existing city cards, press
Edit city. The city information is presented in
the form of a data card. The city data card contains the following fields:
City — The name shown in the Cities list.
Can be entered manually.
Country/State — The name of the country or
state associated with the city.
Area code — The area code required when
calling the city. The area code can be entered
with or without a long distance (+1) prefix.
Only numbers can be entered.
GMT offset — Indicates by how much the local time differs from the Greenwich Mean
Time (London time). Select a value for the
offset from a list. The offset can range from –
12 to +12 hours.
New York (Eastern)= GMT-5
Chicago (Central) = GMT-6
Salt Lake City (Mountain) = GMT-7
San Francisco (Pacific)= GMT-8
Hawaii = GMT-10
Set position — Opens a world map view
where you can determine the position of a
city by moving the cross hairs with the arrow
keys. When the city is where you want it to
appear, press OK.
Chapter 11 - Extras
11-5
Figure 11-3: World time
To create a new city card, press Add.
To remove a city from the database, press Delete.
The current home location cannot be deleted
(change the home location, then delete the old
one from the list).
Clock settings
The Clock application related settings are adjusted with Settings in the Clock main view.
Select the setting you want to change and press
Change or type the new time or date from the
keyboard.
Home location — Select the home location by
scrolling the city list with the scroll keys, or type
the first letter of the city name to jump to the
first name starting with that letter. When your
home location has been selected, press OK.
Your new home location now appears in the
home location window in the world time view.
If you select a city that is in a different time zone
than your current home location, the system
time will change.
Time — Enter the new time in the current time
format (24 hour or AM/PM, selected in System
Settings: Preferences).
Date — Enter the new date in the current date
format.
Alarm interval - 0/1/2/3/4/5 minutes. You can
choose the interval between alarms. If you select
0, the alarm clock will only go off once.
Daylight savings — You can set the home location and destination daylight saving time On or
Off. This setting remains the same even if the
home/destination is changed.
Changing the time or daylight saving time of a
home location will also adjust the time of the
whole time zone, as well as the system time. If a
set alarm is skipped because of changes in any of
the above fields, the alarm goes off immediately.
Composer
The Composer application enables you to create
your own, customized ringing tunes.
Scroll to the Composer and press Select.
You can change the phone ringing tune in the
Tel. application settings (see Chapter 4 "Telephone: Telephone settings - Ringing settings" on
page 4-1).
To play the composition shown on the staff, press
Play tune. While the composition is being played,
the command changes into Stop playing.
To compose a new tune press Compose tune.
11-6
Custom tune options
Press Options to do one of the following:
Tempo opens the tempo pop-up box with a new
set of commands. Tempo is measured in beats
per minute. To alter the tempo, use backspace
and enter a new value in the box.
To accept the tempo, press OK.
To test the tempo, press Test. The tune will be
played with the tempo shown in the entry
field. To use the default tempo (150 beats/
min), press Default.
Clear tune deletes the tune shown on the staff.
Undo changes restores the tune to what it was
before editing.
Editing a custom tune
To edit the tune, press Edit. In the editor, an
arrow appears at the bottom of the screen,
indicating the currently selected note or rest.
An empty space may be inserted in the tune by
pressing the space bar. Empty spaces do not
affect the tune. The cursor can be moved with
the Left and Right commands or the left and
right arrow keys.
To create a rest, note or alter the note’s pitch:
Press the up and down scroll (or arrow) keys.
Each press up or down changes the note’s
pitch or creates a rest. A rest will appear after
all possible note levels have been scrolled
through.
To alter the length of the selected note or rest:
Press Duration. Choose sixteenth note,
eighth note, quarter note (default), half note
or whole note. Press the command button
until the value you want is shown.
Note: Although you compose tunes in the Extras
application, the settings for the communicator sounds are found in the System
application, under Settings, System
sounds.
Composer
While in the editing mode, you can use the
following shortcuts:
Enter
Plays the tune.
Spacebar
Inserts an empty space to the
left of the cursor. Moves all
following notes to the right.
Backspace
Deletes the selected note or
rest. Moves all following
notes to the left.
Period (.)
Lengthens the duration of
the note or rest by half.
Colon (:)
Staccato (makes the note
clipped, or short).
Hyphen (-)
Inserts a rest.
For quick composing, press the corresponding
letter key on the keyboard to generate a note.
For example pressing C generates the note C.
When you press Shift and the corresponding
letter key, a sharp note is generated, e.g. Shift +
D generates D-sharp.
Menu
When you press Menu in the Composer main
view, the following options become available:
Copy — Copies a tune.
Delete — Deletes a tune.
Rename — Allows you to write a new name into
the input field.
Send as SMS — Opens up the SMS directory
where you can select a recipient for the composition. To send the composition, press Send.
When you receive a composition, a note
showing the name or number of the sender
and the name of the sent composition will
appear on the display. When you press
Accept, the composition is added to the list
of tunes. Press Cancel if you want to discard
the composition.
Note: If you receive several compositions at once,
they cannot be accepted or discarded individually. You may delete them individually
once you have accepted them together.
Chapter 11 - Extras
11-7
Figure 11-4: Converter
Converter
This application allows you to make conversions
between different units of measure, which include: length, area, volume, mass, velocity, temperature, power, energy, and currency.
The converter main screen shows two identical
lists containing the units that may be converted.
From this application, you can convert, for
example, inches to feet, inches to centimeters,
kilometers to miles, etc.
When you enter a number or quantity to be converted, it appears at the bottom left of the screen
in the input field. The cursor will always be in the
input field. The result will appear to the right of
the original, in the result field (see Figure 11-4).
The darkened frames within the lists indicate the
specific measurement that is currently being
converted.
To make a conversion:
• Press Conversion type to open a list of units
of measure. Select one of the units by scrolling the list and press OK.
‚ When the main view returns, scroll the selection frame in the original units list to the unit
you want to convert from. Change between
lists by pressing Change list.
ƒ Scroll the selection frame in the converted
units list (on the right) to the units you want
to convert to.
„ Enter the amount to be converted. Any
amount you enter will automatically appear
in the input field. The result will appear in the
result field.
Currency converter
If you select Currency as the quantity, the command Rates will appear. As there are no pre-set
exchange rates in the communicator, you will
have to set the base currency and the exchange
rate before you can use the currency converter.
Within the Rates screen, the Edit unit command
allows you to change the name of the currency.
To use the currency converter:
• In the Currency conversion main view, press
Rates, then Base currency.
‚ Scroll to the currency you would like to set as
the base currency and press OK.
ƒ The screen returns to the list of available currency units. Enter the exchange rates compared to the base currency.
„ Press Close to return to the Currency conversion main screen.
11-8
… Select the currency from which you want to
convert in the list on the left, and the currency to which you want to convert in the list on
the right.
Wireless Data Backup
† Enter the quantity you would like to convert.
The amount is displayed in the result field.
Note: Changing the base currency will clear all
set exchange rates.
Wireless Data Backup
Wireless Data Backup allows you to backup and
restore data over the GSM network via a data
call.
To use this application, you must first obtain this
service from a service provider. Contact your
local network operator to check if this service is
available.
Chapter 12 - Document outbox
12-1
12. Document outbox
Figure 12-1: Document outbox
All documents you send go through the Document outbox, which sends the documents whenever it is possible (see Chapter 1 "Introduction:
Things to remember" on page 1-2).
Once a document is in the document outbox, it
will remain there until it is successfully sent or
you manually cancel the send.
Access the Document outbox from the main
screen of these applications:
Fax
SMS
E-mail
Notes
The Document outbox is shown at the bottom of
the list of folders.
To open the Document outbox, select the Document outbox from the list and press Open. The
document at the top of the list will be the next
one to be sent. The document’s position in the
list reflects its sending status. As the status
changes, the document will be moved up or
down the list. For example, if sending fails, the
document is placed at the bottom of the list and
the Document outbox will try to send it again
later.
A document’s sending status may be:
Sending — The document is currently being sent.
Waiting — The document is waiting for sending
to become possible (e.g., when the phone
interface is switched on, network signal
strength becomes adequate, previous phone
call ends).
Retry [time] — Sending of the document failed.
It will be sent again later (at the time given
in brackets).
Queued — The document is waiting for its turn in
the sending queue.
At [time] — The fax is waiting to be sent at the
time you have specified (see Chapter 5 "Fax:
Sending faxes - Fax cover page and send options" on page 5-4).
Sending [current page/total pages] — The number of the fax page that is being sent and the
total number of the pages.
[number] % sent — An e-mail message is being
sent, and the Document outbox shows the
percentage that has been sent.
Upon request — E-mail messages may have this
status if the Send email setting has been set
to Upon request (see Chapter 7 "Internet:
Sending e-mail - Send e-mail upon request"
on page 7-8). These messages will not be
12-2
sent until you select one and press Start.
All email with the Upon request status will
be sent during the same connection.
To speed up the process and manually send
documents that have the Waiting, Retry or Upon
request status:
• Select the document and press Start. The
document(s) will be sent as soon as possible.
A document is removed from the Document
outbox only if:
1. Sending succeeds.
or
2. You cancel the sending manually by pressing
Cancel send.
or
3. Sending fails ten times or fails because of
missing or inadequate sending information.
In this case, an information note will be
shown.
Chapter 13 - Phone interface
13-1
13. Phone interface
When operating the phone interface, keys must
be pressed one at a time. Two keys are never to
be pressed simultaneously.
switches the phone interface on and off.
Note: This button does not function when the
device cover is open.
As with any other radio transmitting device,
avoid unnecessary contact with the antenna
when the phone interface is switched on.
switches between alpha mode and numeric
mode. When scrolling through in the menu function, pressing this key produces a help text on the
current function.
deletes characters or exits the menu facility
and memory functions.
and
are used to scroll through menus,
submenus or settings. If there are no active calls,
the scroll keys can be used to browse through
the memory contents. When a call is active,
pressing the scroll keys adjusts the volume level.
dials a phone number and answers a call.
ends any active call or cancels a dialed call.
0... 9 are the number and alpha keys.
are used for special purposes in certain
functions.
Selection keys. The function of these two
keys (on both sides of the scroll keys) depends on
the text shown on the bottom line of the display.
See Figure 13-2.
Figure 13-1: Phone interface
13-2
Display indicators
Using the selection keys
When this user’s manual instructs you to “press”
a key (the name of the function appears in bold),
it means that you should press the selection key
under the function name; for example, pressing
Menu (the selection key under the text Menu)
gains access to the menu functions, and Memory
(the selection key under the text Memory) to the
memory functions. The functions change according to the situation and previous selection.
Note: The selection must often be confirmed by
pressing OK. Whenever the Quit option is
shown, it can be used to return to the previous menu level without making any
changes.
Figure 13-2: Menu and Memory keys
Display indicators
You have received an SMS message, fax or
e-mail.
Indicates one of the following: memory
location, menu, submenu or setting option.
Indicates that you should use the scroll keys
to reach items that are currently not shown on
the screen.
Figure 13-3: Display indicators
A or B Indicates which memory is currently selected. “A” refers to the SIM card memory and
“B” to the communicator’s memory.
A voice call is in progress.
A data or fax call is in progress.
The phone interface is in alpha mode
(letters, as well as digits, can be entered).
You have a voice mail message.
Indicates that there is a list of options to select
from. The pointer also indicates the currently
selected option.
and bar. Indicates the current signal strength
at your location. The higher the bar, the better
the signal. When this antenna symbol is not visible, you are outside network’s service area.
and bar. Indicates how much charge there is
left in the battery. The higher the bar, the more
charge in the battery.
With regard to network signal strength and
charge level, both the phone interface and the
communicator interface displays show the same
information, see Chapter 2 "Getting started: Indicators" on page 2-10.
Chapter 13 - Phone interface
13-3
Making a call
The communicator can make and receive calls
only when all the following requirements are met:
• The phone interface is switched on.
• The communicator has a valid SIM card fitted.
• The communicator is located in the network
service area ( is shown).
To make a call from the phone interface:
• Key in the area code and the phone number
of the person you wish to call. If you make a
mistake, you can delete the digits one by one
by pressing repeatedly, or clear the whole
display by pressing and holding down the
key.
For international calls, start by pressing
twice quickly. The international call character + appears on the display, which informs
the network center to add the international
access code. Enter the country code, area
code and the subscriber number.
‚ Press
to dial the phone number.
ƒ When the phone number disappears and the
text Call 1 is shown, the call is connected.
Note: The keypad and display are on the top of
the device, the microphone and earpiece
are on the bottom of the device.
Receiving a call
When somebody is calling you, the communicator
will give a ringing tone and the text CALL on the
display will flash. If you have selected SILENT in
Menu 10, only the keypad and display lights will
flash. If you have selected BEEP, only a single beep
will be heard. If the caller can be identified, the
caller’s phone number (or name if stored in memory) and the text CALLING will be displayed instead.
You can answer the call any time, even while
using the memory or menu functions.
To answer an incoming voice call, press
any other key except
or
.
or
If you do not want to answer the call, simply
press
. The caller will hear the alerting tone
change to a busy tone, and the call will be forwarded to your voice mailbox if Forward when
phone is busy is on and set to To voice mailbox,
see Chapter 4 "Telephone: Telephone settings Voice call forward, call restrictions and call
waiting" on page 4-2.
Sending DTMF tones
DTMF tones are the touch tones you hear when
you press the keys of the telephone.
• Make a call to the desired phone number.
‚ Key in the digits you want to send as DTMF
If you need to send long DTMF strings, it is more
convenient to send them within the communicator interface, see Chapter 4 "Telephone: Conference call - Sending DTMF tones" on page 4-8.
tones. The digits are sent one by one to the
network. DTMF tones can be transmitted
even when the keypad tones are turned off.
13-4
Automatic sending
In order to send DTMF tones automatically, you
must store them first. Storing DTMF strings is
most conveniently done in the communicator interface, see Chapter 3 "Contacts: Contact cards Storing DTMF tones" on page 3-4. If you want to
store DTMF strings in the phone interface, see
"Using memory: Storing information via the
phone interface" on page 13-5.
• Press Memory. Key in the name of the contact
card which contains the DTMF service phone
number and the DTMF digits and press Find.
For how to recall information, see "Using memory:
Recalling information" on page 13-5.
Using memory
Note: When stored DTMF tones are recalled in
the phone interface, only DTMF strings
which have been stored in a Tel field can
be used.
‚ When the recalled string (containing the
phone number and the DTMF digits) is on the
display, press
.
After the connection has been established, the
DTMF tones will be sent directly. If you include
the p character, the tones will be sent after a
small pause. If you include the w character,
the tones will be sent after you press
a
second time.
Using memory
The phone numbers and names you store are
normally located in the standard memory of the
communicator, indicated by the letter “B” on the
phone interface display.
The “B” memory is the communicator memory,
known as the Contacts directory. When the
communicator is started-up for the first time,
the “B” memory is selected automatically.
The “A” memory is located on the SIM card that
is inserted in the communicator. The SIM card
memory uses numbered memory locations to
store data. When numbers are saved in the SIM
card (“A”) memory, a message will indicate its
location number. The number of standard memory locations available on SIM cards varies from
one card to another.
When the “A” memory is selected, the phone interface stores all contact information on the SIM
card and cannot access the Contacts directory.
Therefore, the use of the communications applications of the communicator interface will be less
convenient (you will have to enter most contact
information manually). This users’s manual will
assume that you use the standard “B” memory.
Keying in a name
• Press the Memory selection key to switch to
the alpha mode (the
indicator is shown
on the phone interface display).
‚ Press the key that has the desired character.
If the character that you want is not the first
to be displayed, press the key again within
one second (before the cursor appears) to
display the next character. Keep pressing the
key until the desired character appears.
ƒ If you miss a character, keep pressing the key
until it appears again; or first press and
then start pressing the key again.
To enter a space between characters, press
To correct a mistake, press
.
.
Once the desired character is on the display and
you want to enter a new character, do either of
the following:
1. If the next required character is located on
some key other than the previously pressed
key, press the new key and the first character
on the key will appear.
or
Chapter 13 - Phone interface
2. If the next required character is located on
the same key as the present one, wait one
second. The vertical cursor will appear to the
right of the character just pressed. Or, press
to move the cursor and select the character without waiting for the cursor to appear.
Note: When entering names, you may include
numbers or other characters in the text
(e.g. Paul-2nd line). Phone numbers, however may only contain digits and the special characters associated with DTMF
tones.
Lower case letters
If you want a lower case character, press and
hold a key until the character appears in lower
case. All further letters will appear in lower case
until a key is pressed and held once again.
Storing information via the
phone interface
To store names and phone numbers via the
phone interface (to enter other contact information, such as email addresses, use the Contacts
application):
• Press Memory.
‚ Key in the name (up to 30 characters) that
you want to store with the phone number.
For details, see ”Keying in a name” on page
13-4.
ƒ Press Save.
„ Enter a 1 plus the area code and phone number. While you might not need long distance
access to the number in your home location,
you might need it when roaming. If the number is a GSM number or international number, be sure to include +1.
If you are storing DTMF sequences and want
to use the DTMF special characters, for a
pause, press
three times quickly, so that a
p is displayed. For a wait character, press
four times quickly, so that a w is displayed.
For more information on storing DTMF sequences, see Chapter 3 "Contacts: Contact
cards - Storing DTMF tones" on page 3-4.
13-5
… Press Save. The message SAVED will appear on
the display. The entry will be automatically
saved in the Contacts directory in alphabetical
order (numbers will precede letters).
Note: A quick way to save text or numbers currently on the display is to press Memory
for three seconds.
Recalling information
You may retrieve phone numbers and names
from memory by the name associated with the
phone number or by the speed dial number of
the Contacts directory entry.
To recall a phone number by name:
• Press Memory.
‚ Key in the name or its first letter(s).
ƒ Press Find. The name closest to the keyed in
characters will appear.
„ You can move to the next name containing
the same characters by pressing Next, or
scroll through the names with
or
until
you reach the correct one.
To review the phone number stored with the
name:
Press
. If the phone number has been designated a speed dial number, the location number
of the name and phone number is shown in the
upper right corner of the display.
Dialing shortcuts
The dialing shortcuts provide quick and convenient ways to make voice calls.
Speed dialing
Speed dialing is a handy way to call frequentlyused phone numbers by keying one digit and the
key. You can define up to eight speed dial
numbers in the communicator memory (“B”
memory). For information on how to assign
phone number speed dials, see Chapter 3 "Contacts: Contact cards - Speed dials" on page 3-4.
13-6
Key in the number of the memory or speed dial
location where you have stored the phone number and press
.
The phone interface will recall the number from
the memory, display it briefly, and then dial it.
If the speed dial location is empty, an error
message will be displayed.
Number 1 is the speed dial location of your voice
mailbox. To call your voice mailbox, press 1 and
then
.
Note: Speed dialing is not possible during a call.
Speed search
• Press the Memory selection key and enter as
many characters as needed to identify the
contact.
‚ Press Find. The first matching name appears
with the cursor blinking under the last
matching character you keyed in.
ƒ If the name found was not the one you
searched for, press Next to view the next
matching name. Note that the Next selection
key will only show names that match the
Menu shortcuts
keyed in sequence. If the initial character sequence produced too many matches, key in
more characters and continue from step 2.
„ When the name of the contact you want to
call is shown on the display, press
.
Last number redial
The communicator stores the phone numbers
you dial, i.e., call or attempt to call. However,
only the last twenty phone numbers (and associated names) can be stored in the last number
redial memory at a time.
• If there are any characters on the display,
clear the display by pressing and holding .
‚ Press
. The last dialed number will appear
on the display.
ƒ You can scroll the numbers with or
until the desired number is displayed.
„ Press
to dial the number.
You can also recall Dialed calls (Menu 01 1),
Received calls (Menu 01 2) and Missed calls
(Menu 01 3), see "Detailed menus list: Recent
calls (Menu 01)" on page 13-8.
Menu shortcuts
The phone interface offers a set of menu functions, which allow you to tailor the phone interface to your particular use. In each menu and
submenu, you can check and alter the setting of
any particular function. The menus and submenus can be entered by scrolling the menu or
using appropriate menu shortcuts.
You can access the menu functions even during
a call.
All the menus, submenus and settings are numbered. This index number is shown in the upper
right corner of the display.
To access a menu function by its shortcut:
• Press Menu.
‚ Key in the number of the main menu under
which the desired submenu is located.
ƒ Key in the number of the submenu where the
function can be found before the View options
text appears.
„ Key in the number of the desired setting option.
For instance, to select the ringing volume level 2
(Menu 4 2 2):
• Press Menu (to enter the menu section).
‚ 4 (to enter the Phone settings menu).
ƒ 2 (to enter the Ringing volume submenu).
„ 2 (to select ringing level 2).
Menu scrolling
• Press Menu to enter the menu section. The
display will read View menu.
Chapter 13 - Phone interface
‚ Press either
or
to scroll the list of
menus until you reach the desired menu.
ƒ Press Select to enter the menu. If the menu
contains any submenus, you can go to the
one you want with
or .
„ Press Select. The current setting of the function is indicated on the display by .
… Press
or
to scroll the list of setting
options until the pointer points to the desired
option.
† Press OK to select the option. If you don’t
want to change the setting after all, you can
return to the previous menu level by pressing
Quit.
Pressing or pressing and holding Quit will exit
the menu section.
13-7
Main menu structure
The following menu structure lists the names of
the main menus and their submenus. Third-level
menus are not shown here. Some menu items
are shown only when the menu list mode has
been set to Complete in Phone settings: Menu
list (Menu 4 14). These menus are indicated by
the 4 symbol in the following menu list.
Some menu functions are network services, indicated by the
symbol in the following menu list.
These functions can be utilized only if provided by
your local network service provider. To make use of
a network service, you must first subscribe to it.
Note that network services are specific to each
SIM card. If you change the SIM card and you do
not have obtained the service for the new card,
you will not be able to use the service.
MENU
FUNCTION
SUBMENUS
MENU 01
RECENT
CALLS 4
1 Dialed calls, 2 Received calls, 3 Missed calls, 4 Clear list of recent calls
MENU 2
MESSAGES
1 Listen to voice messages ( ), 2 Read messages , 3 Show delivery
reports , 4 Read info messages, 5 Message settings
MENU 3
VOICE CALL
FORWARDING
1 Forward all voice calls, 2 Forward if busy, 3 Forward if not answered,
4 Forward if out of reach, 5 Cancel all forwarding
MENU 4
PHONE
SETTINGS
1 Lights 4, 2 Ringing volume 4, 3 Ringing tone 4, 4 Keypad tones 4,
5 Auto DTMF length, 6 Warning tones 4, 7 One touch dialing 4, 8 Automatic
answer 4, 9 Date and time, 10 Cell info display 4 , 11 Send own number
4 , 12 Call waiting 4 , 13 Restore factory settings, 14 Menu list
MENU 5
SECURITY
OPTIONS 4
1 PIN code request, 2 SIM change security, 3 Restrict calls, 4 View fixed dial
list, 5 Fixed dialing, 6 Change access codes, 7 Closed user group,
8 System lock
MENU 6
DURATION
AND COST 4
1 Call duration, 2 Call costs
MENU 7
NETWORK
SELECTION 4
MENU 8
MEMORY
FUNCTIONS
MENU 9
IN-CALL
OPTIONS 4
MENU 10
ALL SOUNDS
MENU 11
KEYPAD LOCK
, 3 Call costs limit, 4 Show costs in
1 Memory selection, 2 SIM card memory status 4, 3 Copy between memories,
4 Erase SIM card memory 4, 5 Show own number
13-8
Detailed menus list
Detailed menus list
When you have reached the correct menu, use
or
to scroll through the menu options.
(or answering machine). The access code will be
sent as DTMF tones to the receiving end.
Recent calls (Menu 01)
Read messages (Menu 2 2)
Within this menu, you can review and erase the
phone numbers stored automatically. Note that
the Received calls and Missed calls functions are
network services which work only in networks
that allow you to view the caller’s phone number.
For more information on these functions, see
Chapter 4 "Telephone: Making a call" on page 4-4.
Dialed calls (Menu 01 1), Received calls
(Menu 01 2), Missed calls (Menu 01 3)
Note: The communicator only registers missed
calls when the phone interface is switched
on and it is used within the network’s service area.
Erase all recent calls (Menu 01 4)
Caution: Unlike other delete functions, you will
not be asked to verify the operation before you
execute it. Once you have selected this, you cannot undo the operation.
Messages (Menu 2)
The Short Message Service (SMS) function is a
network service and may not be supported by
your network. Contact your home service provider for details. The phone interface can be used
for recording and listening to voice messages in
voice mailbox and for reading received short text
messages. Reading short messages is, however,
more convenient via the larger display of the
communicator interface, see Chapter 6 "Short
messages: Received messages" on page 6-5.
When you receive a short message, the text
MESSAGE RECEIVED and the
indicator will
be displayed and a tone will sound (if the communicator has not been set to silent service
within Menu 10). A note is also shown when you
receive faxes or mail. To read received faxes or
mail, you must use the respective applications of
the communicator interface.
To read the message immediately, press Read.
To read the message later, press Quit.
Press
to view the first message. The messages
are shown in the order they were received.
Once you have read the message, you can press
Quit or Option. The options available in the
phone interface are:
Read next — Shows the next message.
Erase — Erases the selected message from
memory.
Use number — Copies the phone number from
the message and moves it onto the phone interface display. You can now call the number
or save it.
Show delivery reports (Menu 2 3)
Delivery reports give information about the status
of sent messages. The sent message can be either
successfully delivered, pending, or the sending of
the message has failed.
Read info messages (Menu 2 4)
Listen to voice messages (Menu 2 1)
This network service allows you to receive short
messages on various topics. You may select from
topics that are pre-defined on the communicator interface. Press Select to view the list of
available topics.
When you enter this function, the communicator
dials the phone number stored in Menu 2 5 1.
If required, key in the access code of the mailbox
Use
or
to scroll through the topic list. To
read a topic, press Read: the content of the topic
is displayed. If the topic contains no information,
Chapter 13 - Phone interface
the text NO MESSAGE ON THE TOPIC is
displayed.
You can scroll the text with
or . Pressing
Option gives you the following options:
Use number — Copies the phone number from
the current message onto the display, from
which you can dial it or store it elsewhere.
(Instead of this function, you may press
while viewing the message.) You can dial the
number or store it elsewhere in the normal
way.
Off — Turns the cell broadcast receiving off.
If you want to read a message again, choose the
message from the menu. The message will appear
on the display.
Message settings (Menu 2 5)
Set voice mailbox number (Menu 2 5 1)
The phone number that you enter here will be
dialed when you select the Listen to voice
messages function in Menu 2 1. A voice mailbox can be a network service or your personal
answering machine. You may enter a new or
edit an existing phone number. The number
will be used until you change the number
again.
Info service (Menu 2 5 2)
This menu allows you to control the info service
settings.
On — Activates the reception of topics that
are pre-defined in the communicator and
which can also be seen with the Read info
messages menu (Menu 2 4).
Off — Deactivates new topic reception. You
can still read previously stored messages.
Index — Phone receives only the list of available topics, no messages. Any previously received index list will be shown and updated
automatically by the info service provider.
To receive the messages for the chosen topics, you must first select the topics from the
list (via the communicator interface, see
Chapter 6 "Short messages: SMS settings" on
page 6-2), then change the setting to On.
13-9
Call forwarding (Menu 3)
The call forward network service allows you to
direct your incoming voice calls to another
phone number when you do not want to be disturbed, or when the phone interface is switched
off or outside of the network coverage area. For
more details about the call forwarding functions, see Chapter 4 "Telephone: Telephone settings - Voice call forward, call restrictions and
call waiting" on page 4-2.
Note: Call forward settings made via the phone
interface only apply to voice calls. Fax forwarding is done in the Fax application’s
settings (see Chapter 5 "Fax: Fax settings"
on page 5-1).
Call forward settings
• Select the desired call forward mode in the
main menu:
Forward all voice calls (Menu 3 1)
Forward if busy (Menu 3 2)
Forward if not answered (Menu 3 3)
Forward if out of reach (Menu 3 4)
Cancel all forwarding (Menu 3 5)
‚ Press
or
to move the pointer to
Activate (set forward mode on).
You will be asked for the phone number to
which you wish to forward the incoming voice
calls (to your voice mailbox or some other
number). See Chapter 4 "Telephone: Telephone
settings - Voice call forward, call restrictions
and call waiting" on page 4-2 for details.
When the phone interface is in the idle state
(you have no active calls and you are not in any
menu), you can modify the phone number to
which your calls will be forwarded by using a
command string.
The delay time (after which the call is forwarded)
can be modified by a command string programmed by your network operator.
Cancel sets the forward mode off.
Status shows call types which are being forwarded.
13-10
Phone settings (Menu 4)
Lights (Menu 4 1)
The keypad and display of the phone interface are
fitted with lights to make them easy to read.
When the communicator is used as a handportable phone or is connected to a charger, this setting determines whether the lights remain on for
15 seconds after the last keystroke or an incoming
call alert (On) or remain permanently off (Off).
The lights can be switched on for 15 seconds by
pressing
quickly even if Off is selected. When
the communicator is connected to a handsfree
car kit, the lights always remain on (On) or extinguish after 15 seconds (Off).
Ringing volume (Menu 4 2)
The ringing tone will be heard when you receive
a call. There are several ringing tone volume levels available. If you have set the communicator
to Silent or Beep in Menu 10, the ringing tone
will not be heard.
Detailed menus list
charge is too low. If you have set the communicator to silent service (Menu 10), the warning
tones will not be heard.
One touch dialing (Menu 4 7)
When this function is set on, you can dial phone
numbers stored in speed dial locations by simply
pressing and holding the assigned speed dial key.
Automatic answer (Menu 4 8)
When this function is set on, the communicator
will automatically receive an incoming call.
This function can only be used when the communicator is connected to an approved handsfree car kit which is equipped with the ignition
sense option. The ignition sense option has to be
installed and the ignition must be switched on.
Note that this function works with voice calls
only.
Date and time (Menu 4 9)
You can select whether the date and time are
shown on the display.
Ringing tone (Menu 4 3)
You can select from a range of different tone
patterns. When you change the ringing tone, a
short sample tone will be heard. If you have set
the communicator to silent service (Menu 10),
the ringing tone will not be heard.
Keypad tones (Menu 4 4)
A short tone is sounded each time you press a
key. You can select a suitable volume level or set
the keypad tones off. If you have set the communicator in silent service within Menu 10, the
keypad tones will not be heard.
Auto DTMF length (Menu 4 5)
Choose Long (default) or Short to set the duration of the DTMF tones that you have programmed into the communicator.
Warning tones (Menu 4 6)
A warning tone, i.e., error or confirmation tone
will sound, for example, when the network is currently too busy to allow new calls or the battery
Cell info display (Menu 4 10)
When this function is set on, the phone interface
will indicate when it is using a network cell
based on Micro Cell Network (MCN) technology.
The setting will remain in effect even if the SIM
card is changed or the phone interface is
switched off.
Note: The communicator consumes more power
when the Cell info display is on.
Own number sending (Menu 4 11)
This function setting determines whether the
phone number of your SIM card is revealed to
the receiving end. This function works only in
networks which allow you to view the caller’s
phone number. For subscription to this service,
contact your network operator.
Choose Preset, On or Off. Preset selects the preferential setting (On or Off) that you have agreed
upon with your network operator. When you
change the SIM card, the Preset setting is automatically selected.
Chapter 13 - Phone interface
13-11
Call waiting (Menu 4 12)
Voice call restrictions (Menu 5 3)
Call waiting is a network service. Contact your
operator for subscription. See Chapter 4 "Telephone: Telephone settings - Voice call forward,
call restrictions and call waiting" on page 4-2.
Call restrictions is a network service, contact
your operator for subscription. See Chapter 4
"Telephone: Telephone settings - Voice call forward, call restrictions and call waiting" on page
4-2. Within this submenu you can choose the
following call restriction modes:
Choose Activate to set call waiting on, Cancel to
set call waiting off or Status to show the types
of calls with which call waiting may be used.
Restore factory settings (Menu 4 13)
You can reset the settings of the menu functions
to their original values. When you activate this
setting, you will be prompted for your five-digit
lock code. This function will not affect stored
phone numbers and names, access codes, earpiece volume setting, call timers and cost
counters (Menu 6).
Menu list (Menu 4 14)
If you do not need all menu functions frequently,
you may hide some of the menus and submenus.
When Complete is selected, the phone interface
will show all its menu functions. When Short is
selected, only the main functions are shown and
can be accessed.
Security options (Menu 5)
The purpose of the security system is to prevent
unauthorized use or the altering of important
settings. Activating or changing the security
options requires, in most cases, the appropriate
access code (see Chapter 10 "System: Security"
on page 10-2).
Note: When call restrictions, fixed dialing, closed
user group, or system lock is in use, calls
may be possible to certain emergency
numbers in some networks (e.g., 911).
PIN code request (Menu 5 1)
See Chapter 10 "System: Security" on page 10-2:
On or Off.
SIM change security (Menu 5 2)
see Chapter 10 "System: Security" on page 10-2:
On or Off.
Outgoing calls (Menu 5 3 1)
International calls (Menu 5 3 2)
Int except to home country (Menu 5 3 3)
Incoming calls (Menu 5 3 4)
Incoming calls if roaming (Menu 5 3 5)
Cancel all restrictions (Menu 5 3 6)
Note: Call restrictions made via the phone interface only apply to voice calls. Fax restrictions are made in the Fax application’s
settings (Chapter 5) and data restrictions
are made in the Internet main settings
(Chapter 7).
View fixed dial list (Menu 5 4)
Within this submenu, you can review the contents of the fixed dialing list that you created
within Menu 5 5. If you have selected Off in the
Menu 5 5, calls to all numbers are possible.
Fixed dialing (Menu 5 5)
You may restrict your outgoing calls to a pre-determined set of phone numbers. This ‘fixed dialing’ function works only with SIM cards which
support it. When the function is set on, you can
only call a phone number which is included in the
fixed dialing list or which begins with the same
digit(s) as a phone number on the list.
• Enter the PIN2 code.
‚ Select On (set the function on), Off (set the
function off) or Numbers (to edit the fixed
dialing list). If you selected Numbers, the first
name in the list will be displayed.
ƒ Press Option and choose Erase all, Add,
Remove or Edit. The Remove and Edit options
affect the name (and the associated phone
number) which was on the display when you
pressed Option.
13-12
Change access codes (Menu 5 6)
Within this submenu, you can change the following access codes: lock code (Menu 5 6 1), PIN
code (Menu 5 6 2), PIN2 code (Menu 5 6 3),
Network password (Menu 5 6 4). See Chapter 10
"System: Security" on page 10-2.
Note: The access codes may only include digits
0 to 9.
Closed user group (Menu 5 7)
This network service allows the restriction of outgoing calls to and incoming calls from a selected
group of people. For details on creating a user
group and activating this service, contact your
network operator. You may be a member of up to
10 user groups (the groups need not necessarily
be assigned numbers from 1 to 10).
Select one of the following options:
None — Calls can be made and received in the
normal way. This option overrides all other
user group settings. You can use this option
only if you are entitled to do so.
Preset — Use a preferential user group that
the SIM card owner has agreed upon with the
network operator.
Set— Use a particular user group. Calls can be
made to or received from the members of the
selected group only.
System lock (Menu 5 8)
Detailed menus list
To unlock the communicator, press Unlock and
enter the lock code.
Note: To prevent the communicator from locking
itself again after the time-out period, deactivate the option in the Security application settings (see Chapter 10 "System:
Security" on page 10-2).
Duration and cost (Menu 6)
Within this menu, you can view the duration and
cost of your outgoing and incoming calls, reset
the timers and counters, limit the duration of
calls and select whether the call costs are shown
in charging units or units of currency.
Note: The actual time invoiced for calls and services from your service provider may vary,
depending upon network features, rounding-off for billing, taxes and so forth.
Call duration (Menu 6 1)
The communicator provides two call timers
which help you monitor the duration of your
calls.
Last call duration (Menu 6 1 1)
Shows the duration of the last, or current, outgoing or incoming call in hours, minutes and
seconds, e.g., 00:02:15.
When the system lock is activated in this menu,
the communicator will lock immediately. Even if
you remove and replace the battery and switch
on the phone interface, the communicator will
remain locked.
Note: The duration of incoming calls is not displayed when you are within your home
network.
The communicator can also be locked automatically if the Autolock period is turned on in the
communicator interface (see Chapter 10 "System:
Security" on page 10-2).
Shows the total cost of all calls made or received
with any SIM card that you have used with the
communicator.
To lock the communicator:
• Press Select to activate the lock code
prompt.
‚ Enter the lock code. The communicator locks
immediately.
All calls duration (Menu 6 1 2)
Clear timers (Menu 6 1 3)
Resets all timers.
Note: There is no way to undo the reset operation.
Chapter 13 - Phone interface
13-13
Call costs (Menu 6 2)
Show costs in (Menu 6 4)
This network service allows you to check various
call costs. The costs are shown in charging units
or units of currency that you have set within
Menu 6 4. The call cost is shown for each SIM
card separately. For these settings you need the
PIN2 code. Contact your service provider for
more information.
Within this submenu, you may select whether
the call cost limits (and the amount of remaining
calling time) will be displayed in currency or
charging units. Contact your network operator
for charging unit prices. Changing the call costs
unit requires the PIN2 code.
Last call units (Menu 6 2 1)
Shows the cost of the last, or current, call in
charging units or the currency set in Menu 6 4.
All calls units (Menu 6 2 2)
Shows the total cost of all calls in charging units
or units of currency that you have set in Menu 6 4.
Clear counters (Menu 6 2 3)
Resets all cost counters. Resetting requires the
PIN2 code. This service is not available with SIM
cards that do not support the PIN2 code.
Note: There is no way to undo the reset operation.
Call costs limit (Menu 6 3)
This function allows you to limit the total costs
of outgoing calls to a specified number of charging units or units of the currency that you have
set in Menu 6 4. For this service you need the
PIN2 code.
Emergency calls to the number 911 can be made
even if there are no charging units left.
Changing the call costs limit requires the PIN2
code. To turn the limit on, select Set. Enter the
cost limit in charging units or currency units. If
you define the limit in currency units, you can
press
or
to insert a decimal point.
After the limit has been turned on, the quantity
of remaining charging or currency units will be
continuously shown on the display when in the
idle mode. When all units have been used, no
calls can be made except for emergency calls to
the number 911.
To turn the limit off, select None.
To show limits in currency units, select Currency,
or Units to show limits in charging units. If you
selected Currency, enter the charging unit price.
Use
or
to insert a decimal point. Next, enter the currency name.
Network selection (Menu 7)
The communicator can be set to select automatically one of the GSM 1900 networks available in
your area, or you may select the desired GSM network manually in this menu. This function comes
in handy when you want to select a particular
network, e.g., due to lower call charges.
When the Automatic option is selected, the
communicator tries to utilize the network it
was last registered on. Outside of the home
network service area, the communicator will
select one of the networks which have a
roaming agreement with the home network.
In the Manual mode, when you pick up a network manually from the network list, the
communicator will always attempt to register on that network. If the communicator
cannot reach or loses contact with the selected network, you are prompted to select
another network.
Memory functions (Menu 8)
Memory selection (Menu 8 1)
Choose A: SIM Card, or B: Phone (recommended).
Within this submenu, you can set the phone
interface to use either the SIM card memory
(“A memory”) or the communicator’s internal
memory (“B memory”). The letter indicating the
currently selected memory is shown in the top
left corner of the phone interface display.
13-14
Detailed menus list
The memory selection does not affect the
communicator interface applications, which will
always use “B” memory.
number and, therefore, the number cannot be
shown. If the SIM card is activated with several
phone numbers, you may scroll the list.
SIM card memory status (Menu 8 2)
In-call options (Menu 9)
Within this submenu, you may review the number of empty and full memory locations on the
SIM card.
Copy between memories (Menu 8 3)
Within this submenu, you can copy phone numbers and names between the communicator
memory and the SIM card memory. You can copy:
From phone to SIM card (Menu 8 3 1)
You can choose to copy contact cards One by
one (Menu 8 3 1 1) or copy all Speed dials
(Menu 8 3 1 2).
Note: All Contacts directory contacts may not
fit in the SIM card.
From SIM Card to Phone (Menu 8 3 2)
You can copy locations One by one (Menu 8
3 2 1) or Copy all SIM card locations (Menu 8
3 2 2) to the Contacts directory.
Note: All copied phone numbers go to the Tel
field of the contact card. If you want to
send SMS messages to these numbers,
they must be moved to the Tel(GSM) field.
Erase SIM card memory (Menu 8 4)
This function allows you to remove phone numbers and names from some or all locations of the
SIM, or “A,” memory (not the communicator
memory). The SIM memory does not need to be
selected in order to erase its contents.
Note: Once erased, the memory contents are
permanently lost.
You can erase individual locations One by one
(Menu 8 4 1) or Erase all locations (Menu 8 4 2).
Show own number (Menu 8 5)
You may view the phone number(s) assigned to
the SIM card you are currently using, i.e. your own
phone number(s). Some SIM cards do not hold the
The phone interface provides a number of control functions that you can use during a call. To
access the in-call options during a call, simply
press and hold Menu for a second. The in-call
options are not numbered. You cannot, therefore, access them by the shortcut method.
Mute / Unmute — Switches off or on the communicator’s microphone. If the communicator is
connected to a hands free car kit, Mute turns off
the microphone of the car kit, as well.
Hold / Unhold — Hold allows you to put a currently active call on hold, so that another call
can be initiated. After you have finished the new
call (with Drop call, see below), the original call
can be made active again by selecting Unhold. If
the held call is the only call, you can also unhold
it by pressing
.
Swap — This network function is available when
you have one active call and one call on hold.
Swap puts the currently active call on hold and
activates the other call. In this way, you may converse with one party without ending the other
call. Instead of using this function, you can press
to swap between the calls (if no numbers
have been keyed in right before pressing
).
Drop call — Ends the currently active call. This
function is useful when there is an active call, as
well as a held call. In such a situation, pressing
would terminate both calls.
Join / Private — Join includes a new participant in
a conference call if supported by the network.
During a conference call, Private allows you to
converse privately with a selected call participant.
Transfer — The voice call transfer network service enables you to connect two voice calls together and disconnect yourself from both calls.
See Chapter 4 "Telephone: Conference call Voice call transfer" on page 4-8.
Data — When you have an alternating call active,
this network service changes the mode of the call
Chapter 13 - Phone interface
13-15
from voice to fax (see Chapter 4 "Telephone: Conference call - Alternating calls" on page 4-8).
for example, in your pocket. The keypad can be
locked or unlocked even during a call.
Speech — When you have an alternating call active,
this option changes the mode of the call from fax
or data to voice.
When the keypad lock is on:
To answer a call, simply press
. During a
call, the keypad is unlocked and the communicator can be operated in the normal way. After
the call, the keypad lock is automatically
turned back on.
Send DTMF — Transmits Dual Tone Multi-Frequency tones. This function helps you communicate with answering machines, computerized
telephony systems, etc. For more details, see
”Sending DTMF tones” on page 13-3.
All sounds (Menu 10)
The keypad lock will be automatically turned off
when the communicator is connected to a car kit.
When the communicator is removed from the car
kit, without being switched off previously, the
keypad lock will be activated automatically again.
You can select the indication mode for incoming
calls and all alerts from the following options. This
setting affects both interfaces. You can adjust the
same settings in the System Settings (see Chapter
10 "System: System settings" on page 10-1).
To activate the keypad lock:
Ring — A ringing tone will sound.
2. Press Menu and then the
seconds of the first press.
Beep — One short beep will sound and the phone
interface will flash its display lights.
Silent — Turns on the silent service: the communicator will flash its display lights. No tones will
be heard, including keypad and warning tones.
When silent service is selected, the text SILENT
will be shown on the display in the idle mode.
Keypad lock (Menu 11)
The keypad lock prevents the keypad keys being
accidentally pressed when the communicator is,
1. Press Menu and use
or
to reach the
menu Keypad lock and press Select.
or
key within 5
While the keypad lock is active, the text KEYPAD
LOCKED and the Unlock selection key are displayed all the time.
To deactivate the keypad lock:
Press Unlock and then the
onds of the first press.
key within 5 sec-
When the keypad lock is on, calls may be possible to the emergency number programmed into
your communicator (e.g., 911 or other official
emergency number).
Help
Most menu functions are provided with a help
text, which gives a brief description of the displayed function.
Enter the menu area you want help with.
You can view the help text of the function in two
ways:
1. Wait for 5 seconds. The first page of the
help text will appear. The text is scrolled
automatically.
or
2. Press
. The first page of the help text will
appear. For additional pages, press
as
many times as necessary.
13-16
Once you have read the text, either press Select
to enter the function or press Quit to return to
the title screen.
Help
While reading a help text, you can move to the next
or previous menu function by pressing
or .
Chapter 14 - Troubleshooting
14-1
14. Troubleshooting
For questions about specific topics, please see
the index of this Owner’s Manual. For additional
support, see www.forum.nokia.com, or contact
the Nokia HelpLine.
Nokia HelpLine Canada: 1-888-22-NOKIA
(1-888-226-6542)
Hours of operation: 8:00 AM - 7:30 PM Mon-Fri
and Sat 9:00 AM - 12:00 PM Eastern time.
Nokia HelpLine USA: 1-888-665-4228
(1-888-NOKIA2U)
Hours of operation 8:00AM - 6:00 PM Mon-Fri
Eastern time.
Communicator activation and system trouble
1. Phone interface or communicator interface
does not start (both displays remain blank)
Make sure the battery is properly installed
and charged.
Remove the battery and make sure that the
contacts on the battery and the communicator
or the charging stand are clean.
Battery charge may be too low for operation.
Check the display and listen for the low battery warning tones. Charge the battery with
the adapter and charger as described in Chapter 2 "Getting started: Battery" on page 2-5.
If the NOT CHARGING message is displayed, the
charging is suspended. In this case check that
the temperature of the battery is not above
+113°F (+45°C). Wait for a while, disconnect
the charger, connect it again and retry. If charging still fails, contact your local Nokia retailer.
2. Power comes on, but the phone interface
does not work
Remove the battery and replace it again
(reboot).
Try charging the communicator. If you see the
battery charging indicator on the phone interface but the phone does not work, contact
your local Nokia retailer.
Check the field strength indicator, as you
might be out of the network service area.
Check if there is an error message on the display
after switching on. If so, contact your local
Nokia retailer.
Check that the SIM card is correctly installed,
see Chapter 2 "Getting started: SIM card" on
page 2-2.
3. Communicator does not activate or applications stop responding
Close the cover and open it again. If this does
not help, close the cover and remove the battery. Replace the battery and open the cover
again. Wait while the communicator performs
a self-test and starts. See also problem 4.
14-2
4. Resetting the communicator
Removing the battery in mid-transmission
may cause errors in the communicator’s file
system. If you receive internal memory or system error messages and/or reboot prompts, or
the device does not respond to commands
normally, the reset operations will help you to
recover from most of these problems. Try the
reset operations in the order they are listed: if
checking the file system does not help, try deleting temporary files, and so on.
To reset the communicator, follow these steps:
• Close the cover.
‚ Remove the battery.
ƒ Place the connector end of the battery (the
end with the four metal strips) in the battery
cavity, but do not press the other end in place
yet. You will be balancing the battery at the
edge of its insertion point.
„ Place the communicator on a flat surface
with the phone interface display upwards (do
not let the battery slip from its place).
… Open the cover.
† Press and hold down the required key combination (listed below) and simultaneously
push the battery end of the communicator
down, so that the battery clicks in place.
Continue to hold down the keys until you see
progress messages or a confirmation prompt
on the display.
‡ In some cases the communicator will ask you
to confirm the action and you must press a
command button (e.g., Format / Cancel).
Establishing communication
1) Check the file system
Key combination: Shift-ESC-(left arrow)
Symptoms: The Memory application (in the
System main view) shows too much (over 2
megabytes) or too little memory (even if
you have just deleted some documents), or
the communicator interface applications
crash when opening a document.
Caution: If there are problems in the file
system, the corrupted files will be removed.
If there are no problems, this operation
does not affect any documents or settings.
2) Delete temporary files
Key combination: Shift-ESC-(right arrow)
Symptoms: The communicator interface is
in a reboot cycle or a note saying that an
.ini file is corrupted is displayed.
Caution: All temporary files are removed.
The Document outbox is cleared, default
application settings are restored (for example, the SMSC phone number, Internet
Access Point(s) and remote mailbox settings are lost).
Stored documents are not affected.
3) Format file system
Key combination: Shift-ESC-F
Symptoms: The communicator interface is
in a reboot cycle or does not boot up.
Caution: Formatting the file system will
erase all data you have entered. This operation will restore your communicator in
the same state it was in at the time of
purchase.
Remember that backed up data can be restored in all cases. If these measures do
not help, contact your local Nokia retailer.
After the reset, the communicator will reboot
and start normally.
Establishing communication
5. Calls cannot be made or received
The phone interface is off. Close the cover
and switch the phone interface on.
If you get the message INVALID SIM CARD,
your SIM cannot be used in the communicator. Contact your Nokia retailer or network
operator.
Chapter 14 - Troubleshooting
Check the status of your call restrictions and
call forwarding, see Chapter 4 "Telephone:
Telephone settings - Voice call forward, call
restrictions and call waiting" on page 4-2.
The phone interface is already busy (data or
fax being sent or received, the communicator
is used as a fax modem). Wait for the data/
fax transmission to end or drop the call (by
pressing the
key on the phone interface
keyboard).
6. Calls, faxes or data cannot be forwarded or
restricted
You may not have a subscription to the service
in question.
The service in question is not supported by
the network.
The service center number and voice mailbox
number (required for call forwarding) may be
missing or incorrect.
Fax forwarding and restrictions are set in the
Fax application’s settings. Data restrictions
are set in the Internet main settings (data
cannot be forwarded).
7. Common reasons why faxes, short messages
or e-mail cannot be sent or received
• The phone interface is off.
• You have no subscription to the specific
network service.
• The communicator is low on memory (see
problem 16).
• The number format used is invalid.
• The dialed number does not answer (within
10 tries).
• You are calling the wrong phone number.
• The phone interface is already busy (data or
fax being sent or received, the communicator
is used as a fax modem). Wait for the data/
fax transmission to end or drop the call (by
pressing the
key on the phone interface
keyboard).
• Fax/data restrictions or fax forwarding may
be active (fax restrictions/forwarding are set
in Fax application’s settings, data restrictions
are set in the Internet settings).
14-3
• Fax reception: The SIM does not have a fax
number.
• E-mail reception: The SIM does not have a
phone number for data connections. Contact
your cellular service provider.
• Short message sending: You have not
subscribed to the Short Message Service or
the Short Message Service center number is
missing or incorrect. Contact your cellular
service provider.
• E-mail sending: You do not have a remote
mailbox service.
• The e-mail server (which delivers your mail)
does not comply with the SMTP protocol.
Contact your e-mail service provider.
If you are using the Send upon request option, e-mail sending must be started in the
Document outbox, see Chapter 12 ”Document outbox” on page 12-1.
The failure reason can also depend on the network:
• No network support for SMS.
• No network support for fax.
• No network support for data/e-mail.
• Network out of order.
• Network is busy.
• The field strength is not adequate for
sending.
8. Cannot establish a terminal or Internet
connection
Internet, E-mail, WWW, Telnet or Terminal settings and configurations may be missing or incorrect. Check your Internet access point number (in Internet main settings). Contact your Internet service provider for the correct settings.
See also ”Internet settings” on page 7-3.
If you receive internal error messages, remove and replace the battery and try again.
If the problem persists, see problem 4.
If you receive service provider error messages
when connecting to your remote mailbox,
contact your remote mailbox service provider.
Your remote mailbox may contain corrupted
e-mail messages or the e-mail server settings
may be incorrect.
14-4
Connectivity and printing
9. Fax modem problems
If you experience problems establishing a
data connection with the remote modem,
you can try fixing the data transmission rate
by using an AT command, for example,
ATS35=6, which defines the remote modem
as a V.32 modem. Common AT commands
(based on the ETSI 07.07 standard) supported
by the Nokia 9000i Communicator are listed
in the file atcomm.txt on the diskette supplied with the product. For information on
how to use the AT commands, consult the
documentation of the telecommunication or
fax application that you use on your PC.
When the communicator is used as a fax modem (see Chapter 10 "System: Fax modem"
on page 10-5), use autobauding. The communicator and the PC must be using the same
baud rate. For the communicator, this is set
in System settings. For the PC, the baud rate
is set in the PC’s connectivity software.
If a cable connection is used, fully compatible
operation with all PC fax and terminal software cannot be guaranteed (consult with
your Nokia retailer). If you experience problems with your PC fax software, use the infrared connection.
Connectivity and printing
10. Cannot print
Direct printing is possible via an infrared link
only. The remote infrared port must be compatible to the IrDA standard. Check the IR
connection, see Chapter 10 "System: Connecting to a PC" on page 10-6.
You are using an incorrect printer driver, see
Chapter 8 "Notes: Printing documents" on
page 8-4.
If you fail to establish a working infrared
connection, transfer the file to a PC and use
the PC to print the document. See Chapter 10
"System: File transfer" on page 10-7. Alternatively, you can send the document as a fax
to the nearest fax machine. See Chapter 5
"Fax: Fax settings" on page 5-1.
11. PC connectivity problems
The PC software for desktop connectivity is
not installed, see Chapter 10 "System: Connecting to a PC" on page 10-6. The software
is found on the diskette included in the communicator sales package.
Check the cable or IrDA connection used. If
an infrared connection is used, the IR ports
must be facing each other, see Chapter 10
"System: Connecting to a PC" on page 10-6.
12. Infrared connection
The communicator may be connected to a
computer, laptop or printer via an infrared
connection.
If you wish to use an infrared connection, the
computer to which you want to establish a
connection must have an IrDA compatible
infrared port; installed and activated IrDA
drivers; and Microsoft Windows 95 (for more
information on IrDA drivers and their use in
Windows 95, contact Microsoft).
If the IrDA drivers are activated on your computer, the computer will automatically detect
the presence of the communicator.
If you want use a printer which does not have
an infrared port, you may try to connect to
the printer via an IrDA adapter (not supplied
with the Nokia 9000i Communicator).
For further information see readme.txt file on
the diskette supplied with the communicator.
Chapter 14 - Troubleshooting
14-5
Miscellaneous
13. Distorted Characters in Terminal
If the data bits/stop bits/parity settings are
different from those defined to the data service by the operator, characters may look distorted on the display.
14. Access code problems
The lock code is included in the communicator sales package. If you forget or lose the
lock code, contact your Nokia retailer.
If you forget or lose a PIN or PUK code, or you
have not received such a code, contact your
network operator.
For information about Internet or terminal
passwords, contact your Internet service
provider.
15. Cannot open a directory entry in the directory view
If you cannot select a contact in the Telephone, Fax, SMS or E-mail directory, it means
that the contact card does not have a telephone number, fax number, GSM telephone
number or an e-mail address.
Within the Contacts application, add the
missing information to the contact card.
16. Call quality is poor
Your location may not allow better call quality.
This problem may occur especially in a moving
car or train. Move to a location where radio
signal reception is better. See Chapter 16 "Important safety information: Facts about wireless data transmission" on page 16-3.
Reception is usually better above ground level, outdoors and while stationary. Sometimes even moving the cellular phone slightly
will improve reception. You can also try using
the communicator in the handsfree mode
with the communicator interface’s Telephone
application (see Chapter 4 "Telephone: Telephone settings" on page 4-1). Remember to
turn the antenna to an upright position.
17. Low on memory
If you notice that your communicator’s memory is getting low or you receive a warning
note about insufficient memory, check the
Memory details (see Chapter 10 "System:
Memory" on page 10-11). Use the memory
details to determine what kind of data takes
up most memory.
First, make a backup of all important data.
Next, either delete some data manually (documents, received faxes, etc.) You can also use
the Data removal application (see Chapter 10
"System: Data removal" on page 10-10).
With the Data removal application you can
delete old calendar data, for example.
Note: Downloaded images and received faxes
can take up significant amounts of memory space.
18. Cannot access numbers stored on the SIM
Use the phone interface’s Menu 8 3 2 to copy
the SIM card entries into the Contacts directory. See Chapter 13 "Phone interface: Detailed
menus list - Memory functions (Menu 8)" on
page 13-13.
Chapter 15 - Care and maintenance
15-1
15. Care and maintenance
Your Nokia 9000i Communicator is a product of
superior design and craftsmanship and should be
treated with care. The suggestions below will
help you to fulfil any warranty obligations and to
enjoy this product for many years.
Keep the communicator and all its parts and
accessories out of small children’s reach.
Keep the communicator dry. Precipitation,
humidity and liquids contain minerals that will
corrode electronic circuits.
Do not use or store the communicator in dusty,
dirty areas. Its moving parts can be damaged.
Do not store the communicator in hot areas.
High temperatures can shorten the life of electronic devices, damage batteries, and warp or
melt certain plastics.
Do not store the communicator in cold areas.
When the communicator warms up (to its
normal temperature), moisture can form inside
the communicator, which may damage electronic
circuit boards.
Do not attempt to open or disassemble the communicator. Non-expert handling of the communicator may damage it.
Do not drop, knock or shake the communicator.
Rough handling can break internal circuit
boards.
Do not use harsh chemicals, cleaning solvents, or
strong detergents to clean the communicator.
Wipe it with a soft cloth slightly dampened in a
mild soap-and-water solution.
If the communicator or any of its accessories are
not working properly, take them to your nearest
qualified service facility. The personnel there will
assist you, and if necessary, arrange for service.
Warranty information
NOKIA One-Year Limited Warranty
Nokia Mobile Phones, Inc. (“NMPI”) warrants
that this cellular phone (“Product”) is free from
defects in material and workmanship, according
to the following terms and conditions:
1. The limited warranty for the Product extends
for ONE (1) year beginning on the date of
purchase of the Product.
2. The limited warranty extends only to the
original consumer purchaser (“Consumer”) of
the Product and is not assignable or transferable to any subsequent purchaser/end user.
3. The limited warranty extends only to Consumers who purchase the Product in the United
States or Canada.
4. During the limited warranty period, NMPI will
repair, or replace, at NMPI’s option, any defective parts, or any parts that will not properly
operate for their intended use with new or
factory rebuilt replacement items. No charge
will be made to the Consumer for any such
parts. NMPI will also pay for the labor charges
incurred by NMPI in repairing or replacing the
defective parts. The external housing and
cosmetic parts shall be free of defects at the
time of shipment and, therefore, shall not be
covered under these limited warranty terms.
15-2
5. Upon request from NMPI, the Consumer must
provide information to reasonably prove the
date of purchase.
6. The Consumer shall bear the cost of shipping
the Product to the Customer Service Department of NMPI. NMPI shall bear the cost of
shipping the Product back to the Consumer
after the completion of service under this
limited warranty.
7. The Consumer shall have no coverage or benefits under this limited warranty if any of the
following conditions are applicable:
a) The Product has been subject to abnormal
use, abnormal conditions, improper storage, exposure to moisture or dampness,
unauthorized modifications, unauthorized
connections, unauthorized repair, misuse,
neglect, abuse, accident, alteration, improper installation, or other acts which
are not the fault of NMPI, including damage caused by shipping and blown fuses.
b) The Customer Service Department at
NMPI was not notified by Consumer of the
alleged defect or malfunction of the Product during the applicable limited warranty
period.
c) The Product serial number plate or the
accessory date code has been removed,
defaced, or altered.
d) The defect or damage was caused by the
defective function of the cellular system,
or by inadequate signal reception by the
external antenna.
8. If a problem develops during the limited
warranty period, the Consumer should take
the following step-by-step procedure:
a) The Consumer shall return the Product to
the place of purchase for repair or replacement processing.
b) If “a” is not convenient the Consumer may
contact the Customer Service Department
at NMPI, at the phone number listed on
the bottom of the next page for further
instructions.
Warranty information
c) The Consumer shall ship the Product
prepaid and insured. Expenses related to
removing the Product from an installation
are not covered under this limited warranty.
d) The Consumer will be billed for any parts or
labor charges not covered by this limited
warranty. The Consumer shall be responsible for expenses related to reinstallation
of the Product.
e) If the Product is returned to the Customer
Service Department at NMPI during the
limited warranty period, but the problem
with the Product cannot be fixed under the
terms and conditions of this limited warranty, the Consumer will be notified and
given an estimate of the charges the Consumer must pay to have the Product repaired, with all shipping charges billed to
the Consumer. If the estimate is refused,
the Product will be returned freight collect.
If the Product is returned to the Customer
Service Department at NMPI after the expiration of the warranty period, NMPI’s
normal service policies shall apply and the
Consumer will be invoiced for all shipping
charges.
9. The Product consists of newly assembled
equipment that may contain used components which have been reprocessed to allow
machine compliance with Product performance and reliability specifications.
10. ANY IMPLIED WARRANTY OF MERCHANTABILITY, OR FITNESS FOR A PARTICULAR
PURPOSE OF USE, SHALL BE LIMITED TO THE
DURATION OF THE FOREGOING WRITTEN
WARRANTY, OTHERWISE, THE FOREGOING
WARRANTY IS THE PURCHASER’S SOLE AND
EXCLUSIVE REMEDY AND IN LIEU OF ALL
OTHER WARRANTIES, EXPRESS OR IMPLIED.
NMPI SHALL NOT BE LIABLE FOR INCIDENTAL
OR CONSEQUENTIAL DAMAGES OR A LOSS OF
ANTICIPATED BENEFITS OR PROFITS, RESULTING FROM THE PURCHASE OR USE OF THE
PRODUCT OR ARISING FROM THE BREACH OF
THE WARRANTY EVEN IF NMPI KNEW OF THE
LIKELIHOOD OF SUCH DAMAGES.
Chapter 15 - Care and maintenance
11. Some states do not allow limitation of how
long an implied warranty lasts, so the above
limitation may not apply to you (the Consumer).
Some states do not allow the exclusion of incidental or consequential damages, so the above
limitation or exclusions may not apply to you
(the Consumer). This limited warranty gives you
specific legal rights and you may also have
other rights which vary from state to state.
12. NMPI neither assumes nor authorizes any
authorized service center or any person or
entity to assume for it any other obligation or
liability beyond that which is expressly
provided for in this limited warranty.
15-3
13. Questions concerning this limited warranty
may be directed to the Customer Service
Department at Nokia, 6200 Courtney Campbell
Causeway, Suite 900, Tampa, FL 33630. Telephone (813) 288-3800 or 1-800-456-5553,
Fax: (813) 287-6612.
14. The limited warranty period for Nokia
Product Corp. supplied attachments and
accessories are specifically defined within
their own warranty cards and packaging.
Chapter 16 - Important safety information
16-1
16. Important safety
information
Traffic safety
• Do not use the communicator while driving a
vehicle. Park the vehicle before using the
communicator.
• Always secure the communicator in its holder,
and ensure that the locking mechanism on top
of the holder is properly engaged; do not place
the communicator on the passenger seat or
where it can break loose in a collision or
sudden stop.
• The use of an alert device to operate a
vehicle’s lights or horn on public roads is not
permitted.
• Remember, road safety always comes first!
Operating environment
• Remember to follow any special regulations in
force in any area, and always switch off your
communicator’s phone interface whenever it
is forbidden to use a mobile phone, or when it
may cause interference or danger.
• Operation of any radio transmitting
equipment, including the Nokia 9000i
Communicator, may interfere with the functionality of inadequately protected medical
devices. Consult a physician or the manufacturer of the medical device if you have any
questions. Other electronic equipment may
also be subject to interference.
• As with other mobile radio transmitting
equipment, users are advised that for the
satisfactory operation of the equipment and
for the safety of personnel, it is recommended
•
•
•
•
•
•
•
that the equipment should only be used in
the normal operating position.
Users are advised to switch off the phone
interface when at a refueling point (service
station). Users are reminded of the need to
observe restrictions on the use of radio
equipment in fuel depots (fuel storage and
distribution areas), chemical plants or where
blasting operations are in progress.
Do not store or carry flammable liquids, gases or
explosive materials in the same compartment
as the communicator, its parts or accessories.
Only qualified personnel should install or
service the communicator in a vehicle. Faulty
installation or service may be dangerous and
may invalidate any warranty which may
apply to the unit.
Electronic fuel injection systems, electronic
anti-skid braking systems, electronic cruise
control systems and other electronic systems
can malfunction due to the lack of protection
from radio signals. Check regularly that all
cellular phone equipment in your vehicle is
mounted and operating properly.
Remember to make backup copies of all
important data to protect against its possible
loss or alteration.
When connecting the communicator to a PC
or printer, please refer to the User’s Guides of
those devices for detailed safety instructions.
The infrared beam of the communicator may
interfere with the functioning of other
infrared devices that are not IrDA certified. Do
not point the infrared beam at anyone’s eye.
16-2
• Consult aircraft personnel as to whether you
may use the communicator interface applications in an aircraft. However, always switch
off the phone interface before boarding an
aircraft. The use of mobile telephones in an
aircraft may be dangerous to the operation of
the aircraft, disrupt the cellular network and is
illegal.
• Failure to observe these instructions may
lead to suspension or denial of cellular telephone services to the offender, or legal action
or both.
Emergency calls
IMPORTANT!
The Nokia 9000i Communicator, like any mobile
phone, operates using radio signals, cellular and
landline networks, as well as user-programmed
functions which cannot guarantee connection in
all conditions. Therefore, you should never rely
solely upon any mobile phone for essential communications (e.g. medical emergencies).
Remember, to make or receive any calls the
communicator’s phone interface must be
switched on and in a service area with adequate
network signal strength.
Emergency calls may not be possible on all cellular phone networks or when certain network
services and/or phone features are in use. Check
with your home network operator.
Some networks require that a valid SIM card is
properly inserted in the communicator.
To make an emergency call:
1 If the device cover is open, close the cover.
2 If the phone interface is not on, switch it on
(press the
key).
3 Press and hold the key for several seconds
to ready the phone interface for calls. If there
is an active data or fax call, drop the call first
by pressing the
key.
4 Key in the emergency number for your
present location (e.g., 911 or other official
emergency number). Emergency numbers
may vary by location.
5 Press the
key.
If certain features are in use (call restriction,
fixed dialing, closed user group, system lock,
keypad lock, etc.), you may first need to turn
those features off before you can make an emergency call. Consult this document and your
home network operator.
When making an emergency call, remember
to give all the necessary information as accurately as possible. Remember that your mobile
phone may be the only means of communication at the scene of an accident - do not cut
off the call until given permission to do so.
Using this manual
The mobile phone described in this manual is approved for use in GSM1900 digital networks.
This manual is used for the Nokia 9000i Communicator GSM1900 model.
A number of features described in this manual
are called Network Services. They are special
services provided by network operators. Before
you can take advantage of any of these Network
Services, you must subscribe to the service(s)
you require from your network operator. You can
then activate these functions as described in this
manual. The manual activation commands for
various services are not presented in this manual
(e.g., using the
and
characters for activating or deactivating services). The Nokia 9000i
Communicator, nevertheless, is capable of
handling commands given in that form.
For these commands, please consult with your
home network operator.
WARNING! This apparatus is intended for use
when supplied with power from a Lithium-Ion
battery and chargers ACH-4UC, ACH-4E,
ACH-4X and ACH-4A. Other usage will invalidate any approval given to this apparatus and
may be dangerous.
Use only accessories approved by the communicator manufacturer. The use of any other types
will invalidate any approval or warranty applying to the apparatus, and may be dangerous.
When you disconnect the power cord of any
accessory, grasp and pull the plug, not the
cord.
Chapter 16 - Important safety information
16-3
Facts about wireless data transmission
The Nokia 9000i Communicator employs the
digital data transmission capabilities of the GSM
network to send faxes, short messages, e-mail
and to establish connections with remote
computers.
Wireless data connections can be made from
most locations where your mobile phone operates. However, it is recommended that you move
the communicator to a location where the
strongest possible cellular signal can be obtained.
When the signal is strong, data transmission is
efficient. In general, you should not expect the
same performance from wireless cellular data
communications as from landline communications due to the inherent characteristics of the
cellular environment.
The following factors may impair digital cellular
connections:
Noise
Radio interference from electronic appliances
and equipment, as well as from other mobile
phones in metropolitan areas where mobile
telephones are prevalent.
Handover
As the mobile phone user moves from one
network cell to another, the signal strength
of the channel drops and the cellular telephone exchange may hand the user over to a
different cell and frequency, where the signal
is stronger. A cell handover may also occur
when the user is stationary due to varying
cellular traffic loads. Such handovers may
cause slight delays.
Electrostatic discharge (ESD)
A discharge of static electricity from a finger
or a conductor may cause erroneous functions
in electric devices. The discharge can result in
“garbled” display and unstable software operation. Cellular connections may become
unreliable, data may be corrupted, and the
transmission halted. In this case you need to
end the existing call (if any), switch off the
phone interface (if on) and remove the battery. Then replace the battery and establish a
new cellular connection.
Dead spots and dropouts
Dead spots are areas where radio signals cannot
be received. Dropouts occur when the cellular
phone user passes through an area where the
radio signal is blocked or reduced by geographic
or structural obstructions.
Signal impairment
Distance and obstacles can cause out-ofphase reflected signals that result in a loss of
signal strength.
Low signal strength
Due to either distance or obstacles, the radio
signal strength from a cell site may not be
strong enough or stable enough to provide a
reliable cellular connection for communication. Therefore, to ensure the best possible
communication, remember to consider the
following points:
• The data connection works best when the
communicator is in a stationary position.
Attempting cellular communication while in
a moving vehicle is not recommended. Fax
transmission is more easily impaired than
data or short message transmission.
• Do not place the communicator on a metal
surface.
• Check that the cellular signal strength on the
communicator displays is sufficient (see
Chapter 2 "Getting started: Indicators" on
page 2-10 and Chapter 13 "Phone interface:
Display indicators" on page 13-2 of this
manual). Moving the communicator within a
room especially towards a window, may
result in a stronger signal. If the cellular
signals are not strong enough to support a
voice call, data connection should not be
attempted until you can find a location with
better signal reception.
Index
Index
Symbols
+ character 3-3
A
Access codes 1-2
Alarm
calendar 9-3
clock 11-3
Area codes 11-4
B
Backup/Restore 10-9
Battery
charge indicator 13-2
charging 2-5
C
Calendar application
alarms 9-3
booking 9-5
icons 9-2
memos 9-3
password 9-5
Call records
messages 13-8
recent calls 4-5, 13-8
Calling card 4-5
making a call 4-6
settings 4-3
Calls
answering a call 4-5, 13-3
call waiting 4-3, 13-11
conference call 4-6, 4-7
forwarding 4-2, 13-9
Hold / Unhold 13-14
making a call 4-4, 13-3
restricting 4-2
transferring 4-8, 13-14
Cleaning the communicator 15-1
Clock
alarms 11-3
settings 11-5
Connectivity software 10-6
Contact card 3-2
creating 3-2
customizing 3-3
editing 3-2
settings 3-1
template 3-1
Contacts directory 3-2
D
Data removal 10-10
Date format 10-2
Deleting temporary files 14-2
DTMF tones 3-4, 13-3
automatic sending 13-4
in contact cards 3-3
sending 13-15
special characters 3-4
storing 13-4
E
E-mail
adding attachments 7-8
deleting 7-9
envelope 7-8
forwarding 7-7, 7-10
group reply 7-7
Received e-mail folder 7-9
receiving attachments 7-10
Remote mailbox 7-9
remote mailbox icons 7-9
Remote mailbox settings 7-6
reply all 7-10
retrieving 7-9
sending 7-7
sending upon request 7-8
settings 7-5
viewing 7-10
writing 7-6
E-mail directory 7-7
Emergency calls 16-2
F
Fax application
cover page 5-3
directory 5-4
forwarding 5-2
receiving 5-5
restrictions 5-2
sending 5-3
viewing 5-5
writing 5-3
zooming 5-5
fax driver software 10-5
Files
graphics files 10-7
text files 10-7
transferring 10-7
Flight mode 4-3
Fonts 8-1
Formatting file system 14-2
G
GMT offset (Clock) 11-4
H
Help
application topics 2-12
general topics 2-12
phone interface 13-15
I
Import/Export
calendar data 10-10
contacts 10-9
infrared connection 10-6
infrared drivers 10-5
Install/Remove software 10-8
Internet
glossary 7-2
Internet application
access requirements 7-1
data call restrictions 7-3
e-mail 7-5
settings 7-3
Telnet 7-16
Terminal 7-18
World Wide Web 7-11
L
Lock code 4-3, 10-4
Locking
communicator 10-2
keypad 13-15
M
Margins 8-1
Memory 2-2, 13-4
cache 7-13
copy between memories 3-5
Memory A 2-2, 13-4
Memory B 2-2, 13-4
phone display indicator 13-2
phone memory 2-2
selection 13-13
SIM memory 2-2
Menu functions 13-6
main and submenus 13-7
scrolling 13-6
shortcuts 13-6
Messages 6-1
Multi-select function 2-12
N
Network password 10-4
Network selection 13-13
Notes application
settings 8-1
P
PC connectivity
cable connection 10-6
infrared connection 14-4
Index
Phone interface 1-1
display indicators 13-2
keypad functions 13-1
lights 13-10
memory button 13-2
menu button 13-2
PIN code 10-3
PIN2 code 10-4
Plus (+) character 3-3
PUK code 10-4
R
Read-only documents 8-2
Rebooting the communicator 14-1
Reception (call quality) 14-5
Record function 3-4
General record 3-4
Individual record 3-5
Resetting the communicator 14-2
Ringing and tones
composing 11-5
keypad tones 10-2
ring, beep, silent 13-15
settings 13-10
Ringing tones 10-2
S
Safety information 16-1
Security 10-2
lock/unlock system 10-2, 13-12
passwords 10-4
Settings
Internet access 7-3
network services 4-2
Remote mailbox 7-6
ringing and tones 4-1
Tel application 4-1
WWW 7-11
Shortcuts
last number redial 13-6
one touch dialing 13-10
speed dialing 13-5
speed search 13-6
table of keystrokes 2-13
Signal strength
indicator 13-2
signal impairment 16-3
SIM card 2-2
installing 2-3
SMS application
business cards 6-6
forwarding 6-3
Recent numbers 6-4
requesting delivery report 6-2, 6-3
sending options 6-2
SMSC 6-2
Standard messages 6-5
Use number 6-3
Sounds
Ringing 10-2
Special character key 8-3
Speed dialing 3-4, 13-5
Speed search 13-6
SSL encryption 7-3
System application
settings 10-1
T
Telnet
commands 7-16
defining connections 7-16
Terminal
commands 7-19
defining connections 7-18
Text Web 11-1
Time format 10-2
Timers
call cost counter 4-6
call cost display 4-3
call duration 13-12
U
Unlocking
communicator 10-2
keypad 13-15
V
Voice mailbox
calling 4-4
setting number 4-4, 13-9
Volume
phone interface 13-10
speakerphone 4-4
W
World time 11-4
WWW
downloading software 7-15
Hotlist 7-12
Navigation index 7-14
saving information 7-13
settings 7-11
URL addresses 7-12
viewing images 7-15