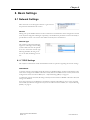
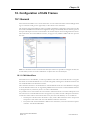
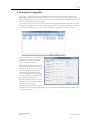
1
User Manual Anybus Communicator CAN EtherNet/IP ® Doc.Id. SCM-1200-123 Rev. 1.00 Connecting DevicesTM +$/067$'&+,&$*2.$5/658+(72.<2%(,-,1*0,/$1208/+286(&29(175<381(&23(1+$*(1 HMS Industrial Networks Mailing address: Box 4126, 300 04 Halmstad, Sweden Visiting address: Stationsgatan 37, Halmstad, Sweden E-mail: [email protected] Web: www.anybus.com Important User Information This document is intended to provide a good understanding of the functionality offered by the Anybus Communicator CAN - EtherNet/IP. The reader of this document is expected to be familiar with high level software design, and communication systems in general. The use of advanced EtherNet/IP specific functionality may require in-depth knowledge of EtherNet/IP networking internals and/or information from the official EtherNet/IP specifications. In such cases, the people responsible for the implementation of this product should either obtain the EtherNet/IP specification to gain sufficient knowledge or limit their implementation in such a way that this is not necessary. Liability Every care has been taken in the preparation of this manual. Please inform HMS Industrial Networks AB of any inaccuracies or omissions. The data and illustrations found in this document are not binding. We, HMS Industrial Networks AB, reserve the right to modify our products in line with our policy of continuous product development. The information in this document is subject to change without notice and should not be considered as a commitment by HMS Industrial Networks AB. HMS Industrial Networks AB assumes no responsibility for any errors that may appear in this document. There are many applications of this product. Those responsible for the use of this device must ensure that all the necessary steps have been taken to verify that the applications meet all performance and safety requirements including any applicable laws, regulations, codes, and standards. HMS Industrial Networks AB will under no circumstances assume liability or responsibility for any problems that may arise as a result from the use of undocumented features, timing, or functional side effects found outside the documented scope of this product. The effects caused by any direct or indirect use of such aspects of the product are undefined, and may include e.g. compatibility issues and stability issues. The examples and illustrations in this document are included solely for illustrative purposes. Because of the many variables and requirements associated with any particular implementation, HMS Industrial Networks AB cannot assume responsibility for actual use based on these examples and illustrations. Intellectual Property Rights HMS Industrial Networks AB has intellectual property rights relating to technology embodied in the product described in this document. These intellectual property rights may include patents and pending patent applications in the US and other countries. The “Silk” icon set, used in the Anybus Configuration Manager tool, is created by Mark James, Birmingham, England. The complete icon set is found at http://famfamfam.com/lab/icons/silk/. The icon set is licensed under the Creative Commons Attribution 2.5 License (http://creativecommons.org/licenses/by/2.5). Trademark Acknowledgements Anybus ® is a registered trademark of HMS Industrial Networks AB. All other trademarks are the property of their respective holders. Warning: This is a class A product. in a domestic environment this product may cause radio interference in which case the user may be required to take adequate measures. ESD Note: This product contains ESD (Electrostatic Discharge) sensitive parts that may be damaged if ESD control procedures are not followed. Static control precautions are required when handling the product. Failure to observe this may cause damage to the product. Anybus Communicator CAN - EtherNet/IP User Manual Rev 1.00 Copyright© HMS Industrial Networks AB June 2011 Doc Id SCM-1200-123 Anybus Communicator CAN to EtherNet/IP Doc.Rev. 1.00 Doc.Id. SCM-1200-123 Table of Contents Table of Contents Preface About This Document Related Documents.................................................................................................................................. 1 Document History ................................................................................................................................... 1 Conventions & Terminology .................................................................................................................. 2 Sales and Support ..................................................................................................................................... 3 Chapter 1 About the Anybus Communicator CAN Introduction .............................................................................................................................................. 4 Anybus Communicator CAN Concept................................................................................................. 5 General............................................................................................................................................ 5 Data Exchange Model..................................................................................................................... 6 Chapter 2 About the Module External view............................................................................................................................................. 8 Mounting.................................................................................................................................................... 9 Status LEDs ............................................................................................................................................ 10 Connectors .............................................................................................................................................. 11 Ethernet Connectors ....................................................................................................................... 11 USB Connector.............................................................................................................................. 11 CAN Connector............................................................................................................................ 11 Power Connector.................................................................................................................................... 12 Software Installation .............................................................................................................................. 13 Anybus Configuration Manager ..................................................................................................... 13 Chapter 3 Getting Started Chapter 4 CAN Network Communication General..................................................................................................................................................... 15 Types of Messages.................................................................................................................................. 15 Query-Response.............................................................................................................................. 15 Produce and Consume .................................................................................................................... 16 Protocol Building Blocks....................................................................................................................... 16 Control/Status Word ............................................................................................................................. 17 Transaction Live List ............................................................................................................................. 18 Chapter 5 Data Representation on EtherNet/IP General..................................................................................................................................................... 19 Data Representation............................................................................................................................... 19 General.......................................................................................................................................... 19 Memory Layout (Internal Memory Buffer)...................................................................................... 20 Modbus/TCP.......................................................................................................................................... 21 Anybus Communicator CAN to EtherNet/IP Doc.Rev. 1.00 Doc.Id. SCM-1200-123 II General.......................................................................................................................................... 21 Addressing Modes .......................................................................................................................... 21 Supported Exception Codes............................................................................................................ 21 Modbus Addressing Mode.............................................................................................................. 22 Anybus Addressing Mode .............................................................................................................. 23 Chapter 6 Configuration Configuring the Anybus Communicator CAN.................................................................................. 24 Configuring the EtherNet/IP Network.............................................................................................. 24 Chapter 7 Anybus Configuration Manager Main Window.......................................................................................................................................... 25 Pull-down Menus ........................................................................................................................... 26 Chapter 8 Basic Settings Network Settings .................................................................................................................................... 29 TCP/IP Settings ........................................................................................................................... 29 Communicator Settings ......................................................................................................................... 31 Subnetwork Settings............................................................................................................................... 32 Chapter 9 Groups and Transactions General..................................................................................................................................................... 33 Groups ..................................................................................................................................................... 33 Transactions ............................................................................................................................................ 33 Produce .......................................................................................................................................... 34 Consume ........................................................................................................................................ 35 Query/Response............................................................................................................................. 35 Chapter 10 Configuration of CAN Frames General..................................................................................................................................................... 36 CAN Identifiers ............................................................................................................................ 36 Produce/Query CAN Frame................................................................................................................ 37 Consume/Response CAN Frame........................................................................................................ 37 Chapter 11 Anybus Configuration Manager Tools Monitor/Modify ..................................................................................................................................... 39 CAN Line Listener ................................................................................................................................. 40 Address Overview .................................................................................................................................. 41 Diagnostics/Status ................................................................................................................................. 41 Chapter 12 Online Anybus Communicator CAN to EtherNet/IP Doc.Rev. 1.00 Doc.Id. SCM-1200-123 III Appendix A Technical Specification Protective Earth (PE) Requirements................................................................................................... 45 Power Supply .......................................................................................................................................... 45 Environmental Specification ................................................................................................................ 45 Temperature................................................................................................................................... 45 Relative Humidity.......................................................................................................................... 45 EMC (CE) Compliance ......................................................................................................................... 46 Chapter B Configuration Example Appendix C Advanced IT Functionality File System............................................................................................................................................... 51 General.......................................................................................................................................... 51 File System Overview...................................................................................................................... 52 System Files ................................................................................................................................... 52 Basic Network Configuration............................................................................................................... 53 General Information....................................................................................................................... 53 Ethernet Configuration File (‘ethcfg.cfg’) ......................................................................................... 54 PROFINET Settings ................................................................................................................... 55 IP Access Control .......................................................................................................................... 56 Anybus IPconfig (HICP)............................................................................................................... 57 FTP Server............................................................................................................................................... 58 General.......................................................................................................................................... 58 FTP Connection Example (Windows Explorer) ............................................................................ 58 Telnet Server ........................................................................................................................................... 60 General.......................................................................................................................................... 60 General Commands........................................................................................................................ 60 Diagnostic Commands.................................................................................................................... 61 File System Operations................................................................................................................... 62 Web Server .............................................................................................................................................. 65 General.......................................................................................................................................... 65 Authorization ................................................................................................................................ 66 Content Types ................................................................................................................................ 66 Server Side Include (SSI) ....................................................................................................................... 68 General.......................................................................................................................................... 68 Functions ....................................................................................................................................... 69 Changing SSI output...................................................................................................................... 75 E-mail Client ........................................................................................................................................... 78 General.......................................................................................................................................... 78 E-mail Definitions ......................................................................................................................... 78 Appendix D Copyright Notices Anybus Communicator CAN to EtherNet/IP Doc.Rev. 1.00 Doc.Id. SCM-1200-123 Preface P. About This Document For more information, documentation etc., please visit the HMS website, ‘www.anybus.com’. P.1 Related Documents Document CAN protocol specification Open Modbus/TCP Specification, Release 1.0 RFC 821 RFC 1918 EIP Specifications Author www.can-cia.org Schneider Automation Network Working Group Network Working Group ODVA P.2 Document History Summary of Recent Changes ( ... 1.00) Change - Page(s) - Revision List Revision 1.00 Date Author(s) 2011-06-23 KeL Anybus Communicator CAN to EtherNet/IP Doc.Rev. 1.00 Chapter(s) Description First official release Doc.Id. SCM-1200-123 About This Document 2 P.3 Conventions & Terminology The following conventions are used throughout this manual: • Numbered lists provide sequential steps • Bulleted lists provide information, not procedural steps • The terms ‘Anybus’ or ‘module’ refers to the Anybus Communicator CAN module. • The terms ‘host’ or ‘host application’ refers to the device that hosts the Anybus module. • Hexadecimal values are written in the format NNNNh or 0xNNNN, where NNNN is the hexadecimal value. • A byte always consists of 8 bits. Anybus Communicator CAN to EtherNet/IP Doc.Rev. 1.00 Doc.Id. SCM-1200-123 About This Document 3 P.4 Sales and Support Sales Support HMS Sweden (Head Office) E-mail: [email protected] E-mail: [email protected] Phone: +46 (0) 35 - 17 29 56 Phone: +46 (0) 35 - 17 29 20 Fax: +46 (0) 35 - 17 29 09 Fax: +46 (0) 35 - 17 29 09 Online: www.anybus.com Online: www.anybus.com HMS North America E-mail: [email protected] E-mail: [email protected] Phone: +1-312 - 829 - 0601 Phone: +1-312-829-0601 Toll Free: +1-888-8-Anybus Toll Free: +1-888-8-Anybus Fax: +1-312-629-2869 Fax: +1-312-629-2869 Online: www.anybus.com Online: www.anybus.com HMS Germany E-mail: [email protected] E-mail: [email protected] Phone: +49 (0) 721-96472-0 Phone: +49 (0) 721-96472-0 Fax: +49 (0) 721-96472-10 Fax: +49 (0) 721-96472-10 Online: www.anybus.de Online: www.anybus.de HMS Japan E-mail: [email protected] E-mail: [email protected] Phone: +81 (0) 45-478-5340 Phone: +81 (0) 45-478-5340 Fax: +81 (0) 45-476-0315 Fax: +81 (0) 45-476-0315 Online: www.anybus.jp Online: www.anybus.jp E-mail: [email protected] E-mail: [email protected] Phone: +86 (0) 10-8532-3183 Phone: +86 (0) 10-8532-3023 Fax: +86 (0) 10-8532-3209 Fax: +86 (0) 10-8532-3209 Online: www.anybus.cn Online: www.anybus.cn E-mail: [email protected] E-mail: [email protected] Phone: +39 039 59662 27 Phone: +39 039 59662 27 Fax: +39 039 59662 31 Fax: +39 039 59662 31 Online: www.anybus.it Online: www.anybus.it HMS China HMS Italy HMS France E-mail: [email protected] E-mail: [email protected] Phone: +33 (0) 3 68 368 034 Phone: +33 (0) 3 68 368 033 Fax: +33 (0) 3 68 368 031 Fax: +33 (0) 3 68 368 031 Online: www.anybus.fr Online: www.anybus.fr HMS UK & Eire E-mail: [email protected] E-mail: [email protected] Phone: +44 (0) 1926 405599 Phone: +46 (0) 35 - 17 29 20 Fax: +44 (0) 1926 405522 Fax: +46 (0) 35 - 17 29 09 Online: www.anybus.co.uk Online: www.anybus.com E-mail: [email protected] E-mail: [email protected] Phone: +45 (0) 22 30 08 01 Phone: +46 (0) 35 - 17 29 20 Fax: +46 (0) 35 17 29 09 Fax: +46 (0) 35 - 17 29 09 Online: www.anybus.com Online: www.anybus.com E-mail: [email protected] E-mail: [email protected] Phone: +91 (0) 20 40111201 Phone: +46 (0) 35 - 17 29 20 Fax: +91 (0) 20 40111105 Fax: +46 (0) 35 - 17 29 09 Online: www.anybus.com Online: www.anybus.com HMS Denmark HMS India Anybus Communicator CAN to EtherNet/IP Doc.Rev. 1.00 Doc.Id. SCM-1200-123 Chapter 1 1. About the Anybus Communicator CAN 1.1 Introduction The Anybus Communicator CAN is a series of products that acts as a gateway between a subnetwork, running the standard CAN protocol, and a number of popular industrial networks. Integration of industrial devices is enabled without loss of functionality, control and reliability, both when retro-fitting to existing equipment as well as when setting up new installations. The Anybus Communicator CAN is based on patented Anybus technology, a proven industrial communication solution used all over the world by leading manufacturers of industrial automation products. Each module offers integration of industrial CAN devices to one of these industrial networks: PROFIBUS, PROFINET, EtherNet/IP, DeviceNet and CANopen. The scope of this manual is the Anybus Communicator CAN for EtherNet/IP. The manual primarily describes the functionality and the configuration of the CAN network and the connection between the networks. For information about EtherNet/IP, please refer to official specifications. No proprietary configuration software is needed. All necessary configuration is performed using the Anybus Configuration Manager that accompanies the product. Fieldbus Control System (e.g a PLC) (Fieldbus Network) (Fieldbus Network) Fieldbus Control System (e.g a PLC) HMII HM INVE IN VERT VE RTER RT ER HMII HM INVE IN VERT VE RTER RT ER PC configuration and monitoring PC configuration and monitoring CAN communication device CAN communication devices Single-Node Standard CAN Network Multi-Node Standard CAN Network Subnetwork The Anybus Communicator CAN recognizes and supports communication that conforms to the CAN standards 2.0A and 2.0B. The Communicator can adapt to any predefined network using CAN frames as means for data exchange, using the Anybus Configuration Manager tool, that is included with the product. • 0 - 8 bytes of data in each frame • 11-bit identifier or 29-bit identifier • Bit rates supported: 20, 50, 100, 125, 200, 250, 500, 800 and 1000 kbit/s. Anybus Communicator CAN to EtherNet/IP Doc.Rev. 1.00 Doc.Id. SCM-1200-123 About the Anybus Communicator CAN 5 EtherNet/IP Interface EtherNet/IP connectivity is provided through patented Anybus technology: • Complete EtherNet/IP slave functionality • 2 ports • Up to 509 bytes of input data and up to 505 bytes of output data. • EtherNet/IP group 2 and 3 server • Modbus/TCP slave functionality • Server Side Include (SSI) functionality • Web server and E-mail client capabilities • FTP and Telnet servers • 10/100 Mbit/s, twisted pair 1.2 Anybus Communicator CAN Concept 1.2.1 General The Anybus Communicator is designed to exchange data between a subnetwork, running CAN, and a higher level network. The CAN protocol uses frames, that are individually configurable, offering great flexibility. Through the configuration of the CAN frames, the Communicator will adapt to a predefined CAN network. It will be possible to send data to and receive data from the subnetwork, but also to act as a relay for data on the CAN subnetwork. The Communicator can issue frames cyclically, on change of data, or based on trigger events issued by the control system of the higher level network (i.e. the fieldbus master or PLC) or by the CAN network. It can also monitor certain aspects of the subnetwork communication and notify the higher level network when data has changed. An essential part of the Anybus Communicator package is the Anybus Configuration Manager, a Windows™ application which is used to supply the Communicator with a description of the subnetwork protocol. No programming skills are required; instead, a visual protocol description-system is used to specify the different parts of the CAN frames. Anybus Communicator CAN to EtherNet/IP Doc.Rev. 1.00 Doc.Id. SCM-1200-123 About the Anybus Communicator CAN 6 1.2.2 Data Exchange Model Internally, the data exchanged on the subnetwork, and the data exchanged on the higher level network, resides in the same memory. The Communicator supports a maximum of 1014 bytes for the input and output data, up to 509 bytes as input data and 505 as output data. • Input Data (Up to 509 bytes) Output Data (504 bytes) PROFINET Network The internal memory buffer is divided into three areas based on their function: Input Data (509 bytes) CAN Network This means that in order to exchange data with the subnetwork, the higher level network simply reads and writes data to memory locations specified using the Anybus Configuration Manager. The very same memory locations can then be exchanged on the subnetwork. ABC Internal Memory General Data (1024 bytes) This area can be read by the higher level network. (how this data is represented on the higher level network will be described later in this chapter). • Output Data (Up to 505 bytes) This area can be written to by the higher level network. (how this data is represented on the higher level network will be described later in this chapter). • General Data This area can not be accessed from the higher level network, but may be used for transfers between individual nodes on the subnetwork, or as a general “scratch pad” for data. The size of the General Data area is 1024 bytes. How much of the area that is used for subnetwork communication is decided by the configuration. Anybus Communicator CAN to EtherNet/IP Doc.Rev. 1.00 Doc.Id. SCM-1200-123 About the Anybus Communicator CAN 7 Memory Map When building the subnetwork configuration using the Anybus Configuration Manager, the different areas described above are mapped to the memory locations (addresses) specified below. Input Data 0x000 Output Data 0x200 CAN network: Write Only Fieldbus: Read Only 0x1FF Anybus Communicator CAN to EtherNet/IP Doc.Rev. 1.00 General Data 0x400 CAN network: Read Only Fieldbus: Write Only 0x3FF CAN network: Fieldbus: Read/Write - 0x7FF Doc.Id. SCM-1200-123 Chapter 2 2. About the Module 2.1 External view A: Status LEDs See also... A - “Status LEDs” on page 10 B B: Fieldbus Specific Connectors and Switches This connector is used to connect the Anybus Communicator CAN module to the EtherNet/ IP network. They are described in “Ethernet Connectors” on page 11. C: USB connector This connector is used for uploading and downloading the configuration and for software upgrade of the module. C See also... D - “USB Connector” on page 11 D: CAN Connector F E This connector is used to connect the communicator to the CAN network. See also... - “CAN Connector” on page 11 E: Power Connector This connector is used to apply power to the communicator. See also... - “Power Connector” on page 12 F: DIN-rail Connector The DIN-rail mechanism connects the communicator to PE (Protective Earth). See also... - “Mounting” on page 9 Anybus Communicator CAN to EtherNet/IP Doc.Rev. 1.00 Doc.Id. SCM-1200-123 About the Module 9 2.2 Mounting Perform the following steps when physically installing the Communicator: 1. Snap the Communicator on to the DIN-rail (See “External view” on page 8). The DIN-rail mechanism works as follows: 1 To snap the Communicator on, first press it downwards (1) to compress the spring in the DIN-rail mechanism, then push it against the DIN-rail as to make it snap on (2). 2 1 To snap the Communicator off, push it downwards (1) and pull it out from the DIN-rail (2), as to make it snap off from the DIN-rail. 2 2. Connect the Communicator to the CAN network. 3. Connect the Communicator to the EtherNet/IP network. 4. Connect the power cable and apply power. Anybus Communicator CAN to EtherNet/IP Doc.Rev. 1.00 Doc.Id. SCM-1200-123 About the Module 10 2.3 Status LEDs The status LEDs on the front indicate the status of the module as shown in the table below. Status LEDs 1 - 4 indicate the status of the EtherNet/IP network and status LEDs 5 - 6 indicate the status of the CAN subnetwork and the device. # 1 - Module Status 2 -Network Status State Off Green Flashing green Flashing red Red Flashing green/red Off Green Flashing green Flashing red Red Flashing green/red 3/4 - Link activity 1/2 Off Flashing green Flashing yellow 5 - CAN subnetwork status 6 - Device status Off Green Flashing red Red Off Alternating red/green Green Flashing green Red Anybus Communicator CAN to EtherNet/IP Doc.Rev. 1.00 Status No power Controlled by a scanner in Run state Not configured or scanner in Idle state Minor fault, recoverable Major fault, unrecoverable Self test in progress No power or no IP address On-line, one or more connections established (CIP Class 1 or 3) On-line, no connection established One or more connections timed out (CIP class 1 or 3) Duplicate IP address, fatal error Self test in progress No link sensed on port 1/2 Activity, receiving/transmitting Ethernet packets at 100 Mbit/s Activity, receiving/transmitting Ethernet packets at 10 Mbit/s Power off/No CAN communication Running with no transaction error/timeout Transaction error/timeout or subnetwork stopped Fatal error Power off Invalid or missing configuration Operation mode Run Operation mode Idle Fatal error 1 2 3 4 5 6 Doc.Id. SCM-1200-123 About the Module 11 2.4 Connectors 2.4.1 Ethernet Connectors EtherNet/IP Ports 1 and 2 Pin no 1 2 3 4, 5, 7, 8 6 Housing Description TD+ TDRD+ (not connected) RDCable Shield 1 8 1 2 2.4.2 USB Connector At the bottom of the module you find a USB connector used for software upgrade of the module and for uploading and downloading configurations. Pin no. 1 2 3 4 Housing Description +5 V input USBDM (USB communication signals) USBDP (USB communication signals) Signal GND Cable Shield 2 1 3 4 Note: USB is used for configuration and software upgrade only and not for monitoring, modifying or exchanging data. Remove the USB cable when the configuration of the module is finished. 2.4.3 CAN Connector Next to the USB connector the CAN connector is found. Pin no. 2 5 7 1, 4, 8, 9 3, 6 Description CAN_L Housing, CAN cable shield CAN_H (not connected) CAN GND Anybus Communicator CAN to EtherNet/IP Doc.Rev. 1.00 1 6 5 (male) 9 Doc.Id. SCM-1200-123 About the Module 12 2.5 Power Connector Pin no. 1 2 Description +24V DC GND 1 2 Notes: • • Use 60/75 or 75×C copper (CU) wire only. The terminal tightening torque must be between 5... 7 lbs-in (0.5... 0.8 Nm) See also... - “Power Supply” on page 45 Anybus Communicator CAN to EtherNet/IP Doc.Rev. 1.00 Doc.Id. SCM-1200-123 About the Module 13 2.6 Software Installation 2.6.1 Anybus Configuration Manager System Requirements • Pentium 233 MHz or higher (300 MHz recommended) • 64 MB RAM or more (128 MB recommended) • Microsoft Windows XP, Windows Vista, or Windows 7 Installation • Anybus Communicator CAN resource CD Insert the CD and follow the onscreen instructions. If the installation does not start automatically right-click on the CD-drive icon and select Explore. Execute ‘setup.exe’ and follow the onscreen instructions • From website Download and execute the self-extracting .exe file from the HMS website (www.anybus.com). Anybus Communicator CAN to EtherNet/IP Doc.Rev. 1.00 Doc.Id. SCM-1200-123 Chapter 3 3. Getting Started The purpose of this chapter is to give a short description on how to install the module and get it up and running, transferring I/O data between the CAN network and the EtherNet/IP network. Before starting, make sure that you have access to knowledge about the CAN protocol to be configured, e.g. access to the CAN protocol specification. Perform the following steps when installing the Communicator: 1. Download the Anybus Configuration Manager from the product pages at www.anybus.com or copy it from the CD that accompanies the product. Install it on your PC. 2. Build your configuration in the Anybus Configuration Manager tool, for an example see “Configuration Example” on page 47, for a description of the tool see chapters 7 to 11 3. Connect the Communicator to your PC using the USB connector. 4. Connect the power cable and apply power. 5. Download the configuration from the Anybus Configuration Manager to the Communicator. See “Online” on page 43. 6. Remove the USB cable, turn off the power and disconnect the power cable. 7. Snap the Communicator on to the DIN-rail (See “Mounting” on page 9) 8. Connect the Communicator to the CAN network. 9. If necessary, configure the other nodes in the CAN network. 10. Connect the Communicator to the EtherNet/IP network. 11. Connect the power cable and apply power. 12. Configure the EtherNet/IP network. Anybus Communicator CAN to EtherNet/IP Doc.Rev. 1.00 Doc.Id. SCM-1200-123 Chapter 4 4. CAN Network Communication 4.1 General The CAN protocol is message-based and offers the possibility to exchange up to 8 bytes of data in each message. How these bytes are interpreted, is defined in each application. The CAN protocol is a transparent protocol, meaning that it only acts as a data carrier, and it is up to the users (the application) to define and interpret the data content of the messages. Data on CAN is exchanged using frames. Each frame has a unique identifier for the data it exchanges. The identifier also represents the message priority on the CAN network. The Anybus Communicator CAN supports 11-bit (CAN 2.0A) and 29-bit (CAN 2.0B) identifiers. CAN is essentially a produce-consume network, where all nodes listen to all messages. The devices recognize what data to collect by what identifier the CAN frame carries. The Communicator is also able to act as a Master and issue queries that demand responses. It is possible to use both methods in the same configuration of the module. 4.2 Types of Messages The Anybus Communicator CAN features three different message types regarding the subnetwork communication, called ‘Query/Response’, ‘Produce’ and ‘Consume’. Note that these messages only specify the basic communication model, not the actual CAN protocol. All three types of messages can be used in the same configuration. 4.2.1 Query-Response The Communicator acts as a master on the subnetwork, and the serial communication takes place in a query-response fashion. The Communicator sends a query and expects an answer within the specified timeout. Control System Anybus Communicator CAN to EtherNet/IP Doc.Rev. 1.00 Gateway Subnetwork Devices Doc.Id. SCM-1200-123 CAN Network Communication 16 4.2.2 Produce and Consume When using these messages, there is no master-slave relationship between the Communicator and the nodes on the subnetwork. Any node, including the Communicator, may spontaneously produce a message. The message is sent on the network. The nodes on the network listen to all traffic and decide independently which messages to consume (read). Nodes do not have to respond to messages, nor do they have wait for a query to send a message on the network. Control System Communicator Subnetwork Devices Node 2 Node 1 Node 3 In the figure above, the Communicator ‘consumes’ data that is ‘produced’ by a node on the subnetwork. This ‘consumed’ data can then be accessed from the higher level network. This also works the other way around; the data received from the higher level network is used to ‘produce’ a message on the subnetwork to be ‘consumed’ by a node. Note: When configuring the Communicator using the Anybus Configuration Manager, ‘produce’ and ‘consume’ are defined from the Communicator’s perspective. 4.3 Protocol Building Blocks The following building blocks are used in Anybus Configuration Manager to describe the subnetwork communication. How these blocks apply to the two modes of operation will be described later in this document. • Group A group in the Anybus Configuration Manager does not represent any special device on the CAN network. It is a means to structure the transactions that are defined for the Communicator. Each group can be associated with a number of transactions, see below. • Transaction A transaction consists of one or more CAN frames. Each transaction is associated with a set of parameters controlling how and when to use it on the subnetwork. There are three kinds of transactions: produce, consume and query-response. A group can contain transactions of all three types. A total of 128 transactions can be configured. • CAN Frames The CAN frames are low level entities used to compose transactions (see above). Each frame carries an 11-bit or 29-bit identifier and can hold up to 8 bytes of data. See “Configuration of CAN Frames” on page 36. A total of 256 CAN frames can be configured. Anybus Communicator CAN to EtherNet/IP Doc.Rev. 1.00 Doc.Id. SCM-1200-123 CAN Network Communication 17 4.4 Control/Status Word An optional control/status word can be used to control the startup mode of the module and to read the status of the CAN network. The control word is always mapped to the first two bytes of the output data area, and the status word is mapped to the first two bytes of the input data area. It is not possible to change these locations. Input Data 0x000 Output Data 0x200 Status Word (2 bytes) CAN network: Write Only Fieldbus: Read Only Control Word (2 bytes) General Data 0x400 CAN network: Read Only Fieldbus: Write Only 0x1FF 0x3FF CAN network: Fieldbus: Read/Write - 0x7FF Note: The picture shows the maximum available data areas in the Communicator. Not all fieldbuses can access all addresses in the input and output data areas, please see section Data Exchange Model in chapter 1. Through the control word it is possible to reset the CAN controller, reboot the module and decide the start-up mode of the Communicator: Bit 15 - 3 2 1 0 Name (Reserved) Reset CAN Reboot module Operation mode Description A transition from 0 to 1 resets the CAN controller (used when the CAN interface is bus off). A transition from 0 to 1 reboots the Communicator (software reset) This bit sets the start-up operation mode of the Communicator: 0 - Idle (No new data issued to the CAN network. Data received from the CAN network is sent on the EtherNet/IP network.) 1 - Run (Data is exchanged between the CAN network and EtherNet/IP.) The status word holds status information from the CAN network: Bit 15 - 6 5 Name (Reserved) CAN overrun 4 Error passive 3 Bus off 2 Reset CAN complete (Reserved) Operation mode 0 - Idle 1 - Run 1 0 Description 0 - OK 1 - CAN reception overrun 0 - The CAN interface is NOT in error passive state 1 - The CAN interface is in error passive state 0 - Bus running 1 - Bus off If set, the CAN controller has been reset (used when the CAN interface is bus off). Anybus Communicator CAN to EtherNet/IP Doc.Rev. 1.00 Doc.Id. SCM-1200-123 CAN Network Communication 18 4.5 Transaction Live List An optional transaction live list is available. It consists of a bit array where each bit corresponds to a transaction on the CAN subnetwork. (bit 0 corresponds to transaction 1 etc.). A set bit indicates normal functionality. The bit is not set if the transaction is non-working or non-existent. The live list is mapped in the input data area of the memory, either at the start of the area or directly after the status word. From 8 transactions up to 128 transactions in steps of 8 can be monitored using the live list. Thus, up to 16 bytes of the input data area of the memory can be occupied by the live list. The latest live list is always available from the Anybus Configuration Managers Diagnostics/Status window, whether the live list is mapped in the input data area or not, see “Diagnostics/Status” on page 41. Anybus Communicator CAN to EtherNet/IP Doc.Rev. 1.00 Doc.Id. SCM-1200-123 Chapter 5 5. Data Representation on EtherNet/IP 5.1 General The Anybus Communicator CAN acts as a slave on the EtherNet/IP network. As such, it does not initiate communication towards other nodes by itself, but can be read from/written to by a EtherNet/IP master. 5.2 Data Representation 5.2.1 General The Input and Output Data areas in the internal memory buffer are used both for EtherNet/IP I/O data. The amount of data exchanged on the bus depends on the configuration of the Communicator. When setting up the EtherNet/IP communication, make sure that the I/O sizes in the EtherNet/IP master match the actual sizes used by the Communicator. The data sizes can be viewed at any time, see “Address Overview” on page 41. At least one byte of data must be mapped for the communication to start. EtherNet/IP is based on the Control and Information Protocol (CIP). The Anybus Communicator acts as a Group 2 and 3 server on the EtherNet/IP network. The input and output data is accessed using I/O connections towards the assembly object. Anybus Communicator CAN to EtherNet/IP Doc.Rev. 1.00 Doc.Id. SCM-1200-123 Data Representation on EtherNet/IP 20 5.2.2 Memory Layout (Internal Memory Buffer) The I/O sizes are specified using the Anybus Configuration Manager - Communicator CAN. The data in the input and output data areas is represented as continuous blocks of I/O data. Each data object in a CAN frame adds to the total amount. Usage of the memory can always be seen in the Address Overview, see page 41. Example: In this example, the I/O Sizes for the Communicator has been set to the following values: IO Size In= 256 bytes (0x0100) IO Size Out= 128 bytes (0x0080) Resulting memory layout: Input Data 0x000 Output Data 0x200 General Data 0x400 I/O Data (Output) I/O Data (Input) 0x27F 0x280 (Cannot be accessed from EtherNet/IP) 0x0FF 0x100 Not used Not used 0x1FF Anybus Communicator CAN to EtherNet/IP Doc.Rev. 1.00 0x3FF 0x7FF Doc.Id. SCM-1200-123 Data Representation on EtherNet/IP 21 5.3 Modbus/TCP 5.3.1 General The Modbus/TCP protocol is an implementation of the standard Modbus protocol running on top of TCP/IP. The built-in Modbus/TCP server provides access to the input and output data areas via a subset of the functions defined in the Modbus/TCP specification. The server supports up to 8 simultaneous connections and communicates over TCP port 502. For detailed information regarding the Modbus/TCP protocol, consult the Open Modbus Specification. 5.3.2 Addressing Modes The Anybus Communicator features two different modes of operation regarding the Modbus communication: • Modbus Addressing Mode (Default) In this mode, the input and output data areas are mapped to different function codes. Note that coil addressing is not possible in this mode. See also... - “Modbus Addressing Mode” on page 22 • Anybus Addressing Mode Compared to Modbus Addressing Mode, this mode allows data to be addressed in a more flexible way. Note however that several function codes can be used to access the same data in the Communicator. While this may appear confusing at first, it allows data to be manipulated in ways not possible in Modbus Addressing Mode (e.g. it is possible to manipulate individual bits of a register by accessing coils associated with the same memory location). See also... - “Anybus Addressing Mode” on page 23 5.3.3 Supported Exception Codes Code 0x01 0x02 0x03 Name Illegal function Illegal data address Illegal data value Anybus Communicator CAN to EtherNet/IP Doc.Rev. 1.00 Description The function code in the query is not supported The data address received in the query is outside the initialized memory area The data in the request is illegal Doc.Id. SCM-1200-123 Data Representation on EtherNet/IP 22 5.3.4 Modbus Addressing Mode Supported Function Codes The following function codes can be used in this mode: Modbus Function Read Holding Registers Read Input Registers Write Single Register Force Multiple Registers Mask Write Register Read/Write Registers Function Code 3 4 6 16 22 23 Associated with Area Output Data area (0x200...0x3FF) Input Data area (0x000....0x1FF) Output Data area (0x200...0x3FF) Output Data area (0x200...0x3FF) Output Data area (0x200...0x3FF) Output Data area (0x200...0x3FF) Input Register Map The input data area is mapped to input registers as follows: Register # 1 2 3 4 5 6 ... 255 256 Memory Location in the Communicator 0x000... 0x001 0x002... 0x003 0x004... 0x005 0x006... 0x007 0x008... 0x009 0x00A... 0x00B ... 0x1FC... 0x1FD 0x1FE... 0x1FF Comments Each register corresponds to two bytes in the input data area. Holding Register Map The output data area is mapped to holding registers as follows: Register # 1 2 3 4 5 6 ... 255 256 Memory Location in the Communicator 0x200... 0x201 0x202... 0x203 0x204... 0x205 0x206... 0x207 0x208... 0x209 0x20A... 0x20B ... 0x3FC... 0x3FD 0x3FE... 0x3FF Anybus Communicator CAN to EtherNet/IP Doc.Rev. 1.00 Comments Each register corresponds to two bytes in the output data area. Doc.Id. SCM-1200-123 Data Representation on EtherNet/IP 23 5.3.5 Anybus Addressing Mode Supported Function Codes The following function codes can be used in this mode: Modbus Function Read Coil Read Input Discretes Read Holding Registers Read Input Registers Write Coil Write Single Register Force Multiple Coils Force Multiple Registers Mask Write Register Read/Write Registers Function Code 1 2 3 4 5 6 15 16 22 23 Associated with Area(s) No. of I/Os or data points per command Input and Output Data Area 1 - 2000 bits (0x000... 0x3FF) 1 - 2000 bits 1 - 125 registers 1 - 125 registers Output Data Area (0x200... 1 bit 0x3FF) 1 register 1 - 800 bits 1 - 800 registers 1 register Input and Output Data Area 125 registers read/100 registers write (0x000... 0x3FF) Coil & Register Map The input and output data areas are mapped to coils and registers as follows: Register # 1 2 3 4 ... 255 256 257 ... 1024 1025 1026 1027 1028 ... 1279 1280 Coil # 1... 16 17... 32 33... 48 49... 64 ... 4065... 4080 4081... 4096 4097... 4112 ... 16369... 16384 16385... 16400 16401... 16416 16417... 16432 16433... 16448 ... 20449... 20464 20465... 20480 Memory Location in ABC 0x000... 0x001 0x002... 0x003 0x004... 0x005 0x006... 0x007 ... 0x1FC... 0x1FD 0x1FE... 0x1FF Area Input Data area Comments - - - (reserved) 0x200... 0x201 0x202... 0x203 0x204... 0x205 0x206... 0x207 ... 0x3FC... 0x3FD 0x3FE... 0x3FF Output Data area - Note 1: The table above applies to all function codes. Note 2: Coils are mapped MSB first, i.e. coil 0 corresponds to bit 15 of register 0. Anybus Communicator CAN to EtherNet/IP Doc.Rev. 1.00 Doc.Id. SCM-1200-123 Chapter 6 6. Configuration 6.1 Configuring the Anybus Communicator CAN The configuration of the Anybus Communicator CAN is performed using the configuration tool Anybus Configuration Manager for Communicator CAN (ACM). The tool is included on the CD that accompanies the module, and it is also available for download at ‘www.anybus.com’. Chapters 7 to 11 in this manual describe the configuration tool and its features. A configuration example is given in Appendix B on page 47. The USB connector at the bottom of the module is used for uploading and downloading the configuration. Please remove the USB cable when the configuration of the Communicator is finished. 6.2 Configuring the EtherNet/IP Network The Anybus Communicator CAN - EtherNet/IP is a EtherNet/IP slave on the EtherNet/IP network. The general settings for the adapter interface are configured using the ACM (see “TCP/IP Settings” on page 33). Please note that the size of the I/O data that can be read from and written to the module is defined when configuring the Communicator using the ACM tool. There are a number of different configuration tools for EtherNet/IP available on the market. The choice of tool depends on the application and the EtherNet/IP master of the network. An application note, describing how to configure an Anybus EtherNet/IP adapter interface, is available on the support pages for the Anybus Communicator CAN - EtherNet/IP module at ‘www.anybus.com’. Anybus Communicator CAN to EtherNet/IP Doc.Rev. 1.00 Doc.Id. SCM-1200-123 Chapter 7 7. Anybus Configuration Manager The Anybus Configuration Manager (ACM) is used to configure all aspects of the Communicator CAN. It also provides different tools for monitoring the module and the CAN subnetwork. Note: The configuration manager automatically allocates addresses and memory space in the input and output areas of the Communicator for the data objects that are configured. It is possible to change these addresses, but it is recommended to finish the configuration using default addresses before starting to change any addresses. A valid address range is always shown in the information section of the main window. 7.1 Main Window The main window in the Anybus Configuration Manager (ACM) is divided into 4 sections as follows: 1 3 2 4 1. Pull-down Menus & Toolbar The toolbar provides quick access to frequently used functions. 2. Navigation Section This section is the main tool for building, selecting and altering different levels of the subnetwork configuration. On most entries, right-clicking will give access to the different selections related to that particular entry. 3. Parameter Section This section holds a list of parameters or options related to the currently selected entry in the Navigation Section. The parameter value may be specified either using a selection box or entering a value manually, depending on parameter. 4. Information Section This section presents information related to the parameter where the pointer is hovering. Anybus Communicator CAN to EtherNet/IP Doc.Rev. 1.00 Doc.Id. SCM-1200-123 Anybus Configuration Manager 26 7.1.1 Pull-down Menus Some of these entries are available directly on the toolbar as well. The toolbar icon is shown next to these entries. File This menu features the following entries: • New Create a new configuration. • Open... Open a previously created configuration. A configuration is saved with the file extension .hcg. • Save Save the current configuration. • Save As... Save the current configuration under a new name. • Recent Files Displays a list of recently accessed configurations • Exit Close the Anybus Configuration Manager. Edit This menu features the following entries: • Undo Undo the most recent action. Repeat to undo more actions. • Redo Redo the most recent undo. • Cut Remove selected group, transaction, CAN frame or object. • Copy Copy selected group, transaction, CAN frame or object. • Paste Paste previously copied group, transaction, CAN frame or object. Please note that an item can only be pasted at the same level as it was copied from. The item can be moved to another group/ transaction, but not up or down in the configuration tree structure. For example, if a group is selected, when a copied transaction is to be pasted, that transaction will be pasted last in the transactions list in the group, but if a transaction is selected, the copied transaction will be pasted before the selected transaction. Anybus Communicator CAN to EtherNet/IP Doc.Rev. 1.00 Doc.Id. SCM-1200-123 Anybus Configuration Manager 27 Tools This menu features the following entries: • Monitor/Modify This entry opens the Monitor/Modify window that gives easy access to monitoring and modifying the transaction data. - See “Monitor/Modify” on page 39 • CAN Line Listener Listen in on the CAN communication on the subnetwork. - See “CAN Line Listener” on page 40 • Address Overview Display the usage of the different parts of the internal memory of the module. - See “Address Overview” on page 41 • Diagnostics/Status Display diagnostics and status of the Communicator and the present configuration. - See “Diagnostics/Status” on page 41 • Options This will bring out the following window: Item General Security File Paths Subitem Comment Language Monitor/Modify Update Time Enter the time between (ms) monitor/modify updates in millisecondsa. Valid range: 1000 to 60000 Default: 2000 Upload Password Download Password Log File Path Browse to the folder where the Log File should be saved.b a. If a low value is entered, it may affect the performance of the Communicator, i.e. the data throughput delay will be longer. b. The Log File contains time stamped versions of the line listener and diagnostic logs. Anybus Communicator CAN to EtherNet/IP Doc.Rev. 1.00 Doc.Id. SCM-1200-123 Anybus Configuration Manager 28 Online This menu features the following entries: • Select Connection This entry gives the opportunity to select connection for the module. See also - “Select Connection” on page 43 • Connect/Disconnect This entry connects/disconnects the configuration tool to the module. • Upload Configuration This entry uploads a previously downloaded configuration to the Anybus Configuration Manager. • Download Configuration This entry downloads the configuration to the Anybus Communicator CAN. Any previously downloaded configuration will be overwritten. • Set Module Password This option makes it possible to create, change and remove password for a module. See also - “Set Module Password” on page 44 Help This menu features the following entry: • About... Displays information about the Anybus Configuration Manager. Anybus Communicator CAN to EtherNet/IP Doc.Rev. 1.00 Doc.Id. SCM-1200-123 Chapter 8 8. Basic Settings 8.1 Network Settings Select ‘Network’ in the Navigation Section to gain access to the parameters described in this section. General During start-up the fieldbus interface of the Communicator is initialized to fit the configuration created in the Anybus Configuration Manager. Optionally, some initialization parameters can be set manually to provide better control over how the data shall be treated by the Communicator. Network Type The Anybus Configuration Manager supports a wide range of networking systems. Make sure that this parameter is set to the correct network type. Selecting EtherNet/IP will give access to the TCP/IP Settings, see below. 8.1.1 TCP/IP Settings The Anybus Communicator CAN offers different modes of operation regarding the network settings. DHCP/BootP At the first startup of the module ‘TCP/IP settings’ are disabled and the Anybus Communicator CAN retrieves the settings from a DHCP or BootP server by default. If no DHCP server is found, the network configuration can be accessed via HICP, see “Anybus IPconfig (HICP)” on page 57. At subsequent startups the TCP/IP settings will only be retrieved from a DHCP or BootP if ‘TCP/IP settings’ are disabled. If no current settings are available the Communicator will halt and indicate an error on the on-board status LEDs (the network configuration may however still be accessed via HICP, see “Anybus IPconfig (HICP)” on page 57. Anybus Communicator CAN to EtherNet/IP Doc.Rev. 1.00 Doc.Id. SCM-1200-123 Basic Settings 30 Settings specified in Anybus Configuration Manager The network settings can be configured in the Anybus Configuration Manager if ‘TCP/IP Settings’ are enabled. Note that in such cases, the contents of the system file ‘ethcfg.cfg’ will be ignored completely, causing the following behavior: • DNS services will not be available • Domain and Host name cannot be set • Settings received from the network (i.e. via HICP or DCP) will be lost in the event of a power loss or reset. This behavior will persist for as long as ‘TCP/IP Settings’ is enabled, also if the module is restarted, i.e. the settings will be valid after a restart. Anybus Communicator CAN to EtherNet/IP Doc.Rev. 1.00 Doc.Id. SCM-1200-123 Basic Settings 31 8.2 Communicator Settings Select ‘Communicator’ in the Navigation Section to gain access to the parameters described in this section. The figure shows the available parameters. General Parameter Comment If the Control/Status word is enabled it occupies the first two bytes of the out/in area of the memory. See also.. “Control/Status Word” on page 17 Start-up Operation If the Control Word is enabled, it is possible to decide the start-up mode of the subnetwork. The Mode start-up mode can be either ‘Run’ or ‘Idle’. a If the Transaction Live List is enabled it is mapped from the beginning of the input area or, if the Transaction Live List Control/Status Word is enabled, after the Status Word. It is possible to map from 8 to 128 transactions, in steps of 8. Each transaction is represented by a bit that tells the system whether the transaction is alive or not. See also ... “Transaction Live List” on page 18 Control/Status Worda a. If the Control/Status Word or the Transaction Live List are going to be used, it is recommended to enable these before any frames are added when building the configuration, to avoid memory address collisions. Statistics Parameter Counters Comment The receive counter and the transmit counter count successful CAN messages on the subnetwork. If enabled, the counters can be mapped to the input data area. The first free address in the input data area is selected by default.The counters can be disabled and enabled separately. Receive Counter Address Enter the address in the input data area where the receive counter shall be mapped. The receive counter occupies 2 bytes. Transmit Counter Address Enter the address in the input data area where the transmit counter shall be mapped. The transmit counter occupies 2 bytes. Fatal Event The action in case of a fatal software event is decided by this parameter Parameter Values Action Stay in Safe-State Software Reset Anybus Communicator CAN to EtherNet/IP Doc.Rev. 1.00 Comment The Communicator will be locked in the safe state The software will be reset and the Communicator will be restarted automatically Doc.Id. SCM-1200-123 Basic Settings 32 8.3 Subnetwork Settings Select ‘Subnetwork’ in the Navigation Section to gain access to the settings described in this section. General Parameter Bit Rate Values 20 kbit/s 50 kbit/s 100 kbit/s 125 kbit/s 200 kbit/s 250 kbit/s 500 kbit/s 800 kbit/s 1000 kbit/s Bus Off Action No action Automatic Reset 11/29-bit CAN Identifier 11 bit 29 bit Anybus Communicator CAN to EtherNet/IP Doc.Rev. 1.00 Comment Select CAN bit rate on the subnetwork. Select what will happen to the CAN controller when the CAN network goes bus off. Available only when the Control/Status Word is not used. Please note that when enabling the Control/Status Word, this parameter will automatically be set to ‘No Action’. Select CAN identifier size on the subnetwork If there are transactions configured when this parameter is changed, the following will happen: - a change from 11 bit to 29 bit identifier will cause the identifier to be padded with zeroes up to 29 bits, keeping the 11 bits at the same location. - a change from 29 bit to 11 bit identifier will cause the upper 18 bits to be deleted and the lower 11 bits kept. WARNING! This may in some cases cause faulty CAN identifiers. Doc.Id. SCM-1200-123 Chapter 9 9. Groups and Transactions 9.1 General The configuration of the Communicator is set up in groups, each containing one or more transactions. Please note that the groups do not represent a physical device on the CAN network. They are a means for structuring the application, and maintaining an overview of it. The maximal number of groups is 128. A transaction can be either a Produce, a Consume or a Query/Response transaction. Each transaction holds one or more CAN frames, which transport the data on the network. A total of 128 transactions is allowed, and a total of 256 CAN frames. Each CAN frame can hold up to 8 bytes of data. Groups and transactions as well as frames and objects (described in the next section) can be copied and pasted in the configuration tree, but only at the same level as they were copied from, or their parent. 9.2 Groups To create a group, right click on ‘Subnetwork’ and select ‘Add Group’. The name of the group can be changed by selecting ‘Group’ and then entering a new name at ‘Group Alias‘. If you want to insert another group, right click on ‘Subnetwork’ once more. The new group will be added to the end of the list of groups. If you right click on a group and select ‘Insert Group’, the new group will be inserted before the selected group. It is recommended to change the group name, to better present the configuration. 9.3 Transactions There are three kinds of transactions: Produce, Consume and Query/Response. Selecting the transaction will give the option to give the transaction an alias. The order of the transactions in the tree is given as the transaction number in the parameter section. Each transaction number corresponds to a bit in the transaction live list that can be mapped to the input data area. Note: The transaction live list is always available in the Diagnostics/Status window, even when it is not mapped to the input data area in the memory. Anybus Communicator CAN to EtherNet/IP Doc.Rev. 1.00 Doc.Id. SCM-1200-123 Groups and Transactions 34 To add a transaction to the group, right click on the group and select either Insert Produce, Insert Consume or Insert Query/Response. Each transaction must hold one or more CAN frames. 9.3.1 Produce A produce transaction transmits CAN frames on the CAN network for all devices on the network to listen to. A CAN device on the network will use the identifier of the produce transaction to decide if the data is meant for it or not. The Communicator operates as any other device on the CAN network, that produces and transmits data on the network. Selecting ‘Produce’ gives access to the following parameters: Parameter Offline Options Update Mode Update on RTR Value Clear Data Freeze Data Stop Transaction Cyclically On Data Change Single Shot Trigger Byte Disabled Enabled Comment Select what will happen to the output data if the EtherNet/IP network goes offline Defines how the transmission of the transaction is triggered If a message on the configured CAN identifier for a produce transaction is received with the RTR (Remote Transmission Request) bit set, the produce transaction is triggered to be sent. Only available if only one CAN frame is configured in the transaction. When enabled, the Transmission Complete Byte is incremented each time a produce transmission is completed. Transmission Complete Disabled Byte Enabled Transmission Complete First available If the Transmission Complete Byte is enabled, enter the address here. Address address (default) Update Time (ms) 1000 (default) When Update Mode ‘Cyclically’ is selected, this parameter defines the time interval (ms) between two transmissions. Valid range: 5 - 65535 Trigger Byte Address 200h (default) When Update Mode ‘Trigger Byte’ is selected, this parameter specifies the address of the trigger byte. The transaction will be triggered on a change in this byte. Right click on ‘Produce’ to add a CAN frame to the configuration. For the setup of CAN frames see “Configuration of CAN Frames” on page 36. Anybus Communicator CAN to EtherNet/IP Doc.Rev. 1.00 Doc.Id. SCM-1200-123 Groups and Transactions 35 9.3.2 Consume A consume transaction listens to CAN frames on the CAN network and collects data from a frame with a matching CAN identifier. The Communicator operates as any other device on the CAN network that listens to all data that is available on the network. Selecting ‘Consume’ gives access to the following parameters: Parameter Offline Options Offline Timeout Value Clear Data Freeze Data 0 (default) Comment Select what will happen to the input data if the CAN subnetwork goes offline The maximum time before the transaction is considered to be lost. Use 0 to disable the timeout. Valid Range: 0, 10 - 65535. When enabled, the Reception Trigger Byte is incremented each time a consume transaction is received. Reception Trigger Byte Disabled Enabled Reception Trigger First available If the Transmission Complete Byte is enabled, enter the address here. Address address (default) Right click on ‘Consume’ to add a CAN frame to the configuration. For the setup of CAN frames see “Configuration of CAN Frames” on page 36. 9.3.3 Query/Response In Query/Response mode the Communicator operates as a master and issues queries to the CAN network. The Communicator will then expect a response within the specified timeout. A Query/Response transaction includes both query CAN frames and response CAN frames. Selecting Query will give the same options as selecting Produce, except ‘Update on RTR’, see: • “Produce” on page 34. Selecting Response will give the same options as selecting Consume, see • “Consume” on page 35. Please note that the Offline Timeout value indicates the maximum time that the Communicator will wait for an answer before an error is issued. Right click on either ‘Query’ or ‘Response’ to add a new CAN frame. For the setup of CAN frames see “Configuration of CAN Frames” on page 36. Anybus Communicator CAN to EtherNet/IP Doc.Rev. 1.00 Doc.Id. SCM-1200-123 Chapter 10 10. Configuration of CAN Frames 10.1 General Each transaction includes one or more CAN frames. A total of 256 CAN frames is allowed. Right-clicking on a transaction will give the opportunity to add a frame to the transaction. The Anybus Configuration Manager makes it possible to decide the configuration of the 8 bytes of data that can be included in each frame. The configuration manager automatically allocates memory space in the input and output areas of the Communicator for the data objects that are configured in the frames. The result can be seen in the Address Overview, see page 41. Any address conflicts will turn up red in this view. Note: A CAN frame can not contain more than 8 bytes of data. It is possible to configure the data area in each frame, but the size of the combination of objects must not exceed 8 bytes. 10.1.1 CAN Identifiers Each frame has a CAN identifier, to make it possible for each node on the CAN network to recognize data meant for it. Default identifier is ‘0’. It can be changed by selecting the CAN Frame and enter the new CAN Identifier in the Parameter window. The CAN frame has either a 11-bit identifier or a 29-bit identifier. If the size of the identifier is changed, an 11-bit identifier will have the 11 original bits padded with zeroes in front. A 29 bit identifier will have its 18 highest bits cut, which may cause a not valid 11-bit identifier. It is possible to have several frames in one transaction. The first frame in a Consume or Response transaction must have a CAN identifier that does not appear in any other Consume or Response transaction. Consecutive frames within a received transaction may have the same identifier, on two conditions: • The first part of the data area in the frame is a byte, word or Dword constant with a unique value compared to other frames with the same identifier within the transaction. • If any frame with another identifier is added to the transaction, it must not break the sequence of frames with identical identifiers. Anybus Communicator CAN to EtherNet/IP Doc.Rev. 1.00 Doc.Id. SCM-1200-123 Configuration of CAN Frames 37 10.2 Produce/Query CAN Frame The following objects and parameters are configurable in a CAN frame in a produce transaction, or when used in the query part of a query/response transaction. To add objects to the 8 byte data area of the frame, right-click on CAN Frame. Object Data Byte Constant Word Constant Dword Constant Parameters Description/Comment Data Length (Bytes) A data object can occupy 1 - 8 bytes (default =1). Address in the data area where the object shall Data Addressa be mapped. Default: The first available position is used. Swap Values: Result (original value = 0102 0304): No Swapping (default) 0102 0304 Word Swap 0201 0403 Double Word Swap 0403 0201 Value (1 byte, valid Constant value to be transmitted (little endian). range: 0x00 - 0xFF) Value(2 bytes, valid Constant value to be transmitted (little endian). range: 0x0000 0xFFFF) Value (4 bytes, valid Constant value to be transmitted (little endian). range: 0x00000000 0xFFFFFFFF) a. Range depends on network. 10.3 Consume/Response CAN Frame The following objects and parameters are configurable in a CAN frame in a consume transaction, or when used in the response part of a query/response transaction. To add objects to the 8 byte data area of the frame, right-click on CAN Frame. Object Data Byte Constant Word Constant Parameters Description/Comment Data Length (Bytes) A data object can occupy 1 - 8 bytes (default =1). Data Address Address in the data area where the object shall be mapped. Default: The first available position shall be used.Range depends on network. Swap Values: Result (original value = 0102 0304): No Swapping (default) 0102 0304 Word Swap 0201 0403 Double Word Swap 0403 0201 Value (1 byte, valid When receiving a message with a constant, the range: 0x00 - 0xFF) received value will be checked against this value. If the values differ, the message will be ignored (little endian). Value(2 bytes, valid When receiving a message with a constant, the range: 0x0000 received value will be checked against this value. 0xFFFF) If the values differ, the message will be ignored (little endian). Anybus Communicator CAN to EtherNet/IP Doc.Rev. 1.00 Doc.Id. SCM-1200-123 Configuration of CAN Frames 38 Object Dword Constant Parameters Value (4 bytes, valid range: 0x00000000 0xFFFFFFFF) Byte Limit (1 byte, valid range: 0x00 0xFF Minimum Value Maximum Value Word Limit (2 bytes, valid range: 0x0000 0xFFFF) Minimum Value Maximum Value Dword Limit (4 bytes, valid range: 0x00000000 0xFFFFFFFF) Minimum Value Maximum Value Anybus Communicator CAN to EtherNet/IP Doc.Rev. 1.00 Description/Comment When receiving a message with a constant, the received value will be checked against this value. If the values differ, the message will be ignored (little endian). When receiving a message with a limit object, the received value will be checked against the minimum value. If the received value is lower than the minimum value, the message will be ignored. When receiving a message with a limit object, the received value will be checked against the maximum value. If the received value is larger than the maximum value, the message will be ignored. When receiving a message with a limit object, the received value will be checked against the minimum value. If the received value is lower than the minimum value, the message will be ignored. When receiving a message with a limit object, the received value will be checked against the maximum value. If the received value is larger than the maximum value, the message will be ignored. When receiving a message with a limit object, the received value will be checked against the minimum value. If the received value is lower than the minimum value, the message will be ignored. When receiving a message with a limit object, the received value will be checked against the maximum value. If the received value is larger than the maximum value, the message will be ignored. Doc.Id. SCM-1200-123 Chapter 11 11. Anybus Configuration Manager Tools The Anybus Configuration Manager (ACM) gives access to different tools for monitoring and controlling the module and the CAN subnetwork: • Monitor/Modify • CAN Line Listener • Diagnostics/Status • Address Overview 11.1 Monitor/Modify Selecting this option in the Tools menu opens this window, where the data areas of the transactions can be monitored. If the configuration downloaded to the Communicator is the same as is open in the ACM, it is possible to monitor and modify the transactions. Pressing the green button on the left starts the monitoring/modifying: If Modify is enabled, it is possible to change the data values during runtime in Produce transactions and in the Query part of Query/Response transactions, i.e. only the out area of the Communicator can be modified. This will inhibit any data from the industrial network (EtherNet/IP), but input data from the CAN network will still be updated. Note: Addresses in the general area range can not be modified. If a transaction only have addresses in the general area, the Modify check box will be disabled. Anybus Communicator CAN to EtherNet/IP Doc.Rev. 1.00 Doc.Id. SCM-1200-123 Anybus Configuration Manager Tools 40 11.2 CAN Line Listener The CAN Line Listener gives the opportunity to log the traffic on the CAN network. Any log can be saved for later use. The 5000 latest frames are logged. This is done continuously, or it is possible to stop logging after 5000 frames from a defined time. The CAN Line Listener shows all CAN frames present on the CAN network, not only those sent or received by the Communicator. Information about CAN frames, that have identifiers present in the configuration, that is downloaded to the Communicator, is shown in black text. Information about all other frames is shown in gray text. Please note that the configuration in the ACM and the configuration in the Communicator have to match. Anybus Communicator CAN to EtherNet/IP Doc.Rev. 1.00 Doc.Id. SCM-1200-123 Anybus Configuration Manager Tools 41 11.3 Address Overview The Address Overview tool shows the usage of the different memory areas in the module. It gives an easy view of any collisions of data that are present in the different memory areas. If needed, the memory location for the data of one transaction at a time, can be shown. 11.4 Diagnostics/Status The Diagnostics/Status tool gives access to diagnostics and status information of different kinds. Anybus Communicator CAN to EtherNet/IP Doc.Rev. 1.00 Doc.Id. SCM-1200-123 Anybus Configuration Manager Tools 42 Item Configuration Description The configuration is validated by the ACM and any errors will be reported here, e.g. if the some address has been used for several transactions or if the same CAN identifier is used for more than one transaction. This is the only section of the Diagnostic/Status window that can be used when the configuration tool is not connected to a Communicator. CAN Information on the status of the CAN subnetwork Identification Information on the module Communicator This item gives the operation mode and the configuration status of the Communicator Fieldbus Fieldbus state Transaction The live list will be shown here. It can also be kept in the input memory area, see 4-18 “Transaction Live List”. Fatal Error Information If the Communicator is subject to a fatal error, this information is used by HMS support when troubleshooting the module. Please contact HMS support at www.anybus.com if a fatal error occurs. Anybus Communicator CAN to EtherNet/IP Doc.Rev. 1.00 Doc.Id. SCM-1200-123 Chapter 12 12. Online The entries in the Online menu are used to find and connect to a Anybus Communicator CAN module and to administer the module: • Select Connection • Connect/Disconnect • Upload Configuration • Download Configuration • Set Module Password Connect the Communicator that is to be configured to your PC using the included USB cord. Apply power to the module. Select Connection To be able to access the module, start by choosing ‘Select Connection’. . Continue by pressing ‘Configure’ to open the ACM USB Connection window. The dropdown menu in this window shows available Anybus Communicator CAN modules. There is also the option to select ‘first available device’ to download a configuration to. When selecting a connection, the PC running the ACM, will lock to that specific Communicator, identified by its serial number. If the configuration is to be downloaded to another module, using the same PC, the process of selecting connection will have to be repeated for that specific module. It is recommended to select a specific Communicator for the connection, as this will diminish the risk of downloading the wrong configuration. Connect/Disconnect The Communicator is connected/disconnected using this entry in the menu. Download and Upload Configuration Selecting “Download Configuration” downloads the configuration to the Communicator. Any configuration previously present in the ACM will be overwritten. Anybus Communicator CAN to EtherNet/IP Doc.Rev. 1.00 Doc.Id. SCM-1200-123 Online 44 Selecting ‘Upload Configuration’ will fetch the configuration in the connected Communicator to the Anybus Configuration Manager. If the configuration is to be downloaded to another Communicator, change the connection, see “Select Connection” on page 43. Set Module Password A password can be set either for downloading a configuration, uploading a configuration or for both. If the Password Type field is empty, no password is available, or the password is disabled. Anybus Communicator CAN to EtherNet/IP Doc.Rev. 1.00 Doc.Id. SCM-1200-123 Appendix A A. Technical Specification A.1 Protective Earth (PE) Requirements The product must be connected to protective earth (PE) via the DIN-rail connector in order to achieve proper EMC behavior. HMS Industrial Networks does not guarantee proper EMC behavior unless these PE requirements are fulfilled. A.2 Power Supply Supply Voltage The Communicator requires a regulated 24 V±10% DC power source. Power Consumption The typical power consumption is 150 mA at 24 V. A.3 Environmental Specification A.3.1 Temperature Operating -25º to +55º Celsius (Test performed according to IEC-60068-2-1 and IEC 60068-2-2.) Non Operating -40º to +85º degrees Celsius (Test performed according to IEC-60068-2-1 and IEC 60068-2-2.) A.3.2 Relative Humidity The product is designed for a relative humidity of 5 to 95% non-condensing. Test performed according to IEC 60068-2-30. Anybus Communicator CAN to EtherNet/IP Doc.Rev. 1.00 Doc.Id. SCM-1200-123 Technical Specification 46 A.4 EMC (CE) Compliance EMC compliance testing has been conducted according to the Electromagnetic Compatibility Directive 2004/108/EC. For more information please consult the EMC compliance document, see product/support pages for Anybus Communicator CAN to CANopen (slave) at www.anybus.com. Anybus Communicator CAN to EtherNet/IP Doc.Rev. 1.00 Doc.Id. SCM-1200-123 Chapter B B. Configuration Example This appendix gives an example of the configuration of an Anybus Communicator CAN to collect data from a temperature sensor and to control and monitor a motor. Fieldbus Control System (e.g a PLC) (Fieldbus Network) 1. Start the Anybus Configuration Manager - Communicator CAN (ACM). 2. Choose industrial network. The example is the same irrespective of industrial network, but in an application it is important to choose network first, as the ACM will show the amount of data that can be transferred. HMII HM INVE IN VERT RTER ER PC configuration and monitoring Motor Temperature sensor CAN Network 3. Select ‘Communicator’. - Enable the Control/Status Word. If the Control/Status Word is to be used in a configuration, it is recommended to enable it before adding any transactions to the configuration. The Control/Status Word is positioned at the start of the memory, and this may cause address conflicts if any data objects have been configured previously. For more information on the Control/Status Word, see page 18. - Leave the rest of the parameters at default values. Anybus Communicator CAN to EtherNet/IP Doc.Rev. 1.00 Doc.Id. SCM-1200-123 Configuration Example 48 4. Select ‘Subnetwork’. If the Control/Status Word is enabled no Bus Off Action can be defined. 5. Add Groups. - Right-click on ‘Subnetwork’ and add two groups to the navigation tree, one for each device on the CAN network. - Rename them e.g. Temp. Sensor and Motor. Renaming is essential to enable other users than the designer of the application to comfortably monitor and modify the application. The CAN network is message-based, but using the group to structure the transactions will make it conceptually easier to build a configuration. 6. Add transactions to Temp. Sensor group. The temperature sensor needs to be initialized. It needs instructions during runtime, and it will deliver temperature data to the Communicator. A suitable transaction for an initialization is a queryresponse transaction which is run once at start up. A query-response transaction ensures an acknowledgement of a successful initialization. In this example, the initialization is performed in two steps. Also, instructions and information need to be sent to the sensor and data collected. A produce transaction sends information to the network and a consume transaction will collect information. - Add two query-response transactions and rename them ‘Initialize 1’ and ‘Initialize 2’. - On each, select Query and change Update Mode to Single Shot. The transactions will be run once at startup to initialize the communication with the temperature sensor. - Leave the rest of the parameters at default values. - Add one Produce transaction to send information and instructions to the temperature sensor. Rename the transaction to ‘Cels/Farenh’ and set Update Mode to Cyclically. - Leave the rest of the parameters at default values. - Finally add one Consume transaction to collect the data cyclically from the temperature sensor. Rename the transaction to ‘Temperature’ and set Update Mode to Cyclically. - Leave the rest of the parameters at default values. Anybus Communicator CAN to EtherNet/IP Doc.Rev. 1.00 Doc.Id. SCM-1200-123 Configuration Example 49 7. Add frames to the transactions. - Right-click on ‘Query’ in ‘Initialize 1’ and add a CAN frame. - Select the frame. - Set a unique CAN identifier to the frame. The CAN identifier shall be recognized on the network by the temperature sensor. - Right click on the frame to define the components of the 8 byte data area in the frame, see figure to the right. - Enter constant values where applicable. - Right-click on ‘Response’ in ‘Initialize 1’ and repeat the procedure. Addresses in the input and output areas of the internal memory will automatically be allocated to the data objects. It is possible to change these addresses, but it is recommended to finish configuration using default values. If any collisions appear, the addresses can be changed at a later stage. The ACM will not allow you to add a data or a constant object, that is larger than the remaining data area in the selected frame. 8. Repeat according to step 7 to add frames and contents to ‘Initialize 2’, ‘Cels/Farenh’ and ‘Temperature’. 9. Add transactions to Motor group. The motor needs to be initialized. It also needs instructions during runtime, and it will return status information to the Communicator. It is also possible to remotely set the speed of the motor. - Add a query-response transaction and rename it ‘Initialize’. - Select Query and change Update Mode to Single Shot. - Add one Query-Response transaction (‘Motor Control’) to control the motor during runtime. - Set Update Mode to On Data Change. - Add one Consume transaction (‘Motor Status’) to collect status cyclically from the motor. - Finally add a Produce transaction (‘Speed’) to be able to change the speed of the motor. Anybus Communicator CAN to EtherNet/IP Doc.Rev. 1.00 Doc.Id. SCM-1200-123 Configuration Example 50 10. Add frames to the transactions, see step 7 above. 11. Check the validity of configuration in the Diagnostics/Status window. If address conflicts are present, check the Address Overview to see which transactions cause the conflict. Change the addresses of the data objects in the frames to remove conflicts. 12. Download the configuration to the Communicator using the USB connection. Remove the USB cable when finished A configuration can be saved at any time and opened at a later time for editing. Once it is valid it can be downloaded to the Anybus Communicator CAN. Anybus Communicator CAN to EtherNet/IP Doc.Rev. 1.00 Doc.Id. SCM-1200-123 Appendix C C. Advanced IT Functionality C.1 File System C.1.1 General General The Anybus Communicator features a built-in file system, which is used to store information such as web files, network communication settings, e-mail messages etc. Storage Areas The file system consists of the different storage areas: • Non-volatile area (approx. 1.4 Mb) This section is intended for static files such as web files, configurations files etc. • Volatile area (approx. 1 Mb) This area is intended for temporary storage; data placed here will be lost in case of power loss or reset. Conventions • ‘\’ (backslash) is used as a path separator • A ‘path’ originates from the system root and as such must begin with a ‘\’ • A ‘path’ must not end with a ‘\’ • Names may contain spaces (‘ ‘) but must not begin or end with one. • Names must not contain one of the following characters: ‘\ / : * ? “ < > |’ • Names cannot be longer than 48 characters (plus null termination) • A path cannot be longer than 256 characters (filename included) • The maximum number of simultaneously open files is 40 • The maximum number of simultaneously open directories is 40 Important Note: The non-volatile storage is located in FLASH memory. Each FLASH segment can only be erased approximately 100000 times due to the nature of this type of memory. The following operations will erase one or more FLASH segments: • Deleting, moving or renaming a file or directory • Writing or appending data to an existing file • Formatting the file system Anybus Communicator CAN to EtherNet/IP Doc.Rev. 1.00 Doc.Id. SCM-1200-123 Advanced IT Functionality 52 C.1.2 File System Overview (admin root) (user root) user ip_accs.cfg ssi_str.cfg http.cfg pswd (protected) ethcfg.cfg sys_pswd.cfg email RAM (volatile, optional) email_1.cfg . . . email_10.cfg pswd (protected) ad_pswd.cfg email email_1.cfg . . . email_10.cfg C.1.3 System Files The file system contains a set of files used for system configuration. These files, known as “system files”, are regular ASCII files which can be altered using a standard text editor (such as the Notepad in Microsoft Windows™). Note that some of these files may also be altered by the Communicator itself, e.g. when using SSI (see “Server Side Include (SSI)” on page 68). The format of the system files are based on the concept of ‘keys’, where each ‘key’ can be assigned a value, see example below. Example: [Key1] value of key1 [Key2] value of key2 The exact format of each system file is described in detail later in this document. The contents of the above files can be redirected: Example: In this example, the contents will be loaded from the file ‘here.cfg’. [file path] \i\put\it\over\here.cfg Note: Any directory in the file system can be protected from web access by placing the file web-accs.cfg in the directory, see “Authorization” on page 66. Anybus Communicator CAN to EtherNet/IP Doc.Rev. 1.00 Doc.Id. SCM-1200-123 53 C.2 Basic Network Configuration C.2.1 General Information The Anybus Communicator offers two modes of operation regarding the network settings (see below). Which mode to use is determined by the ‘TCP/IP Settings’ parameter in Anybus Configuration Manager, see “TCP/IP Settings” on page 33. • TCP/IP Settings: Enabled When operating in this mode, the contents of the system file ‘ethcfg.cfg’ will be ignored completely, causing the following behavior: • - DNS services will not be available - Domain and Host name cannot be set - E-mail services will not be available - Settings received from the network (i.e. via HICP or DCP) will be lost in the event of a power loss or reset. TCP/IP Settings: Disabled When operating in this mode, the Anybus Communicator module will use the settings stored in the system file ‘ethcfg.cfg’. If this file is missing, the module will attempt to retrieve its settings via DHCP or HICP for 30 seconds. If no configuration has been received within this period, the module will halt and indicate an error on its status LEDs. DCP (Discovery and Basic Configuration) The Anybus Communicator fully supports the DCP protocol, which allows an IO Controller/Supervisor to change the TCP/ IP settings during runtime. DHCP/BootP The Anybus Communicator can retrieve the TCP/IP settings from a DHCP or BootP server. If no DHCP server is found, the module will fall back on its current settings (i.e. the settings currently stored in ‘\ethcfg.cfg’). If no current settings are available (i.e. ‘ethcfg.cfg’ is missing, or contains invalid settings), the module will halt and indicate an error on the onboard status LEDs. The network configuration may however still be accessed via HICP, see “Anybus IPconfig (HICP)” on page 57. Anybus Communicator CAN Doc.Rev. 1.00 Doc.Id. SCM-1200-123 54 C.2.2 Ethernet Configuration File (‘ethcfg.cfg’) General To be able to participate on the network, the Anybus Communicator needs a valid TCP/IP configuration. These settings are stored in the system file ‘\ethcfg.cfg’. File Format: [IP address] xxx.xxx.xxx.xxx [Subnet mask] xxx.xxx.xxx.xxx [Gateway address} xxx.xxx.xxx.xxx [DHCP/BOOTP] ON or OFF • IP address • Subnet mask • Gateway address • DHCP/BootP ON - Enabled OFF - Disabled [SMTP address] xxx.xxx.xxx.xxx [SMTP username] username • SMTP server/login settings Username and Password is only necessary if required by the server. [SMTP password] password [DNS1 address] xxx.xxx.xxx.xxx [DNS2 address] xxx.xxx.xxx.xxx [Domain name] domain [Host name] anybus [HICP password] password • Primary and Secondary DNS Needed to be able to resolve host names • Default domain name for not fully qualified host names • Host name • HICP password The settings in this file may also be affected by... • DCP (See “DCP (Discovery and Basic Configuration)” on page 53). • HICP (See “Anybus IPconfig (HICP)” on page 57) • SSI (See “Server Side Include (SSI)” on page 68) • DHCP/BootP (See “DHCP/BootP” on page 53) See also... • “FTP Server” on page 58 • “TCP/IP Settings” on page 33 Anybus Communicator CAN Doc.Rev. 1.00 Doc.Id. SCM-1200-123 55 C.2.3 PROFINET Settings The file ‘\pnio.cfg’ holds various PROFINET-related settings. The file is read once during startup, i.e. the Anybus Communicator must be restarted in order for any changes to have effect (unless its contents has been changed by an IO Controller/Supervisor via the DCP protocol. In such case, the settings will have effect immediately). Example: [Station Name] Nice Device [Station Type] ABS-PRT [Vendor ID] 0x010C • Station Name Station name as ASCII string, maximum 64 characters. • Station Type Station type as ASCII string, maximum 64 characters. • Vendor ID 16 bit hexadecimal value, with the prefix 0x. Assigned by the PNO. [Device ID] 0x0001 • Device ID 16 bit hexadecimal value, with the prefix 0x. Assigned by vendor. Anybus Communicator CAN Doc.Rev. 1.00 Doc.Id. SCM-1200-123 56 C.2.4 IP Access Control It is possible to specify which IP addresses that are permitted to connect to the Anybus Communicator. This information is stored in the system file ‘\ip_accs.cfg’. File Format: [Web] xxx.xxx.xxx.xxx • Nodes listed here may access the web server [FTP] xxx.xxx.xxx.xxx • Nodes listed here may access the FTP server [Modbus/TCP] xxx.xxx.xxx.xxx • Nodes listed here may access the module via Modbus/TCP [All] xxx.xxx.xxx.xxx • Fallback setting, used by the module when one or several of the keys above are omitted Note: ‘*’ may be used as a wildcard to select IP series. Anybus Communicator CAN Doc.Rev. 1.00 Doc.Id. SCM-1200-123 57 C.2.5 Anybus IPconfig (HICP) The Anybus Communicator supports the HICP protocol used by the Anybus IPconfig utility from HMS, which is included in the installer. This utility may be used to configure the network settings of any Anybus product connected to the network. Note that if successful, this will replace the settings currently stored in the configuration file (‘ethcfg.cfg’). Upon starting the program, the network is scanned for Anybus products. The network can be rescanned at any time by clicking ‘Scan’. In the list of detected devices, the Communicator will appear as ‘Anybus Communicator Generic CAN’. To alter its network settings, double-click on its entry in the list. A window will appear, containing the IP configuration and password settings. Validate the new settings by clicking ‘Set’, or click ‘Cancel’ to abort. Optionally, the TCP/IP settings may be protected from unauthorized access by a password. To enter a password, click on the ‘Change password’ checkbox, and enter the password under ‘New password’. When protected, any changes in the configuration requires that the user supplies a valid password. When done, click ‘Set’. The new IP configuration will now be stored in the configuration file (‘ethcfg.cfg’). Note that if ‘TCP/IP Settings’ has been enabled in the Anybus Configuration Manager, any settings received via HICP will be lost in the event of a power loss or reset. Anybus Communicator CAN Doc.Rev. 1.00 Doc.Id. SCM-1200-123 58 C.3 FTP Server C.3.1 General The built-in FTP server provides a way to access the file system using a standard FTP client. The following port numbers are used for FTP communication: • TCP, port 20 (FTP data port) • TCP, port 21 (FTP command port) Security Levels The FTP server features two security levels; admin and normal. • Normal level users The root directory will be ‘\user’. • Admin level users The root directory will be ‘\’, i.e. the user has unrestricted access to the file system. User Accounts The user accounts are stored in two files, which are protected from web access: • ‘\user\pswd\sys_pswd.cfg’ This file holds the user accounts for normal level users. • ‘\pswd\ad_pswd.cfg’ This file holds the user accounts for admin level users. File Format: The format of these files are as follows: Username1:Password1 Username2:Password2 Username3:Password3 Note 1: If no valid user accounts have been defined, the gateway will grant admin level access to all users. In such cases, the FTP accepts any username/password combination, and the root directory will be ‘\’. Note 2: The FTP server shares user accounts with the Telnet server. C.3.2 FTP Connection Example (Windows Explorer) The built-in FTP client in Windows Explorer can easily be used to access the file system as follows: 1. Open the Windows Explorer by right-clicking on the ‘Start’ button and selecting ‘Explore’. 2. In the address field, type FTP://<user>:<password>@<address> - Substitute <address> with the IP address of the Anybus Communicator - Substitute <user> with the username Anybus Communicator CAN to EtherNet/IP Doc.Rev. 1.00 Doc.Id. SCM-1200-123 59 - Substitute <password> with the password 3. Press enter. The Explorer will now attempt to connect to the gateway using the specified settings. If successful, the built in file system is displayed in the Explorer window. Anybus Communicator CAN to EtherNet/IP Doc.Rev. 1.00 Doc.Id. SCM-1200-123 60 C.4 Telnet Server C.4.1 General The built-in Telnet server provides a way to access the file system using a standard Telnet client. The server communicates through TCP port 23. Security Levels Just like the FTP server, the Telnet server features two security levels; admin and normal. • Normal level users The root directory will be ‘\user’. • Admin level users The root directory will be ‘\’, i.e. the user has unrestricted access to the file system. User Accounts The Telnet server shares user accounts with the FTP server. If no valid user accounts have been defined, the gateway will grant admin level access to all users. In such case, no login is required, and the root directory will be ‘\’. For more information, see “User Accounts” on page 58 C.4.2 General Commands admin • Syntax admin • Description Provided that the user can supply a valid admin username/password combination, this command provides admin access rights to normal level users. exit • Syntax exit • Description This command closes the Telnet session. help • Syntax help [general|diagnostic|filesystem] Anybus Communicator CAN to EtherNet/IP Doc.Rev. 1.00 Doc.Id. SCM-1200-123 61 • Description If no argument is specified, the following menu will be displayed. General commands: help version exit - Help with menus - Display version information - Exit station program Also try ‘help [general|diagnostic|filesystem]’ version • Syntax version • Description This command will display version information, serial number and MAC ID of the Ethernet module, in the Communicator. C.4.3 Diagnostic Commands arps • Syntax arps • Description Display ARP stats and table. iface • Syntax iface • Description Display net interface stats. routes • Syntax routes • Description Display IP route table. sockets • Syntax sockets • Description Display socket list. Anybus Communicator CAN to EtherNet/IP Doc.Rev. 1.00 Doc.Id. SCM-1200-123 62 C.4.4 File System Operations For commands where filenames, directory names or paths shall be given as an argument the names can be written directly or within quotes. For names including spaces the filenames must be surrounded by quotes. It is also possible to use relative pathnames using ‘.’, ‘\’ and ’..’ append • Syntax append [file] [“The line to append”] • Description Appends a line to a file. cd • Syntax cd [path] • Description Changes current directory. copy • Syntax copy [source] [destination] • Description This command creates a copy of the source file at a specified location. del • Syntax del [file] • Description Deletes a file. dir • Syntax dir [path] • Description Lists the contents of a directory. If no path is given, the contents of the current directory is listed. df • Syntax df • Description Displays filesystem info. Anybus Communicator CAN to EtherNet/IP Doc.Rev. 1.00 Doc.Id. SCM-1200-123 63 format • Syntax format • Description Formats the file system. This is a privileged command and can only be called in administration mode. Anybus Communicator CAN to EtherNet/IP Doc.Rev. 1.00 Doc.Id. SCM-1200-123 64 md • Syntax md [directory] • Description Creates a directory. If no path is given, the directory is created in the current directory. mkfile • Syntax mkfile [filename] • Description Creates an empty file. move • Syntax move [source] [destination] • Description This command moves a file or directory from the source location to a specified destination. rd • Syntax rd [directory] • Description Removes a directory. The directory can only be removed if it is empty. ren • Syntax ren [old name] [new name]] • Description Renames a file or directory. type • Syntax type [filename] • Description Types the contents of a file. Anybus Communicator CAN to EtherNet/IP Doc.Rev. 1.00 Doc.Id. SCM-1200-123 65 C.5 Web Server C.5.1 General The Anybus Communicator features a flexible web server with SSI capabilities. The built-in web pages can be customized to fit a particular application and allow access to I/O data and configuration settings. The web server communicates through port 80. See also... • “Server Side Include (SSI)” on page 68 • “IP Access Control” on page 56 Protected Files For security reasons, the following files are protected from web access: • Files located in ‘\user\pswd’ • Files located in ‘\pswd’ • Files located in a directory which contains a file named ‘web_accs.cfg’ Default Web Pages The Anybus Communicator contains a set of virtual files which can be used when building a web page for configuration of network parameters. These virtual files can be overwritten (not erased) by placing files with the same name in the root of disc 0. This makes it possible to, for example, replace the HMS logo by uploading a new logo named ‘\logo.jpg’. It is also possible to make links from a web page to the virtual configuration page. In such case the link shall point to ‘\config.htm’. These virtual files are: \index.htm \config.htm \configform.htm \configform2.htm \store.htm \logo.jpg \configuration.gif \boarder.bg.gif \boarder_m_bg.gif Anybus Communicator CAN to EtherNet/IP Doc.Rev. 1.00 - Points to the Configuration Configuration Configuration Configuration HMS logo Configuration picture picture contents of config.htm frame page form page form page store page picture Doc.Id. SCM-1200-123 66 C.5.2 Authorization Directories can be protected from web access by placing a file called ‘web_accs.cfg’ in the directory to protect. This file shall contain a list of users that are allowed to access the directory and its subdirectories. File Format: Username1:Password1 Username2:Password2 ... UsernameN:PasswordN [AuthName] (message goes here) • List of approved users. • Optionally, a login message can be specified by including the key [AuthName]. This message will be displayed by the web browser upon accessing the protected directory. The list of approved users can optionally be redirected to one or several other files. Example: In this example, the list of approved users will be loaded from the files ‘here.cfg’ and ‘too.cfg’. [File path] \i\put\it\over\here.cfg \i\actually\put\some\of\it\over\here\too.cfg [AuthName] Yeah. Whatsda passwoid? Note that when using this feature, make sure to put the user/password files in a directory that is protected from web access, see “Protected Files” on page 65. C.5.3 Content Types By default, the following content types are recognized by their file extension: Content Type text/html image/gif image/jpeg image/x-png application/x-javascript text/plain application/x-zip-compressed application/octet-stream text/vnd.wap.wml application/vnd.wap.wmlc image/vnd.wap.wbmp text/vnd.wap.wmlscript application/vnd.wap.wmlscriptc text/xml application/pdf Anybus Communicator CAN to EtherNet/IP Doc.Rev. 1.00 File Extension *.htm, *.html, *.shtm *.gif *.jpeg, *.jpg, *.jpe *.png *.js *.bat, *.txt, *.c, *.h, *.cpp, *.hpp *.zip *.exe, *.com *.wml *.wmlc *.wbmp *.wmls *.wmlsc *.xml *.pdf Doc.Id. SCM-1200-123 67 It is possible to configure/reconfigure the reported content types, and which files that shall be scanned for SSI. This is done in the system file ‘\http.cfg’. File Format: [FileTypes] FileType1:ContentType1 FileType2:ContentType2 ... FileTypeN:ContentTypeN [SSIFileTypes] FileType1 FileType2 ... FileTypeN Note: Up to 50 content types and 50 SSI file types may be specified in this file. Anybus Communicator CAN to EtherNet/IP Doc.Rev. 1.00 Doc.Id. SCM-1200-123 68 C.6 Server Side Include (SSI) C.6.1 General Server Side Include (from now on referred to as SSI) functionality enables dynamic content to be used on web pages and in e-mail messages. SSI are special commands embedded in the source document. When the Anybus Communicator encounters such a command, it will execute it, and replace it with the result (when applicable). Syntax The ‘X’s below represents a command opcode and parameters associated with the command. <?--#exec cmd_argument='XXXXXXXXXXXXXXXXXXXXXX'--> Example The following example causes a web page to display the Ethernet Mac ID of the gateway: <HTML> <HEAD><TITLE>SSI Test</TITLE></HEAD> <BODY> The Ethernet Mac ID of the ABC is: <?--#exec cmd_argument='DisplayMacID'--> </BODY> </HTML> Resulting webpage: The Ethernet Mac ID of the ABC is: 00:30:11:78:9A:BC Anybus Communicator CAN to EtherNet/IP Doc.Rev. 1.00 Doc.Id. SCM-1200-123 69 C.6.2 Functions DisplayMacID This function returns the MAC ID in format xx:xx:xx:xx:xx:xx. Syntax: <?--#exec cmd_argument='DisplayMacId'--> DisplaySerial This function returns the serial number of the network interface. Syntax: <?--#exec cmd_argument='DisplaySerial'--> DisplayFWVersion This function returns the main firmware revision of the network interface. Syntax: <?--#exec cmd_argument='DisplayFWVersion'--> DisplayBLVersion This function returns the bootloader firmware revision of the network interface. Syntax: <?--#exec cmd_argument='DisplayBLVersion'--> DisplayIP This function returns the currently used IP address. Syntax: <?--#exec cmd_argument='DisplayIP'--> DisplaySubnet This function returns the currently used Subnet mask. Syntax: <?--#exec cmd_argument='DisplaySubnet'--> DisplayGateway This function returns the currently used Gateway address. Syntax: <?--#exec cmd_argument='DisplayGateway'--> Anybus Communicator CAN to EtherNet/IP Doc.Rev. 1.00 Doc.Id. SCM-1200-123 70 DisplayDNS1 This function returns the address of the primary DNS server. Syntax: <?--#exec cmd_argument='DisplayDNS1'--> DisplayDNS2 This function returns the address of the secondary DNS server. Syntax: <?--#exec cmd_argument='DisplayDNS2'--> DisplayHostName This function returns the hostname. Syntax: <?--#exec cmd_argument='DisplayHostName'--> DisplayDomainName This function returns the default domain name. Syntax: <?--#exec cmd_argument='DisplayDomainName'--> DisplayDhcpState() This function returns whether DHCP/BootP is enabled or disabled. Syntax: <?--#exec cmd_argument='DisplayDhcpState( "Output when ON", "Output when OFF" )'--> DisplayDhcpSupport() This function returns ‘Arg1’ if DHCP is supported, and ‘Arg2’ if it is not. Syntax: <?--#exec cmd_argument='DisplayDhcpSupport( "Arg1", "Arg2" )'--> DisplayEmailServer This function returns the currently used SMTP server address. Syntax: <?--#exec cmd_argument='DisplayEmailServer'--> Anybus Communicator CAN to EtherNet/IP Doc.Rev. 1.00 Doc.Id. SCM-1200-123 71 DisplaySMTPUser This function returns the username used for SMTP authentication. Syntax: <?--#exec cmd_argument='DisplaySMTPUser'--> DisplaySMTPPswd This function returns the password used for SMTP authentication. Syntax: <?--#exec cmd_argument='DisplaySMTPPswd'--> StoreEtnConfig Note: This function cannot be used in e-mail messages. This function stores a passed IP configuration in the configuration file ‘ethcfg.cfg’. Syntax: <?--#exec cmd_argument='StoreEtnConfig'--> Include this line in a HTML page and pass a form with new IP settings to it. Accepted fields in form: SetIp SetSubnet SetGateway SetEmailServer SetDhcpState - value "on" or "off" SetDNS1 SetDNS2 SetHostName SetDomainName SetSMTPUser SetSMTPPswd Default output: Invalid IP address! Invalid Subnet mask! Invalid Gateway address! Invalid IP address or Subnet mask! Invalid Email Server IP address! Invalid DHCP state! Invalid DNS1! Invalid DNS2! Configuration stored correctly. Failed to store configuration. Anybus Communicator CAN to EtherNet/IP Doc.Rev. 1.00 Doc.Id. SCM-1200-123 72 GetText() Note: This function cannot be used in e-mail messages. This function retrieves a text string from an object and stores it in the output data area. Syntax: <?--#exec cmd_argument='GetText( "ObjName", OutWriteString ( offset ), n )'--> ObjName- Name of object. offset - Specifies the destination offset from the beginning of the output data area. n - Specifies maximum number of characters to read (optional) Default output: Success Failure - Write succeeded - Write failed printf() This function includes a formatted string, which may contain data from the input and output data areas, on a web page. The formatting of the string is similar to the C-language function printf(). Syntax: <?--#exec cmd_argument='printf("String to write", Arg1, Arg2, ..., ArgN)'--> Like the C-language function printf() the "String to write" for this SSI function contains two types of objects: Ordinary characters, which are copied to the output stream, and conversion specifications, each of which causes conversion and printing of the next successive argument to printf. Each conversion specification begins with the character % and ends with a conversion character. Between the % and the conversion character there may be, in order: • Flags (in any order), which modify the specification: + (space) 0 # which specifies left adjustment of the converted argument in its field. which specifies that the number will always be printed with a sign if the first character is not a sign, a space will be prefixed. for numeric conversions, specifies padding to the field with leading zeroes. which specifies an alternate output form. For o, the first digit will be zero. For x or X, 0x or 0X will be prefixed to a non-zero result. For e, E, f, g and G, the output will always have a decimal point; for g and G, trailing zeros will not be removed. • A number specifying a minimum field width. The converted argument will be printed in a field at least this wide, and wider if necessary. If the converted argument has fewer characters than the field width it will be padded on the left (or right, if left adjustment has been requested) to make up the field width. The padding character is normally space, but can be 0 if the zero padding flag is present. • A period, which separates the field width from the precision. • A number, the precision, that specifies the maximum number of characters to be printed from a string, or the number of digits to be printed after the decimal point for e, E, or F conversions, or the number of significant digits for g or G conversion, or the minimum number of digits to be printed for an integer (leading 0s will be added to make up the necessary width) • A length modifier h, l (letter ell), or L. "h" Indicates that the corresponding argument is to be printed as a short or unsigned short; "l" indicates that the argument is along or unsigned long. Anybus Communicator CAN to EtherNet/IP Doc.Rev. 1.00 Doc.Id. SCM-1200-123 73 The conversion characters and their meanings are shown below. If the character after the % is not a conversion character, the behavior is undefined. Character d, i o x, X u c s f e, E g, G % Argument type, Converted to byte, short; decimal notation (For signed representation. Use signed argument) byte, short; octal notation (without a leading zero). byte, short; hexadecimal notation (without a leading 0x or 0X), using abcdef for 0x or ABCDEF for 0X. byte, short; decimal notation. byte, short;single character, after conversion to unsigned char. char*; characters from the string are printed until a "\0" is reached or until the number of characters indicated by the precision have been printed float; decimal notation of the form [-]mmm.ddd, where the number of d’s is specified by the precision. The default precision is 6; a precision of 0 suppresses the decimal point. float; decimal notation of the form [-]m.dddddd e+-xx or[-]m.ddddddE+-xx, where the number of d’s specified by the precision. The default precision is 6; a precision of 0 suppresses the decimal point. float; %e or %E is used if the exponent is less than -4 or greater than or equal to the precision; otherwise %f is used. Trailing zeros and trailing decimal point are not printed. no argument is converted; print a % The arguments that can be passed to the SSI function printf are: Argument InReadSByte(offset) InReadUByte(offset) InReadSWord(offset) InReadUWord(offset) InReadSLong(offset) InReadULong(offset) InReadString(offset) InReadFloat(offset) OutReadSByte(offset) OutReadUByte(offset) OutReadSWord(offset) OutReadUWord(offset) OutReadSLong(offset) OutReadULong(offset) OutReadString(offset) OutReadFloat(offset) Anybus Communicator CAN to EtherNet/IP Doc.Rev. 1.00 Description Read a signed byte from position offset in the Input Data area Read an unsigned byte from position offset in the Input Data area Read a signed word from position offset in the Input Data area Read an unsigned word from position offset in the Input Data area Read a signed longword from position offset in the Input Data area Read an unsigned longword from position offset in the Input Data area Read a string (char*) from position offset in the Input Data area Read a floating point (float) value from position offset in the Input Data area Read a signed byte from position offset in the Output Data area Read an unsigned byte from position offset in the Output Data area Read a signed word (short) from position offset in the Output Data area Read an unsigned word (short) from position offset in the Output Data area Read a signed longword (long) from position offset in the Output Data area Read an unsigned longword (long) from position offset in the Output Data area Read a null-terminated string from position offset in the Output Data area Read a floating point (float) value from position offset in the Output Data area Doc.Id. SCM-1200-123 74 scanf() Note: This function cannot be used in e-mail messages. This function reads a string passed from an object in a HTML form, interprets the string according to the specification in format, and stores the result in the output data area according to the passed arguments. The formatting of the string is equal to the standard C function call scanf(). Syntax: <?--#exec cmd_argument='scanf( "ObjName", "format", Arg1, ..., ArgN), ErrVal1, ..., ErrvalN'--> ObjName format Arg1 - ArgN ErrVal1 -ErrValN - The name of the object with the passed data string - Specifies how the passed string shall be formatted - Specifies where to write the data - Optional; specifies the value/string to write in case of an error. Character Input, Argument Type d Decimal number; byte, short i Number, byte, short. The number may be in octal (leading 0(zero)) or hexadecimal (leading 0x or 0X) o Octal number (with or without leading zero); byte, short u Unsinged decimal number; unsigned byte, unsigned short x Hexadecimal number (with or without leading 0x or 0X); byte, short c Characters; char*. The next input characters (default 1) are placed at the indicated spot. The normal skip over white space is suppressed; to read the next non-white space character, use %1s. s Character string (not quoted); char*, pointing to an array of characters large enough for the string and a terminating "\0" that will be added. e, f, g Floating-point number with optional sign, optional decimal point and optional exponent; float* % Liteal %; no assignment is made. The conversion characters d, i, o, u and x may be preceded by l (letter ell) to indicate that a pointer to ‘long’ appears in the argument list rather than a ‘byte’ or a ‘short’ The arguments that can be passed to the SSI function scanf are: Argument OutWriteByte(offset) OutWriteWord(offset) OutWriteLong(offset) OutWriteString(offset) OutWriteFloat(offset) Description Write a byte to position offset in the Output Data area Write a word to position offset in the Output Data area Write a long to position offset in the Output Data area Write a string to position offset in the Output Data area Write a floating point value to position offset in the Output Data area Default output: Write succeeded Write failed Anybus Communicator CAN to EtherNet/IP Doc.Rev. 1.00 Doc.Id. SCM-1200-123 75 IncludeFile() This function includes the contents of a file on a web page. Syntax: <?--#exec cmd_argument='IncludeFile( "File name" )'--> Default output: Success Failure - <File content> - Failed to open <filename> SaveToFile() Note: This function cannot be used in e-mail messages. This function saves the contents of a passed form to a file. The passed name/value pair will be written to the file "File name" separated by the "Separator" string. The [Append|Overwrite] parameter determines if the specified file shall be overwritten, or if the data in the file shall be appended. Syntax: <?--#exec cmd_argument='SaveToFile( "File name", "Separator",[Append|Overwrite] )'--> Default output: Success Failure - Form saved to file - Failed to save form SaveDataToFile() Note: This function cannot be used in e-mail messages. This function saves the data of a passed form to a file. The “Object name” parameter is optional, if specified, only the data from that object will be stored. If not, the data from all objects in the form will be stored. The [Append|Overwrite] parameter determines if the specified file shall be overwritten, or if the data in the file shall be appended. Syntax: <?--#exec cmd_argument='SaveDataToFile( "File name", "Object name",[Append|Overwrite] )'--> Default output: Success Failure - Form saved to file - Failed to save form C.6.3 Changing SSI output There are two methods of changing the output strings from SSI functions: 1. Changing SSI output defaults by creating a file called "\ssi_str.cfg" containing the output strings for all SSI functions in the system 2. Temporarily changing the SSI output by calling the SSI function "SsiOutput()" Anybus Communicator CAN to EtherNet/IP Doc.Rev. 1.00 Doc.Id. SCM-1200-123 76 SSI Output String File If the file "\ssi_str.cfg" is found in the file system and the file is consistent with the specification below, the SSI functions will use the output strings specified in this file instead of the default strings. The files shall have the following format: [StoreEtnConfig] Success: "String to use on success" Invalid IP: "String to use when the IP address is invalid" Invalid Subnet: "String to use when the Subnet mask is invalid" Invalid Gateway: "String to use when the Gateway address is invalid" Invalid Email server: "String to use when the SMTP address is invalid" Invalid IP or Subnet: "String to use when the IP address and Subnet mask does not match" Invalid DNS1: "String to use when the primary DNS cannot be found" Invalid DNS2: "String to use when the secondary DNS cannot be found" Save Error: "String to use when storage fails" Invalid DHCP state: "String to use when the DHCP state is invalid" [scanf] Success: "String to use on success" Failure: "String to use on failure" [IncludeFile] Failure: "String to use when failure"1 [SaveToFile] Success: "String to use on success" Failure: "String to use on failure"1 [SaveDataToFile] Success: “String to use on success” Failure: “String to use on failure”1 [GetText] Success: “String to use on success” Failure: “String to use on failure” The contents of this file can be redirected by placing the line ‘[File path]’ on the first row, and a file path on the second. Example: [File path] \user\ssi_strings.cfg In this example, the settings described above will be loaded from the file ‘user\ssi_strings.cfg’. Temporary SSI Output change The SSI output for the next called SSI function can be changed with the SSI function “SsiOutput()” The next called SSI function will use the output according to this call. Thereafter the SSI functions will use 1. ‘%s’ includes the filename in the string Anybus Communicator CAN to EtherNet/IP Doc.Rev. 1.00 Doc.Id. SCM-1200-123 77 the default outputs or the outputs defined in the file ‘\ssi_str.cfg’. The maximum size of a string is 128 bytes. Syntax: <?--#exec cmd_argument='SsiOutput( "Success string", "Failure string" )'--> Example: This example shows how to change the output strings for a scanf SSI call. <?--#exec cmd_argument='SsiOutput ( "Parameter1 updated", "Error" )'--> <?--#exec cmd_argument='scanf( "Parameter1", "%d", OutWriteByte(0) )'--> Anybus Communicator CAN to EtherNet/IP Doc.Rev. 1.00 Doc.Id. SCM-1200-123 78 C.7 E-mail Client C.7.1 General The built-in e-mail client can send predefined e-mail messages based on trigger-events in input and output data areas. The client supports SSI, however note that some SSI functions cannot be used in e-mail messages (specified separately for each SSI function). See also... • “Server Side Include (SSI)” on page 68 Server Settings The Anybus Communicator needs a valid SMTP server configuration in order to be able to send e-mail messages. These settings are stored in the system file ‘\ethcfg.cfg’. See also... • “Ethernet Configuration File (‘ethcfg.cfg’)” on page 54 Event-Triggered Messages As mentioned previously, the e-mail client can send predefined messages based on events in the input and output data areas. In operation, this works as follows: 1. The trigger source is fetched from a specified location 2. A logical AND is performed between the trigger source and a mask value 3. The result is compared to a reference value 4. If the result is true, the e-mail is sent to the specified recipient(s). Which events that shall cause a particular message to be sent, is specified separately for each message. For more information, see “E-mail Definitions” on page 78. Note that the input and output data areas are scanned twice per second, i.e. to ensure that an event is detected by the gateway, it must be present longer than 0.5 seconds. C.7.2 E-mail Definitions The e-mail definitions are stored in the following two directories: • ‘\user\email’ This directory holds up to 10 messages which can be altered by normal level FTP users. • ‘\email’ This directory holds up to 10 messages which can be altered by admin level FTP users. Anybus Communicator CAN to EtherNet/IP Doc.Rev. 1.00 Doc.Id. SCM-1200-123 79 E-mail definition files must be named ‘email_1.cfg’, ‘email_2.cfg’... ‘email_10.cfg’ in order to be properly recognized by the gateway. File Format: [Register] Area, Offset, Type [Register Match] Value, Mask, Operand [To] recipient [From] sender [Subject] subject line [Headers] Optional extra headers [Message] message body Key Area Offset Type Value Mask Operand To From Subject Headers Message Value Scanned for SSI Source area. Possible values: ‘IN’ (Input Data area) or ‘OUT’ (Output Data area) No Source offset, written in decimal or hexadecimal. Source data type. Possible values are ‘byte’, ‘word’, and ‘long’ Used as a reference value for comparison. Mask value, applied on the trigger source prior to comparison (logical AND). Possible values are ‘<‘, ‘=’ or ‘>’ E-mail recipient Yes Sender e-mail address E-mail subject. One line only. Optional; may be used to provide additional headers. The actual message. Note: Hexadecimal values must be written with the prefix ‘0x’ in order to be recognized by the Anybus Communicator. Anybus Communicator CAN to EtherNet/IP Doc.Rev. 1.00 Doc.Id. SCM-1200-123 Appendix D Copyright Notices This product includes software developed by Carnegie Mellon, the Massachusetts Institute of Technology, the University of California, and RSA Data Security: ***************************************************************************** Copyright 1986 by Carnegie Mellon. ***************************************************************************** Copyright 1983,1984,1985 by the Massachusetts Institute of Technology ***************************************************************************** Copyright (c) 1988 Stephen Deering. Copyright (c) 1982, 1985, 1986, 1992, 1993 The Regents of the University of California. All rights reserved. This code is derived from software contributed to Berkeley by Stephen Deering of Stanford University. Redistribution and use in source and binary forms, with or without modification, are permitted provided that the following conditions are met: • Redistributions of source code must retain the above copyright notice, this list of conditions and the following disclaimer. • Redistributions in binary form must reproduce the above copyright notice, this list of conditions and the following disclaimer in the documentation and/or other materials provided with the distribution. • Neither the name of the University nor the names of its contributors may be used to endorse or promote products derived from this software without specific prior written permission. THIS SOFTWARE IS PROVIDED BY THE REGENTS AND CONTRIBUTORS ``AS IS'' ANDANY EXPRESS OR IMPLIED WARRANTIES, INCLUDING, BUT NOT LIMITED TO, THE IMPLIED WARRANTIES OF MERCHANTABILITY AND FITNESS FOR A PARTICULAR PURPOSE ARE DISCLAIMED. IN NO EVENT SHALL THE REGENTS OR CONTRIBUTORS BE LIABLE FOR ANY DIRECT, INDIRECT, INCIDENTAL, SPECIAL, EXEMPLARY, OR CONSEQUENTIAL DAMAGES (INCLUDING, BUT NOT LIMITED TO, PROCUREMENT OF SUBSTITUTE GOODS OR SERVICES; LOSS OF USE, DATA, OR PROFITS; OR BUSINESS INTERRUPTION) HOWEVER CAUSED AND ON ANY THEORY OF LIABILITY, WHETHER IN CONTRACT, STRICT LIABILITY, OR TORT (INCLUDING NEGLIGENCE OR OTHERWISE) ARISING IN ANY WAY OUT OF THE USE OF THIS SOFTWARE, EVEN IF ADVISED OF THE POSSIBILITY OF SUCH DAMAGE. ***************************************************************************** Copyright (C) 1990-2, RSA Data Security, Inc. All rights reserved. License to copy and use this software is granted provided that it is identified as the "RSA Data Security, Inc. MD4 Message-Digest Algorithm" in all material mentioning or referencing this software or this function. License is also granted to make and use derivative works provided that such works are identified as "derived from the RSA Data Security, Inc. MD4 Message-Digest Algorithm" in all material mentioning or referencing the derived work. RSA Data Security, Inc. makes no representations concerning either the merchantability of this software or the suitability of this software for any particular purpose. It is provided "as is" without express or implied warranty of any kind. These notices must be retained in any copies of any part of this documentation and/or software. ***************************************************************************** Copyright (C) 1991-2, RSA Data Security, Inc. Created 1991. All rights reserved. License to copy and use this software is granted provided that it is identified as the "RSA Data Security, Inc. MD5 Message-Digest Algorithm" in all material mentioning or referencing this software or this function. License is also granted to make and use derivative works provided that such works are identified as "derived from the RSA Data Security, Inc. MD5 Message-Digest Algorithm" in all material mentioning or referencing the derived work. RSA Data Security, Inc. makes no representations concerning either the merchantability of this software or the suitability of this software for any particular purpose. It is provided "as is" without express or implied warranty of any kind. These notices must be retained in any copies of any part of this documentation and/or software.