1
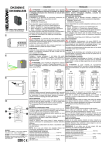
Control unit pCO
3
FLBB0MMTTF, version 2.5
User manual for control unit pCO3 Multiscroll:
TEAL
20120704
EN.pCO3 multiscroll_user 120704
Innehåll
1. GENERAL .................................................................................3
1.1 Scope of the manual.................................................................3
1.2 Control functions......................................................................3
2. USER INTERFACE......................................................................3
3. MENU MASKS..........................................................................4
3.1 Main menu...............................................................................4
3.2 On/off mask.............................................................................4
3.3 Maschere Menu........................................................................5
3.4 Set Masks.................................................................................6
3.5 Clock Masks.............................................................................6
3.6 Maintenance Masks..................................................................7
3.7 I/O Masks.................................................................................7
4 UNIT FUNCTIONING..................................................................9
4.1 Unit in stand-by........................................................................9
4.2 Enabling and stopping the unit.................................................9
4.3 Functioning in chiller and heat pump mode..............................9
4.4 Functioning with double set.....................................................9
5 ALARM MASK ........................................................................10
Source language of document is italian.
2
www.swegon.com
Swegon reserves the right to alter specifications
EN.pCO3 multiscroll_user 120704
1. GENERAL
2. USER INTERFACE
1.1 Scope of the manual
The user interface is made up from 6 keys and a display with
4 lines.
The scope of this manual is to supply all necessary information for the use of the pCO3 control.
The information found in this manual refers to the use of the
control in the various types of unit in which it can be installed. It is therefore part of the documentation and integral
with that stated in the “Instruction, use and maintenance
manual” specific to the unit.
This interface can be used to start, stop and check unit functioning.
The information that appears on the display allows to know
the functioning status of the unit and the six keys can be
used to perform all operations necessary for use.
Considering the wide range of units that this control can
manage, this manual surely contains more information than
those regarding a specific unit.
1.2 Control functions
The electronic control with pCO3 microprocessor and
FLBB0MMTTF program has been designed to manage chiller
units, refrigerants and heat pumps.
The program envisions the possibility, by means of appropriate configuration, to mange water and air-cooled units with
shell & tube and plate heat exchangers, with independent
and parallel refrigerant circuits, essentially with hermetic
compressors.
The management of a chiller unit means the control of
functioning of the parts that make up the various envisioned
functioning stages in complete safety.
The functions of the six buttons are as follows:
Button: “up arrow” to scroll through the forms
in the branches and to increase values in the
various fields.
Button: “down arrow” to scroll through the
forms in the branches and to decrease values in
the various fields.
Button: “Button enter” to confirm a selection,
access the various branches and change the
parameters.
Button: “Button alarm” to stop a buzzer, to
display and, if required, cancel active alarms.
Button: “Button prog” to access the loop of
forms in the various branches.
This button returns you to the main display.
Swegon reserves the right to alter specifications
www.swegon.com
3
EN.pCO3 multiscroll_user 120704
3. MENU MASKS
The groups of information that appear on the display are collected into masks.
The masks are then gathered into homogeneous groups.
Some can be accessed at any time using the keys, others,
signals and alarms, only when the correct conditions are
present.
The masks that can be accessed at any time are organised in
a tree diagram, with a main menu and various sub-groups.
3.1 Main menu
The following branches are envisioned in the main menu:
Service, Maintenance, GSM, Clock, Menu, Set, I/O and Historical.
For access to the various branches, after the “prg” button
has been pressed, the control presents a mask containing a
continuous loop, where all available menus are proposed on
three lines.
3.2 On/off mask
The unit can be started or stopped in this branch.
Access to the branch takes place from any mask by pressing
the “prg” to access the main menu in order to select the
branch.
After having scrolled the options of the mask upwards or
downwards using the arrow keys until “On/off” appears in
large dimensions on the central part of the display, confirm
using the “enter” key.
Unit
Off
Press on [<-] for:
- turn on -By pressing the “enter” key the unit is started if it is at a
standstill or stopped if it is functioning
The mask is made up from two lateral lines with normal
depth and a double central one, which corresponds to the
branch selected as in the following example.
M _ MAIN _ SCROLL
Change
Menu
Set
The complete loop is:
“Menu”; “Set Point”; “I/O”; “Clock”; “GSM”; “Maint.“;
“Service”; “On/Off”; and “Change”.
The arrow keys are used within the branches to change the
masks.
Except for the main menu, place the cursor in the field in
thetop left on every mask.
To move around the fields, where it is possible to insert or
change values, the “enter” key must be used.
The arrow keys can be used to vary the set value in a field
selected using the “enter” key.
By pressing the “enter” key again the modified value is confirmed. Pass to the next field.
4
www.swegon.com
Swegon reserves the right to alter specifications
EN.pCO3 multiscroll_user 120704
3.3 Maschere Menu
All general parameters that concern unit functioning are
available in the “Menu” branch.
Access to the branch takes place from any mask by pressing
the “Esc” key or by pressing the “prg” to access the main
menu for the selection of the branch.
MENU _ 5
User Circuit
Delay Unload 00000s
Delay Load
00000s
|Dead Zone|
After having scrolled the options of the mask upwards or
downwards using the arrow keys until “Menu” appears in
large dimensions on the central part of the display, confirm
using the “enter” key.
The mask only appears when the outlet temperature control
function is enabled. The power decrease and increase delays
can be read. These are expected by the control when the
temperature of the reference water is out of the dead zone.
Except for the main mask “MENU_1” the others present are
linked to the functions enabled.
When the temperature of the reference water is out of the
dead zone, an asterisk appears on the last line.
.
MENU _ 1
Ref. Water
00.0°C
Set
00.0°C
System:Off
Chiller
Operation
In this mask it is possible to read the temperature of the reference water for functioning of the chiller unit, the set point
set, the functioning status (it will be given even if the unit has
been switched off from digital input or supervision) and the
functioning mode.
This is the mask that appears on unit start-up and to which
the program returns automatically.
MENU _ 2
Unload
Forcing
The mask will be present in the loop when the compressors
function with forced partialisation, independently from the
type of force.
MENU _ 3
Unit is
defrosting
The mask appears in the loop only when defrosting is in
progress
MENU _ 4
Dual Set Point
Operating Mode
Operation
HIGH Set
00.0°C
MENU _ 6
Demand
000%
Compressors Running
1 2 3 4 5 6
The power percentage requested by the plant appears in the
first line, the third and fourth show the compressors active in
the unit.
MENU _ 7
Set Point
Outlet Alarm
Max.Temperat.
00.0°C
00.0°C
00.0°C
The mask is present in the loop only when the active set
point, anti-freeze limit and temperature values are given, at
which activation time of the compressors is minimum.
MENU _ 8
Set Point
Hihg T.limit
Min.Temperat.
00.0°C
00.0°C
00.0°C
The mask corresponds to the previous one for functioning in
heat pump mode.
MENU _ 9
Free Cooling
Working
The mask appears in the loop only when free cooling is present and the functioning status is given.
The mask only appears if functioning is envisioned with double set point. The active set and its value can be read.
Swegon reserves the right to alter specifications
www.swegon.com
5
EN.pCO3 multiscroll_user 120704
3.4 Set Masks
3.5 I/O Masks
The main functioning parameters can be set in the “Set”
branch.
In the “I/O” branch it is possible to see the status of all digital
and analogue inputs and outputs.
To enter the “SET” branch, after having scrolled the options
of the mask upwards or downwards using the arrow keys
until “SET” appears in large dimensions on the central part of
the display, confirm using the “enter” key.
To enter the “I/O” branch, after having scrolled the options
of the mask upwards or downwards using the arrow keys
until “I/O” appears in large dimensions on the central part of
the display, confirm using the “enter” key.
SET _ 1
Set Point
Summer
Winter
Recovery
00.0°C
00.0°C
00.0°C
The summer set point can be set in this mask and, if functioning is envisioned, that in the heat pump and recovery.
SET _ 2
Dual Set Point Sel.
HIGH
This mask only appears if functioning has been envisioned
with double set point and the set point change over has
been envisioned from the keyboard. It is therefore possible
to change the functioning set point from “HIGH” to “LOW”
and vice versa.
SET _ 3
Set Point
HIGH
LOW
00.0°C
00.0°C
Only if the operation has been anticipated with double set
point, this mask it will appear, and it will be possible to vary
the planned set point values.
SET _ 4
Working Mode
SUMMER
This mask, which only appears in the chiller unit and heat
pump, allows to change over functioning from “SUMMER”
to “WINTER” and vice versa, if the same function is not envisioned from the digital input.
I _ 0 _ 01
Water temperature
Reference
00.0°C
Outlet 1
00.0°C
Outlet 2
00.0°C
I_0_2
Water Temperature
Outlet 3
00.0°C
Outlet 4
00.0°C
In Recovery
00.0°C
I _ 0 _ 02a
Water Temperature
Well 1
00.0°C
Well 2
00.0°C
I _ 0 _ 02b
Water Temperature
Well 3
00.0°C
Well 4
00.0°C
I _ 0 _ 03
Air Temp.
Coil 1 Temp
Coil 2 Temp
Return Wat.T.
I _ 0 _ 04
Coil 3 Temp
Coil 4 Temp
00.0°C
00.0°C
00.0°C
00.0°C
00.0°C
00.0°C
The values read by the relative probes will appear in this
series of masks.
The masks really present depend on the features of the unit.
I _ 0 _ 05
Circuit 1
H 00.0 L 00.0
B 00.0 B 00.0
D 00.0 D 00.0
I _ 0 _ 06
Circuit 2
H 00.0 L 00.0
B 00.0 B 00.0
D 00.0 D 00.0
6
www.swegon.com
Swegon reserves the right to alter specifications
EN.pCO3 multiscroll_user 120704
I _ 0 _ 07
Circuit 3
H 00.0 L 00.0
B 00.0 B 00.0
D 00.0 D 00.0
I _ 0 _ 08
Circuit 4
H 00.0 L 00.0
B 00.0 B 00.0
D 00.0 D 00.0
The pressure values read by the relative probes will appear in
this series of masks.
The masks really present depend on the features of the unit.
I _ 0 _ 09
DGT Input Status
Master Board
CCCCC CCCCC CCCCC
CCCCC CCCCC
I _ 0 _ 10
DGT Input Status
Slave Board
CCCCC CCCCC CCCCC
CCCCC CCCCC
I _ 0 _ 11
DGT Output Status
Master Board
OOOOO OOOOO
OOOOO OOO
I _ 0 _ 12
DGT Output Status
Slave Board
OOOOO OOOOO
OOOOO OOO
I _ 0 _ 13
Fan Speed 1
|
Fan Speed 2
|
I _ 0 _ 14
Fan Speed 3
|
Fan Speed 4
|
000%
000%
000%
000%
I _ 0 _ 15
FC Valve
|
Recovery Valve
|
000%
000%
The percentage of the signal sent to the analogue outputs,
relative to the various functions, appear in the mask.
The masks really present depend on the features of the unit.
I _ 0 _ 18
Circuit 1 Valve 1
Steps 0000 SH 00.0°C
Evap 00.0b 00.0°C
T.asp 00.0°C
This mask shows the number of steps at which the valve is
working, the over-heating value measured, the intake pressure and its conversion into degrees and the relative temperature measured.
There will be the same amount of masks present as there are
electronic expansion valves.
I _ 0 _ 22
Firmware vers.
Cirecuit 1
Driver 1 000
Driver 2 000
000
000
The status of the digital inputs and outputs appear in these
masks.
In this mask it is possible to see the software version present
on the driver.
C = closed; A = open.
There will be the same amount of masks present as there are
electronic expansion valves.
The masks really present depend on the features of the unit.
I _ O _ 99
Unità Multi _ Compr.00
BLUE BOX
Cod. FLBB0MMTTF
Ver. 00.00 dd/mm/yy
The code, the version and state of issue of the program and
the address in the unit pLAN when boss-runner functioning
is envisioned, appear in this mask.
I _ O _ 100
Testing Date
dd/mm/yyyy
Inspector Code
00000
The date of inspection and the inspector’s code are given in
this mask.
Swegon reserves the right to alter specifications
www.swegon.com
7
EN.pCO3 multiscroll_user 120704
3.6 Clock Masks
3.7 Maintenance Masks
In the “Clock” branch it is possible to read the current time
and, if necessary, set the exact time.
The functioning hours and the number of start-ups of the
various unit components can be displayed in this branch.
To enter the “Clock” branch, scroll the selections upwards
or downwards using the arrow keys until “Clock” appears in
large dimensions on the central part of the display, confirm
using the “enter” key.
Access to the branch takes place from any mask by pressing
the “prg” key to access the main menu to select the branch.
After having entered the branch, by pressing an “arrow” key,
access the mask to set the password.
The clock branch password is 00001.
Orol _ 1
Date 00/00/00
dd/mm/yy
Hour 00:00
hh:mm
The current date and time appear in this mask.
Orol _ 2
Clock Password
00000
The password must be set in this mask in order to enter the
mask that allows to correct the date and time.
Orol _ 3
Date 00/00/00
dd/mm/yy
Hour 00:00
hh:mm
The correct date and time appear in this mask.
After having scrolled the options of the mask upwards or
downwards using the arrow keys until “Maintenance” appears in large dimensions on the central part of the display,
confirm using the “enter” key.
MENU _ 1
Operation Hours
Unit
00000
P1 0000
P2 00000
P3 0000
PFC 00000
MENU _ 2
Operation Hours
C1 0000
C2 00000
C3 0000
C4 00000
C5 0000
C6 00000
MENU _ 3
Operation Hours
C7 0000
C8 00000
C9 0000
C10 00000
C11 0000
C12 00000
MENU _ 4
Operation Hours
C13 0000
C14 00000
C15 0000
C16 00000
MENU _ 5
Starting
Unit
P1 0000
P3 0000
00000
P2 00000
PFC 00000
MENU _ 6
Starting
C1 0000
C3 0000
C5 0000
C2
C4
C6
MENU _ 7
Starting
C7 0000
C9 0000
C11 0000
C8 00000
C10 00000
C12 00000
MENU _ 8
Starting
C13 0000
C15 0000
C14 00000
C16 00000
00000
00000
00000
The masks really present depend on the features of the unit
that the control manages.
8
www.swegon.com
Swegon reserves the right to alter specifications
EN.pCO3 multiscroll_user 120704
4 UNIT FUNCTIONING
4.1 Unit in stand-by
The unit is in stand-by when it is correctly powered from the
electric side and hydraulic side but is not enabled to function.
In this condition the control will display the values read by
the analogue inputs and the status of the digital inputs and
outputs.
To enable the unit from the stand-by condition:
–– Close the digital input for the remote consent envisioned
between clamps 1 and 2;
–– Give the start command from the keyboard or via supervision serial port and/or Boss, if these control systems are
envisioned;
–– Start functioning from keyboard.
The two “set” functioning values are factory-set according to
the requests of the design. However, they can be modified
within envisioned limits.
The functioning set variation can take place automatically
from external consent or can be controlled from the keyboard.
The choice of the mode in which functioning set change over
is performed is made in the factory and it can only be modified by a technician.
The modification of the functioning set and the change over,
when it is envisioned that this takes place from the keyboard,
can be performed in the “Set” branch.
4.2 Enabling and stopping the unit
The unit is intended as enabled for functioning when the
outputs can be activated automatically following plant requirements.
This condition exists when all functioning consents seen in
the previous paragraph are present simultaneously.
The activation of functioning from the keyboard takes place
in the “On/off” mask.
Once functioning has started, the control sees the plant requirements by reading the reference water probe in the case
of stand-alone functioning and by the signal sent from the
Boss if functioning in a network with other units.
The activation of the control outputs that command the
various parts of the chiller unit, takes place automatically
as programmed on the control, in order to guarantee good
functioning of the unit.
4.3 Functioning in chiller and heat pump mode
All refrigerant units function as water chillers.
As well as cooling water for summer air conditioning, the
heat pump units can also heat it for winter heating.
The temperature of the water for air conditioning and heating is set in the factory at the design values normally used,
anyhow, it can be modified within limits.
The functioning change over from summer to winter can take
place automatically by external consent or can be controlled
from the keyboard.
The choice of the mode in which functioning change over is
performed is made in the factory and it can only be modified
by a technician.
The modification of the water temperature values and the
functioning change over, when it is envisioned that this takes
place from the keyboard, can be performed in the “Set”
branch masks.
4.4 Functioning with double set
Some units for particular plants can supply cold water at two
temperatures, normally, even if it is not the rule, one positive
and one negative.
Swegon reserves the right to alter specifications
www.swegon.com
9
EN.pCO3 multiscroll_user 120704
5 ALARM MASK
Any cause of bad functioning detected by the control enables
an alarm mask.
The active alarm masks will only appear after the “alarm” key
has been pressed.
The first time the “alarm” key is pressed any acoustic signal
will be excluded, the second time it is pressed the active
alarm mask will appear or if there is no alarm active the
“ALL_1” mask will appear. All alarms present are cancelled
the third time it is pressed.
If you remain inside an alarm mask for thirty minutes without
pressing any key, the display will go back to the first mask of
the menu branch.
ALL _ 1
No
Alarm
This mask appears when the “alarm” key is pressed twice
and no alarm is active.
All masks envisioned for signals and alarms in the software
are stated below.
The scope of the list of masks is to be able to help the aftersales assistance, informing them of the type of alarm.
In all cases, if the alarm persists, an intervention must be
requested from an after-sales centre.
Non-qualified persons must not intervene on the chiller unit
Example of alarm mask:
ALL _ 6
High Pressure
Circuit 1
10
www.swegon.com
Swegon reserves the right to alter specifications