1
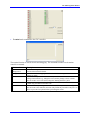
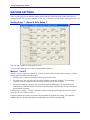
1^ INTEGRATION MANUAL
^2 Adv 400 Integration Manual
^3 Adv 400 Integration Manual
^4 700-100002-xIxx
^5 November 2, 2007
USER MANUAL
Single Source Machine Control
Power // Flexibility // Ease of Use
21314 Lassen Street Chatsworth, CA 91311 // Tel. (818) 998-2095 Fax. (818) 998-7807 // www.deltatau.com
Copyright Information
© 2007 Delta Tau Data Systems, Inc. All rights reserved.
This document is furnished for the customers of Delta Tau Data Systems, Inc. Other uses are
unauthorized without written permission of Delta Tau Data Systems, Inc. Information contained in
this manual may be updated from time-to-time due to product improvements, etc., and may not
conform in every respect to former issues.
To report errors or inconsistencies, call or email:
Delta Tau Data Systems, Inc. Technical Support
Phone: (818) 717-5656
Fax: (818) 998-7807
Email: [email protected]
Website: http://www.deltatau.com
Operating Conditions
All Delta Tau Data Systems, Inc. motion controller products, accessories, and amplifiers contain
static sensitive components that can be damaged by incorrect handling. When installing or handling
Delta Tau Data Systems, Inc. products, avoid contact with highly insulated materials. Only
qualified personnel should be allowed to handle this equipment.
In the case of industrial applications, we expect our products to be protected from hazardous or
conductive materials and/or environments that could cause harm to the controller by damaging
components or causing electrical shorts. When our products are used in an industrial environment,
install them into an industrial electrical cabinet or industrial PC to protect them from excessive or
corrosive moisture, abnormal ambient temperatures, and conductive materials. If Delta Tau Data
Systems, Inc. products are directly exposed to hazardous or conductive materials and/or
environments, we cannot guarantee their operation.
REVISION HISTORY
REV.
DESCRIPTION
DATE
CHG
APPVD
1
NEW MANUAL CREATION – PRELIMINARY
12/20/04
N/A
N/A
2
UPGRADE FROM PRELIM TO FULL RELEASE
11/02/07
CP
VB
Adv 400 Integration Manual
Table of Contents
INTRODUCTION .......................................................................................................................................................1
Passwords..................................................................................................................................................................1
User Level.............................................................................................................................................................1
Manager Level ......................................................................................................................................................1
Integration Level...................................................................................................................................................1
Integration Menu .......................................................................................................................................................1
MACHINE SETTINGS ..............................................................................................................................................3
Setting Page 1: General Axis Setup 1.......................................................................................................................3
Motors 1, 2 and 3..................................................................................................................................................3
Motor 4 .................................................................................................................................................................4
Motor 5 .................................................................................................................................................................4
Setting Page 2: General Axis Setup 2.......................................................................................................................5
Setting Page 3: Axis Homing Setup .........................................................................................................................6
Setting Page 4: Miscellaneous..................................................................................................................................7
AXIS TUNING.............................................................................................................................................................9
CUSTOM PLCS ........................................................................................................................................................11
PLCs Management ..................................................................................................................................................11
Writing a PLC .........................................................................................................................................................12
Testing an Input ..................................................................................................................................................13
Waiting State of an Input ....................................................................................................................................13
Setting an Output ................................................................................................................................................13
Testing or Waiting an Information .....................................................................................................................13
Using a Timer .....................................................................................................................................................13
Specific PLC25 .......................................................................................................................................................13
Messages .................................................................................................................................................................14
Table of Symbols ....................................................................................................................................................15
CUSTOM M-CODES PROGRAMMING...............................................................................................................17
TOOL CHANGER ....................................................................................................................................................19
Sub-Routine 998......................................................................................................................................................19
Tool Changer Initialization .....................................................................................................................................20
APPENDIX A: TABLE OF SYMBOLS.................................................................................................................21
Inputs.......................................................................................................................................................................21
Inputs True..........................................................................................................................................................21
Inputs False ........................................................................................................................................................22
Set Outputs Non Synchrone ................................................................................................................................23
Set Outputs Synchrone for Programming Only ..................................................................................................23
Reset Outputs ......................................................................................................................................................24
Reset Outputs Synchronously for Programming Only ........................................................................................24
Outputs On..........................................................................................................................................................25
Outputs Off .........................................................................................................................................................25
Timers .....................................................................................................................................................................26
Status .......................................................................................................................................................................26
Buttons ....................................................................................................................................................................27
Read a Number Value — Buttons .......................................................................................................................27
Mode, Axis Selected ...............................................................................................................................................28
Read a Number Value — Mode, Axis Selected ...................................................................................................28
Read a Number Value or Bit — Mode, Axis Selected .........................................................................................29
P-Variables..............................................................................................................................................................31
Constants .................................................................................................................................................................31
APPENDIX B: HARD DISK CNC ARCHITECTURE ........................................................................................33
Table of Contents
i
Adv 400 Integration Manual
Table of Contents
ii
Adv 400 Programming Manual
INTRODUCTION
The Adv 400 is a flexible CNC system able to run different types of Milling or Lathe machines.
This manual describes the different options for setting the CNC controller to a dedicated machine:
• Setting machine and axis specifications
• Tuning the axis
• Writing custom M-codes
• Writing tool changer code
Passwords
The system contains three levels of use, protected with passwords. The system password must be entered
every time the system is started. It also can be called at any time from the File menu.
User Level
If a password is not entered (F2 is pressed instead), the system will be at machine User level. The User
level homes the axis, moves the axis manually and runs the present part program.
Manager Level
If the first password (400USER) is entered, the system will be at machine Manager level. This level
permits modification of the part program and accesses the different menus for managing the production
(Tool menu, Work Offset menu, subprograms, etc.).
Integration Level
If the second password (400MC) is entered, the system will be at machine Integration level. This level
accesses all menus to perform the machine integration (PLCs, tuning, etc.). This level must be used for
the machine integration. It is at this level that the password choices are given to the machine operator.
Integration Menu
On the Menu bar, the CNC menu accesses the different configuration menus.
This menu gives access to different tools:
• Switch mm/in designates the CNC system to use millimeters or inches.
• IO-check shows the digital inputs and outputs state.
Introduction
1
Adv 400 Integration Manual
•
Terminal sends commands to the CNC controller.
The terminal function is used for checks and debugging. The commands sent here are the motion
controller commands.
Command
Description
Symbols and
Manage-PLCs
Settings
Creates and manages customs PLCs for the machine. Refer to the Custom PLCs
section of this manual for details.
Opens the machine setting pages. Refer to the Machine Settings section of this
manual for details.
Performs a backup of the I-variables on the system. The I-variables contains several
settings of the machine (e.g., PID gains of axis) and any change to these variables
must be saved to recover the same setting after shutting down the system.
Sends a text file to the controller. This is used for maintenance, as this file must
contain only pure Motion Controller code.
Restarts the CNC system (e.g., after a shutdown). If, for any reason, the configuration
must be resent to the controller, this menu will perform the job. Remove the power of
drives or press the E-stop button before performing this action.
Save I Variables
Download Raw File
Reset CNC
2
Introduction
Adv 400 Programming Manual
MACHINE SETTINGS
Before using the axis, the machine must be set.
There are four pages for the machine setting which define the details about the machine that must be
managed by this CNC controller (number of axis, type of each axis, spindle, limits, homing procedure, etc.).
Setting Page 1: General Axis Setup 1
The Adv 400 is capable of using up to five axes.
To use an axis, check the box in front of motor number (Motor x).
Motors 1, 2 and 3
Motors 1, 2 and 3, respectively named X, Y and Z, are always linear axis and can be analog (+/-10V) or
stepper (pulses and direction) type of axis.
• If Analog axis is selected, an encoder must be present on this axis.
• For stepper axis, the Adv 400 can work with or without real encoder feedback. The maximum
frequency for pulse output must be entered also when an axis is used in stepper.
• In both cases (analog or stepper), the resolution (counts per millimeters), the maximum speed
(millimeters per minute) and the maximum acceleration (time in milliseconds from 0 to maximum
speed) must be indicated.
If analog axis or stepper + encoder is selected, perform a position-loop tuning before this axis can be
used. (See the Axis Tuning section.)
If stepper (without an encoder) is selected, do not perform the position-loop tuning. The controller
simulates the encoder internally and the axis PID gains are calculated automatically.
Machine Settings
3
Adv 400 Integration Manual
Motor 4
Motor 4 can be an axis (linear named U or rotary named A). In this case, like motors 1, 2 and 3, this
motor can be analog or stepper with the same setup.
Motor 4 can be a spindle named S (open-loop without an encoder, open-loop with encoder, or closed-loop
automatically with encoder). In this case, the analog type is used (no stepper).
The resolution (counts per millimeters if linear axis U, counts per degree if rotary axis A or counts per
revolution in case of spindle), the maximum speed (millimeters per minute if linear axis U, degrees per
minute if rotary axis A or revolution per minute in case of spindle) and the maximum acceleration (time
in milliseconds from 0 to maximum speed) must be indicated.
If analog axis, stepper + encoder or closed-loop spindle is selected, perform a position-loop tuning before
this axis can be used. (See the Axis Tuning section.)
If stepper (without an encoder) or open-loop spindle (with or without an encoder) is selected, do not
perform the position-loop tuning. For stepper, the controller simulates the encoder internally and the axis
PID gains are calculated automatically. For open-loop spindle case, the amplifier must be an inverter or
an amplifier closing the velocity-loop internally.
Motor 5
Motor 5 can be an axis (linear named V or rotary named B). This motor is always an analog axis with
encoder feedback.
The resolution (counts per millimeters in linear axis V or counts per degree if rotary axis B), the
maximum speed (millimeters per minute if linear axis V, degrees per minute if rotary axis B) and the
maximum acceleration (time in milliseconds from 0 to maximum speed) must be indicated. A positionloop tuning must be performed before this axis can be used. (See the Axis Tuning section.)
When Motor 5 is not used, the encoder feedback can be used for an external handwheel. To enable this
function, uncheck the Motor 5 box and check the Use ENC5 as Handwheel box.
In this case, some Inputs/Outputs will not be for general-purpose use anymore, but must have dedicated
functions to indicate whether to use an external box for manual movements of the axis:
Input7 will indicate whether to use the internal Adv 400 functions or the external box buttons:
If INPUT7 is OFF -> use internal Adv 400 functions
If INPUT7 is ON -> use external box buttons
The external box buttons are:
INPUT9, INPUT10 and INPUT10 for axis select
With INPUT9=Off and INPUT10=Off and INPUT11=Off axis X is selected
With INPUT9=On and INPUT10=Off and INPUT11=Off axis Y is selected
With INPUT9=On and INPUT10=On and INPUT11=Off axis Z is selected
With INPUT9=Off and INPUT10=On and INPUT11=Off axis A or U is selected
INPUT13, INPUT14 and INPUT15 for step move size with handwheel
With INPUT13=On and INPUT14=Off and INPUT15=Off, axis moves of 0.001mm per Handwheel step
With INPUT13=On and INPUT14=On and INPUT15=Off, axis moves of 0.01mm per Handwheel step
With INPUT13=Off and INPUT14=On and INPUT15=Off, axis moves of 0.1mm per Handwheel step
With INPUT13=Off and INPUT14=On and INPUT15=On, axis moves of 0.2 mm per Handwheel step
INPUT12 for JOG axis in minus direction
INPUT16 for JOG axis in plus direction
4
Machine Settings
Adv 400 Programming Manual
Setting Page 2: General Axis Setup 2
If an axis is used (box checked on Setting page 1), information on this page must be entered.
• The Amp Fault (amplifier fault signal) returning from the drive can be true (amplifier on default) at
level high or at level low. Also, the management of the amplifier fault signal can be disabled if the
drive does not have one.
• The Hardware Limits (plus and minus) can be enabled or disabled. If enabled, if one of these limits
is reached, the axis will stop automatically.
• The Software Limits in millimeters can be used to limit the travel of the axis. These limits are only
for linear axis (X, Y, Z, U and V). A zero (0) value disables the software limit.
• The Max JOG Speed indicates the maximum speed of the axis on manual JOG moves.
• If a motor has an internal Brake (vertical axis, for example), a digital output must be attached to the
brake and the Adv 400 will manage this output automatically with the status (open-loop or closedloop) of this motor. In this case, check the Motor x with Brake box and enter a number for the
digital output between 1 and 16. (See the Digital Outputs section on Adv 400, connector OUT1.)
Machine Settings
5
Adv 400 Integration Manual
Setting Page 3: Axis Homing Setup
If an axis is used (box checked in Setting Page 1), the information on this page must be entered.
This page gives the setting for the homing (home reference) of each axis.
The No Home box indicates that no homing routine has to be performed on this axis. In this case, during
the homing sequence, the zero position will be forced to this axis.
If this box is checked, all information for this axis on this page is not used.
An axis reference can be entered on the C channel (zero encoder) or on one of the fast inputs Home Flag
(high-true or low-true), Limit+ or Limit-. If one of these three fast inputs is selected, it is possible to use
it in combination with the C channel.
Depending on the encoder used, the C channel active can be low true or high true.
• To perform the homing routine on the C channel only, check the Only C ch box.
• To perform the homing on one of the fast input flags only, uncheck the Only C ch box. Check the
None box under the C channel section and check the desired fast input (Home Low True, Home High
True, Limit flag + or Limit flag -).
• To perform the homing on a combination of the C channel and one of the fast input flags, uncheck
the Only C ch box, check the Low True or High True box under the C channel section and check the
desired fast input (Home Low True, Home High True, Limit flag + or Limit flag -).
The home speed must be entered in millimeters per minute.
In addition, the direction for the home search must be entered. The direction is where the axis is going to
the selected flag direction.
The Home Seq box must be set with a number between 1 and 5, indicating the desired sequence of the
homing. Axis homing will be performed one-by-one following this sequence (first axis will be this with
number 1, second axis will be this with number 2, etc.).
If Motor 4 is used as a spindle, no homing sequence will be performed on this motor.
6
Machine Settings
Adv 400 Programming Manual
Setting Page 4: Miscellaneous
This page indicates the Maximum Following Error allowed for an axis in millimeters.
If for any reason during operation an axis has more following error than the one indicated here, all axes
will be stopped and disabled and an error message will appear.
The Reverse Counting Direction box changes the encoder counting direction. As the encoder counting
direction must be always in correlation with the command output (a positive command on the analog or
stepper output must move the motor in the direction where the encoder counts positive, and a negative
command on the analog or stepper output must move the motor in the direction where the encoder counts
negative), checking this box creates this correlation by inverting the encoder counting direction.
On the right of this setting page, indicate the Machine Type to manage (Mill or Lathe). A Lathe selection
will make the X axis with a diameter input.
The Use Input 1 for Emergency Stop box uses the INPUT1 as the ESTOP input, low true. If this box is
checked, the INPUT1 must be high to have the machine running.
• The Use Input 2 for Feed Hold box gives the Feed Hold function to INPUT2.
• The Use Input 3 for Cycle Start box gives the Cycle Start function to INPUT3.
• The Use Input 4 for Reset box gives the Reset function to INPUT4.
The Use Toolchanger Prog998 box creates an automatic jump to sub-routine 998 when a tool code Txxyy
is programmed. This creates some tool changing routines. Refer to the Tool Changer section of this
manual for details.
The Use Toolchanger Init Dialog box gives a special dialog menu at power-up of Adv 400-CNC, and then
special tool changer positions can be initialized. Refer to the Tool Changer section of this manual for
details.
Machine Settings
7
Adv 400 Integration Manual
The Use Custom M3/M4/M5 Prog999 box writes custom M-codes for spindle in sub-routine 999. If this
box is checked, these custom M-codes must be written, otherwise the normal M3/M4/M5 codes of the
system will be used. Refer to the Custom M-Codes section of this manual for details.
The Use 4 decimal places box allows four decimal digits in the axis position windows. Default is three
digits.
8
Machine Settings
Adv 400 Programming Manual
AXIS TUNING
The tuner tool of the Executive Program (Pewin32 or Pewin32Pro) is used to tune the axis.
The following steps must be performed:
1. Boot the Adv 400 system and let the HMI start.
2. Exit from the HMI using the File /Exit menu.
3. Connect an external computer with the Executive program to the RS232 connector of the Adv 400.
4. Start the Executive Program and tune the axis with this external computer.
5. When the tuning is finished, quit the Executive program and without shutting down the Adv 400
controller, start the Adv 400 HMI again (the program is called ADV400.EXE and is located on the
Hard Disk/CNC/ directory).
6. Save the I-Variables using the CNC/Save_I_variables menu of the Adv 400 HMI.
7. Reboot the Adv 400 unit.
Axis Tuning
9
Adv 400 Integration Manual
10
Axis Tuning
Adv 400 Programming Manual
CUSTOM PLCS
Create custom PLCs to managing certain functions of the machine with this feature. PLCs numbers 15 to
24 are available for these customs PLCs. PLC25 is present already and creates some additional
conditions for the use of some machine control buttons.
PLCs Management
Under the CNC menu, a management page creates (New), Edit, Delete, Load and Unload for a custom PLC.
•
•
•
•
•
New (or F2 on the keyboard) creates a new custom PLC (opening text editor with blank page).
Edit (or F3 on the keyboard) opens an existing custom PLC (opening text editor with this PLC
inside) for consulting or modification.
Delete (or F4 on the keyboard) removes an existing custom PLC from the list.
Load (or F5 on the keyboard) loads an existing custom PLC in the controller and enables it. An X
appears in the Loaded section for this PLC and the PLC is used until it is unloaded.
Unload (or F6 on the keyboard) removes an existing custom PLC from the controller. The X does
not appear in the Loaded section for this PLC.
Custom PLCs
11
Adv 400 Integration Manual
When creating a new PLC or editing an existing PLC, a text editor is opened and the PLC code can be
entered.
• Download (or F2 on the keyboard) is sending the PLC to the controller and uses it automatically (like
the Load button on the Managing PLC page).
• Close Editor (or F10 on the keyboard) is providing a quit of this page, asking to save to entered code
if not done.
Writing a PLC
The Custom PLCs use the symbol table. Refer to the Table of Symbols section for a list of all available
symbols. Personal symbols can be created with Adv 400 free variables.
The free variables are:
• P800 to P1023
• Q800 to Q1023
• M800 to M1023
P and Q-Variables are 48-bits floating-point format and any calculation can be performed or flag designated.
M-Variables are 24-bits format and any calculation can be performed or any flag designated. Normally,
they are used for pointing any memory of the Adv 400 system, but the needed memories for writing
applications are already done, accessible with the Table of Symbols.
In the CNC menu, there is a table to create symbols for free variables:
• PLC15 to PLC24 are available for customs PLCs.
• A special PLC25 is present in the system already and must be downloaded in the CNC in order to
have all buttons (Cycle Start, Feed Hold, etc.) working. Refer to the PLC25 section of this manual
for details.
• A PLC is scanned all the time, asynchronously as part of the program. It reads inputs, writes outputs,
and tests conditions.
12
Custom PLCs
Adv 400 Programming Manual
Testing an Input
If (ON_INPUT1)
; action
Endif
If (OFF_INPUT4)
; action
Else
; other action
Endif
; test is Input1 true
; test is Input4 false
Waiting State of an Input
While (ON_INPUT2)
; action
Endw
; wait as long as Input2 is true
Setting an Output
SET_OUTPUT2
RESET_OUTPUT3
; set Ouput2
; Reset Ouput3
Testing or Waiting an Information
With an If condition or a While loop, it is possible to test or wait for some other information coming from
the CNC.
The Table of Symbols gives the list of information available.
If (CS_SPND_AT_ZERO != 0)
; action
Endif
While (CS_SPND_AT_SPEED = 0)
Endif
; test is spindle is at zero speed
; wait that spindle is at programmed speed.
Using a Timer
SET_OUTPUT2
USER_TIMER_1=150
While (USER_TIMER_1>0)
Endw
RESET_OUTPUT2
; set ouput2
; timer of 150ms
; wait timer finished
; reset ouput2
Specific PLC25
The PLC25 adds some conditions to the use of buttons.
The buttons managed in this PLC25 that have conditions are:
• MANUAL mode button
• AUTO mode button
• MDI mode button
• HOME mode button
• CYCLE START button
• FEED HOLD button
• JOG PLUS button
• JOG MINUS button
• SINGLE MODE button
• OPTIONNAL MODE button
• BLOCK DELETE button
As an example, here is the standard code (no conditions) for the Cycle Start button:
If (PB_CYCLE_START!=0)
Custom PLCs
13
Adv 400 Integration Manual
IPB_CYCLE_START = 1
Else
IPB_CYCLE_START = 0
Endif
For example, to add the condition that Input 1 is ON to allow a Cycle Start of the program, modify this
section:
If (PB_CYCLE_START!=0 and ON_INPUT3)
IPB_CYCLE_START = 1
Else
IPB_CYCLE_START = 0
Endif
As another example, to reset the Output 2 and 3 when in manual mode:
If (PB_MANUAL_MODE!=0)
IPB_MANUAL_MODE = 1
RESET_OUTPUT2
RESET_OUTPUT3
Else
IPB_MANUAL_MODE = 0
Endif
Messages
From PLCs, it is possible to create messages (information, warning or error) for the machine user.
These messages will appear then in the message window on the bottom of the main screen
When any message is present, use the F1 key to go to the detailed message window.
A maximum of 96 messages are possible, but messages 1 to 59 are reserved for the system. So, messages
60 to 96 can be used by custom PLCs.
14
Custom PLCs
Adv 400 Programming Manual
To display or remove a message, use the following code:
SET_ER_60
RESET_ER_71
; this will display message number 60
; this will remove message number 71
To test if a message is displayed (present) or not:
IF (ERH_81)
IF (ERL_68)
; test if message 81 is display (present)
; test if message 68 is not present
The text message must be entered in the Adv4Err.dtx file which is on the system under the Hard
Disk/CNC/01 directory for the first language English, or under Hard Disk/CNC/02 for the second language.
In this file, any message is contained in three lines.
For the message 60, for example, the following lines appear:
60
60.1
60.2
The first line of a message is the one displayed on the bottom of the main screen.
In the detailed message window, all three lines will appear, giving detailed messages.
For example, to have message 65 give an error about a door open:
65 DOOR OPEN
65.1 Please, close the door
65.2 to allow cycle starting
Table of Symbols
The Table of Symbols present on the system contains all symbols permitting access to all system
information, like Input and Output, status of axis, status of spindle.
These symbols can be used mainly in custom PLCs, but it is possible also to use them in part programs or
in the sub-routines.
Refer to Appendix A: Table of Symbols to view the complete list.
Custom PLCs
15
Adv 400 Integration Manual
16
Custom PLCs
Adv 400 Programming Manual
CUSTOM M-CODES PROGRAMMING
In several applications, custom M-codes are created and used in the part program to perform some
specific actions. The sub-routine 999 allows this.
Some M-codes are reserved (already used by the system) and cannot be created in this sub-routine.
List of reserved M-codes:
• M00 Program Stop
• M01 Optional Stop
• M02 Program End & Rewind
• M19 Spindle Orient
• M30 Program End & Rewind
• M50 C-Axis Call
• M51 Spindle Call
• M98 Subprogram Call
Usually the M03, M04, and M05 M-codes are used for a spindle. If a spindle is present in the system,
these codes are reserved and cannot be created in this sub-routine. If no spindle is present, use M03, M04
and M05 codes by checking the Use Custom M3/M4/M5 Prog999 box on the machine Setting Page 4.
The part program M-code will call the same label number as the code number:
• M06 code will call sub-routine 999 at label N6
• M09 code will call sub-routine 999 at label N9
• M10 code will call sub-routine 999 at label N10
• M12 code will call sub-routine 999 at label N12
• M252 code will call sub-routine 999 at label N252
In the sub-routine 999, a RET command must be entered at the end of the program code to exit this subroutine and return to the main program.
For example, the following code uses M07 code to set the output to 1 and the M08 code to reset the
output 1. The Dwell0 command waits until a previous move is finished before starting the action of this
M-code. If a Dwell0 command is not entered in front of the action, the action is performed before the
previous move is finished.
// Prog 999
;
;
// M07 code
N7
Dwell0
SET_OUTPUT1
RET
// M08 code
N8
Dwell0
RESET_OUTPUT1
RET
Custom M-Codes Programming
; set Ouput1
; reset Ouput1
17
Adv 400 Integration Manual
18
Custom M-Codes Programming
Adv 400 Programming Manual
TOOL CHANGER
Sub-Routine 998
The sub-routine 998 is used to create the code for a tool changer.
To use this function, check the Use Toolchanger Prog998 box on the Machine Setting Page 4.
In this case, when the T-code Txxyy is programmed in the part program, two jumps to this sub-routine
will be done automatically.
• A first jump on label N1000 will be done with the actual Tool offset, creating some axis movements
out with the actual tool offset.
• A second jump on label N2000 will then be done with the new tool offset, the one called by Txxyy Tcode, permitting to create axis movements in with the new tool offset.
At the end of these two sections, a RET command must be present to indicate that this section is finished
(jump back to main program). Even if one of the two labels has no code because one of these two jumps
is not needed, the RET command must be present.
The structure of an empty sub-routine 998:
//
//
//
//
Prog 998
Create the tool changer in this file
put the code before new tool offset at label N1000
put the code with new tool offset at label N2000
// put the code here before tacking new tool offset
N1000
; put the code here
RET
// put the code here after tacking new tool offset
N2000
; put the code here
RET
As an example, to move X and Y axis to positions 0 before changing tool, ask a PLC with variable P810
to make the tool change, then move back X and Y axis to position 10.
In this example, there are some Dwell0 commands. A Dwell0 command waits until the previous axis
movement is finished before starting the next job. A Dwell0 command must be present in a While loop
of a part program (as sub-routines are running in part programs).
//
//
//
//
Prog 998
Create the tool changer in this file
put the code before new tool offset at label N1000
put the code with new tool offset at label N2000
// put the code here before tacking new tool offset
N1000
G00 X0 Y0
; move axis with actual tool offset
Dwell0
; this waits previous movement is finished
P801=1
; ask PLC to make tool change
While (P810=1)
; wait that the tool change is finished
Dwell0
; this means that PLC puts back P801 to 0
Endwhile
RET
Tool Changer
19
Adv 400 Integration Manual
// put the code here after tacking new tool offset
N2000
G00 X10 Y10
; move axis with new tool offset
RET
Tool Changer Initialization
With certain types of Tool Changers, it is necessary to initialize some data every time the CNC is started
to indicate to the system what tool is present.
Therefore, when the Use Toolchanger Init Dialog box is checked in Machine Setting Page 4, a menu
appears at power-up of the Adv 400 CNC software:
These two values, tool number and magazine position, are just memorized on some variables so that the
tool changing code can be used later.
• The first value is entered in the variable P355, named TOOL_IN_SPINDLE.
• The second value is entered in the variable P356, named MAGAZINE_POSITION.
Use these two variables for a tool changer where an initialization must be made whenever the system is
started, telling what tool is in the spindle and what the magazine position is next to the spindle. For any
other type of tool changer, these two variables can be used in another way, such as telling what tool is
active at power-up.
20
Tool Changer
Adv 400 Programming Manual
APPENDIX A: TABLE OF SYMBOLS
Inputs
Inputs True
Appendix A
Symbol
Comment
ON_INPUT1
ON_INPUT2
ON_INPUT3
ON_INPUT4
ON_INPUT5
ON_INPUT6
ON_INPUT7
ON_INPUT8
ON_INPUT9
ON_INPUT10
ON_INPUT11
ON_INPUT12
ON_INPUT13
ON_INPUT14
ON_INPUT15
ON_INPUT16
ON_INPUT17
ON_INPUT18
ON_INPUT19
ON_INPUT20
ON_INPUT21
ON_INPUT22
ON_INPUT23
ON_INPUT24
ON_INPUT25
ON_INPUT26
ON_INPUT27
ON_INPUT28
ON_INPUT29
ON_INPUT30
ON_INPUT31
ON_INPUT32
Input 1 true
Input 2 true
Input 3 true
Input 4 true
Input 5 true
Input 6 true
Input 7 true
Input 8 true
Input 9 true
Input 10 true
Input 11 true
Input 12 true
Input 13 true
Input 14 true
Input 15 true
Input 16 true
Input 17 true
Input 18 true
Input 19 true
Input 20 true
Input 21 true
Input 22 true
Input 23 true
Input 24 true
Input 25 true
Input 26 true
Input 27 true
Input 28 true
Input 29 true
Input 30 true
Input 31 true
Input 32 true
21
Adv 400 Integration Manual
Inputs False
Symbol
OFF_INPUT1
OFF_INPUT2
OFF_INPUT3
OFF_INPUT4
OFF_INPUT5
OFF_INPUT6
OFF_INPUT7
OFF_INPUT8
OFF_INPUT9
OFF_INPUT10
OFF_INPUT11
OFF_INPUT12
OFF_INPUT13
OFF_INPUT14
OFF_INPUT15
OFF_INPUT16
OFF_INPUT17
OFF_INPUT18
OFF_INPUT19
OFF_INPUT20
OFF_INPUT21
OFF_INPUT22
OFF_INPUT23
OFF_INPUT24
OFF_INPUT25
OFF_INPUT26
OFF_INPUT27
OFF_INPUT28
OFF_INPUT29
OFF_INPUT30
OFF_INPUT31
OFF_INPUT32
22
Comment
Input 1 false
Input 2 false
Input 3 false
Input 4 false
Input 5 false
Input 6 false
Input 7 false
Input 8 false
Input 9 false
Input 10 false
Input 11 false
Input 12 false
Input 13 false
Input 14 false
Input 15 false
Input 16 false
Input 17 false
Input 18 false
Input 19 false
Input 20 false
Input 21 false
Input 22 false
Input 23 false
Input 24 false
Input 25 false
Input 26 false
Input 27 false
Input 28 false
Input 29 false
Input 30 false
Input 31 false
Input 32 false
Appendix A
Adv 400 Programming Manual
Set Outputs Non Synchrone
Symbol
Comment
SET_OUTPUT1
SET_OUTPUT2
SET_OUTPUT3
SET_OUTPUT4
SET_OUTPUT5
SET_OUTPUT6
SET_OUTPUT7
SET_OUTPUT8
SET_OUTPUT9
SET_OUTPUT10
SET_OUTPUT11
SET_OUTPUT12
SET_OUTPUT13
SET_OUTPUT14
SET_OUTPUT15
SET_OUTPUT16
Set Output 1 true
Set Output 2 true
Set Output 3 true
Set Output 4 true
Set Output 5 true
Set Output 6 true
Set Output 7 true
Set Output 8 true
Set Output 9 true
Set Output 10 true
Set Output 11 true
Set Output 12 true
Set Output 13 true
Set Output 14 true
Set Output 15 true
Set Output 16 true
Set Outputs Synchrone for Programming Only
Symbol
SETS_OUTPUT1
SETS_OUTPUT2
SETS_OUTPUT3
SETS_OUTPUT4
SETS_OUTPUT5
SETS_OUTPUT6
SETS_OUTPUT7
SETS_OUTPUT8
SETS_OUTPUT9
SETS_OUTPUT10
SETS_OUTPUT11
SETS_OUTPUT12
SETS_OUTPUT13
SETS_OUTPUT14
SETS_OUTPUT15
SETS_OUTPUT16
Appendix A
Comment
Set Output 1 true synchronously (for Part Prog only)
Set Output 2 true synchronously (for Part Prog only)
Set Output 3 true synchronously (for Part Prog only)
Set Output 4 true synchronously (for Part Prog only)
Set Output 5 true synchronously (for Part Prog only)
Set Output 6 true synchronously (for Part Prog only)
Set Output 7 true synchronously (for Part Prog only)
Set Output 8 true synchronously (for Part Prog only)
Set Output 9 true synchronously (for Part Prog only)
Set Output 10 true synchronously (for Part Prog only)
Set Output 11 true synchronously (for Part Prog only)
Set Output 12 true synchronously (for Part Prog only)
Set Output 13 true synchronously (for Part Prog only)
Set Output 14 true synchronously (for Part Prog only)
Set Output 15 true synchronously (for Part Prog only)
Set Output 16 true synchronously (for Part Prog only)
23
Adv 400 Integration Manual
Reset Outputs
Symbol
RESET_OUTPUT1
RESET_OUTPUT2
RESET_OUTPUT3
RESET_OUTPUT4
RESET_OUTPUT5
RESET_OUTPUT6
RESET_OUTPUT7
RESET_OUTPUT8
RESET_OUTPUT9
RESET_OUTPUT10
RESET_OUTPUT11
RESET_OUTPUT12
RESET_OUTPUT13
RESET_OUTPUT14
RESET_OUTPUT15
RESET_OUTPUT16
Comment
Reset Output 1
Reset Output 2
Reset Output 3
Reset Output 4
Reset Output 5
Reset Output 6
Reset Output 7
Reset Output 8
Reset Output 9
Reset Output 10
Reset Output 11
Reset Output 12
Reset Output 13
Reset Output 14
Reset Output 15
Reset Output 16
Reset Outputs Synchronously for Programming Only
Symbol
RESETS_OUTPUT1
RESETS_OUTPUT2
RESETS_OUTPUT3
RESETS_OUTPUT4
RESETS_OUTPUT5
RESETS_OUTPUT6
RESETS_OUTPUT7
RESETS_OUTPUT8
RESETS_OUTPUT9
RESETS_OUTPUT10
RESETS_OUTPUT11
RESETS_OUTPUT12
RESETS_OUTPUT13
RESETS_OUTPUT14
RESETS_OUTPUT15
RESETS_OUTPUT16
24
Comment
Reset Output 1 synchronously
Reset Output 2 synchronously
Reset Output 3 synchronously
Reset Output 4 synchronously
Reset Output 5 synchronously
Reset Output 6 synchronously
Reset Output 7 synchronously
Reset Output 8 synchronously
Reset Output 9 synchronously
Reset Output 10 synchronously
Reset Output 12 synchronously
Reset Output 13 synchronously
Reset Output 14 synchronously
Reset Output 15 synchronously
Reset Output 16 synchronously
Reset Output 17 synchronously
Appendix A
Adv 400 Programming Manual
Outputs On
Symbol
ON_OUTPUT1
ON_OUTPUT2
ON_OUTPUT3
ON_OUTPUT4
ON_OUTPUT5
ON_OUTPUT6
ON_OUTPUT7
ON_OUTPUT8
ON_OUTPUT9
ON_OUTPUT10
ON_OUTPUT11
ON_OUTPUT12
ON_OUTPUT13
ON_OUTPUT14
ON_OUTPUT15
ON_OUTPUT16
Comment
Output 1 true
Output 2 true
Output 3 true
Output 4 true
Output 5 true
Output 6 true
Output 7 true
Output 8 true
Output 9 true
Output 10 true
Output 11 true
Output 12 true
Output 13 true
Output 14 true
Output 15 true
Output 16 true
Outputs Off
Symbol
OFF_OUTPUT1
OFF_OUTPUT2
OFF_OUTPUT3
OFF_OUTPUT4
OFF_OUTPUT5
OFF_OUTPUT6
OFF_OUTPUT7
OFF_OUTPUT8
OFF_OUTPUT9
OFF_OUTPUT10
OFF_OUTPUT11
OFF_OUTPUT12
OFF_OUTPUT13
OFF_OUTPUT14
OFF_OUTPUT15
OFF_OUTPUT16
Appendix A
Comment
Output 1 false
Output 2 false
Output 3 false
Output 4 false
Output 5 false
Output 6 false
Output 7 false
Output 8 false
Output 9 false
Output 10 false
Output 11 false
Output 12 false
Output 13 false
Output 14 false
Output 15 false
Output 16 false
25
Adv 400 Integration Manual
Timers
; example of a timer of 100ms
;
USER_TIMER_1=100
;
While (USER_TIMER_1>0)
;
Endwhile
Symbol
USER_TIMER_1
USER_TIMER_2
USER_TIMER_3
USER_TIMER_4
USER_TIMER_5
USER_TIMER_6
USER_TIMER_7
USER_TIMER_8
Comment
User timer 1 (for PLC)
User timer 2 (for PLC)
User timer 3 (for PLC)
User timer 4 (for PLC)
User timer 5 (for PLC)
User timer 6 (for PLC)
User timer 7 (for PLC)
User timer 8 (for PLC)
Status
; test if a status is false : If (CS_SPND_AT_SPEED=0)
; test if a status is true : If (CS_SPND_AT_SPEED!=0)
Symbol
;; CS_MACHINE_LOCK
;; CS_RESET
CS_SINGLE_BLOCK
CS_OPT_STOP
CS_BLOCK_DELETE
;; CS_CLNT_FLOOD
;; CS_CLNT_MIST
;; CS_JOG_PLUS
;; CS_JOG_MINUS
;; CS_JOG_STOP
;; CS_JOG_RETURN
;; CS_HOME
;; CS_CYCLE_START
;; CS_CYCLE_RESTART
;; CS_FEED_HOLD
;; CS_DRY_RUN
;; CS_SPND_CW
;; CS_SPND_CCW
;; CS_SPND_BRAKE
;; CS_SPND_NEUTRAL
;; CS_PRG_REWIND
;; CS_CHUCK_OPEN
;; CS_CHUCK_CLOSE
;; CS_CHUCK_OD_GRIP
;; CS_CHUCK_ID_GRIP
;; CS_TOOL_RELEASE
;; CS_TOOL_ENGAGE
CS_SPND_DETECT
CS_SPND_CSS
CS_SPND_AT_SPEED
CS_SPND_AT_ZERO
CS_SPND_FEED
26
Comment
Not used
Not used
Part program single block status
Part program optional stop status
Part program block delete status
Not used
Not used
Not used
Not used
Not used
Not used
Not used
Not used
Not used
Not used
Not used
Not used
Not used
Not used
Not used
Not used
Not used
Not used
Not used
Not used
Not used
Not used
Spindle speed detection status
Spindle constant surface speed status
Spindle at speed status
Spindle at zero speed status
Spindle feed per revolution status
Appendix A
Adv 400 Programming Manual
Buttons
; test if a button is not pressed
; test if a button is pressed
Symbol
;; PB_MACHINE_LOCK
PB_RESET
PB_SINGLE_BLOCK
PB_OPT_STOP
PB_BLOCK_DELETE
;; PB_CLNT_FLOOD
;; PB_CLNT_MIST
PB_JOG_PLUS
PB_JOG_MINUS
;; PB_JOG_STOP
;; PB_JOG_RETURN
PB_HOME
PB_CYCLE_START
;;PB_CYCLE_RESTART
PB_FEED_HOLD
;; PB_DRY_RUN
;; PB_SPND_CW
;; PB_SPND_CCW
;; PB_SPND_BRAKE
;; PB_SPND_NEUTRAL
;; PB_PRG_REWIND
;; PB_CHUCK_OPEN
;; PB_CHUCK_CLOSE
;;PB_CHUCK_OD_GRIP
;;PB_CHUCK_ID_GRIP
;; PB_TOOL_RELEASE
;; PB_TOOL_ENGAGE
PB_AUTO_MODE
PB_MANUAL_MODE
PB_MDI_MODE
PB_HOME_MODE
;; PB_FREE_TWO
: If (PB_AUTO_MODE=0)
: If (PB_AUTO_MODE!=0)
Comment
Not used
Reset button
Single block button
Optional stop button
Block delete button
Not used
Not used
Jog Plus button
Jog Minus button
Not used
Not used
Home mode button
Cycle start button
Not used
Feed Hold button
Not used
Not used
Not used
Not used
Not used
Not used
Not used
Not used
Not used
Not used
Not used
Not used
Auto mode button
Manual mode button
MDI mode button
Home mode button
Not used
Read a Number Value — Buttons
Symbol
; VS_SPINDLE_RPM_M
VS_SPINDLE_MAX_RPM_M
VS_SPINDLE_MAX_LIM_M
VS_SPINDLE_CMD_RPM_M
VS_SPINDLE_ACT_RPM_M
; VS_SPINDLE_COUNTS_REV_M
; VS_SPINDLE_CSS_M
; VS_SPINDLE_CSS_UNITS_M
VS_SPINDLE_OVERRIDE_M
; VS_HAND_STEP_M
VS_FEED_OVERRIDE_M
VS_RAPID_OVERRIDE_M
Appendix A
Comment
Not used
Maximum spindle speed
Maximum spindle speed
Actual commanded spindle speed
Actual spindle speed
Not used
Not used
Not used
Actual spindle override
Not used
Actual feed override
Actual rapid override
27
Adv 400 Integration Manual
Mode, Axis Selected
; test the actual mode
: If (S_MODE_M=SEL_MODE_AUTO)
; test the axis selected : If (S_AXIS_M=SEL_AXIS_X)
; test of spindle status : If (S_SPND_M=SEL_SPND_CCW)
Symbol
Comment
S_MODE_M
SEL_MODE_AUTO
SEL_MODE_MANUAL
SEL_MODE_MDI
SEL_MODE_HOME
Symbol
Tell actual mode
Auto mode
Manual mode
MDI mode
Home mode
Comment
S_AXIS_M
SEL_AXIS_X
SEL_AXIS_Y
SEL_AXIS_Z
SEL_AXIS_A
SEL_AXIS_B
Tell axis selected
X axis selected
Y axis selected
Z axis selected
A/U axis selected
B/V axis selected
Symbol
Comment
S_SPND_M
SEL_SPND_CCW
SEL_SPND_OFF
SEL_SPND_CW
;SEL_SPND_ORIENT1
;SEL_SPND_ORIENT2
;SEL_SPND_LOCK
Tell spindle status
Spindle turning CCW
Spindle stopped
Spindle turning CW
Not used
Not used
Not used
Read a Number Value — Mode, Axis Selected
Symbol
VS_TOOL_NUM_M
VS_X_ABS_M
VS_Y_ABS_M
VS_Z_ABS_M
28
Comment
Give active tool and correction numbers
Give actual offset (G54-G59 + G52 + Tool) of X axis
Give actual offset (G54-G59 + G52 + Tool) of Y axis
Give actual offset (G54-G59 + G52 + Tool) of Z axis
Appendix A
Adv 400 Programming Manual
Read a Number Value or Bit — Mode, Axis Selected
To write DAC5 or DAC6 from –512 to +512 for –10V to +10V
Symbol
SERVO_COUNTER_M
HANDLE5IN_COUNT_M
HANDLE6IN_COUNT_M
ADC1_M
ADC2_M
ADC3_M
ADC4_M
; TIMER_1_M
; TIMER_2_M
; TIMER_3_M
; TIMER_4_M
; FEED_HOLD_M
PROG_RUNNING_M
HOME_COMPLETE_1_M
HOME_COMPLETE_2_M
HOME_COMPLETE_3_M
HOME_COMPLETE_4_M
HOME_COMPLETE_5_M
; PROG_STEPPING_M
; MOTION_MODE_M
IN_POSITION_M
; CONT_MOTION_REQ_M
; SPINDLE_MOTOR_VEL
; SPINDLE_CSS_POS
; SPINDLE_DAC_M
; SPINDLE_ENA_M
; ABORT_DECEL_1_M
; ABORT_DECEL_2_M
; ABORT_DECEL_3_M
DES_VEL_ZERO_1_M
DES_VEL_ZERO_2_M
DES_VEL_ZERO_3_M
DES_VEL_ZERO_4_M
DES_VEL_ZERO_5_M
POS_BIAS1_M
POS_BIAS2_M
POS_BIAS3_M
POS_BIAS4_M
POS_BIAS5_M
PLUS_LIMIT1_M
PLUS_LIMIT2_M
PLUS_LIMIT3_M
PLUS_LIMIT4_M
PLUS_LIMIT5_M
NEG_LIMIT1_M
NEG_LIMIT2_M
NEG_LIMIT3_M
NEG_LIMIT4_M
NEG_LIMIT5_M
Appendix A
Comment
Servo counter incremented by one every Servo inter.
Encoder 5 value (if motor 5 not used)
Encoder 6 value
ADC1 value (feed potentiometer)
ADC2 value
ADC3 value
ADC4 value
Program running bit
Axis 1 (X) home completed bit
Axis 2 (Y) home completed bit
Axis 3 (Z) home completed bit
Axis 4 (A/U) home completed bit
Axis 5 (B/V) home completed bit
Coordinate system one all axis in position
Axis 1 (X) desired velocity zero bit
Axis 2 (Y) desired velocity zero bit
Axis 3 (Z) desired velocity zero bit
Axis 4 (A/U) desired velocity zero bit
Axis 5 (B/V) desired velocity zero bit
Axis 1 (X) position bias (G92 offset)
Axis 2 (Y) position bias (G92 offset)
Axis 3 (Z) position bias (G92 offset)
Axis 4 (A/U) position bias (G92 offset)
Axis 5 (B/V) position bias (G92 offset)
Axis 1 (X) plus limit active (hard or soft)
Axis 2 (Y) plus limit active (hard or soft)
Axis 3 (Z) plus limit active (hard or soft)
Axis 4 (A/U) plus limit active (hard or soft)
Axis 5 (B/V) plus limit active (hard or soft)
Axis 1 (X) minus limit active (hard or soft)
Axis 2 (Y) minus limit active (hard or soft)
Axis 3 (Z) minus limit active (hard or soft)
Axis 4 (A/U) minus limit active (hard or soft)
Axis 5 (B/V) minus limit active (hard or soft)
29
Adv 400 Integration Manual
MOT1_ACTUAL_POS_M
MOT2_ACTUAL_POS_M
MOT3_ACTUAL_POS_M
MOT4_ACTUAL_POS_M
MOT5_ACTUAL_POS_M
CS1_PROG_FEED_M
HOME_FLAG_1
HOME_FLAG_2
HOME_FLAG_3
HOME_FLAG_4
HOME_FLAG_5
HWLIM1_PLUS
HWLIM1_MINUS
HWLIM2_PLUS
HWLIM2_MINUS
HWLIM3_PLUS
HWLIM3_MINUS
HWLIM4_PLUS
HWLIM4_MINUS
HWLIM5_PLUS
HWLIM5_MINUS
USER_FLAG_1
USER_FLAG_2
USER_FLAG_3
USER_FLAG_4
USER_FLAG_5
AMP1_ENA_M
AMP2_ENA_M
AMP3_ENA_M
AMP4_ENA_M
AMP5_ENA_M
FATAL_FE1_M
FATAL_FE2_M
FATAL_FE3_M
FATAL_FE4_M
FATAL_FE5_M
AMP_FAUT1_M
AMP_FAUT2_M
AMP_FAUT3_M
AMP_FAUT4_M
AMP_FAUT5_M
DAC5_OUT
DAC6_OUT
30
Axis 1 (X) actual position
Axis 2 (Y) actual position
Axis 3 (Z) actual position
Axis 4 (A/U) actual position
Axis 5 (B/V) actual position
Axis 1 (X) home flag hardware input
Axis 2 (Y) home flag hardware input
Axis 3 (Z) home flag hardware input
Axis 4 (A/U) home flag hardware input
Axis 5 (B/V) home flag hardware input
Axis 1 (X) limit plus hardware input
Axis 1 (X) limit minus hardware input
Axis 2 (Y) limit plus hardware input
Axis 2 (Y) limit minus hardware input
Axis 3 (Z) limit plus hardware input
Axis 3 (Z) limit minus hardware input
Axis 4 (A/U) limit plus hardware input
Axis 4 (A/U) limit minus hardware input
Axis 5 (B/V) limit plus hardware input
Axis 5 (B/V) limit minus hardware input
Axis 1 (X) User flag hardware input
Axis 2 (Y) User flag hardware input
Axis 3 (Z) User flag hardware input
Axis 4 (A/U) User flag hardware input
Axis 5 (B/V) User flag hardware input
Axis 1 (X) Amplifier enable hardware output
Axis 2 (Y) Amplifier enable hardware output
Axis 3 (Z) Amplifier enable hardware output
Axis 4 (A/U) Amplifier enable hardware output
Axis 5 (B/V) Amplifier enable hardware output
Axis 1 (X) Fatal following error bit
Axis 2 (Y) Fatal following error bit
Axis 3 (Z) Fatal following error bit
Axis 4 (A/U) Fatal following error bit
Axis 5 (B/V) Fatal following error bit
Axis 1 (X) Amplifier fault hardware input
Axis 2 (Y) Amplifier fault hardware input
Axis 3 (Z) Amplifier fault hardware input
Axis 4 (A/U) Amplifier fault hardware input
Axis 5 (B/V) Amplifier fault hardware input
DAC 5 output value (when motor 5 not used)
DAC 6 output value
Appendix A
Adv 400 Programming Manual
P-Variables
Symbol
TOOL_GEOMWEAR
TOOL_NUMBER
VERSION_NUMBER
DATE_VERSION
HOME_COMPLETE_P
DES_VEL_ZERO_P
USER_DISABLE_OVRD
AMP_ARE_ENABLED_P
LATHE_MACHINE
MMI_OK
TOOL_PREVIOUS
HAVE_TOOL_CHANGER
S1_IN_C_AXE
TOOL_IN_SPINDLE
MAGAZINE_POSITION
INCH_MODE
Comment
Actual tool correction number
Actual tool number
PLC program version number
PLC program date
All axis Home completed bit
All axis Desired Velocity zero bit
User bit to force feed to 100% (disable feed pot.)
All axis amplifier are enabled
0 = Milling machine 1 = Lathe machine
HMI running
Actual (previous) tool active when tool change called
Tool changer option checked in setting page 4
Spindle used in C axe
Tool in spindle from tool changer initialization page
Magazine positive from tool changer initialization page
Metric or Inch mode
Constants
Appendix A
Symbol
Comment
TRUE
FALSE
ON
OFF
Value True
Value False
Value ON
Value OFF
31
Adv 400 Integration Manual
32
Appendix A
Adv 400 Programming Manual
APPENDIX B: HARD DISK CNC ARCHITECTURE
This section explains the structure of directories and files in the flash memory (DOM) of the Adv 400.
This structure is needed for the Adv 400 HMI software.
Disk Architecture for Adv 400 CNC:
•
•
•
•
•
•
•
•
The main directory is called Hard Disk. It is the root of the disk and it contains the Windows CE files.
The sub-directory NCDATA contains the part programs (G-codes programs) created by the user.
These files are managed automatically by the HMI while creations/modifications of part programs.
They have a .NC extension.
The sub-directory CNC contains sub-directories (01, 02, PLC and SUB) and some files needed by the
HMI. The Adv400.exe file is the HMI software.
•
The Mill.dl and Lathe.dl files are the system PLCs sent to the controller at power-up.
•
If a Milling machine was selected in the Machine Setting Page 4, the Mill.dl file is used. If a
Lathe machine was selected, the Lathe.dl file is used.
The HMI software creates all other files in this CNC sub-directory during the setting of the machine.
The sub-directory 01 contains the error file and the text file used for first language. The first
language is English by default.
The sub-directory 02 contains the error file and the text file used for the second language. The second
language can be any language. The machine integrator must make the translations.
The sub-directory PLC will contain the PLC15 to 24 the machine integrator may create. A PLC25
exists already and can be modified by the machine integrator. It is used to put extra conditions on the
use of the Adv 400 buttons (e.g., Cycle Start button, JOG button, etc.). In addition, this sub-directory
contains the different symbol tables (files Sys.sbl, Errors.sbl and Plc.sbl) containing all symbol names
used for PLC or Sub-program development.
The sub-directory SUB will contain the sub-programs 2-997 the user may create. The sub-program
998 and 999 are present already and must be completed by the machine integrator. Program 998 is
used for integration of a tool changer. Program 999 is used to create custom M-codes.
Appendix B
33