1
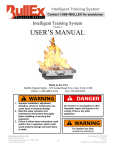
Bullex Digital Fire Simulator BASIC SETUP INSTRUCTIONS Target Age : 7 and up How it works: The Bullex Digital Fire Simulator uses LEDs to mimic the look of a fire and senses lasers projected from the fire extinguishers provided. As a demonstrator, you can choose the level and the class of fire. The LEVEL affects how flames will grow/diminish and the CLASS controls how the fire will flare-up. With the right technique, the fire will eventually go out. Aiming too high or aiming too low will not put the fire out. Warnings : Read the User’s Manual before use. Two people are required to setup the Bullex. Children must ALWAYS be supervised when around the Bullex. Make sure the controller cable and battery charger cable don’t become tripping hazards. Beware of the risk of electric shock. ALWAYS pick up the monitor by the handles - nothing else. Make sure EVERYONE knows these are make believe fire extinguishers. Lasers don’t extinguish REAL fires. The Bullex system should be treated with care to ensure the long life of the unit. Setting up the Bullex 1. Plug the female end of the black power cable into the rear of the Bullex base unit. 2. Plug the male end of the black power cable into a power outlet from the wall. 3. Plug the male end of the controller cable into the appro priate connector on the rear of the LCD monitor. 4. Plug the female end of the controller cable into the con nector on the handheld controller. This should turn the system on. 5. Once plugged in, the handheld controller will read “Bulls Eye v1 By BullEx, Inc.” 6. One second after Bullex is powered up, the handheld controller will display, “Read Manual Before Use”. Please do! 7. Press and release the START/STOP button once. 8. Make sure to select “Laser” mode by adjusting the top black knob to the desired setting and then press and release the START/STOP button once. If “Water’’ mode is selected, the system will not work. 9. To change between “Laser” and “Water’’modes, simply unplug the controller cable from the handheld controller, wait two seconds, plug in again and start over. 11. The Handheld Controller will now display “Ready” . 12. Mark the ground 6 feet away from the Bullex panel. The laser extinguisher sizes are to be used 6 feet from the panel. 13. Insert the pin into the handle of the extinguishers. 14. Press the power switch under the hose, on the side of the extinguisher. You will see the green light turn on. 15. The laser will emit when the user pulls the pin, removes the nozzle from extinguisher clip, and then depresses the handle. The 10 kg extinguisher’s discharge time is longer than the 4 kg extinguisher’s. 16. To reset the extinguisher, simply replace the hose into the hose clip. 17. After 45 seconds without use, the extinguisher will chirp and turn itself off. 18. Please recharge the batteries every 3 hours of use. 19. Do not leave the extinguishers or LCD screen plugged in for more than 12 hours if they’re not being used. Setup Smart tip Make sure to recharge the batteries of the fire extinguishers before and after your activity. planfarmsafety.ca jemengage.ca Bullex Digital Fire Simulator ACTIVITY INSTRUCTIONS Changing the Class of Fire Simulation The Bullex can simulate different classes of fire including Class A, B, and C fires. The fires all respond differently to allow for a more thorough training session. For example, Class A fires respond by “gradually extinguishing” with the proper application of extinguishant, while Class B fires are easily “knocked down” by a single sweep, but are quick to “flare up” if enough extinguishant is not discharged. Use the MODE selector knob to select the class of fire to simulate. Select “A” for Class A “Common Combustibles” fires. Select “B” for Class B “Flammable Liquids” fires. Select “C” for Class C “Electrical” fires. Return Address : Canadian Agricultural Safety Association 3325-C Pembina Highway Winnipeg, MB R3V 0A2 Canada For more information visit : www.planfarmsafety.ca or call 1-877-452-2272 Conducting the Demonstration: When the system is set up according to the instructions on the back of this page, press the START/STOP button on the handheld controller. You will hear an initial warning beep and the flames will begin to grow. Instruct one of the participants to slowly approach the 6 ft (1.8 metres) marker. Using the PASS Technique, the participant should Pull the extinguisher pin, Aim the hose at the base of the fire, Squeeze the handle, and Sweep the extinguisher. If the participant properly aims and sweeps the extinguisher, the flames will eventually go out and the participant’s time will be displayed on the handheld controler The key is to aim and sweep to extinguish the flames. Flames have the ability to rekindle or flare-up if not fully extinguished. The extinguishers are designed to provide the participant with a discharge time that corresponds to an actual dry chemical extinguisher of the same size. As with actual extiguishers, Bullex training extinguishers are most effective during the first several seconds of discharge. The Bullex system can also detect the distance of the participant from the flame. If the participant gets too close to the digital fire, the flames may be more difficult to extinguish. This simulates the sometimes dangerous effects of getting “on top of ” a fire, and helps reinforce the behavior of remaining at a proper distance from a fire. The digital flames can be stopped at any time by pressing and releasing the start/stop button. If the trainer presses and holds the START/STOP button, the system will begin a flame “Die Down” mode and the digital flames will gradually diminish. If the button is released, the flames will “Grow Back. Allowing you to manually provide additional challenges for the participant. Shuting Down Included in the Kit : Shut down the Bullex by pressing the START/STOP button. Unplug all connections. Return the hose of the laser extinguisher to the hose clip. Packing Up Make sure the system has been properly shut down. Find a buddy to help pack. Fold in the feet of the LCD monitor as much as possible. ALWAYS pick up the monitor by the handles - nothing else. Pack the extinguisher in the case provided. Be careful not to drop any of the units during transportation. 10 kg fire extinguisher knock or LCD monitor 12 volt yellow plugin for LCD monitor Black charger pack for LCD montor Handheld controler Black cord for handheld controler 4 kg and 10 kg fire extinguishers Two fire extinguisher battery chargers Two black cases Instructions