1
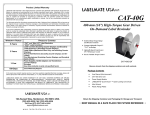
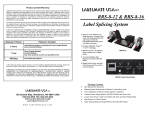
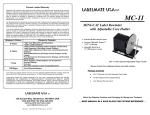
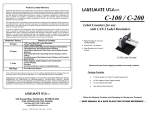
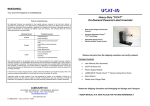
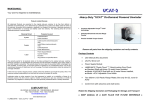
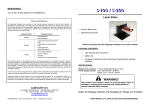
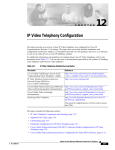
Product Limited Warranty
Labelmate USA warrants to the original end-user customer that Labelmate USA products will be free from
defects in materials and workmanship for the duration described herein below. Labelmate USA’s Limited
Warranty covers only those defects that arise as a result of normal use of the products and does not cover
any other problems, including those that arise as a result of: (i) improper maintenance or modification; (ii)
parts or supplies not provided or supported by Labelmate USA; (iii) operation outside the products’
specifications; or (iv) unauthorized repair, modification or misuse. Use of any unauthorized accessory or
attachment will void coverage.
The Warranty period for all products commences the date of shipment from Labelmate USA and accrues to
the original end-user customer. Warranty coverage is non-transferable and terminates immediately upon
rental, resale or any other change in ownership. Original purchase documentation should be retained for
Warranty coverage verification.
In the event Labelmate USA substantiates, during the applicable Warranty period, a defect in any product
which is covered by Labelmate USA’s Warranty, Labelmate USA shall repair or replace the product, at
Labelmate USA’s option. Labelmate USA retains sole discretion to determine whether or not a product is
defective. In no event shall Labelmate USA have any obligation to repair or replace until the customer
returns the defective product to Labelmate USA. The customer assumes any and all responsibility and
liability associated with transportation of products for service under this Warranty.
WARRANTY PERIOD
PRODUCTS COVERED
5-Years
“CAT” and “Mini CAT” Label Rewinders
“UCAT” Label Unwinders
Label Counters (Excluding Counter Displays and Encoders)
Label Dispensers (Excluding Counter Displays)
Label Slitters (Mechanical Parts Only, and excluding Counter
Displays)
Reel-to-Reel Machines (Excluding Counter Displays and Encoders)
Print Mechanisms (Excluding Counter Displays and Encoders)
Quick-Chucks
Power Supplies, AC/DC Adaptors and Transformers
Counter Displays
Encoders
Any other products or parts not specified herein
3-Years
1-Year
180-Days
LABELMATE USA LLC
MC-10A
MINI-CAT
Universal Label Rewinder
• Switched Bi-Directional Control
• Constant Adjustable Torque™
"CAT" technology
• Adjustable Speed Control up to
15" (380-mm) per second
MC-10A with Optional
Outer Flange
Out-of-Warranty Repairs
In the event your product requires service or you have questions regarding Warranty coverage, please call
toll-free (877) 833-7149 inside the United States, or +1 (702) 435-8535 outside the United States.
LABELMATE MAKES NO OTHER WARRANTY OF ANY KIND, WHETHER EXPRESS OR IMPLIED
WARRANTIES OR CONDITIONS OF MERCHANTABILITY, SATISFACTORY QUALITY, AND/OR
FITNESS FOR A PARTICULAR PURPOSE. NO OTHER PERSON, AGENT, DEALER OR RESELLER IS
AUTHORIZED TO GIVE ANY WARRANTIES ON BEHALF OF LABELMATE. ANY OBLIGATION TO
WARRANTY OTHER THAN THAT SPECIFICALLY ADDRESSED HEREIN IS EXPRESSLY DISCLAIMED.
LABELMATE USA LLC
12A Sunset Way, Henderson, NV 89014 USA
Remove all parts from shipping container and verify contents.
Package Contents
•
MC-10A Rewinder Unit
•
AC-DC Adapter (Power Supply Module)
•
Plastic Bag with 3-metal Fins, 6-Screws for the Fins, 6Lockwashers, 1-hook-shaped Bail (BAIL-MC10A), and the
User Manual (this document).
Retain the Shipping Container and Packaging for Storage and Transport.
(702) 435-8535 FAX (702) 435-8536
Toll-Free (877) 833-7149 in USA!
[email protected]
www.labelmateusa.com
• KEEP MANUAL IN A SAFE PLACE FOR FUTURE REFERENCE •
PRODUCT SPECIFICATIONS
REWINDING LABELS
Max. Label Width:
4.5 inches (115-mm)
Max. Label Roll Weight: 8.5 lbs. (3.9 kg)
Max. Label Roll Size:
Up to 8.5 inches (215-mm)
Speed:
Adjustable up to 15-ips (380-mm/sec)
Start/Stop:
ON/OFF/ON Direction Switch
Power Supply:
Voltage-selectable AC/DC Adapter 120vac 60Hz
UL & CSA Listed (230vac 50Hz available)
Rewind Directly “On-Shaft” (“coreless”)
1. Slide the hook-shaped metal Bail onto the MC-10A Shaft. The straight end
goes into the hole in the plastic Flange Plate. The curved end fits into the small
hole in the outer end of the Shaft.
2. Insert the label web under the Bail and turn the Rewind Shaft by hand to secure
the labels.
3. Place the MC-10A (ON/OFF/ON Direction) Switch to the ON position in the
desired direction of operation, left or right.
4. Start the Printer and observe that the labels are being rewound correctly. You
can adjust the VOLT CHANGE SW Slide Switch on the Power Supply Module
to provide more or less rewind force.
5. When rewinding is finished, place the MC-10A (ON/OFF/ON) Switch in the OFF
(0) position.
6. To remove the labels, first pull out the hook-shaped Bail from the center of the
label roll. Then remove the labels.
WARNING
This product is for indoor use only.
Not for use in wet locations.
Unplug unit before removing waste material or
performing any cleaning or maintenance services.
INITIAL SET-UP
1. Place the MC-10A with the Rewind Shaft perpendicular to the web of
the labels to be rewound, and near where the labels come out of the
printer. The MC-10A is bi-directional, so can be operated in either
direction.
2. Verify that the (ON/OFF/ON Direction) Switch on the rear of the Unit is
in the OFF (0) position.
3. Set the VOLT CHANGE SW Slide Switch on the AC/DC Adapter to the
“4.5” position as an initial setting.
4. Insert the Power Cord into the Power Jack on the rear of the MC-10A.
5. Plug the AC/DC Adapter into a suitable electrical outlet. It can be left
plugged in at all times.
6. The MC-10A has a combination Power and Direction (ON/OFF/ON
Direction) Switch on the Rear Panel. See photo below. The Center
Position of the Switch is "OFF" (0). To make the Rewinder run to the
right (looking from the rear of the Rewinder), press the Power / Direction
Switch in the direction of the right arrow. To make the Rewinder run to
the left, press the Power / Direction Switch in the direction of the left
arrow.
Rewind on a 3-inch Cardboard Core
1. To use a 3-inch cardboard core, install the 3-stainless steel Fins onto the
Rewind Shaft of the MC-10A using the 6-screws provided. DO NOT USE THE
LOCKWASHERS. For narrow cores, orient the Fins next to the plastic Flange.
Slide an empty cardboard core over the Fins and up against the plastic Flange
Plate.
2. NOTE: IF CORE IS TOO LOOSE, remove only one of the Fins and place a
supplied #8 split ring Lock washer on each screw BETWEEN THE VANE AND
THE SHAFT. Retighten the Screws securely. Add Lock-washers under
additional Fins if necessary.
3. Use a piece of masking tape to secure the label web to the cardboard.
4. Place the MC-10A (ON/OFF/ON Direction) Switch to the ON position in the
desired direction of operation, left or right.
5. Start the printer and observe that the labels are being rewound correctly. You
can adjust the VOLT CHANGE SW Slide Switch on the Power Supply Module
to provide more or less rewind torque.
6. When rewinding is finished, place the MC-10A (ON/OFF/ON Direction) Switch
in the OFF (0) position.
7. Slide the cardboard core and the labels off the MC-10A.
UNWIND FEATURE
To use the MC-10A as an Unwinder, place the VOLT CHANGE SW to the “1.5”
position and place the (ON/OFF/ON Direction) Switch in the reverse direction to
provide resistance to the roll of labels you wish to unwind.
MAINTENANCE
The MC-10A Rewinder requires no maintenance.