1
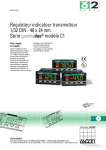
EN-V-R ENVI Series Network Video Recording Software VITEK • Highly Flexible and Scalable with 16, 32, 64, 128 channel versions • Live view, playback, record, backup from multiple network cameras and video servers. • Scheduled, Event-driven, Motion Detection & Forced recording • Supports up to 160TB total hard drive space with multiple drives • Control Pan/Tilt/Zoom functions Remotely • Supports up to 3 MegaPixel cameras • H.264 & MJPEG & MPEG-4 Streaming • Microsoft Windows Based Software • Multi vendor integration with Arecont, Axis, ACTi, Vivotek, and many more! Specifications & installation procedure subject to change without notice. Visit www.vitekcctv.com for the most current information available. ENVI Series EN-V-R 1. 2. 3. 4. 5. 6. 7. 8. 9. Table of Contents About EN-V-R.......................................................................................................................................................................... 4 Requirements for Installation ......................................................................................................................................... 5 2.1. EN-V-R Versions ....................................................................................................................................................... 5 2.2. System Requirement for PC ................................................................................................................................. 5 Installing EN-V-R ................................................................................................................................................................... 7 Uninstalling EN-V-R ............................................................................................................................................................. 9 4.1. Closing Active EN-V-R ............................................................................................................................................ 9 4.2. Executing Uninstaller .......................................................................................................................................... 10 Components of EN-V-R Program ................................................................................................................................. 12 5.1. EN-V-R Configurator ............................................................................................................................................ 12 5.2. EN-V-R Service ....................................................................................................................................................... 12 5.3. EN-V-R Controller ................................................................................................................................................. 12 5.4. EN-V-R System Tray Menu ................................................................................................................................ 12 Starting EN-V-R Configurator ....................................................................................................................................... 12 Quick Start Guide ............................................................................................................................................................... 15 7.1. EN-V-RConfigurator User Interface ............................................................................................................... 15 7.2. Searching for IP Devices ..................................................................................................................................... 16 7.3. Registering IP Devices ......................................................................................................................................... 17 7.4. Viewing Live Video ............................................................................................................................................... 19 7.5. Recording Video..................................................................................................................................................... 21 7.6. Overall ........................................................................................................................................................................ 25 ENVI Smart Player ............................................................................................................................................................. 25 8.1. Introduction............................................................................................................................................................. 25 8.2. Key Features ............................................................................................................................................................ 25 8.3. System Requirement for PC .............................................................................................................................. 25 EN-V-R Configuration ....................................................................................................................................................... 26 9.1. System, Network Configuration ...................................................................................................................... 26 9.1.1. Configuring System name ..................................................................................................................... 26 9.1.2. System, Network Configuration - Admin password .................................................................. 27 9.1.3. System, Network Configuration - Access Control ....................................................................... 27 9.1.4. System, Network Configuration - HTTP Port................................................................................ 28 9.1.5. System, Network Configuration–IP CCTV-DNS............................................................................ 29 9.2. IP-CCTVDNS Registration .................................................................................................................................. 29 9.3. IP-Device Registration......................................................................................................................................... 35 9.3.1. IP-Device Registration (Manual) ....................................................................................................... 36 9.3.2. IP-DeviceRegistration (Automatic) .................................................................................................. 38 9.3.3. IP-DeviceModification ............................................................................................................................ 40 1 ENVI Series EN-V-R 9.3.4. IP-DeviceDeletion .................................................................................................................................... 41 9.3.5. IP-DeviceHomepage ................................................................................................................................ 41 9.4. Camera Management ........................................................................................................................................... 41 9.4.1. Configure Camera Name and Information ..................................................................................... 43 9.4.2. Camera Resolution, Quality.................................................................................................................. 44 Configure Camera Recording Condition ......................................................................................................... 45 9.4.3. Alarm, Event Configuration ................................................................................................................. 48 9.5. User Management ................................................................................................................................................. 49 User Registration ...................................................................................................................................................... 50 9.5.1. User Modification ..................................................................................................................................... 51 9.5.2. UserDeletion............................................................................................................................................... 51 9.6. Disk Setup ................................................................................................................................................................. 51 9.6.1. Disk Setup.................................................................................................................................................... 51 9.6.2. Disk Quota Modification and Deletion............................................................................................. 52 9.6.3. Disk Mode Change.................................................................................................................................... 53 9.7. Utilities ...................................................................................................................................................................... 55 9.7.1. Email accountConfiguration ................................................................................................................ 56 9.7.2. About Program .......................................................................................................................................... 56 10. Using EN-V-R Controller ........................................................................................................................................ 57 11. Connecting to EN-V-R ............................................................................................................................................. 58 11.1. PC with EN-V-R installed ............................................................................................................................... 58 11.2. PC without EN-V-R ........................................................................................................................................... 59 12. ENVI Smart Player .................................................................................................................................................... 60 12.1. Introduction ........................................................................................................................................................ 60 12.2. Key Features ....................................................................................................................................................... 60 12.3. System Requirement for PC .......................................................................................................................... 60 12.4. Installing and Uninstalling ............................................................................................................................ 61 12.4.1. Installing Smart Player......................................................................................................................... 61 12.4.2. Manual Installation ................................................................................................................................ 61 12.5. Uninstalling Smart Player .............................................................................................................................. 63 12.5.1. Uninstalling on Program Menu ......................................................................................................... 63 12.6. Configuring & Viewing Player...................................................................................................................... 73 12.6.1. Main Window View ............................................................................................................................... 74 12.7. Connecting to NVR Player ............................................................................................................................. 74 12.7.1. Creating a Group ..................................................................................................................................... 75 12.8. Searching Video ................................................................................................................................................. 76 12.8.1. Daily Search .............................................................................................................................................. 77 12.8.2. Search Mode ............................................................................................................................................. 77 12.8.3. GO to Time Position ............................................................................................................................... 77 12.8.4. Condition Search Mode ........................................................................................................................ 78 2 ENVI Series EN-V-R 12.8.5. Advanced Search Mode ........................................................................................................................ 78 12.9. Video Playback Controls ................................................................................................................................ 80 12.10. Extra Features ................................................................................................................................................ 80 12.10.1. Window Control ................................................................................................................................... 80 12.10.2. Recording Period ................................................................................................................................. 81 12.10.3. Backup ...................................................................................................................................................... 81 12.10.4. Snapshot .................................................................................................................................................. 83 12.10.5. Print ........................................................................................................................................................... 84 12.10.6. Ratio Display .......................................................................................................................................... 84 3 ENVI Series EN-V-R 1. About EN-V-R This User's manual explains how to set up EN-V-R software in your PC. EN-V-R is the integrated system software for video security applications, which runs on Microsoft’s Windows-based computers.Some of major features of EN-V-Rare listed below. Provides main features of Live view, Playback, Record, Backup Event, motion, scheduled recording & conditional playback Motion-JPEG, MPEG-4, H.264 stream supported Supports various vendors’ IP devices for recording and retransmission of video, voice, and data Supports Megapixel cameras (up to 3M pixels) Users can connect to EN-V-R on web browsers to access live video, voice, and data, and search for video to play back Up to 128 channels supported for cameras Note: A product-key is required for proper installation of EN-V-R program. You can still install EN-V-R in 10-working day trial mode if a product-key is not entered during installation. ENVI Series EN-V-R 2. Requirements for Installation 2.1. EN-V-R Versions EN-V-R is supplied to customers in different versions for each appropriate application. Users will need to choose the right versions for their needs. Retransmiss ion Streams Supp ort Other vendo rs Max Recodi ng Capaci ty 128 256 Yes 160 TB N/A 16 64 No 160 TB 9 N/A 9 36 Yes 160 TB 16 N/A 16 64 Yes 160 TB 32 N/A 32 128 Yes 160 TB 64 N/A 64 256 Yes 160 TB 128 N/A 128 512 Yes 160 TB Version Types Regist er Chann els Time Restricti on Recordi ng Channe ls Evaluatio n 128 10 days Free 16 Multiven dor 2.2. System Requirement for PC For best quality and performance, your computer needs to meet the minimum requirement as below. Microsoft Windows XP Pro, Windows 7 Pro or higher, Video Card(256MB Ram, 1024x768 or higher) Compression # of Channels 16 Channels H.264 32 channels 64 channels 128 Resolution Recommended CPU Memory D1 Intel Core2Duo T5200 1.0GB 720P Intel Core2Duo E7550 1.5GB 1080P Intel Core i-5-2500S 2.0GB Intel Core2Duo E6700 1.0GB 720P Intel Core i-5 750 2.0GB 1080P Intel Core i-7 970 4.0GB D1 Intel Core i-5 661 1.5GB 720P Intel Xeon X5660 4.0GB 1080P Intel Xeon X5680 Dual CPU 4.0GB D1 Intel Xeon X5507 Dual CPU 4.0GB D1 5 ENVI Series EN-V-R channels 16 Channels 32 channels Motion-JPEG 64 channels 128 channels 720P Intel Xeon X5670 Dual CPU 6.0GB 1080P Intel Xeon E7-4850 Dual CPU 6.0GB Intel Core2Duo E6700 1.0GB 720P Intel Core i-5 460M 1.5GB 1080P Intel Core i-5 -2500 3.0GB Intel Core i-5 661 1.5GB 720P Intel Core i-5 -2400S 2.0GB 1080P Intel Xeon X5590 Dual CPU 4.0GB Intel Core i-5 -2500 3.0GB 720P Intel Xeon X5550 Dual CPU 4.0GB 1080P Intel Xeon E7-4850 Dual CPU 6.0GB D1 Intel Xeon X5687 Dual CPU 4.0GB 720P Intel Xeon X5690 Dual CPU 6.0GB 1080P Intel Xeon E7-4850 Dual CPU 6.0GB D1 D1 D1 Note: Above PC requirements are based on running EN-V-R program only. If other software needs to run along with EN-V-R at the same time, you may need additional performance level for your PC. It is recommended to check actual performance and disk capacity before selecting a PC for EN-VR. 6 ENVI Series EN-V-R 3. Installing EN-V-R After downloading/ EN-V-R, double click EN-V-R Setup icon to start installation.The following window will be displayed on the screen. Before installing, check the version of the EN-V-R which is shown on the window. You may encounter following security warning. To continue installing the program, click Yes button. Then select language for installation. You will see the below window, then click Next button. The default location for installation is C:\Program Files\Vitek. It is recommended to install in this folder, but if you want to change it to another location, click Browse button to choose a proper path. Now click Install button. 7 ENVI Series EN-V-R You will see the progress of copying install files to the hard drive as shown below, once is completed click on NEXT. Click Finish to complete the Installation. After installing EN-V-R programfor the first time, it needs to be configured before use, so it automatically executes the configuration program, which is called EN-V-R Configurator. 8 ENVI Series EN-V-R Enter the proper Admin Password. The default password is root. The following screen will be displayed, click OK to continue. Now you will see EN-V-R Configurator window on the screen. To use EN-V-R Configurator program, please see Section 6Starting EN-V-R Configurator section. 4. Uninstalling EN-V-R 4.1. Closing Active EN-V-R If you need to uninstall EN-V-R, first you need to make sure EN-V-R program is not running on your computer by checking the system icon. As you see on the following picture, you can easily find out if EN-V-R service running. 9 ENVI Series EN-V-R If EN-V-R is not running, you can go ahead to next section of uninstalling the program. If EN-V-R is active, place the mouse pointer on the EN-V-R icon, and click the right mouse button. You’ll see the pop-up menu. Select Exit. Then the EN-V-R icon disappears, and you know that EN-V-R is no longer running on your computer. Now you’re ready to start uninstalling. 4.2. Executing Uninstaller To start uninstalling, click Start >All Programs >Vitek>EN-V-R>Uninstall. When the following window appears, clickYES button. The progress of uninstalling is displayed. 10 ENVI Series EN-V-R After all the install files are deleted, the following window will be displayed. Click OK button on the following window to complete the uninstalling. 11 ENVI Series EN-V-R 5. Components of EN-V-R Program EN-V-Rconsists of three programs, (EN-V-R Service, EN-V-RConfigurator, and EN-V-R Controller). 5.1. EN-V-R Configurator EN-V-R Configurator is used to set up various parameters and conditions of EN-V-R Service. Users can register, modify, and delete IP devices and users with this program. It also provides configuring tools for recording, alarm, event, and other functions. 5.2. EN-V-R Service EN-V-R program is a Windows service and runs in a background mode, which means that it is not shown on the Windows desktop. EN-V-R receives video, audio, alarm, even data from IP devices over the network, and then it can record the data on the hard drive or retransmit to users. Starting, terminating and restarting of EN-V-R program can be done by using EN-V-RConfiguration or EN-V-R Controller. 5.3. EN-V-R Controller EN-V-R Controller program is used to start or stop the EN-V-R service. 5.4. EN-V-R System Tray Menu After you finish installing EN-V-R, you will find the EN-V-R icon on the system tray, which is located right, bottom part of the Windows desktop. Move the cursor overthe icon, and right click. The following pop-up menu will shown. You can open EN-V-R Configurator or EN-V-R Controller program from this menu, or you can go to the Home page of the EN-V-R program for live view or playback. 6. Starting EN-V-R Configurator EN-V-R Configurator starts automatically right after installation is completed, you may also click the EN-V-R icon on the Windows desktop. 12 ENVI Series EN-V-R If EN-V-R program is already running in background, you may also select the EN-V-R icon on the system tray by clicking right button of the mouse. You may encounter the security window as below. Click Yes button to continue. Once EN-V-R program starts, a log-in window will be displayed as below. Type in the proper admin password and click the OK button. The default admin / password is root. Now EN-V-R Configurator window will be displayed. 13 ENVI Series EN-V-R 14 ENVI Series EN-V-R 7. Quick Start Guide EN-V-R is full-functioning Network Video Recorder software that runs on your PC. When started for the first time after EN-V-R is installed, there is no IP devices connected. To add a camera to the EN-V-R you must register the camera first.Then EN-V-R knows what IP devices they are, how to connect to them, and how to use them. That way, you will be able to control EN-V-R for recording, live viewing, etc. 7.1. EN-V-RConfigurator User Interface The following picture shows the main window of EN-V-R Configurator program. Items Descriptions A Main Toolbar Frequently-used menu items are shown on this toolbar. B Configuration Tree Menu Configurable categories are shown as a tree menu style. C Configuration Menu Description Descriptions and usages of the selected category are displayed. D Sub-Menu Toolbar Menu items for the selected category are shown. (Note: This toolbar is displayed only when any top menu item is selected from the tree menu.) E Device List IP cameras Information F Apply Button Click this button to apply the changed values. G Close Button Click this button to exit EN-V-R Configurator program. 15 ENVI Series EN-V-R 7.2. Searching for IP Devices Click the first button on the Main Toolbar. You are now given a choice to register the IP devices by “search and register or manually”. To make it easy, choose Search and register IP-Device in this stage, and click Next button. On the following window,click Scan button. 16 ENVI Series EN-V-R The searching for IP devices is started. As the detected IP devices are being listed. Wait until searching is finished. If you click Cancel button in the middle of searching, the EN-V-R will retain only the IP devices found until that moment. 7.3. Registering IP Devices After scanning is finished, you have a list of IP devices found on your network. Next step is registering them. Double click the IP device you want to registeror you may highlight it and then click Register button. In this example, the first one is chosen to register. The next window shows up and it’s for entering the network parameters and camera resolutions of the IP device you’ve chosen. You may need to enter the Login ID and Password here. Click Save to finish registering it. 17 ENVI Series EN-V-R Click on Save after configuring IP device (camera) Click Apply after registering one or more IP devices (cameras).The image below represents the configurator with multiple IP devices registered. 18 ENVI Series EN-V-R After clicking Apply, the program will ask you to confirm it. Clickthan click OK EN-V-R service is being stopped momentarily, and then it will start running again. 7.4. Viewing Live Video Once the network and cameras are set up, it is necessary to check if EN-V-R is functioning by viewing the live video from those devices. To view the EN-V-R home page, click the Go NVR Home button on the main toolbar. Below is an image of the EN-V-R home page. 19 ENVI Series EN-V-R Click Live View on top right part of the window to see the live video from registered IP devices (cameras) If this is the first time you are usingVitekLive View feature, the web browser may ask you to allow installing of an ActiveX program. Click Install to continue. In some cases there is no response from the web browser, you may need to install the ActiveX manually by clickingManualDownload. When you see the following security warning, click Install. 20 ENVI Series EN-V-R 7.5. Recording Video The essential feature of EN-V-R is recording the video from IP devices. Before starting the recording, it is required to prepare the hard drive of your PC where EN-V-R program is running. Click Disk Quota on the Tree Menu. The hard drive will be ready to start recording video after the progress window is done counting drives. It shows the target drive, total capacity, available size and quota for recording. You are able to change the setting by clicking the first icon of the sub-menu Toolbar. You are able to change the setting by clicking the first icon of the sub-menu Toolbar. Possible Maximum Quota (the available of free space on your HDD) Possible Minimum Quota (the minimum amount required) Set Quota (desired amount of HDD to be use for recording) 21 ENVI Series EN-V-R To set up the recording feature, select an IP device from the Tree Menu on the left pane. The device information will be shown on the right pane. Click the button for recording configuration on the sub-menu Toolbar as shown below. Now you will see Configure Recording Condition window as below. 22 ENVI Series EN-V-R The recording feature is already enabled and recording conditions are configured in default settings. In the example shown above, you can see that Camera 1 of Device 0 will record video only when motion is detected. ClickOK to use this Recording Conditioned. To change recording condition high light camera 1 under condition list (A) Select the type of Recording under Condition Mode (B) If schedule is recording is enabled, the schedule section will be available to configure (C) If Event is selected the event section will be available to configure (D) After conditions are selected click Apply to condition(E) After apply to condition click Apply to camera(F) Click OK when done. 23 ENVI Series EN-V-R Now that the configuration is done, you need to start the EN-V-R service program. Select Start > All Programs >Vitek>smart NVR>Smart NVR controller. You will find the EN-V-R icon on the system tray, which is located right, bottom part of the Windows desktop. Move the cursor over the icon, and right click. The following pop-up menu will show. You can open EN-V-R Configurator or EN-V-R Controller program from this menu, or you can go to the Home page of the EN-V-R program for live view or playback. 24 ENVI Series EN-V-R You can find it out from this window that the service is running at that moment. If not, click Start Service button to make it run. Once EN-V-R service is started, the video sent from the configured camera will be recorded according to the recording condition. 7.6. Overall This chapter, Quick Start Guide, is intended to give you the clear understanding of how EN-V-R can be used. If you have come through up to this stage, you are now pretty much aware of how ENV-R works in principal. EN-V-R has a lot more features and functionalities than you learned from this chapter. For further detail of using EN-V-R effectively, please read the following chapters thoroughly. 8. ENVI Smart Player 8.1. Introduction Smart Player is and ActiveX program for Internet Explorer Web browser, which enables users to search and play back recorded video in Network Video Servers and other devices with built-in recording capabilities. The Searching and playback of video is refined by condition, schedule, and event. Smart Player can be run in SmartNVR network video software for PC and network cameras equipped with microSD card as well as standalone NVR (Network Video Recorder) devices. 8.2. Key Features Transformingrecorded video into AVI, FJP&IDX, formats Supports Printing of video Playing Audio from recorded video Group Searching from recorded video SupportsFull Screen Mode 8.3. System Requirement for PC For best quality and performance, your computer needs to meet the minimum requirement. OS: Microsoft Windows XP Pro, Windows 7 Pro, Windows 8 PC CPU: Intel Pentium 4, 2 GHz (Dual-Core or faster is recommended) System RAM: 2GB Video Card: 256MB Ram, 1024x768 Resolution 100 Mbps Network Adaptor 25 ENVI Series EN-V-R 9. EN-V-R Configuration A 9.1. System, Network Configuration General system and network properties of EN-V-R program can be set up in this section. To start, select System, Network Configuration from the menu list. 9.1.1. Items Descriptions System Name Setting Enter the system's name. Set up Admin password Modify the password for Admin. Access Control Configure the access privileges of users. HTTP Port Assign Assign an HTTP Port for EN-V-R Service. Configure IP-CCTV DNS Configure IP-CCTV DNS for EN-V-R Service Configuring System name To name the system, click configuring system name, the following window will be displayed. Change the name as desired. 26 ENVI Series EN-V-R Items Descriptions System name Type in a System name. OK Click this button to apply the entered System Name. Cancel Click this button to discard the configured System name. 9.1.2. System, Network Configuration - Admin password To assign Password for the admin, click System, Network Configuration on the tree menu. Click configure admin password Items Descriptions Current password Enter the Current password. New password Enter a new password to use. Confirm Password Enter the new password again to confirm. OK Click this button to apply the changed password. Cancel Click this button to discard the change. 9.1.3. System, Network Configuration - Access Control To configure User Access Control, click System, Network Configuration on the tree menu. Click configure access control 27 ENVI Series EN-V-R Items Descriptions Full Access Set Full Access for the user. Anyone can connect to the EN-V-R without authentication, and be allowed live view, audio, PTZ, playback. Limited Access Set Limited Access for the user. Only the users with proper permission to the camera can access it. OK Click this button to apply the change. Cancel Click this button to discard the change. 9.1.4. System, Network Configuration - HTTP Port To configure HTTP port to use, click System, Network Configuration on the tree menu. Then click Change HTTP Port Items Descriptions HTTP Port Enter a HTTP Port to use in the EN-V-R Service. (Default is 80) OK Click this button to apply the changed HTTP port number. Cancel Click this button to apply discard the changed port number. Note: If a firewall is enabled in your Windows, you should set the above HTTP port number to be allowed in your computer. 28 ENVI Series EN-V-R 9.1.5. System, Network Configuration–IP CCTV-DNS To configure IP CCTV-DNS, click System, Network Configuration on the tree menu. Click Configure IP-CCTV-DNS Items Descriptions Service Set to use IP CCTV DNS or not. DNS Server IP Vitek IP CCTV DNS address already entered. Go Server Directs to Vitek IP CCTV DNS server MAC MAC address of EN-V-R already entered Product Key Product Key of EN-V-R already entered External Port Enter a external HTTP Port to use for IP CCTV DNS service. (Default is 80) Register verify Click to test the connection with IP CCTV DNS server after setting is done in IP CCTV DNS server. OK Click this button to apply the changed IP CCTVV DNS settings. Cancel Click this button to apply discard the changed IP CCTV DNS settings 9.2. IP-CCTVDNS Registration To register your camera / server please visit http://www.ipcctvdns.com 29 ENVI Series EN-V-R If this is your first visit your need to Sign Upif you abide by the Agreement, click on “I Agree” than on the NEXT button as shown below. Fill out the requested information as shown below and click on Apply. 30 ENVI Series EN-V-R The following screen will confirm that your Membership has been completed successfully, that click OK. You will be brought back to the main page of the IPCCTVDNS website; in this case you need to Login with the information previously created. To register your first product, click on Product Registrationas shown below. 31 ENVI Series EN-V-R Enter the requested information (The name of your camera, the Mac Address and product Key) as shown below. Note that the Mac Address and the product Key will be available under the Network Configuration>> IP-CCTV DNS setupin thecamera menu. Please see image below. A window will pop up confirming that your product has been registered successfully, click on OK. You will be directed to the Product List page where you will be able to see your recent camera registration. 32 ENVI Series EN-V-R By clicking the Detail Information tab you will be allow edit DDNS Host Name Click Edit to change the DDNS Host Name. Type in desired host name than click Apply. A window will pop up asking if you really want to apply the new configurations, to continue click OK. 33 ENVI Series EN-V-R A window will pop up confirming that the product information has been modified successfully, click OK. Click under Product List to view your changes Your camera with the new DDNS Host name will be displayed. Your camera is now registered and ready for use. 34 ENVI Series EN-V-R 9.3. IP-Device Registration You will see how to manage IP devices in this section, which includes registering, modifying, and deleting IP devices. To start managing IP devices, select IP-Device, Camera Management from the menu list. Items Descriptions A IP-Device Manual Registration Register IP-Devices manually by users. B IP-Device Automatic Registration Scan and register IP-Devices automatically by the program. C IP-Device Modification Modify the information of registered IPDevices. D IP-Device Deletion Delete IP-Devices previously registered. E IP-Device Homepage Go to the homepage of the IP-Device. 35 ENVI Series EN-V-R 9.3.1. IP-Device Registration (Manual) To manually register an IP-Device, click IP-Device, Camera Management on the tree menu. Click Register IP device manually. A Item Description IP-Device ID Select the IP-Device ID to register. 36 ENVI Series EN-V-R Select the Vendor name of the IP-Device to register. Click the pull-down list, and choose a proper vendor name from the list. B Vendor Select the total number of channels (streams) the IP device has. Click the pull-down list, and choose proper one from the list. C Model D Name Type in the name of the IP-Device. E IP Address Type in the IP Address to use with the IP-Device. IPCCTVDNS or URL addresses are also supported. (If Input IP Address Range box is checked, then the starting address of the range will be selected.) F Input IP Address Range Enter the last IP address of the range. G Getting Information from IP-Device Check this box if the information from IP-Device needs to be acquired. H VS Module ID Select the VS Module ID. Enter 0 for non-Vitek IP devices. Vitek products can be set to 0 to 15, and default is 0. I HTTP Port Enter the HTTP Port to use with the IP-Device. (Default is 80) 37 ENVI Series EN-V-R J RTSP Port Enter the RTSP Port (Default is 554) K Login ID Type in the Login ID to use. (Default is root) L Login Password Type in the Login Password to use for the Login ID. (Default is root) M Confirm Password Type in the same password to confirm. (Default is root) O Checking available resolution Select the Video Resolution for the device. Not used any more, all resolution is done at camera level P Checking available PTZ camera Checkboxes to choose if PTZ is supported on the IP device. Q OK Click this button to apply the configured values. R Cancel Click this button to discard the configured values. 9.3.2. IP-DeviceRegistration (Automatic) To register an IP-Device by automatic scanning, click IP-Device, Camera Management on the tree menu. Then Click Scan available IP devices and register 38 ENVI Series EN-V-R Items Descriptions A IP-Device list This list shows the IP devices found during the scan process. If you need to select multiple IP devices at the same time, drag your mouse over the devices or keep pressing CTRL or SHIFT key while clicking the IP devices. B Clear Clear the scanned IP Devices from the list. C Scan Start scanning for IP Devices on the network. D Go Home Go to the home page of the IP device selected from the list. E Register Go to the registration window for the IP Device selected. F Close Cancel the registration of the IP device and exit the window. When you click the Register button after selecting more than one IP devices on the scanned device list, the following window will be displayed. You can register those IP devices to your EN-VR in this window. Items Descriptions A Resolution Description Descriptions of the image resolution modes in the IPDevice list.(R1, R2, R3, R4, R5, R6, R7, R8, R9, R10) B PTZ Install Description Descriptions of the PTZ numbers in the IP-Device list. (P1, P2, P3, P4) C IP-Device list IP-Device list to select from. 39 ENVI Series EN-V-R D Apply to All Click this button to copy the information of a selected IP-Device to all other devices.(Only Model, Login ID, and Login Password will be copied.) E Register Click this button to confirm and save the registered IPDevice added. F Cancel Click this button to cancel IP-Device registration. 9.3.3. P-DeviceModification To modify an IP-Device registration, Click Modify registered IP-Device Items Descriptions A IP-Device ID IP-Device ID is displayed. (not allowed to modify) B Vendor Select the Vendor of the device. C Model Select how many channels the device support. D Name Change the Name as required. E IP Address Enter the IP Address to use with the selected device. F Input IP Address Range (not allowed to modify) G Getting Information from (not allowed to modify) 40 I ENVI Series EN-V-R IP-Device H VS Module ID Select the VS Module ID. Enter 0 for non-Vitek IP devices. Vitek products can be set to 0 to 15, and default is 0. I HTTP Port Enter the HTTP Port to use with the IP-Device. (Default is 80) J RTSP Port Enter the RTSP Port (Default is 554) K Login ID Type in the Login ID to use. (Default is root) L Login Password Type in the Login Password to use for the Login ID. (Default is root) M Confirm Password Type in the same password to confirm. (Default is root) N Checking available resolution Select the Video Resolution for the device.. Not used any more, all resolution is done at camera level O Checking available PTZ camera Checkboxes to choose if PTZ is supported. P OK Click this button to apply the changed values. Q Cancel Click this button to discard the changed values. 9.3.4. IP-DeviceDeletion To delete a registered IP-Device, click IP-Device, Camera Management on the tree menu in the left pane. Then select an IP device to be deleted from the list. Click Remove IP-Device registration 9.3.5. IP-DeviceHomepage To go to the home page of an IP-Device, click the IP-Device, Camera Management on the tree menu. Then select the IP device. Click Go to IP-Device homepage 9.4. Camera Management In this section, you will see how to manage the device information, video resolutions, recording configuration, and alarm event configuration. Firstly, select a camera name under IP-Device, Camera Management on the tree menu. When you select IP-Device, Camera Management on the tree menu, it will show Camera Management sub-menu. You can configure cameras here.The following picture shows when you selected an IP-device in the tree menu. The sub-menu toolbar changes accordingly to your selection. 41 ENVI Series EN-V-R Items Descriptions A Camera Information Configure Information of the selected camera. B Resolution and Quality Choose the resolution and quality of cameras. C Recording Conditions Set up recording conditions. D Alarm and Map service settings Configure Alarm and Map service functions. 42 ENVI Series EN-V-R 9.4.1. Configure Camera Name and Information From the configuration list, select a camera to be assigned with a name. Then click on camera1 or camera 2, then click Configure Camera Name and Information The below image will be display, enter name (F), then click Apply to camera(H), then OK. 43 ENVI Series EN-V-R Items Descriptions A,B,C,D Camera Selection Select one or more cameras for name assignment by clicking buttons. E Unselect All Clear the device list which shows the selected cameras. F Name Type in a camera name. G Clear Clear the camera name field. H Apply to Camera Apply the changed camera name to the system. I OK Click this button to confirm the change and close the window. J Cancel Click this button to cancel the change and close the window. 9.4.2. Camera Resolution, Quality To configure a camera's resolution and video quality,select a camera to configure and click Configure camera resolution and quality 44 ENVI Series EN-V-R The below image will be display, adjust resolution (F), then click Apply to camera(H), then OK Items Descriptions A,B,C,D Camera Selection Select one or more cameras by clicking buttons. E Unselect All Clear the device list which shows the selected cameras. F Resolution Select the video resolution. G Quality Select the video quality. H Apply to Camera Apply the selected video resolution and quality to the system. I Go Home Go to the homepage of the product. J Close Close and exit the window. Configure Camera Recording Condition To configure recording conditions, select a camera to configure,then click Configure camera recording condition 45 ENVI Series EN-V-R The below image is where you adjust the recording parameters. Item Description A,B,C,D Camera Selection Select one or more cameras by clicking buttons. E Unselect All Clear the device list which shows the selected cameras. F Condition List Define the condition for recording to be started. G Condition to use Decide whether to use the defined condition or not. H Condition Mode Select the condition mode for recording. I Scheduling Set up the schedule for recording. J Event setup Set up the event to initiate recording. K Apply to Condition Apply the configured schedule and event data to condition list. 46 ENVI Series EN-V-R L Apply to Camera Apply the condition to camera. M Enable Recording Service Enable this to activate the recording. When this is not enabled, it won’t be saved if a recording condition is set. N Pre Alarm Images Select pre-alarm images. O Pre Alarm Speed Select pre-alarm speed. P Post Alarm Images Select post-alarm images. Q Post Alarm Speed Select post-alarm speed R OK Click this button to confirm the change and exit the window. S Cancel Click this button to cancel the all the changed made in this session. To setup recording, first click camera under Condition list(F).This enables the Configure Recording Condition (G, H, I and J) Now you can select your condition mode(H). Under condition mode you have four choices always, schedule, event and schedule and event. (in this example we will record by event only) Schedule: To schedule time and date of recording (I). (when schedule is activated in condition mode) Event: Here you can select Alarm or Motion (J) After completing your conditions selection click Apply to condition(K) After apply to condition click Apply to camera (L), then click OK(R) 47 ENVI Series EN-V-R When that screen closes click Apply 9.4.3. Alarm, Event Configuration To configure the Alarm and Event features, select a camera to configure, and then click Configure alarm, map service Item Description 48 ENVI Series EN-V-R A,B,C,D Camera Selection Select one or more cameras by clicking buttons. E Unselect All Clear the device list which shows the selected cameras. F Alarm Service Setup Put check marks on alarm types to use. G Event Service Setup Put check marks on event types to use. H Apply to Camera Click this button to apply the changes to the camera. I OK Click this button to confirm the change and exit the window. J Cancel Click this button to cancel the Alarm, Event configuration. 9.5. User Management In this section, you will see how to manage user information. To start managing users, select User Management from the tree menu. Items Descriptions A User Registration Register new users to the system. B User Modification Change the information of existing users. 49 ENVI Series EN-V-R C User Deletion Remove the account of existing users. User Registration To register a new user, click the 1'st button on the tool bar in the sub-menu toolbar. 50 ENVI Series EN-V-R Items Descriptions A User ID Enter a new User ID to register. B Password Enter the Password for the new user. C Confirm password Enter the same Password for confirmation. D Name Enter the name of the new user to be registered. Choose the level of permission for System resource access. E System resource access permission All channels access: Viewing all cameras, Alarm, PTZ, Audio, Searching General access: Viewing all cameras only No access: An user account without any access to cameras Selective access: Access to only selected cameras and privileges. F System Permission Eight different modules can be set. The setup can be made on Module, camera, alarm, PTZ, Audio, and Search respectively. Enabling each module gives accesspermission to it. G OK Click this button to apply the registration of the new user. H Cancel Click this button to cancel the registration process. 9.5.1. User Modification To modify a user's information, selectthe users name than click the second button on the submenutoolbar.The User Registration window will come up on the screen, make the necessary changes and click OK . 9.5.2. UserDeletion To delete an existing user, selectthe user name than click Remove Registered user account another screen will pop up confirming to proceed with deletion, click OK to proceed . 9.6. Disk Setup 9.6.1. Disk Setup When you click Disk Setup on the tree menu, it will show two sub-menu items. One is Disk Quota, and the other is Disk Mode. The following window shows the Disk Quota mode. 51 ENVI Series EN-V-R 9.6.2. Items Descriptions A Disk Quota Setup Define the HDD for recording and configure the size of quota. B Disk Quota Deletion Delete previously assigned disk quota. Disk Quota Modification and Deletion When EN-V-R program is installed, all local drives are assigned as recording devices. To modify the disk quota for recording, click Disk Quota on the menu list, and select the drive to be modified. Now to change the disk quota size, click the 1'st button on the sub tool bar, or double click the drive on the device list. The following window will be displayed. Item Description A Use HDD Decide whether this HDD is to be used. B Possible Maximum Quota Display Possible maximum quota on this HDD. 52 ENVI Series EN-V-R C Possible Minimum Quota Display Possible minimum quota on this HDD. D Set Quota Enter the desired size of disk quota for recording. E OK Click to apply the configured disk quota. F Cancel Click to cancel the disk quota configuration. To delete the existing disk quota, click Disk Quota on the menu list. Then choose the drive quota to be deleted. Click the 2'nd button on the sub tool bar. 9.6.3. Disk Mode Change To modify the disk circulation style, click Disk Setup, and then Disk Mode on the tree menu. Items Descriptions 53 ENVI Series EN-V-R A Disk Circulation Setup Configure disk circulation type. B Disk Usage Report Setup Configure email address for reporting. Click the Disk Circulation in the list. The following window will be displayed. Item Description A Use circulation Select this if disk circulation will be used. B Not use circulation Select this if disk circulation will not be used. C Use expired duration Decide whether the expiration will be used for recording. (This can be se when Use circulation is selected.) D Expired days Enter the date when the recorded content will be expired. E OK Click this to apply the Disk circulation settings. F Cancel Click this to Cancel Disk circulation settings. Configure email reporting for disk usage To modify the email notification behavior for hard disk recording. 54 ENVI Series EN-V-R Item Description A Use to report HDD usage Choose whether to Enable or Disable the report service. B Report HDD space When disk circulation is not used, select the HDD size when it will be reported by email. C Periodic report Define when Periodic reports will be sent. D OK Click to apply the Email report settings. E Cancel Click to cancel Email report configuration. 9.7. Utilities Select Utilities from the tree menu. You can perform two functions in Utility category, one is Email Account Configuration and the other is About Program. Items Descriptions A Email Account Configure email account. B About Program Display the information of EN-V-R program. 55 ENVI Series EN-V-R 9.7.1. Email accountConfiguration Once an email account is registered here, you can receive email notification from EN-V-R program upon a certain event. To configurean email accounts, click Utilities on the tree menu. Click Configure email account for mail service Item Description A Service Decide whether to report HDD usage by email or not. B SMTP server Enter the address of SMTP server for sending email. C Authentication Decide whether to use Authentication. D Email user id Enter the sender's id for email account. E Email user password Enter the password of the sender’s email account. F Sender email Enter the Sender's email address. G,H,I Recipient email #1,2,3 The email addresses of three Recipients to be notified. J Email subject Enter the title of the Email when it's sent. K OK Click to apply the Email account registration. L Cancel Click to cancel this configuration. 9.7.2. About Program To displays the information of this program on the screen, Click Information of this program. 56 ENVI Series EN-V-R Items Descriptions A About program Show the information about the EN-V-R running. B System Resource Displays the PC's system resource information. C OK Click this button to close the Window. 10. Using EN-V-R Controller To open EN-V-R controller,click Start >All Programs>Vitek>SMART NVR Controller. Smart NRV controller will be on the lower right part of the system tray. Then right click the icon a sub-window will display, click on Open Smart NVR Controller. The following window will open 57 ENVI Series EN-V-R Items Descriptions A Current Service State Shows whether EN-V-R Service is running or stopped. B Start Service Click this button to start EN-V-R Service when it’s stopped. C Stop Service Click this button to stop EN-V-R Service when it’s running. D Refresh Refresh the Screen. E Go Home Go to the EN-V-R’s built-in webpage. F Close Close the EN-V-R Controller window. 11. Connecting to EN-V-R 11.1. PC with EN-V-R installed You can connect to EN-V-R in various ways as explained below. Click Go Home in EN-V-R Configurator EN-V-R Controller window. Click Go Home from the pop-up menu on the System Tray. In Internet Explorer, enter the IP address of the computer that EN-V-R is running on. In case that the HTTP port for EN-V-R is not 80 (default), the port number should be entered together with the IP address. (the example below assumes HTTP port of 7777) 58 ENVI Series EN-V-R After you successfully connecting to the EN-V-R homepage, you will see the following window. Items Descriptions A Home Go to EN-V-R’s homepage. B Live View Click this button to execute Live View program. You can use various features such as live view, audio transmission, PTZ control, unconditional recording, etc. C Player Click this button to search, record, and back up the video data sent from IP devices registered in EN-V-R. 11.2. PC without EN-V-R If your PC doesn’t have EN-V-R program installed, type in the IP address of the PC where ENV-R is up and running. Note: For further details on how to use Live View program, please refer to ENVI Series Viewer User’s Manual. For Player, please refer to ENVI Series Player User’s Manual. 59 ENVI Series EN-V-R In case that the HTTP port for EN-V-R is not 80 (default), the port number should be entered together with the IP address. (the example below assumes HTTP port of 7777) 12. ENVI Smart Player 12.1. Introduction Smart Player is and ActiveX program for Internet Explorer Web browser, which enables users to search and play back recorded video in Network Video Servers and other devices with built-in recording capabilities. The Searching and playback of video is refined by condition, schedule, and event. Smart Player can be run in SmartNVR network video software for PC and network cameras equipped with microSD card as well as standalone NVR (Network Video Recorder) devices. 12.2. Key Features Transforming recorded video into AVI, FJP&IDX, formats Supports Printing of video Playing Audio from recorded video Group Searching from recorded video Supports Full Screen Mode 12.3. System Requirement for PC For best quality and performance, your computer needs to meet the minimum requirement. OS: Microsoft Windows XP Pro, Windows 7 Pro, Windows 8 PC CPU: Intel Pentium 4, 2 GHz (Dual-Core or faster is recommended) System RAM: 2GB Video Card: 256MB Ram, 1024x768 Resolution 100 Mbps Network Adaptor 60 ENVI Series EN-V-R 12.4. Installing and Uninstalling 12.4.1. Installing Smart Player Connect to the Vitek Camera / Server / NVR on Internet Explorer, and click Player on the main page. If you're using Windows XP Service Pack 2 or later, it may asked you to install ActiveX click the massage bar than click on the Install ActiveX control… After the installation is successfully completed, Smart Player window will be displayed. 12.4.2. Manual Installation When an Internet connection is not available or having some difficulties, you can manually download and install the Smart Player program file prior to setup, visit http://www.vitekcctv.com/Downloads.asp. You may also install from the provided CD. Execute the downloaded file, and you will see the Smart Player Setup Wizard window. Click Run to start installing. 61 ENVI Series EN-V-R The following window will appear. Click Next. The following window will be displayed. Click Install After installation is successfully completed, the following window will be displayed. Click Finish. 62 ENVI Series EN-V-R 12.5. Uninstalling Smart Player Before uninstalling, close all the Internet Explorer windows. 12.5.1. Uninstalling on Program Menu Click Uninstall and the following window will be shown. Click the Yes button. Live View & Play Back To live view and play back your cameras, go to Start menu, All Programs, Vitek Folder, Click on Smart NVR Controller, as shown below. 63 ENVI Series EN-V-R Look for icon on right side of taskbar as shown below (windows XP and windows 8 might show it different). Right click icon. The following window will display. Click on Open Smart NVR Controller. Click on Start Service to run the program. Click on Go Home to view Smart Player Home Page 64 ENVI Series EN-V-R Click on Live View The following screen will be display were you can configure your live view. Server Control Bar Allows you to view cameras / servers that are registered in the system. Toggle On/Off 65 ENVI Series EN-V-R Group Control Bar In order to view video, cameras must be assigned to a group, in this section you create groups with cameras you want to view. Create Group In order to create a group in Group Control Bar, right click on Group, another window will appear then select New. The following window will be displayed. Type in the group name, check “Circulation” to allow sequencing, input dwell time for “Circulation” and click OK. 66 ENVI Series EN-V-R A new group with the assigned name will be created as shown below. To add cameras to the new group, drag from server control bar and drop on newly created group. You can create multiple groups and add multiple cameras in each group. PTZ control Bar In this section you will be able to control PTZ’s connected to the system. 67 ENVI Series EN-V-R Audio Control Bar Controls Speaker and Mic volume. When audio is available click on Connect and adjust speaker and mic levels, when done click Disconnect. Full/Normal Screen Select full screen as seen below, to return to normal press Esc on your keyboard. 68 ENVI Series EN-V-R Group Circulation Start sequencing between groups. 69 ENVI Series EN-V-R Layout settings You can change the screen layout between 1,2,4, etc. Image in Original Size This allows for digital zoom. 70 ENVI Series EN-V-R Draw Image by Maintaining Aspect Ratio Maintains the aspect ratio of the camera Draw Image by Filling the Screen 71 ENVI Series EN-V-R Enhanced Draw Mode On/Off. Enhance image for a better reproduction. 72 ENVI Series EN-V-R About Smart Viewer You can see the status of the Smart Viewer 12.6. Configuring & Viewing Player From the Home Screen click on Player 73 ENVI Series EN-V-R 12.6.1. Main Window View Note: The appearance of Smart Player window may vary depending on version and type of Vitek device you’re using. This user’s manual is based on general display screen. Server Control Bar A Allows you to view cameras / servers that are registered in the system. Playback Control Bar C You can compose a new group by dragging & dropping servers, modules, and cameras into a group. Grouping provides search function of recorded video from cameras. Users can use this bar for functions such as forward/reverse play, previous frame, next frame, pause, stop, playback speed. Control Tool Bar D Users can change search mode between calendar, condition, and data. It also provides additional features such as backup and snapshot. Time Line Control Bar E Display screen F Search condition (calendar, condition, and data) can be refined in this bar. Group Control Bar B This screen shows multiple numbers of recorded videos. 12.7. Connecting to NVR Player In order to playback video, cameras must be assigned to a Group, in this section you create groups with cameras you want to playback. Playback directly from cameras with SD card installed will have “Group” automatically created and the camera assigned to that “Group” 74 ENVI Series EN-V-R 12.7.1. Creating a Group In order to generate a group in Group Control Bar, right click on Group, another window will appear then select New. The following window will be displayed. Type in the group name and click OK. 75 ENVI Series EN-V-R A new group with the assigned name will be created as shown below. To add a camera to the new group, drag and drop from the server tree to the newly created group. 12.8. Searching Video Make sure you have recorded video on the calendar (recorded video shows in red). There are three choices in searching recorded video - Day Search, Condition Search, and Data Search. Make sure that Camera / Server Connection and Creating Group have been performed before you search recorded video. To search and playback video, Smart Player requires one or more groups to exist. If a search is executed on the basis of a selected group, a search will be performed on all the cameras in that group. If a search is executed on the basis of a single camera, the search will be performed only from that camera. 76 ENVI Series EN-V-R For example, if you select a group and start searching; the search from that group will be displayed If you only select “Brian-Camera 1”, the searching will be performed only on the video from that. 12.8.1. Daily Search Select date from calendar than select time from the time bar. 12.8.2. Search Mode By clicking a date in red on the calendar, the time frame recorded is shown. 12.8.3. GO to Time Position To go to specific time click on “Go to time position” than input time and click search. 77 ENVI Series EN-V-R 12.8.4. Condition Search Mode In this mode, you can search for video on the basis of combination of 3 different conditions, which are Time, Motion, and Sensor. Initially only Time condition is available for searching, and you need to enter Advance Search mode to utilize Motion and Sensor state if necessary. Search Select time and date from beginning to end of search criteria. Then click Search. The following window will be displayed to inform you of the search progress. If any results are found, the video will start playing back right after searching is completed. 12.8.5. Advanced Search Mode In Advance Search Mode you can select which conditions to search from (Time, Event, etc) First, select Time checkbox, and choose the desired time frame (Start date and time ~ End date and time), and then click Add Condition button to add to Search Condition. 78 ENVI Series EN-V-R Now select Event checkbox, and choose Camera 1 from Motion, and then click Add Condition button to add to Search Condition. Next, select Event checkbox, choose Sensor 1, and then click Add Condition button to add the Sensor condition to Search Condition. Now that all the conditions have been configured, click Search button to start searching. Any video data which meets at least one of the conditions in Search Condition list will be shown as the results. 79 ENVI Series EN-V-R 12.9. Video Playback Controls Play Reverse Play Forward Pause Stop Back to Previous Frame Go to Next Frame Playback Speed Control Player Path Control (only for condition search mode) 12.10. Extra Features 12.10.1. Window Control Users can open or close control windows. 80 ENVI Series EN-V-R 12.10.2. Recording Period You can view the starting and ending date of a recorded channel. Record time is displayed as shown below. 12.10.3. Backup There are two backup formats IDX and AVI. .IDX Default video file format used by Vitek .AVI Video file format supported by Microsoft Windows When the Backup button is clicked, the following window is displayed as below. 81 ENVI Series EN-V-R Select Camera Backup Period Check the camera to backup. For AVI backup, only one camera is permitted. For FJP, IDX, multiple backup is allowed. Select the time frame (Start date and time ~ End date and time) to backup. Backup Type Select either AVI or FJP, IDX format. Backup Path Select the HDD path where the backup file will be saved. After selecting the parameters, click OK then the following window will display. After searching is finished, backup operation will start. When backup is completed, the following window will appear. Click OK button. 82 ENVI Series EN-V-R Note: For AVI file backup, only one camera is allowed. For IDX backup, multiple cameras are allowed. 12.10.4. Snapshot Choose the camera currently being played or paused, click Snapshot button. Then a snapshot file will be saved in a designated path. The below picture is a result of snapshot from the above window. 83 ENVI Series EN-V-R 12.10.5. Print Choose the camera currently being played or paused, then click Print button. Then the image of the selected camera will be sent to your default printer. 12.10.6. Ratio Display You have three options to view videos, which are Original, Ratio, and Stretch. 84 VITEK LIMITED PRODUCT WARRANTY VITEK products carry a three (3) year limited warranty. Digital recording and storage products are also warranted for 3 years except for the hard drives which carry their own independent factory warranty from the hard drive manufacturer. VITEK warrants to the purchaser that products manufactured by VITEK are free of any rightful claim of infringement or the like, and when used in the manner intended, will be free of defects in materials and workmanship for a period of three (3) years, or as otherwise stated above, from the date of purchase by the end user. This warranty is non-transferable and extends only to the original buyer or end user customer of a Vitek Authorized Reseller. “Alpha Series by VITEK” products carry a three (3) year limited warranty. All other factors of the standard VITEK warranty will apply as stated above. ** Three Year “Alpha Series by VITEK” Warranty effective September 1st 2010. “Alpha Series by VITEK” products purchased prior to September 1st 2010 carry a one (1) year warranty. ** Three Year Warranty on all products except Alpha Series became effective on April 1st 2009. Legacy Products purchased prior to April 1st 2009 carry a two (2) year warranty. This warranty shall not apply to repairs or replacements necessitated by any cause beyond the control of VITEK, including but not limited to, acts of nature, improper installation, excess moisture, misuse, lack of proper maintenance, accident, voltage fluctuations, or any unauthorized tampering, repairs or modifications. This warranty becomes VOID in the event of alteration, defacement, or removal of serial numbers. Within the first 6 months of purchase, VITEK will replace or credit any defective product at the request of the customer (subject to availability) with a new product that equals or exceeds the performance of the original product purchased. Within the first 6 months of purchase, at its sole discretion, VITEK may issue an advance replacement for a defective product; however, all related costs including, but not limited to shipping and/or delivery charges will be the responsibility of the customer. If upon return inspection a product is determined to be in good working order or shows evidence of misuse, the customer will be responsible for full payment of the original product purchased as well as the replacement product. Beyond the first 6 month period for the remainder of the warranty, VITEK’S responsibility shall be limited to repairing the defective product, including all necessary parts and related labor costs. At its sole discretion, VITEK may choose to either exchange a defective product or issue a merchandise credit towards future product purchases. Any replacement parts furnished in connection with this warranty shall be warranted for a period not to exceed the remaining balance of the original equipment warranty. A Return Authorization number or “RA” number must be obtained prior to the return of any item for repair, replacement, or credit. VITEK requires that this “RA” number be clearly printed on the outside of the shipping carton to avoid refusal of said shipment. The Return Authorization number expires after 30 days. Products returned after the 30 day period will be subject to refusal. Shipping charges, if any, must be prepaid. A copy of the bill of sale (or invoice of purchase), together with a complete written explanation of the problem must accompany all returns. Vitek makes no warranty or guarantee whatsoever with respect to products sold or purchased through unauthorized sales channels. Warranty support is available only if product is purchased through a Vitek Authorized Reseller. Class A Digital Device (industrial & commercial environment) This equipment has been tested and found to comply with the limits for a Class A digital device, pursuant to CE and FCC Rules. These limits are designed to provide reasonable protection against harmful interference when the equipment is operated in a commercial environment. This equipment generates, uses and can radiate radio frequency energy and, if not installed and used in accordance with the instruction manual, may cause harmful interference to radio communications. Operation of this equipment in a residential area is likely to cause harmful interference in which case the user will be required to correct the interference at his own expense. 28492 Constellation Road Valencia, ca 91355 WWW.VITEKCCTV.COM | 888-VITEK-70 Version 2 09/2013