1
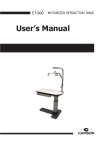
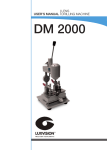
USER’S MANUAL RIMLESS KIT
RM 2500
Notification
Dear Users,
Thank you for your purchase of RM 2500 Rimless Kit. Please take time to read our
user’s manual carefully before use.
This guarantees you to make full use of this unit and prolongs the operation life of
this unit.
Precautions
If you have detected abnormal heat, smoke, noise or smell, immediately stop using
the product.
In the event of an abnormality, turn off the power and disconnect the power plug from
the power socket. Continuing to use the product may result in electric shock or fire.
Observe the instructions given below regarding the power cable:
•
•
•
•
•
•
Be sure to use the supplied or specified power cable.
Do not modify, forcibly bend, kink or pull the power cable.
When disconnecting the power cable from the AC outlet, be sure to hold the cable
by the plug.
Pulling the cable may cause wire breakage or shot circuit, resulting in fire or electric
shock.
Do not connect or disconnect the plug of the power cable to/from the AC outlet
using wet hands.
Doing so may result in electric shock.
Do not touch the product with wet hands while the power cable is connected
to the AC outlet.
Doing so may result in electric shock.
If the product will not be used for a long period, disconnect the power cable
from the power source. Leaving the cable connected to the power socket for
a prolonged period will consume electricity and may result in heating.
1. Assembly Tool For The
No Frames Spectacles
Specification
Welcome you select this tool, which is a perfect choice for you, it will bring you more
convenoence to you job, and processing quality and precision of your spectacles is
better. When you use it at first please you note as follows to help you master correctly
operating method.
1.
Begin with the client’s selected frame.
2.
Remove the model lenses from the frame.
3.
Position the model lens over the patient’s edged prescription lens. Make sure
that they are perfectly aligned.
4.
Secure both lenses using the clamp included in the RM-2500 kit (teflon padding
protects the lenses from damage).
5.
Perforate the prescription lens using the holes of the model lens as a guide.
6.
Smooth the edges of the drilled holes with the conical file included in the RM-2500
kit to prevent splintering when the screws are tightened.
7.
For frames that require notches secure the clamp in the block included in the
RM-2500 kit and use the file (also included) to create the notch.
8.
Mount the lenses in the frame and tighten the screws using the nut and screw
driver set included in the RM-2500 kit. A wide selection of blades are included
to accomodate different nut and screw sizes.
3
1.
2.
3.
4.
5.
6.
7.
8.
Please tell us if you have better advice in the course of your use, so that we will serve
you better after improve.
4
LUXVISION is not responsible or liable for indirect, special or consequential damages arising out of or in
connection with the use or performance of the product or damages with respect to any economic loss,
loss of property, loss of revenues or profits, loss of enjoyment or use, costs of removal or installation or
other consequential damages of whatsoever nature. Some states do not allow the exclusion or limitation
of incidental or consequential damages. Accordingly, the above limitation may not apply to you.
Every effort has been made to ensure the accuracy of this manual. However, LUXVISION, makes no
warranties with respect to the documentation and disclaims any implied warranties of merchantability
and fitness for a particular purpose. LUXVISION, Inc. shall not be liable for any errors or for incidental or
consequential damages in connection with the furnishing, performance, or use of this manual or the examples
herein. The information in this document is subject to change without notice.
5