1
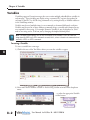
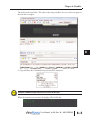
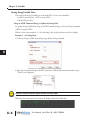
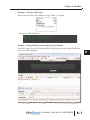
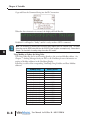
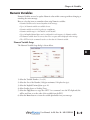
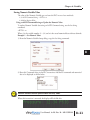
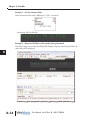
Chapter 8: Variables
Copy and Paste the Command String into the PLC instruction.
1
2
3
4
5
6
7
8
9
10
11
12
13
14
A
B
C
D
When the above instruction is executed, the display will look like this.
Variable #1 is still equal to “Smiley” until it is set by another <SETS> command.
NOTE: The conditions for executing the instructions above depend upon the controller used. The above
instructions are the SEND instruction from the CLICK PLC and are given as examples only. Please refer to
Chapter 7 for the details of sending strings from other PLC models.
Using Modbus to Update the String Value
The String Value may also be set by writing directly to the associated Modbus address. See
Chapter 7 - Sending Messages from your PLC to the ViewMarq for more information on
writing to Modbus addresses in the ViewMarq Display.
Following is a table of the corresponding ViewMarq String Variables and Slave Modbus
addresses.
8–8
ViewMarq String
Modbus Address
String Variable #1
String Variable #2
String Variable #3
String Variable #4
String Variable #5
String Variable #6
String Variable #7
String Variable #8
String Variable #9
String Variable #10
String Variable #11
String Variable #12
String Variable #13
String Variable #14
String Variable #15
String Variable #16
400200
400250
400300
400350
400400
400450
400500
400550
400600
400650
400700
400750
400800
400850
400900
400950
User Manual, 1st Ed. Rev. B – MD-USER-M