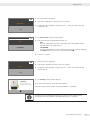
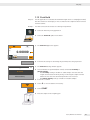
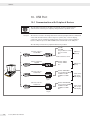
1
User Manual Secura®, Quintix® 26, 35, 65, 125, 125D, 225D, 324 Laboratory Balances 98648-020-26 Contents Contents 1. User Information . . . . . . . . . . . . . . . . . . . . . . . . . . . . . . . . . . . . . . . . . . 1.1 Warning/Danger Symbols . . . . . . . . . . . . . . . . . . . . . . . . . . . . . 1.2 Explanation of Symbols . . . . . . . . . . . . . . . . . . . . . . . . . . . . . . . 1.3 Application Advice/Technical Support . . . . . . . . . . . . . . . . 4 4 4 5 2. Safety Information . . . . . . . . . . . . . . . . . . . . . . . . . . . . . . . . . . . . . . . . 2.1 Guidelines and General Information . . . . . . . . . . . . . . . . . . 2.2 Installation Information . . . . . . . . . . . . . . . . . . . . . . . . . . . . . . . 2.3 Intended Use . . . . . . . . . . . . . . . . . . . . . . . . . . . . . . . . . . . . . . . . . . 6 6 6 7 3. General View of the Equipment . . . . . . . . . . . . . . . . . . . . . . . . . . 8 4. Getting Started . . . . . . . . . . . . . . . . . . . . . . . . . . . . . . . . . . . . . . . . . . . . 9 4.1 Unpacking and Equipment Supplied . . . . . . . . . . . . . . . . . . 9 4.2 Installing the Balance . . . . . . . . . . . . . . . . . . . . . . . . . . . . . . . 10 4.3 Choosing a Location . . . . . . . . . . . . . . . . . . . . . . . . . . . . . . . . . 12 4.4 Moving the Balance . . . . . . . . . . . . . . . . . . . . . . . . . . . . . . . . . 13 4.5 Power Connection (Power Supply) . . . . . . . . . . . . . . . . . . 14 4.6 Warm-up Time . . . . . . . . . . . . . . . . . . . . . . . . . . . . . . . . . . . . . . 15 4.7 Switching On the Balance . . . . . . . . . . . . . . . . . . . . . . . . . . 16 4.7.1 Startup Wizard . . . . . . . . . . . . . . . . . . . . . . . . . . . . . . 16 4.8 Anti-theft Locking Device . . . . . . . . . . . . . . . . . . . . . . . . . . . 18 7.Weighing . . . . . . . . . . . . . . . . . . . . . . . . . . . . . . . . . . . . . . . . . . . . . . . . . 40 7.1 Mass Unit Conversion . . . . . . . . . . . . . . . . . . . . . . . . . . . . . . . 41 7.2 SQmin Minimum Weighing (Secura® only) . . . . . . . . . . 43 7.3 Individual Identifiers (Secura® only) . . . . . . . . . . . . . . . . . 44 7.4Mixing . . . . . . . . . . . . . . . . . . . . . . . . . . . . . . . . . . . . . . . . . . . . . . . 45 7.5Statistics . . . . . . . . . . . . . . . . . . . . . . . . . . . . . . . . . . . . . . . . . . . . . 48 7.6 Totalizing Components . . . . . . . . . . . . . . . . . . . . . . . . . . . . . . 51 7.7Density . . . . . . . . . . . . . . . . . . . . . . . . . . . . . . . . . . . . . . . . . . . . . . 54 7.8Percentage . . . . . . . . . . . . . . . . . . . . . . . . . . . . . . . . . . . . . . . . . . 58 7.9Conversion . . . . . . . . . . . . . . . . . . . . . . . . . . . . . . . . . . . . . . . . . . . 61 7.10Unstable Condition . . . . . . . . . . . . . . . . . . . . . . . . . . . . . . . . . . 63 7.11Checkweighing . . . . . . . . . . . . . . . . . . . . . . . . . . . . . . . . . . . . . . 65 7.12Peak Hold . . . . . . . . . . . . . . . . . . . . . . . . . . . . . . . . . . . . . . . . . . . . 67 7.13Counting . . . . . . . . . . . . . . . . . . . . . . . . . . . . . . . . . . . . . . . . . . . . 69 8. Calibration and Adjustment . . . . . . . . . . . . . . . . . . . . . . . . . . . . 8.1 Calibration/Adjustment Using an Internal Calibration Weight . . . . . . . . . . . . . . . . . . . . . . 8.2 Calibration/Adjustment Using an External Calibration Weight . . . . . . . . . . . . . . . . . . . . . 8.3Automatic Calibration/Adjustment with isoCAL . . . . 72 73 74 75 5. Using the Balance . . . . . . . . . . . . . . . . . . . . . . . . . . . . . . . . . . . . . . . 19 5.1 Switching the Balance On/Off (Standby) . . . . . . . . . . . 19 5.2 Leveling the Balance . . . . . . . . . . . . . . . . . . . . . . . . . . . . . . . . 20 5.2.1 Leveling with Electronic Level Indicator (Secura®) . . . . . . . . . . . . . . . . . . . . . . . . . . . . . . . . . . . . 20 5.2.2 Leveling with a Conventional Level Indicator (Quintix®) . . . . . . . . . . . . . . . . . . . . . . . . . . . . . . . . . . . . 21 5.3 Operating Concept . . . . . . . . . . . . . . . . . . . . . . . . . . . . . . . . . . 22 5.3.1 Operating and Display Elements . . . . . . . . . . . . 22 5.3.2Menu . . . . . . . . . . . . . . . . . . . . . . . . . . . . . . . . . . . . . . . . 23 5.3.3 Entering Figures on the Number Pad . . . . . . . 24 5.3.4 Entering Text and Characters (Secura® only) 24 5.3.5 Accessing an Application in the Menu . . . . . 25 5.3.6 List of Applications in the Menu . . . . . . . . . . . . 25 9. ISO/GLP-compliant Printout . . . . . . . . . . . . . . . . . . . . . . . . . . . . 76 6. System Settings (Setup Menu) . . . . . . . . . . . . . . . . . . . . . . . . . 6.1 Accessing the Menu and Changing Settings . . . . . . . . 6.2 List of Available Settings . . . . . . . . . . . . . . . . . . . . . . . . . . . . 6.2.1Language . . . . . . . . . . . . . . . . . . . . . . . . . . . . . . . . . . . . 6.2.2 Date and Time . . . . . . . . . . . . . . . . . . . . . . . . . . . . . . . 6.2.3 Device Information . . . . . . . . . . . . . . . . . . . . . . . . . 6.2.4Calibration/Adjustment . . . . . . . . . . . . . . . . . . . . . 6.2.5Weighing . . . . . . . . . . . . . . . . . . . . . . . . . . . . . . . . . . . . 6.2.6Printout . . . . . . . . . . . . . . . . . . . . . . . . . . . . . . . . . . . . . 6.2.7 Identifier (Secura® only) . . . . . . . . . . . . . . . . . . . . . 6.2.8 USB Port . . . . . . . . . . . . . . . . . . . . . . . . . . . . . . . . . . . . 6.2.9 Display Brightness . . . . . . . . . . . . . . . . . . . . . . . . . . 6.2.10 Acoustic Signal . . . . . . . . . . . . . . . . . . . . . . . . . . . . . . 6.2.11 More Settings . . . . . . . . . . . . . . . . . . . . . . . . . . . . . . . 12.Transporting the Balance . . . . . . . . . . . . . . . . . . . . . . . . . . . . . . . 92 12.1Detaching the Draft Shield/Weighing Pan . . . . . . . . . . 92 12.2Packing the Balance . . . . . . . . . . . . . . . . . . . . . . . . . . . . . . . . . 93 27 27 28 28 29 30 30 30 33 34 35 37 37 38 10.USB Port . . . . . . . . . . . . . . . . . . . . . . . . . . . . . . . . . . . . . . . . . . . . . . . . . 10.1Communication with Peripheral Devices . . . . . . . . . . . . 10.2Direct Transfer of Data (PC) . . . . . . . . . . . . . . . . . . . . . . . . . 10.3Interface Specification . . . . . . . . . . . . . . . . . . . . . . . . . . . . . . 10.3.1 Data Output . . . . . . . . . . . . . . . . . . . . . . . . . . . . . . . . . 10.3.2 Data Output Formats . . . . . . . . . . . . . . . . . . . . . . . 10.3.3 Data Output Format with 22 Characters . . . 10.3.4 Data Input . . . . . . . . . . . . . . . . . . . . . . . . . . . . . . . . . . 10.3.5 Overview of Interface Commands . . . . . . . . . . 78 78 79 85 85 85 87 88 89 11.Status Messages . . . . . . . . . . . . . . . . . . . . . . . . . . . . . . . . . . . . . . . . . 90 11.1Key Fadeout . . . . . . . . . . . . . . . . . . . . . . . . . . . . . . . . . . . . . . . . . 90 11.2Application Error Messages . . . . . . . . . . . . . . . . . . . . . . . . . 90 13.Care and Maintenance . . . . . . . . . . . . . . . . . . . . . . . . . . . . . . . . . . 94 13.1Service . . . . . . . . . . . . . . . . . . . . . . . . . . . . . . . . . . . . . . . . . . . . . . . 94 13.2Cleaning the Balance . . . . . . . . . . . . . . . . . . . . . . . . . . . . . . . . 94 14.Disposal . . . . . . . . . . . . . . . . . . . . . . . . . . . . . . . . . . . . . . . . . . . . . . . . . . . 97 15.Specifications . . . . . . . . . . . . . . . . . . . . . . . . . . . . . . . . . . . . . . . . . . . . 98 15.1General Data . . . . . . . . . . . . . . . . . . . . . . . . . . . . . . . . . . . . . . . . 98 15.2Model-specific Data . . . . . . . . . . . . . . . . . . . . . . . . . . . . . . . . 100 15.3Verified Models with Country-specific Type Approval Certificate . . . . . . . . . . . . . . . . . . . . . . . . . . 101 15.4Accessories . . . . . . . . . . . . . . . . . . . . . . . . . . . . . . . . . . . . . . . . . 103 15.5Balance Dimensions . . . . . . . . . . . . . . . . . . . . . . . . . . . . . . . . 104 15.5.1Secura®, Quintix® . . . . . . . . . . . . . . . . . . . . . . . . . . 104 15.5.2Secura® 26 . . . . . . . . . . . . . . . . . . . . . . . . . . . . . . . . . . 105 Appendix . . . . . . . . . . . . . . . . . . . . . . . . . . . . . . . . . . . . . . . . . . . . . . . . . . . . 106 Secura, Quintix User Manual3 User Information 1. User Information 1.1 Warning/Danger Symbols Warning and danger symbols used in these instructions: These notes identify hazards which have a high probability of resulting in death or serious physical injury if not avoided. These notes identify hazards that can result in moderate or mild injuries if not avoided. These notes identify hazards associated with the risk of material damage. 1.2 Explanation of Symbols The following symbols are used in this manual: Useful information and tips Notes for use in legal metrology Note regarding device operation When individual buttons are displayed, they should be pressed. 4 Secura, Quintix User Manual User Information The following symbols are used in these instructions: t Indicates a required action y Describes what happens after you have performed a particular step Perform steps in the specified order: 1. First action 2. Second action 3.… – Indicates an item in a list Conventions for this User Manual: – The illustrations in these instructions are based on “Standard” balances. On balances verified for use in legal metrology, some displays and reports may deviate slightly from the figures. Where this is significant for operation, the differences will be explained in the text. 1.3 Application Advice/Technical Support Contact addresses for application advice and our technical support can be found online at: http://www.sartorius.com Secura, Quintix User Manual 5 Safety Information 2. Safety Information 2.1 Guidelines and General Information – The balance complies with EU Directives and standards for electrical safety and electromagnetic compatibility*. Improper use or handling, however, can result in damage and/or injury. Any improper use or operation of the balance, i.e., that is not consistent with the instructions, will result in forfeiture of all claims under the manufacturer's warranty. – Personnel need to have read and understood these installation instructions, including the safety instructions. – In the event of use in systems and ambient conditions which have greater safety requirements, you must observe the requirements and provisions applicable in your country. – Always keep the equipment and balance freely accessible. Any installation work or balance operation that does not conform to the instructions will result in forfeiture of all claims under the manufacturer's warranty. * = see “Specifications” Danger of Explosion! Do not use this equipment in hazardous areas in which explosive materials are present. Make sure that the voltage rating printed on the AC adaptor is identical to your local mains voltage. 2.2 Installation Information Do not operate the balance if its housing or AC adaptor is damaged. Immediately disconnect the damaged device from the power by pulling the plug. Do not expose the balance, its AC adaptor or the accessories supplied by Sartorius to extreme temperatures, aggressive chemical vapors, moisture, shocks, vibrations or strong electromagnetic fields. Observe the conditions of operation described in the Specifications. Note on Installation: The operator shall be solely responsible for any modifications to the equipment and for connecting any cables or equipment not supplied by Sartorius. Information on operational quality is available upon request from Sartorius. You should only use peripherals supplied by Sartorius. Note the IP protection class of the balance and its AC adaptor. Do not allow liquid penetration. The protection class specifies the suitability of equipment for various environmental conditions (moisture, foreign bodies). Before cleaning the AC adaptor or the balance: Unplug from the mains power. The balance may only be opened by specialized personnel trained by Sartorius. Do not open the AC adaptor. 6 Secura, Quintix User Manual Safety Information Hazards during Installation and Operation: If glass breaks, there is a risk of injury posed by cuts from glass edges. Lay the cables where they pose no risk of causing someone to trip. Observe the additional safety and danger information in the following chapters. 2.3 Intended Use This high-precision balance is designed to be used exclusively indoors under normal atmospheric conditions. It was developed specifically for the exact determination of the mass of materials in liquid, paste, powder or solid form. Appropriate containers must be used for each type of sample material. Secura, Quintix User Manual 7 General View of the Equipment 3. General View of the Equipment 1 2 3 4 5 10 6 11 7 12 13 14 15 16 8 9 No. Name and Function No. Name and Function 1 Cover 9 Leveling feet 2 Grip, upper panel (draft shield) 10 Rear device cover (only for service) 3 Weighing pan 11 Manufacturer's ID label, for verified models Additional ID label 4 Shield disk (Secura® 26) 12 Lug for attaching anti-theft device 5 Collection container 13 Verification access switch: Blocks various functions and units on verified balances 6 Grip, side panel (draft shield) 14 USB port for mini AB 7 Level indicator (Quintix® model) 15 DC jack 8 Touchscreen 16 Fastening point for "Kensington" key lock (optional) 8 Secura, Quintix User Manual Getting Started 4. Getting Started The balance must be disconnected from the mains power for all assembly work. 4.1 Unpacking and Equipment Supplied t Open the packaging, making sure to remove all parts carefully. t After unpacking the balance, check it immediately for any external damage. y If you detect any damage, proceed as directed in the chapter entitled “Care and Maintenance.” y Save all parts of the original packaging for any future transportation. During shipment, please do not leave cables plugged in! The following parts are included in the equipment supplied: Components Secura® Quintix® Model: 26 225D 125 324 125D 65 35 Draft shield (4 panels) Collection container Weighing pan: d 80 mm – – Weighing pan: d 90 mm – * * * Weighing pan: d 50 mm - - - - Shield disk (normal / high) - - - - AC adapter with country-specific power plug In-use dust cover Dust cover Installation and operating instructions Application guide * optional Secura, Quintix User Manual 9 Getting Started 4.2 Installing the Balance Installing the Collection Container t Insert the collection container into the balance. Installing the Panels (Draft Shield) t Press against the front of the cover from both sides and fold it upwards. 1) Inserting the front panel of the draft shield: t Insert the panel on the top into the guide rails of the draft shield. t Press the panel gently upwards, while simultaneously pressing downwards into the slot of the draft shield. y The panel must click into place in the slot. 10 Secura, Quintix User Manual Getting Started 2) Inserting the side panels: t Mount the guide carriages (1) of the side panel by inserting them into the guide rails on the top. t Insert the side panel at the bottom behind the guide rod (2) of the draft shield. 1 t Make sure that: – the guide carriage (1) is properly and fully positioned on the guide rail. – the side panels are positioned behind the guide rod (2). – the panels can be moved smoothly and freely. 2 3 3) Inserting the upper panel: t Insert the panel on the top of the draft shield guide. t Push the panel carefully backwards. t Gently lift the panel by its grip in order to push it below the guide rod (3). t Close the cover by folding it downwards completely until it locks. Inserting the Weighing Pan t Insert the weighing pan into the opening of the collection container. t Push the upper and side panels forward to close them. Secura® 26: t Insert the weighing pan into the opening of the collection container. t Position one of the two shield disks on the collection container. t Push the upper and side panels forward to close them. Secura, Quintix User Manual 11 Getting Started 4.3 Choosing a Location t Select the proper setup location: – Set up the device on a stable, even surface that is not exposed to vibrations (e.g., a weighing stone). – Maintain free access to the balance at all times. – – – – – – – °C 12 Secura, Quintix User Manual Choose a location that is not subject to the following negative influences: Heat (heater or direct sunlight) Drafts from open windows, AC systems, and doors Extreme vibrations during measurement Heavy traffic areas (personnel) Extreme humidity Electromagnetic fields Extremely dry air Acclimatization Condensation from humidity can form on the surfaces of a cold device when it is brought into a substantially warmer area. You should therefore let a device that has been disconnected from its power source acclimatize for approximately 2 hours before reconnecting it to the power. Getting Started 4.4 Moving the Balance Moving the Balance over Short Distances in the Lab Avoid glass breakage, shocks and vibrations: Never lift or carry the balance by its draft shield! t Hold the balance under the housing, lift it up carefully, and carry it to its new location. The balance needs to be re-leveled and then adjusted each time its setup location is changed. Secura, Quintix User Manual 13 Getting Started 4.5 Power Connection (Power Supply) AC Adaptor Assembly Using the wrong power plug adaptors may cause fatal electric shock and damage the equipment. Never plug the power plug adaptor into the socket when it is disconnected from the device (danger of electrical shock). tUse the right power plug adaptor for your mains power supply. A AC adaptor versions: Bag Region/Country Bag Region/Country a) transparent Europe/EU (except United Kingdom) e) black India b) yellow United Kingdom f) turquoise South Africa c) blue USA, Canada, China, and Japan g) green Korea d) red Australia h) pink Brazil i) white Argentina The packaging of AC adaptor module 6971790 with line adaptors g), h), and i) is labeled with 98671791. t Push (1) and slide (2) the power plug adaptor (A) required for your power supply into the opening of the AC adaptor module (B). When doing this, the AC adaptor needs to lock into position. 14 Secura, Quintix User Manual Getting Started Removing/Replacing the AC Adaptor t Unlock (1) the AC adaptor and then detach (2) it. Power Connection/Safety Precautions – Only use original Sartorius AC adaptors. The AC adaptor has an IP rating of IP40 in accordance with EN 60529. – Make sure that the voltage rating printed on the manufacturer's ID label is identical to that of your local mains voltage. – If the stated supply voltage or the plug design of the AC adaptor does not comply with your country's standard, please inform your nearest Sartorius representative. – The power must be connected in accordance with the regulations applicable in your country. t 1)First, plug the AC adaptor into the socket at the back of your balance. t 2) Then connect the AC adaptor to the wall outlet (mains voltage). 0 4.6 Warm-up Time y To ensure accurate results are delivered, the balance must warm up for at least 30 minutes after initial connection to the power supply. Only after this time will the balance have reached the required operating temperature. 30 When a verified balance of accuracy class k for use in legal metrology is connected to the mains power, it must warm up for at least one hour before operation. Secura, Quintix User Manual 15 Getting Started 4.7 Switching On the Balance tTouch j on the display to switch on the balance. y When the balance is switched on for the first time or when it has been reset to the factory settings, the startup wizard appears. 4.7.1 Startup Wizard The default language for the display text is English. When the balance is switched on for the first time, the startup wizard is automatically activated. Follow the instructions on the interactive display to configure your selections for: –Language – Date format/date – Time format/time yThe Language settings window appears. Language English t Touch the language you would like to select, such as Deutsch. Deutsch tTouch l to confirm. Français y The display changes immediately to the desired language. Español yThe Getting Started settings window appears. Installation The display format, date, and time can be set here. Initializing date and time. tTouch START. START yThe Date Format settings window appears: Date format DD-MM-YYYY MM-DD-YYYY YYYY-MM-DD (ISO) t Select how the date should be displayed and printed out. – DD-MMM-YYYY: The date is displayed in the order of day, month and then year. – MMM-DD-YYYY: The date is displayed in the order of month, day and then year. – YYYY-MM-DD (ISO): The date is displayed in the order of year, month and then day. (The time is displayed in 24-hour format with this setting.) tTouch l to confirm. 16 Secura, Quintix User Manual Getting Started y The current date is displayed. Date t If the date is displayed correctly, select l to confirm. 2014-10-06 t To adjust the date manually, if required, touch t, enter the current date and confirm with l. yThe Time Format settings window appears: Time format t Select how the time is displayed and printed out. – 24h: The time is displayed in 24-hour format. (This is the only available setting when the date is set to ISO format.) – 12h (AM/PM) The time is displayed in 12-hour format. The hours before noon are displayed with AM and the hours after noon are displayed with PM. 24 h 12 h (AM/PM) tTouch l to confirm. y The current time is displayed. Time t If the time is displayed correctly, touch l to confirm. 15.55 t To adjust the time manually, if required, touch t, enter the current time and confirm with l. Leveling Please turn each foot in the direction of the arrow as shown. yThe Leveling settings window appears: t Follow the instructions on the interactive display. Follow the instructions in Chapter “Leveling the Balance” on page 20. If required, you can subsequently modify your selection in the “Settings” menu (see Chapter “Accessing the Menu and Changing Settings” on page 27). Secura, Quintix User Manual 17 Getting Started 4.8 Anti-theft Locking Device t A “Kensington” key lock can be installed at the fastening point on the back of the balance if required. t The balance can also be secured at the installation location with a chain and lock, for example. 18 Secura, Quintix User Manual Using the Balance 5. Using the Balance 5.1 Switching the Balance On/Off (Standby) Max 120 g d=0.00001 g 0.00000 y The leveling screen is displayed first after any model is switched on. Level the balance if necessary. The actual weighing screen is only displayed after confirmation. – When the balance is switched on, the following message appears on the display: Secura®: Level The balance has been leveled (if leveled). Quintix®: Level Please check leveling. – If the balance needs to be leveled, a message appears on the display (see “Leveling the Balance” on page 20). – The balance must be regularly calibrated and adjusted in order to achieve accurate weighing results (see “Calibration and Adjustment” on page 72). – The default language for the display text is English. You can change the language (see “Language” on page 28). t To switch the balance to standby, select the menu key at the bottom left of the weighing screen on the display. y The menu is displayed. Weighing Mixing Statistics Components t Select the j button in the application menu. y The balance switches to standby mode. t To switch the balance on again: Select j on the display. The balance starts in the application most recently used before the it was last switched off. Secura, Quintix User Manual 19 Using the Balance 5.2 Leveling the Balance The balance must be leveled in order to enable it to provide accurate weighing results. Leveling the balance compensates for slant or unevenness at the place of installation by twisting the front leveling feet of the balance. Leveling is always required if the balance is set up at a different location or is moved at its original location. The leveling function is different for the various balance models: – Electronic level indicator (Secura® only) – Conventional level indicator (Quintix®) Note: The balance needs to be re-leveled and then adjusted each time its setup location is changed. 5.2.1 Leveling with Electronic Level Indicator (Secura®) In Secura® models, the balance's position is checked with sensors. Instructions on the display guide the user when leveling the balance. LEVEL Max 120 g d=0.00001 g yWhen LEVEL appears in red at the top left of the display, you must level the balance. 0.00000 LEVEL t To start the leveling function, select the LEVEL button. y The balance position is shown as an animation of a level indicator on the display. Leveling Please turn each foot in the direction of the arrow as shown. t Twist the front leveling feet of the balance in the specified direction. A prompt appears every 2 minutes after confirmation of this “Leveling” status message if the balance has not been leveled. y When the level indicator animation turns green, the balance is correctly leveled. Leveling The balance has been leveled. t To exit the function, select l. t Complete the leveling by calibrating the balance. 20 Secura, Quintix User Manual Using the Balance 5.2.2 Leveling with a Conventional Level Indicator (Quintix®) The Quintix® models are fitted with a conventional level indicator. This is located to the left of the display. The position of the air bubble in the indicator shows whether or not the balance is correctly leveled. t Twist both of the front leveling feet of the balance to move the air bubble so that it is centered in the circular marking. The figure shows which leveling foot should be twisted in which direction. Generally, both feet must be adjusted in order to position the air bubble exactly in the center of the circular marking. Examples: – If the air bubble is too far to the lower right, twist the right leveling foot counterclockwise (see figure). – If the air bubble is too far to the upper right, twist the left leveling foot clockwise. – If the air bubble is too far to the left, twist the left leveling foot counterclockwise and the right leveling foot clockwise. t Check the level indicator after each adjustment and correct if necessary. t Complete the leveling by calibrating the balance. Secura, Quintix User Manual 21 Using the Balance 5.3 Operating Concept This section explains the operating options available to you so that you can familiarize yourself with the balance. 5.3.1 Operating and Display Elements Sharp or pointed instruments (such as ballpoint pens) can damage the device! – The touchscreen should only be operated by lightly pressing it using the tips of your fingers. This can be done while wearing laboratory gloves. 1 13 12 11 10 9 Max 120 g LEVEL Net G + d=0.00001 g 41.97650 2 3 4 5 SQmin 3.05000 g Component 1 8 6 7 1 Toolbar with currently available buttons: Zero, tare, GLP printout, print (data output) 2 Metrology line (additional info for minimum capacity Min and the verification scale interval e appear on verified balances) 3 Warning symbol to indicate calculated values, negative gross values, or values that are smaller than the minimum sample quantity (SQmin) 4 Current weight or value measured 5 Unit and stability indicator; set weight unit and display accuracy (see page 41) 6 Run application, such as saving the weight value of a component 7 Settings for the selected application 8 Menu key: Switch to menu or function selection 9 SQmin minimum weighing (Secura® only; see page 43) 10 Bar graph: Scaled display showing capacity usage (in percent) 11 Preceding symbol (±) for weight value 12 Display value ID, e.g., “G” for gross value, “Net” for net value; switch display value for application, such as net value, total value, weight value, or calculated value 13 Field for status and warning displays, and activation of isoCAL and leveling 22 Secura, Quintix User Manual Using the Balance 5.3.2 Menu All applications and settings for the balance can be accessed via the menu. t To access the menu, select the menu key at the bottom left of the display. y The menu appears. 8 1 7 Weighing Mixing 6 5 Statistics Components 4 3 2 1 Selected application (such as Mixing) 2 Application selection area: Symbols for all available applications (see “List of Applications in the Menu” on page 25) 3 Function area 4 Back: Run the most recent application. 5 Setup menu: Access the balance system settings (see “System Settings (Setup Menu)” on page 27). 6 Access the balance leveling function via electronic level indicator (Secura® only – see “Leveling with Electronic Level Indicator (Secura®)” on page 20). 7 Access the calibration and adjustment options (see “Calibration and Adjustment” on page 72). 8 Switch the balance to standby mode. Secura, Quintix User Manual 23 Using the Balance 5.3.3 Entering Figures on the Number Pad Min + 0000000 g 1 2 3 4 5 6 7 8 9 +/- 0 . C Numerical values can be entered for many applications or system settings (such as a minimum value for the Checkweighing application). A number pad appears on the display, which is always used in the same way. t To enter numbers, select the desired numbers one after the other. The entered numbers appear at the top of the display. t To correct the most recent number, select k. The number is deleted. Then enter the correct number. t To delete the entire value, select C. t To confirm the entry, select l. 5.3.4 Entering Text and Characters (Secura® only) A keyboard will appear whenever you have to enter text or characters. The cursor is located in the line above the keyboard. t Select the individual characters simply by touching them. y The entered text will appear in the input line. t Use the Shift key to switch the keyboard display between uppercase and lowercase letters. t Use the 123 key to switch the keyboard display from letters to numbers. t Use the ABC key to switch the keyboard display from numbers to letters. t Use the backspace key to delete the last character. t The l key ends the process and saves the characters entered. 24 Secura, Quintix User Manual Using the Balance 5.3.5 Accessing an Application in the Menu The right-hand side of the display shows available applications for various weighing tasks which can be carried out with the balance. You can scroll up and down through the menu to select the desired application. Weighing Statistics Mixing Components Density Percentage Weighing Mixing Statistics Density t To scroll, place your finger on the display and drag it slowly either up or down. y The symbols in the menu move in the corresponding direction. t Select a symbol to start that particular application. Components Percentage y The desired application appears on the display. Max 120 g d=0.00001 g 0.00000 Reference 10.0 % 5.3.6 List of Applications in the Menu The menu provides the following applications for various weighing tasks: Weighing (see page 40) This is the standard application that appears when the balance is first switched on. Use this application to determine the weight of a sample within the device's specific weighing range. Mixing (see page 45) Use this application to weigh up to 99 components one after the other for a mixture or formula in one container. The balance is automatically tared after each component is weighed. The weight value of an individual component or the total weight can be displayed as desired. Secura, Quintix User Manual 25 Using the Balance Statistics (see page 48) Use this application to save weight and calculated values and statistically analyze them. You can save up to 99 components. Components (see page 51) Totalize weight values. You can save up to 99 components that are weighed in various individual containers. Each container can be tared before each component is weighed. Density (see page 54) Use this application to determine the density of solid samples using a density set based on the buoyancy method. The density is determined using Archimedes' Principle. The upward buoyant force exerted on a body immersed in a fluid is equal to the weight of the fluid the body displaces. Percentage (see page 58) This application is used to determine the percentage share or the percentage difference of the sample related to a reference weight. Conversion (see page 61) Use this application to multiply the weight value by a user-defined factor. The selected factor is saved to protected memory. Unstable condition (see page 63) This application is used for moving samples (e.g., live animals) and for weighing in unstable environments. A measurement cycle is automatically carried out with a defined number of measurements for each object to be weighed. The individual measurements are averaged, and this average is displayed as the result. Checkweighing (see page 65) Use this application to check whether a weight value falls within the specified tolerances. This application also makes it easy to fill sample materials to a specified target weight. Peak hold (see page 67) Use this application to calculate the maximum weight value of a sample (peak value). The value remains on the display for five seconds after the sample has been removed from the balance. Example: Use for measuring release force during an experiment, or use when a load is so big that the balance display is hidden from view during weighing. Counting (see page 69) Use this application to determine the number of parts of approximately equal weight. The weight of a counted reference sample is calculated and then the objects with an unknown piece count are weighed. The balance displays the number of parts and the piece weight. 26 Secura, Quintix User Manual System Settings (Setup Menu) 6. System Settings (Setup Menu) The Settings (Setup) menu contains all basic settings for the balance. On balances verified for use in legal metrology, not all functions and settings are available. 6.1 Accessing the Menu and Changing Settings t Select the menu key in any application. y The menu appears. Weighing Mixing Statistics Components t To access the system settings of the balance, select i (Setup) in the menu. Settings yThe Settings (Setup) menu appears. Language Date and time Device information Calibration/Adjustment Weighing Settings Date and time Device information t To scroll, place your finger on the display and drag it slowly either up or down. y The settings in the menu move in the corresponding direction. While you are scrolling, a gray scroll bar appears on the right of the display, indicating where you are in the list of options. Calibration/Adjustment Printout Signals t Select a setting and make the desired changes. Information about the available settings can be found from page 28. tSelect l to confirm your changes. tSelect ; to return to the menu. The changed settings are active when you reach the first level of the menu again. Secura, Quintix User Manual 27 System Settings (Setup Menu) 6.2 List of Available Settings This section contains information on all basic balance settings which can be defined in the Settings menu. 6.2.1 Language Language The language of the display text can be set here. English is the default language for the balance. English The following languages are available: –English –German –French –Spanish –Italian –Japanese –Russian –Chinese –Polish –Portuguese –Korean –Turkish –Hungarian Deutsch Français Español Setting the Language The default language for the display text is English. To change the language, proceed as follows: t Select the menu key at the bottom left of the weighing screen on the display. y The menu is displayed. Weighing Mixing Statistics Components t Select the j (Setup) key in the menu. Settings Language Date and time Device information Calibration/Adjustment Weighing 28 Secura, Quintix User Manual yThe Settings window appears. tSelect Language or the top entry in the list. System Settings (Setup Menu) yThe Language settings window appears. Language English t Touch the language you would like to select, such as English. Deutsch tTouch l to confirm. Français Español y The display changes immediately to the desired language. tSelect ; to return to the menu. 6.2.2 Date and Time The date, time, and display format can be set here. Date and time Date Under Date: t To set the date, select t, enter the current date and confirm with l. Date format Time Time format Under Date format: t Select how the date should be displayed and printed out. – DD-MMM-YYYY: The date is displayed in the order of day, month and then year. – MMM-DD-YYYY: The date is displayed in the order of month, day and then year. – YYYY-MM-DD (ISO): The date is displayed in the order of year, month and then day. (The time is displayed in 24-hour format with this setting.) Under Time: t To set the time, select t, enter the current time and confirm with l. Under Time format: t Select how the time is displayed and printed out. – 24h: The time is displayed in 24-hour format. (This is the only available setting when the date is set to ISO format.) – 12h (AM/PM) The time is displayed in 12-hour format. The hours before noon are displayed with AM and the hours after noon are displayed with PM. Secura, Quintix User Manual 29 System Settings (Setup Menu) 6.2.3 Device Information Device information Manufacturer: Model: Serial number: Version BAC: Version APC: Sartorius SECURA225D 0012345678 00-50-05.xx CN:15B2 01-71-02.xx CN:8152 The manufacturer, model, serial number and software version of the balance are displayed here. 6.2.4 Calibration/Adjustment Calibration/Adjustment isoCAL Calibration report You can configure how the automatic calibration/adjustment function isoCAL starts. You can view the saved reports on recently conducted adjustments, including the deviations detected, and send the output to a PC or a Sartorius laboratory printer. Under isoCAL: t Select the desired start option for isoCAL. – Off: isoCAL is switched off. – Info, manual start: A note appears on the display when predefined time intervals or temperature values are exceeded. isoCAL can be started manually. – Automatic: isoCAL is switched on. Calibration/adjustment starts automatically when predefined time intervals or temperature values are exceeded. Calibration report 2014-10-04: 2 Protocols 2014-10-01: 2 Protocols 2014-09-25: 3 Protocols Under Calibration report: t Select the desired report by date. If there is more than one calibration report per date, use the < and > buttons to navigate through the reports. tSelect a to print the displayed report. 2014-09-24: 3 Protocols 2014 09 20: 4 Protocols Up to 99 entries per day are saved. Calibration reports older than 30 days are deleted. 6.2.5 Weighing Weighing SQmin Safety level Ambient conditions Application Stability signal 30 Secura, Quintix User Manual A number of basic settings for the weighing functions can be defined here. Options are limited for verified balances. All settings given in the menu are permitted. Under SQmin (Secura® only): If the SQmin function is set up on the balance, the function can be switched On or Off here (see “SQmin Minimum Weighing (Secura® only)” on page 43). System Settings (Setup Menu) Safety Level The Secura® models monitor the following at all times: – whether the balance is leveled correctly – whether adjustment is necessary – whether minimum sample quantity requirements are met according to USP Under Safety level (Secura® only): t Select the desired safety level for SQmin, isoCAL and LEVEL. Weighing SQmin Safety level Ambient conditions Application Stability signal If a verified balance has not been leveled, the following functions will be disabled immediately (as is the case with the “High” safety level): – Printout – Startup and saving of application Here, it does not matter what settings this menu item has. High (factory setting): If one of the three conditions has not been met, a warning is displayed straight away. No data is transmitted. The following functions are disabled immediately: –Printout – Startup and saving in applications Displays: –Information about red marking of display element (LEVEL, isoCAL or SQmin) – Weight value displayed in gray with a black warning symbol A warning is displayed after 60 seconds if no action is taken to correct the problem. Standard: If one of the three conditions has not been met, a warning is displayed straight away. Displays: –Information about red marking of display element (LEVEL, isoCAL or SQmin) – Weight value displayed in gray with a black warning symbol A warning is displayed after 60 seconds if no action is taken to correct the problem. Printout: – Weight values are marked with “!” Low: The following information is displayed: – SQmin value has not been achieved –> SQmin value is displayed in red –Balance not leveled –> Red marking on “LEVEL” display element –Balance not adjusted due to temperature or time –> Red marking on “isoCAL” display element Secura, Quintix User Manual 31 System Settings (Setup Menu) Under Ambient conditions: t Choose whether the conditions at the balance location are Stable or Unstable. If Unstable is selected, adverse ambient conditions (drafts, vibrations) are filtered by changing the measurement time for the weight values. Under Application: t Choose whether the balance will be used for Weighing or Dosing. This setting is used to compensate for load fluctuations on the display. – Weighing: The display responds very quickly to fast load changes. The display responds more slowly to small changes in weight (in the digit range). This setting is suitable for normal weighing. – Dosing: The display responds quickly to small changes in weight, making it faster and more accurate for additional dosing and container filling functions. Under Stability signal: t Choose whether stability is shown with High accuracy, Medium accuracy or Fast on the display. The balance stability is displayed as soon as the weighing result is constant within a defined range. Until stability is reached, the measured value is shown in gray on the display and only turns black once the balance is deemed stable. Under Zero/tare: t Define settings for zeroing and taring. – Zero/Tare function: Choose whether the balance is zeroed and tared With stability or Without stability. If Without stability is selected, the balance will automatically be tared when A or D is selected. If With stability is selected, the balance is tared the next time stability is reached after A or D is selected. – Automatic zero (zero tracking function): If this option is enabled, changes of a set fraction of scale intervals per second starting from the display zero point are automatically zeroed. – Zero/Tare at power on: If this option is enabled, the balance is automatically zeroed or tared when switched on. 32 Secura, Quintix User Manual System Settings (Setup Menu) 6.2.6 Printout Printout Printout Manual print Automatic print You can configure the settings for printing and data output here. Some of the settings depend on the USB port configuration (see “USB Port” on page 35). Under Printout: t Define the settings for outputting logs and reports to a connected lab printer. – Manual: The data is printed out when a is selected in the application. – Automatic: The data is printed out automatically. – Without stability: No stability is required for a printout. The printout does not have any unit symbols in this case. – With stability: The data can only be printed out when stability is reached. – Print after weight change: Data is printed once, after a threshold has been exceeded at stability and the weight has previously been reduced to less than half of the threshold. Under Manual print: This option can be selected when manual print has been set in the Printout menu option. t Define the settings for the manual print. – ISO/GLP printout: Activate this option when an ISO/GLP-compliant printout is required. – Tare after print: Activate this option to automatically tare the balance after printing. – Manual print format: Select the information to be printed during manual printing, such as date and value. Value without ID: Only if being transmitted to a PC (menu items: USB port: Device/protocol: PC – xxx) Value or date, value or value (N, T, G#) or date, value (N, T, G#) Under Automatic print: This option can be selected when automatic print has been set in the Printout menu option. t Define the settings for the automatic print. – Autom. print interval: – Interval time: Choose from the last three interval times or enter the desired interval time in seconds via t and confirm with l (factory setting: 5 seconds). – Select the Standard option to use model-specific output rate for weight determination. – Autom. print format: Select the information to be printed during automatic printing, such as date and value. Value without ID: Only if being transmitted to a PC (menu items: USB port: Device/protocol: PC – xxx) Value or date, value Secura, Quintix User Manual 33 System Settings (Setup Menu) 6.2.7 Identifier (Secura® only) Define identifiers for the printout via the g button and in the ISO/GLP printout here. Under Printout in Manual print, the ISO/GLP printout option must be activated. IDs can be maximum 14 characters long. Identifier Set device ID Set additional ID Under Set device ID: The device identifier (ID) is printed in the header of the GLP printout. t To activate the device ID, select t, enter the desired device ID, and confirm with l. Batch ID function Sample ID function Under Set additional ID: The additional ID (A ID) is also printed in the header of the GLP printout. t To activate the additional ID, select t, enter the desired device ID and confirm with l. Under Batch ID function: The batch ID (L ID) is queried one time at the start of the GLP printout. t Activate this option to enter or print out the batch ID. Under Sample ID function: The sample identifier (S ID) can be activated for each printout by selecting the g button. t Define settings for printing the sample ID. – On: The sample ID is activated. This ID is queried before each printout. – Autom. increment: Select this option to automatically assign the sample ID in ascending order. – Autom. decrement: Select this option to automatically assign the sample ID in descending order. – Off: The sample ID is deactivated. 34 Secura, Quintix User Manual To enter and delete numbers and text, e.g., for the sample ID, see “Entering Figures on the Number Pad” on page 24. System Settings (Setup Menu) 6.2.8 USB Port The settings for the data transfer to a peripheral device (such as a PC or printer) can be defined here. USB port Device / Protocol RS232 Configuration Spreadsheet Keyboard emulation In legal metrology data can be transmitted to a PC and used with an Alibi memory. The balance does not have its own Alibi memory. Connection to a printer or Alibi printer is permitted. Depending on the cable and peripheral device connected to the balance, various options are available in the menu. The balance automatically detects the type of connection. PC-SBI PC-xBPI PC spreadsheet format PC text format Off Sartorius order no.: YCC04-D09 1) Mini-B Removable data carrier Type-A Printer equipment supplied 2) Mini-A Mini-A RS 232 9-pin Sartorius order no.: YCC03-D25 4) Mini-A Printer YDP30 Printer YDP40 Off USB Device (Slave) Printer YDP20-0CE Second display YRD03Z USB-RS 232 SBI USB-RS 232 xBPI Off Serial device with 9-pin SUB-D plug (Printer YDP20-0CE) (Second display YRD03Z) USB-RS 232 SBI USB-RS 232 xBPI Off Serial device with 25-pin SUB-D plug Type-B Sartorius order no.: YCC03-D09 3) USB Host (Master) RS 232 25-pin There are several ways to connect the balance via USB: Device / Protocol PC - SBI PC - xBPI PC spreadsheet format 1) Connection to a PC via USB Cable (Mini-B to USB A) Under Device/Protocol: t Select the data format for the transfer to the PC. – PC - SBI: Driver for PC required (CDC Virtual Com Port). The data is sent via SBI protocol using a virtual serial interface. Information on the driver and SBI can be found from page 82. – PC - xBPI: Driver for PC required (CDC Virtual Com Port). The data is sent via xBPI protocol using a virtual serial interface. Information on the driver and xBPI can be found from page page 82. – PC spreadsheet format: The balance transmits the data via keyboard command (keyboard emulation) to the currently opened application on the PC in spreadsheet format. – PC text format: The balance transmits the data via keyboard command (keyboard emulation) to the currently opened application on the PC in text format. – Off: Data transmission is deactivated. Secura, Quintix User Manual 35 System Settings (Setup Menu) Additional menu option if “PC spreadsheet format” has been selected: Under Spreadsheet: – Decimal markers: – Decimal point (factory setting): The number value is transmitted with a decimal point to the PC program (example: 99.963 g). – Decimal comma: The value is transmitted with a decimal comma to the PC program (example: 99,963 g). Additional menu option if “PC spreadsheet format” has been selected: Under Spreadsheet: – Output format: – Text and numerical value (factory setting): Transmits the output with ID, value and unit, across several lines if necessary. – Numerical value only: Outputs numerical value only, in one line (without ID and unit) (date, value or net/tare/gross). Additional menu option if “PC spreadsheet format” or “PC text format” has been selected: Under Keyboard emulation: – Universal (Num Lock On) (factory setting): Data is sent as special keyboard characters in ASCII format (ALT + number pad). Requirement: Numbers lock must be turned on on the PC keyboard. – English (USA): Data is sent according to a keyboard set to English (USA). Requirement: For PC applications, such as MS Excel, the keyboard must be set to English (USA). You can find more information in Chapter “USB Port” on page 78. 36 Secura, Quintix User Manual System Settings (Setup Menu) 2) Connection to Sartorius Lab Printer via the Supplied Printer Cable Under Device/Protocol: t Select the desired setting for the connection to the printer. – YDP30/YDP40: The connected printer is detected automatically and the connection is established. – Off: The connection to the printer is deactivated. 3) and 4) Connection to a Serial Printer or Another External Serial Device via a 9/25-pin Serial Interface (USB Mini-A to RS-232) Under Device/Protocol: t Select the desired setting for the connection to the device. – Printer YDP20-0CE – Remote display YRD03Z – USB-RS-232 SBI – USB-RS-232 xBPI – Off: The connection is deactivated. Under RS-232 Configuration: This option can be selected if under Device/Protocol the setting USB-RS-232 SBI has been selected. t Select the desired setting for the RS-232 interface. – Baudrate: 600 to 19,200 (factory setting: 9600) – Databits: 7 bits or 8 bits (factory setting: 8 bits) – Parity: Odd, even, or none (factory setting: odd) – Stopbits: 1 bit or 2 bits (factory setting: 1 bit) – Handshake: Software (XON, XOFF), hardware (CTS, RTS), or off [factory setting: hardware (CTS, RTS)] 6.2.9 Display Brightness Display brightness Bright Medium Eco mode The brightness of the display can be set here. The following brightness levels are available: – Bright – Medium – Eco mode: Energy-saving mode (factory setting): The brightness is reduced after 2 min. of inactivity. To reactivate the normal brightness: Touch any key. 6.2.10 Acoustic Signal Acoustic signal The volume of the acoustic signal can be set here. Loud Medium Low Off The following volume levels are available: – Loud – Medium – Low – Off Secura, Quintix User Manual 37 System Settings (Setup Menu) 6.2.11 More Settings Additional service functions for the balance can be found here. More settings Set password Under Set password (Secura® only): Secura® models can be password-protected to prevent unauthorized personnel from making changes to the system settings of the balance. When a user password is set, all settings which could change the metrological behavior of the balance are locked. tSelect t. t Enter a number as the password. If you have made a mistake, you can correct your entry: – k button: Delete individual characters in reverse order. – C button: Delete all characters. t Enter the same password again to ensure correct entry. t Confirm with l. y The new password is only active once you have returned to the first level of the menu. Reset settings USB mass storage Enable service mode To change the password, the old password must first be entered. A new password can then be set. To completely delete the password and use the balance without password protection, leave the entry blank. Contact the Sartorius Service Center if you forget the password. Under Reset settings: Reset all balance settings to the factory (default) settings here. t When the security prompt appears, select Yes, reset and confirm with l. The balance is reset and restarts. Under USB mass storage: Use this function to register the balance memory as a USB removable data carrier on a PC. This function is required by the Sartorius Service Center or when installing the PC driver for the virtual COM port. Further information can be found in Chapter “USB Port” on page 78. Under Enable service mode: This function is used by the Sartorius Service Center and can only be accessed by authorized service technicians. The following service functions are available: – Preset value for minimum weighing (SQmin) – Enter date for next service – Reset all settings to factory settings The Calibration/Adjustment menu also provides the following functions for authorized Service Center personnel (depending on the model): – External linearization (not for use in legal metrology) – Set the preload – Delete the preload – Internal linearization (not for use in legal metrology) These functions are not available for verified and sealed balances. 38 Secura, Quintix User Manual System Settings (Setup Menu) Locking the Menu (Quintix® models) Use this function to lock or unlock the menu. t Hold down the Menu key for longer than 10 seconds. t Confirm with “Lock.” Supervisor lock Lock menu? Lock Supervisor lock Unlock menu? Menu Accessing the menu or unlocking it again: t Hold down the Menu key for longer than 10 seconds. t Then select the required function. Unlock Secura, Quintix User Manual 39 Weighing 7. Weighing Purpose: Use this application to determine the weight of a sample within the device's specific weighing range (see Specifications). t Select the menu key in any application. t Select the Weighing symbol in the menu. yThe Weighing application appears. Max 120 g d=0.00001 g 0.00000 Zeroing t Remove the load from the balance. tSelect A to zero the balance. All weight values are measured based on this zero point (zeroing within ±2% of the weighing range around the zero point). Taring t Place an empty container on the balance, if weighing with containers. tSelect D to tare the balance. The balance displays zero again after being tared. The tared value is subtracted from the overall weighing range of the balance. The balance can be tared throughout its entire weighing range. t Place the sample on the weighing pan. y You can read the measured value as soon as the weight value stops changing and the unit is displayed. The balance stability is displayed as soon as the weighing result is constant within a defined range. Until stability is reached, the measured value is shown in gray on the display and only turns black once the balance is deemed stable. Max 120 g + 40 d=0.00001 g 14.42000 Secura, Quintix User Manual Weighing 7.1 Mass Unit Conversion Purpose: Configure the weight unit and accuracy of the weight value displayed. Not all units can be selected on balances used for legal metrology. The user can only switch between metric units (e.g., milligram, gram, kilogram). t To switch to another unit, select the Unit button on the weighing display. Unit / Accuracy yThe Unit/Accuracy menu appears. g All digits on kg Last digit autom. off ct Last digit off lb Reduced by 2 digits The left list contains the available units. The currently selected unit is marked (e. g., g). The most recently selected units automatically appear at the top of the list. Units which are rarely or never used are shown further down the list. The right list contains the display accuracy options. The currently selected setting is marked (e. g., All digits on). t Select the unit to be used to display the weighing results (e.g., g, kg, ct). t Select the display accuracy (e.g., All digits on or Last digit off). The display accuracy can be individually assigned to each unit. tTouch l to confirm. y The weighing display appears with the changed settings. This setting remains until the selection is changed. There is an online animation for this application. Click here to view it: Secura, Quintix User Manual 41 Weighing Conversion Factors for Weight Units The table contains common weight units and their conversion factors in relation to the gram. The balance can work in the following units as and when needed (with verified balances, this is only possible if the country’s laws regarding legal metrology and verification permit this): Unit FactorDisplay Gram 1.00000000000g Kilogram 0.00100000000kg Carat 5.00000000000ct Pound 0.00220462260lb Ounce 0.03527396200oz Troy ounces 0.03215074700 ozt Hong Kong tael 0.02671725000 tlh Singapore tael 0.02645544638 tls Taiwanese tael 0.02666666000 tlt Grain 15.43235835000GN Pennyweight 0.64301493100dwt Milligram 1000.00000000000mg Parts per pound 1.12876677120 /lb Chinese tael 0.02645547175 tlc Momme 0.26666666666666667mom Austrian carat 5.00000000000 Kt Tola 0.08573333810tol Baht 0.06578947437bat Mesghal 0.21700000000MS Newton 0.00980665000N 42 Some weight units and accuracy settings may be blocked from use in verified balances, depending on national laws regarding legal metrology and verification. Depending on the country-specific model version, not all weight units listed may be available. Secura, Quintix User Manual Weighing 7.2 SQmin Minimum Weighing (Secura® only) Purpose: This application is used to compare the measured weight value directly with the defined minimum sample quantity (SQmin = sample quantity minimum). This ensures that weighing results are above the specified minimum weight defined by your quality assurance system. This function is used to observe the minimum weight in order to meet the criteria of the United States Pharmacopeia (USP), for example. SQmin is not the same as the minimum capacity Min in legal metrology. Requirements: The balance must be set up by a service technician to be able to use the SQmin function. The technician will determine the permitted minimum sample quantity and load this to your balance using the guidelines of your QA system. He or she will document this setting via a “Weighing module test as per USP” certificate in which the measurements and min. sample quantity are logged. The SQmin function ensures that the weighing results correspond to USP guidelines. Switching SQmin On/Off If the SQmin function is set up on the balance, go to the Settings menu, Weighing – SQmin to switch it on/off. Max 120 g + d=0.00001 g 0.10370 Display of SQmin Function during Weighing t Place the sample on the weighing pan. y The SQmin value is displayed in red if the weight value is smaller than the specified minimum weight. The weight value is displayed in gray if it is smaller than the specified SQmin value. The weight value cannot be saved or printed out in applications (depending on the setting in the “Safety level” menu). SQmin 0.12000 g Secura, Quintix User Manual 43 Weighing 7.3 Individual Identifiers (Secura® only) Purpose: You can define identifiers for the following print jobs: – Device identification (ID): printed in header of GLP printout. – Additional ID (A ID): printed in header of GLP printout. – Batch ID (L ID): queried after each GLP head in GLP printout at beginning of measurement. – Sample ID (S ID): for printouts via the g button. This ID is queried before each printout. Requirements: – The balance must be connected to a Sartorius lab printer or PC for printouts (see page 78). – The settings for individual identifiers can be configured in the system settings under Identifier (see page 34). – The GLP printout can be activated in the system settings under Printout in Manual print (see page 33). Starting the Printout Example: Configuration of system settings for printing sample ID (S ID): Identifier – Sample ID function – Autom. increment t Place the sample on the weighing pan. tSelect g to print. Max 120 g + d=0.00001 g 14.42000 y The identifier for the printout is displayed. The displayed value can be changed if desired. – Delete the last character: Select k. tTouch l to confirm. y The weight value is displayed. A sample printout can be seen below: ---------------------- 44 Secura, Quintix User Manual S ID Sample 11 N S ID N +100.21000 g Sample 12 +100.19000 g Weighing 7.4 Mixing Purpose: Use this application to weigh up to 99 components one after the other for a mixture or formula in one container. The balance is automatically tared after each component is weighed. The weight value of an individual component or the total weight can be displayed as desired. Example: You want to weigh several components of a formula in one container. t Select the menu key in any application. t Select the Mixing symbol in the menu. yThe Mixing application appears. Max 120 g d=0.00001 g 0.00000 Component 1 Component 1 t To change the settings, select the gray button. y The Mixing settings window appears. Mixing Print component On t Choose whether the individual weights of the components are printed out when a printer is connected. tTouch l to confirm. Off tSelect A to zero the balance if necessary. t Place a container on the weighing pan. tSelect D to tare the balance. Secura, Quintix User Manual 45 Weighing t Place the first component on the weighing pan. y The weight value is displayed. Max 120 g Net + d=0.00001 g 14.33000 Component 1 t To save the component, select v. y The component is saved, and the balance is automatically tared. Max 120 g Net1 d=0.00001 g 0.00000 Component 2 END t Place the next component on the weighing pan. t To save the component, select v. t Continue this procedure with additional formula components. 46 Secura, Quintix User Manual Weighing Net1 t To view the total weight, select the Net1/Total button on the weighing display. y The total weight is displayed. Max 120 g Total + d=0.00001 g 26.28000 Component 3 END Total t To change back to viewing the individual weights of each component, select the Net1/Total button again. t To exit the function, select x. y The total weight is displayed and the application switches back to its original state. Printing Results Requirements: For printouts, a printer (e.g., Sartorius YDP40) or PC must be connected and configured (see page 78). In the Mixing settings window the Print component option must be set to On. Max 120 g Net + d=0.00001 g y If a printer is connected, an additional button automatically appears at the top right of the display. 26.28000 Component 1 y When each component is saved, their weight value is printed (Comp1, Comp2, etc.) ySelect x to print the total weight (T-Comp). y A sample of the complete printout is given below: ---------------------Comp1 + 14.33000 g Comp2 + 5.97000 g Comp3 + 5.98000 g T-Comp+ 26.28000 g There is an online animation for this application. Click here to view it: Secura, Quintix User Manual 47 Weighing 7.5 Statistics Purpose: Save weight values and statistically evaluate them. You can save up to 99 components. The values are generated as results: – Number of components –Average – Standard deviation – Variation coefficient – Sum of all values – Lowest value (minimum) – Highest value (maximum) – Spread: Difference between maximum and minimum Requirements: For printouts, a printer must be connected and configured (see page 78). t Select the menu key in any application. t Select the Statistics symbol in the menu. yThe Statistics application appears. Max 120 g d=0.00001 g 0.00000 Component 1 Component 1 t To change the settings, select the gray button. yThe Statistics settings window appears. Statistics Print component Automatic tare On On Off Off t Choose whether the individual weights of the components are printed out. t Determine whether the balance is tared when a component is saved. tTouch l to confirm. tSelect A to zero the balance if necessary. t Place a container on the weighing pan. 48 Secura, Quintix User Manual Weighing tSelect D to tare the balance. t Place the first component on the weighing pan. y The weight value is displayed. Max 120 g Net + d=0.00001 g 14.33000 Component 1 t To save the component, select v. t Remove the first component from the weighing pan and place the next component on the balance. t To save the component, select v. t Continue this procedure with additional components. y The weight values of the saved components (Comp1, Comp2, etc.) are printed on the connected printer. A sample printout can be seen below: ---------------------Comp1 + 14.33000 g Comp2 + 8.47000 g Comp3 + 18.30000 g Comp4 + 13.19000 g Comp5 + 13.18000 g t To display the intermediate result for previously saved components, select n. Secura, Quintix User Manual 49 Weighing Report Number of components: Average: Standard deviation: Variation coefficient: Total: Minimum: Maximum: Spread: n5 x 13.49000 g s 3.60000 g sRel 27 % Sum 67.47000 g Min 8.47000 g Max 18.30000 g Diff 9.83000 g y The following values are displayed as an intermediate result: – Number of saved components –Average – Standard deviation – Variation coefficient – Sum of all values – Lowest value (minimum) – Highest value (maximum) – Spread: Difference between maximum and minimum t To print the intermediate result, select a. y The analysis is printed on the connected printer as it appears in the report (n, x, s, sRel, etc.). A sample printout can be seen below: ---------------------n 5 x + 13.49000 g s + 3.60000 g sRel + 27.00 % Sum Min Max Diff + 67.47000 g + 8.47000 g + 18.30000 g + 9.83000 g t To switch back to the Statistics application, select m. t Weigh additional components, if any, and display the updated intermediate result. Max 120 g Net + d=0.00001 g 12.03000 Component 5 END t To exit the function, select x. y The application returns to its original state. There is an online animation for this application. Click here to view it: 50 Secura, Quintix User Manual Weighing 7.6 Totalizing Components Purpose: Totalize weight values. You can save up to 99 components. This allows you to save components that must be weighed in various containers. Each container can be tared before each component is weighed. Example: You have a formula, the components of which should not be mixed together immediately. Use this application to weigh individual components in different containers, print out the results, and check the total weight at any time. t Select the menu key in any application. t Select the Components symbol in the menu. yThe Components application appears. Max 120 g d=0.00001 g 0.00000 Component 1 Component 1 t To change the settings, select the gray button. yThe Components settings window appears. Components Print component On t Choose whether the individual weights of the components are printed out. tTouch l to confirm. Off tSelect A to zero the balance if necessary. t Place the container for the first component on the weighing pan. tSelect D to tare the balance. Secura, Quintix User Manual 51 Weighing t Place the first component on the weighing pan. y The weight value is displayed. Max 120 g Net + d=0.00001 g 14.32000 Component 1 t To save the component, select v. t Remove the load from the balance. t Place the container for the second component on the weighing pan. tSelect D to tare the balance. t Place the second component on the weighing pan. t To save the component, select v. y The weight value is displayed. Max 120 g Sum + d=0.00001 g 32.59000 Component 3 52 END Secura, Quintix User Manual Weighing t Continue this procedure with additional components. Net t To view the total weight, select the Net button on the weighing display. y The total weight of all saved components is displayed. Max 120 g Sum + d=0.00001 g 51.67000 Component 4 END Sum t To switch back to view individual weights, select the Sum button. t To exit the function, select x. y The application returns to its original state. Printing Results Requirements: For printouts, a Sartorius YDP40 printer or PC must be connected and configured (see page 78). Max 120 g Net + d=0.00001 g 14.32000 y If a printer is connected, an additional button automatically appears at the top right of the display. tSelect a to print the current value. Component 1 Max 120 g Net + d=0.00001 g 18.27000 Component 2 END y When each component is saved, their weight value is printed (Comp1, Comp2, etc.). ySelect x to print the total weight (T-Comp). y A sample of the complete printout is given below: ---------------------Comp1 + 14.32000 g Comp2 + 18.27000 g Comp3 + 13.73000 g T-Comp+ 51.67000 g There is an online animation for this application. Click here to view it: Secura, Quintix User Manual 53 Weighing 7.7 Density Purpose: Use this application to determine the density of solid samples based on the buoyancy method. The density is determined using Archimedes' Principle. The upward buoyant force exerted on a body immersed in a fluid is equal to the weight of the fluid the body displaces. Calculation Basis for Density Determination Density determination using the buoyancy method is based on the following formula: ρ ρfl Wa Wfl Density of sample (Rho) Density of buoyancy liquid Weight of sample in air Weight of sample in liquid Buoyancy: ρ = (Wa / (Wa - Wfl)) * ρfl Requirements: A Sartorius density determination kit is required for this function (see Chapter “Accessories” on page 103). Mount the density determination kit on the balance and prepare it as described in the kit instructions. t Select the menu key in any application. t Select the Density symbol in the menu. yThe Density application appears. The density of the buoyancy liquid is displayed under Density of liquid. The following values are preset for distilled water at various temperatures: – 0.99823 g/cm3 at 20°C – 0.99802 g/cm3 at 21°C – 0.99780 g/cm3 at 22°C Additional density values can be found in the table on page 57. Max 120 g d=0.00001 g 0.00000 Density of liquid 0.99820 g/cm 54 3 Secura, Quintix User Manual Weighing Density of liquid 0.9982 g/cm t To change the density of the buoyancy liquid, select the gray button. 3 yThe Density settings window appears. Density Density of liquid Accuracy 0.9982 0 0.9980 0.0 0.9978 0.00 t Enter the density of the buoyancy liquid on the left. Select a value or select t, enter the desired value, and confirm with l. t Select the accuracy of the density result on the right. tTouch l to confirm. 0.000 t Attach the sample holder to the frame of the density determination kit. t Fill the beaker in the density determination kit with the buoyancy liquid. Ensure that the sample holder is sufficiently immersed in the liquid in order to hold the sample later. t If distilled water is used as the buoyancy liquid, add three drops of tenside to reduce the effect of surface tension on the measurement result. tSelect D to tare the balance. y The balance is tared with the prepared density determination kit. Max 120 g Net d=0.00001 g 0.00000 Density of liquid 0.99820 g/cm 3 t To begin density determination, select w. t Place the sample on the weighing pan above on the frame of the density determination kit. y The weighing display shows the step Weight in air. Max 120 g Net + d=0.00001 g 4.89090 Weight in air END Secura, Quintix User Manual 55 Weighing t To save the weight value, select v. t Remove the sample from the weighing pan and place it in the sample holder of the density determination kit using forceps. ! E nsure that the sample is completely submerged in the buoyancy liquid and that no air bubbles have formed on the sample. y The weighing display shows the step Weight in medium. Max 120 g Net + d=0.00001 g 4.47870 Weight in medium END t To save the weight value, select v. y The balance calculates the density of the sample and displays this value. Max 120 g + d=0.00001 g 11.86000 END t To exit the function, select x. y The application returns to its original state. If the GLP printout function is activated, the GLP printout is automatically printed (see page 33). There is an online animation for this application. Click here to view it: 56 Secura, Quintix User Manual Weighing Density Values of H2O at Temperature T (in °C) T/°C 0.00.10.20.30.40.50.60.70.80.9 10. 11. 12. 13. 14. 0.999730.999720.999710.999700.999690.999680.999670.999660.999650.99964 0.999630.999620.999610.999600.999590.999580.999570.999560.999550.99954 0.999530.999510.999500.999490.999480.999470.999460.999440.999430.99942 0.999410.999390.999380.999370.999350.999340.999330.999310.999300.99929 0.999270.999260.999240.999230.999220.999200.999190.999170.999160.99914 15. 16. 17. 18. 19. 0.999130.999110.999100.999080.999070.999050.999040.999020.999000.99899 0.998970.998960.998940.998920.998910.998890.998870.998850.998840.99882 0.998800.998790.998770.998750.998730.998710.998700.998680.998660.99864 0.998620.998600.998590.998570.998550.998530.998510.998490.998470.99845 0.998430.998410.998390.998370.998350.998330.998310.998290.998270.99825 20. 21. 22. 23. 24. 0.998230.998210.998190.998170.998150.998130.998110.998080.998060.99804 0.998020.998000.997980.997950.997930.997910.997890.997860.997840.99782 0.997800.997770.997750.997730.997710.997680.997660.997640.997610.99759 0.997560.997540.997520.997490.997470.997440.997420.997400.997370.99735 0.997320.997300.997270.997250.997220.997200.997170.997150.997120.99710 25. 26. 27. 28. 29. 0.997070.997040.997020.996990.996970.996940.996910.996890.996860.99684 0.996810.996780.996760.996730.996700.996680.996650.996620.996590.99657 0.996540.996510.996480.996460.996430.996400.996370.996340.996320.99629 0.996260.996230.996200.996170.996140.996120.996090.996060.996030.99600 0.995970.995940.995910.995880.995850.995820.995790.995760.995730.99570 30. 0.995670.995640.995610.995580.995550.995520.995490.995460.995430.99540 Density Values of Ethanol at Temperature T (in °C) T/°C 0.00.10.20.30.40.50.60.70.80.9 10. 11. 12. 13. 14. 0.797840.797750.797670.797580.797500.797410.797330.797250.797160.79708 0.796990.796910.796820.796740.796650.796570.796480.796400.796310.79623 0.796140.796060.795980.795890.795810.795720.795640.795550.795470.79538 0.795300.795210.795130.795040.794960.794870.794790.794700.794620.79453 0.794450.794360.794280.794190.794110.794020.793940.793850.793770.79368 15. 16. 17. 18. 19. 0.793600.793520.793430.793350.793260.793180.793090.793010.792920.79284 0.792750.792670.792580.792500.792410.792320.792240.792150.792070.79198 0.791900.791810.791730.791640.791560.791470.791390.791300.791220.79113 0.791050.790960.790880.790790.790710.790620.790540.790450.790370.79028 0.790200.790110.790020.789940.789850.789770.789680.789600.789510.78943 20. 21. 22. 23. 24. 0.789340.789260.789170.789090.789000.788920.788830.788740.788660.78857 0.788490.788400.788320.788230.788150.788060.787970.787890.787800.78772 0.787630.787550.787460.787380.787290.787200.787120.787030.786950.78686 0.786780.786690.786600.786520.786430.786350.786260.786180.786090.78600 0.785920.785830.785750.785660.785580.785490.785400.785320.785230.78515 25. 26. 27. 28. 29. 0.785060.784970.784890.784800.784720.784630.784540.784460.784370.78429 0.784200.784110.784030.783940.783860.783770.783680.783600.783510.78343 0.783340.783250.783170.783080.782990.782910.782820.782740.782650.78256 0.782480.782390.782300.782220.782130.782050.781960.781870.781790.78170 0.781610.781530.781440.781360.781270.781180.781100.781010.780920.78084 30. 0.780750.780660.780580.780490.780400.780320.780230.780140.780060.77997 Secura, Quintix User Manual 57 Weighing 7.8 Percentage Purpose: This application is used to determine the percentage share or the percentage difference of the sample related to a reference weight. t Select the menu key in any application. t Select the Percentage symbol in the menu. yThe Percentage application appears. The reference percentage is displayed under Reference (e.g., 10.0%). Max 120 g d=0.00001 g 0.00000 Reference 10.0 % Reference 10.0 % t To change the reference percentage, select the gray button. yThe Percentage settings window appears. Percentage Reference Accuracy 10.0 0 50.0 0.0 100.0 0.00 0.000 t Enter the reference percentage on the left. Select a value or select t, enter the desired value, and confirm with l. t Select the accuracy of the percentage display on the right. tTouch l to confirm. tSelect A to zero the balance if necessary. t Place a container on the weighing pan. tSelect D to tare the balance. 58 Secura, Quintix User Manual Weighing t Place the reference sample on the weighing pan. y The weight of the reference sample is displayed. Max 120 g + d=0.00001 g 14.32000 Reference 10.0 % tSelect w. y The reference percentage is displayed. The weight of the reference sample is displayed under Reference weight. Max 120 g % + d=0.00001 g 10.00000 Reference weight 14.32000 t Remove the reference sample from the balance. END t Place the unknown sample on the weighing pan. y The balance shows the percentage of the sample based on the reference sample. Max 120 g % d=0.00001 g 100.10000 + Reference weight 14.32000 END Secura, Quintix User Manual 59 Weighing % t To view the sample weight, select the % button on the weighing display. y The weight of the sample is displayed. Max 120 g Net + d=0.00001 g 43.28000 Reference weight 14.32000 END Net t To change back to viewing the percentage, select the Net button again. t Place additional samples on the weighing pan, if any, to calculate their percentages based on the reference sample. t To exit the function, select x. y The application returns to its original state. There is an online animation for this application. Click here to view it: 60 Secura, Quintix User Manual Weighing 7.9 Conversion Purpose: Use this application to multiply the weight value by a user-defined factor. Division is also possible if a factor of less than one is selected. The selected factor is saved to protected memory. Example: You want to calculate the weight per unit of a sheet of paper (DIN A4). To do so, proceed as follows: – The weight per unit (e.g., 80 g/m2) can be determined by dividing the weight by the surface. – The surface of a sheet of DIN A4 paper is: 0.210 + 0.297 = 0.06237 m2. – Division by 0.06237 is equal to multiplication by reciprocal value 1 / 0.06237, i.e., 16.03335. – Set the factor to 16.03335 in the application. t Select the menu key in any application. t Select the Conversion symbol in the menu. yThe Conversion application appears. The multiplier is displayed under Factor. Max 120 g d=0.00001 g 0.00000 Factor 1 Factor 1 yThe Conversion settings window appears. Conversion Factor 16.03335 1 2 t To set the factor and accuracy of the conversion, select the gray button. Accuracy 0 0.0 t On the left, enter the factor by which the weight of the sample will be multiplied. Select a value or select t, enter the desired value, and confirm with l. t Select the accuracy of the conversion display on the right. tTouch l to confirm. 0.00 tSelect A to zero the balance if necessary. tSelect w. Secura, Quintix User Manual 61 Weighing t Place the sample on the weighing pan. Max 120 g Res + d=0.00001 g y The weight of the sample is multiplied by the entered factor, and the result is displayed. 81.40000 Factor END 16.03335 t Place additional samples on the weighing pan, if any, to multiply their weights by the entered factor. Res t To view the measured individual weight of the sample, select the Res button on the weighing display. y The individual weight of the sample is displayed. Max 120 g Net + d=0.00001 g 5.08000 Factor 16.03335 END Net t To switch back to the calculated result, select the “Net/G” button again. t To exit the function, select x. y The application returns to its original state. There is an online animation for this application. Click here to view it: 62 Secura, Quintix User Manual Weighing 7.10Unstable Condition Purpose: This application is used for moving samples (e.g., live animals) and for weighing in unstable environments. A measurement cycle is automatically carried out with a defined number of measurements for each object to be weighed. The individual measurements are averaged, and this average is displayed as the result. t Select the menu key in any application. t Select the Unstable condition symbol in the menu. yThe Unstable condition application appears. The set number of measurements is displayed under Measurements. Max 120 g d=0.00001 g 0.00000 Measurements 5 Measurements 5 yThe Unstable condition settings window appears. Unstable condition Measurements 5 10 20 Instability t To set the number of measurements and define other settings, select the gray button. Start Auto Manual t Enter the number of measurements on the left. Select the number of measurements on the left or select t, enter the desired value, and confirm with l. t Select the degree of instability of movement in the middle (e.g., for the starting criterion of the measurement). t On the right, choose whether the measurements are started manually with Manual or Auto. tTouch l to confirm. tSelect A to zero the balance if necessary. t To weigh a living animal, place a container or cage on the weighing pan. tSelect D to tare the balance. Secura, Quintix User Manual 63 Weighing t Place the animal in the container. t If the start of measurement is set to Manual, select w. If the start of measurement is set to Auto, the measurement begins as soon as the individual weight values fall within the preset fluctuation range/instability. y The specified number of measurements is carried out. The average is calculated and displayed. Max 120 g + d=0.00001 g 49.21000 Measurements 5 END t To view the current weight value, select the \ button on the weighing display. y The (fluctuating) current weight value is displayed in gray. Max 120 g Net + d=0.00001 g 38.84000 Measurements 5 END Net t To change back to viewing the calculated average, select the Net button again. t To exit the function, select x. Or remove the sample from the weighing pan. y The application returns to its original state. There is an online animation for this application. Click here to view it: 64 Secura, Quintix User Manual Weighing 7.11Checkweighing Purpose: Use this application to check whether a weight value falls within the specified tolerances. This application also makes it easy to fill sample materials to a specified target weight. t Select the menu key in any application. t Select the Checkweighing symbol in the menu. yThe Checkweighing application appears. The set thresholds are displayed under Min and Max. Max 120 g d=0.00001 g 0.00000 Min Max 90.00000 g 95.00000 g Min Max 0.00 g t To set the thresholds, select the gray button. 0.00 g yThe Checkweighing settings window appears. Checkweighing Min Max 0.00 0.00 00.0 0.00 00.0 0.00 t Select or enter the lower threshold (minimum) and the upper threshold (maximum). Select t, enter the desired value, and confirm with l. tTouch l to confirm. y The set thresholds are displayed. Max 120 g d=0.00001 g 0.00000 Min Max 90.00000 g 95.00000 g tSelect A to zero the balance if necessary. t Place a container on the weighing pan. Secura, Quintix User Manual 65 Weighing tSelect D to tare the balance. tSelect w. t Place the sample on the weighing pan. y The weight value is displayed. The colored bar indicates whether the weight value falls within the thresholds: – Yellow: The weight value is too low. – Green: The weight value is OK and falls within the specified range. – Red: The weight value is too high. Max 120 g G + d=0.00001 g 93.19000 Min Max 90.00000 g 95.00000 g END t Add the sample to the weighing pan until the desired value is reached, or place other samples, if any, on the weighing pan for checkweighing. t To exit the function, select x. y The application returns to its original state. There is an online animation for this application. Click here to view it: 66 Secura, Quintix User Manual Weighing 7.12Peak Hold Purpose: Use this application to calculate the maximum weight value of a sample (peak value). The value remains on the display for five seconds after the sample has been removed from the balance. Example: You wish to measure the release force during an experiment. t Select the menu key in any application. t Select the Peak hold symbol in the menu. yThe Peak hold application appears. Max 120 g d=0.00001 g 0.00000 t To define the setting for calculating the peak hold, select the gray button. Peak hold y The Peak hold settings window appears. Apply At stability Without stability t Choose whether the peak hold (max. value) is calculated At stability or Without stability. –The At stability setting is suitable for stable samples. It ensures that the weight value fluctuations when placing or removing the sample from the balance do not cause the calculated peak value to be incorrect. –The Without stability setting is suitable for unstable samples. tTouch l to confirm. tSelect A to zero the balance if necessary. tSelect w. t Place the sample on the weighing pan. Secura, Quintix User Manual 67 Weighing Max 120 g Hold + d=0.00001 g y The maximum measured weight value is displayed and kept as long as the sample remains on the balance. 44.80000 Apply END Hold t To view the current weight value, select the Hold button on the weighing display. y The current weight value is displayed. G t To change back to viewing the peak hold (max. value), select the G or Net button again. t Remove the sample from the weighing pan. y In the “Hold” display mode the balance displays the peak hold (max. value) for another five seconds before switching back to zero. t Place the additional samples, if any, on the weighing pan. t To exit the function, select x. y The application returns to its original state. There is an online animation for this application. Click here to view it: 68 Secura, Quintix User Manual Weighing 7.13Counting Purpose: Use this application to determine the number of parts of approximately equal weight. The weight of a counted reference sample is calculated and then the objects with an unknown piece count are weighed. The balance displays the number of parts and the piece weight. Minimize counting errors: – Ensure that the weight of individual parts is evenly distributed. – Larger reference piece counts lead to a higher degree of accuracy. – Switch on Auto Reference Updating. t Select the menu key in any application. t Select the Counting symbol in the menu. yThe Counting application appears. The piece count of the reference sample is displayed under Reference. Max 120 g d=0.00001 g 0.00000 Reference 5 pcs Reference 5 pcs t To set the reference sample quantity, select the gray button. yThe Counting settings window appears. t Enter the reference sample quantity on the left. Select a value or select t, enter the desired value, and confirm with l. t Select the accuracy of the weight value during counting in the middle. y Activate “Automatic Reference Sample Updating” on the right. Automatic reference sample updating optimizes the counting accuracy. The average piece weight is recalculated every time the reference sample is updated automatically. Since the new parts broaden the basis for the calculation, this increases the counting accuracy of the reference and with it the result. tTouch l to confirm. tSelect A to zero the balance if necessary. t Place a container on the weighing pan. Secura, Quintix User Manual 69 Weighing tSelect D to tare the balance. t Place the set number of reference samples on the weighing pan. y The weight value is displayed. Max 120 g + d=0.00001 g 1.83000 Reference 10 pcs tSelect w. y The weighing displays changes and shows the piece count. The average piece weight is shown on the weighing display. “Update automatically” setting: y If the balance is performing the automatic reference sample update, “Update” will display the new average piece weight. Max 120 g d=0.00001 g Qnt + 10 Piece weight 0.18340 END t Place the sample with the unknown piece count on the weighing pan. y The piece count is calculated and displayed. t Place other pieces, if any, on the balance to reach a specific desired count. Max 120 g d=0.00001 g Qnt + 27 Piece weight 0.18340 70 Secura, Quintix User Manual END Weighing Qnt t To view the total weight of the sample, select the Qnt button on the weighing display. y The total weight of the sample is displayed. Max 120 g Net + d=0.00001 g 4.95000 Piece weight 0.18340 END Net t To change back to viewing the piece count, select the Net button again. t To exit the function, select x. y The application returns to its original state. There is an online animation for this application. Click here to view it: Secura, Quintix User Manual 71 Calibration and Adjustment 8. Calibration and Adjustment BackgroundDuring calibration, a calibration weight is used to determine how much the displayed value deviates from the actual measurement value. This deviation is compared against a preset target value. The subsequent adjustment corrects this deviation or reduces the permissible error limits. In Secura® and Quintix® balances, calibration and adjustment are combined as one process. The balance is automatically adjusted after each calibration. Before using a verified balance for legal metrology, calibration/adjustment must always be carried out at the balance setup location. This can be performed automatically or manually. When and How Often To achieve the highest accuracy possible, regularly calibrate and adjust the balance: – daily after switching on the balance. – each time the balance is leveled. – each time ambient conditions have changed (temperature, humidity, or air pressure). – each time the balance is set up at a new location or moved in its current location. The following describes in detail the available options for calibrating and adjusting the balance: – Calibration/adjustment using an internal calibration weight – Calibration/adjustment using an external calibration weight (see “Calibration/Adjustment Using an External Calibration Weight” on page 74) – Automatic calibration/adjustment with isoCAL 72 Secura, Quintix User Manual Calibration and Adjustment 8.1 Calibration/Adjustment Using an Internal Calibration Weight The balance is fitted with an internal calibration weight in the housing. This calibration weight is automatically placed on the balance by a motor during internal calibration and adjustment. t Ensure that the balance is stable, the draft shield is closed, and the weighing pan is empty. tSelect A to zero the balance. t Select the menu key at the bottom left of the display in the current application. y The menu appears. Weighing Mixing Statistics Components t Select the CAL button to access the calibration function. yThe Calibrate balance window appears. Calibrate balance CAL-Extern tSelect CAL-Intern. CAL-Intern y Calibration begins. – The internal weight is automatically placed on the balance in the housing. – The balance is calibrated and then immediately adjusted. – The internal weight is automatically removed from the balance. Report Date and Time: Calibration function: Start calibration: Calibration deviation: Adjustment function: Adjustment deviation: 14-Jun-2014 13:10 Internal calibration Start: manually Dev 0.00001 g Internal adjustment Dev 0.00000 g y A report appears on the display. The report indicates the deviations identified during calibration. The report also gives the result of the adjustment process. t Close the report window: Select <. y The balance is now calibrated and adjusted. Information on potential errors can be found in Chapter “Status Messages” on page 90. Secura, Quintix User Manual 73 Calibration and Adjustment 8.2 Calibration/Adjustment Using an External Calibration Weight An external calibration weight is required for this function. Please note the tolerance of the calibration weight being used. In verified balances with accuracy class k, external adjustment can only be accessed when the access switch is open. t Make sure that the weighing pan is empty. tSelect A to zero the balance. t Select the menu key at the bottom left of the display in the current application. y The menu appears. Weighing Mixing Statistics Components t Select the CAL button to access the calibration function. yThe Calibrate balance window appears. Calibrate balance tSelect CAL-Extern. CAL-Extern CAL-Intern y A message appears on the display, prompting the user to place the calibration weight on the weighing pan. t Place the calibration weight on the weighing pan. y Calibration starts automatically. Report Date and Time: Calibration function: Start calibration: Calibration weight: Calibration deviation: Adjustment function: Adjustment deviation: 14-Jun-2014 14:13 External calibration Start: manually Set 100.00000 g Dev 0.00002 g External adjustment Dev 0.00000 g y A report appears on the display. The report indicates the deviations identified during calibration. The report also gives the result of the adjustment process. t Close the report window: Select <. y The balance is now calibrated and adjusted. 74 Secura, Quintix User Manual Information on potential errors can be found in Chapter “Status Messages” on page 90. Calibration and Adjustment 8.3 Automatic Calibration/Adjustment with isoCAL Fully automatic calibration/adjustment ensures that the balance is automatically calibrated and adjusted when predefined time intervals or temperature values are exceeded. This function varies in different models: – isoCAL is automatically carried out based on time or temperature, and each time the balance is leveled. This function can be switched off via the system settings (see page 30). isoCAL Max 120 g d=0.00001 g 0.00000 In Secura® models, every adjustment process, including the identified deviations, is documented and saved on the balance. The saved reports can be viewed via the system settings and printed out on a PC or Sartorius lab printer (see page 30). y If the ambient temperature has changed since the last calibration/adjustment or the preset time interval has been exceeded, the red isoCAL button appears on the display. y If the isoCAL function is set to Automatic, the calibration/adjustment process starts automatically. ! If the balance has not been adjusted, the prompt will be shown again 5 minutes after the “isoCAL” status message is acknowledged. y If the isoCAL function is set to Info, manual start, the function must be started manually. t To start the calibration/adjustment function manually, select the isoCAL button. isoCAL y Calibration starts automatically. Report Date and Time: Calibration function: Start calibration: Calibration deviation: Adjustment function: Adjustment deviation: 14-Jun-2014 15:18 Internal calibration Start: isoCAL (Niv) Dev -0.00001 g Internal adjustment Dev 0.00000 g y A report appears on the display. The report indicates the deviations identified during isoCAL calibration. The report also gives the result of the adjustment process. t Close the report window: Select <. y The balance is now calibrated and adjusted. Secura, Quintix User Manual 75 ISO/GLP-compliant Printout 9. ISO/GLP-compliant Printout Characteristics The device information, ID, and the current date can be printed before (GLP header) and after (GLP footer) the values from the weighing series. The following data is printed: GLP header: – Date, time at the start of a weighing series – Balance manufacturer – Balance model – Model serial number – Software version number of the balance (BAC) – Software version number of the display (APC) – Two identification numbers (ID and A ID) with max. 14 characters (ASCII) – Device and batch ID with max. 14 characters (if activated in the system settings) GLP footer: –Date – Time at the end of a weighing series – Field for signature Configuration To print out the ISO/GLP report, define the following system settings (see page 33): t Activate ISO/GLP-compliant printouts: Go to the Printout menu, select “Manual with stability,” and then under Manual print, set the ISO/GLP printout option to On. t Set printout format of date and time: Go to the Printout menu, and then under Manual print, select Manual print format and choose a setting. – Select any setting except “Value w/o identifier.” The ISO/GLP printout is not printed if “Value w/o identifier” is set when connected to a PC. – The ISO/GLP printout is only printed if the “Manual with stability” setting is selected under Printout. The “Value w/o identifier” menu option is only displayed if data is being output to a PC. Operation t To print the header and the first measurement value: Select the d key. y To print the header and start an application: Select the w key. y The header is included with the first printout. y To print the results of the application and the footer: Select the x key. t To print the footer: Select the f key. 76 Secura, Quintix User Manual ISO/GLP-compliant Printout y The ISO/GLP-compliant printout can have the following lines (configuration using date/time “DD-MMM-YYYY” and “12h AM/PM”): ---------------------09-Nov-2014 02:50 pm Sartorius Mod. Secura 125-1S SerNo. 0032109091 BAC: 00-50-05 APC: 01-71-02 ID Device 1234 A ID Inv.-Nr. 11 ---------------------L ID CH01 09-Nov-2014 02:50 pm S ID Tablette 4321 N + 0.90000 g T + 0.60000 g G# + 1.50000 g ---------------------09-Nov-2014 02:50 pm Name: ---------------------y A sample ISO/GLP printout for external calibration/adjustment can be seen below (configuration using ISO date/time): ---------------------2014-11-23 14:57 Sartorius Mod. Secura 125-1S SerNo. 0032109091 BAC: 00-50-05 APC: 01-71-02 ID Device 1234 A ID Inv.-Nr. 11 ---------------------2014-11-23 14:57 External calibration Start: manually Set + 50.00000 g Dev + 3.00000 g External adjustment Dev 0.00000 g ---------------------2014-11-23 14:57 Name: ---------------------- Secura, Quintix User Manual 77 USB Port 10. USB Port 10.1Communication with Peripheral Devices The following steps may not be able to be carried out due to restricted user authorizations. Contact your company's IT department if problems occur. Purpose: The interface is used to exchange data with connected peripheral devices: Measured values and calculated values can be output to a printer, PC, or remote display; conversely, control commands and data inputs can be sent via connected devices (such as a PC). The protocols SBI and xBPI can be transmitted via the USB port. The following connections to peripheral devices are possible: Sartorius order no.: YCC04-D09 1) Mini-B Type-A Printer equipment supplied 2) Mini-A Mini-A Mini-A Secura, Quintix User Manual RS 232 9-pin Sartorius order no.: YCC03-D25 4) USB Host (Master) Removable data carrier Printer YDP30 Printer YDP40 Off USB Device (Slave) Printer YDP20-0CE Second display YRD03Z USB-RS 232 SBI USB-RS 232 xBPI Off Serial device with 9-pin SUB-D plug (Printer YDP20-0CE) (Second display YRD03Z) USB-RS 232 SBI USB-RS 232 xBPI Off Serial device with 25-pin SUB-D plug Type-B Sartorius order no.: YCC03-D09 3) 78 PC-SBI PC-xBPI PC spreadsheet format PC text format Off RS 232 25-pin USB Port 10.2Direct Transfer of Data (PC) Requirements: – PC with Windows 7, Vista, Windows XP, or 2000 operating system – A to Mini-B USB connection cable from PC to balance, Sartorius order no. YCC04-D09 In legal metrology data can be transmitted to a PC and used with an Alibi memory. The balance does not have its own Alibi memory. Connection to a printer or Alibi printer is permitted. PC-SBI PC-xBPI PC spreadsheet format PC text format Off Sartorius order no.: YCC04-D09 Mini-B Type-A CDC virtual COM port (2) HID keyboard (1) Host (Master) Removable data carrier (1) USB Connection as PC Keyboard without Additional Driver via a PC with Spreadsheet or Text Editor (e.g., Microsoft Office or OpenOffice) t Connect the balance to the PC using the supplied USB connection cable. t To access the system settings of the balance, select i (Setup) in the menu. Device / Protocol PC - xBPI PC spreadsheet format PC text format Off t To access the PC spreadsheet format menu option on the balance: Go to USB port and select the Device/Protocol option. Setting Options tIf you need to adjust the balance to match the settings on your PC, you can implement the following system settings: –For the spreadsheet, the decimal place and output format: See “System Settings” on page 35 –Emulation of the PC keyboard for English (USA) instead of Universal (Num Lock on): See “System Settings” on page 35 Secura, Quintix User Manual 79 USB Port yWith the “PC spreadsheet format” setting on the balance, Microsoft Excel 2010 has the following display for the “Gross/ Tare/Net” example: y With the “PC text format” setting on the balance, Microsoft Word 2010 has the following display for the “Gross/Tare/Net” example: Gross/Tare/Net Additional Data Transmission Settings on the PC [Keyboard Set to English (USA)] To ensure that the data is imported correctly from the balance using the spreadsheet or text program, the Office program installed on your PC needs to be configured. y Function test: –The HID keyboard connection appears in the Device Manager of the PC under Connections – Keyboards. t Set the language to English (USA) – U.S. in the language toolbar of the PC (e.g., in the taskbar). Note: If English (UK) is chosen, “G£” is printed instead of “G#.” 80 Secura, Quintix User Manual USB Port t Configure how Microsoft Excel treats numbers: In Excel, go to File – Options – Advanced – Editing options and set the following separators: – Decimal separator: Period – Thousand separator: Empty (none) t Configure the typographical quotation marks for OpenOffice Calc: In Calc, go to Tools – Autocorrect Options – Custom Quotes and set the following “Simple quotes”: – At the beginning of a word: empty space (U+200F) – At the end of a word: “ ‚ “ y Once data has been transferred to your PC, the following appears on the PC: – Microsoft Excel 2010 (example): Gross/Tare/Net –With the PC text format setting on the balance, Microsoft Word 2010 has the following display for the “Gross/Tare/Net” example: Gross/Tare/Net Secura, Quintix User Manual 81 USB Port (2) USB Connection: PC-SBI and PC-xBPI Operating Mode To use the balance as a slave device for the protocols PC-SBI and PC-xBPI, first install a USB driver on the connected PC. This driver can be located in the “Driver” folder on the balance. The balance is then operated via a virtual, serial interface (COM port). Installing the USB Driver The USB driver for the virtual, serial interface is Microsoft-listed and available online via the Microsoft Update Service. A USB driver does not need to be installed if the PC is connected to a network and has administrator rights (authorization to install updates). The driver is installed automatically on the PC in this case when the balance is connected to the PC. If the PC is not connected to a network, the following information must be taken into account: t Connect the balance to the PC using the supplied USB connection cable. t To access the system settings of the balance, select i (Setup) in the menu. t To access the USB mass storage menu option on the balance: Go to More settings and select the USB mass storage option. t To connect the balance memory to the PC: Select Start. USB mass storage Storage connect to PC? 82 Secura, Quintix User Manual USB Port t To install the installation program for the USB driver on the PC: Click on the appropriate removable data carrier (in this case, the E: drive) and then click on the Driver folder. t To select the Windows version: Click on the appropriate version of the PC. t Start the installation program InstallDriver.exe. t Follow the instructions from the installation program. y Function test: – Once the driver is installed, operating modes “PC-SBI” and “PC-xBPI” are available. – The “USB CDC serial port emulation” connection appears in the Device Manager of your PC under Connections. Note: This does not apply to operating modes “PC spreadsheet format,” “PC text format,” and “Off.” The data transfer commands can be found in Chapter “Data Input Formats.” Secura, Quintix User Manual 83 USB Port Connection with Sartorius Lab Printer YDP30, YDP40 Printer YDP30, YDP40 Printer equipment supplied 2) Mini-A Off Device (Slave) Type-B t Connect the balance to the Sartorius printer using the supplied USB connection cable. y The balance detects the printer automatically. No settings need to be changed. Connection for 9-pin RS-232 Configuration Printer YDP 20-0CE Second display YRD03Z USB-RS 232 SBI USB-RS 232 xBPI Sartorius order no.: YCC03-D09 3) Mini-A RS 232 9-pin Off Serial device t Connect the peripheral device to the balance using the Sartorius YCC03-D09 connection cable (RS-232, 9-pin, PC-compliant assignment). t Define the desired system settings: See page 35. Connection for 25-pin RS-232 Configuration Sartorius order no.: YCC03-D25 4) Mini-A RS 232 25-pin (Printer YDP20-0CE) (Second display YRD03Z) USB-RS 232 SBI USB-RS 232 xBPI Mini-A Off Serial device t Connect the peripheral device to the balance using the Sartorius YCC03-D25 connection cable (RS-232, 25-pin, Sartorius-specific assignment). t Define the desired system settings: See “USB Port” on page “USB Port” on page 35. 84 Secura, Quintix User Manual USB Port 10.3Interface Specification 10.3.1 Data Output You can define the data output parameter so that output is activated either when a manual print command is received or automatically synchronized with the display or at defined intervals (see application programs and autoprint settings). Data Output following Print Command The print command can be transmitted by pressing the a key or by a software command (ESC P). Automatic Data Output In Autoprint mode, data is output to the data interface port without an extra print command. You can have synchronized data output automatically or at defined intervals, with or without balance stability. If the automatic data output is activated in the Device Configuration, it starts immediately after the balance is turned on. 10.3.2 Data Output Formats You can output the values with or without an identifier. The output format is configured in the device settings (see page 33). Example: Output without ID + 253 pcs (16 characters are printed, “SBI” mode only) Example: Output with ID Qnt + 253 pcs (22 characters are printed, always with ID for printers and “PC text format”) Data Output Format with 16 Characters Characters that are blank on the display are printed as spaces. Display values without a decimal point are printed without a decimal point. Normal Operation No. 1 2 3 4 5 6 7 8 9 10 11 12 13 14 15 16 + A A A A A A A A A * E E E CR LF . . . . . . . . * * * * * * * * * * * or - or * * * A E Space Displayed characters Unit characters CR Carriage return LF Line feed . Decimal point or comma Secura, Quintix User Manual 85 USB Port Special Outputs No. 1 2 3 4 5 6 7 8 9 10 11 12 13 14 15 16 * * * * * * – – * * * * * * CR LF or * * * * * * L o w * * * * * CR LF or * * * * * * H i g h * * * * CR LF * –– Low High Space Final readout Underweight Overload Cal.Ext. Cal.Int. CR LF External adjustment Internal adjustment Carriage return Line feed Error message No. 1 2 3 4 5 6 7 8 * * * E r r * */# # * Space 9 10 11 12 13 14 15 16 # * * * * CR LF ### Error number Example: Output of the weight value + 111.255 g No. 1 2 3 4 5 6 7 8 9 10 11 12 13 14 15 16 * 1 2 3 . 4 5 6 7 8 * g * * CR LF + 1 2 3 . 4 5 6 7 [ 8 ]1) g * CR LF Position 1: Positions 2–11: Positions 12–14: Position 15: Position 16: 1) 86 Secura, Quintix User Manual Plus +, minus –, or space Space or weight value with decimal point; leading zeros are output as spaces. Characters for unit of measure or space Carriage return Line feed In settings “PC - SBI” and “USB RS-232 SBI” the non-verified display digit is not automatically identified. Corresponding measures or settings must be carried out on the peripheral device. USB Port 10.3.3 Data Output Format with 22 Characters When data is output in this format, ID codes with six characters will precede data. These characters identify the subsequent value. Normal Operation 1 2 3 4 5 6 7 8 9 10 11 12 13 14 15 16 17 18 19 20 21 22 K K K K K K + A A A A A A A A A * E E E CR LF * * * * * * - * . . . . . . . . * * * * * * * * * * * * * * K * A Marking Space Displayed characters CR Carriage return LF Line feed E Unit characters (see “Conversion Factors for Weight Units” on page 42) Example: 1 2 3 4 5 6 N N 7 8 9 10 11 12 13 14 15 16 17 18 19 20 21 22 + 1 2 3 . 4 5 6 7 8 * g * * CR LF g * CR LF + 1 2 3 . 4 5 6 7 [ 8 ]1) Special Outputs 1 2 3 4 5 6 7 8 9 10 11 12 13 14 15 16 17 18 19 20 21 22 S t a t * * * * * * * * – – * * * * * * CR LF H i g h L o w l . E t . C * Low High Cal.Ext. a x Space Underweight Overload External adjustment Cal.Int. CR LF Internal adjustment Carriage return Line feed Error message 1 2 3 4 5 6 7 8 9 10 11 12 13 14 15 16 17 18 19 20 21 22 S t a t * * * * * E r r * # # # * * * * CR LF * 1) Space ### Error number In settings “PC - SBI” and “USB RS-232 SBI” the non-verified display digit is not automatically identified. Corresponding measures or settings must be carried out on the peripheral device. Secura, Quintix User Manual 87 USB Port 10.3.4 Data Input Interface Commands The computer connected via the data port can send commands to the balance to control the functions of the balance. Formats for Control Commands (Syntax) Format 1 Esc ! CR LF Format 2 Esc ! # _ Esc ! # _ CR LF Escape Command character Number Underscore (ASCII: 95) Carriage return (optional) Line feed (optional) Examples: Format 1: Esc P Format 2: Esc x1_ 88 Secura, Quintix User Manual CR LF USB Port 10.3.5Overview of Interface Commands Format Command Action/Function Note 1 ESC P Print Corresponding menu settings; with/without stability 1 ESC T Tare or zero 1 ESC K Filter “Very stable conditions” 1 ESC L Filter “Stable conditions” (Corresponds to “Stable” menu setting) 1 ESC M Filter “Unstable conditions” (Corresponds to “Unstable” menu setting) 1 ESC N Filter “Very unstable conditions” 1 ESC O Block keys 1 ESC Q Acoustic signal 1 ESC R Unblock keys 1 ESC S Restart 1 ESC Z Internal calibration/adjustment 1 ESC U Tare 1 ESC V Zero 1 ESC W Ext. adjustment with standard weight (not available for verified models) Depending on menu 2 ESC kP_ Print as with Print button 2 ESC s3_ Go back, exit, cancel 2 ESC x1_ Print balance type 2 ESC x2_ Print serial number 2 ESC x3_ Print balance software version 2 ESC x4_ Print software version of display and control unit 2 ESC x5_ Print user/device ID Depending on menu and model Secura, Quintix User Manual 89 Status Messages 11. Status Messages Messages appear on the display when certain events occur: – Info messages are displayed for two seconds. The program then returns automatically to its original state. – Error messages are displayed until they are acknowledged with a key. 11.1Key Fadeout To prevent operating errors, only relevant functions/keys are displayed depending on the situation. This prevents most operating errors from occurring. The following buttons are only available in specific circumstances: A Only when there is a weight value within the zero setting range. D Only when there is a weight value larger than zero, i.e., positive. a Only when a peripheral device is connected and “Print” is not locked. z Only when calibration and adjustment functions are available and not locked. [ Only when the balance has an electronic level indicator. v Only when a weight value larger than zero is the value saved in the memory, if the value can be saved (e.g., value larger than SQmin). w Only when an application can be started (i.e., only when larger than zero and “Start” is permitted). 11.2Application Error Messages 90 Secura, Quintix User Manual “Value is too small!” When an entered value is too low for the parameter. “Value is too large!” When an entered value is too high for the parameter. “Incorrect license code!” When password protection is enabled and the code was entered incorrectly. “Not able to increase identifier.” When the sample ID could not be assigned a number in ascending order automatically (as described in Chapter “Individual Identifiers”). “Not able to decrease identifier.” When the sample ID could not be assigned a number in descending order automatically (as described in Chapter “Individual Identifiers”). Status Messages Calibration/Adjustment Error Messages “The balance needs to be adjusted.” When isoCAL is required. “The balance needs to be leveled.” When leveling is required. “Weight is too light!” When a weight that is too light is placed on the balance during external calibration. “Weight is too heavy!” When a weight that is too heavy is placed on the balance during external calibration. Leveling Error Messages “Level” The balance must be leveled (for balances with electronic level indicators only). Balance Maintenance Error Messages “Maintenance interval ended” When the maintenance date set by Service has passed. Calibration Report Error Messages “Cal. data not saved” When the 99 data records per day limit has been reached. “Unable to read file” When an error occurred when the file was being read. USB Device Error Message “The attached USB device is not supported.” When a USB device (printer) not made by Sartorius is connected. Secura, Quintix User Manual 91 Transporting the Balance 12. Transporting the Balance Please use the original packaging for shipping. Packaging can be ordered through the Sartorius Service Center if required. Avoid glass breakage, shocks and vibrations: Never lift or carry the balance by its draft shield! Prior to shipping, switch the balance to standby mode (see page page 94) and then pull the power plug. 12.1 Detaching the Draft Shield/Weighing Pan Danger of damage to the side panels! The guide carriages of the side panels are provided with fine steel filaments. Removal of these steel filaments or carrying out any other modifications to the guide carriages is forbidden. t Press against the front of the cover from both sides and fold it upwards. t Push the upper panel forwards and pull it out of the draft shield. t Push the side panels slightly backwards and remove them from the draft shield. t Pull the front panel over the groove of the draft shield and remove the panel. t Pull the weighing pan out of the collection container. Secura® 26: t Pull the weighing pan out of the collection container. t Take the shield disk off the collection container. t Remove the collection container. 92 Secura, Quintix User Manual Transporting the Balance 12.2 Packing the Balance t Insert the bottom part of the packaging into the box. t Place the balance in the bottom part of the packaging. t Place the remaining components of the balance into the recesses provided in the packaging part: – Collection container – Weighing pan – Right and left side panels – Top panel – Front panel – Shield disks (Secura® 26 only) t Close the cardboard with the components and the corresponding packaging part. t Place the cardboard in the recess provided for the purpose. t Put the top part of the packaging over the device parts. t Next, put the packaged balance into the cardboard box and seal the box. Secura, Quintix User Manual 93 Care and Maintenance 13. Care and Maintenance 13.1 Service To ensure the continued accuracy of your balance, we recommend scheduling regular servicing at least once a year. The Sartorius Service Center offers different service contracts for this purpose, which can be individually adapted to suit your needs (see also www.sartorius.com/service). A calibration certificate should always be issued as part of every maintenance session. Safety inspections of the AC adaptor and its connections must be performed at appropriate intervals by a qualified electrician (e.g., every 2 years). Repairs Repair work must only be carried out by trained service technicians. The device must be unplugged during repair work. Unplug from the mains power. In addition, the measurement accuracy of your balance may be affected and serious risks to the user may occur. Contact Sartorius Service or a Sartorius dealer for proper repairs. 13.2 Cleaning the Balance Cleaning the Control Panel Switch the display to standby mode to avoid modifying the settings for operation during cleaning. t Select the menu key to switch to the application selection. t If you then select j, the display is switched off. t To switch the display back on: Select j at the bottom left of the display. The balance starts in the application most recently used before the it was last switched off. 94 Secura, Quintix User Manual Care and Maintenance Cleaning the Balance Housing Contaminated Equipment: – Health risk from product contamination due to product deposits and the collection of residue with microbial contamination. – Health risk from biological or microbiological substances. – Observe cleaning specifications. – Examine the cleaning results closely. t Disconnect the equipment from the AC power: Disconnect the AC adapter from the power supply. Disconnect any data cable connected to the balance. Never open the balance or the AC adapter. The parts contained in these cannot be cleaned, repaired or replaced by the operator. – Make sure that no liquid or dust gets into the balance or the AC adapter. –Never use cleaning agents that contain solvents or abrasive ingredients, which can ultimately damage the equipment. Secura® and Quintix® models: Do not clean the following parts with acetone or aggressive cleaning agents: Control panel, mains plug, data interface, labels, verified seal and all other plastic parts. t Press against the front of the cover from both sides and fold it upwards. t Push the upper panel forwards and pull it out of the draft shield. t Push the side panels slightly backwards and remove them from the draft shield. t Pull the front panel over the groove on the bottom of the draft shield and remove the panel. Secura, Quintix User Manual 95 Care and Maintenance t Pull the weighing pan out of the collection container. t Remove the collection container. Secura® 26 t Pull the weighing pan out of the collection container. t Take the shield disk off the collection container. t Remove the collection container. You can also remove the collection container without taking out the panels. To do so, open the side panels, tilt the collection container, and carefully pull it out through the open side panels. If required, remove the rear panel for cleaning. t Press the locking mechanism above the rear panel upwards and remove the rear panel. t Clean the housing/panels and then dry the balance with a soft cloth. t After cleaning put together the components in reverse order: – Reinsert the rear panel. Ensure that this engages in the locking mechanism above the rear panel. – Follow the instructions in Chapter “Installing the Balance” on page 10. 96 Secura, Quintix User Manual Disposal 14. Disposal The packaging is made from environmentally-friendly materials that can be used as secondary raw materials. Packaging that is no longer needed can be disposed of in Germany free of charge via the VfW Dual System (contract number D-59101-20091129). Otherwise, dispose of the material at your local waste management facility according to the applicable regulations. The device, including accessories and batteries, must not be disposed of in general household waste and must be recycled similar to electrical and electronic devices. For disposal or recycling, please contact our service staff on-site. In addition, the partners listed on the following website are available within the EU: 1) 2) 3) 4) Select http://www.sartorius.com. Select the “Services” tab. Then select “Disposal Information.” Addresses for the local Sartorius disposal contacts can be found in the PDF files available for download on this page. Sartorius will not take back equipment contaminated with hazardous materials (ABC contamination) – either for repair or disposal. Service Address for Disposal: Detailed information, including service addresses for returning your device for repair or disposal, can be found on our website (www.sartorius.com) or requested from a Sartorius Service Center. Secura, Quintix User Manual 97 Specifications 15. Specifications 15.1 General Data Specification Unit Value AC Adapter Sartorius AC adapter module Primary 100 - 240 V~, -10% / +10%, 50–60 Hz, 0.2 A Secondary 15 V DC, ± 5%, 530 mA (max.) / 8 Watt (max.): 0 to +40°C 15 V DC, ±5%, 330 mA (max.) / 5 W (max.): 0 to +50°C Other data Protection class II in accordance with EN/IEC 60950-1 / up to 3000 m above sea level; IP40 in accordance with EN 60529/IEC 60529 Balance Power supply Only via Sartorius AC adapter module 6971790 Input supply voltage V DC 12.0 - 15.0 Power consumption W 4.5 (typically) Other data IP43 in accordance with EN 60529/IEC 60529 Ambient Conditions The specifications apply under the following ambient conditions: Environment For indoor use only Ambient temperature* °C +10 - +30 Operational capability °C Guaranteed between +5 and +45 Storage and shipping °C -10 - +60 Height m above sea level Up to 3000 Relative humidity** 15% to 80% for temperatures up to 31°C non-condensing, decreasing linearly up to 50% relative humidity at 40°C and 20% at 50°C Safety of Electrical Equipment In accordance with EN 61010-1/IEC 61010-1 Safety requirements for electrical equipment for measurement, control and laboratory use – Part 1: General requirements Electromagnetic Compatibility In accordance with EN 61326-1/IEC 61326-1 Electrical equipment for measurement, control and laboratory use – EMC requirements – Part 1: General requirements Interference resistance Suitable for use in industrial areas Transient emissions Class B Suitable for use in residential areas and areas that are connected to a low voltage network that also supplies residential buildings. Standard Equipment Selectable weight units1 Gram, kilogram, carat, pound, ounce, troy ounce, Hong Kong tael, Singapore tael, Taiwanese tael, grain, pennyweight, milligram, parts per pound, Chinese tael, momme, Austrian carat, tola, baht, mesghal and Newton Available application programs Secura® models: Counting, percentage, density determination, peak hold, unstable condition, checkweighing, mixing, components (totalizing), statistics, conversion, SQmin, and identifiers Quintix® models: Counting, percentage, density determination, peak hold, unstable condition, checkweighing, mixing, components (totalizing), statistics, conversion Verified balances in accordance with EU requirements comply with the requirements of Council Directive 2009/23/EC with EN 45501:1992 and OIML R76:2006. * For verified balances in accordance with EU requirements, refer to the information on the balance. **For verified balances in accordance with EU requirements, the legal regulations apply. 1 Depending 98 on the country-specific model version, not all weight units listed may be available. Secura, Quintix User Manual Specifications FCC Rules Safety Precautions: NOTE: This equipment has been tested and found to comply with the limits for a Class B digital device, pursuant to part 15 of the FCC Rules. These limits are designed to provide reasonable protection against harmful interference in a residential installation. This equipment generates, uses and can radiate radio frequency energy and, if not installed and used in accordance with the instructions, may cause harmful interference to radio communications. However, there is no guarantee that interference will not occur in a particular installation. If this equipment does cause harmful interference to radio or television reception, which can be determined by turning the equipment off and on, the user is encouraged to try to correct the interference by one or more of the following measures: – Reorient or relocate the receiving antenna. − Increase the separation between the equipment and receiver. − Connect the equipment into an outlet on a circuit different from that to which the receiver − Consult the dealer or an experienced radio/TV technician for help. Shielded Cables: Connections between the devices and peripherals must be made using shielded cables in order to maintain compliance with FCC radio frequency emission limits. Modifications: Any modifications made to this devices that are not approved by Sartorius Lab Instruments GmbH & Co. KG may void the authority granted to the user by the FCC to operate this equipment. Secura, Quintix User Manual 99 Specifications 15.2 Model-specific Data Secura® Model 26-1x 1) 225D-1x 1) 125-1x 1) 324-1x 1) Weighing capacity g 21 60 / 120 / 220 60 / 120 320 Readability mg 0.002 0.01 / 0.01 / 0.1 0.01 / 0.01 0.1 Repeatability (standard deviation) mg 0.004 0.03 / 0.04 / 0.07 0.03 / 0.04 0.1 Repeatability (standard deviation), typical mg 0.003 0.02 / 0.04 / 0.07 0.02 / 0.04 0.1 Linearity deviation mg 0.01 0.1 / 0.1 / 0.2 0.1 / 0.1 0.3 Min. initial weight according to USP, typical mg 4 40 40 160 Sensitivity drift between +10 to +30°C ± ppm/K 1 1 1 1 Typical stabilization time s 8 6/6/2 6 2 isoCAL: – Temperature change – Time interval K h 1.5 4 1.5 4 1.5 4 1.5 4 Display result (depending on s the set filter level) 0.2 / 0.4 0.2 / 0.4 0.2 / 0.4 0.2 / 0.2 Weighing pan size mm d 50 d 80 (d 90 optional) d 80 (d 90 optional) d 90 Weighing chamber height* mm 218 218 218 218 Net weight, approx. kg 8.0 7.8 7.8 7.9 Quintix® Model 125D-1x 1) 65-1x 1) 35-1x 1) Weighing capacity g 40 / 60 / 120 40 / 60 30 Readability mg 0.01 / 0.01 / 0.1 0.01 / 0.01 0.01 Repeatability (standard deviation) mg 0.03 / 0.04 / 0.07 0.03 / 0.04 0.03 Repeatability mg (standard deviation), typical 0.02 / 0.04 / 0.07 0.02 / 0.04 0.03 Linearity deviation mg 0.1 / 0.1 / 0.2 0.1 / 0.1 0.1 Sensitivity drift between +10 to +30°C ± ppm/K 1 1 1 Typical stabilization time s 6/6/2 6 6 isoCAL: – Temperature change – Time interval K h 1.5 4 1.5 4 1.5 4 0.2 / 0.4 0.2 / 0.4 0.2 / 0.4 Display result (depending on s the set filter level) Weighing pan size mm d 80 (d 90 optional) d 80 (d 90 optional) d 80 (d 90 optional) Weighing chamber height* mm 218 218 218 Net weight, approx. kg 7.8 7.8 7.8 * Upper edge of the weighing pan to the lower edge of the upper draft shield panel 1) Possible terms for country-specific models: x = S: Standard balances without country-specific additions x = SAR: Standard balances with country-specific additions for Argentina x = SJP: Standard balances with country-specific additions for Japan x = SKR: Standard balances with country-specific additions for South Korea 100 Secura, Quintix User Manual Specifications 15.3 Verified Models with Country-specific Type Approval Certificate Secura® Model 26-1x 1) 225D-1x 1) 125-1x 1) 324-1x 1) Accuracy class k k k k Type 2) SQP-H SQP-F SQP-F SQP-G Max g 21 120 / 220 120 320 Scale interval d g 0.000002 0.00001 / 0.0001 0.00001 0.0001 Verification scale interval e g 0.001 0.001 0.001 0.001 Min g 0.001 0.001 0.001 0.01 Min (only for Models ...-1OIN) g – 0.1 0.1 0.1 Tare equalization range (subtractive) < 100% from max. weighing capacity Min. initial weight according to USP, typical mg 4 40 40 160 Typical stabilization time s 8 6/2 6 2 isoCAL: – Temperature change – Time interval K h 1.5 4 1.5 4 1.5 4 1.5 4 Display result (depending on the set filter level) s 0.2 / 0.4 0.2 / 0.4 0.2 / 0.4 0.2 / 0.2 Weighing pan size mm d 50 d 80 (optional d 90) d 80 (optional d 90) d 90 Weighing chamber height* mm 218 218 218 218 Net weight, approx. kg 8.0 7.8 7.8 7.9 1) Possible terms for country-specific models: x = CEU: Verified balances with EC Type Approval Certificate D12-09-014 without country-specific additions x = CFR: Verified balances with EC Type Approval Certificate D12-09-014 for France only x = CIT: Verified balances with EC Type Approval Certificate D12-09-014 for Italy only x = CCH: Verified balances with EC Type Approval Certificate D12-09-014 for Switzerland only x = CN: CMC Type Approval Certificate for China x = OJP: Balance with Type Approval Certificate for Japan x = OBR: Balance with Type Approval Certificate for Brazil x = ORU: Balance with Type Approval Certificate for Russia x = OIN: Balance with Type Approval Certificate for India 2) all Models ...CN: Type “SQP” * Upper edge of the weighing pan to the lower edge of the upper draft shield panel Secura, Quintix User Manual 101 Specifications Quintix® Model 125D-1x 1) 65-1x 1) 35-1x 1) Accuracy class k k k Type 2) Max g SQP-F SQP-F SQP-F 60 / 120 60 30 Scale interval d g 0.00001 / 0.0001 0.00001 0.00001 Verification scale interval e g 0.001 0.001 0.001 Min g 0.001 0.001 0.001 Min (only for Models ...-1OIN) g 0.1 0.1 0.1 Tare equalization range (subtractive) < 100% from max. weighing capacity Typical stabilization time s 6/2 6 6 isoCAL: – Temperature change – Time interval K h 1.5 4 1.5 4 1.5 4 Display result (depending on the set filter level) s 0.2 / 0.4 0.2 / 0.4 0.2 / 0.4 Weighing pan size mm d 80 (optional d 90) d 80 (optional d 90) d 80 (optional d 90) Weighing chamber height* mm 218 218 218 Net weight, approx. kg 7.8 7.8 7.8 1) Possible terms for country-specific models: x = CEU: Verified balances with EC Type Approval Certificate D12-09-014 without country-specific additions x = CFR: Verified balances with EC Type Approval Certificate D12-09-014 for France only x = CIT: Verified balances with EC Type Approval Certificate D12-09-014 for Italy only x = CCH: Verified balances with EC Type Approval Certificate D12-09-014 for Switzerland only x = CN: CMC Type Approval Certificate for China x = OJP: Balance with Type Approval Certificate for Japan x = OBR: Balance with Type Approval Certificate for Brazil x = ORU: Balance with Type Approval Certificate for Russia x = OIN: Balance with Type Approval Certificate for India 2) all Models ...CN: Type “SQP” * Upper edge of the weighing pan to the lower edge of the upper draft shield panel 102 Secura, Quintix User Manual Specifications 15.4Accessories General Information Set of rechargeable batteries for standard laboratory balances YRB11Z In-use dust cover 6960MA03 Dust cover 6960SE04 Weighing pan 80 mm, slotted YSP01SQP Weighing pan 90 mm, incl. retrofitting kit YWP01SQP Filter weighing pan 130 mm YFW01SQP Round glass draft shield YHK01SQP USP Minimum sample weight certificate 84CGNA Printers and Communication Premium GLP Laboratory Printer – Printer paper for GLP lab printer – Continuous labels GLP lab printer YDP30 69Y03285 69Y03286 Standard lab printer – Printer paper for lab printer YDP40 69Y03287 Data cable for Mini USB/USB A YCC04-D09 Data cable for Mini USB/9-pin RS-232 YCC03-D09 Data cable for Mini USB/25-pin RS-232 YCC03-D25 Density Determination Density determination kit YDK05, available upon request Calibration Weights Calibration weight for lab balance type 26 Proof Line knob weight 20 g, OIML Class E2, with DAkkS certificate YCW422-AC-02 Calibration weight for lab balance type 225 / 324 Proof Line knob weight 200 g, OIML Class E2, with DAkkS certificate YCW522-AC-02 Calibration weight for lab balance type 125 Proof Line knob weight 100 g, OIML Class E2, with DAkkS certificate YCW512-AC-02 Calibration weight for lab balance type 65 Proof Line knob weight 50 g, OIML Class E2, with DAkkS certificate YCW452-AC-02 Calibration weight for lab balance type 35 Proof Line knob weight 20 g, OIML Class E2, with DAkkS certificate YCW422-AC-02 Secura, Quintix User Manual 103 Specifications 15.5 Balance Dimensions 15.5.1Secura®, Quintix® 35, 65, 125, 125D, 225D, 324 All dimensions are given in millimeters 104 Secura, Quintix User Manual 15.5.2Secura® 26 All dimensions are given in millimeters Secura, Quintix User Manual 105 EU Declaration of Conformity Appendix The declaration of conformity supplied here is for verified balances for use in the EEA. Please keep it in a safe place. 106 Secura, Quintix User Manual EC Type-approval Certificate Secura, Quintix User Manual 107 Plates and Markings 108 Secura, Quintix User Manual Specifications Secura, Quintix User Manual 109 Sartorius Lab Instruments GmbH & Co. KG Weender Landstrasse 94–108 37075 Goettingen, Germany Phone: +49.551.308.0 Fax: +49.551.308.3289 www.sartorius.com The information and figures contained in these instructions correspond to the version date specified below. Sartorius reserves the right to make changes to the technology, features, specifications and design of the equipment without notice. Copyright notice: This instruction manual, including all of its components, is protected by copyright. Any use beyond the limits of the copyright law is not permitted without our approval. This applies in particular to reprinting, translation and editing irrespective of the type of media used. © Sartorius Germany Last updated: 08 | 2015 Printed in the EU on paper bleached without chlorine. | NT Publication No.: WSE6015-e150803