1
For German, French, Spanish, Italian, Dutch and Japanese instructions go to www.msrgear.com/tents/ownersmanual
80-466-1
HUB B A ™ N X
Assembl y I nstr uctions
Please follow these instructions to guide you through assembly only.
For complete instructions on the recommended care and use of your tent,
please refer to Owner’s Manual at www.msrgear.com/tents/ownersmanual
PACKAGE INCLUDES:
Frame assembly, tent body, rainfly, 1 guy cord, 1 tensioner,
6 MSR® Mini-Groundhog™ Stakes, 1 repair sleeve
PREPARE FOR SETUP
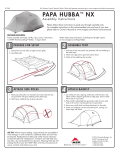
1. Spread tent out and stake out four corners tightly.
2. Assemble poles.
ATTACH CLIPS
1. Attach clips to pole along length of tent and ridge pole.
USE TIPS: All tents require staking; unsecured tents are susceptible to
wind damage. In some conditions, additional stakes and cord may
be required. Readjustment of stakes and rainfly may be necessary
to keep tent tight and weatherproof. A footprint can help keep your
tent clean, dry and protected from abrasion. Following these tips will
prolong the life of your tent. MSR® offers a full line of accessories to
secure, maintain and enhance your tent.
Watch video setup instructions, including Fast & Light® options,
at www.msrgear.com/Hubba
ATTACH HUBBED POLES
1. Insert tips of two hubbed poles into grommets at one end of tent
floor, followed by the remaining two at the other.
2. Insert short ridge pole into two grommets at midpoint of tent
ceiling.
ATTACH RAINFLY
1.Lay rainfly over tent, aligning red webbing to red stake loops,
gray webbing to gray stake loops. Attach the rainfly’s midpoint
grommets to ridge pole.
2.Stretch out vestibule until taut and stake down, making sure
seams align with frame.
MOUNTAIN SAFETY RESEARCH®
© 2014 Cascade Designs, Inc.
4000 First Avenue South
Seattle, WA 98134 USA
1-800-531-9531
1-206-505-9500
HUB B A™ N X
Fast & Light® Setup with Rainfly
and MSR® Footprint (sold separately).
Hubba Footprint-Rainfly Setup
Fast & Light® Setup with Rainfly only.
PR E PARE FStep-2
O R S E T U P, AT TA C H POL E S
PR EPAR E F OR S ETUP
Hubba Rainfly Only Setup
1.Start by staking out the
footprint with the MSR logo
facing up.
2.Insert assembled poles
into the footprint’s corner
grommets to create the
same pole structure as the
standard setup.
SECU RE RAI NF LY
Hubba Footprint-Rainfly Setup
Step-3
1.Secure rainfly by attaching the
rainfly webbing to the pole
tips using the grommets.
2.Insert ridge pole into
grommets above vestibule
door on rainfly.
Step-1
1.Assemble poles
2.Lay rainfly on the ground.
ATTAC H POLES
Hubba Rainfly Only Setup
Step-2
1.Insert tips of poles into grommets
at bottom of rainfly on one side.
2.Place the other end of the poles
into grommets at other side
of rainfly, making sure
frame fits properly
under the rainfly.
3.Insert ridge pole into
grommets above
vestibule door on
rainfly.
Hubba Rainfly Only Setup
Hubba Footprint-Rainfly Setup
Step-3
Step-4
SECU RE T E NT
1.Stake out the vestibule and
guy out if necessary.
S EC UR E TENT
1.Stake out the corners and tension
the webbing straps.
2.Stake out the vestibule and guy
out if necessary
MOUNTAIN SAFETY RESEARCH®