1
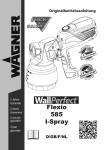
Originalbetriebsanleitung 2 Jahre Garantie 2 years Guarantee 2 ans de garantie W1500 P 2 jaar garantie D/GB/F/NL W1500 P GB Translation of the original operating instructions Contents 1. General Safety Instructions. . . . . . . . . . . . . . . . . . . . . . . . . . . . . . . . . . . . . . . . . . . . . . . . . . . . . . 2. Technical Data. . . . . . . . . . . . . . . . . . . . . . . . . . . . . . . . . . . . . . . . . . . . . . . . . . . . . . . . . . . . . . . . . . 3. Description/ Scope of delivery . . . . . . . . . . . . . . . . . . . . . . . . . . . . . . . . . . . . . . . . . . . . . . . . . . 4. Field of application . . . . . . . . . . . . . . . . . . . . . . . . . . . . . . . . . . . . . . . . . . . . . . . . . . . . . . . . . . . . . 5. Operating elements and displays on device. . . . . . . . . . . . . . . . . . . . . . . . . . . . . . . . . . . . . . 6. Assembly. . . . . . . . . . . . . . . . . . . . . . . . . . . . . . . . . . . . . . . . . . . . . . . . . . . . . . . . . . . . . . . . . . . . . . . 7. Start-up. . . . . . . . . . . . . . . . . . . . . . . . . . . . . . . . . . . . . . . . . . . . . . . . . . . . . . . . . . . . . . . . . . . . . . . . 8. Working with the steam cleaner. . . . . . . . . . . . . . . . . . . . . . . . . . . . . . . . . . . . . . . . . . . . . . . . . 9. Refilling the water tank . . . . . . . . . . . . . . . . . . . . . . . . . . . . . . . . . . . . . . . . . . . . . . . . . . . . . . . . . 10. Cleaning and maintenance . . . . . . . . . . . . . . . . . . . . . . . . . . . . . . . . . . . . . . . . . . . . . . . . . . . . 11. Correction of Malfunctions. . . . . . . . . . . . . . . . . . . . . . . . . . . . . . . . . . . . . . . . . . . . . . . . . . . . . 12. Spare Parts. . . . . . . . . . . . . . . . . . . . . . . . . . . . . . . . . . . . . . . . . . . . . . . . . . . . . . . . . . . . . . . . . . . . 13 14 15 15 15 16 17 18 20 20 21 21 Explanation of symbols used This symbol indicates a potential danger for you or for the device. Under this symbol you can find important information on how to avoid injuries and damage to the device. i Indicates tips for use and other particularly useful information. Risk of scalding: Discharged steam is hot Risk of scalding: Do not point steam plate towards people and pets Risk of scalding: When working overhead, beware of hot water dripping Hot surface: Parts heat up when in operation Do not pull on the hose Do not pull on the power cord 12 W1500 P GB MANY THANKS FOR PLACING YOUR TRUST IN US We would like to congratulate you on purchasing this brand product from Wagner; we are sure that you will enjoy working with it greatly. Please read the Operating Manual carefully and observe the safety information before starting the device. Store the Operating Manual in a safe place close to the product in case it needs to be used by someone else. We would be happy to be of assistance if you have any questions, suggestions or requests. Please contact us via the phone number included on the back page or via our homepage, www.wagner-group.com/service. 1. General Safety Instructions WARNING! Read all safety notifications and instructions. Failure to comply with the safety notifications and instructions provided may result in electric shock, fire and/or serious injury. Store the Operating Manual in a safe place close to the product. CAUTION DANGER OF INJURY! When working with hot steam (approx.100°), there is a risk of serious scalding. Do not direct steam towards people, animals, electrical devices, plugs and temperature-sensitive objects. Do not touch nozzles and brushes when in operation. Always wear the respective protective clothes and gloves. The steam cleaner is only designed to be used in the home and may not be used outside. This device can be used by people with restricted physical, sensory or mental abilities or who have little experience or knowledge about it, providing they are supervised or instructed on how to use the device safely and what risks are involved. Children may not play with the device. Never leave the steam cleaner unattended when it is connected to the mains. Keep children away from the device when it is switched on or cooling down. Do not use the steam cleaner if it has been dropped, if it is visibly damaged or not tightly sealed. Ensure that the accessories are connected correctly to each other. Otherwise there is a danger of scalding! Do not operate the steam cleaner if there is no water in the tank. Operate the unit only with pure water without agents or additives. Do not overfill the water tank. Overfilling the water tank can lead to damage or injuries. Be careful of overhead water dripping down when you are working on the ceiling. Keep feet and all parts of the body away from the jet of steam. Do not operate machine in bare feet or when wearing open toed shoes or sandals. The steam cleaner gets hot during use. Only move the steam cleaner by the handle. Be particularly careful when you are working on stairs or ladders. Always ensure that the unit is standing securely in a horizontal position (on the floor). Never turn the device upside down or to an angle of more than 45° when it is switched on. • • • • • • • • • • • • • • • 13 W1500 P GB •Do not tread on the steam cleaner, hose or steam plate. •Do not pull or carry the steam cleaner by the cable or hose. Do not allow the cable or hose to become jammed in a door and do not lay them around sharp edges or corners. Keep the cable and hose away from hot surfaces. If the cable or hose are damaged you must have them replaced immediately by the manufacturer or an authorized person in order to avoid any hazards. In order to protect against electric shocks, connect the steam cleaner only to earthed mains sockets. Integration of a 30 mA earth leakage circuit breaker in the power grid connection is recommended to provide extra protection against electric shocks. When using an extension cable: max.10 m long – the cable cross section must be at least 3 x 1 mm². Do not pull the plug out of the socket by the cable, but always by pulling at the plug itself. Never take hold of the plug or the steam cleaner with wet hands. When the steam cleaner is not being used, disconnect it from the mains. Always use the on/off switch first and then disconnect it from the socket. After use disconnect the steam cleaner from the mains and allow it to cool down before you clean it. Before you empty the steam cleaner allow it cool down completely. Do not dip the electric cable, plug or steam cleaner in water or other liquids. Store the steam cleaner only when it is dry and empty. Keep it in a place that is not exposed to frost. Use only WAGNER original spare parts and accessories! • • • • • • • • • • • • 2. Technical Data Technical Data Power source: Power consumption: Protection class Tank capacity Warm-up period Operating time with one tank filling Hose length Length of electric cable Weight 14 220-240 V ~ , 50-60 Hz 1500 W I 1200 ml Up to 7 minutes Up to 30 minutes 3m 2.5 m approx. 5.6 kg W1500 P GB 3. Description/ Scope of delivery i The picture that goes with this table can be found on the fold-out page at the beginning of the operating manual. Description/ Scope of delivery 1) Basic device, W1500 P 2) Measurement jug (500 ml) 3) Funnel 4) Towel 5) Straight adapter* for nozzles and brushes 6) Steam cap 7) Extension tube 8) Floor attachment with swivel adapter (8a) 9) Window cleaner 10) Angle nozzle* 11) B rushes: small (11a) and large (11b)* 12) Steam plate 13) Steam gun * The marked accessories can be found underneath the transparent cover at the front of the device. 4. Field of application The steam cleaner together with this wide range of accessories is suitable for cleaning various heat-resistant surfaces. It can also be used to remove old wallpaper from the walls. Only clear water without any additives may be used. Applications other than those described in the operating manual are not permitted. 5. Operating elements and displays on device A: ON/OFF switch B: Operating display (red): Lights when the device is switched on C: Steam display (orange): Lights when steam is being produced. The device is ready as soon as the light goes out. D: Trigger: Keep depressed to let out steam. After it has cooled down, depress when the device is switched off to release pressure. E: Trigger lock: To enable a constant stream of steam without having to keep the trigger depressed. A C B D E 15 W1500 P GB 6. Assembly i Depending on what you require, various accessories can be attached to the steam gun. ATTENTION! Carry out assembly work only when the steam cleaner is switched off and all individual parts have cooled down! Steam plate (e.g. to remove wallpaper) Press down the button on the steam gun (Fig. 1, 13). Attach the steam plate (Fig. 1, 12) to the gun either with or without extensions (7). • • 13 Press Press 7 Floor brush (for cleaning floors) Press down the button on the steam gun (Fig. 2, 13). Attach the extensions (Fig. 2, 7) to the gun. Attach the swivel adapter (Fig. 3, 8a) to the extensions (7). Attach the floor brush (Fig. 4, 8) to the swivel adapter (8a). Push up both the clips on the floor brush upwards (Fig. 5, 8) and attach the floor cloth (4). Make sure the edges are secured properly. • • • • • 8a 4 8a 8 Press 3 12 2 13 5 Press 8 7 4 16 7 W1500 P GB Cleaning brushes and window cleaners Press down the button on the steam gun (Fig. 6, 13). Attach the straight adapter (Fig. 6, 5) to the gun either with or without extensions (7). Depending on what you are doing, attach the angle nozzle (Fig. 7, 10), the brushes (11) or the window cleaner (9) to the adapter (5). • • • 6 13 Press Press 7 5 7 5 5 10 11 9 7. Start-up Fill the steam cleaner, but only while it is disconnected from the mains. Turn the steam cap (6) in an anti-clockwise direction to remove it. Fill the steam cleaner with the help of the funnel (Fig. 8, 3) 3 and measurement jug (2) with max. 1200 ml water. Put the steam cap back on (6) and screw it shut tightly. Connect it to the mains and switch the steam cleaner on. The operating display (red) and the steam display (orange) light up. As soon as the steam display (orange) switches off, the steam cleaner is ready to be used (depending on the volume of water, this can take up to 7 minutes). • • • • 8 2 • 17 W1500 P GB 8. Working with the steam cleaner General ATTENTION! Change accessories only when the steam cleaner is switched off and all individual parts have cooled down! •Press the trigger (Fig. 9, D) to let out steam. •Activate the red lock (E) while the trigger is held depressed in order to enable a permanent stream of steam. •Release the lock (E) whenever you take a break in your work and switch off the device. 9 D E i While you are working the steam display (orange) can light up again. In this event release the trigger so that the steam pressure can build again (this should not take longer than 40 seconds). If the trigger is pressed while the steam display (orange) is lit, hot water might exit from the steam cleaner. i If the work is interrupted for a longer period, a small amount of water can collect in the steam tube because the device has cooled down. After switching it back on again, a small jet of water (might be hot) will come out of the end of the hose when the trigger is pressed. Allow this water to escape when you start your work (e.g. into a bucket). Floors/upholstery You should test a small insignificant spot of any carpets or textiles you want to clean. A number of materials and fabrics are NOT suitable to be cleaned by steam for example: leather, furniture or floors that have been treated with wax, artificial textiles, velvet or other steam-sensitive materials. Before cleaning, first remove the dust from the surfaces you want to clean. 8 Depending on the floor surface, use the floor brushes (Fig. 10, 8) with or without the floor cloth (4). Use the brushes (Fig. 10, 8 and 11a) to clean upholstery. i • • • 4 11a 18 W1500 P GB Glass and ceramic tiles Thermal shock can shatter glass. Before cleaning glass surfaces heat them gently by directing the steam jet at the surface but at a distance of at least 15 cm. •Use the Window/Tile Cleaner (9) to clean grime from tiles and windows. Special applications for nozzle and brush The Angled Nozzle (10) and the Brushes (11) can be used to get into awkward corners that are normally difficult to clean. The brushes (11) are suitable for scrubbing and loosening persistent dirt from hard surfaces. The brass brush (11b) may only be used for scratchproof surfaces (not enamel). • 9 10 11 • Removing wallpaper Caution! Danger of short-circuits! Cover sockets and switches and do not subject them to steam. i Before you start your work, check the condition of the plaster. Steam can loosen weak, porous or poorly bonded plaster. The same can happen if there are cracks or holes in the plaster or if the steam plate is held too long in one place after the wallpaper has absorbed the water. You can detect poorly bonded plaster by rapping against it at a few different locations on the wall. A hollow sound means that you have to be extremely careful here. Stop immediately if you hear cracking sounds or if the plaster starts crumbling away. The device is primarily for dry walls and plasterboard walls. Regardless of the underlying surface, before you start work you should run a few tests in a small corner to see whether any problems arise. •As for all kinds of renovation work, cover floors and furniture to keep them protected. •If there are several layers of wallpaper, we recommend perforating the surface with a conventional perforator tool or by lightly slicing crisscross marks on the surface with a scraper at a distance of 15 cm (Fig. 12). Hold the steam plate (12) flat against the wallpaper for approx. 10 seconds. Now move the steam plate (12) to the area immediately next to the one just steamed – from which the paper should now easily come away with a little help from a wallpaper scraper. (Fig. 13) • • 19 W1500 P GB Work in the garden Steam can be used to disinfect soil in flower beds or greenhouses. First loosen the soil to attain a porous surface. Hold the steam plate (12) over each section for about 2 to 2 1/2 minutes to ensure that the steam has penetrated the surface. • 9. Refilling the water tank •Switch off the steam cleaner at the on/off switch and disconnect from the mains. •Let the steam cleaner cool down for about 5 minutes and D release the pressure by depressing the trigger (Fig. 14). i Please note that the steam cap (6) may not be removed while the device is still under pressure for safety reasons. •Wait until there is no more steam coming out and then turn the steam cap (6) in an anticlockwise direction to remove it. Fill the steam cleaner with the help of the funnel (Fig. 15, 3) and measurement jug (2) with max. 1200 ml water. Put the steam cap back on (6) and screw it shut tightly. Switch the steam cleaner back on. As soon as the steam display (orange) goes off, you can continue your work. 3 2 • • • • 10. Cleaning and maintenance ATTENTION! Carry out cleaning and maintenance only when the steam cleaner is switched off and all individual parts have cooled down! To ensure that the steam cleaner functions properly over a longer period, rinse the water tank once a month to remove any lime scale. When you do this, we recommend using a vinegar solution or a normal descaler. Depending on how hard the water is, you might need to descale more often. Using distilled water is recommended. Clean the steam cleaner and accessories with a slightly damp cloth. Never use a cleaning product or detergent. If the steam cleaner calcifies, pour a vinegar solution or a normal descaler into the water tank and leave it take effect for about 2-3 hours. Please observe also the instructions for using the descaler provided by the manufacturer. The steam cleaner does not consists of any components that should be repaired by the customer. All repairs must be carried out by Wagner Customer Services. i • • • • 20 W1500 P GB 11. Correction of Malfunctions Problem Remedy A. Water is coming out ➞➞The steam cleaner generates a lot of steam. This may of the nozzle condense as water or water droplets in the steam hose and can be expelled when used after a period of cooling. This is normal and not a cause for concern. (see chapter 8) B. There is no steam coming out ➞➞Check that the hose has not become kinked or blocked (allow to cool down first). Also check the power supply and water level. ➞➞Descale the steam cleaner (see chapter 10). To prevent the water tank from calcifying empty the water tank every time it has been used and use distilled or deionised water C. The steam cap (6) won't come off ➞➞The steam container is still under pressure. Switch off the device and let it cool down. Press the trigger to release pressure. (see chapter 9) D. Steam flow is erratic; ➞➞Check that all accessory parts are positioned correctly (allow sometimes it works to cool down first). well, other times it ➞➞Descale the steam cleaner (see chapter 10). does not To prevent the water tank from calcifying empty the water tank every time it has been used and use distilled or deionised water 12. Spare Parts i The picture that goes with this table can be found on the fold-out page at the beginning of the operating manual. Spare Parts List Pos. 2, 3 4 5 6 7 8, 8a 9 10, 11 12 Designation Measurement jug and funnel Towel (3 pcs.) Straight adapter Steam cap Extension tube (2 pcs.) Floor attachment with swivel adapter Window cleaner Brush and nozzle kit Steam plate Order No. 2353111 2353106 2351732 2353107 2353109 2353110 2351733 2351731 2353108 21 W1500 P GB Environmental protection The device and all accessories and packaging have to be recycled in an environmentally friendly manner. Do not dispose of the appliance with household waste. Support environmental protection by taking the appliance to a local collection point or obtain information from a specialist retailer. Important Note regarding Product Liability! Using other accessories and spare parts can lead to partial or total loss of liability and guarantee claims. With original WAGNER accessories and spare parts, you have the guarantee that all safety regulations are fulfilled. 2 years guarantee The guarantee runs for two years, counting from the date of sale (sales slip). It covers and is restricted to free-of-charge rectification of faults which are demonstrably attributable to the use of faulty materials in manufacture, or assembly errors; or freeof-charge replacement of the defective parts. The guarantee does not cover incorrect use or commissioning or fitting or repair work which is not stated in our operating instructions. Wearing parts are also excluded from the guarantee. The guarantee excludes commercial use. We expressly reserve the right to fulfil the guarantee. The guarantee expires if the tool is opened up by persons other than WAGNER service personnel. Transport damage, maintenance work and loss and damage due to faulty maintenance work are not covered by the guarantee. Under any guarantee claim, there must be proof of purchase of the tool through submission of the original receipt. Wherever legally possible, we exclude all liability for injury, damage or consequential loss, especially if the tool has been used for a purpose other than that stated in the operating instructions, commissioned or repaired other than in accordance with our operating instructions or if repairs are performed by someone who is unqualified. We reserve the right to perform any repairs in excess of those stated in our operating instructions. In case of guarantee or repair, please refer to your point of sale. 22 W1500 P GB Warning If the supply cord of this appliance is damaged, it must only be replaced by a repair shop appointed by the manufacturer, because special purpose tools are required. The wires in this mains lead are coloured in accordance with the following code: green/yellow = earth blue = neutral brown = live As the colours of the wires in the mains lead of this appliance may not correspond with the coloured markings identifiying the terminals in your plug, proceed as follows: The wire which is coloured green and yellow must be connected to the terminal in the plug which is marked with the letter E or by the earth symbol or coloured green or green and yellow. The wire which is coloured blue must be connected to the terminal which is marked with the letter N or coloured black. The wire which is coloured brown must be connected to the terminal which is marked with the letter L or coloured brown. Should the moulded plug have to be replaced, never re-use the defective plug or attempt to plug it into a different 13 A socket. This could result in an electric shock. Should it be necessary to exchange the fuse in the plug only use fuses approved by ASTA in accordance with BS 1362. Only 13 Amp fuses may be used. To ensure that the fuse and fuse carrier are correctly mounted please observe the provided markings or colour coding in the plug. After changing the fuse, always make sure that the fuse carrier is correctly inserted. Without the fuse carrier, it is not permissible to use the plug. The correct fuses and fuse carriers are available from your local electrical supplies stockist. • • • • • • • • 23 W1500 P D CE Konformitätserklärung Wir erklären in alleiniger Verantwortung, dass dieses Produkt (Type 2351726) den folgenden einschlägigen Bestimmungen entspricht: 2006/95/EG, 2004/108/EG, 2011/65/EG, 2002/96/EG. Angewandte harmonisierte Normen: EN 60335-1:2006 , EN 60335-2-54:2008 , EN 55014-1:2009, EN 55014-2 :2008, EN 61000-3-2:2009, EN 61000-3-3:2008 GB CE Declaration of Conformity We declare under sole responsibility that this product (Type 2351726) conforms to the following relevant stipulations: 2006/95/EG, 2004/108/EG, 2011/65/EG, 2002/96/EG. Applied harmonised norms: EN 60335-1:2006 , EN 60335-2-54:2008 , EN 55014-1:2009, EN 55014-2 :2008, EN 61000-3-2:2009, EN 61000-3-3:2008 F CE Déclaration de conformité Nous déclarons sous notre responsabilité que ce produit (Type 2351726) est en conformité avec les réglementations suivantes : 2006/95/EG, 2004/108/EG, 2011/65/EG, 2002/96/EG. Conforme aux normes et documents normalisés : EN 60335-1:2006 , EN 60335-2-54:2008 , EN 55014-1:2009, EN 55014-2 :2008, EN 61000-3-2:2009, EN 61000-3-3:2008 NL CE Konformitätserklärung Wij verklaren dat dit product (Type 2351726) voldoet aan de volgende normen: 2006/95/EG, 2004/108/EG, 2011/65/EG, 2002/96/EG. En normatieve dokumenten: EN 60335-1:2006 , EN 60335-2-54:2008 , EN 55014-1:2009, EN 55014-2 :2008, EN 61000-3-2:2009, EN 61000-3-3:2008 i.V. T. Jeltsch i. V. J. Ulbrich Senior Vice President Vice President Engineering Global Product Strategy & Planning Dokumentationsverantwortlicher Responsible person for documents Responsable de la documentation Documentatieverantwoordelijke J. Wagner GmbH Otto-Lilienthal-Str. 18 D-88677 Markdorf 48