1
user guide
Dear Customer,
RA00251
#96500
Brushless
Sensorless Design
Micro Car specialist
www.nosram.com
for distributor address see packaging
thank you for your trust in this NOSRAM product. By purchasing the NOSRAM Shock 40 speed-control, you have
chosen one of the most advanced sensorless brushless speed-controls of today. The Shock 40, with all of its hightech features and specially selected electronic components, is one of the best speed-controls currently available:
• Brushless und Brushed • Sensorloses Design
• Micro Car Specialist
• Smallest dimensions,low weight
• 8 xps.2 Power Profiles
• Smart-Cell System (NiMH 4-9 / LiPo 2S + 3S)
• Smart-Temp-Readout System 2 • Freeze Drive Design
• 3-way Protection System
• Waterproof
Please read the following instructions carefully before you start using your NOSRAM Shock 40 speed control. This user
guide contains important notes for the safety, the use and the maintenance of this product. Thus protecting yourself and
avoid damages of the product.
Proceed according to the user guide in order to understand your NOSRAM Shock 40 speed control better. Please take
your time as you will have much more joy with your product if you know it exactly.
This user manual shall be kept in a safe place. If another customer is using this product, this manual has to be handed
out together with it.
4. specifications
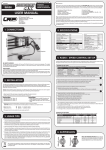
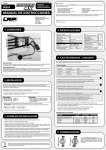
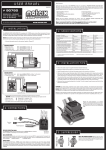
1. Connections
Brushless + Brushed
Sensorless Brushless System
Forward / Brake
Forward / Brake/ Reverse
Case Size
Weight (excl. wires)
Voltage Input
On/Off - Switch
Receiverwire
Typ. Voltage Drop* @20A
Rated Current*
Rec. Motor Limit (370/380 size)
Rec. Motor Limit (540 size)
BAT - (Black)
Power Capacitor
Button + LED‘s
BAT + (Red)
Motor Connection
*
RX-/SWITCH HARNESS:
This NOSRAM speed-control is equipped with the new RX-/Switch-Harness for maximum convienence. The regular
NOSRAM Multicon receiver wire is used and will easily fit in all ordinary receivers. Install the On/Off micro switch
using supplied doublesided tape.
POWER WIRES:
1.5mm² power wires without any attached connectors are used. There are G3.5 gold connectors included which
allow convienent installation with brushless motors such as the Storm Evolution Micro 370.
The unique solder posts allow easy and convenient replacement of the power wires. Nevertheless some soldering
skills are required. Avoid soldering longer then 5sec per soldering joint to prevent possible damage to the speedcontrol due to overheating of the components!
Transistors rating at 25°C junction temperature
B.E.C.
Smart-Temp-Readout System 2
High Frequency
Fail-Safe-System
3 Way-Protection-System
Waterproof
Integrated Solder Posts
Power Wires
3.5mm Gold Connector
BRUSHED
0.019V
382A
none
over 13T
6.0V / 2.0A
yes
yes
yes
yes
yes
yes
1.5mm²
include
4 adj. Mode‘s (SmartCell, Motor/
Drive-Settings, XPS.2 Powerpro- yes
files, Autobrake)
Specifications subject to change without notice.
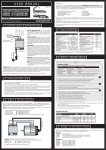
5. radio / speed-control set-up
In setup mode the Shock 40 stores radio calibrations after completed procedure, all the settings will be stored in
the speed-controls memory even if the speed-control will be disconnected from the battery.
TRANSMITTER SETTINGS
Setup the following basic functions on your transmitter (if available):
Description
Throttle Travel
Brake Travel
Throttle Exponential
Neutral Trim
Servo Reverse
other names in radio
High ATV, EPA
Low ATV, EPA, ATL
EXP, EXPO
SUB Trim
Throttle Reverse
Required Setting
100%
100%
start with 0
centre
any setting, don‘t change after set-up procedure!
If your transmitter doesn‘t offer any of above functions, it‘s already in „basic setup“ mode.
• Ensure that the speed-control is not connected to the drive battery and is switched off.
• Remove motor pinion or ensure that the wheels of the model are free to rotate.
• Switch the transmitter on and set the transmitter throttle stick to neutral.
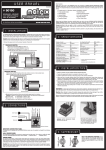
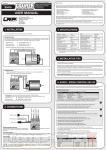
2. INSTALLATION
The Shock 40 is supplied with 1.5mm² power-wires without attached connectors. There are G3.5 gold connectors
included which allow convienent installation with brushless motors such as the Storm Evolution Micro 370.
Be careful with the correct wire sequence/colors since an incorrect connection may damage the speed-control!
Isolate all connections carefully.
Caution: Avoid soldering longer than 5sec per soldering joint when replacing the power wires on the speed-control
and motor to prevent possible damage due to overheating of the components!
Hall-Sensor Anschlusskabel
• Attach switch-/RX-wire harness to speedo (be careful with correct polarity)
• Connect the speed-control to the receiver (position: Channel 2)
blau
gelb
orange
Brushless Motor
Brushed Motor:
• Speedo MOT.A - Motor „A“
• Speedo MOT.A (blue) and MOT.B (yellow) will
• Speedo MOT.B Motor „B“
be the combined „minus“ on brushed motor.
• Speedo MOT.C Motor „C“
• Speedo MOT.C (orange) is the „plus“ on bruhed motor.
• Doublecheck all connections before connecting the speed-control to a battery.
CAUTION: If battery is connected with reversed polarity it will destroy your speed-control!
• Red power-wire
• Black power-wire
yes
yes
yes
yes
28.5 x 40.3mm
20g
4.8 - 11.1V
BRUSHLESS
0.026V / phase
382A / phase
none
over 7.5 turns
- Speedo „+“ to battery „Plus“
- Speedo „-“ to battery „Minus“
• The speed-control is now ready to be set-up (see section 5).
• Connect the speed-control to the battery (switch in OFF position).
• Hold the button pressed and turn the switch on.
You entered setup mode and the blue LED flashes (it will flash until the setup is completed).
• Leave transmitter in neutral position and press the button once.
Neutral setting is stored , yellow/blue LED flashes and the motor beeps.
• Hold full throttle on transmitter and press the button once.
Full-throttle setting is stored, red/blue LED flashes.
• Hold full brake on transmitter and press the button once.
Brake setting is stored, red and blue LED‘s glow..
• This completes the setup procedure, stores all settings, and your Shock 40 is ready to use.
• If you make a mistake during the setup procedure, don‘t worry: Disconnect the battery for about 10sec and start
again from the first step.
• At the end of each run switch off the car, and then switch off the transmitter.
• At the start of each run switch on the transmitter first, then switch on the car.
• For storage of the car, disconnect the drive battery at all times!
CHECKING THE FUNCTIONS:
Check the LED‘s when moving your throttle stick and you will see if everything is setup correctly.
3. usage tips
• Position the speed-control and capacitor where they are protected in the event of a crash and gives you easy
access to the connectors and button.
• Make sure there is enough clearance between the speed-control, power-wires, antenna and receiver. Avoid
any direct contact between power components, the receiver or the antenna as this can cause interference. If
interference occurs, position the components at a different place in the model.
FUNCTION
Neutral (automatic brake inactive)
Neutral (automatic brake active)
Forward
Forward
Brake
Brake
STATUS
--partial throttle
full throttle
partial brake
full brake
Left LED
off
red
yellow
yellow
red
red
Right LED
blue
off
off
blue
off
blue
• Mount the speedo and capacitor using the supplied thick/black doubled-sided tape.
• The aerial should be run vertically up and away from the receiver. Avoid contact with any parts made of carbon
fibre or metal. If the aerial is too long, don’t coil up the excess length. See also the instructions supplied with
your radio control system.
6. suppression
• Because of the physical principles of brushless technology, the speed-controls do get a little hotter than brushed
systems. Therefore it is required to let the speed-control cool down completely after every run.
• Sensorless brushless motors do not have a designated rotating direction and work identically in both directions.
If the motor rotates the wrong way for your model, after you have wired up the three phase wires, then you can
simply change motor rotation direction by swapping two of the three phase wires (e.g. SpeedoA goes to MotorB
and SpeedoB goes to MotorA)!
The crossed-out wheeled bin means that within the European Union the product must be taken to
seperate collection at the product end-of-life. Do not dispose of these products as unsorted municipal
waste.
ONLY FOR BRUSHED MOTORS! Motors with no
capacitors or not enough capacitors may interfere
with the speed-control. To avoid this, solder the supplied capacitors to your motor (see picture).
8. special features
7. mode programming
The Shock40 features 4 modes which enable you to adjust it to YOUR special requirements. The factory settings
are shown in grey colour.
This is the first NOSRAM speed-control using a single button setup for radio-setup and mode adjustments, therefore it works in a slightly different way than known from NOSRAM speed-controls before but we have retained the
simple and intuitive logic from before to make it as user-friendly as possible
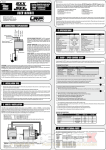
• How to get into „programming the modes“? With speedo turned on, press button for 3sec until all 3 LED‘s flicker twice quickly.
• How to know in which mode you are?
check LED flashing Hall-Sensor
sequence ofAnschlusskabel
left LED‘s.
• How to check the stored values?
Count the number of flashes of the blue LED.
(*
=
value
1
|
**
=
value
2
|
etc.).
• How to change the value?
Press button to increase value by one step.
• How to get to the next mode?
this is done automatic, the values will be shown 3 times be
fore it jumps to the next Mode! The „jump“ to the next mode is indicated by all 3 LED‘s flickering twice quickly.
• How to leave the programming mode?
simply turn off speedo anytime, the most recent values you had choosen will be stored.
• Table of settings, values and modes: see below (grey-shaded values show „default settings“).
DirectAccess Function: For maximum convienence we have incorporated the new DirectAccess function
Sensorless Brushless Design: Revolutionary NOSRAM software providing sensored driveability even without hall sensors. A quantum leap in sensorless brushless technology!
XPS.2 Power Profiles: result in more power and better driveability. Depending on the status of the car
(start, acceleration, full speed) the software calculates the perfect motor management by adjusting current limiter, motor timing, throttle curve and more! Higher value means more overall power and aggressive
response.
PMS.3 Brushed - Power Profiles: The known and world‘s winning PMS.3. Brushed style power programs
have been implemented into the Shock 40 as well. Higher value means more overall power and aggressive
response.
Smart-Temp-Readout System 2: the Shock 40 allows you to read-out the maximum internal temperature
that the speedo reached. To store it to the memory, briefly apply brakes after the run before you turn the
switch off. You can convienently read-out the temperature back in the pits since it remains stored until you
turn it on the next time regularly (which will reset the memory). This new feature allows you to accurately
check if all is running well or if you‘re close to shutdown already.
The higher the number of flashes, the hotter the speedo ran. Thermal shutdown would occur at 10 flashes.
DirectAccess Function: For maximum convienence we have incorporated a quick DirectAccess function
which allows you to jump straight to the mode you would like to change without having to go „the long way“
through all the other mode‘s.
See section 7 „Mode Programming“ on how to use the DirectAccess function.
which allows you to jump straight to the mode you would like to change without having to go „the long way“
through all the other mode‘s.
• with speedo turned on, press button and keep pressed (do not release after 3sec!).
• speedo scrolls through the mode‘s and they are indicated by the LED flashing sequence of the left LED‘s, blue
LED will not flash.
• if you have reached the mode you would like to change (as indicated by left LED‘s), release button.
Brake Adjustment: A good starting point for the brake setting on your radio is 80% for all classes. Make
sure you do the radio-setup with all settings on the radio on 100%!
The DirectAccess works if you start from the beginning of all mode‘s, but it also works to jump from Mode.1
straight to Mode.3 for example (simply keep button pressed to activate DirectAccess again!).
Waterproof: Due to latest production technologies and use of HighTech materials, it was possible to make
these speed-controls fully waterproof! This material also makes the speed-controls more shock resistant
then other similar products. It‘s no longer needed to seal your speed-control when you are driving in the
rain/snow!
But please make sure you still seal your other electronic components (receiver, servo and motor) since
these are normally not waterproof and will get damaged due to the water.
MODE.0 (Smart-Temp-Readout System 2): This new feature allows you to accurately check if all is running
well or if you‘re close to shutdown already. The higher the number of flashes, the hotter the speedo ran and every
flash equals to 5°C temperature decrease
Left LED‘s
OFF
#1
> -45°C
> -81°F
#2
-40°C
-72°F
#3
-35°C
-63°F
#4
-30°C
-54°F
#5
-25°C
-45°F
#6
-20°C
-36°F
#7
-15°C
-27°F
#8
-10°C
-18°F
#9
-5°C
-9°F
#10
Shutdown
MODE.1 (Smart-Cell System): we recommend using value 2 for 4-6 cells NiMH racing purposes, which dis-
engages the LiPo protection. With value #1, the Shock 40 automatically detects if a 2S or 3S LiPo is connected
and adjusts cut-off accordingly.
Left LED‘s
Yellow
#1
LiPo/NiMH
Automatic
#2
4-6cell NiMH
Racing Mode
MODE.2 (Motor- & Drive Selection): the Shock 40 allows you to select from two different drive modes
(with or without reverse) and select between brushless and brushed motor operation.
Left LED‘s
Red
#1
Forward/Brake/Reverse
Brushless
#2
Forward/Brake
Brushless
#3
Forward/Brake/Reverse
Brushed
#4
Forward/Brake
Brushed
MODE.3 (XPS.2 Power Profiles): allows you to adjust the Shock 40 to your likes. Either you run on mild
or powerful motors or on slippery or high-traction surfaces, we have incorporated a profile for you! Higher value
means more overall power and more aggressive throttle response. All settings are available for brushless and
brushed motors.
Left LED‘s
Yellow/Red
(alternate)
#1
smooth
Power: 1X
#2
smooth
Power: 2X
#3
smooth
Power: 3X
#4
smooth
Power: 4X
#5
linear
Power: 4X
This enables you to simulate the feel of a brushed motor and also hold the throttle on longer when entering a turn.
For brushless motors you achieve the same natural slowdown as a brushed motor with no autobrake when you
set value 1-2.
#0
#1
#2
none
Changing Mode settings without the transmitter: At race events you usually do not have access to your
transmitter, but never mind since you can simply disconnect the receiver lead from the receiver and change
the MODE settings as described in section 7 „Mode Programming“.
Power Capacitor: Never disconnect the power-capacitor! It offers increased punch and additional protection, it must be connected to BAT+ and BAT- solder posts with shortest possible wires.
FreezeDrive Design: NOSRAM’s secret FreezeDrive Design results in lower speedo temperature under all
racing conditions and for both brushless + brushed. Sorry, no further details to be disclosed. Simply a step
ahead of the competition!
Fail Safe System: Digital protection against radio interference, “The guardian angel“. The safety electronic
can detect reception of a “false” or incomplete radio signal, e.g due to a low transmitter battery or environmental radio interference which reach the model, or if the model is out of the transmitter range. For protection against damage, the speed-control switches to the neutral position, and the model comes to a stop.
3-way protection system: The perfect protection against short-circuits (motor), overload and overheating. If your speed-control faces overload, the motor function will be shut-off for protection and the blue LED
will flash, although the steering function is maintained. Let the speed-control cool down for a few minutes.
If you experience frequent shutdowns, check for the following:
• Correct gear ratio (refer to motor manual for gearing recommendations)
• XPS.2 setting too high (higher value will heat up motor and speed-control excessively)
• Motor is too strong or motor is damaged.
#6
#7
#8
linear
progressive aggressive
Power: 5X Power: 5X Power: 6X
MODE.4 (Automatic Brake): allows you to set a slight braking action which is applied in the neutral range.
Left LED‘s
Yellow/Red
(same time)
Smart-Cell System: Ready for the next battery technology – LiPo batteries! NOSRAM’s exclusive and
smart Smart Cell System ensures that LiPo batteries can be used safely without accidentially deep-discharging of the cells. Motor power will be reduced (no shutdown will occur!) if the system recognises very low
battery voltage. It is self adjusting to 2S or 3S LiPo batteries!
#3
#4
#5
#6
Going from lowest to highest automatic brake setting
(value 1 = minimum / value = maximum)
#7
#8
Repair procedures / Limited warranty
All products from NOSRAM are manufactured according to the highest quality standards. NOSRAM guarantees
this product to be free from defects in materials or workmanship for 90 days (non-european countris only) from the
original date of purchase verified by sales receipt. This limited warranty doesn’t cover defects, which are a result
of misuse, improper maintenance, outside interference or mechanical damage.
„This applies among other things on:
• Cut off original power plug or not using reverse polarity protected plugs
• Receiver wire and/or switch wire damaged
• Mechanical damage of the case
• Mechanical damage of electronical components/PCB
• Soldered on the PCB (except on solder posts)
• Connected speed-control with reversed polarity“
To eliminate all other possibilities or improper handling, first check all other components in your model and the
trouble shooting guide, if available, before you send in this product for repair. If products are sent in for repair,
which do operate perfectly, we have to charge a service fee according to our pricelist.
With sending in this product, the customer has to advise NOSRAM if the product should be repaired in either case.
If there is neither a warranty nor guarantee claim, the inspection of the product and the repairs, if necessary, in
either case will be charged with a fee at the customers expense according to our price list. A proof of purchase
including date of purchase needs to be included. Otherwise, no warranty can be granted. For quick repair- and
return service, add your address and detailed description of the malfunction.
If NOSRAM no longer manufactures a returned defective product and we are unable to service it, we shall provide
you with a product that has at least the same value from one of the successor series.
The specifications like weight, size and others should be seen as guide values. Due to ongoing technical improvements, which are done in the interest of the product, NOSRAM does not take any responsibility for the accuracy
of these specs.
NOSRAM-Distributor-Service:
• Package your product carefully and include sales receipt and detailed description of malfunction.
• Send parcel to your national NOSRAM distributor.
• Distributor repairs or exchanges the product.
• Shipment back to you usually by COD (cash on delivery), but this is subject to your national NOSRAM distributor‘s
general policy.
9. troubleshooting guide
Symptom
Cause
Remedy
Servo is working, no motor function.
Speed-control plugged in incorrectly
Plug speed-control in Ch 2
Overload protection activated
Allow speed-control to cool down
Wiring problem
Check wires and connectors
Motor defective
Replace motor
Speed-control defective
Send in product for repair
Speedo connected to receiver with wrong polarity
Connect speedo with correct polarity
RX-/Switch Harness not plugged in correctly
Connect RX-/Switch-Harness correctly
Battery defective
Replace with different battery pack
Crystal defective
Replace components one by one.
No servo and no motor function.
Receiver defective
Transmitter defective
Speed-control defective
Send in product for repair
Power Capacitor damaged
replace Power Capacitor
Radio Interference
Change location of components
Motor defective
Replace motor
Speed-control defective
Send in product for repair
Motor connected for reverse operation
Swop two of the 3 phase wires
BM - Motor connected with reversed polarity
Connect motor correctly
Transmitter settings changed after set-up
Repeat set-up procedure
Motor pinion too big or gear ratio too long.
Use smaller motor pinion/shorter gear ratio
Transmitter settings changed after set-up
Repeat set-up procedure
Power Capacitor damaged
Replace Power Capacitor
BM - Motor worn out
Maintain motor
Motor defective
Replace motor
Speed-control defective.
Send in product for repair
Model used too often without cool-down periods
Let speed-control cool down after every run
Motor stronger than motorlimit or input voltage
too high
Use only motors and batteries which are within
the specifications of the speed-control
Motor pinion too big (e.g. gear ratio too long)
Use smaller motor pinion/shorter gear ratio
Stuck drivetrain or ballbearing
Maintain model
Motor defective
Replace motor
Motor never stops, runs at constant
slow speed
Transmitter settings changed after set-up
Repeat set-up procedure
Radio interference
Receiver or antenna too close to power wires,
motor, battery or speed-control.
Receiver aerial too short or coiled up
See „Installation Tips“ and „Installation“
Receiver defective, too sensitive;
Transmitter defective, transmitter output power
too low, servo problem
Replace components one by one
Only use original manufacturers crystals
Poor battery connection
Check plugs and connecting wires
Transmitter batteries empty
Replace / recharge transmitter batteries
Motor stutters while accelerating
Motor runs in reverse when accelerating forward on the transmitter.
Insufficient performance.
E.g. poor brake power, topspeed or
acceleration..
Speed-control switches off
frequently.