1
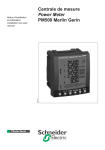
Centrale de mesure
Power Meter
Central de medida
PM500 Merlin Gerin
062052N
Notice d'installation et d'utilisation
Installation and user manual
Manual de instalación y utilización
51112563ADCOUV.P65
1
14/01/04, 11:49
!
Danger et avertissement
Le montage de ces matériels ne peut être effectué que par des professionnels.
Le non respect des indications de la présente notice ne saurait engager la responsabilité du
constructeur.
RISQUE D'ELECTROCUTION, DE BRULURES OU D'EXPLOSION
b l'installation et l'entretien de cet appareil ne doivent être effectués que par du personnel
qualifié.
b avant toute intervention sur l'appareil, coupez ses entrées tensions, court-circuitez le secondaire
de chaque transformateur de courants et coupez l'alimentation auxiliaire de l'appareil.
b utilisez toujours un dispositif de détection de tension approprié pour confirmer l'absence de
tension.
b replacez tous les dispositifs, les portes et les couvercles avant de mettre cet appareil sous
tension.
b utilisez toujours la tension assignée appropriée pour alimenter cet appareil.
Si ces précautions n'étaient pas respectées, cela pourrait entraîner des blessures graves.
!
Danger and warning
This equipment must be mounted only by professionals.
The manufacturer shall not be held responsible for failure to comply with the instructions in this
manual.
RISK OF ELECTROCUTION, BURNS OR EXPLOSION
b the device must be installed and serviced only by qualified personnel.
b prior to any work on or in the device, isolate the voltage inputs and auxiliary power supplies and
short-circuit the secondary winding of all current transformers.
b always use an appropriate voltage detection device to confirm the absence of voltage.
b put all mechanisms, door and covers back in place before energising the device.
b always supply the device with the correct rated voltage.
Failure to take these precautions could cause serious injuries.
!
Advertencia
El montaje de estos materiales sólo puede ser efectuado por profesionales.
No respetar las indicaciones del presente manual exime de responsabilidad al fabricante.
RIESGO DE ELECTROCUCIÓN, DE QUEMADURAS O DE EXPLOSIÓN
b la instalación y mantenimiento de este aparato debe ser efectuado por personal cualificado.
b antes de cualquier intervención en el aparato, cortar sus entradas de tensión, corto-circuitar el
secundario de cada transformador de intensidad y cortar la alimentación auxiliar del aparato.
b utilizar siempre un dispositivo de detección de tensión apropiado para asegurar la ausencia
de tensión.
b volver a colocar todos los dispositivos, tapas y puertas antes de poner el aparato en tensión.
b utilizar siempre la tensión asignada apropiada para alimentar el aparato.
No respetar estas precauciones podría entrañar un serio riesgo de producir heridas graves.
51112563ADRAB_R.P65
1
14/01/04, 11:50
1 Affichage LCD rétro éclairé.
2 Clavier de 6 boutons poussoirs à double fonctionnalité
pour visualisation et programmation.
Front-panel
identification
1 Back-lit LCD display.
2 Six dual-function pushbuttons for measurement display
and programming.
Identificación de
la cara delantera
1 Pantalla LCD retroiluminada.
2 Teclado de de 6 botones pulsadores de doble funcionalidad
para visualización y programación.
DB101806
Repérage face
avant
1 Bornier entrées courants.
2 Emplacements des options.
3 Bornier débrochable entrées tensions et alimentation
auxiliaire.
Rear-panel
identification
1 Terminal block for input currents.
2 Slots for optional modules.
3 Plug-in terminal block for input voltages and auxiliary power.
Identificación de
la cara posterior
1 Bornero de entrads de intensidades.
2 Emplazamiento para los módulos opcionales.
3 Bornero desmontable para entradas de tensión
y de alimentación auxiliar.
E78240
Repérage face
arrière
51112563ADRAB_V.P65
1
14/01/04, 11:53
FRANCAIS
Sommaire
Version française
Voir page 1
ENGLISH
Contents
English version
See page 79
ESPANÕL
Indice
Versiõn española
Ver página 157
51112563AESOMG_N_.P65
1
02/12/04, 17:52
Contents
2
3
4
5
6
7
8
Introduction and description
Package contents ........................................................................................................ 81
Device identification ..................................................................................................... 81
Characteristics
PM500 .......................................................................................................................... 82
Options ......................................................................................................................... 84
Installation
Front-panel cut-out ....................................................................................................... 86
Mounting ...................................................................................................................... 86
Connections
PM500 .......................................................................................................................... 87
Options ......................................................................................................................... 92
Operation
Energising .................................................................................................................... 95
Presentation of the front panel .................................................................................... 95
Viewing measurements ............................................................................................... 96
Programming
General ........................................................................................................................
Resetting the maxi-meters ...........................................................................................
Type of distribution system ..........................................................................................
Current transformers ....................................................................................................
Voltage transformers ....................................................................................................
Bar-chart scale .............................................................................................................
Power-factor convention ..............................................................................................
Demand-current calculation interval ............................................................................
Demand-power calculation interval .............................................................................
Optional IO11 Puls/ IO02 2 Puls module .....................................................................
Optional Modbus RS485 module .................................................................................
OptionalAO20 4-20mA module ....................................................................................
Optional IO22 Alarm module .......................................................................................
98
100
101
102
103
106
107
108
109
110
113
117
121
Modbus communication
Introduction ..................................................................................................................
Functions .....................................................................................................................
Programming parameters ............................................................................................
Backup of programming parameters ...........................................................................
Measurements (not including THD) .............................................................................
THD values ..................................................................................................................
Alarms and input/outputs .............................................................................................
Initialisation (max/ min/ counters/ alarms) ...................................................................
PM500 identification and optional module ...................................................................
127
128
129
137
138
140
141
145
146
Trouble-shooting .............................................................................147
Installation and user manual
51112563AESOM_EN.P65
79
79
09/12/04, 16:42
ENGLISH
1
Contents
9
Appendices
Contents ....................................................................................................................... 151
Characteristics ............................................................................................................. 152
Abbreviations and symbols .......................................................................................... 155
Installation and user manual
80
51112563AESOM_EN.P65
80
09/12/04, 16:42
Introduction and description
Package contents
b one PM500 power meter
with terminal block mounted
b one installation and user
manual
E78259
1
Device
identification
On the package:
1 Part number
2 Product name: PM500
3 Auxiliary-power voltage
4 Manufacturing year/week
code
E78432
On the device:
1 Product name: PM500
2 Auxiliary-power voltage
3 Part number
4 Serial number
5 Manufacturing year/week
code
Installation and user manual
51112563AEP081_105.P65
81
81
09/12/04, 15:38
PM500 characteristics
The PM500 provides all the measurement capabilities required
to monitor a low voltage (single-phase, two-phase or threephase) or high voltage electrical installation. The PM500 carries
out true rms four-quadrant measurements and offers energy
metering and THD (total harmonic distortion) measurements for
both current and voltage as standard features.
PM500
Operation
Local
Remote(1)
Instantaneous rms values
Current
phase and neutral
b
b
Voltage
ph-N and ph-ph
b
b
b
b
Frequency
2
Active power (four quadrants)
total and per phase
b
b
Reactive power (four quadrants)
total and per phase
b
b
Apparent power (four quadrants)
total and per phase
b
b
Power factor
total and per phase
b
b
Maximum current(2)
3 phases and neutral
b
b
Maximum ph-ph voltage(2)
3 phases
b
b
b
b
Maximum instantaneous values
Maximum frequency(2)
Energy values
Active energy (four quadrants)
0 to 99 999 999 kWh
b
b
Reactive energy (four quadrants)
0 to 99 999 999 kvarh
b
b
Apparent energy
0 to 99 999 999 kVAh
b
b
Operating times
in centihours
b
b
Current
phase and neutral
b
b
Total demand active, reactive and apparent power
total
b
b
Maximum current
phase and neutral
b
b
Maximum active power (four quadrants)
total
b
b
Maximum reactive power (four quadrants)
total
b
b
Maximum apparent power
total
b
b
current and voltage
b
b
Demand values
Maximum demand values
Power-quality values
Total harmonic distortion (THD)
Reset
Maximum instantaneous value(2)
b
b
Maximum demand values
b
b
Energy values and operating times
b
b
Input counter(2)(3)
b
b
(1)
remote operation requires the optional Modbus RS485 module
(2)
with optional IO22 Alarm module
(3)
with optional IO11 Puls module
Installation and user manual
82
51112563AEP081_105.P65
82
09/12/04, 15:38
PM500 characteristics
PM500
Operation
Local
Remote(1)
b
b
b
b
b
b
Local or remote set-up via optional Modbus RS485 communication module
Type of distribution system
3-phase 3 or 4-wire with 1, 2 or
3 CTs, two-phase or single-phase
Rating of current transformers
primary 5 to 10000 A
secondary 5 or 1 A
Current transformers
primary 400 kV max
secondary 100, 110, 115, 120,
100/3, 110/3, 115/3, 120/3
y 2000000
Product(4) CT ratio x Ut ratio
Bar-chart scale
b
b
b
b
b
b
Calculation interval for demand currents from 5 to 60 minutes or Ext. sync(3)
b
b
Calculation interval for demand power from 5 to 60 minutes or Ext. sync(3)
b
b
PF calculation mode
IEC or IEEE
(1)
remote operation requires the optional Modbus RS485 module
(3)
with optional IO11 Puls module
(4)
e.g.: Supply:
2
Primary 110 kV
CT: Primary 2000 A
Secondary 110 V
Secondary 1 A
In this case, the product of 110000/110 x 2000/1 = 2000000.
Installation and user manual
51112563AEP081_105.P65
83
83
09/12/04, 15:38
Characteristics of PM500 options
The PM500 is fully upgradeable and can be equipped with
optional modules on site at any time.
The modules are simply clipped into any free slot.
The PM500 can be equipped with a maximum of one optional
module from each of the 5 types available.
Recommendation:
De-energise the PM500
before installing the
optional modules.
Modbus RS485 option
2
Part no. 50982
Functions
RS485 link
JBus/Modbus ® communication protocol
Settings
Communication address
Communication speed
Parity
Stop bits
IO22 Alarm option
Functions
2 digital inputs with pulse counting
2 relay outputs for
Output settings
Independent settings for the two outputs
Operation
Local
Remote
b
2 wires
1 to 247
2400 to 38400 bauds
none, even, odd
1 or 2
b
b
b
b
Part no. 50984
Operation
Local
Remote
b
control via Modbus
or high/low threshold alarms
control mode
or alarm mode
Alarm mode settings
- Type of alarm: 3I, IN, 3U, 3V, ΣP, ΣQ, ΣS, F,
ΣPF, THD 3I, THD IN, THD 3U, THD 3V,
AVG ΣP, AVG ΣQ, AVG ΣS, AVG 3I, AVG IN
and timer
- High/low thresholds, hysteresis and delay
- Relay operating mode
NO or NC
AO20 4-20mA option
Part no. 50985
b
b
b
b
b
b
b
b
b
b
b
b
Operation
Local
Functions
2 analogue outputs
Power supply (Pwr) to IO11 and IO22 module inputs
Analogue-output settings
- Type of analogue output, either 0-20mA or 4-20mA or Pwr
- Assigned values: I1, I2, I3, IN, U12, U23, U31, V1, V2, V3, ΣP, ΣQ,
ΣS, ΣPFL, F and ΣPFC
- Value corresponding to 0/4 mA, value corresponding to 2 mA
b
b
b
b
b
b
b
b
Installation and user manual
84
51112563AEP081_105.P65
Remote
84
09/12/04, 15:38
Characteristics of PM500 options
IO11 Puls option
Part no. 50983
Functions
1 input
Operation
Local
Remote
b
b
b
external sync.
or digital
1 pulse output for energy metering
Pulse-output settings
Energy: + kWh, - kWh, +kvarh, - kvarh, kVAh
Units: 0,1, 1, 10, 100 kWh, kvarh or kVAh
and 1 or 10 MWh, Mvarh and MVAh
Pulse duration
IO02 2 Puls option
Function
2 impulse outputs for energy metering
Pulse-output settings
Energy: + kWh, - kWh, +kvarh, - kvarh, kVAh
Units: 0,1, 1, 10, 100 kWh, kvarh or kVAh
and 1 or 10 MWh, Mvarh and MVAh
Pulse duration
b
b
b
b
100 ms to 900 ms in
100 ms steps
b
b
Part no. 50986
Operation
Local
Remote
b
100 ms to 900 ms in
100 ms steps
Installation and user manual
51112563AEP081_105.P65
b
b
b
b
b
b
85
85
09/12/04, 15:38
2
Installation
Front-panel
cut-out
E78242
3
Recommendations :
• avoid proximity with
systems generating
electromagnetic
disturbances.
• avoid vibrations with
accelerations greater than
1 G for frequencies under
60 Hz.
Mounting
E78261
No special tools are required
to mount the PM500. Simply
remove the four clips, insert
the PM500 through the cut-out
and refit the four clips,
pressing them tight against the
sheet metal to obtain a spring
effect.
Installation and user manual
86
51112563AEP081_105.P65
86
09/12/04, 15:38
PM500 connections
General
The PM500 comprises a fixed terminal block (6 mm2 wires) for
the currents and a plug-in terminal block (2.5 mm2 wires) for the
voltages and auxiliary power.
Note:
The maximum tightening
torque for each screw is
0.4 Nm.
E78243
4
Recommendations:
To avoid damaging the device, check the following before
making any connections:
• the voltage of the auxiliary power (AUX),
• the frequency of the distribution system (50 or 60 Hz),
• the maximum voltage across the voltage-input terminals,
(V1, V2, V3 and VN) 480 V AC phase-to-phase or 300 V AC
phase-to-neutral,
• a maximum current of 20 A on the current-input terminals
(I1, I2 and I3).
Connection of AC/DC auxiliary power (AUX)
b check the auxiliary-power voltage for your device:
- part no. 50980: 110 to 400 V AC ± 10 % and 120
to 305 V DC ± 20 %,
- part no. 50981: 24 to 48 V DC ± 20 %.
b when DC power is used, it is not necessary to respect the
polarities.
b it is advised to protect the auxiliary power supply using
protection devices rated for the prospective short-circuit current
at the connection points.
Installation and user manual
51112563AEP081_105.P65
87
87
09/12/04, 15:38
PM500 connections
Distribution systems up to 480 volts
Unbalanced 3-phase 4-wire system: 4 3CT
Balanced 3-phase 4-wire system: 4 1CT
Unbalanced 3-phase 3-wire system: 3 2-3CT
Balanced 3-phase 3-wire system: 3 1CT
4
* see page 87.
Recommendation:
• the voltage-input protection devices must be rated for the
short-circuit current at the connection points
• when connecting PM500 current inputs, always short the
secondaries of each current transformer. This can be done
easily using the shorting block.
Installation and user manual
88
51112563AEP081_105.P65
88
09/12/04, 15:38
PM500 connections
Distribution systems up to 480 volts (cont.)
Unbalanced 3-phase 3-wire system: 3 2-3CT
Note:
• the solution with two CTs reduces by
0.5 % the accuracy on the phase from
which the current is deduced
• always respect the direction of current
flow in the CT primary:
I
I
P1
P2
4
Two-phase 2-wire system: 2 1CT
Single-phase 2-wire system: 1 1CT
* see page 87.
Recommendation:
• the voltage-input protection devices must be rated for the
short-circuit current at the connection points
• when connecting PM500 current inputs, always short the
secondaries of each current transformer. This can be done
easily using the shorting block.
Installation and user manual
51112563AEP081_105.P65
89
89
09/12/04, 15:38
PM500 connections
Distribution systems over 480 volts
Unbalanced 3-phase 4-wire system: 4 3CT
Balanced 3-phase 4-wire system: 4 1CT
Unbalanced 3-phase 3-wire system: 3 2-3CT
Balanced 3-phase 3-wire system: 3 1CT
4
* see page 87.
Recommendation:
• the voltage-input protection devices must be rated for the
short-circuit current at the connection points
• when connecting PM500 current inputs, always short the
secondaries of each current transformer. This can be done
easily using the shorting block.
Installation and user manual
90
51112563AEP081_105.P65
90
09/12/04, 15:38
PM500 connections
Distribution systems over 480 volts (cont.)
Unbalanced 3-phase 3-wire system: 3 2-3CT
Note:
• the solution with two CTs reduces by
0.5 % the accuracy on the phase from
which the current is deduced
• always respect the direction of current
flow in the CT primary:
I
I
P1
P2
4
Unbalanced 3-phase 3-wire system: 3 2-3CT
* see page 87.
Recommendation:
• the voltage-input protection devices must be rated for the
short-circuit current at the connection points
• when connecting PM500 current inputs, always short the
secondaries of each current transformer. This can be done
easily using the shorting block.
Installation and user manual
51112563AEP081_105.P65
91
91
09/12/04, 15:38
Connection of the optional modules
IO11 Puls option
IO22 Alarm option
4
(*) volt free (external power supply)
(*) volt free (external power supply)
Recommendation:
To avoid damaging the modules, check the operating limits
(page 151) before making any connections.
RS485 Modbus option
IO02 2 Puls option
(*) Flip switches 1 and 2 as indicated by the arrow
to insert the 120 Ω line-termination resistor.
Note: For more information on Modbus communication
interfaces, see the Schneider Electric Modbus Network Guide.
Installation and user manual
92
51112563AEP081_105.P65
92
09/12/04, 15:38
Connection of the optional modules
AO20 4-20mA option
4
Recommendation:
To avoid damaging the modules, check the operating limits
(page 151) before making any connections.
Installation and user manual
51112563AEP081_105.P65
93
93
09/12/04, 15:38
4
Installation and user manual
94
51112563AEP081_105.P65
94
09/12/04, 15:38
Operation
Energising
( )
*
Display test screen
Product-version screen
( ) product version
*
5
Welcome screen displaying
values
Presentation of the front panel
The PM500 is equipped with a large, back-lit LCD display.
It can present up to five measurements simultaneously for fast
and direct access to information.
Values
Phase
Units
Type of measurement
(I, U, P, Q, S,
PF, THD)
Bar chart in %
current per phase
(continuous display)
IO22 Alarm option:
output 2 status (OUT2)
output 1 status (OUT1)
Activity indicator on
the communication bus
Neutral, sum (Σ)
and frequency (F)
Energy-metering
indicator
Energy,
operating time
and pulses (optional)
6 function buttons to easily view all values and
modify device settings (see page 98)
Installation and user manual
51112563AEP081_105.P65
95
95
09/12/04, 15:38
Operation
Viewing measurements
I button:
Press successively to obtain:
b instantaneous currents
b demand currents (AVG)
5
U F button:
Press successively to obtain:
b phase-to-phase voltages and frequency
b phase-to-neutral voltages and frequency
For 3-wire systems, the phase-to-neutral voltages are not
displayed.
P Q S button:
Press successively to obtain:
b active power (P) per phase and total
b reactive power (Q) per phase and total
b apparent power (S) per phase and total
b total demand active power (P AVG)
b total demand reactive power (Q AVG)
b total demand apparent power (S AVG)
Note: Display of certain values depends on device settings and the presence of the optional
modules.
Installation and user manual
96
51112563AEP081_105.P65
96
09/12/04, 15:38
Operation
Viewing measurements (cont.)
PF THD button:
Press successively to obtain:
b power factor (PF) with the inductive ( ) and
capacitive (
) indications
b current Total Harmonic Distortion (THD I)
b voltage Total Harmonic Distortion (THD U)
5
Max button:
Press successively to obtain:
b maximum demand currents (I MAX AVG)
b maximum demand active power (P MAX AVG)
b maximum demand reactive power (Q MAX AVG)
b maximum demand apparent power (S MAX AVG)
b maximum instantaneous current for highest phase (I MAX)
maximum instantaneous neutral current (IN MAX)
b maximum ph-ph voltage for highest phase (U MAX)
maximum frequency (F MAX)
E button:
Press successively to obtain:
b active energy in (+)
b reactive energy in (+)
b apparent energy
b active energy out (-)
b reactive energy out (-)
b input pulse counter for IO11 Puls (C0)
b input 1 pulse counter for IO22 Alarm (C1)
b input 2 pulse counter for IO22 Alarm (C2)
b operating time ( )
Note: Display of certain values depends on device settings and the presence of the optional
modules.
Installation and user manual
51112563AEP081_105.P65
97
97
09/12/04, 15:38
Programming
General
Programming principles
Programming mode is used to:
b display or modify PM500 settings and options;
b reset counters (energy, operating time, etc.);
b reset the maxi-meters and mini-meters.
Operations take place in three main steps:
b start programming mode;
b display or modify settings;
b exit programming mode.
The PM500 stores the new settings in memory on exiting
programming mode.
6
Start programming mode
FUNCTION BUTTONS
SCREEN
Start programming mode
b press the Prog button for
at least three seconds
Enter code 100
b press once
Confirm the code
b press
once
Installation and user manual
98
51112563AEP081_105.P65
98
09/12/04, 15:38
Programming
General (cont.)
Viewing the settings
Scroll through settings
or
Symbols
Order of settings
Modification
Options
Resetting the maxi-meters
page 100
Type of distribution system
page 101
Current transformers
page 102
Voltage transformers
page 103
Bar-chart scale
page 106
Power-factor convention
page 107
Demand-current calculation interval
page 108
Demand-power calculation interval
page 109
Pulse outputs 0, 1 and 2
page 110
IO11 Puls / IO02 2 Puls
Modbus communication
page 113
Modbus RS485
Analogue outputs 1 and 2
page 117
AO20 4-20mA
Alarm outputs 1 and 2
page 121
IO22 Alarm
6
Exit programming mode
Exit programming mode
b press the Prog button for
at least three seconds
Automatic exit
b if no function buttons are pressed for two minutes,
the system automatically exits programming mode
Installation and user manual
51112563AEP081_105.P65
99
99
09/12/04, 15:38
Programming
Resetting the maxi-meters
The default display is Max I
NO. If you do not want to reset
any maxi-meters, simply press
to go on to the next
parameter. To reset a maximeter, proceed as follows:
Reset a maxi-meter
b press once
Select a maxi-meter
b scroll through the choices
6
by pressing
or
choices: MAX I
MAX U
MAX F
C2
C1
C0
EREAES
ER+
EA+
TIME
MAX S
MAX -Q
MAX +Q
MAX -P
MAX +P
b press
or
,
(maximum demand current) and (maximum instantaneous currents
for optional IO22 Alarm module)
(maximum phase-to-phase voltages for optional IO22 Alarm module)
(maximum frequency for optional IO22 Alarm module)
(input 2 pulse counter for optional IO22 Alarm module)
(input 1 pulse counter for optional IO22 Alarm module)
(input pulse counter for optional IO11 Puls module)
(reactive energy out)
(active energy out)
(apparent energy)
(reactive energy in)
(active energy in)
(operating time)
(peak demand apparent power)
(peak negative demand reactive power)
(peak positive demand reactive power)
(peak negative demand active power)
(peak positive demand active power)
once
Select YES to enable resetting
of the selected maxi-meter
b press
once
Confirm your choice
b press
once
b press
once to go on
to the next parameter or exit
programming mode (see page 99)
Installation and user manual
100
51112563AEP081_105.P65
100
09/12/04, 15:38
Programming
Type of distribution system
The default setting is 4 3CT.
If this is correct, simply press
to go on to the next
parameter. To change the
setting, proceed as follows:
Change the type of distribution system
b press once
Select the type of distribution
system
b scroll through the choices
by pressing
or
,
choices :
4 3CT
4 1CT
3 2-3CT
3 1CT
2 1CT
1 1CT
6
or
Note: See the information on connections, pages 88 to 91.
Confirm your choice
b press
once
b press
once to go on
to the next parameter or exit
programming mode
(see page 99)
Installation and user manual
51112563AEP081_105.P65
101
101
09/12/04, 15:38
Programming
Current transformers
The default current
transformer setting is 500/5 A.
If this is correct, simply
press
to go on to the next
parameter. To change the
setting, proceed as follows:
Modify the primary and
secondary values
b press once
6
Set the values
b select the digit by pressing
or
b decrement
the value
or
or increment
or
Confirm your choice
b press
once
b press
once to go on
to the next parameter or exit
programming mode
(see page 99)
Note:
• the first five digits set the current for the primary winding of the transformer
(1 to 10000 A) and the last digit sets the current for the secondary winding (1 or 5 A).
• modification of the CT ratings requires resetting of the bar-chart scale with the new value
of the primary winding (see page 106).
Installation and user manual
102
51112563AEP081_105.P65
102
09/12/04, 15:38
Programming
Voltage transformers
The default setting is without
a voltage transformer.
If this is correct, simply
press
to go on to the next
parameter. To change the
setting, proceed as follows:
Modify the setting
b press once
6
Indicate that a voltage
transformer is present
b press
once
Confirm your choice
b press
once
b press
once to go on
to the next parameter (voltage
of the primary winding)
Installation and user manual
51112563AEP081_105.P65
103
103
09/12/04, 15:38
Programming
Voltage transformers (cont.)
Set the voltage for the primary winding of the voltage
transformers
The default setting is 100 V.
If this is correct, simply
to go on to the next
press
parameter. To change the
setting, proceed as follows:
6
Modify the voltage of the
primary winding
b press once
Set the voltage of the primary
winding
b select the digit by pressing
or
b decrement
the value
or
or increment
or
Note: The six digits set the voltage of the primary winding of the transformer
(maximum 400 000 V).
Confirm your choice
b press
once
b press
once to go on
to the next parameter (voltage
of the secondary winding)
Installation and user manual
104
51112563AEP081_105.P65
104
09/12/04, 15:38
Programming
Voltage transformers (cont.)
Set the voltage for the secondary winding of the
voltage transformers
The default setting is 100 V.
If this is correct, simply
to go on to the next
press
parameter. To change the
setting, proceed as follows:
Modify the voltage of the
secondary winding
b press once
6
Set the voltage of the
secondary winding
b scroll through the choices
by pressing
or
,
choices (in V): 100
69 (120/3)
66 (115/3)
64 (110/3)
58 (100/3)
120
115
110
or
Confirm your choice
b press
once
b press
once to go on
to the next parameter or exit
programming mode
(see page 99)
Installation and user manual
51112563AEP081_105.P65
105
105
09/12/04, 15:38
6
Programming
Bar-chart scale
The default setting is 500 A.
If this is correct, simply
press
to go on to the next
parameter. To change the
setting, proceed as follows:
Modify the bar-chart scale
b press once
6
Enter the scale
b select the digit by pressing
or
b decrement
the value
or
or increment
or
Confirm your choice
b press
once
b press
once to go on
to the next parameter or exit
programming mode
(see page 99)
Note: The above programming can only be done after choosing the CT ratings (see page 102).
Installation and user manual
106
51112563AEP106_129.P65
106
09/12/04, 15:39
Programming
Power-factor convention
The default setting is IEC.
If this is correct, simply
press
to go on to the next
parameter. To change the
setting, proceed as follows:
Modify the sign convention
b press once
Select the sign convention
b scroll through the choices
by pressing
or
,
choices: IEC
IEEE
6
or
Confirm your choice
once
b press
b press
once to go on
to the next parameter or exit
programming mode
(see page 99)
Installation and user manual
51112563AEP106_129.P65
107
107
09/12/04, 15:39
Programming
Demand-current calculation interval
The default setting is 15
minutes. If this is correct,
simply press
to go on to
the next parameter.
To change the setting,
proceed as follows:
Modify the calculation interval
b press once
6
Select the calculation interval
b scroll through the choices
by pressing
or
,
choices: 15 (minutes)
10
8
5
EXT (see note)
60
30
20
or
Confirm your choice
b press
once
b press
once to go on
to the next parameter or exit
programming mode
(see page 99)
Note: EXT is displayed if the optional IO11 Puls module is connected. The calculation interval
is determined by an external pulse.
Installation and user manual
108
51112563AEP106_129.P65
108
09/12/04, 15:39
Programming
Demand-power calculation interval
The default setting is 15
minutes. If this is correct,
simply press
to go on to
the next parameter.
To change the setting,
proceed as follows:
Modify the calculation interval
b press once
6
Select the calculation interval
b scroll through the choices
by pressing
or
,
choices: 15 (minutes)
10
8
5
EXT (see note)
60
30
20
or
Confirm your choice
b press
once
b press
once to go on
to the next parameter or exit
programming mode
(see page 99)
Note: EXT is displayed if the optional IO11 Puls module is connected. The calculation interval
is determined by an external pulse.
Installation and user manual
51112563AEP106_129.P65
109
109
09/12/04, 15:39
Programming
Optional IO11 Puls/ IO02 2 Puls module
Assign a function to the pulse output
The programming procedure
is identical for outputs E0
(IO11 Puls), E1 and E2
(IO02 2 Puls).
6
The default setting is active
energy. If this is correct,
simply press
to go on to
the next parameter.
To change the setting,
proceed as follows:
Modify the assignment
b press once
Select the desired energy
b scroll through the choices
by pressing
or
,
choices: EA+
EREAES
ER+
or
Confirm your choice
b press
once
b press
once to go on
to the next parameter
(value of the pulse)
Installation and user manual
110
51112563AEP106_129.P65
110
09/12/04, 15:39
Programming
Optional IO11 Puls/ IO02 2 Puls module (cont.)
Value of the pulse
The default setting is 1 k.
If this is correct, simply
press
to go on to the next
parameter. To change the
setting, proceed as follows:
Modify the value of the pulse
b press once
Select the desired value
b scroll through the choices
by pressing
or
,
choices: 10 (k)
1
0.1
10000
1000
100
6
or
Confirm your choice
b press
once
b press
once to go on
to the next parameter
(duration of the pulse)
Note: the value of the pulse must be chosen so that there is never more than 1 pulse/
second.
Installation and user manual
51112563AEP106_129.P65
111
111
09/12/04, 15:39
Programming
Optional IO11 Puls/ IO02 2 Puls module (cont.)
Duration of the pulse
The default setting is 100 ms.
If this is correct, simply
press
to go on to the next
parameter. To change the
setting, proceed as follows:
6
Modify the duration in
milliseconds
b select the digit by pressing
once
b decrement
the value
or increment
or
Confirm your choice
b press
once
b press
once to go on
to the next parameter or exit
programming mode
(see page 99)
Installation and user manual
112
51112563AEP106_129.P65
112
09/12/04, 15:39
Programming
Optional Modbus RS485 module
Address selection
The default setting is 001.
If this is correct, simply
press
to go on to the next
parameter. To change the
setting, proceed as follows:
Modify the address
b select the digit by pressing
once
Set the address
b decrement
or increment
the value
6
or
Confirm your choice
b press
once
b press
once to go on
to the next parameter
(communication speed)
Note: The address may be set from 1 to 255.
Installation and user manual
51112563AEP106_129.P65
113
113
09/12/04, 15:39
Programming
Optional Modbus RS485 module (cont.)
Communication speed
The default setting is 19 200
bauds. If this is correct, simply
press
to go on to the next
parameter. To change the
setting, proceed as follows:
6
Modify the speed
b press once
Select the speed
b scroll through the choices
by pressing
or
,
choices: 19200 (bauds)
9600
4800
2400
38400
or
Confirm your choice
b press
once
b press
once to go on
to the next parameter (parity)
Installation and user manual
114
51112563AEP106_129.P65
114
09/12/04, 15:39
Programming
Optional Modbus RS485 module (cont.)
Parity
The default setting is no parity.
If this is correct, simply press
to go on to the next
parameter. To change the
setting, proceed as follows:
Modify the parity
b press once
6
Select the parity
b scroll through the choices
by pressing
or
,
choices: NO
(no parity)
EVEN (even parity)
ODD (odd parity)
or
Confirm your choice
b press
once
b press
once to go on
to the next parameter
(stop bit)
Installation and user manual
51112563AEP106_129.P65
115
115
09/12/04, 15:39
Programming
Optional Modbus RS485 module (cont.)
Stop bit
The default setting is 1.
If this is correct, simply
press
to go on to the next
parameter. To change the
setting, proceed as follows:
6
Modify the stop bit
b press once
Select the number of stop bits
b scroll through the choices
by pressing
or
,
choices: 1
2
or
Confirm your choice
b press
once
b press
once to go on
to the next parameter or exit
programming mode
(see page 99)
Installation and user manual
116
51112563AEP106_129.P65
116
09/12/04, 15:39
Programming
Optional AO20 4-20mA module
Type of analogue output
The programming
procedure is identical for
outputs 1 (OUT 1) and 2
(OUT 2).
The default setting is 4-20mA.
If this is correct, simply
press
to go on to the next
parameter. To change the
setting, proceed as follows:
Modify the type of analogue
output
b press once
Select the type
b scroll through the choices
by pressing
or
,
6
or
choices: 0-20mA
4-20mA
Pwr*
* When set to Pwr mode, the output can be used to power the volt-free inputs of the IO11 and IO22 modules.
Confirm your choice
b press
once
b press
once to go on
to the next parameter
(assignment of the analogue
output)
Installation and user manual
51112563AEP106_129.P65
117
117
09/12/04, 15:39
Programming
Optional AO20 4-20mA module (cont.)
Assignment of the analogue output
The default setting is I1.
If this is correct, simply
press
to go on to the next
parameter. To change the
setting, proceed as follows:
6
Modify the assignment
b select the digit by pressing
once
Select a parameter
b scroll through the choices
by pressing
or
,
choices: I1
I2
I3
IN
U12
U23
U31
V1
V2
V3
ΣP
ΣQ
ΣS
ΣPFL
F
ΣPFC
or
Confirm your choice
b press
once
b press
once to go on
to the next parameter (value
at 0 or 4 mA (LV))
Installation and user manual
118
51112563AEP106_129.P65
118
09/12/04, 15:39
Programming
Optional AO20 4-20mA module (cont.)
Value 0 or 4 mA (LV)
The default setting is zero.
If this is correct, simply
press
to go on to the next
parameter. To change the
setting, proceed as follows:
Modify the value
b select the digit by pressing
once
Set the value (0 to 9999)
b decrement
or increment
the value
6
or
Modify the scale factor
b select the digit by pressing
once
Set the scale factor
b scroll through the choices
by pressing
or
,
choices: / (x 1)
K (x 1000)
M (x 1000000)
or
Confirm your choice
once
b press
b press
once to go on
to the next parameter (value
20 mA HV)
Note: When the output is assigned to a signed value (ΣP and ΣQ), the value at 0 or 4 mA
(LV) is negative.
Installation and user manual
51112563AEP106_129.P65
119
119
09/12/04, 15:39
Programming
Optional AO20 4-20mA module (cont.)
Value 20 mA (HV)
The default setting is 500.
If this is correct, simply
press
to go on to the next
parameter. To change the
setting, proceed as follows:
Modify the value
b select the digit by pressing
once
6
Set the value (0 to 9999)
b decrement
or increment
the value
or
Modify the scale factor
b select the digit by pressing
once
Set the scale factor
b scroll through the choices
by pressing
or
,
choices: / (x 1)
K (x 1000)
M (x 1000000)
or
Confirm your choice
b press
once
b press
once to go on
to the next parameter or exit
programming mode
(see page 99)
Installation and user manual
120
51112563AEP106_129.P65
120
09/12/04, 15:39
Programming
Optional IO22 Alarm module
Assign a function to the output
The programming
procedure is identical for
outputs 1 (OUT 1) and 2
(OUT 2).
The default setting is control
mode via Modbus (CdE).
If this is correct, simply press
to go on to the next
parameter. To change the
setting, proceed as follows:
Modify the assignment
b press once
6
Select the type of alarm
b scroll through the choices
by pressing
or
,
choices: CDE
AVG IN
AVG I
AVG ΣS
AVG ΣQ
AVG ΣP
THD V
THD U
THD IN
THD I
TIMER
ΣPF
F
ΣS
ΣQ
ΣP
or
V
U
IN
I
Confirm your choice
b press
once
b press
once to go on
to the next parameter (value
of the high threshold HT)
Installation and user manual
51112563AEP106_129.P65
121
121
09/12/04, 15:39
Programming
Optional IO22 Alarm module (cont.)
Value of the high threshold (HT)
The default setting is 0.
If this is correct, simply
press
to go on to the next
parameter. To change the
setting, proceed as follows:
6
Modify the high threshold
b select the digit by pressing
once
Set the value (0 to 9999)
b decrement
or increment
the value
or
Modify the scale factor
b select the digit by pressing
once
Set the scale factor
b scroll through the choices
by pressing
or
,
choices: / (x 1)
K (x 1000)
M (x 1000000)
or
Confirm your choice
b press
once
b press
once to go on
to the next parameter (value
of the low threshold LT)
Installation and user manual
122
51112563AEP106_129.P65
122
09/12/04, 15:39
Programming
Optional IO22 Alarm module (cont.)
Value of the low threshold (LT)
The default setting is 0.
If this is correct, simply
press
to go on to the next
parameter. To change the
setting, proceed as follows:
Modify the low threshold
b select the digit by pressing
once
Set the value (0 to 9999)
b decrement
or increment
the value
6
or
Modify the scale factor
b select the digit by pressing
once
Set the scale factor
b scroll through the choices
by pressing
or
,
choices: / (x 1)
K (x 1000)
M (x 1000000)
or
Confirm your choice
b press
once
b press
once to go on
to the next parameter
(hysteresis)
Installation and user manual
51112563AEP106_129.P65
123
123
09/12/04, 15:39
Programming
Optional IO22 Alarm module (cont.)
Hysteresis
The default setting is 0%.
If this is correct, simply
press
to go on to the next
parameter. To change the
setting, proceed as follows:
6
Modify the hysteresis
b select the digit by pressing
once
Set the value (0 to 99%)
b decrement
or increment
the value
or
Confirm your choice
b press
once
b press
once to go on
to the next parameter
(time delay)
Installation and user manual
124
51112563AEP106_129.P65
124
09/12/04, 15:39
Programming
Optional IO22 Alarm module (cont.)
Time delay
The default setting is 0
seconds. If this is correct,
to go on to
simply press
the next parameter.
To change the setting,
proceed as follows:
Modify the time delay
b select the digit by pressing
once
Set the value (0 to 999
seconds)
b decrement
or increment
the value
6
or
Confirm your choice
b press
once
b press
once to go on
to the next parameter
(operating mode)
Installation and user manual
51112563AEP106_129.P65
125
125
09/12/04, 15:39
Programming
Optional IO22 Alarm module (cont.)
Operating mode
The default setting for the
relay-output operating mode is
normally open (NO).
If this is correct, simply
press
to go on to the next
parameter. To change the
setting, proceed as follows:
6
Modify the operating mode
b press once
Set the mode
b scroll through the choices
by pressing
or
,
choices: NO (normally open)
NC (normally closed)
or
Confirm your choice
b press
once
b press
once to go on
to the next parameter or exit
programming mode
(see page 99)
Installation and user manual
126
51112563AEP106_129.P65
126
09/12/04, 15:39
Modbus communication
Introduction
The Modbus RS485 communication option can be used to
control all PM500 functions and options remotely:
b display measurements
b display counters and status of inputs
b control outputs
b reset counters, maxi-meters and mini-meters
b program the PM500
The Modbus RS485 option uses an RS485 type physical link
and the Modbus/JBus communication protocol in RTU mode.
The RS485 standard limits the number of physical connection
points per segment to 32.
It is however possible to exceed this limit by using a number of
segments connected by repeaters.
Maximum number of Modbus slaves
Per RS485 segment
With repeaters
31
47
Recommendation:
To ensure correct operation of the RS485 Modbus option,
set the master TimeOut (supervisor) to the minimum value
(250 ms).
Installation and user manual
51112563AEP106_129.P65
127
127
09/12/04, 15:39
7
Modbus communication
Functions
Access to tables of registers
7
Modbus
register no.
513
…
573
769
…
915
JBus decimal
address
512
…
572
768
…
914
1025
1024
1281
…
1338
1280
…
1337
1537
1536
2305
…
2320
64647
…
64652
2304
…
2319
64646
…
64651
Type of data
Format
Modbus function
Programming parameters
16 bits
32 bits
Measurements (not incl. THD)
32 bits
Read N words (3)
Write 1 word (6)
Write N words (16)
Read N words (3)
Initialisation of maxi-meters,
mini-meters, counters and alarms
16 bits
Alarms, alarm histories and status
of inputs and outputs
16 bits
32 bits
Backup of programming
parameters
16 bits
THD values
16 bits
Read N words (3)
Write 1 word (6)
Write N words (16)
Read N words (3)
Identification of PM500
and optional modules
16 bits
Read N words (3)
Read N words (3)
Write 1 word (6)
Write N words (16)
Read N words (3)
Note: the RS485 option accepts diffusion requests.
Special case of data in 32-bit format (2 words)
b organisation :
- register n: most significant bits;
- register n + 1: least significant bits.
b access: The requests must concern the two words.
An attempt to read/write data coded over two words with a
request to read/write one word results in a PM500 exception
message.
Modbus diagnostics - functions
Subfunction
Description
8
1 to 6
Management of diagnostic counters
Installation and user manual
128
51112563AEP106_129.P65
Function
code
128
09/12/04, 15:39
Modbus communication
Programming parameters
Decimal
Hexadecimal
Number
address
address
of words
512
200
1
Description
Units
Type of distribution system
-
0: 1 1CT
1: 2 1CT
2: 3 1CT
3: 3 2-3CT
4: 4 1CT
5: 4 3CT
513
201
1
Secondary winding of current transformer (Ct):
A
1: 1 A
7
5: 5 A
514(2)
202
1
Primary winding of current transformer (Ct):
A
(interval [1..10000])
Default value: 500
515
203
1
Voltage transformer (Ut):
-
0: No
1: Yes
516
204
2
Primary winding of voltage transformer (Ut):
V
(interval [1..400000])
518
206
1
Secondary winding of voltage transformer (Ut):
V
58: 100/3 V
64: 110/3 V
66: 115/3 V
69: 120/3 V
100: 100 V
110: 110 V
115: 115 V
120: 120 V
519
207
1
Calculation interval for demand currents
-
(AVG Time I):
0: External synchronisation(1)
5: 5 minutes
8: 8 minutes
10: 10 minutes
15: 15 minutes
20: 20 minutes
30: 30 minutes
60: 60 minutes
Default value
Installation and user manual
51112563AEP106_129.P65
129
129
09/12/04, 15:39
Modbus communication
Programming parameters (cont.)
Decimal
Hexadecimal
Number
address
address
of words
520
208
1
Description
Units
Calculation interval for demand power
-
(AVG Time P/Q/S):
0: External synchronisation(1)
5: 5 minutes
8: 8 minutes
10: 10 minutes
15: 15 minutes
20: 20 minutes
7
30: 30 minutes
60: 60 minutes
521(1)
209
1
IO11 Puls: type of energy for pulse output
-
(Out E E0):
0: kWh +
1: kvarh +
2: kVAh
3: kWh –
4: kvarh 522(1)
20A
1
IO11 Puls: value of pulse
kWh
(Out E E0 Val):
kvarh
0: 1/10
kVAh
1: 1
2: 10
3: 100
4: 1000
5: 10000
523(1)
20B
1
IO11 Puls: duration of pulse
ms
(Out E E0 Dur):
1: 100
2: 200
3: 300
4: 400
5: 500
6: 600
7: 700
8: 800
9: 900
Default value
Installation and user manual
130
51112563AEP130_156.P65
130
09/12/04, 15:39
Modbus communication
Programming parameters (cont.)
Decimal
Hexadecimal
Number
address
address
of words
527
20F
1
Description
Units
Power-factor sign convention:
-
0: IEC
1: IEEE
530
212
1
Bar-chart scale in current
A
(interval [1..10000]):
Default value: 500
539(4)
21B
1
AO20 4-20mA: type of output 1
-
(Out 1 20mA):
0: 0-20 mA
7
1: 4-20 mA
2: Pwr
540(4)
21C
1
AO20 4-20mA: assignment of output 1
-
(Out 1 20mA):
0: I1 (units: A or kA)
1: I2 (units: A or kA)
2: I3 (units: A or kA)
3: IN (units: A or kA)
4: U12 (units: V or kV)
5: U23 (units: V or kV)
6: U31 (units: V or kV)
7: ΣP (units: kW or MW)
8: ΣQ (units: kvar or Mvar)
9: ΣS (units: kVA or MVA)
10: ΣPFL (units: 0.001)
11: V1 (units: V or kV)
12: V2 (units: V or kV)
13: V3 (units: V or kV)
14: F (units: Hz/10)
15: ΣPFC (units: 0.001)
541(4)(5)
542(4)
21D
1
21E
1
AO20 4-20mA: value at 0 or 4 mA
Dependent
(Out 1 20mA LV) (interval [0..9999]):
on
Default value: 0
settings
AO20 4-20mA: scale factor value at 0 or 4 mA
Dependent
(Out 1 20mA):
on
0: x 1
settings
1: x 1000
2: x 1000000
Default value
Installation and user manual
51112563AEP130_156.P65
131
131
09/12/04, 15:39
Modbus communication
Programming parameters (cont.)
Decimal
Hexadecimal
Number
address
address
of words
543(5)
21F
1
544(4)
220
1
Description
Units
AO20 4-20mA: value at 20 mA
Dependent
(Out 1 20mA HV) (interval [0..9999]):
on
Default value: 500
settings
AO20 4-20mA: scale factor of value at 20 mA
Dependent
(Out 1 20mA):
on
0: x 1
settings
1: x 1000
2: x 1000000
545(4)
221
1
7
AO20 4-20mA: type of output 2
-
(Out 2 20mA):
0: 0-20 mA
1: 4-20 mA
2: Pwr
546(4)
222
1
AO20 4-20mA: assignment of output 2
-
(Out 2 20mA):
0: I1 (units: A or kA)
1: I2 (units: A or kA)
2: I3 (units: A or kA)
3: IN (units: A or kA)
4: U12 (units: V or kV)
5: U23 (units: V or kV)
6: U31 (units: V or kV)
7: ΣP (units: kW or MW)
8: ΣQ (units: kvar or Mvar)
9: ΣS (units: kVA or MVA)
10: ΣPFL (units: 0.001)
11: V1 (units: V or kV)
12: V2 (units: V or kV)
13: V3 (units: V or kV)
14: F (units: Hz/10)
15: ΣPFC (units: 0.001)
547(4)(5)
548(4)
223
224
1
1
AO20 4-20m: value at 0 or 4 mA
Dependent
(Out 2 20mA LV) (interval [0..9999]):
on
Default value: 0
settings
AO20 4-20mA: scale factor of value at 0 or 4 mA
Dependent
(Out 2 20mA):
on
0: x 1
settings
1: x 1000
2: x 1000000
Default value
Installation and user manual
132
51112563AEP130_156.P65
132
09/12/04, 15:39
Modbus communication
Programming parameters (cont.)
Decimal
Hexadecimal
Number
address
address
of words
549(4)
225
1
550(4)
226
1
Description
Units
AO20 4-20mA: value at 20 mA
Dependent
(Out 2 20mA HV) (interval [0..9999]):
on
Default value: 500
settings
AO20 4-20mA: scale factor of value at 20 mA
Dependent
(Out 2 20mA):
on
0: x 1
settings
1: x 1000
551(3)
227
1
2: x 1000000
IO22 Alarm: output 1 assignment
-
7
(Out 1 A-Cd):
0: Control
1: I (units: A or kA)
2: U (units: V or kV)
3: SP (units: kW or MW)
4: SQ (units: kvar or Mvar)
5: SS (units: kVA or MVA)
6: F (units: Hz/10)
7: SPF (units: 0.01)
8: THD I (units: %)
9: THD U (units: %)
10: IN (units: A or kA)
11: Operating-time counter (units: h or kh)
12: V (units: V or kV)
13: THD In (units: %)
14: THD V (units: %)
15: AVG I (units: A or kA)
16: AVG IN (units: A or kA)
17: AVG ΣP (units: kW or MW)
18: AVG ΣQ (units: kvar or Mvar)
552(3)
553(3)
228
1
229
1
19: AVG ΣS (units: kVA or MVA)
IO22 Alarm: low threshold for output 1
Dependent
(Out 1 Lt) (interval [0..9999]):
on
Default value: 0
settings
IO22 Alarm: scale factor of low threshold for output 1 Dependent
0: x 1
on
1: x 1000
settings
2: x 1000000
Default value
Installation and user manual
51112563AEP130_156.P65
133
133
09/12/04, 15:39
Modbus communication
Programming parameters (cont.)
Decimal
Hexadecimal
Number
address
address
of words
554(3)
22A
1
555(3)
22B
1
Description
Units
IO22 Alarm: high threshold for output 1
Dependent
(Out 1 Ht) (interval [0..9999]):
on
Default value: 500
settings
IO22 Alarm: scale factor of high threshold for output 1: Dependent
0: x 1
on
1: x 1000
settings
2: x 1000000
556(3)
7
22C
1
IO22 Alarm: hysteresis for output 1
%
(Out 1 Hyst) (interval [0..99])
557(3)
22D
1
IO22 Alarm: time delay for output 1
s
(Out 1 Delay) (interval [0..999])
558(3)
22E
1
IO22 Alarm: operating mode of output 1
-
(Out 1 Relay):
0: open
1: closed
559(3)
22F
1
IO22 Alarm: output 2 assignment
-
(Out 2 A-Cd):
Same as address 551
560(3)
561(3)
230
231
1
1
IO22 Alarm: low threshold for output 2
Dependent
(Out 2 Lt) (interval [0..9999]):
on
Default value: 0
settings
IO22 Alarm: scale factor of low threshold for output 2:
Dependent
0: x 1
on
1: x 1000
settings
2: x 1000000
562(3)
563(3)
232
233
1
1
IO22 Alarm: high threshold for output 2
Dependent
(Out 2 Ht) (interval [0..9999]):
on
Default value: 500
settings
IO22 Alarm: scale factor of high threshold for output 2 : Dependent
0: x 1
on
1: x 1000
settings
2: x 1000000
564(3)
234
1
IO22 Alarm: hysteresis for output 2
%
(Out 2 Hyst) (interval [0…99])
Default value
Installation and user manual
134
51112563AEP130_156.P65
134
09/12/04, 15:39
Modbus communication
Programming parameters (cont.)
Decimal
Hexadecimal
Number
address
address
of words
565(3)
235
1
Description
Units
IO22 Alarm: time delay for output 2
s
(Out 2 Delay) (interval [0…999])
566(3)
236
1
IO22 Alarm: operating mode of output 2
-
(Out 2 Relay):
0: open
567(6)
237
1
1: closed
IO02 2 Puls: type of energy for pulse output
-
(Out E E1) :
0: kWh +
7
1: kvarh +
2: kVAh
3: kWh –
4: kvarh 568(6)
238
1
IO02 2 Puls: value of pulse
kWh
(Out E E1 Val):
kvarh
0: 1/10
kVAh
1: 1
2: 10
3: 100
4: 1000
5: 10000
569(6)
239
1
IO02 2 Puls: duration of pulse
ms
(Out E E1 Dur):
1: 100
2: 200
3: 300
4: 400
5: 500
6: 600
7: 700
8: 800
9: 900
Default value
Installation and user manual
51112563AEP130_156.P65
135
135
09/12/04, 15:39
Modbus communication
Programming parameters (cont.)
Decimal
Hexadecimal
Number
address
570(6)
address
23A
of words
1
IO02 2 Puls: type of energy for pulse output
Description
Units
-
(Out E E2):
0: kWh +
1: kvarh +
2: kVAh
3: kWh –
4: kvarh 571(6)
23B
1
7
IO02 2 Puls: value of pulse
kWh
(Out E E2 Val):
kvarh
0: 1/10
kVAh
1: 1
2: 10
3: 100
4: 1000
5: 10000
572(6)
23C
1
IO02 2 Puls : duration of pulse
ms
(Out E E2 Dur):
1: 100
2: 200
3: 300
4: 400
5: 500
6: 600
7: 700
8: 800
9: 900
(1)
register not filled in if IO11 Puls module is not installed.
(2)
if the secondary winding of the current transformer is set to 1 A, the interval values are [1..10000],
if the secondary winding of the current transformer is set to 5 A, the interval values are [5..10000] in 5 A steps,
if the set value is not a multiple of 5, PM500 uses the closest multiple of 5.
register not filled in if IO22 Alarm module is not installed.
(3)
(4)
register not filled in if AO20 4-20mA module is not installed.
(5)
when the output is assigned to a signed value (ΣP and ΣQ), the value set toat 0 or 4 mA (LV) is negative.
(6)
register not filled in if IO02 2 Puls module is not installed.
Default value
Installation and user manual
136
51112563AEP130_156.P65
136
09/12/04, 15:39
Modbus communication
Backup of programming parameters
PM500 programming parameters may be modified via the
Modbus communication port:
b write the new parameters in registers 513 to 573;
b save the programming parameters.
The PM500 resets and takes into account the new parameters.
Decimal
Hexadecimal
Number
address
address
of words
1536
600
1
Description
Write 0: backup of programming parameters
7
Warning:
Before backing up the new data, make sure there are no
inconsistencies in the new parameters.
Installation and user manual
51112563AEP130_156.P65
137
137
09/12/04, 15:39
Modbus communication
Measurements (not including THD)
7
Decimal
Hexadecimal
Number
address
address
of words
Description
Units
768
300
770
302
2
I1: instantaneous current, phase 1
mA
2
I2: instantaneous current, phase 2
772
mA
304
2
I3: instantaneous current, phase 3
mA
774
306
2
IN: neutral current
mA
776
308
2
U12: phase-to-phase voltage, phase 1 to 2
V/100
778
30A
2
U23: phase-to-phase voltage, phase 2 to 3
V/100
780
30C
2
U31: phase-to-phase voltage, phase 3 to 1
V/100
782
30E
2
U1N: phase-to-neutral voltage, phase 1
V/100
784
310
2
U2N: phase-to-neutral voltage, phase 2
V/100
786
312
2
U3N: phase-to-neutral voltage, phase 3
V/100
788
314
2
F: frequency
Hz/100
790
316
2
ΣP: total active power ±
kW/100
792
318
2
ΣQ: total reactive power ±
kvar/100
794
31A
2
ΣS: total apparent power
kVA/100
798
31E
2
P1: active power, phase 1 ±
kW/100
800
320
2
P2: active power, phase 2 ±
kW/100
802
322
2
P3: active power, phase 3 ±
kW/100
804
324
2
Q1: reactive power, phase 1 ±
kvar/100
806
326
2
Q2: reactive power, phase 2 ±
kvar/100
808
328
2
Q3: reactive power, phase 3 ±
kvar/100
810
32A
2
S1: apparent power, phase 1
kVA/100
812
32C
2
S2: apparent power, phase 2
kVA/100
814
32E
2
S3: apparent power, phase 3
kVA/100
822
336
2
I1 AVG: demand current, phase 1
mA
824
338
2
I2 AVG: demand current, phase 2
mA
826
33A
2
I3 AVG: demand current, phase 3
mA
836
344
2
ΣS AVG : puissance apparente moyenne totale
kVA/100
838
346
2
I1 MAX AVG: maximum demand current, phase 1
mA
840
348
2
I2 MAX AVG: maximum demand current, phase 2
mA
842
34A
2
I3 MAX AVG: maximum demand current, phase 3
mA
844
34C
2
P MAX AVG +: maximum demand active power +
kW/100
846
34E
2
P MAX AVG -: maximum demand active power -
kW/100
848
350
2
Q MAX AVG +: maximum demand reactive power +
kvar/100
850
352
2
Q MAX AVG -: maximum demand reactive power -
kvar/100
852
354
2
S MAX AVG: maximum demand apparent power
kVA/100
854
356
2
Operating-time counter
1/100 h
856
358
2
EA+: active energy in +
kWh
858
35A
2
ER+: reactive energy in +
kvarh
Installation and user manual
138
51112563AEP130_156.P65
138
09/12/04, 15:39
Modbus communication
Measurements (not including THD) (cont.)
Decimal
Hexadecimal
Number
address
address
of words
Description
Units
860
35C
862
35E
2
ES: apparent energy
kVAh
2
EA-: active energy out -
864
360
2
ER-: reactive energy out -
kWh
kvarh
866(1)
362
2
C1: input 1 pulse counter
-
868(1)
364
2
C2: input 2 pulse counter
-
870
366
2
PF: total power factor
0.001
872
368
2
PF1: power factor, phase 1
0.001
874
36A
2
PF2: power factor, phase 2
0.001
876
36C
2
PF3: power factor, phase 3
0.001
mA
878
36E
2
IN AVG: demand current in the neutral
880
370
2
ΣP AVG: total demand active power ±
kW/100
882
372
2
ΣQ AVG: total demand reactive power ±
kvar/100
884
374
2
IN MAX AVG: maximum demand current in the neutral mA
886(1)
376
2
I MIN: minimum current on the three phases
mA
888(1)
378
2
IN MIN: minimum current in the neutral
mA
890(1)
37A
2
U MIN: minimum of phase-to-phase voltages
on the three phases
V/100
892(1)
37C
2
F MIN: minimum frequency
Hz/100
894(1)
37E
2
PF MIN: minimum power factor
0.001
896(1)
380
2
P MIN: minimum active power ±
kW/100
898(1)
382
2
Q MIN: minimum reactive power ±
kvar/100
900(1)
384
2
I MAX: maximum instantaneous current
on the three phases
mA
902(1)
386
2
IN MAX: maximum current in neutral
mA
904(1)
388
2
U MAX: maximum of phase-to-phase voltages
on the three phases
V/100
906(1)
38A
2
F MAX: maximum frequency
Hz/100
908(1)
38C
2
PF MAX: maximum power factor
0.001
910(1)
38E
2
P MAX: maximum total active power ±
kW/100
912(1)
390
2
Q MAX: maximum total reactive power ±
kvar/100
914(2)
392
2
C0: input 0 pulse counter
-
(1)
register not filled in if IO22 Alarm module is not installed.
(2)
register not filled in if IO11 Puls module is not installed.
Installation and user manual
51112563AEP130_156.P65
139
139
09/12/04, 15:39
7
Modbus communication
THD values
7
Decimal
Hexadecimal
Number
address
address
of words
Description
Units
2304
900
2305
901
1
THD I1
1/10 %
1
THD I2
2306
1/10 %
902
1
THD I3
1/10 %
2307
903
1
THD IN
1/10 %
2308
904
1
THD U12
1/10 %
2309
905
1
THD U23
1/10 %
2310
906
1
THD U31
1/10 %
2311
907
1
THD V1
1/10 %
2312
908
1
THD V2
1/10 %
2313
909
1
THD V3
1/10 %
2314(1)
90A
1
MIN THD I: minimum of current THD on the three
phases
1/10 %
2315(1)
90B
1
MIN THD IN: minimum current THD in the neutral
1/10 %
2316(1)
90C
1
MIN THD U: minimum of phase-to-phase voltage THD 1/10 %
on the three phases
2317(1)
90D
1
MAX THD I: maximum of current THD on the three
phases
2318(1)
90E
1
MAX THD IN: maximum current THD in the neutral
1/10 %
2319(1)
90F
1
MAX THD U: maximum of phase-to-phase voltage
THD on the three phases
1/10 %
(1)
1/10 %
register not filled in if IO22 Alarm module is not installed.
Installation and user manual
140
51112563AEP130_156.P65
140
09/12/04, 15:39
Modbus communication
Alarms and input/outputs
Updating of the alarm and history registers requires the IO22
Alarm option and activation of alarm mode (see chapter 6,
Programming IO22 Alarm module).
Active alarm, Output 1 (OUT 1)
Decimal
Hexadecimal
Number
address
address
of words
Description
Units
1280
500
1
Active alarm, output 1 low threshold
Logged alarm: type of alarm(1)
-
1281
501
2
Active alarm, output 1 low threshold
Value of low threshold
See logged
alarm
1283
503
1
Active alarm, output 1 high threshold
Logged alarm: type of alarm(1)
-
1284
504
2
Active alarm, output 1 high threshold
Value of high threshold
See logged
alarm
1286
506
1
Duration of active alarm on output 1
s
Alarm (- 1) output 1 (OUT 1)
Decimal
Hexadecimal
Number
address
address
of words
Description
Units
1287
507
1
Alarm (- 1) output 1 low threshold
Logged alarm: type of alarm(1)
-
1288
508
2
Alarm (- 1) output 1 low threshold
Value of low threshold
See logged
alarm
1290
50A
1
Alarm (- 1) output 1 high threshold
Logged alarm: type of alarm(1)
-
1291
50B
2
Alarm (- 1) output 1 high threshold
Value of high threshold
See logged
alarm
1293
50D
1
Duration of alarm (- 1) on output 1
s
Alarm (- 2) output 1 (OUT 1)
Decimal
Hexadecimal
Number
address
address
of words
Description
Units
1294
50E
1
Alarm (- 2) output 1 low threshold
Logged alarm: type of alarm(1)
-
1295
50F
2
Alarm (- 2) output 1 low threshold
Value of low threshold
See logged
alarm
1297
511
1
Alarm (- 2) output 1 high threshold
Logged alarm: type of alarm(1)
-
1298
512
2
Alarm (- 2) output 1 high threshold
Value of high threshold
See logged
alarm
1300
514
1
Duration of alarm (- 2) on output 1
s
(1)
see page 144.
Installation and user manual
51112563AEP130_156.P65
141
141
09/12/04, 15:39
7
Modbus communication
Alarms and input/outputs (cont.)
Alarm (- 3) output 1 (OUT 1)
Decimal
Hexadecimal
Number
address
address
of words
Description
Units
1301
515
1
Alarm (- 3) output 1 low threshold
Logged alarm: type of alarm(1)
-
1302
516
2
Alarm (- 3) output 1 low threshold
Value of low threshold
See logged
alarm
1304
518
1
Alarm (- 3) output 1 high threshold
Logged alarm: type of alarm(1)
-
1305
519
2
Alarm (- 3) output 1 high threshold
Value of high threshold
See logged
alarm
1307
51B
1
Duration of alarm (- 3) on output 1
s
7
Active alarm, Output 2 (OUT 2)
Decimal
Hexadecimal
Number
Description
address
address
of words
of words
Units
1308
51C
1
Active alarm, output 2 low threshold
Logged alarm: type of alarm(1)
-
1309
51D
2
Active alarm, output 2 low threshold
Value of low threshold
See logged
alarm
1311
51F
1
Active alarm, output 2 high threshold
Logged alarm: type of alarm(1)
-
1312
520
2
Active alarm, output 2 high threshold
Value of high threshold
See logged
alarm
1314
522
1
Duration of active alarm on output 2
s
Alarm (- 1) output 2 (OUT 2)
Decimal
Hexadecimal
Number
address
address
of words
Description
Units
1315
523
1
Alarm (- 1) output 2 low threshold
Logged alarm: type of alarm(1)
-
1316
524
2
Alarm (- 1) output 2 low threshold
Value of low threshold
See logged
alarm
1318
526
1
Alarm (- 1) output 2 high threshold
Logged alarm: type of alarm(1)
-
1319
527
2
Alarm (- 1) output 2 high threshold
Value of high threshold
See logged
alarm
1321
529
1
Duration of alarm (- 1) on output 2
s
(1)
see page 144.
Installation and user manual
142
51112563AEP130_156.P65
142
09/12/04, 15:39
Modbus communication
Alarms and input/outputs (cont.)
Alarm (- 2) output 2 (OUT 2)
Decimal
Hexadecimal
Number
address
address
of words
Description
Units
1322
52A
1
Alarm (- 2) output 2 low threshold
Logged alarm: type of alarm(1)
-
1323
52B
2
Alarm (- 2) output 2 low threshold
Value of low threshold
See logged
alarm
1325
52D
1
Alarm (- 2) output 2 high threshold
Logged alarm: type of alarm(1)
-
1326
52E
2
Alarm (- 2) output 2 high threshold
Value of high threshold
See logged
alarm
1328
530
1
Duration of alarm (- 2) on output 2
s
7
Alarm (- 3) output 2 (OUT 2)
Decimal
Hexadecimal
Number
address
address
of words
Description
Units
1329
531
1
Alarm (- 3) output 2 low threshold
Logged alarm: type of alarm(1)
-
1330
532
2
Alarm (- 3) output 2 low threshold
Value of low threshold
See logged
alarm
1332
534
1
Alarm (- 3) output 2 high threshold
Logged alarm: type of alarm(1)
-
1333
535
2
Alarm (- 3) output 2 high threshold
Value of high threshold
See logged
alarm
1335
537
1
Duration of alarm (- 3) on output 2
s
Status of input/outputs
Decimal
Hexadecimal
Number
address
address
of words
Description
Units
1336
538
1
Status of IO11 Puls module(2)
bit 0: input status (0 = open, 1 = closed)
-
1337
539
1
Status of IO22 Alarm module(3)
bit 0: input 1 status (0 = open, 1 = closed)
bit 1: input 2 status (0 = open, 1 = closed)
bit 4: output 1 status (0 = open, 1 = closed)
bit 5: output 2 status (0 = open, 1 = closed)
-
(1)
see page 144.
(2)
register not filled in if IO11 Puls module is not installed.
(3)
register not filled in if IO22 Alarm module is not installed.
Installation and user manual
51112563AEP130_156.P65
143
143
09/12/04, 15:39
Modbus communication
Alarms and input/outputs (cont.)
Alarm type codes
Description
No alarm
I1 (units: mA)
I2 (units: mA)
I3 (units: mA)
IN (units: mA)
U12 (units: V/100)
U23 (units: V/100)
U31 (units: V/100)
ΣP (units: kW/100)
ΣQ (units: kvar/100)
ΣS (units: kVA/100)
F (units: Hz/100)
ΣPF (units: 0.001)
THD I1 (units: 1/10 %)
THD I2 (units: 1/10 %)
THD I3 (units: 1/10 %)
THD U12 (units: 1/10 %)
THD U23 (units: 1/10 %)
THD U31 (units: 1/10 %)
Operating-time counter (units: 1/100 h)
V1 (units: V/100)
V2 (units: V/100)
V3 (units: V/100)
THD IN (units: 1/10 %)
THD V1 (units: 1/10 %)
THD V2 (units: 1/10 %)
THD V3 (units: 1/10 %)
I1 AVG (units: mA)
I2 AVG (units: mA)
I3 AVG (units: mA)
IN AVG (units: mA)
ΣP AVG (units: kW/100)
ΣQ AVG (units: kvar/100)
7
Value
0
1
2
3
4
5
6
7
8
9
10
11
12
15
16
17
18
19
20
21
22
23
24
25
26
27
28
29
30
31
32
33
34
ΣS AVG (units: kVA/100)
35
Operation of the alarm history
When an alarm occurs, its characteristics (type, value and
duration) are recorded in the "active alarm" zone.
When the active alarm drops out, its values are transferred to
the alarm (- 1) registers and the "logged alarm" register is set
to 0 (no active alarm).
Transfer of the active alarm to alarm (- 1) provokes transfer of
alarm (- 1) to alarm (- 2) and of alarm (- 2) to alarm (- 3).
The previous alarm (- 3) is lost.
Installation and user manual
144
51112563AEP130_156.P65
144
09/12/04, 15:39
Modbus communication
Initialisation (max/ min/ counters/ alarms)
Decimal
Hexadecimal
Number
address
address
of words
1024
400
1
Description (value in hexadecimal format)
Initialisation of:
0: no initialisation
1: maximum demand current
(address &346, &348, &34A, &374)
2: P MAX AVG+ (address &34C)
4: P MAX AVG- (address &34E)
8: Q MAX AVG+ (address &350)
10: Q MAX AVG- (address &352)
20: S MAX AVG (address &354)
7
40: Operating-time counter (address &356)
80: Ea+ kWh (address &358)
100: Er+ kvarh (address &35A)
200: Es kVAh (address &35C)
400: Ea- kWh (address &35E)
800: Er- kvarh (address &360)
1000: all MAX AVG, Operating-time counter and energy values
2000: C1 (address &362)
4000: C2 (address &364)
4001: C0 (address &392)
8001: Min and Max I and IN (address &376, &378, &384, &386)
8002: Min and Max U (address &37A, &388)
8004: Min and Max frequency (address &37C, &38A)
8008: Min and Max PF (address &37E, &38C)
8010: Min and Max P (address&380, &38E)
8020: Min and Max Q (address &382, &390)
8040: Min and Max THD I, THD IN (address &90A, &90B, &90D, &90E)
8080: Min and Max THD U (address &90C, &90F)
8100: all min. and max. instantaneous measurements
8201: active alarm and history registers output 1 (OUT 1)
8202: active alarm and history registers output 2 (OUT 2)
8203: active alarm and history registers outputs 1 and 2 (OUT 1 and 2)
Installation and user manual
51112563AEP130_156.P65
145
145
09/12/04, 15:39
Modbus communication
PM500 identification and optional module
Decimal
Hexadecimal
Number
address
address
of words
Description
Units
64646
FC86
1
Schneider Electric identification = &0100
-
64647
FC87
1
PM500 identification = &C724
-
64649
FC89
1
Optional modules:
see the codes for installed modules
-
64650(1)
FC8A
2
PM500 version
-
(1)
the PM500 product version is coded in decimal format. For example, 200 signifies version 2.00
7
Codes for installed modules
Value
Bit 0: RS485 Modbus module
0: not installed
1: installed
Bit 1: IO11 Puls module
0: not installed
1: installed
Bit 2: IO22 Alarm module
0: not installed
1: installed
Bit 3: AO20 4-20mA module
0: not installed
1: installed
Bit 4: IO02 2 Puls module
0: not installed
1: installed
Installation and user manual
146
51112563AEP130_156.P65
Description
146
09/12/04, 15:39
Trouble-shooting
Problem
Nothing appears on the display
after the Power Meter is turned on
Probable cause
The Power Meter may not be
receiving power with the required
characteristics
Solution
Check that the power received
at the "AUX" auxiliary supply
terminals of the Power Meter
has the following characteristics:
b cat. no. 50980 : 110 to 400 V AC
±10 % or 120 to 350 V DC ±20 %
b cat. no. 50981: 24 to 48 V DC
±20 %
The voltage values are zero
The device protecting the voltage
Check the device protecting the
measurement inputs is open
voltage measurement inputs
No voltage on the measurement
Check the presence of
input terminals
Power Meter voltages V1, V2,
V3, VN using a multimeter
The current values are zero
The CT secondaries are shorted
Remove the bars used to short
the CT secondaries or open the
shorting block
Primary current absent or insufficient The minimum current on the CT
secondary must be > 25 mA
The data displayed are inexact
The CT transformer ratio, chosen
Check the programmed CT ratio
or do not correspond to the
according to the rated current of
expected values
the load, and the value programmed
do not correspond
Incorrect configuration values
Check that the correct values
have been entered for the
Power Meter configuration
parameters (type of distribution
system, CTs, VTs, power factor
convention, etc.).
See instructions in the
"Programming" section of the
manual
Incorrect voltage measurement
Check the presence of
inputs
Power Meter voltages V1, V2,
V3, VN and that their values are
within the permissible tolerances
Incorrect current measurement
Check phase concordance on
inputs
the CTs and VTs.
Check that the current in the CTs
flows in the direction P1 to P2.
Check that the bars used to
short the CT secondaries are
not present or open the shorting
block.
See the "PM500 connection"
section of the manual.
The total power values are incorrect CTs and/or VTs not connected
Check phase concordance on
properly
the CTs and VTs.
Check that the current in the CTs
flows in the direction P1 to P2
The wiring does not correspond
Check the type of distribution
to the type of distribution system
system programmed (see the
programmed
"Programming" section of the
manual)
Installation and user manual
51112563AEP130_156.P65
147
147
13/12/2004, 08:48
8
Trouble-shooting
Problem
The power per phase values are
incorrect
8
Probable cause
CTs and/or VTs not connected
properly
Solution
Check phase concordance on
the CTs and VTs.
Check that the current in the CTs
flows in the direction P1 to P2
The reactive power value is much
Excessive THD in the installation
Reduce the THD (for example
higher than expected
by installing harmonic filters)
No communication with Power Meter The RS485 connection is not
Respect standard EIA485
properly wired
(characteristic impedance of the
communication cable, 2-wire or
4-wire medium, load, termination
and bias resistors, etc.
The TimeOut value is too short
Set the TimeOut of the master
(supervisor) to at least 250 ms
Incorrect Power Meter address
Make sure the addresses have
been properly assigned
(master-slave)
Incorrect Power Meter
Make sure the Power Meter
communication speed
transmission rate is the same
(transmission rate) setting
as that of all the other devices
connected to the communication
link.
See instructions in the
"Programming" section of the
manual.
Incorrect Power Meter parity setting Make sure the Power Meter
parity setting is the same as that
of all the other devices
connected to the communication
link.
See instructions in the
"Programming" section of the
manual.
Incorrect Power Meter stop-bit
Make sure the Power Meter
setting
stop-bit setting is the same as
that of all the other devices
connected to the communication
link.
See instructions in the
"Programming" section of the
manual.
Electromagnetic (EMC) compatibility Carry out wiring in accordance
problem
with standard practices (running
of power and communication
cables, earthing of exposed
conductive parts, cable
shielding, etc.)
Installation and user manual
148
51112563AEP130_156.P65
148
09/12/04, 15:39
Trouble-shooting
Problem
Values on local display different
from those read on the remote
supervisor
A frame sent by the Power Meter
includes an exception code
Probable cause
Solution
Electromagnetic (EMC) compatibility Carry out wiring in accordance
problem
with standard practices (running
of power and communication
cables, earthing of exposed
conductive parts, cable
shielding, etc.)
Difference of 1 between Modbus
Check whether the supervisor
and Jbus register addresses
uses Modbus or Jbus
communication protocol.
Modbus and Jbus register
addresses differ by a value of 1.
See the "Modbus communication"
section of the manual
Incorrect data format
See the "Modbus communication"
section of the manual
Modbus function not supported
See the "Modbus communication"
by Power Meter
section of the manual
The register address read is
See the "Modbus communication"
incorrect
section of the manual
The number of words read is
See the "Modbus communication"
incorrect
section of the manual
Installation and user manual
51112563AEP130_156.P65
149
149
09/12/04, 15:39
8
8
Installation and user manual
150
51112563AEP130_156.P65
150
04/01/2005, 13:33
Appendices
Contents
Characteristics .......................................................................................... 152
PM500 electrical characteristics .............................................................................................. 152
Mechanical characteristics ....................................................................................................... 152
Electrical characteristics of the IO11 Puls and IO02 2 Puls options ....................................... 152
Electrical characteristics of the IO22 Alarm option .................................................................. 153
Electrical characteristics of the AO20 4-20mA option ............................................................. 153
Environmental characteristics .................................................................................................. 153
CE marking .......................................................................................................................................... 153
Electromagnetic compatibility .............................................................................................................. 153
Climate ................................................................................................................................................. 153
Insulation ............................................................................................................................................. 153
Measurement ranges ............................................................................................................... 154
Accuracy .................................................................................................................................. 154
Abbreviations and symbols ....................................................................... 155
Installation and user manual
51112563AEP130_156.P65
151
151
09/12/04, 15:39
9
Appendices
Characteristics
PM500 electrical characteristics
Auxiliary power supply PM500 part no. 50980
110 to 400 V AC (± 10 %), 10 VA
120 to 350 V DC (± 20 %), 10 W
PM500 part no. 50981
Voltage inputs
24 to 48 V DC (± 20 %), 10 W
Phase to phase (direct)
50 to 480 V AC
Phase to neutral (direct)
28 to 277 V AC
Phase to phase
Primary
(with external VT)
Secondary
Frequency
Current inputs
9
Up to 400 kV AC
58, 64, 66, 69, 100, 110, 115, 120 V AC
45 to 65 Hz
CT:
Rating (In)
1 to 10000 A in
1 A steps
5 to 10000 A in
5 A steps
Secondary
1A
5A
Permissible overload
20 A
48 A
150 A
Consumption
0.1 VA
continuous
10 s
1s
Mechanical characteristics
Dimensions
PM500 alone: overall dimensions
96 x 96 x 80 mm
PM500 alone: dimensions behind mounting surface
96 x 96 x 60 mm
PM500 with option: overall dimensions
96 x 96 x 100 mm
PM500 with option: dimensions behind mounting surface
96 x 96 x 80 mm
Weight
PM500 without options
0.4 kg
Vibration
IEC 60068-2-6
5 to 13.2 Hz : ± 1 mm
13.2 to 100 Hz : 0.7 g
Electrical characteristics of the IO11 Puls and
IO02 2 Puls options
Input (optocoupler)
Max. positive-sequence voltage
30 V DC
(IO11 only)
Min. positive-sequence voltage
10 V DC
Max. negative-sequence voltage
30 V DC
For synchronisation use:
min. duration
1s
For digital input use:
min. duration
Impulse output
100 ms
Max. voltage
100 V DC
(REED relay)
Max. current
0.5 A
(IO11 and IO02)
Max. switched power
10 W
Number of operations
108 (10 mA, 5 V)
Pulse value (kWh, kvarh, kVAh)
0.1 ; 1 ; 10 ; 100 ; 1000 ; 10000
Pulse duration
100 to 900 ms in 100 ms steps
Maximum number of pulses/second
1
Installation and user manual
152
51112563AEP130_156.P65
152
09/12/04, 15:39
Appendices
Characteristics (cont.)
Electrical characteristics of the IO22 Alarm option
Input (optocoupler)
Outputs (relays)
Max. positive-sequence voltage
30 V DC
Min. positive-sequence voltage
10 V DC
Max. negative-sequence voltage
30 V DC
Min. duration
10 ms
Switching voltage
250 V AC
Rated current
5A
Rated breaking capacity
1500 VA
Number of operations
4 x 10⁵ (2 A, 250 V AC, AC11) (VDE0660)
5 x 10⁵ (5 A, 30 V DC, resistive load)
Electrical characteristics of the AO20 4-20mA option
Analogue outputs
IO11 and IO22 inputs power
Load resistance
0 to 600 ohms including cables
Response time
1s
Accuracy (full scale)
0,5 %
Maximum number
8
supply (Pwr type)
Environmental characteristics
CE marking
The PM500 Power Meter complies with: the requirements of the European directive on electromagnetic
compatibility (EMC) no. 89/336/CEE dated 3 May 1989, modified by directive no. 92/31/CEE dated 28 April
1992 and by directive no. 93/68/CEE dated 22 July 1993. Low voltage directive no. 73/23/CEE dated
19 February 1973, modified by directive no. 93/68/CEE dated 22 July 1993.
Electromagnetic compatibility
Immunity to electrostatic discharges
IEC 61000-4-2
Level III
Immunity to radiated radio-frequency fields
IEC 61000-4-3
Level III
Immunity to electrical fast transients/bursts
IEC 61000-4-4
Level IV
Immunity to impulse waves
IEC 61000-4-5
Level IV
Immunity to conducted disturbances
IEC 61000-4-6
Level III
Immunity to power frequency magnetic fields
IEC 61000-4-8
Level IV
Conducted and radiated emissions
CISPR11
Class B
Immunity to voltage dips and short interruptions
IEC 61000-4-11
Climate
Operating-temperature range
- 10°C to + 55°C
Storage-temperature range
- 20°C to + 85°C
Insulation
Installation category
For systems up to 277 / 480 V
III
Degree of pollution
2
Rated impulse withstand voltage
IEC 60947-1
Uimp = 4 kV
Front face
Classe II
Degree of protection
Front
IP5X
Case
IP30
Installation and user manual
51112563AEP130_156.P65
153
153
09/12/04, 15:39
9
Appendices
Characteristics (cont.)
Measurement ranges
Instantaneous values
Measurement range
Refresh rate
Voltages
50 V to 400 kV
1s
00.00 V to 400 kV
Currents
25 mA to 10 A
1s
0.000 A to 20 kA
Current bar chart
10 to 120 % of bar
1s
1 bar for 10%
Frequency
45 to 65 Hz
1s
45.00 Hz to 65.00 Hz
Per phase
0 to 1660 MW/ Mvar/ MVA
4 quadrants
1s
00.00 kW to
1660 MW / Mvar / MVA
Total
0 to 8000 MW/ Mvar/ MVA
4 quadrants
1s
00.00 kW to
8000 MW / Mvar / MVA
- 1 to + 1, 4 quadrants
1s
- 1.000 to 1.000
Power
Power factor
Type of load
9
Display
4 quadrants
1s
Current
1.7 to 999 %
1s
000.0 % to 999.9 %
Voltage
1.7 to 15 %
1s
000.0 % to 999.9 %
Demand values
Measurement range
Refresh rate
Display
Demand current
18 mA to 10 A
Calc. interval
0.000 A to 20 kA
Total demand power
0 to 8000 MW/ Mvar/ MVA
4 quadrants
Calc. interval
00.00 kW to
8000 MW / Mvar / MVA
Meters
Metering range
Refresh rate
Display
Energy
0 to 99999999 kWh / kvarh 1 s
/ kVAh, 4 quadrants
THD
or
00000000 to 99999999
kWh / kvarh / kVAh
Operating times
0 to 99999.99 h
1s
00000.00 to 99999.99 h
C0, C1 and C2 counters
(IO11 and IO22 inputs)
0 to 999999
1s
000000 to 999999
Accuracy
Value
Range
Accuracy
Voltage
140 to 480 V AC
0.5 %
Current
0.1 to 2 x In
0.5 %
Power
PF = 0.5 L to 0.8 C
1 % of value
Power factor
0.5 < PF < 1
1%
Frequency
45 to 65 Hz
0.1 %
Up to 31st harmonic
0.2 % (absolute)
THD
Energy
Current and ph-N voltage
ph-ph voltage
0.4 % (absolute)
Active
Class 1 as per
IEC 62053-21
(or 61036)
Reactive
Class 2 as per
IEC 62053-23
(or 61268)
Installation and user manual
154
Sstitre-6
154
15/12/2004, 14:59
Appendices
Abbreviations and symbols
PM500
PM500 + RS485 Modbus
PM500 + IO22 Alarm
12345678901234
1234567890123456789
12345678901234
1234567890123456789
12345678901234
PM500 + IO11/IO02 Puls1234567890123456789
PM500 +AO20 4-20mA
Abbreviation Definition / meaning
Comments
4 3CT
4 wires, 3 current transformers
3-phase system + unbalanced neutral
4 1CT
4 wires, 1 current transformer
3-phase system + balanced neutral
3 2-3CT
3 wires, 2 or 3 current transformers
Unbalanced 3-phase system
3 1CT
3 wires, 1 current transformer
Balanced 3-phase system
2 1CT
2 wires, 1 current transformer
2-phase system
1 1CT
2 wires, 1 current transformer
Single-phase system
A-Cd
Alarm or Command
ADR
Address
AVG
Average
Demand value
Bar
Bar-chart
Bar-chart scale
Modbus address
BdS
Bauds
Modbus speed
12345678901234567890123456789012123456789012345678901234567890121
12345678901234567890123456789012123456789012345678901234567890121
C0
Pulse counter for input
For input of IO 11 option
12345678901234567890123456789012123456789012345678901234567890121
C1 and C2
Pulse counter for input 2
For inputs 1 and 2 of the option
CdE
Command
IO22 output in control mode
COdE
Access code
Access to programming mode
CT
Current transformer
DELAY
Time delay
Time delay for the alarm
12345678901234567890123456789012123456789012345678901234567890121
12345678901234567890123456789012123456789012345678901234567890121
DUR
Pulse duration
Pulse output
12345678901234567890123456789012123456789012345678901234567890121
EA+
Positive active energy
Active energy in
EA-
Negative active energy
Active energy out
ER+
Positive reactive energy
Reactive energy in
ER-
Negative reactive energy
Reactive energy out
ES
Apparent energy
EVEN
Even
Even parity for Modbus
12345678901234567890123456789012123456789012345678901234567890121
12345678901234567890123456789012123456789012345678901234567890121
EXT
External
External
synchronisation signal for demand
12345678901234567890123456789012123456789012345678901234567890121
12345678901234567890123456789012123456789012345678901234567890121
calculation intervals (only with IO11)
Ht
High threshold
High threshold for alarm
123456789012345678901234567890121234567890123456789012345678901212345678901234567890123456
123456789012345678901234567890121234567890123456789012345678901212345678901234567890123456
123456789012345678901234567890121234567890123456789012345678901212345678901234567890123456
HV
High value
Value to 20 mA on the analogue output
123456789012345678901234567890121234567890123456789012345678901212345678901234567890123456
HYST
Hysteresis
Alarm hysteresis setting
IEC
International Electrotechnical Commission
Convention for power-factor calculation
IEEE
Institute of Electrical and Electronics Engineers Convention for power-factor calculation
Lt
Low threshold
Low threshold for alarm
123456789012345678901234567890121234567890123456789012345678901212345678901234567890123456
123456789012345678901234567890121234567890123456789012345678901212345678901234567890123456
123456789012345678901234567890121234567890123456789012345678901212345678901234567890123456
LV
Low
value
Value to 0 or 4 mA on the analogue output
123456789012345678901234567890121234567890123456789012345678901212345678901234567890123456
Max
Maximum
Max I
Maximum demand current
Max +P
Maximum demand active power (positive)
Displayed during reset operation
Max -P
Maximum demand active power (negative)
Displayed during reset operation
Max +Q
Maximum demand reactive power (negative)
Displayed during reset operation
Max -Q
Maximum demand reactive power (negative)
Displayed during reset operation
Max S
Maximum demand apparent power
Displayed during reset operation
Max AVG
Maximum Average
Maximum demand values
Displayed during reset operation
Installation and user manual
51112563AEP130_156.P65
155
155
09/12/04, 15:39
9
Appendices
Abbreviations and symbols (cont.)
PM500
PM500 + RS485 Modbus
PM500 + IO22 Alarm
1234567890123
1234567890123456789
1234567890123
1234567890123456789
1234567890123
PM500 + IO11/IO02 Puls1234567890123456789
PM500 + AO20 4-20mA
Abbreviation
Definition / meaning
NC
Normally closed
Comments
Output-relay operating mode
Net
Network
Type of distribution system
NO
Normally open
Output-relay operating mode
Out 1 and 2
Outputs 1 and 2
PAR
Parity
PF
Power factor
Pr
Primary
12345678901234567890123456789012123456789012345678901234567890121
ODD
Odd
Odd parity for Modbus
12345678901234567890123456789012123456789012345678901234567890121
12345678901234567890123456789012123456789012345678901234567890121
Out E
Output Energy
Pulse output
12345678901234567890123456789012123456789012345678901234567890121
9
Selection of parity for Modbus
Primary winding on Ut transformer
Prog
Programming mode
Programming mode active
123456789012345678901234567890121234567890123456789012345678901212345678901234567890123456
123456789012345678901234567890121234567890123456789012345678901212345678901234567890123456
123456789012345678901234567890121234567890123456789012345678901212345678901234567890123456
Pwr
Power
Power supply to volt-free inputs
RELAY
Relay
Output-relay operating mode
RSEt
Reset
Reset / initialise
SE
Secondary
Secondary winding on Ut transformer
STOP
Stop bit
Number of stop bits for Modbus
TIME
Operating time
Displayed during reset of operating-time
AVG TIME
Average time
Calculation interval for demand values
TIMER
Operating-time counter
Alarm for operating-time counter
THD
Total Harmonic Distorsion
Harmonic distortion
THD I
THD for phase currents
THD IN
THD for neutral current
THD U
THD for phase-to-phase voltages
THD V
THD for phase-to-neutral voltages
123456789012345678901234567890121234567890123456789012345678901212345678901234567890123456
123456789012345678901234567890121234567890123456789012345678901212345678901234567890123456
123456789012345678901234567890121234567890123456789012345678901212345678901234567890123456
TYPE
Type
Operating mode of analogue output
123456789012345678901234567890121234567890123456789012345678901212345678901234567890123456
123456789012345678901234567890121234567890123456789012345678901212345678901234567890123456
(0-20 or 4-20mA or Pwr)
123456789012345678901234567890121234567890123456789012345678901212345678901234567890123456
Ut
Voltage transformer
12345678901234567890123456789012123456789012345678901234567890121
12345678901234567890123456789012123456789012345678901234567890121
12345678901234567890123456789012123456789012345678901234567890121
VAL
Pulse value
Pulse output
Symbol
Definition / meaning
Comments
Capacitive load
Inductive load
Operating-time counter
Σ
Sum
ΣP
Total active power
ΣQ
Total reactive power
ΣS
Total apparent power
ΣPF
Total power factor
123456789012345678901234567890121234567890123456789012345678901212345678901234567890123456
123456789012345678901234567890121234567890123456789012345678901212345678901234567890123456
123456789012345678901234567890121234567890123456789012345678901212345678901234567890123456
ΣPFL
Inductive power factor
123456789012345678901234567890121234567890123456789012345678901212345678901234567890123456
123456789012345678901234567890121234567890123456789012345678901212345678901234567890123456
123456789012345678901234567890121234567890123456789012345678901212345678901234567890123456
Σ
PFC
Capacitive power factor
123456789012345678901234567890121234567890123456789012345678901212345678901234567890123456
Installation and user manual
156
51112563AEP130_156.P65
156
09/12/04, 15:39
© 2005 Schneider Electric - All rights reserved - Réalisation : PROFIL
Schneider Electric Industries SAS
89, boulevard Franklin Roosevelt
F - 92500 Rueil Malmaison (France)
Tel : +33 (0)1 41 29 85 00
http://www.schneider-electric.com
Ce produit doit être installé, raccordé et utilisé en respectant
les normes et/ou les règlements d’installation en vigueur.
En raison de l’évolution des normes et du matériel, les caractéristiques indiquées par les textes et les images de ce document ne
nous engagent qu’après confirmation par nos services.
51 112 563 AE
This product must be installed, connected and used in
compliance with prevailing standards and/or installation
regulations.
As standards, specifications and designs change from time to time,
please ask for confirmation of the information given in this
publication.
01/2005
51112563AEDOS.P65
1
09/12/04, 08:49