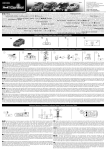
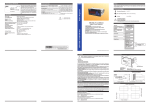
1
TRANS-MINIAUTO++
AUTOMATIC START UNIT
FOR GAS/DIESEL/GASOLINE GENERATORS
WITH J1939 ECUs
User Manual
EMKO ELEKTRONÝK A.Þ.
Demirtaþ Org. San. Bolg.
Karanfil Sk. No: 6 TR
16369 Bursa / TURKEY
Phone
Faks
Url
E-mail
: +90 224 261 1900
: +90 224 261 1912
: www.emkoelektronik.com.tr
:[email protected]
[email protected]
Introduction Manual. ENG TRANS-MINIAUTO++ 02 V00 05/12
CONTENTS
1.Introduction.......................................................................................................................................
1.1 General Specifications..............................................................................................................
1.2 Warranty....................................................................................................................................
1.3 Maintenance .............................................................................................................................
1.4 Order Information......................................................................................................................
Page
Page
Page
Page
Page
4
4
4
4
4
2.Installation.........................................................................................................................................
2.1 Unit Configuration......................................................................................................................
2.2 Panel Mounting..........................................................................................................................
Figure 2.1 Front View................................................................................................................
Figure 2.2 Panel Cut-Out..........................................................................................................
2.3 Electrical Connection.................................................................................................................
Page
Page
Page
Page
Page
Page
5
5
5
5
5
6
3.Definition Of Front Panel And Accessing To The Parameters......................................................
3.1 Front Panel Description.............................................................................................................
3.2 Accessing To The Operator Parameters....................................................................................
3.3 Accessing To The Technician Parameters.................................................................................
3.4 Changing And Saving Parameter Values .................................................................................
Page
Page
Page
Page
Page
7
7
15
16
21
4.Parameters........................................................................................................................................
4.1 Operator Parameters.................................................................................................................
4.1.1 Generator.........................................................................................................................
4.2 Technician Parameters..............................................................................................................
4.2.1 System.............................................................................................................................
4.2.2 Generator.........................................................................................................................
4.2.3 Engine..............................................................................................................................
4.2.4 Inputs...............................................................................................................................
4.2.5 Outputs.............................................................................................................................
4.2.6 Timers..............................................................................................................................
4.2.7 User Adjustment...............................................................................................................
Page
Page
Page
Page
Page
Page
Page
Page
Page
Page
Page
22
22
22
23
23
27
29
39
48
56
58
5.Specifications.................................................................................................................................... Page
61
2
EU DECLARATION OF CONFORMITY
Manufacturer’s Name
: EMKO ELEKTRONIK A.S.
Manufacturer’s Address : DOSAB, Karanfil Sk., No:6,
16369 Bursa, TURKEY
The manufacturer hereby declares that the product:
Product Name
: Automatic Start Unit
Type Number
: TRANS-MINIAUTO++
Product Category
: Electrical equipment for measurement, control and
laboratory use
Conforms to the following directives :
2006 / 95 / EC The Low Voltage Directive
2004 / 108 / EC The Electromagnetic Compatibility Directive
has been designed and manufactured to the following specifications:
EN 61000-6-4:2007 EMC Generic Emission Standard for Industrial Environments
EN 61000-6-2:2005 EMC Generic Immunity Standard for Industrial Environments
EN 61010-1:2001
Safety Requirements for electrical equipment for measurement, control
and laboratory use
When and Where Issued
th
Authorized Signature
07 January 2012
Name
: Serpil YAKIN
Bursa-TURKEY
Position
: Quality Manager
3
1.Introduction
1.1 General Specifications
The unit provides automatic start and stop the engine and protect the generator system. Both
automatic and manual control is possible. A test mode is also available which allows the
generator to be run for checking the generator system.
The unit calculates engine RPM from Magnetic Pickup sensor input (Trans-MiniAUTO++.MPU
devices only) and/or generator voltage signal. At Trans-MiniAUTO++.CAN devices, unit gets
engine RPM information from J1939 ECU and/or generator voltage signal.
The unit monitors J1939 ECU messages and provides remote start/stop control via J1939
protocol at only Trans-MiniAUTO++.CAN devices.
The unit is extensively programmable through the front panel, with password protection on two
levels. Operational parameters can also be monitored and controlled from a PC via a built-in RS232 communication port.
In the event that the engine fails to start on the first attempt, the attempt will be repeated a
programmed number of times or until successful.
The unit monitors generator operation and gives warning of any faults that are detected.
If a fault is detected, the unit shuts down the engine and shows the failure message on the LCD
display.
The unit has Remote Start input for remote control of the engine.
The configurable inputs can be programmed to perform 28 different functions.
Six configurable outputs can be programmed for 122 different functions.
1.2 Warranty
EMKO Elektronik warrants that the equipment delivered is free from defects in material and
workmanship. This warranty is provided for a period of two years. The warranty period starts from
the delivery date. This warranty is in force if duty and responsibilities which are determined in
warranty document and instruction manual performs by the customer completely.
1.3 Maintenance
Repairs should only be performed by trained and specialized personnel. Cut power to the device
before accessing internal parts.
Do not clean the case with hydrocarbon-based solvents (Petrol, Trichlorethylene etc.). Use of
these solvents can reduce the mechanical reliability of the device. Use a cloth dampened in ethyl
alcohol or water to clean the external plastic case.
1.4 Order Information
Trans-MiniAUTO++
: Auto Start GenSet controller, LCD display
Trans-MiniAUTO++.CAN : Auto Start GenSet controller, CanBus J1939 ECU comm.
Trans-MiniAUTO++.MPU : Auto Start GenSet controller,
speed sensing from Magnetic Pickup
Note: Devices have time clock. If real time clock is needed, “RTC” expression must be added to end of order code.
Example: Trans-MiniAUTO++.MPU.RTC
4
2.Installation
Ýçindekiler
!
Before beginning installation of this product, please read the instruction
manual and warnings below carefully.
A visual inspection of this product for possible damage occured during shipment is
recommended before installation. It is your responsibility to ensure that qualified mechanical
and electrical technicians install this product.
If there is danger of serious accident resulting from a failure or defect in this unit , power off
the system and seperate the electrical connection of the device from the system.
Keep the power off until all of the wiring is completed so that electric shock and trouble with
the unit can be prevented.
2.1 Unit Configuration
Ýçindekiler
The unit can be programmed using the buttons and LCD display on the front panel or PC
Software.
2.2 Panel Mounting
Ýçindekiler
The unit is designed for panel mounting. Fixing is by two screw fixings.
1- Insert the unit in the panel cut-out from the front.
2- Insert the fixings in the slotted at the corners of the unit and tighten the fixing screws to secure
the unit against the panel.
70mm
ü
81mm
!
During the equipment is putted in hole on the metal panel while mechanical
installation some metal burrs can cause injury on hands, you must be careful.
RESET
AUTO
81mm
111mm
Figure 2.1 Front View
Figure 2.2 Panel Cut-Out
5
2.3 Electrical Connection
*
1
!
BATTERY +
Configurable Analog Input
*
19
To Engine
Earth
8A
Generator
Contactor
Relay
Configurable Input-3
BATTERY -
20
Sender Common
Remote Start or
Configurable Input-2
Emergency Stop or
Configurable Input-1
D+(W.L.)
Charge Alternator
FUSE-1, FUSE-2, FUSE-3
FUSE-4 7 A. T
!
9 10
Crank Or
Configurable Output-2
8
Configurable Output-3
7
Fuel Or
Configurable Output-1
Configurable Output-4
6
TO
LOAD
TRANSISTOR OUTPUTS
MAX. 1 A
BATTERY +
G
30 31
FUSE-1
Oil Pressure Sender
or Low Oil Pressure Switch
13 14 15 16
FUSE-2
Temperature Sender
or High Temperature Switch
Max. 300VV
FUSE-3
24 25 26 27
*
1
IT CAN BE USED
AS A DIGITAL INPUT
BY SELECTING
FROM THE PROGRAM
PARAMETERS
2
3
4
*
FUSE-4
17
12 11
BATTERY -
18
2
!
J1939 ECUs
23 22 21
SCR L(-) H(+)
-
4
!
L1
L2
L3
N
GENERATOR
SCR
3
MPU
!
+
TRANS-MINIAUTO++ three phase connections schematic
Configurable Output-5
2 A. T
1- Connect the unit as shown in the appropriate diagram. Be sure to connect the battery
supply the right way round and battery negative should be grounded.
2- The CAN interface requires that a 120 Ohms terminator is fitted to each end of the
communications link. This termination resistor is fitted internally into the unit. So it is not
required externally. The screen is grounded at one end ONLY.
3- Screened cable must be used for connecting the Magnetic Pickup, ensuring that the
screen is grounded at one end ONLY.
4- Current transformers secondary should be grounded.
6
3. Front Panel Description And Accessing To The Parameters
3.1 Front Panel Description
1
ü
4
2
RESET
3
AUTO
5
6
7
Number Comment
This LED indicates that any alarm was detected.
1
This LED shows that the unit is in the AUTO mode.
2
In the Manual and Auto modes, this LED indicates that the engine is starting up or is running.
3
This button is used for showing next page in normal operation.In Programming mode it is
4
5
6
7
used for entering parameter edit section, saving parameter value and showing next
parameters on the currently selected page.This button will also silence the alarm horn after a
failure has been detected.
The RESET button will reset the controller after a failure has been detected.
The STOP button is used for changing operating mode of the unit to the Stop Mode.
The generator is stopped.
The AUTO button is used for changing operating mode of the unit to the Auto Mode.
In Programming mode, it operates as an Down button (changing cursor position) or Decrement
button (decrease parameter value).
The START button is used for starting the engine when the unit is in the Manual Mode.
In Programming mode, it operates as an Up button (changing cursor position) or Increment
button (increase parameter value).
7
LCD display Description
Current page name
Measurement values
Engine Status
or Error Messages
Generator Page1
GENERATOR
V12: 380V V1:
V23: 380V V2:
V31: 380V V3:
On load
220V
220V
220V
ü
RESET
AUTO
128x64 Dot-matrix LCD display.
Use the Next button to select which Data display page (screen) is to be displayed.
When enter button pressed for 2 seconds, menu options displayed.
8
Data display pages on the LCD display;
Generator Page1:
GENERATOR
V12: 380V V1:
V23: 380V V2:
V31: 380V V3:
On load
220V
220V
220V
V12: Generator voltage L1-L2
V23: Generator voltage L2-L3
V31: Generator voltage L3-L1
V1: Generator voltage L1-N
V2: Generator voltage L2-N
V3: Generator voltage L3-N
Generator Page2:
Fq: Generator frequency
GENERATOR
Fq:50.0Hz
On load
Generator Page3:
GENERATOR
I1: 26A PF1: -0.84
I2: 23A PF2: -0.80
I3: 25A PF3: -0.82
On load
I1: Load Current L1
I2: Load Current L2
I3: Load Current L3
PF1: Generator power factor L1
PF2: Generator power factor L2
PF3: Generator power factor L3
Generator Page4:
GENERATOR
P1:
170kW
P2:
170kW
P3:
170kW
On load
P1: Generator active power L1
P2: Generator active power L2
P3: Generator active power L3
Generator Page5:
GENERATOR
Q1:
40kvar
Q2:
40kvar
Q3:
40kvar
On load
Q1: Generator reactive power L1
Q2: Generator reactive power L2
Q3: Generator reactive power L3
Generator Page6:
GENERATOR
S1:
210kVA
S2:
210kVA
S3:
210kVA
On load
S1: Generator apparent power L1
S2: Generator apparent power L2
S3: Generator apparent power L3
9
Generator Page7:
SP: Generator total active power
SQ: Generator total reactive power
SS: Generator total apparent power
GENERATOR
SP:
510kW
SQ:
120kvar
SS:
630kVA
On load
Generator Page8:
kWh :
kvarh:
GENERATOR
30600
7200
kWh: Generator active energy
kvarh: Generator reactive energy
On load
Engine Page1:
ENGINE
Oil Pressure: 4.3Bar
Temperature :
30ºC
Speed
: 1500Rpm
On load
Oil pressure: Oil pressure sender input value
Temperature: Coolant temperature sender input value
Speed: Engine speed
Engine Page2:
ENGINE
Conf.AI
:
96%
Battery volt: 12.0Vdc
Gen.chg.volt: 11.8Vdc
On load
Conf. AI: Configurable Analog Input value
Battery volt: Battery supply voltage
Gen.chg.volt: Charge generator voltage
Engine Page3:
ENGINE
Run times
:
Crank times :
W.Hour_Min:
On load
7
11
2_57
Run times: Number of generator runs
Crank times: Number of generator cranks
W.Hour_Min: Engine running time (Hour and Minute)
Engine Maintenance Page:
ENGINE MAINTENANCE
Next hours : 5000
Next months:
6
Last date: 15/02/2011
On load
Next hours: The remaining hour for maintenance
Next months: The remaining month for maintenance
Last date: The last maintenance date
10
J1939 Values Page1:
*1
J1939 VALUES
Engine speed: 1500Rpm
Oil pressure: 4.0Bar
Coolant temp:
27ºC
On load
J1939 Values Page2:
*1
J1939 VALUES
Fuel rate:
12.50L/h
Fuel tot.:
176L
Oil level:
97.2%
On load
J1939 Values Page3:
*1
J1939 VALUES
Coolant level: 87.6%
Load at cur.spd: 25%
Fuel temper.:
13°C
On load
J1939 Values Page4:
*1
J1939 VALUES
Oil temper.: 82.00ºC
Act.engine torq: 75%
Boost press.: 2.8Bar
On load
J1939 Values Page5:
*1
J1939 VALUES
Int.man.temp.:
45ºC
Pedal position: 50.0%
W.Hour_Min:
2_57
On load
J1939 DM1 (Active) Faults Page:*1
J1939 DM1 FAULTS1
Spn:110
Fmi:0
Oc:1
Coolant Temper.sensor
Value too high
Engine speed: Engine speed via J1939
Oil pressure: Oil pressure via J1939
Coolant temp: Coolant temperature via J1939
Fuel rate: Fuel rate via J1939
Fuel tot.: Fuel total used via J1939
Oil level: Oil level via J1939
Coolant level: Coolant level via J1939
Load at cur.spd: Load at current speed via J1939
Fuel temper.: Fuel temperature via J1939
Oil temper.: Oil temperature via J1939
Act.engine torq: Actual engine torque via J1939
Boost press.: Boost pressure via J1939
Int.man.temp.: Intake manifold temperature via J1939
Pedal position: Accelerator pedal position via J1939
W.Hour_Min: Working hour and minute via J1939
Spn: Suspect parameter number (e.g. SPN = 110 corresponds to
coolant temperature sensor)
Fmi: Failure mode identifier (e.g. FMI = 0 means value too high)
Oc: Occurrence count (if OC = 0, no alarm is present)
The first 10 active alarm messages (Active Diagnostic Trouble
Codes - DM1) with SPN, FMI, and OC are displayed). If more than
one active fault condition is present, all of them is displayed
sequencely by pressing Next and Previous buttons.
Note: *1 = These J1939 pages are only available at Trans-MiniAUTO++.CAN
11
Input & Output Status Page:
INPUT & OUTPUT
1 4 5 8
Inputs :
000X XXXX
Outputs:
0000 0X0X
On load
Inputs: Input status information. If an input is active, related digit
is displayed as "1" else it is displayed as "0".
1: Conf. in-1, 2: Conf. in-2, 3: Conf. in-3, 4: Not available,
5: Not available, 6: Not available, 7: Not available, 8: Not available
Outputs: Output status information. If an output is active, related
digit is displayed as "1" else it is displayed as "0".
1: Conf. out-1, 2: Conf. out-2, 3: Conf. out-3, 4: Conf. out-4,
5: Conf. out-5, 6: Not available, 7: Generator contactor, 8: Not
available.
Date & Time Page:
DATE & TIME
Date: Day, Month, Year.
Time: Hour, minute, second.
15/02/2011
13:32:28
Event Log display pages on the LCD display;
Event Log Page1:
EVENT LOG 1.1
15/02/2011
14:26:08
Emergency stop
V1: 220V I1: 26A
V2: 220V I2: 23A
1.1: The first page of related event log
Emergency stop: This message indicates that an emergency stop
alarm has occurred. (Event history: 15/02/2011 date, 14:26:08
time).
V1: Generator voltage L1-N
I1: Load Current L1
V2: Generator voltage L2-N
I2: Load Current L2
Event Log Page2:
EVENT LOG 1.2
V3: 220V
I3: 25A
Fq:50.0Hz
kW:
510
Oil pressure: 4.3Bar
Coolant temp: 30ºC
1.2: The second page of related event log
V3: Generator voltage L3-N
I3: Load Current L3
Fq: Generator frequency
kW: Generator total active power
Oil oressure: Oil pressure sender input value
Coolant temp: Coolant temperature sender input value
Event Log Page3:
EVENT LOG
Conf.AI
:
1.3
96%
1.3: The last page of related event log
Conf. AI: Configurable Analog Input value
12
Example-1: Displaying all Data display pages.
GENERATOR
V12: 380V V1:
V23: 380V V2:
V31: 380V V3:
On load
220V
220V
220V
GENERATOR
P1:
170kW
P2:
170kW
P3:
170kW
On load
GENERATOR
510kW
SP:
120kvar
SQ:
630kVA
SS:
On load
ü
ü
On load
GENERATOR
I1: 26A PF1: -0.84
I2: 23A PF2: -0.80
I3: 25A PF3: -0.82
On load
ü
GENERATOR
Q1:
40kvar
Q2:
40kvar
Q3:
40kvar
On load
ü
GENERATOR
S1:
210kVA
S2:
210kVA
S3:
210kVA
On load
ü
ü
kWh :
kvarh:
ü
ENGINE
Oil Pressure: 4.3Bar
Temperature :
30ºC
Speed
: 1500Rpm
On load
ü
ü
ENGINE MAINTENANCE
Next hours : 5000
Next months:
6
Last date: 15/02/2011
On load
ü
ü
GENERATOR
Fq:50.0Hz
GENERATOR
30600
7200
On load
ENGINE
Conf.AI
: 96%
Battery volt: 12.0Vdc
Gen.chg.volt: 11.8Vdc
On load
ü
ENGINE
Run times
:
Crank times :
W.Hour_Min:
On load
7
11
2_57
*2
*2
*2
J1939 VALUES
Engine speed: 1500Rpm
Oil pressure: 4.0Bar
Coolant temp:
27ºC
On load
J1939 VALUES
Fuel rate:
12.50L/h
Fuel tot.:
176L
Oil level:
97.2%
On load
J1939 VALUES
Coolant level: 87.6%
Load at cur.spd: 25%
Fuel temper.:
13°C
On load
ü
ü
*2
*2
*2
J1939 VALUES
Oil temper.: 82.00ºC
Act.engine torq: 75%
Boost press.: 2.8Bar
On load
J1939 VALUES
Int.man.temp.:
45ºC
Pedal position: 50.0%
W.Hour_Min:
2_57
On load
J1939 DM1 FAULTS1
Spn:110
Fmi:0
Oc:1
Coolant Temper.sensor
Value too high
INPUT & OUTPUT
1 4 5 8
Inputs :
000X XXXX
Outputs:
0000 0X0X
On load
ü
ü
ü
ü
DATE & TIME
ü
15/02/2011
13:32:28
Note: *2 = These J1939 pages are only available at Trans-MiniAUTO++.CAN
13
Example-2: Displaying all Event Log display pages
GENERATOR
V12: 380V V1:
V23: 380V V2:
V31: 380V V3:
On load
220V
220V
220V
ü
Program
Language
Event log
RESET
Program
Language
Event log
ü
RESET
RESET
Press Enter button
for 2 seconds to
access the menu
options.
AUTO
EVENT LOG 1.1
15/02/2011
14:26:08
Emergency stop
V1: 220V I1: 26A
V2: 220V I2: 23A
AUTO
AUTO
EVENT LOG 1.2
V3: 220V I3: 25A
Fq:50.0Hz
kW:
510
Oil pressure: 4.3Bar
Coolant temp: 30ºC
RESET
EVENT LOG
Conf.AI
:
RESET
AUTO
220V
220V
220V
1.3
96%
RESET
AUTO
GENERATOR
V12: 380V V1:
V23: 380V V2:
V31: 380V V3:
On load
ü
AUTO
Press Stop/Reset
button to exit event log
screen.
LCD display language selection
English Display
GENERATOR
V12:
0V V1:
V23:
0V V2:
V31:
0V V3:
Wait for start
0V
0V
0V
ü
Program
Language
Event log
RESET
Program
Language
Event log
ü
RESET
Press Enter button
for 2 seconds to
access the menu
options.
AUTO
LCD DISPLAY
Language
ENGLISH
ü
RESET
AUTO
AUTO
LCD DISPLAY
Language
ENGLISH
RESET
ü
Press the Enter button
to confirm the
changed value.
RESET
AUTO
AUTO
English Display
GENERATOR
V12:
0V V1:
V23:
0V V2:
V31:
0V V3:
Wait for start
ü
0V
0V
0V
Press Stop/Reset
button to exit
language selection
screen.
Chinese Display
发电机组
V12:
V23:
V31:
0V
0V
0V
V1:
V2:
V3:
0V
0V
0V
14
3.2 Accessing To The Operator Parameters
PROGRAM
Operator setting
Technician setting
Factory adjustment
AUTO
ü
OPERATOR SETTING
Password
ü
OPERATOR SETTING
Generator
0000
AUTO
ü
GENERATOR
Volt level
Frequency level
Current level
Power level
ü
GENERATOR VOLT LEVEL
Under volt shutdown
Under volt prealarm
Under volt reset
Over volt shutdown
ü
GENERATOR VOLT LEVEL
Under volt shutdown
320 Vac
ü
GENERATOR VOLT LEVEL
Under volt shutdown
Under volt prealarm
Under volt reset
Over volt shutdown
GENERATOR VOLT LEVEL
Over volt prealarm
Over volt reset
Shutdown delay time
ü
GENERATOR VOLT LEVEL
Over volt prealarm
340 Vac
ü
GENERATOR VOLT LEVEL
Over volt prealarm
Over volt reset
Shutdown delay time
GENERATOR FREQ LEVEL
Under freq shutdown
Under freq prealarm
Under freq reset
Over freq shutdown
ü
GENERATOR FREQ LEVEL
Under freq shutdown
43.0 Hz
ü
GENERATOR FREQ LEVEL
Under freq shutdown
Under freq prealarm
Under freq reset
Over freq shutdown
GENERATOR FREQ LEVEL
Over freq prealarm
Over freq reset
Shutdown delay time
ü
GENERATOR FREQ LEVEL
Over freq prealarm
55.0 Hz
ü
GENERATOR FREQ LEVEL
Over freq prealarm
Over freq reset
Shutdown delay time
GENERATOR CUR LEVEL
Under cur set
Under cur prealarm
Under cur reset
Over cur set
ü
GENERATOR CUR LEVEL
Under cur set
20 A
ü
GENERATOR CUR LEVEL
Under cur set
Under cur prealarm
Under cur reset
Over cur set
ü
GENERATOR CUR LEVEL
Over cur prealarm
90 A
ü
ü
GEN POWER LEVEL
Under power shutdown
150 kVA
ü
GEN POWER LEVEL
Under power shutdown
Under power prealarm
Under power reset
Over power shutdown
GEN POWER LEVEL
Over power prealarm
Over power reset
Shutdown delay time
ü
GEN POWER LEVEL
Over power prealarm
280 kVA
ü
GEN POWER LEVEL
Over power prealarm
Over power reset
Shutdown delay time
GEN WORKING CALENDAR
Disable/enable select
Start time on monday
Stop time on monday
Start time on tues.
ü
GEN WORKING CALENDAR
Disable/enable select
DISBL
ü
GEN WORKING CALENDAR
Disable/enable select
Start time on monday
Stop time on monday
Start time on tues.
GEN WORKING CALENDAR
Disable/enable select
Start time on monday
Stop time on monday
Start time on tues.
ü
GEN WORKING CALENDAR
Stop time on tuesday
17.30 Hour.Min
ü
GEN WORKING CALENDAR
Stop time on tuesday
Start time on wednes.
Stop time on wednes.
Start time on thurs.
GEN WORKING CALENDAR
Stop time on thursday
Start time on friday
Stop time on friday
Start time on satur.
ü
GEN WORKING CALENDAR
Stop time on thursday
18.30 Hour.Min
ü
GEN WORKING CALENDAR
Stop time on thursday
Start time on friday
Stop time on friday
Start time on satur.
ü
GEN WORKING CALENDAR
Stop time on saturday
14.20 Hour.Min
ü
GEN WORKING CALENDAR
Stop time on saturday
Start time on sunday
Stop time on Sunday
AUTO
GENERATOR
Volt level
Frequency level
Current level
Power level
ü
AUTO
GENERATOR
Volt level
Frequency level
Current level
Power level
AUTO
ü
AUTO
AUTO
GENERATOR CUR LEVEL
Over cur prealarm
Over cur reset
GENERATOR
Volt level
Frequency level
Current level
Power level
ü
AUTO
AUTO
GENERATOR
Working calendar
AUTO
GEN POWER LEVEL
Under power shutdown
Under power prealarm
Under power reset
Over power shutdown
GENERATOR CUR LEVEL
Over cur prealarm
Over cur reset
ü
AUTO
AUTO
GEN WORKING CALENDAR
Stop time on saturday
Start time on sunday
Stop time on Sunday
15
3.3 Accessing To The Technician Parameters
PROGRAM
Operator setting
Technician setting
Factory adjustment
AUTO
ü
TECHNICIAN SETTING
Password
0000
ü
TECHNICIAN SETTING
System
Generator
Engine
Inputs
ü
AUTO
SYSTEM
Network
Breakers
LCD display
Communication
ü
SYSTEM NETWORK
CT ratio
PT ratio
Type of AC system
Generator kVA rating
ü
SYSTEM NETWORK
CT ratio
500 A
ü
SYSTEM NETWORK
CT ratio
PT ratio
Type of AC system
Generator kVA rating
ü
BREAKERS
Type of Breaker
Gen.brk.cls.contact
Gen.brk.cls.relay
Gen.brk.cls.time
ü
BREAKERS
Type of Breaker
0
ü
BREAKERS
Type of Breaker
Gen.brk.cls.contact
Gen.brk.cls.relay
Gen.brk.cls.time
ü
BREAKERS
Gen.brk.open relay
0 SEC
ü
BREAKERS
Gen.brk.open relay
Gen.brk.open time
Break.close puls.time
Break.open pulse time
BREAKERS
Transfer time
Spring loading time
Retry number
ü
BREAKERS
Transfer time
2 SEC
ü
BREAKERS
Transfer time
Spring loading time
Retry number
LCD DISPLAY
Language
Contrast
Auto scroll time
Auto scroll number
ü
LCD DISPLAY
Language
ENGLISH
ü
LCD DISPLAY
Language
Contrast
Auto scroll time
Auto scroll number
ü
LCD DISPLAY
Err. mesg scroll time
5
ü
AUTO
SYSTEM
Network
Breakers
LCD display
Communication
AUTO
AUTO
BREAKERS
Gen.brk.open relay
Gen.brk.open time
Break.close puls.time
Break.open pulse time
AUTO
SYSTEM
Network
Breakers
LCD display
Communication
ü
AUTO
AUTO
LCD DISPLAY
Err. mesg scroll time
SYSTEM
Network
Breakers
LCD display
Communication
LCD DISPLAY
Err. mesg scroll time
ü
COMMUNICATION
Slave address
Baud rate
Parity
Stop bit
ü
COMMUNICATION
Slave address
1
ü
COMMUNICATION
Slave address
Baud rate
Parity
Stop bit
ü
DATE & TIME SET
Year
Month
DaY
Week
ü
DATE & TIME SET
Year
11
ü
DATE & TIME SET
Year
Month
DaY
Week
DATE & TIME SET
Hour
Minute
Second
ü
DATE & TIME SET
Hour
18
ü
DATE & TIME SET
Hour
Minute
Second
DEFAULT SETTINGS
Save setting to def.
Reset default sets
Reset factory sets
ü
DEFAULT SETTINGS
Save setting to def.
no
ü
DEFAULT SETTINGS
Save setting to def.
Reset default sets
Reset factory sets
ü
PASSWORD SETTINGS
Operator password
1
ü
ü
GENERATOR VOLT LEVEL
Under volt shutdown
320 Vac
ü
GENERATOR VOLT LEVEL
Under volt shutdown
Under volt prealarm
Under volt reset
Over volt shutdown
GENERATOR VOLT LEVEL
Over volt prealarm
Over volt reset
Shutdown delay time
ü
GENERATOR VOLT LEVEL
Over volt prealarm
340 Vac
ü
GENERATOR VOLT LEVEL
Over volt prealarm
Over volt reset
Shutdown delay time
GENERATOR FREQ LEVEL
Nominal frequency
Under freq shutdown
Under freq prealarm
Under freq reset
ü
GENERATOR FREQ LEVEL
Nominal frequency
50.0 Hz
ü
GENERATOR FREQ LEVEL
Nominal frequency
Under freq shutdown
Under freq prealarm
Under freq reset
GENERATOR FREQ LEVEL
Over freq shutdown
Over freq prealarm
Over freq reset
Shutdown delay time
ü
GENERATOR FREQ LEVEL
Over freq shutdown
58.0 Hz
ü
GENERATOR FREQ LEVEL
Over freq shutdown
Over freq prealarm
Over freq reset
Shutdown delay time
GEN CUR LEVEL & ACT
Under cur. set
Under cur. prealarm
Under cur. reset
Under cur. act.
ü
GEN CUR LEVEL & ACT
Under cur. set
20 A
ü
GEN CUR LEVEL & ACT
Under cur. set
Under cur. prealarm
Under cur. reset
Under cur. act.
ü
GEN CUR LEVEL & ACT
Under act. delay time
2 SEC
ü
GEN CUR LEVEL & ACT
Under act. delay time
Over cur. set
Over cur. prealarm
Over cur. reset
AUTO
SYSTEM
Date & time set
Default settings
Password
AUTO
SYSTEM
Date & time set
Default settings
Password
AUTO
ü
AUTO
TECHNICIAN SETTING
System
Generator
Engine
Inputs
AUTO
ü
SYSTEM
Date & time set
Default settings
Password
ü
GENERATOR
Volt level
Frequency level
Current level & act.
Power level
ü
AUTO
GENERATOR
Volt level
Frequency level
Current level & act.
Power level
AUTO
GENERATOR VOLT LEVEL
Under volt shutdown
Under volt prealarm
Under volt reset
Over volt shutdown
PASSWORD SETTINGS
Operator password
Technician password
AUTO
ü
AUTO
GENERATOR
Volt level
Frequency level
Current level & act.
Power level
PASSWORD SETTINGS
Operator password
Technician password
AUTO
ü
AUTO
GEN CUR LEVEL & ACT
Under act. delay time
Over cur. set
Over cur. prealarm
Over cur. reset
AUTO
16
GENERATOR
Volt level
Frequency level
Current level & act.
Power level
GEN CUR LEVEL & ACT
Over cur. act.
Over act. delay time
Short circuit cur.
ü
GEN CUR LEVEL & ACT
Over cur. actions
DISBL
ü
GEN CUR LEVEL & ACT
Over cur. act.
Over act. delay time
Short circuit cur.
GEN POWER LEVEL
Under power shutdown
Under power prealarm
Under power reset
Over power shutdown
ü
GEN POWER LEVEL
Under power shutdown
150 kVA
ü
GEN POWER LEVEL
Under power shutdown
Under power prealarm
Under power reset
Over power shutdown
GEN POWER LEVEL
Over power prealarm
Over power reset
Shutdown delay time
ü
GEN POWER LEVEL
Over power prealarm
280 kVA
ü
GEN POWER LEVEL
Over power prealarm
Over power reset
Shutdown delay time
GEN WORKING CALENDAR
Disable/enable select
Start time on monday
Stop time on monday
Start time on tues.
ü
GEN WORKING CALENDAR
Disable/enable select
DISBL
ü
GEN WORKING CALENDAR
Disable/enable select
Start time on monday
Stop time on monday
Start time on tues.
ü
GEN WORKING CALENDAR
Stop time on tuesday
17.30 Hour.Min
ü
GEN WORKING CALENDAR
Stop time on tuesday
Start time on wednes.
Stop time on wednes.
Start time on thurs.
ü
GEN WORKING CALENDAR
Stop time on thursday
18.30 Hour.Min
ü
GEN WORKING CALENDAR
Stop time on thursday
Start time on friday
Stop time on friday
Start time on satur.
ü
GEN WORKING CALENDAR
Stop time on saturday
14.20 Hour.Min
ü
GEN WORKING CALENDAR
Stop time on saturday
Start time on sunday
Stop time on Sunday
ü
GENERATOR GENERAL
Sens.option gen.freq
Sens.opt.pickup&flywh
All warning are latch
ü
GENERATOR GENERAL
Sens.option gen.freq
DISBL
ü
GENERATOR GENERAL
Sens.option gen.freq
Sens.opt.pickup&flywh
All warning are latch
ü
ENGINE START OPTIONS
Horn prior start
No. of start attemp
Cranking time
Crank rest time
ü
ENGINE START OPTIONS
Au. alarm prior start
DISBL
ü
ENGINE START OPTIONS
Horn prior start
No. of start attemp
Cranking time
Crank rest time
ü
ENGINE START OPTIONS
Pickup fail delay
1.0 sec
ü
ü
ENG.CRANK DISCONNECT
Generator frequency
30.0 Hz
ü
ü
ENG.CRANK DISCONNECT
Oil pressure
DISBL
ü
ü
ENGINE SPEED SETS
Nominal speed
1500 RPM
ü
ENGINE SPEED SETS
Nominal speed
Under speed shutdown
Under speed prealarm
Under speed reset
ENGINE SPEED SETS
Over speed shutdown
Over speed prealarm
Over speed reset
Shutdown delay time
ü
ENGINE SPEED SETS
Over speed shutdown
DISBL
ü
ENGINE SPEED SETS
Over speed shutdown
Over speed prealarm
Over speed reset
Shutdown delay time
ENGINE PLANT BATTERY
Under volt
Under volt reset
Under volt delay
Over volt
ü
ENGINE PLANT BATTERY
Under voltage
10.0 Vdc
ü
ENGINE PLANT BATTERY
Under volt
Under volt reset
Under volt delay
Over volt
ü
ENGINE PLANT BATTERY
Over voltage reset
29.5 Vdc
ü
ENGINE PLANT BATTERY
Over volt reset
Over volt delay
Alt. chg. warning
ü
CANBUS ECU
Baud rate
4
ü
CANBUS ECU
Baud rate
J1939 ECU type
Device address
Engine cont. address
ü
AUTO
AUTO
GENERATOR
Working calendar
General
ü
AUTO
AUTO
GEN WORKING CALENDAR
Stop time on tuesday
Start time on wednes.
Stop time on wednes.
Start time on thurs.
AUTO
GEN WORKING CALENDAR
Stop time on thursday
Start time on friday
Stop time on friday
Start time on satur.
AUTO
GEN WORKING CALENDAR
Stop time on saturday
Start time on sunday
Stop time on sunday
*3
GENERATOR
Working calendar
General
TECHNICIAN SETTING
System
Generator
Engine
Inputs
AUTO
ü
ENGINE
Starting options
Crank disconnect
Speed settings
Plant battery
AUTO
AUTO
*3
ENGINE START OPTIONS
Pickup fail delay
ENGINE
Starting options
Crank disconnect
Speed settings
Plant battery
ü
AUTO
ENG.CRANK DISCONNECT
Generator frequency
Engine speed
Generator volt
Alt. charge volt
ENGINE
Starting options
Crank disconnect
Speed settings
Plant battery
ü
AUTO
ENGINE SPEED SETS
Nominal speed
Under speed shutdown
Under speed prealarm
Under speed reset
ENG.CRANK DISCONNECT
Oil pressure
AUTO
ENGINE
Starting options
Crank disconnect
Speed settings
Plant battery
ü
AUTO
AUTO
ENGINE PLANT BATTERY
Over volt reset
Over volt delay
Alt. chg. warning
*4
AUTO
ENG.CRANK DISCONNECT
Generator frequency
Engine speed
Generator volt
Alt. charge volt
AUTO
ENG.CRANK DISCONNECT
Oil pressure
ENGINE
CanBus ECU
CanBus error set
Maintenance
Load test
ENGINE START OPTIONS
Pickup fail delay
*4
ü
CANBUS ECU
Baud rate
J1939 ECU type
Device address
Engine cont. address
AUTO
Note: *3 = “Sens.opt.pickup&flywh” and “Pickup fail delay” parameters are only available at Trans-MiniAUTO++.MPU
*4 = “CanBus ECU” and “CanBus error set” parameter pages are only available at Trans-MiniAUTO++.CAN
17
*5
ü
CANBUS ECU
ECU remote control
DISBL
ü
ü
CANBUS ECU
Speed set point
1500 RPM
ü
ü
CANBUS ERROR SET
CAN fault actions
DISBL
ü
CANBUS ERROR SET
CAN fault actions
CAN fault activation
CAN fault delay
Amber warn.actions
ü
CANBUS ERROR SET
Amber warn.activation
2
ü
CANBUS ERROR SET
Amber warn.activation
Amber warn.delay
Red stop actions
Red stop activation
ü
CANBUS ERROR SET
Red stop delay
2 SEC
ü
ü
ENGINE MAINTENANCE
Running hour interval
5000 HOUR
ü
ENGINE MAINTENANCE
Running hour interval
Maint.date interval
Eng. stop when maint
Eng.running hour(lsb)
ü
ENGINE MAINTENANCE
Eng.running hour
0
ü
ENGINE MAINTENANCE
Eng.running hour
Eng.running hour(msb)
Maintenance okay
ü
LOAD TEST
Disable/enable select
DISBL
ü
ü
ENGINE GENERAL
Fuel selection
DIESL
ü
ü
ENGINE GENERAL
Min.of ignition speed
200 RPM
ü
ü
SENDER INPUTS
Oil pressure unit
Bar
ü
ü
SENDER INPUTS
Oil press. shutdown
1.0 Bar
ü
SENDER INPUTS
Oil pressure shutdown
Temperature unit
Temp. input type
High temp. prealarm
ü
SENDER INPUTS
High temp. reset
88 ºC
ü
SENDER INPUTS
High temp. reset
High temp. shutdown
Low temp. warning
Conf. AI1 unit
ü
SENDER INPUTS
Conf. AI type
DISBL
ü
SENDER INPUTS
Conf. AI type
Conf. AI low prealrm
Conf. AI low reset
Conf. AI low shutdwn
SENDER INPUTS
Conf. AI high prealr
Conf. AI high reset
Conf. AI high shutd.
Conf. AI control ON
ü
SENDER INPUTS
Conf. AI high prealr
DISBL
ü
SENDER INPUTS
Conf. AI high prealr
Conf. AI high reset
Conf. AI high shutd.
Conf. AI control ON
SENDER LINEARISATION
Oil pressure sender 1
Oil pressure 1
Oil pressure sender 2
Oil pressure 2
ü
SENDER LINEARISATION
Oil pressure sender 1
10 R
ü
SENDER LINEARISATION
Oil pressure sender 1
Oil pressure 1
Oil pressure sender 2
Oil pressure 2
ü
SENDER LINEARISATION
Oil pressure sender 3
62 R
ü
SENDER LINEARISATION
Oil pressure sender 3
Oil pressure 3
Oil pressure sender 4
Oil pressure 4
CANBUS ECU
ECU remote control
Speed control enable
Oil Pres cont. enab
Temp. control enable
AUTO
*5
CANBUS ECU
Speed set point
Speed correction
*5
ENGINE
CanBus ECU
CanBus error set
Maintenance
Load test
CANBUS ECU
ECU remote control
Speed control enable
Oil Pres cont. enab
Temp. control enable
CANBUS ECU
Speed set point
Speed correction
*5
ü
CANBUS ERROR SET
CAN fault actions
CAN fault activation
CAN fault delay
Amber warn.actions
AUTO
AUTO
*5
CANBUS ERROR SET
Amber warn.activation
Amber warn.delay
Red stop actions
Red stop activation
AUTO
*5
CANBUS ERROR SET
Red stop delay
CANBUS ERROR SET
Red stop delay
*5
ENGINE
CanBus ECU
CanBus error set
Maintenance
Load test
ü
ENGINE MAINTENANCE
Running hour interval
Maint.date interval
Eng. stop when maint
Eng.running hour(lsb)
AUTO
AUTO
ENGINE MAINTENANCE
Eng.running hour
Eng.running hour(msb)
Maintenance okay
*5
ENGINE
CanBus ECU
CanBus error set
Maintenance
Load test
ü
LOAD TEST
Disable/enable select
LOAD TEST
Disable/enable select
AUTO
ENGINE
General
ü
ENGINE GENERAL
Fuel selection
Stop solenoid time
Ignition delay
Gas valve delay
ENGINE GENERAL
Fuel selection
Stop solenoid time
Ignition delay
Gas valve delay
AUTO
ENGINE GENERAL
Min.of ignition speed
Choke time
TECHNICIAN SETTING
System
Generator
Engine
Inputs
AUTO
ü
INPUTS
Sender inputs
Sender linearisations
Conf. input-1
Conf. input-2
ü
AUTO
Oil
Oil
Oil
Oil
SENDER INPUTS
pressure unit
press. input type
pressure prealarm
pressure reset
ENGINE GENERAL
Min.of ignition speed
Choke time
Oil
Oil
Oil
Oil
SENDER INPUTS
pressure unit
press. input type
pressure prealarm
pressure reset
AUTO
SENDER INPUTS
Oil pressure shutdown
Temperature unit
Temp. input type
High temp. prealarm
AUTO
SENDER INPUTS
High temp. reset
High temp. shutdown
Low temp. warning
Conf. AI1 unit
AUTO
SENDER INPUTS
Conf. AI type
Conf. AI low prealrm
Conf. AI low reset
Conf. AI low shutdwn
AUTO
INPUTS
Sender inputs
Sender linearisations
Conf. input-1
Conf. input-2
AUTO
ü
AUTO
SENDER LINEARISATION
Oil pressure sender 3
Oil pressure 3
Oil pressure sender 4
Oil pressure 4
AUTO
Note: *5 = “CanBus ECU” and “CanBus error set” parameter pages are only available at Trans-MiniAUTO++.CAN
18
SENDER LINEARISATION
Oil pressure sender 5
Oil pressure 5
Oil pressure sender 6
Oil pressure 6
ü
SENDER LINEARISATION
Oil pressure sender 5
111 R
ü
SENDER LINEARISATION
Oil pressure sender 5
Oil pressure 5
Oil pressure sender 6
Oil pressure 6
ü
SENDER LINEARISATION
Oil pressure sender 7
156 R
ü
SENDER LINEARISATION
Oil pressure sender 7
Oil pressure 7
Oil pressure sender 8
Oil pressure 8
ü
SENDER LINEARISATION
Oil pressure sender 9
205 R
ü
SENDER LINEARISATION
Oil pressure sender 9
Oil pressure 9
Oil press. sender 10
Oil pressure 10
ü
SENDER LINEARISATION
Temperature sender 1
360 R
ü
SENDER LINEARISATION
Temperature sender 1
Temperature 1
Temperature sender 2
Temperature 2
ü
SENDER LINEARISATION
Temperature sender 3
145 R
ü
SENDER LINEARISATION
Temperature sender 3
Temperature 3
Temperature sender 4
Temperature 4
ü
SENDER LINEARISATION
Temperature sender 5
50 R
ü
SENDER LINEARISATION
Temperature sender 5
Temperature 5
Temperature sender 6
Temperature 6
ü
SENDER LINEARISATION
Temperature sender 7
43 R
ü
SENDER LINEARISATION
Temperature sender 7
Temperature 7
Temperature sender 8
Temperature 8
ü
SENDER LINEARISATION
Temperature sender 9
10 R
ü
SENDER LINEARISATION
Temperature sender 9
Temperature 9
Temperature sender 10
Temperature 10
ü
SENDER LINEARISATION
Conf. AI sender 1
10 R
ü
SENDER LINEARISATION
Conf. AI sender 1
Conf. AI value 1
Conf. AI sender 2
Conf. AI value 2
ü
SENDER LINEARISATION
Conf. AI sender 3
40 R
ü
SENDER LINEARISATION
Conf. AI sender 3
Conf. AI value 3
Conf. AI sender 4
Conf. AI value 4
ü
SENDER LINEARISATION
Conf. AI sender 5
80 R
ü
SENDER LINEARISATION
Conf. AI sender 5
Conf. AI value 5
Conf. AI sender 6
Conf. AI value 6
ü
SENDER LINEARISATION
Conf. AI sender 7
140 R
ü
SENDER LINEARISATION
Conf. AI sender 7
Conf. AI value 7
Conf. AI sender 8
Conf. AI value 8
ü
SENDER LINEARISATION
Conf. AI sender 9
185 R
ü
SENDER LINEARISATION
Conf. AI sender 9
Conf. AI value 9
Conf. AI sender 10
Conf. AI value 10
ü
CONF. INPUT-1
Dis,user conf.or list
1
ü
CONF. INPUT-1
Dis,user conf.or list
Polarity
Indication
Activation
ü
CONF. INPUT-1
Select from list
25-EMERGENCY STOP
ü
ü
CONF. INPUT-2
Dis,user conf.or list
1
ü
ü
CONF. INPUT-2
Select from list
25-HIGH TEMPERATURE
ü
AUTO
SENDER LINEARISATION
Oil pressure sender 7
Oil pressure 7
Oil pressure sender 8
Oil pressure 8
AUTO
SENDER LINEARISATION
Oil pressure sender 9
Oil pressure 9
Oil press. sender 10
Oil pressure 10
AUTO
SENDER LINEARISATION
Temperature sender 1
Temperature 1
Temperature sender 2
Temperature 2
AUTO
SENDER LINEARISATION
Temperature sender 3
Temperature 3
Temperature sender 4
Temperature 4
AUTO
SENDER LINEARISATION
Temperature sender 5
Temperature 5
Temperature sender 6
Temperature 6
AUTO
SENDER LINEARISATION
Temperature sender 7
Temperature 7
Temperature sender 8
Temperature 8
AUTO
SENDER LINEARISATION
Temperature sender 9
Temperature 9
Temperature sender 10
Temperature 10
AUTO
SENDER LINEARISATION
Conf. AI sender 1
Conf. AI value 1
Conf. AI sender 2
Conf. AI value 2
AUTO
SENDER LINEARISATION
Conf. AI sender 3
Conf. AI value 3
Conf. AI sender 4
Conf. AI value 4
AUTO
SENDER LINEARISATION
Conf. AI sender 5
Conf. AI value 5
Conf. AI sender 6
Conf. AI value 6
AUTO
SENDER LINEARISATION
Conf. AI sender 7
Conf. AI value 7
Conf. AI sender 8
Conf. AI value 8
AUTO
SENDER LINEARISATION
Conf. AI sender 9
Conf. AI value 9
Conf. AI sender 10
Conf. AI value 10
AUTO
INPUTS
Sender inputs
Sender linearisations
Conf. input-1
Conf. input-2
ü
AUTO
CONF. INPUT-1
Dis,user conf.or list
Polarity
Indication
Activation
AUTO
CONF. INPUT-1
Select from list
Active delay
INPUTS
Sender inputs
Sender linearisations
Conf. input-1
Conf. input-2
AUTO
ü
CONF. INPUT-2
Dis,user conf.or list
Polarity
Indication
Activation
CONF. INPUT-1
Select from list
Active delay
CONF. INPUT-2
Dis,user conf.or list
Polarity
Indication
Activation
AUTO
CONF. INPUT-2
Select from list
Active delay
CONF. INPUT-2
Select from list
Active delay
19
ü
CONF. INPUT-3
Dis,user conf.or list
1
ü
CONF. INPUT-3
Select from list
Active delay
ü
CONF. INPUT-3
Select from list
25-LOW OIL PRESSURE
ü
CONF. INPUT-3
Select from list
Active delay
ü
CONF. OUTPUT-1
Polarity
Function
ü
CONF. OUTPUT-1
Polarity
NO
ü
CONF. OUTPUT-1
Polarity
Function
OUTPUTS
Conf. output-5
Conf. output-6
ü
CONF. OUTPUT-5
Polarity
Function
ü
CONF. OUTPUT-5
Polarity
NO
ü
CONF. OUTPUT-5
Polarity
Function
TIMERS
Start timers
Stopping timers
ü
ü
START TIMERS
Remote start delay
4 SEC
ü
START TIMERS
Remote start delay
Pre-heat
Pre-heat bypass
Safety on delay
ü
START TIMERS
Warming up time
3 SEC
ü
START TIMERS
Warming up time
Horn duration
Chg. excitation time
Cooling fan time
ü
START TIMERS
Idle mode time
DISBL
ü
INPUTS
Conf. input-3
ü
AUTO
TECHNICIAN SETTING
Outputs
Timers
User adjustment
ü
AUTO
TECHNICIAN SETTING
Outputs
Timers
User adjustment
Conf.
Conf.
Conf.
Conf.
OUTPUTS
output-1
output-2
output-3
output-4
CONF. INPUT-3
Dis,user conf.or list
Polarity
Indication
Activation
CONF. INPUT-3
Dis,user conf.or list
Polarity
Indication
Activation
AUTO
AUTO
ü
AUTO
AUTO
START TIMERS
Remote start delay
Pre-heat
Pre-heat bypass
Safety on delay
AUTO
START TIMERS
Warming up time
Horn duration
Chg. excitation time
Cooling fan time
AUTO
START TIMERS
Idle mode time
Idle mode time off
TIMERS
Start timers
Stopping timers
TECHNICIAN SETTING
Outputs
Timers
User adjustment
ü
USER ADJUSTMENT
Gen. voltage offset
Current offset
Battery&chrg gen.vol
Sender inputs offset
START TIMERS
Idle mode time
Idle mode time off
ü
STOPPING TIMERS
Remote stop delay
Cooling time
Fail to stop delay
ü
STOPPING TIMERS
Remote stop delay
4 SEC
ü
STOPPING TIMERS
Remote stop delay
Cooling time
Fail to stop delay
ü
GEN. VOLTAGE OFFSET
Gen. V1 offset
Gen. V2 offset
Gen. V3 offset
ü
GEN. VOLTAGE OFFSET
Gen. V1 offset
0 Vac
ü
GEN. VOLTAGE OFFSET
Gen. V1 offset
Gen. V2 offset
Gen. V3 offset
ü
CURRENT OFFSET
Current I1 offset
0 A
ü
ü
BATTERY&CHRG GEN.VOL
Batt.volt offset
0.0 Vdc
ü
ü
SENDER INPUTS OFFSET
Oil pressure offset
0.0 Bar
ü
AUTO
USER ADJUSTMENT
Gen. voltage offset
Current offset
Battery&chrg gen.vol
Sender inputs offset
ü
CURRENT OFFSET
Current I1 offset
CURRENT OFFSET
Current I1 offset
AUTO
USER ADJUSTMENT
Gen. voltage offset
Current offset
Battery&chrg gen.vol
Sender inputs offset
ü
BATTERY&CHRG GEN.VOL
Batt.volt offset
Gen.chg.volt offset
BATTERY&CHRG GEN.VOL
Batt.volt offset
Gen.chg.volt offset
AUTO
USER ADJUSTMENT
Gen. voltage offset
Current offset
Battery&chrg gen.vol
Sender inputs offset
ü
SENDER INPUTS OFFSET
Oil pressure offset
Temperature offset
Conf. AI1 offset
SENDER INPUTS OFFSET
Oil pressure offset
Temperature offset
Conf. AI1 offset
20
3.4 Changing And Saving Parameters Values
Operation Screen
GENERATOR
V12: 380V V1:
V23: 380V V2:
V31: 380V V3:
On load
220V
220V
220V
ü
Program
Language
Event log
RESET
PROGRAM
Operator setting
Technician setting
Factory adjustment
ü
RESET
AUTO
RESET
AUTO
AUTO
Press Enter button
for 2 seconds to
access the menu options.
PROGRAM
Operator setting
Technician setting
Factory adjustment
Press the
Enter
button.
AUTO
TECHNICIAN SETTING
Password
RESET
Note1: If Enter button is pressed
and the technician password is
zero, Password screen is ignored.
AUTO
GENERATOR VOLT LEVEL
Under volt shutdown
Under volt prealarm
Under volt reset
Over volt shutdown
Press Enter button to access to all
parameters page in currently main
parameter group.
Press the Enter
button to view
parameter value.
AUTO
GENERATOR
Volt level
Frequency level
Current level & act.
Power level
ü
ü
RESET
AUTO
Press the Up or Down
buttons to select the main
parameter group you wish to
view/change.
RESET
ü
Press Enter button to access
to all parameters in currently
parameter page.
AUTO
GENERATOR VOLT LEVEL
Under volt shutdown
320 Vac
ü
AUTO
RESET
AUTO
GENERATOR
Volt level
Frequency level
Current level & act.
Power level
ü
RESET
GENERATOR VOLT LEVEL
Under volt shutdown
325 Vac
RESET
Press the Enter button
to confirm password.
If the password is incorrect,
the unit will drop out of
program mode.
AUTO
Enter password with
cursor (Up, Down
and Next) buttons.
TECHNICIAN SETTING
System
Generator
Engine
Inputs
ü
0162
RESET
ü
0000
RESET
TECHNICIAN SETTING
System
Generator
Engine
Inputs
Press the Up or Down
buttons to select
the section you wish
to view/change.
When the Enter button is
pressed, the parameters
section is asked for
accessing to parameters.
TECHNICIAN SETTING
Password
ü
ü
ü
RESET
AUTO
Parameter can be
changed with Up and
Down buttons.
GENERATOR VOLT LEVEL
Under volt shutdown
Under volt prealarm
Under volt reset
Over volt shutdown
Press Enter button to
confirm the changed value.
When the Stop/Reset button is
pressed any time, previous
page can be accessed.
ü
RESET
AUTO
To exit from programming mode
any time, press Stop/Reset
button for 2 seconds.
GENERATOR
V12: 380V V1:
V23: 380V V2:
V31: 380V V3:
On load
Operation
220V Screen
220V
220V
21
4. Parameters
4.1 Operator Parameters
4.1.1 Generator
GENERATOR VOLT LEVEL (Generator->Volt level)
Under volt shutdown
Under volt prealarm
Under volt reset
Over volt shutdown
Over volt prealarm
Over volt reset
Shutdown delay time
Generator Under Voltage Shutdown
Generator Under Voltage Pre-Alarm
Generator Under Voltage Pre-Alarm Reset
Generator Over Voltage Shutdown
Generator Over Voltage Pre-Alarm
Generator Over Voltage Pre-Alarm Reset
Generator Voltage Shutdown Delay Time
GENERATOR FREQ LEVEL (Generator->Frequency level)
Nominal frequency
Under freq shutdown
Under freq prealarm
Under freq reset
Over freq shutdown
Over freq prealarm
Over freq reset
Shutdown delay time
Nominal Alternator Frequency
Generator Under Frequency Shutdown
Generator Under Frequency Pre-Alarm
Generator Under Frequency Pre-Alarm Reset
Generator Over Frequency Shutdown
Generator Over Frequency Pre-Alarm
Generator Over Frequency Pre-Alarm Reset
Generator Frequency Shutdown Delay Time
GENERATOR CUR LEVEL (Generator->Current level)
Under cur. set
Under cur. prealarm
Under cur. reset
Over cur. set
Over cur. prealarm
Over cur. reset
Generator Under Current Set
Generator Under Current Pre-Alarm
Generator Under Current Pre-Alarm Reset
Generator Over Current Set
Generator Over Current Pre-Alarm
Generator Over Current Pre-Alarm Reset
GEN POWER LEVEL (Generator->Power level)
Under power shutdown
Under power prealarm
Under power reset
Over power shutdown
Over power prealarm
Over power reset
Shutdown delay time
Generator Under Power Shutdown
Generator Under Power Pre-Alarm
Generator Under Power Pre-Alarm Reset
Generator Over Power Shutdown
Generator Over Power Pre-Alarm
Generator Over Power Pre-Alarm Reset
Generator Power Shutdown Delay Time
Min
60(dis)
60(dis)
60
60
60(dis)
60
0.0
Max Default Unit
600
320 VV
600
340 VV
600
350 VV
600
440 VV
600
420 VV
600
400 VV
Sec
10.0
1.0
Min
30.0
30.0(dis)
30.0(dis)
30.0
30.0(dis)
30.0(dis)
30.0
0.0
Max Default Unit
Hz
75.0
50.0
75.0
43.0
Hz
Hz
75.0
45.0
75.0
46.0
Hz
75.0
58.0
Hz
55.0
75.0
Hz
54.0
75.0
Hz
10.0
1.0 Sec
Min
0
0(dis)
0
0
0(dis)
0
Max Default Unit
9999
1 AV
9999
dis AV
9999
5 AV
9999
9999 AV
9999
9990 AV
9999
9980 AV
Min
0(dis)
0(dis)
0
0(dis)
0(dis)
0
0
Max Default Unit
9999
dis kVA
dis kVA
9999
9999
5 kVA
dis kVA
9999
dis kVA
9999
0 kVA
9999
Sec
99
2
Note: dis = disable
22
4.2 Technician Parameters
4.2.1 System
SYSTEM NETWORK (System->Network)
CT ratio
PT ratio
Type of AC system
Current Ratio
Voltage Transformer Ratio
Select AC system; 0- 1 Phase 2 Wire
Min
5
1
0
Max Default Unit
100 AV
9999
1
50
1
2
1- 3 Phase 4 Wire
Generator kVA rating
Generator kVA rating set
0
9999
300
kVA
CT ratio
Load current transformers transfer ratio(Primary current/Secondary current) value must be entered to
this parameter.
Example:
If Current Transformer Primary=500A and Current Transformer Secondary=5A, Current Transformer
Ratio should be entered CT Primary/CT Secondary=100.
PT ratio
Defines the scaling factor applied to voltage readout and associated fault conditions.
This PT ratio is for additional voltage transformers mounted the unit.
BREAKERS (System->Breakers)
Type of Breaker
Gen.brk.cls.contact
Gen.brk.cls.relay
Gen.brk.cls.time
Gen.brk.open relay
Gen.brk.open time
Hardware Breaker Selection
Gen Close Breaker Contact Type
Gen Close Breaker Relay Type
Gen Close Timer
Gen Open Breaker Relay Type
Gen Open Timer
Break.close puls.time
Break.open pulse time
Transfer time
Spring loading time
Retry number
Breaker Close Pulse Time
Breaker Open Pulse Time
Transfer Time
Spring Loading Time
Retry Number
Min
Max Default
0
2
0
0
NO / NC
0
NOR / PULS
1
250
5
0
NOR / PULS
5
1
250
0.0
10.0
0.5
0.0
10.0
0.5
0
250
2
1
250
3
1
250
5
Unit
Sec
Sec
Sec
Sec
Sec
Sec
Hardware Breaker Selection
0- Gen schalter has only close drive and if close drive off schalter will open.
Parameters; GEN CLOSE BREAKER CONTACT TYPE, GEN CLOSE TIMER(if gen closed input
selected), GEN OPEN TIMER(if gen closed input selected), TRANSFER TIME.
Note-1 : NO / NC : Normally Open / Normally Close
2 : NOR / PULS : Normal / Pulse
23
Example: If Hardware Breaker Selection parameter is selected as 0;
For closing
Gen. Shalter
For opening
Gen. Shalter
Gen. Closed Out.
(NO)
t[s]
Gen. Closed Out.
(NC)
t[s]
Gen. Shalter
Opened
Closed
1- Gen schalter has only close drive, when want to schalter close, close breaker output on and after 1
sec. open breaker output on and after breaker close pulse time open breaker output will off. When
want to schalter open close breaker output and open breaker output will off.
Parameters; GEN CLOSE BREAKER CONTACT TYPE, GEN CLOSE TIMER(if gen closed input
selected), GEN OPEN TIMER(if gen closed input selected), BREAKER CLOSE PULSE TIME,
TRANSFER TIME.
Example: If Hardware Breaker Selection parameter is selected as 1;
For closing
Gen. Shalter
For opening
Gen. Shalter
Breaker close
pulse time
Gen. Closed Out.
(NO)
t[s]
Gen. Closed Out.
(NC)
t[s]
1s
Gen. Open Out.
(NO)
t[s]
Gen. Open Out.
(NC)
Gen. Shalter
t[s]
Closed
Opened
2- USER CONFIGURED: User can select all the schalter types. Used for Motorised Schalters.
Parameters; GEN CLOSE BREAKER CONTACT TYPE, GEN CLOSE BREAKER RELAY TYPE, GEN
CLOSE TIMER(if gen closed input selected), GEN OPEN BREAKER RELAY TYPE, GEN OPEN
TIMER(if gen closed input selected), BREAKER CLOSE PULSE TIME(if Gen Close Breaker Relay
Type or Main Close Breaker Relay Type parameter is selected as 1), BREAKER OPEN PULSE
TIME(if Gen Open Breaker Relay Type or Main Open Breaker Relay Type parameter is selected as 1),
TRANSFER TIME, SPRING LOADING TIME, RETRY NUMBER.
Example-1: GCB Close Diagram.
If Hardware Breaker Selection parameter is selected as 2 (user configured), Gen. Close Breaker Relay
Type parameter is selected as 1 (PULSE) and Gen. Open Breaker Relay Type parameter is selected
as 1 (PULSE);
GbCt: Gen close timer
brCP: Breaker close pulse time
brOP: Breaker open pulse time
sPLD: Spring loading time
rtNB: Retry number
24
rtNB
brCP
GCB close
command
GCB open
command
brCP
brCP
brCP
sPLD
brCP
brCP
sPLD
brCP
brCP
brCP
brCP
sPLD
t[s]
1s
brOP
GbCt
GbCt
1s
brOP
GbCt
1s
brOP
GbCt
GbCt
GbCt
GbCt
t[s]
Feedback
input
t[s]
GCB fail to
close alarm
t[s]
Example-2: GCB Open Diagram.
If Hardware Breaker Selection parameter is selected as 2 (user configured), Gen. Close Breaker Relay
Type parameter is selected as 1 (PULSE) and Gen. Open Breaker Relay Type parameter is selected
as 1 (PULSE);
GbOt: Gen open timer
brOP: Breaker open pulse time
GCB close
command
t[s]
GbOt
GCB open
command
GbOt
brOP
t[s]
Feedback
input
t[s]
GCB fail to
open alarm
t[s]
Gen Close Timer
This is used to monitor the closure of the generator contactor or breaker. It will only operate if an
auxiliary input is configured as ‘Generator Closed Auxiliary’ and connected to the auxiliary on the
generator contactor or breaker. Once a generator closed signal is issued the ‘gen close timer’ is
initiated. Should the ‘Generator Closed Auxiliary’ input become active the timer the ‘gen close timer’ is
cancelled. If the timer expires and the ‘Generator Closed Auxiliary’ has not become active the module
will issue a ‘generator failed to close’ alarm.
Gen Open Timer
This is used to monitor the opening of the generator contactor or breaker. It will only operate if an
auxiliary input is configured as ‘Generator Closed Auxiliary’ and connected to the auxiliary on the
generator contactor or breaker. Once a generator open signal is issued the ‘gen open timer’ is initiated.
Should the ‘Generator Closed Auxiliary’ input become in-active the timer ‘gen open timer’ is cancelled.
If the timer expires and the ‘Generator Closed Auxiliary’ has not become in-active the module will issue
a ‘generator failed to open’ alarm.
Breaker Close Pulse Time
This is used to determine the duration of the Generator close signal. This timer is only used if Pulsed
outputs are configured to be used.
Breaker Open Pulse Time
This is used to determine the duration of the Generator close signal. This timer is only used if Pulsed
outputs are configured to be used.
25
Transfer Time
This is used to allow for fixed duration transfer breaks when switching from mains to generator and
back. It can be used to ensure that the supply is removed from the load for fixed period of time to allow
pumps/motors to come to rest etc.
Spring Loading Time
When the unit give open command to the breaker and after that the unit want to give close command
the same breaker, this time for between open and close commands, because if there is no delay
between open and close commands can be problem the motorized switches.
Retry Number
The unit try to close breaker number of this parameter. If each try there is no close feedback, after last
try the alarm will be activated.
LCD DISPLAY (System->LCD display)
Language*6
Contrast
Auto scroll time
Auto scroll number*7
Err. mesg scroll time
Language Selection
Digital Contrast
Auto Scroll Time
Auto Scroll Number
Scroll Time For Error Messages
Min
Max Default
Unit
ENGLISH/CHINESE ENGLISH
1
9
5
0 (dis)
250
0
1
14
3
1
250
2
Sec
Sec
Language Selection
Language selection: English or Chinese.
Digital Contrast
It is used to change contrast of LCD Display.
Auto Scroll Time
The scroll time between all data display pages.
Auto Scroll Number
The number of data display pages that will be scrolled.
Scroll Time For Error Messages
Error messages are displayed the last line of LCD Display. If more than one error condition is present,
each of them is displayed during time defined by Auto Scroll Timer parameter.
COMMUNICATION (System->Communication)
Slave Address
Baud Rate
0 - 1200 baud
1 - 2400 baud
Baud rate
2 - 4800 baud
3 - 9600 baud
4 - 19200 baud
5 - 38400 baud
Parity
Parity
0 - NONE
1 - ODD
2 - EVEN
Stop bit
Stop Bit (0-> 1 stop bit,1-> 2 stop bit)
Slave address
Min
1
0
Max Default Unit
247
1
5
3
0
2
0
0
1
0
Note: *6 = Selectable value of this parameter is “ENGLISH/TURKISH” at
Trans-MiniAUTO++.XXX (TR) devices.
*7 = Max. value of this parameter is equal to 20 at Trans-MiniAUTO++.CAN devices
dis = disable
26
DATE & TIME SET (System->Date & time set)
Year
Month
Day
Week
Hour
Minute
Second
Day of week
Year
Month
Date
Day of week
Hour
Minute
Second
Unit
1=Monday,2=Tuesday,3=Wednesday,4=Thursday,5=Friday,6=Saturday,7=Sunday
DEFAULT SETTINGS (System->Default settings)
Save setting to def.
Reset default sets
Reset factory sets
Min Max Default
0
99
12
1
31
1
7
1
23
0
59
0
59
0
Save setting to default
Reset default sets
Reset factory sets
Min Max Default
YES / NO
NO
YES / NO
NO
YES / NO
NO
Unit
Save setting to default
If this parameter is selected as “Yes”, the unit’s currently parameters save as default sets.
After this parameter is reset automatically to “No”.
Reset default sets
If this parameter is selected as “Yes”, the unit’s parameters back to default sets.
After this parameter is reset automatically to “No”.
Reset factory sets
If this parameter is selected as “Yes”, the unit’s parameters back to factory sets.
After this parameter is reset automatically to “No”.
PASSWORD SETTINGS (System->Password settings)
Operator password
Technician password
Operator Password
Technician Password
Min
0
0
Max Default
9999
0
9999
0
Unit
Operator Password
Use this option to change the Operator password. This password allows access to operator
parameters section.
Technician Password
Use this option to change the Technician password. It allows access to both operator and technician
parameters section.
4.2.2 Generator
GENERATOR VOLT LEVEL (Generator->Volt level)
Under volt shutdown
Under volt prealarm
Under volt reset
Over volt shutdown
Over volt prealarm
Over volt reset
Shutdown delay time
Generator Under Voltage Shutdown
Generator Under Voltage Pre-Alarm
Generator Under Voltage Pre-Alarm Reset
Generator Over Voltage Shutdown
Generator Over Voltage Pre-Alarm
Generator Over Voltage Pre-Alarm Reset
Generator Voltage Shutdown Delay Time
Min
60(dis)
60(dis)
60
60
60(dis)
60
0.0
Max Default Unit
600
320 VV
600
340 VV
600
350 VV
600
440 VV
600
420 VV
600
400 VV
Sec
10.0
1.0
Note: dis = disable
27
GENERATOR FREQ LEVEL (Generator->Frequency level)
Nominal frequency
Under freq shutdown
Under freq prealarm
Under freq reset
Over freq shutdown
Over freq prealarm
Over freq reset
Shutdown delay time
Nominal Alternator Frequency
Generator Under Frequency Shutdown
Generator Under Frequency Pre-Alarm
Generator Under Frequency Pre-Alarm Reset
Generator Over Frequency Shutdown
Generator Over Frequency Pre-Alarm
Generator Over Frequency Pre-Alarm Reset
Generator Frequency Shutdown Delay Time
GEN CUR LEVEL & ACT (Generator->Current level & act.)
Under cur. set
Under cur. prealarm
Under cur. reset
Under cur. act.
Generator Under Current Set
Generator Under Current Pre-Alarm
Generator Under Current Pre-Alarm Reset
Generator Under Current Actions
0 - Disable
1 - Warning (Alarm Only, No Shutdown)
2 - Electrical Trip (Alarm/Off Load Generator
Followed By Shutdown After Cooling)
3 - Shutdown (Alarm And Shutdown)
Under act. delay time
Over cur. set
Over cur. prealarm
Over cur. reset
Over cur. act.
Generator Under Current Actions Delay Time
Generator Over Current Set
Generator Over Current Pre-Alarm
Generator Over Current Pre-Alarm Reset
Generator Over Current Actions
0 - Disable
1 - Warning (Alarm Only, No Shutdown)
2 - Electrical Trip (Alarm/Off Load Generator
Followed By Shutdown After Cooling)
3 - Shutdown (Alarm And Shutdown)
Over act. delay time
Short circuit cur.
Generator Over Current Actions Delay Time
Generator Short Circuit Current Set
GEN POWER LEVEL (Generator->Power level)
Under power shutdown
Under power prealarm
Under power reset
Over power shutdown
Over power prealarm
Over power reset
Shutdown delay time
Generator Under Power Shutdown
Generator Under Power Pre-Alarm
Generator Under Power Pre-Alarm Reset
Generator Over Power Shutdown
Generator Over Power Pre-Alarm
Generator Over Power Pre-Alarm Reset
Generator Power Shutdown Delay Time
Min
30.0
30.0(dis)
30.0(dis)
30.0
30.0(dis)
30.0(dis)
30.0
0.0
Max Default Unit
Hz
75.0
50.0
75.0
43.0
Hz
Hz
75.0
45.0
75.0
46.0
Hz
75.0
58.0
Hz
55.0
75.0
Hz
54.0
75.0
Hz
10.0
1.0 Sec
Min
0
0(dis)
0
0(dis)
Max Default Unit
9999
1 AV
9999
dis AV
9999
5 AV
3
dis
0 99
0 9999
0(dis) 9999
0 9999
0(dis)
3
2
9999
9990
9980
dis
Sec
AV
AV
AV
0 99
0 9999
2
9999
Sec
AV
Min
0(dis)
0(dis)
0
0(dis)
0(dis)
0
0
Max Default Unit
9999
dis kVA
dis kVA
9999
9999
5 kVA
dis kVA
9999
dis kVA
9999
0 kVA
9999
Sec
99
2
28
GENERATOR GENERAL (Generator->General)
Sens.option gen.freq
Sensing Options Generator Frq En/Dis
Sens.opt.pickup&flywh*8 Sensing Opt Pickup En/Dis & Flywheel
All warning are latch
All Warnings Are Latched En/Dis
Min
Max
Default Unit
ENABL/DISBL ENABL
0(dis)
1000 DISBL
ENABL/DISBL DISBL
Sensing Options Generator Frq En/Dis
ENABLE: Speed sensing will be derived from the generator output frequency.
DISABLE: Speed sensing not will be derived from the generator output frequency.
Sensing Options Pickup En/Dis & Flywheel
DISABLE: Speed sensing will not be derived from the magnetic pickup.
1-1000: Speed sensing will be derived from the magnetic pickup and the number is flywheel
teeth on the engine.
All Warnings Are Latched En/Dis
ENABLE: Warnings and pre-alarms will latched when triggered. To reset the alarm either an external
reset must be applied to one of the inputs or the 'Reset' pushbutton operated, once the triggering
condition has cleared.
DISABLE: Normal operation, the warnings and pre-alarms (except spare inputs, because they have
their latching or non-latching selections) will automatically reset once the triggering condition has
cleared.
4.2.3 Engine
ENGINE START OPTIONS (Engine->Starting options)
Horn prior start
No. of crank attemp
Cranking time
Crank rest time
Pickup fail delay*8
Audible Alarm Prior To Starting En/Dis
Number Of Start Attempts
Cranking Time
Crank Rest Time
Pickup Sensor Fail Delay(Pickup)
Min
Max Default
ENABL/DISBL DISBL
3
1
10
5
1
99
10
5
99
1.0
0.1 10.0
Unit
Sec
Sec
Sec
Audible Alarm Prior To Starting En/Dis
ENABLE: The audible alarm will sound before the engine starts. The sounder will become active once
the start delay is initialised, it will remain active until either the engine reaches crank disconnect speed
or pre-heat timers are cancelled.
Number Of Start Attempts
This value is the number of times the module will attempt to start the generator. Should the generator
start the module will not attempt further starts. If the generator does not start after the final attempt, the
module will give a ‘Fail to start’ alarm.
Cranking Time
This is the maximum amount of time that the module will energise the starter motor for during starting
attempts once the starter has engaged.
Crank Rest Time
This is the amount of time the module will wait for between start attempts. This is to allow the starter
motor to cool and the starter batteries to recover.
Note: *8 = These parameters are only available at Trans-MiniAUTO++.MPU
dis = disable
29
ENG. CRANK DISCONNECT (Engine->Crank disconnect)
Generator frequency
Engine speed
Generator volt
Alt. Charge volt
Oil pressure
Crank Disconnect On Gen. Frequency
Crank Disconnect On Engine RPM
Crank Disconnect On Gen. Voltage
Crank Disconnect On Charge Alt. Voltage
Crank Disconnect On Oil Pressure
Min
25.0
500
60 (dis)
6.0 (dis)
1.0 (dis)
Max Default
Unit
75.0
6000
600
30.0
30.0
Hz
RPM
VV
VZ
BAR
30.0
500
300
dis
dis
The parameters in this page are used for engine started signals. If any of the selected signals appears,
the unit assumes that the engine has started.
Crank Disconnect On Gen. Frequency
If the generator frequency over than 30.0 Hz, the unit assumes that the engine has started and the unit
stop cranking.
Crank Disconnect On Engine RPM
If the generator speed over than 500 Rpm, the unit assumes that the engine has started and the unit
stop cranking.
Crank Disconnect On Gen. Voltage
If the generator voltage over than 300 Vac, the unit assumes that the engine has started and the unit
stop cranking.
Crank Disconnect On Charge Alt. Voltage
If the charge alternator voltage over than 6.1 Vdc, the unit assumes that the engine has started and
the unit stop cranking. Note: If the charge generator input (terminal #13) is disconnect, this parameter
selected as disabled (6.0 Vdc).
Crank Disconnect On Oil Pressure
If the oil pressure sender over than this value or the oil pressure digital input (terminal #15) is not
switched to -Battery, the unit assumes that the engine has started and the unit stops cranking.
ENGINE SPEED SETS (Engine->Speed settings)
Nominal speed
Under speed shutdown
Under speed prealarm
Under speed reset
Over speed shutdown
Over speed prealarm
Over speed reset
Shutdown delay time
Nominal Speed
Engine Under Speed Shutdown
Engine Under Speed Prealarm
Engine Under Speed Prealarm Reset
Engine Over Speed Shutdown
Engine Over Speed Prealarm
Engine Over Speed Prealarm Reset
Engine Speed Shutdown Delay Time
Min
500
500(dis)
500(dis)
500
500(dis)
500(dis)
500
0.0
Max Default
Unit
5000
5000
5000
5000
5000
5000
5000
10.0
1500
dis
dis
500
dis
dis
500
1.0
RPM
RPM
RPM
RPM
RPM
RPM
RPM
Sec
Max Default
30.0
10.0
30.0
10.5
9.9
1.0
30.0
30.0
30.0
29.5
9.9
1.0
30.0
dis
Unit
VZ
VZ
Sec
VZ
VZ
Sec
VZ
The parameters in this page are used for the generator speed low and high alarms.
ENGINE PLANT BATTERY (Engine->Plant battery)
Under volt
Under volt reset
Under volt delay
Over volt
Over volt reset
Over volt delay
Alt. chg. warning
Battery Undervolts Warning
Battery Undervolts Warning Reset
Battery Undervolts Volts Delay
Battery Overvolts Warning
Battery Overvolts Warning Reset
Battery Overvolts Delay
Charge Alternator Warning
Min
6.0(dis)
6.0
0.0
6.0(dis)
6.0
0.0
6.0(dis)
The parameters in this page are used for the battery voltage low and high alarms and the charge
alternator voltage warning.
30
CANBUS ECU (Engine->CanBus ECU)*9
Min
0
Max Default Unit
7
4 kBaud
Baud rate
Baud Rate:
0 - 20
1 - 50
2 - 100
3 - 125
4 - 250
5 - 500
6 - 800
7 - 1.000
J1939 ECU type
J1939 ECU Type Selection:
0 - Disable
1 - Standard
2 - Volvo EMS2
3 - Volvo EDC4
4 - Perkins
0(dis)
4
0
Device address
Engine cont. address
ECU remote control
Speed control enable
Oil pres cont. enab
Temp. control enable
Speed set point
Speed correction
Device Address
Engine Control Address
ECU Remote Control via J1939
0
255
0
255
ENABL/DISBL
ENABL/DISBL
ENABL/DISBL
ENABL/DISBL
1500 / 1800
0
100
17
0
DISBL
DISBL
DISBL
DISBL
1500
50
Speed Control via J1939
Oil Pressure Control via J1939
Coolant Temperature Control via J1939
Speed Set Point Selection
Speed Correction Value
RPM
%
Baud Rate
It defines the used Baud rate.
Note: All participants on the CAN bus must use the same Baud rate.
J1939 ECU Type Selection
The J1939 interface of this unit can be operated with different ECUs. This parameter determines the
operating mode of the used ECUs.
Note-1: If a Deutz EMR2 or a Deutz EMR3 is utilized, all settings are to be configured as described for
the Volvo EDC4 in this manual. And if a Volvo EDC3 or a Volvo EMS1 is utilized, all settings are to be
configured as described for the Volvo EMS2 in this manual.
Note-2: If this parameter is selected as “disable”, No messages will be sent or received.
ECU Device Address
The unit sends J1939 request and control messages with this ID. It must be changed for different ECU
types according to the following table. The ECU listens only to control messages, if they are sent to the
correct address.
Volvo EMS2
17
Volvo EDC4
3
Perkins
43
Note: Changing above mentioned parameter becomes only effective after restarting the unit.
Engine Control Address
This parameter configures the address of the J1939 ECU, which is controlled.
Note: *9 = Parameters in this table are only available at Trans-MiniAUTO++.CAN
dis = disable
31
ECU Remote Control Via J1939
If this parameter is selected as “Enable”, The unit sends remote control messages to the ECU if the
selected ECU type is supporting the J1939 Remote control Messages. Available messages are engine
start-stop, 50/60 Hz selection or Idle mode. For some ECUs;
Parameter
Remote Start
Remote Stop
50/60 Hz
Selection
Idle Mode
Volvo
EMS2
Yes
Yes
Yes
Volvo
EDC4
No
No
No
Yes
No
Perkins
Standard
No
No
No
No
No
No
No
No
If this parameter is selected as “Disable”, The ECU remote control via the J1939 protocol will be
disabled.
Speed Control via J1939
If this parameter is selected as “Enable”, The speed sensing from J1939 ECU will be used for the
speed (Rpm) failures.
Oil Pressure Control via J1939
If this parameter is selected as “Enable”, The oil pressure sensing from J1939 ECU will be used for the
oil pressure failures and the engine started signal.
Coolant Temperature Control via J1939
If this parameter is selected as “Enable”, The coolant temperature sensing from J1939 ECU will be
used for the coolant temperature failures.
Speed Set Point Selection (50/60 Hz)
This parameter used for to select the requested engine speed as 1500Rpm (50Hz) or 1800Rpm
(60Hz). Note: The scenario; first change the parameter, next wait at least 5 seconds, and then start
the engine.
Speed Correction Value
This parameter can be changed between 0 and 100%. The engine should change the speed as
follows:
0% = rated speed – speed deviation ECU e.g. 1500 – 120 = 1380rpm
50% = rated speed e.g. = 1500rpm
100% = rated speed + speed deviation ECU e.g. 1500 + 120 = 1620rpm
32
CANBUS ERROR SET (Engine->CanBus error set)*10
CAN fault actions
Can Fault Actions:
0- Disable
1- Warning Non-Latching
2- Warning (Alarm Only, No Shutdown)
3- Electrical Trip (Alarm/Off Load Generator
Followed By Shutdown After Cooling)
4- Shutdown (Alarm And Shutdown)
Min
Max
Unit
Default
0(dis)
4
0
CAN fault activation
Can Fault Activation:
0- Active From Starting
1- Active From Safety On
2- Always Active
0
2
0
CAN fault delay
Amber warn.actions
Can Fault Delay
J1939 Amber Warning Lamp Actions:
0- Disable
1- Warning Non-Latching
2- Warning (Alarm Only, No Shutdown)
3- Electrical Trip (Alarm/Off Load Generator
Followed By Shutdown After Cooling)
4- Shutdown (Alarm And Shutdown)
2
250
10
0(dis)
4
0
Amber warn.activation
J1939 Amber Warning Lamp Activation:
0- Active From Starting
1- Active From Safety On
2- Always Active
0
2
2
Amber warn.delay
Red stop actions
J1939 Amber Warning Lamp Delay
J1939 Red Stop Lamp Actions:
0- Disable
1- Warning Non-Latching
2- Warning (Alarm Only, No Shutdown)
3- Electrical Trip (Alarm/Off Load Generator
Followed By Shutdown After Cooling)
4- Shutdown (Alarm And Shutdown)
0
250
2
0(dis)
4
0
Red stop activation
J1939 Red Stop Lamp Activation:
0- Active From Starting
1- Active From Safety On
2- Always Active
0
2
2
Red stop delay
J1939 Red Stop Lamp Delay
0
250
2
Sec
Sec
Sec
Note: *10 = Parameters in this table are only available at Trans-MiniAUTO++.CAN
dis = disable
33
ENGINE MAINTENANCE (Engine->Maintenance)
Running hour interval
Maint.date interval
Eng. stop when maint
Eng.running hour(lsb)
Eng.running hour
Eng.running hour(msb)
Maintenance okay
Running Hours Interval
Maintenance Date Interval
Force Engine Shutdown When Maintenance Is Due
Engine Running Hour (Lsb)
Engine Running Hour
Engine Running Hour(Msb)
Maintenance Okay
Unit
0(dis) 9999
5000 Hour
12
6 Month
0(dis)
ENABL/DISBL DISBL
0 255
0
0 255
0
0
0
14
NO
YES/NO
Min Max
Default
The user can change the engine running hours value by using these parameters (Engine Running
Hour (Lsb) , Engine Running Hour and Engine Running Hour (Msb)).
For example; if the engine running hours was changed 75112 hours, the values of these
parameters was calculated as follows;
Engine Running Hour (Msb) = 75112 / 65536
=1
Intermediate Value = 75112 – (Engine Running Hour (Msb) * 65536)
= 75112 – (1 * 65536)
= 9576.
Engine Running Hour = Intermediate Value / 256
= 9576 / 256
= 37
Engine Running Hour (Lsb) = Intermediate Value – (Engine Running Hour * 256)
= 9576 – (37 * 256)
= 104
LOAD TEST (Engine->Load test)
Disable/enable select
Disable, No Load or On Load Selection
Min
Max
0-DISABLE
1-NO LOAD
2-ON LOAD
Default
Unit
0-DISABLE
Disable, No Load or On Load Selection
DISABLE: Test mode disable.
NO LOAD: The generator will be running without taking the load in test mode.
ON LOAD: The generator will be running with load in test mode.
Note: dis = disable
34
ENGINE GENERAL (Engine->General)
Fuel selection
Engine Fuel Selection
Stop solenoid time
Ignition delay
Gas valve delay
Min. of ignition speed
Choke time
Stop Solenoid Time
Ignition Delay
Gas Valve Delay
Minimum Ignition Speed
Choke Time
Min
Max
Default Unit
0-GAS
1-DIESEL
1-DIESEL
2-GASOLINE
5
99
20
1
99
5
1
99
5
10
1500
200
0.0
30.0
0.8
Sec
Sec
Sec
RPM
Sec
Engine Fuel (Gas/ Diesel/Gasoline) Selection
Gas, Diesel or Gasoline engines can be selected.
Stop Solenoid Time
This timer is used if the unit is configured to operate an Energise to stop engine. It dictates the
duration that the Stop Solenoid output will remain active after the module has detected the engine has
come to rest. If the Stop Solenoid output is not configured, this timer will still operate, preventing an
immediate restart.
Ignition Delay
With gas engines often a purging operation is desired before starting. With the engaging of the starter
the ignition delay is started. If the 'min ignition speed' is reached after expiry of this time, the
configurable relay output 'ignition' is set.
Gas Valve Delay
By setting the ignition relay the gas valve delay is started. After the expiry of the set time as long as the
number of revolutions is higher than the minimum ignition speed, the gas valve is set. When the
necessary engine shutdown process, gas valve is de-energised.
Minimum Ignition Speed
After expiry of the ignition delay the number of revolutions set must be reached, so that the
configurable relay output 'ignition' will be set.
Choke Time
This timer dictates that how long choke output will be active in gasoline engines.
35
36
Starting
Engine
monitoring ON
Gas valve
Starter
Ignition
Start request
Minimum ignition speed
Crank disconnect
magnetic pick-up speed
Rated speed
[RPM]
Unsuccessful
tIT
tR
Minimum ignition speed
will not be reached
tGV
Successful
tD
Start/Stop Diagram for GAS ENGINE
tID
[1/min;RPM]
tR
tID
tGV
tD
5s
Stopping
t[s]
t[s]
t[s]
t[s]
t[s]
t[s]
Interval between 2 start attempts
Ignition delay
Gas valve delay
Engine delayed monitoring
[s]
[s]
[s]
[s]
37
Starting
Engine
monitoring ON
Fuel relay
Starter
Pre-heat
Start request
Crank disconnect
magnetic pick-up speed
Rated speed
[RPM]
2s
tCR
Unsuccessful
tPH
tR
Successful
tD
Start/Stop Diagram for DIESEL ENGINE
tCR
[1/min;RPM]
tPH
tCR
tR
tD
Stopping
t[s]
t[s]
t[s]
t[s]
t[s]
t[s]
Preheating time
Engagement time
Interval between 2 start attempts
Engine delayed monitoring
[s]
[s]
[s]
[s]
38
Starting
Engine
monitoring ON
Fuel relay
Choke
Starter
Pre-heat
Start request
Crank disconnect
magnetic pick-up speed
Rated speed
[RPM]
2s
tCH
tCR
Unsuccessful
tPH
tR
Successful
tD
Start/Stop Diagram for GASOLINE ENGINE
tCH
tCR
[1/min;RPM]
tPH
tCR
tR
tD
tCH
Stopping
t[s]
t[s]
t[s]
t[s]
t[s]
t[s]
Preheating time
Engagement time
Interval between 2 start attempts
Engine delayed monitoring
Choke time
[s]
[s]
[s]
[s]
[s]
4.2.4 Inputs
SENDER INPUTS (Inputs->Sender inputs)
Min
Oil pressure unit
Oil press. input type
Oil Pressure Unit
Oil Pressure Input Type
Oil pressure prealarm
Oil pressure reset
Oil pressure shutdown
Temperature unit
Temp. input type
Oil Pressure Pre-Alarm
Oil Pressure Pre-Alarm Reset
Oil Pressure Shutdown
Coolant Temperature Unit
Coolant Temperature Input Type
High temp. prealarm
High temp. reset
High temp. shutdown
Low temp. warning
Conf. AI unit
Conf. AI type
High Temperature Pre-Alarm
High Temp. Pre-Alarm Reset
High Temperature Shutdown
Low Temperature Warning
Configurable Analog Input Unit
Configurable Analog Input Type
Conf. AI low prealrm
Configurable Analog Input
Low Pre-Alarm
0 (dis)
Conf. AI low reset
Configurable Analog Input
Low Reset
Configurable Analog Input
Low Shutdown
Configurable Analog Input
High Pre-Alarm
Configurable Analog Input
High Reset
Configurable Analog Input
High Shutdown
Configurable Analog Input
control ON
Configurable Analog Input
control OFF
Conf. AI low shutdwn
Conf. AI high prealr
Conf. AI high reset
Conf. AI high shutd.
Conf. AI control ON
Conf. AI control OFF
Max
BAR/PSI/KPA
0 - Not Used (Disable)
1 - Digital NC
2 - Digital NO
3 - VDO 5 BAR
4 - VDO 7 BAR
5 - VDO 10 BAR
6 - DATCON 5 BAR
7 - DATCON 7 BAR
8 - MURPHY 7 BAR
9 - User Configured
0.0 (dis)
0.0
0.0
ºC/ºF
30.0
30.0
30.0
Default
Unit
BAR
3
1.2
1.4
1.0
ºC
3
BAR
BAR
BAR
90
88
95
0 (dis)
%
0 (dis)
C
C
C
C
3000
0 (dis)
%
0
3000
60
%
0 (dis)
3000
0 (dis)
%
0 (dis)
3000
0 (dis)
%
0
3000
90
%
0 (dis)
3000
0 (dis)
%
0 (dis)
3000
0 (dis)
%
0
3000
75
%
0 - Not Used (Disable)
1 - Digital NC
2 - Digital NO
3 - VDO 120 ºC
4 - VDO 150 ºC
5 - DATCON
6 - MURPHY
7 - PT100
8 - User Configured
0 (dis)
0
0
0 (dis)
300
300
300
70
BAR/PSI/KPA/ºC/ºF/%/Lt
0 - Not Used (Disable)
1 - Digital NC
2 - Digital NO
3 - VDO OHM (10-180)
4 - VDO TUBE (90-0)
5 - US OHM (240-33)
6 - GM OHM (0-90)
7 - FORD (73-10)
8 - User Configured
39
Oil Pressure Input Type
This section is used to configure the Oil Pressure sender input.
0-NOT USED: The Oil Pressure input will not be monitored.
1-DIGITAL NC: The Oil pressure input is fed from an engine mounted digital pressure switch. This
switch returns a closed signal during low oil pressure conditions (and engine at rest), once oil pressure
is established the switch will open.
2-DIGITAL NO: The Oil pressure input is fed from an engine mounted digital pressure switch. This
switch returns an open signal during low oil pressure conditions (and engine at rest), once oil pressure
is established the switch will close.
3, 4, 5, 6, 7, 8 and 9: Oil pressure input is connected to a resistive type engine mounted oil pressure
transducer. If this parameter selected as "9-USER CONFIGURED", the user can input the data
manually according to the sensor curve.
Temperature Input Type
This section is used to configure the Coolant Temperature sender input.
0-NOT USED: The Coolant Temperature input will not be monitored.
1-DIGITAL NC: The Coolant Temperature input is fed from an engine mounted digital temperature
switch. This switch returns a closed signal during low temperature, should the temperature rise above
the switch manifacturers trip point the switch contact will open.
2-DIGITAL NO: The Coolant Temperature input is fed from an engine mounted digital temperature
switch. This switch returns an open signal during low temperature, should the temperature rise above
the switch manifacturers trip point the switch contact will close.
3, 4, 5, 6, 7 and 8: The Coolant Temperature input is connected to a resistive type engine mounted
temperature transducer. If this parameter selected as "8-USER CONFIGURED", the user can input the
data manually according to the sensor curve.
Configurable Analog Input Type
This section is used to configure the Configurable Analog Input sender input.
0-NOT USED: The Configurable Analog Input will not be monitored.
1-DIGITAL NC: open for low Configurable Analog Input.
2-DIGITAL NO: close for low Configurable Analog Input.
3, 4, 5, 6, 7 and 8: The Configurable Analog Input input is connected to a resistive type engine
mounted level/temperature/pressure transducer. If this parameter selected as "8-USER
CONFIGURED", the user can input the data manually according to the sensor curve.
40
SENDER LINEARISATION (Inputs->Sender linearisation)
Oil pressure sender 1
Oil pressure 1
Oil pressure sender 2
Oil pressure 2
Oil pressure sender 3
Oil pressure 3
Oil pressure sender 4
Oil pressure 4
Oil pressure sender 5
Oil pressure 5
Oil pressure sender 6
Oil pressure 6
Oil pressure sender 7
Oil pressure 7
Oil pressure sender 8
Oil pressure 8
Oil pressure sender 9
Oil pressure 9
Oil pressure sender 10
Oil pressure 10
Temperature sender 1
Temperature 1
Temperature sender 2
Temperature 2
Temperature sender 3
Temperature 3
Temperature sender 4
Temperature 4
Temperature sender 5
Temperature 5
Temperature sender 6
Temperature 6
Temperature sender 7
Temperature 7
Temperature sender 8
Temperature 8
Temperature sender 9
Temperature 9
Temperature sender 10
Temperature 10
Conf. AI sender 1
Conf. AI value 1
Conf. AI sender 2
Conf. AI value 2
Conf. AI sender 3
Conf. AI value 3
Conf. AI sender 4
Conf. AI value 4
Conf. AI sender 5
Conf. AI value 5
Oil Pressure Sender Point-1
Oil Pressure Point-1
Oil Pressure Sender Point-2
Oil Pressure Point-2
Oil Pressure Sender Point-3
Oil Pressure Point-3
Oil Pressure Sender Point-4
Oil Pressure Point-4
Oil Pressure Sender Point-5
Oil Pressure Point-5
Oil Pressure Sender Point-6
Oil Pressure Point-6
Oil Pressure Sender Point-7
Oil Pressure Point-7
Oil Pressure Sender Point-8
Oil Pressure Point-8
Oil Pressure Sender Point-9
Oil Pressure Point-9
Oil Pressure Sender Point-10
Oil Pressure Point-10
Temperature Sender Point-1
Temperature Point-1
Temperature Sender Point-2
Temperature Point-2
Temperature Sender Point-3
Temperature Point-3
Temperature Sender Point-4
Temperature Point-4
Temperature Sender Point-5
Temperature Point-5
Temperature Sender Point-6
Temperature Point-6
Temperature Sender Point-7
Temperature Point-7
Temperature Sender Point-8
Temperature Point-8
Temperature Sender Point-9
Temperature Point-9
Temperature Sender Point-10
Temperature Point-10
Configurable Analog Input Sender Point-1
Configurable Analog Input Point-1
Configurable Analog Input Sender Point-2
Configurable Analog Input Point-2
Configurable Analog Input Sender Point-3
Configurable Analog Input Point-3
Configurable Analog Input Sender Point-4
Configurable Analog Input Point-4
Configurable Analog Input Sender Point-5
Configurable Analog Input Point-5
Min
0
0.0
0
0.0
0
0.0
0
0.0
0
0.0
0
0.0
0
0.0
0
0.0
0
0.0
0
0.0
0
0
0
0
0
0
0
0
0
0
0
0
0
0
0
0
0
0
0
0
0
0
0
0
0
0
0
0
0
0
Max Default
Unit
1300
30.0
1300
30.0
1300
30.0
1300
30.0
1300
30.0
1300
30.0
1300
30.0
1300
30.0
1300
30.0
1300
30.0
1300
300
1300
300
1300
300
1300
300
1300
300
1300
300
1300
300
1300
300
1300
300
1300
300
1300
3000
1300
3000
1300
3000
1300
3000
1300
3000
R
BAR
R
BAR
R
BAR
R
BAR
R
BAR
R
BAR
R
BAR
R
BAR
R
BAR
R
BAR
R
ºC
R
ºC
R
ºC
R
ºC
R
ºC
R
ºC
R
ºC
R
ºC
R
ºC
R
ºC
R
%
R
%
R
%
R
%
R
%
11
0.0
29
0.5
47
1.0
65
1.5
82
2.0
100
2.5
117
3.0
134
3.5
151
4.0
184
5.0
291
40
197
50
134
60
97
70
70
80
51
90
38
100
29
110
22
120
15
140
10
0
30
11
50
22
70
33
90
44
41
Conf. AI
Conf. AI
Conf. AI
Conf. AI
Conf. AI
Conf. AI
Conf. AI
Conf. AI
Conf. AI
Conf. AI
sender 6
value 6
sender 7
value 7
sender 8
value 8
sender 9
value 9
sender 10
value 10
Configurable Analog Input Sender Point-6
Configurable Analog Input Point-6
Configurable Analog Input Sender Point-7
Configurable Analog Input Point-7
Configurable Analog Input Sender Point-8
Configurable Analog Input Point-8
Configurable Analog Input Sender Point-9
Configurable Analog Input Point-9
Configurable Analog Input Sender Point-10
Configurable Analog Input Point-10
0
0
0
0
0
0
0
0
0
0
1300
3000
1300
3000
1300
3000
1300
3000
1300
3000
110
55
130
66
150
77
170
88
190
100
R
%
R
%
R
%
R
%
R
%
42
CONF. INPUT-1 (Inputs->Conf. input-1)
Dis,user conf.or list
Polarity
0- Disable
1- User Configured
2- Select From List
0- Normally Open (Close To Activate)
1- Normally Close (Open To Activate)
Min Max Default Unit
0(dis)
2
2
0
1
1
Indication
If User Configured
0- Status
1- Warning Non-Latching
2- Warning Latching
3- Electrical Trip
4- Shutdown
0
4
0
Activation
If User Configured
0- Active From Starting
1- Active From Safety On
2- Always Active
0
2
2
Select from list
If Select From List
0-Remote Start On Load
1-Remote Start Off Load
2-Reserved
3-Reserved
4-Reserved
5-Reserved
6-Simulate Auto Button
7-Simulate Test Button
8-Reserved
9-Simulate Start Button
10-Simulate Stop Button
11-Generator Closed Auxiliary
12-Generator Load Inhibit
13-Reserved
14-Reserved
15-Auto Restore Inhibit
16-Auto Start Inhibit
17-Panel Lock
18-Reserved
19-Reserved
20-Reserved
21-Reserved
22-Remote Inhibit
23-Being Found Alive
24-Reserved
25-Low Oil Pressure
26-High Temperature
27-Emergency Stop
28-Low Oil Level
0
28
27
Active delay
Input active delay
0
250
0
Sec
Note: dis = disable
43
CONF. INPUT-2 (Inputs->Conf. input-2)
Dis,user conf.or list
Polarity
0- Disable
1- User Configured
2- Select From List
0- Normally Open (Close To Activate)
1- Normally Close (Open To Activate)
Min Max Default Unit
0(dis)
2
2
0
1
0
Indication
If User Configured
0- Status
1- Warning Non-Latching
2- Warning Latching
3- Electrical Trip
4- Shutdown
0
4
0
Activation
If User Configured
0- Active From Starting
1- Active From Safety On
2- Always Active
0
2
2
Select from list
If Select From List
0-Remote Start On Load
1-Remote Start Off Load
2-Reserved
3-Reserved
4-Reserved
5-Reserved
6-Simulate Auto Button
7-Simulate Test Button
8-Reserved
9-Simulate Start Button
10-Simulate Stop Button
11-Generator Closed Auxiliary
12-Generator Load Inhibit
13-Reserved
14-Reserved
15-Auto Restore Inhibit
16-Auto Start Inhibit
17-Panel Lock
18-Reserved
19-Reserved
20-Reserved
21-Reserved
22-Remote Inhibit
23-Being Found Alive
24-Reserved
25-Low Oil Pressure
26-High Temperature
27-Emergency Stop
28-Low Oil Level
0
28
0
Active delay
Input active delay
0
250
0
Sec
Note: dis = disable
44
CONF. INPUT-3 (Inputs->Conf. input-3)
Dis,user conf.or list
Polarity
0- Disable
1- User Configured
2- Select From List
0- Normally Open (Close To Activate)
1- Normally Close (Open To Activate)
Min Max Default Unit
0(dis)
2
0
0
1
0
Indication
If User Configured
0- Status
1- Warning Non-Latching
2- Warning Latching
3- Electrical Trip
4- Shutdown
0
4
0
Activation
If User Configured
0- Active From Starting
1- Active From Safety On
2- Always Active
0
2
2
Select from list
If Select From List
0-Remote Start On Load
1-Remote Start Off Load
2-Reserved
3-Reserved
4-Reserved
5-Reserved
6-Simulate Auto Button
7-Simulate Test Button
8-Reserved
9-Simulate Start Button
10-Simulate Stop Button
11-Generator Closed Auxiliary
12-Generator Load Inhibit
13-Reserved
14-Reserved
15-Auto Restore Inhibit
16-Auto Start Inhibit
17-Panel Lock
18-Reserved
19-Reserved
20-Reserved
21-Reserved
22-Remote Inhibit
23-Being Found Alive
24-Reserved
25-Low Oil Pressure
26-High Temperature
27-Emergency Stop
28-Low Oil Level
0
28
4
Active delay
Input active delay
0
250
5
Sec
Note: dis = disable
45
CONFIGURABLE INPUTS SELECTIONS
0 REMOTE START ON LOAD
In AUTO mode, if one of the configurable inputs are selected as 0 (Remote Start On Load) and this input is
active, then the unit will perform the start sequence and transfer load to the generator. If the input is passive, the
unit will perform the stop sequence.
1 REMOTE START OFF LOAD
If this input is active, operation will be similar to the ‘Remote Start On Load’ function except that the generator will
not be instructed to take the load. This function can be used where an engine only run is required e.g. for
exercise.
2 RESERVED
3 RESERVED
4 RESERVED
5 RESERVED
6 SIMULATE AUTO BUTTON
This input mimic's the operation of the 'Auto' button and is used to provide a remotely located Auto mode push
button.
7 SIMULATE TEST BUTTON
This input mimic's the operation of the 'Test' button and is used to provide a remotely located Test mode push
button.
8 RESERVED
9 SIMULATE START BUTTON
This input mimic's the operation of the 'Start' button and is used to provide a remotely located start push button.
10 SIMULATE STOP BUTTON
This input mimic's the operation of the 'Stop' button and is used to provide a remotely located Stop push button.
11 GENERATOR CLOSED AUXILIARY
This input is used to provide feedback to allow the unit to give true indication of the contactor or circuit breaker
switching status. It should be connected to the generator load switching device auxiliary contact.
12 GENERATOR LOAD INHIBIT
This input is used to prevent the unit from loading the generator. If the generator is already on load, activating
this input will cause the unit to unload the generator. Removing the input will allow the generator to be loaded
again. Note: This input only operates to control the generator-switching device if the unit load switching logic is
attempting load the generator.
13 RESERVED
14 RESERVED
15 AUTO RESTORE INHIBIT
When module in the AUTO mode. In the event of a remote start, the generator will be instructed to start and take
load. On removal of the remote start signal, the module will continue to run the generator on load until this AUTO
RESTORE INHIBIT input is removed. Once the input is removed the unit will take off the load and supply and
follow a normal generator stop sequence.
16 AUTO START INHIBIT
This input is used to provide an over-ride function to prevent the unit from starting the generator in the event of a
remote start occurring. If this input is active and a remote start signal occurs the unit will not give a start
command to the generator. If this input signal is then removed, the unit will operate as if a remote start has
occurred, starting and loading the generator. If the 'Auto Start Inhibit' signal become active once more it will be
ignored until the unit shutdown the generator.
46
17 PANEL LOCK
This input is used to provide security to the installation. If the panel lock input is active, the unit will not respond to
operation of the mode select or start buttons. This allows the unit to be placed into a spesific mode (such as
Auto) and than secured. The operation of the unit is not affected and the operator will still be able to view the
various instrumentation pages etc. Note: External control sources (i.e. Simulate Start Button) are not affected by
the panel lock input and will continue to operate normally.
18 RESERVED
19 RESERVED
20 RESERVED
21 RESERVED
22 REMOTE INHIBIT
In AUTO mode, if one of the configurable inputs are selected as 22 (Remote Inhibit) and this input is active, the
module will inhibit the generator for starting. In the other hand, if this input is active while the generator was
starting, the module will stop the generator.
23 BEING FOUND ALIVE
When this input is active, controlling the engine remotely is not possible.
24 RESERVED
25 LOW OIL PRESSURE
This input is used as the oil pressure failure input.
26 HIGH TEMPERATURE
This input is used as the temperature failure input.
27 EMERGENCY STOP
This input is used as the emergency stop input.
28-LOW OIL LEVEL
This input is used as the oil level failure input. It won’t be checked while starting or stopping attemps.
47
4.2.5 Outputs
CONF. OUTPUT-1 (Outputs->Conf. output-1)
Min Max Default Unit
Polarity
0- Normally Open (Close To Activate)
1- Normally Close (Open To Activate)
0
1
0
Function
0-NOT USED
1-AIR FLAP CONTROL
2-ALARM RESET
3-AUDIBLE ALARM
4-AUTO START INHIBIT
5-RESERVED
6-BATTERY HIGH VOLTAGE
7-BATTERY LOW VOLTAGE
8-RESERVED
9-CAN ECU POWER (only available at Trans-MiniAUTO++.CAN)
10-CAN ECU STOP (only available at Trans-MiniAUTO++.CAN)
11-CHARGE ALTERNATOR FAILURE
12-COMMON ALARM
13-COMMON ELECTRICAL TRIP ALARM
14-COMMON SHUTDOWN ALARM
15-COMMON WARNING ALARM
16-COOLING FAN AFTER START
17-COOLING FAN AFTER STOP
18-COOLANT TEMPERATURE HIGH PRE-ALARM
19-COOLANT TEMPERATURE HIGH SHUTDOWN
20-COOLING DOWN TIMER IN PROGRESS
21-CRANK RELAY ENERGISED
22-DELAYED ALARMS ACTIVE
23-DIGITAL INPUT1 ALARM
24-DIGITAL INPUT2 ALARM
25-DIGITAL INPUT3 ALARM
26-RESERVED
27-RESERVED
28-RESERVED
29-RESERVED
30-RESERVED
31-RESERVED
32-RESERVED
33-RESERVED
34-RESERVED
35-RESERVED
36-RESERVED
37-RESERVED
38-RESERVED
39-EMERGENCY STOP
40-FAIL TO START ALARM
41-FAIL TO STOP ALARM
42-CONFIGURABLE ANALOG INPUT CONTROL
43-FUEL RELAY ENERGISED
44-GAS ENGINE IGNITION OUTPUT
45-GENERATOR AT REST
46-GENERATOR AVAILABLE
47-GENERATOR CLOSED AUXILIARY
48-GENERATOR FAILED TO CLOSE
49-GENERATOR FAILED TO OPEN
50-GENERATOR HIGH FREQUENCY PRE-ALARM
51-GENERATOR HIGH FREQUENCY SHUTDOWN
52-GENERATOR HIGH VOLTAGE PRE-ALARM
53-GENERATOR HIGH VOLTAGE SHUTDOWN
54-GENERATOR LOAD INHIBIT
55-GENERATOR LOW FREQUENCY PRE-ALARM
56-GENERATOR LOW FREQUENCY SHUTDOWN
57-GENERATOR LOW VOLTAGE PRE-ALARM
58-GENERATOR LOW VOLTAGE SHUTDOWN
59-GENERATOR STOPPING
60-GENERATOR OPEN BREAKER
61-HORN OUTPUT LATCHED
62-HORN OUTPUT PULSED
63-LAMP TEST
64-RESERVED
65-LOSS OF MAGNETIC PICK-UP SPEED SIGNAL (only available at Trans-MiniAUTO++.MPU)
66-LOW TEMPERATURE
67-MAINTENANCE DUE ALARM
68-RESERVED
69-RESERVED
70-RESERVED
71-RESERVED
72-RESERVED
73-RESERVED
74-RESERVED
75-RESERVED
76-RESERVED
77-RESERVED
78-NO LOADING COMMAND
79-OIL PRESSURE LOW PRE-ALARM
80-OIL PRESSURE LOW SHUTDOWN
81-CONFIGURABLE ANALOG INPUT HIGH PREALARM
82-CONFIGURABLE ANALOG INPUT HIGH SHUTDOWN
83-OVER CURRENT PRE-ALARM
84-OVER CURRENT
85-OVER POWER PRE-ALARM
86-OVER POWER SHUTDOWN
87-OVERSPEED PRE-ALARM
88-OVERSPEED SHUTDOWN
89-PANEL LOCK
90-PRE-HEAT(during preheat timer)
91-PRE-HEAT(until end of cranking)
92-PRE-HEAT(until end of warming)
93-PRE-HEAT(until end safety on)
94-REMOTE START PRESENT
95-REMOTE STOP DELAY IN PROGRESS
96-SHORT CIRCUIT
97-SMOKE LIMITING
98-STARTING ALARM
99-STARTING ALARMS ARMED
100-STOP RELAY ENERGISED
101-SYSTEM IN AUTO MODE
102-SYSTEM IN MANUAL MODE
103-SYSTEM IN STOP MODE
104-SYSTEM IN TEST MODE
105-UNDER CURRENT PRE-ALARM
106-UNDER CURRENT
107-UNDER POWER PRE-ALARM
108-UNDER POWER SHUTDOWN
109-UNDERSPEED PRE-ALARM
110-UNDERSPEED SHUTDOWN
111-WAITING FOR GENERATOR
112-RESERVED
113-LOAD SUPPLY FROM GENERATOR
114-RESERVED
115-CONFIGURABLE ANALOG INPUT LOW PRE-ALARM
116-CONFIGURABLE ANALOG INPUT LOW SHUTDOWN
117-RESERVED
118-RESERVED
119-RESERVED
120-RESERVED
121-CHOKE ACTIVE
122-REMOTE CONTROL ACTIVE
0 122
43
48
CONF. OUTPUT-2 (Outputs->Conf. output-2)
Min Max Default Unit
Polarity
0- Normally Open (Close To Activate)
1- Normally Close (Open To Activate)
0
1
0
Function
The same as Configurable Output-1 options
0 122
21
CONF. OUTPUT-3 (Outputs->Conf. output-3)
Min Max Default Unit
Polarity
0- Normally Open (Close To Activate)
1- Normally Close (Open To Activate)
0
1
0
Function
The same as Configurable Output-1 options
0 122
62
CONF. OUTPUT-4 (Outputs->Conf. output-4)
Min Max Default Unit
Polarity
0- Normally Open (Close To Activate)
1- Normally Close (Open To Activate)
0
1
0
Function
The same as Configurable Output-1 options
0 122
68
CONF. OUTPUT-5 (Outputs->Conf. output-5)
Min Max Default Unit
Polarity
0- Normally Open (Close To Activate)
1- Normally Close (Open To Activate)
0
1
0
Function
The same as Configurable Output-1 options
0 122
12
49
CONFIGURABLE OUTPUTS SELECTIONS
0 NOT USED
Output is not used
1 AIR FLAP CONTROL
Normally used to control an air flap, this output becomes active upon an Engine shutdown failure situation.
Inactive when the set has come to rest.
2 ALARM RESET
The output indicates that an alarm reset being performed. Once the alarm reset has been completed, the output
become inactive again. The output could be used to give an external reset signal to external systems.
3 AUDIBLE ALARM
The output indicates that the internal sounder is operating. It may be use for external sounder.
4 AUTO START INHIBIT
This output indicates that a digital input that has been configured as 'auto start inhibit' is active.
5 RESERVED
6 BATTERY HIGH VOLTAGE
This output indicates that a battery high voltage alarm has occurred.
7 BATTERY LOW VOLTAGE
This output indicates that a battery low voltage alarm has occurred.
8 RESERVED
9 CAN ECU POWER (only available at Trans-MiniAUTO++.CAN)
This output normally used to turn on the ECU (sometimes via an external slave relay). Some engine ECUs are
permanently powered in which case the ECU Power output is used to give input to a Run (or similarly named)
input on the ECU.
10 CAN ECU STOP (only available at Trans-MiniAUTO++.CAN)
This output used to give input to a Stop (or similarly named) input on the ECU. This is used as a backup stop
system should the ECU Data link fail. In this instance, it is not possible to stop the engine using a data command
as the link is not operative. As a backup, the STOP signal is given to the engine via a separate hardwired
connection.
11 CHARGE ALTERNATOR FAILURE
This output indicates that a charging alternator failure has occurred.
12 COMMON ALARM
This output indicates that a warning, electrical trip or shutdown alarm has been activated.
13 COMMON ELECTRICAL TRIP ALARM
This output indicates that an electrical trip alarm has been activated. This output can only be reset by removal of
the fault and by then pressing the RESET button.
14 COMMON SHUTDOWN ALARM
This output indicates that a shutdown alarm has been activated. This output can only be reset by removal of the
fault and by then pressing the RESET button or by using an external 'alarm reset' input.
15 COMMON WARNING ALARM
This output indicates that a warning alarm has been activated. This output is normally self-resetting on removal
of the fault.
16 COOLING FAN AFTER START
This output should energise as soon as engine has started so the fan should be running when the engine is
running. This output should continue to operate for Cooling Fan Time parameter after engine has stopped.
17 COOLING FAN AFTER STOP
This output indicates that can be made to energise for Cooling Fan Time parameter after the engine shuts down
(to run an electric cooling fan on the radiator).
50
18 COOLANT TEMPERATURE HIGH PRE-ALARM
This output indicates that a high engine coolant temperature warning (pre-alarm) has occurred.
19 COOLANT TEMPERATURE HIGH SHUTDOWN
This output indicates that a high engine coolant temperature shutdown has occurred.
20 COOLING DOWN TIMER IN PROGRESS
This output source will be active when the cooling off-load timer is running.
21 CRANK RELAY ENERGISED
The output mimics the operation of the crank relay. Can be used to control external logic circuitry.
22 DELAYED ALARMS ACTIVE
The output indicates that the delayed alarms now enabled. Can be used to control external logic circuitry.
23 DIGITAL INPUT1 ALARM
This output indicates that digital input 1 alarm has occurred.
24 DIGITAL INPUT2 ALARM
This output indicates that digital input 2 alarm has occurred.
25 DIGITAL INPUT3 ALARM
This output indicates that digital input 3 alarm has occurred.
26 RESERVED
27 RESERVED
28 RESERVED
29 RESERVED
30 RESERVED
31 RESERVED
32 RESERVED
33 RESERVED
34 RESERVED
35 RESERVED
36 RESERVED
37 RESERVED
38 RESERVED
39 EMERGENCY STOP
This output indicates that an emergency stop alarm has occurred.
40 FAIL TO START ALARM
This output indicates that the engine has not started after the specified number of attempts.
41 FAIL TO STOP ALARM
This output indicates that the generator has failed to stop within the selected time
42 CONFIGURABLE ANALOG INPUT CONTROL
Becomes active when the Analog Input falls below the "ANALOG INPUT ON" setting. If the output is already
active it will become inactive when the Analog Input is above the “ANALOG INPUT OFF" setting.
43 FUEL RELAY ENERGISED
The output mimics the operation of the fuel relay. It can be used to control external logic circuitry.
51
44 GAS ENGINE IGNITION OUTPUT
With the engaging of the starter the ignition delay is started. If the ‘minimum ignition speed’ is reached after
expiry of this time, the configurable relay output ‘ignition’ is set. When the necessary engine shutdown process,
firstly gas valve is de-energised. Then ignition output is de-energised that after 5 seconds when the engine
speed become lower than ‘minimum ignition speed’
45 GENERATOR AT REST
The output indicates that the generator is not running.
46 GENERATOR AVAILABLE
This output indicates when the generator is ready to accept load, i.e. after safety on and warm up timers have
timed out.
47 GENERATOR CLOSED AUXILIARY
This output indicates that a digital input that has been configured as 'generator closed auxiliary' is active.
48 GENERATOR FAILED TO CLOSE
This output source has intended to be used to indicate a failure of the generator contactor or breaker. It can only
be used if the unit is configured to use 'generator closed auxiliary' feedback.
49 GENERATOR FAILED TO OPEN
This output source has intended to be used to indicate a failure of the generator contactor or breaker. It can only
be used if the unit is configured to use 'generator closed auxiliary' feedback.
50 GENERATOR HIGH FREQUENCY PRE-ALARM
This output indicates that a generator high frequency warning (pre-alarm) has occurred.
51 GENERATOR HIGH FREQUENCY SHUTDOWN
This output indicates that a generator high frequency shutdown has occurred.
52 GENERATOR HIGH VOLTAGE PRE-ALARM
This output indicates that a generator high voltage warning (pre-alarm) has occurred.
53 GENERATOR HIGH VOLTAGE SHUTDOWN
This output indicates that a generator high voltage shutdown has occurred.
54 GENERATOR LOAD INHIBIT
This output indicates that a digital input has been configured as 'generator load inhibit' is active.
55 GENERATOR LOW FREQUENCY PRE-ALARM
This output indicates that a generator low frequency warning (pre-alarm) has occurred.
56 GENERATOR LOW FREQUENCY SHUTDOWN
This output indicates that a generator low frequency shutdown has occurred.
57 GENERATOR LOW VOLTAGE PRE-ALARM
This output indicates that a generator low voltage warning (pre-alarm) has occurred.
58 GENERATOR LOW VOLTAGE SHUTDOWN
This output indicates that a generator low voltage shutdown has occurred.
59 GENERATOR STOPPING
This output indicates that the engine has been instructed to stop but has not come to rest.
60 GENERATOR OPEN BREAKER
This output used to control the load switching device. For Details see: "BREAKERS Page" section.
61 HORN OUTPUT LATCHED
This output indicates that the latched horn alarm has occurred.
62 HORN OUTPUT PULSED
This output indicates that the pulsed horn alarm has occurred.
63 LAMP TEST
This output indicates that the module is performing a lamp test.
64 RESERVED
52
65 LOSS OF MAGNETIC PICK-UP SPEED SIGNAL(only available at Trans-MiniAUTO++.MPU)
This output indicates that the magnetic pick up signal is not sufficient to be used by the unit for speed monitoring.
The alarm can only operate if the speed signal fails to appearduring cranking. It is disabled if ‘multiple attempts to
engage’ is selected. If the MPU fails during engine running this would result in an under speed alarm.
66 LOW TEMPERATURE
This output indicates that a low temperature warning has occurred.
67 MAINTENANCE DUE ALARM
This output indicates that the generator is now due for maintenance either because it has used all the available
running hours or the periodic maintenance time has expired. To clear the output a maintenance reset must be
performed.
68 RESERVED
69 RESERVED
70 RESERVED
71 RESERVED
72 RESERVED
73 RESERVED
74 RESERVED
75 RESERVED
76 RESERVED
77 RESERVED
78 NO LOADING COMMAND
This output indicates that the unit is not calling of the generator contactor or breaker to be closed. Should the unit
close the generator contactor this output will become inactive.
79 OIL PRESSURE LOW PRE-ALARM
This output indicates that a low oil pressure warning (pre-alarm) has occurred.
80 OIL PRESSURE LOW SHUTDOWN
This output indicates that a low oil pressure shutdown has occurred.
81 CONFIGURABLE ANALOG INPUT HIGH PRE-ALARM
This output indicates that a high analog input warning (pre-alarm) has occurred.
82 CONFIGURABLE ANALOG INPUT HIGH SHUTDOWN
This output indicates that a high analog input shutdown has occurred.
83 OVER CURRENT PRE-ALARM
This output indicates that the over current pre-alarm has been reached.
84 OVER CURRENT ALARM
This output indicates that the over current trip level has been reached.
85 OVER POWER PRE-ALARM
This output indicates that the over power pre-alarm has been reached.
86 OVER POWER SHUTDOWN
This output indicates that the over power shutdown has been reached.
87 OVER SPEED PRE-ALARM
This output indicates that the over speed warning (pre-alarm) has occurred.
88 OVER SPEED SHUTDOWN
This output indicates that the over speed shutdown has occurred.
53
89 PANEL LOCK
This output indicates that the unit ‘panel lock’ is active. If the panel lock input is active, the unit will not respond to
operation of the Mode select or start buttons. This allows the unit to be placed into a specific mode (such as
auto) and then secured.
90 PRE-HEAT(during preheat timer)
The output controls the pre-heater. Pre-heat output is available for the duration of pre-heat timer, which
terminates prior to cranking.
91 PRE-HEAT(until end of cranking)
The output controls the pre-heater. As 'Pre-heat (during pre-heat timer)' mode but pre-heat is also available
during cranking.
92 PRE-HEAT(until end of warming)
The output controls the pre-heater. As 'Pre-heat (until safety on)' but pre-heat continues to be available until the
warm-up timer has elapsed.
93 PRE-HEAT(until end safety on)
The output controls the pre-heater. As 'Pre-heat (until end of cranking)' but pre-heat is also available while
waiting for the delayed alarms to become active.
94 REMOTE START PRESENT
This output indicates that a digital input that has been configured as 'remote start' is active. This output could be
used to pass the remote start signal on to else where in the control system.
95 REMOTE STOP DELAY IN PROGRESS
This output source will be active to indicate that the return timer is running.
96 SHORT CIRCUIT
This output indicates that the module has detected a short circuit on the generator output.
97 SMOKE LIMITING
This output is used to supply a smoke-limiting signal to an Electronic Governor to limit smoke emissions on startup. It is used in conjunction with the Smoke limit timer (Idle mode timer) settings. Once the timer has expired, the
Smoke limit output will cease to operate allowing the engine to accelerate to normal running speed.
98 STARTING ALARM
This output is used to supply an external sounder with a signal that the engine is about to start. The output will be
active during the start delay and pre-heat timer (if used).
99 STARTING ALARMS ARMED
The output indicates that the starting alarms are now enabled. It can be used to control external logic circuitry.
Starting alarms are armed as soon as the unit commences starting of the engine and remain armed until the
engine at rest.
100 STOP RELAY ENERGISED
The output mimics the operation of the stop relay. Can be used to control external logic circuitry.
101 SYSTEM IN AUTO MODE
The output indicates that the unit is in the Auto mode.
102 SYSTEM IN MANUAL MODE
The output indicates that the unit is in the Manual mode.
103 SYSTEM IN STOP MODE
The output indicates that the unit is in the Stop mode.
104 SYSTEM IN TEST MODE
The output indicates that the unit is in the Test mode.
105 UNDER CURRENT PRE-ALARM
This output indicates that the under current pre-alarm has been reached.
106 UNDER CURRENT ALARM
This output indicates that the under current trip level has been reached.
54
107 UNDER POWER PRE-ALARM
This output indicates that the under power pre-alarm has been reached.
108 UNDER POWER SHUTDOWN
This output indicates that the under power shutdown has been reached.
109 UNDER SPEED PRE-ALARM
This output indicates that an under speed warning (pre-alarm) has occurred.
110 UNDER SPEED SHUTDOWN
This output indicates that an under speed shutdown has occurred.
111 WAITING FOR GENERATOR
This output indicates that the engine has been instructed to start but has not yet become available. Once the
generator becomes available this output will be in-active.
112 RESERVED
113 LOAD SUPPLY FROM GENERATOR
This output indicates that the load is supplying from generator.
114 RESERVED
115 CONFIGURABLE ANALOG INPUT LOW PRE-ALARM
This output indicates that a low configurable analog input-1 warning (pre-alarm) has occurred.
116 CONFIGURABLE ANALOG INPUT LOW SHUTDOWN
This output indicates that a low analog input-1 shutdown has occurred.
117 RESERVED
118 RESERVED
119 RESERVED
120 RESERVED
121 CHOKE ACTIVE
This ouput becomes active everytime generator cranks and stays active until the choke time expires.
122 REMOTE CONTROL ACTIVE
This output indicates that the engine is being controled remotely.
55
4.2.6 Timers
START TIMERS (Timers->Start timers)
Remote start delay
Pre-heat
Pre-heat bypass
Safety on delay
Warming up time
Horn duration
Chg. excitation time
Cooling fan time
Idle mode time
Idle mode time off
Remote Start Delay
Pre-Heat
Pre-Heat Bypass
Safety On Delay
Warmup Time
Horn Duration
Charge Excitation Time
Cooling Fan Time
Idle Mode Time (Smoke Limiting)
Idle Mode Time Off (Smoke Limiting Off)
Min
Max Default
0
3600
0
250
0
250
0
99
0
250
0 (dis)
999
0 99(cont)
0
250
0 (dis)
3600
0
250
4
3
0
5
3
60
15
180
dis
5
Unit
Sec
Sec
Min
Sec
Sec
Sec
Sec
Sec
Sec
Sec
Remote Start Delay
This timer dictates how long the unit will wait after it has received a remote start signal before it will
attempt to start. This prevent un-necessary starting on a fluctuating mains supply etc.
Pre-Heat
This timer dictates the duration that the pre-heat output will be active before an attempt is made to
start the engine. Once this timer is expired cranking will commence.
Pre-Heat Bypass
This feature allows the unit to start a hot engine without performing an un-necessary pre-heat delay.
The bypass timer is triggered by the generator starting and actually being loaded. If the generator
started but does not achieve loading then the timer will not be triggered. The bypass timer is initiated
once the engine has come to rest. If any attempts to start are requested within the duration of the
bypass timer the start sequence will bypass the pre-heat timer.
Safety On Delay
This timer dictates how long the unit will ignore the Low Oil Pressure, High Engine Temperature,
Underspeed, Undervolts and any other inputs configured as active from safety on. It allows the values
such as oil pressure to rise to their operating values on starting without triggering an alarm. Once the
timer has expired all alarm conditions are monitored again. If configured to use 'fast loading', should all
the monitored conditions, such as oil pressure, come to expected state prior to the end of the safety on
timer, the timer will be terminated prematurely ensuring maximum protection as soon as possible.
Warmup Time
This timer is initiated once the engine is up and running. It delays loading the generator until it has
stabilised. Once this timer is expired the 'Close generator' signal will be given and the generator is
available to be loaded.
Horn Duration
This timer dictates how long the horn will work after the last error detected. Once after this timer ended
unit will do horn reset.
Charge Excitation Time
Charge excitation was selectable as momentary / continuous operation.This timer dictates how long
the Charge excitation will active.
Note: dis = disable
cont = continuous
56
Cooling Fan Time
This timer dictates how long the Cooling Fan will continue to operate.
Idle Mode Time (Smoke Limiting)
This is the amount of time that the smoke limiting output will remain active for once the engine has
started. While the smoke limiting output is active the engine will be held at a reduced speed to
minimise smoke emissions on start-up. (Only if fitted with an appropriate Electronic Control Module).
Once the timer has expired the engine will be allowed to accelerate up to its normal operating speed.
Idle Mode Time Off (Smoke Limiting Off)
This timer is started after the Idle mode timer (smoke limit timer) was expired. This is to allow the
engine to accelerate to its normal running speed without triggering an underspeed alarm, etc.
STOPPING TIMERS (Timers->Stopping timers)
Remote stop delay
Cooling time
Fail to stop delay
Remote Stop Delay
Cooling Time
Fail To Stop Time
Min Max Default
0 250
0 (dis) 3600
15
99
4
60
30
Unit
Sec
Sec
Sec
Remote Stop Delay
This timer dictates how long the unit will wait after it has received a remote stop signal before it will
attempt to stop. This prevent un-necessary stopping on a fluctuating mains supply etc.
Cooling Timer
This is the time the generator is to run off-load once the load transfer signal has ceased. This gives the
engine time to cool down before shutdown.
Fail To Stop Time
Once the unit has given a shutdown signal to the engine it expects the engine to come to rest. It
monitors the Oil pressure and speed sensing sources and if they still indicate engine movement when
this timer expires a 'Fail To Stop' alarm signal is generated.
Note: dis = disable
57
4.2.7 User Adjustment
GEN. VOLTAGE OFFSET (User adjustment->Gen. voltage offset)
Gen. V1 offset
Generator V1 Offset
Gen. V2 offset
Generator V2 Offset
Gen. V3 offset
Generator V3 Offset
Min
CURRENT OFFSET (User adjustment->Current offset)
Current I1 offset
Current I1 Offset
Current I2 offset
Current I2 Offset
Current I3 offset
Current I3 Offset
Min
BATTERY&CHRG GEN.VOL (User adjustment->Battery&chrg gen.vol)
Batt.volt offset
Battery Voltage Offset
Gen.chg.volt offset
Charge Generator Voltage Offset
Min
SENDER INPUTS OFFSET (User adjustment->Sender inputs offset)
Oil Pressure offset
Oil Pressure Offset
Temperature offset
Coolant Temperature Offset
Conf. AI offset
Configurable Analog Input Offset
Min
-20
-20
-20
-20
-20
-20
-5.0
-5.0
Max Default
20
20
20
0 VV
0 VV
0 VV
Max Default
20
20
20
Unit
0 VZ
0 VZ
Max Default
-2.0 2.0
-20 20
-200 200
Unit
0 AV
0 AV
0 AV
Max Default
5.0
5.0
Unit
Unit
0.0 BAR
ºC
0
%
0
58
Error Messages And Explanations:
Battery high warning! : Battery high error
Battery low warning! : Battery low error
Can bus warning! : Can bus error (Only available at Trans-MiniAUTO++.CAN devices)
Charge alterntr fail! : Caharge alternator fail
Conf. AI low error! : Configurable analogue input low error
Conf. AI low prealr! : Configurable analogue input low prealarm
Conf. AI high error! : Configurable analogue input high error
Conf. AI high preal! : Configurable analogue input high prealarm
Conf. AI sensor err! : Configurable analogue input sensor break
Emergency stop! : Emergency stop error
Fail to start alarm! : Fail to start alarm
Gen break.close fail! : Generator breaker not closed alarm
Gen break.open fail! : Generator breaker not opened alarm
Gen over frq.prealr! : Generator over frequency prealarm
Gen over frq.shutdwn! : Generator over frequency shutdown
Gen over vol.shutdwn! : Generator over voltage shutdown
Gen over volt.prealr! : Generator over voltage prealarm
Gen stop fail! : Generator stop error
Gen under frq.prealr! : Generator under frequency prealarm
Gen under frq.shtdwn! : Generator under frequency shutdown
Gen under vol.shtdwn! : Generator under voltage shutdown
Gen under volt.preal! : Generator under voltage prealarm
High temp.prealarm! : Temp prealarm
High temp.shutdown! : High temp. shutdown
J1939 ECU warning! : Amber warning lamp error (Only available at Trans-MiniAUTO++.CAN devices)
Low temperature! : Low temperature
Maintenance alarm! : Maintenance error
Oil press.shutdown! : Pressure shutdown
Over curr.trip cool.! : Over current electrical trip
Over current prealr! : Over current prealarm
Over current trip! : Over current error
Over current warnng! : Over current warning
Over power alarm! : Over power error
Over power prealarm! : Over power prealarm
Over speed alarm! : Over speed error
Over speed prealarm! : Over speed prealarm
Pressure prealarm! : Pressure prealarm
Pressure sensor err! : Oil pressure sensor break
Red stop lamp! : Red stop lamp error (Only available at Trans-MiniAUTO++.CAN devices)
Short circuit trip! : Short Circuit Error
Spare-1 alarm! : Spare 1 error
Spare-2 alarm! : Spare 2 error
Spare-3 alarm! : Spare 3 error
Speed loss alarm! : Speed loss error (Only available at Trans-MiniAUTO++.MPU devices)
Temperat. sensor err! : Temperature sensor break
Under curr.trip cool! : Under current electrical trip
Under current prealr! : Under current prealarm
Under current trip! : Under current error
Under current warnng! : Under current warning
Under power prealarm! : Under power prealarm
Under power trip! : Under power error
Under speed prealarm! : Under speed prealarm
Under speed trip! : Under speed error
59
Event Messages And Explanations:
Battery high warning : Battery high error
Battery low warning : Battery low error
Can bus warning : Can bus error (Only available at Trans-MiniAUTO++.CAN devices)
Changed mode to auto : Changed mode to auto
Changed mode to man : Changed mode to manual
Changed mode to stop : Changed mode to stop
Changed mode to test : Changed mode to test
Charge alterntr fail : Caharge alternator fail
Conf. AI high error : Configurable analogue input high error
Conf. AI high preal : Configurable analogue input high prealarm
Conf. AI low error : Configurable analogue input low error
Conf. AI low prealr : Configurable analogue input low prealarm
Conf. AI sensor err : Configurable analogue input sensor break
Emergency stop : Emergency stop error
Fail to start alarm : Fail to start alarm
Gen break.close fail : Generator breaker not closed alarm
Gen break.open fail : Generator breaker not opened alarm
Gen over frq.prealr : Generator over frequency prealarm
Gen over frq.shutdwn : Generator over frequency shutdown
Gen over vol.prealr : Generator over voltage prealarm
Gen over vol.shutdwn : Generator over voltage shutdown
Gen stop fail : Generator stop error
Gen under frq.preal : Generator under frequency prealarm
Gen under frq.shtdwn : Generator under frequency shutdown
Gen under vol.preal : Generator under voltage prealarm
Gen under vol.shtdwn : Generator under voltage shutdown
High temp.prealarm : High temp. prealarm
High temp.shutdown : High temp. shutdown
J1939 ECU warning : Amber warning lamp error (Only available at Trans-MiniAUTO++.CAN devices)
Low temperature : Low temperature
Maintenance alarm : Maintenance error
Maintenance warning : Maintenance warning
Oil press.shutdown : Pressure shutdown
Over current alarm : Over current alarm
Over current prealr : Over current prealarm
Over power alarm : Over power error
Over power prealarm : Over power prealarm
Over speed prealarm : Over speed prealarm
Over speed shutdown : Over speed shutdown
Pressure prealarm : Pressure prealarm
Pressure sensor err : Oil pressure sensor break
Red stop lamp : Red stop lamp error (Only available at Trans-MiniAUTO++.CAN devices)
Short circuit alarm : Short circuit alarm
Spare-1 alarm : Spare 1 error
Spare-2 alarm : Spare 2 error
Spare-3 alarm : Spare 3 error
Speed loss alarm : Magnetic pickup loss of speed error (Only available at Trans-MiniAUTO++.MPU devices)
Temperat. sensor err : Temperature sensor break
Under current alarm : Under current error
Under current prealr : Under current prealarm
Under power alarm : Under power error
Under power prealarm : Under power prealarm
Under speed prealarm : Under speed prealarm
Under speed shutdown : Under speed shutdown
60
5. Specifications
Equipment use
: Electrical control equipment for generating sets.
Housing & Mounting
:111 mm x 81 mm x 61 mm. (including connectors). Plastic
housing for panel mounting.
Panel Cut-Out
: 81mm x 70mm.
Protection
: IP65 at front panel.
Weight
: Approximately 0,3 Kg.
Environmental rating
: Standard, indoor at an altitude of less then 2000 meters
with non-condensing humidity.
Operating/Storage Temperature : -20°C to +70°C / -30°C to +80°C
Operating/Storage Humidity
: 90 % max. (non-condensing)
Installation Over Volt. Category : II Appliances, portable equipment
Pollution Degree
: II, Normal office or workplace, non conductive pollution
Mode of Operation
: Continuous.
DC Battery Supply Voltage
: 8 to 32 V Z. Max. operating current is 360 mA.
Cranking Dropouts
: Battery voltage can be “0” VDC for max. 50 ms during
cranking (battery voltage should be at least nominal
voltage before cranking).
Battery Voltage Measurement
: 8 to 32 V Z, accuracy: 1 % FS, resolution: 0,1 V
Generator Voltage Measurement: 3 to 300 VAC Ph-N, 5 to 99.9 Hz. Accuracy: 1 % FS,
Resolution: 1 V.
Generator Frequency
: 5 to 99.9Hz (min. 20 VAC Ph-N) Accuracy: 0,25 % FS,
Resolution: 0,1 Hz.
Magnetic Pickup Input
: 35 to 10000 Hz (4 to 35 volts peak continuously).
Accuracy: 0,25 % FS. (Only available at
Trans-MiniAUTO++.MPU devices)
CT secondary
: 5A.
Charge Generator Excitation
: 210mA @12V, 105mA @24V. Nominal 2.5W.
Charge Gen. Vol. Measurement : 8 to 32 V Z, accuracy: 1 % FS, resolution: 0,1 V.
Sender Measurement
: 0 to 1300 ohm, accuracy: 1 % FS, resolution: 1 ohm.
Communication interface
: RS-232, CanBus communication with 1939 ECU(Only
available at Trans-MiniAUTO++.CAN devices)
Relay Outputs
: Generator contactor relay output 8A at DC supply voltage
Transistor Outputs
: Fuel or Configurable output-1 1A at DC supply voltage
Crank or Configurable output-2 1A at DC supply voltage
Configurable output-3 1A at DC supply voltage
Configurable output-4 1A at DC supply voltage
Configurable output-5 1A at DC supply voltage
All transistor ouputs supplied from DC supply terminal 12
61