1
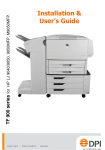
Bryan-Dumon™ Series II Rigid Bronchoscope
and Stent Placement Kit
USER MANUAL
Table of Contents
Bryan-DUmon™ Series II rigid bronchoscope
1. Diagram and Overview
2. Universal Barrel
3. Bronchial and Tracheal Tubes
4. Accessory Ports
5. Telescope, Camera and Light Source
Bryan-DUmon™ Series II stent placement kit
1. Inspection and Overview
2. Stent Loading
3. Stent Deployment
4. Y-Stent Loading and Deployment
disinfecting and sterilizing the instruments
1. Disinfection and cleaning of the Bronchoscope
2. Disinfection and cleaning of the Telescope
3. Gas Sterilization
4. Steam Sterilization
5. Contact
bryan-dumon™ series ii rigid bronchoscope-Diagram
• Check that your instrument is in good condition and that the tubes are neither damaged nor obstructed.
• If you have purchased telescopes with the system, look through the telescopes to confirm the lenses are in
good condition.
*Pictures ARE not to scale
Silicone Cap Blue
Diameter 12 mm
Metallic Obturator Cap for Double Accessory
Silicone cap Green or Red
Diameter 16 mm
Metallic Obturator Cap for Single Accessory
Metallic Obturator Cap for Telescope
and Single Accessory
Tracheal tube (non-ventilating)
Silicone Cap Blue
Diameter 12 mm
Metallic
Obturator Cap
Color-coded
Universal Barrel
(2 pieces)
Silicone cap Green or Red
Diameter 25 mm
Jet Venturi
Intermediate Connector
Bronchial tube (ventilating)
universal barrel
• Make sure that the ribbed rings on the universal barrel rotate, the small ring 360o and the large 90o.
• Connect the two pieces of the barrel together.
• The universal barrel has two lateral ports and one main horizontal port.
• Connect the metallic obturator cap to the main port. (In addition, there is an obturator cap for telescope and
single accessory that can be used when the flexible bronchoscope is introduced through the rigid).
• The larger lateral port may be used for ventilation and anesthesia. Connect the jet venturi or place a silicone
cap over the access port if it is not being used.
• The smaller lateral port is for accessories. You may connect the metallic obturator caps for single or double
accessory to the smaller port.
Metallic Obturator Caps for
single and double accessory
Metallic Obturator Cap and single acccessory
Universal Barrel (2 Pieces)
Jet Venturi
Metallic Obturator Cap
tracheal and bronchial tubes
• Select the desired size tracheal or bronchial tube. All tubes are color-coded, indicating different tube
diameters. The tube diameter (in millimeters) is etched on the tube directly below the color-coded ring.
• Introduce the selected tube to the airtight lock back of the universal barrel by aligning the red dots. Lock the
tube to the universal barrel by turning the rotating ring a quarter turn to the right.
Rotate ring a quarter turn to lock in tube
Tracheal tube
Axial
obturators
Scope-head
Color coded
Bronchial tube
side ports
• Select the metallic obturator cap for either single or double accessory to go into the lateral port of the
universal barrel. Connect the desired obturator cap to the side port by pushing and turning it.
• Connect the jet venturi (if used) to the larger diameter lateral port of the universal barrel.
• If closed system is used, select the appropriate silicone caps according to your instrument configuration
(optics, suction catheter, laser fibers, etc.). Connect the silicone caps to the metallic ports as shown below.
Silicone cap
diameter 12 mm
Lateral
obturators
Silicone cap
diameter 16 mm
Tracheal tube
Silicone cap
diameter 12 mm
Axial
obturators
Scope-head
Color coded
Bronchial tube
Silicone cap
diameter 25 mm
Jet
"Venturi"
telescope, camera and light source
• Insert the telescope into the bronchoscope through the hole in the silicone cap. The red caps are for the 5.5 mm
telescope and the green caps are for the 4.0 mm telescope. If you are using open system ventilation, it is not
necessary to use the caps.
• Connect the camera and light cable to the telescope.
• Telescope has three different light cable adapters: STORZ/Olympus, WOLF and ACMI (see picture below).
• Telescope eyepiece fits a universal C-mount camera.
Eyepiece
Marking Ring
Tube
Connector for light
guide (ACMI)
Adapter for light guide,
detachable (WOLF)
Adapter for light guide, detachable
(STORZ, Olympus)
Color coding for indication
of viewing direction:
Green = 0o
Blue = 12o, 15o
Red = 30o
Orange = 45o
Yellow = 70o
Black = 90o
STent Placement Kit
• The Bryan-Dumon™ Stent Placement Kit is specially designed for deploying the Dumon Style silicone stents.
• The basic stent placement kit consists of three parts- stent introducer tube, stent plunger and stent funnel.
• Stent placement kits are color-coded to correspond with the tracheal and bronchial tubes.
• The recommended stent sizes for each kit are etched on each introducer tube. (Please note, the orange stent
introducer can accommodate large stents up to 22 mm in addition to all Y-stents).
Plunger
Funnel
Introducer tube
Color
code
Color
code
Color
code
STent Placement Kit - getting started
• Check that your instrument is in good condition by inspecting the tubes for damage or obstruction. Make sure
the handles of the introducer tube rotates 360 degrees.
• Select the corresponding funnel and plunger.
*Equipment needs to be cleaned and sterilized before each procedure.
Plunger
Funnel
Cap
diameter 25 mm
Introducer tube
Color
code
Color
code
Color
code
Series 2 BRYAN- DUMON
Adult bronchoscope
Cap
diameter 25 mm
STent Placement Kit - loading a stent
• Select the desired size of your silicone stent and have it sterilized.
(Please note that silicone stents are sold non-sterile and they need to be sterilized before each use. Dumon style silicone stents
can be sterilized by following the general instrumentation guidelines in this manual, autoclaved at 134oC/ 273oF) See Page 19
• Pick up the stent funnel (two pieces) and remove the cap. Place the funnel on a flat surface with the round tube
opening facing up.
• Lubricate the stent with medical grade silicone or other appropriate lubricant. Take the lubricated silicone stent
and fold it lengthwise. Feed the folded stent into the stent funnel.
STent Placement Kit - loading a stent (cont.)
• Remove the stent plunger from the stent introducer tube and lubricate the tip and inside the barrel of the stent
introducer tube with medical grade silicone or other appropriate lubricant. Take the stent introducer in one
hand and the stent funnel in the other.
• Insert the stent introducer tube into the stent funnel and push until you feel a slight resistance and hear a
click from the stent introducer tube tip touching the bottom of the stent funnel.
• DO NOT push using the handle as you may bend the tube. Instead, hold the top part of the introducer tube
where the hole is, against your hand.
• Remove the stent introducer tube from the funnel. Insert the stent plunger into the stent introducer tube.
DO NOT push all the way or you will deploy the stent.
• The stent is now ready to be deployed.
STent Placement Kit - Deploying a stent
• To deploy the stent, remove the telescope from the bronchoscope together with the silicone cap that covers
the metallic obturator cap (if used).
• Insert the stent introducer into the bronchoscope tube all the way to the end. It is possible to view the stent
deployment by inserting the telescope into the stent plunger. (If desired, you may use a silicone cap on the
metallic obturator as well as the stent plunger to prevent air leaks).
• To deploy the stent, push the stent plunger all the way down the stent introducer using a firm, smooth motion.
The stent will slide into the airway.
• Remove the telescope from the stent plunger and remove the stent placement system from the bronchoscope.
Insert the telescope back into the bronchoscope (with silicone cap, if needed) and manipulate the stent with
forceps, if necessary.
Y-stent - loading and Deploying
• The Bryan-Dumon™ Y-stent loader is compatible with the Bryan-Dumon™ Series II orange and yellow stent
placement kits.
• The Y-stent loader is designed to accommodate Dumon Style Y-shaped and straight stents up to 22 mm in
diameter. The loader is autoclavable at 134oC/ 273oF cycle.
*Equipment needs to be cleaned and sterilized before each procedure.
Y-stent - loading
• The Y-stent loader has three pieces: stent funnel, lid and rod.
• Remove the lid and rod from the loader. Generously lubricate the entire groove of the stent funnel with medical
grade silicone or other appropriate lubricant.
• Make sure the lubricant coats the inside of the conical metal piece on the end of the stent funnel.
• Have your sterilized or disinfected stent ready. Lubricate the stent over the long-studded portion.
Y-stent - loading (cont.)
• Fold the stent into a U-Shape and insert it gradually into the groove. The studded (anterior) side of the stent
should face up, while the smooth (posterior) side faces down.
• When loading the Y-stent, be sure to insert the tracheal part of the stent facing the conical metal piece of the
stent funnel. The correct orientation of the stent is shown on the lid.
• Keep folding the stent until it is completely in the groove of the stent funnel.
Y-stent - loading (cont.)
• Place the lid on the stent funnel and slide it into the locked position. Please note the lid only locks one way.
Once the lid is in the locked position, the stent is secure.
• Take either the orange or yellow Bryan-Dumon™ stent introducer tube and lubricate the inside generously as
this allows the stent to slide smoothly from the stent funnel into the stent introducer.
• Place stent introducer tube onto a flat surface so that the opening of the tube faces up.
Y-stent - loading (cont.)
• Insert the metal end of the stent funnel into the stent introducer tube.
• Orientate the stent loader so that the markings on the lid and the introducer tube are in line. This ensures the
stent will remain in the correct position.
• Introduce the rod into the open end of the stent funnel. With one hand, hold the stent at the metal end and the
stent introducer tube while holding the rod in the other hand.
• With a pumping action, progressively push the rod down and push the stent into the introducer tube. Using the
pumping action you will feel the stent slide smoothly from the funnel into the introducer.
• If you feel resistance, stop pushing and allow the stent to reposition itself.
• Continue pushing the stent with the pumping action until the stent is completely inserted into the stent
introducer.
Y-stent - deployment
• Once the stent is in the introducer tube, remove the stent loader and insert a stent plunger into the stent
introducer.
• Before deploying the stent through the rigid bronchoscope, rotate the introducer tube so the marking faces up.
This way the stent will deploy into the right position.
Basic cleaning and disinfection of the bronchoscope
• Disassemble all of the components from the bronchoscope including the metallic obturator caps attached to
the universal barrel.
• Use a cotton tip applicator, a soft cloth or a brush to clean the bronchoscope’s housing. Rinse with distilled,
tap, or de-mineralized water. Dry thoroughly with a soft cloth or compressed air.
• Bronchoscope components are autoclavable at 134 degrees Celsius/ 273 degrees Fahrenheit.
Remove the attachments
Tracheal tube
Axial
obturators
Scope-head
Color coded
Bronchial tube
NOTE: When using equipment from other manufacturers
in conjunction with Bryan Corporation materials, please
refer to the manufacturers instructions for care and
maintenance.
cleaning and disinfection of the telescope
• Bryan Telescopes MAY NOT be cleaned using ultrasonic.
Manual Cleaning:
• The telescope should be cleaned immediately after use, with careful attention paid to blood, secretions and
other residues. If immediate cleaning is not possible, the telescope should be immersed in a combined cleaning
and disinfection solution.
• Removable parts, such as light guide connectors and adapters, should be cleaned separately. Stopcocks should
be in the open position.
• When immersing the telescope or instrument in the disinfecting / cleaning solution, make sure all bubbles
escape any cavities by rotating or tipping the device. This will ensure that all surfaces are moistened.
• Encrusted material has to be removed carefully, preferably with plastic brushes and soft cloths. Never use sharp
instruments to remove debris. This could scratch the endoscope, particularly the glass components.
• Clean the distal and proximal windows, as well as the light post, with a cotton swab (wooden applicators only)
moistened in isopropyl alcohol (70 %) or acetone. As an alternative, a neutral detergent (such as hand soap) can
be used.
• Thoroughly rinse the telescope with de-mineralized water and dry it with a soft cloth or compressed air.
machine Cleaning
• Only thermal-neutral processes should be used and they must work in a pH-neutral environment.
• The temperature should not exceed 93o C/199o F. The machine must be equipped with fixtures securing the
instruments so they are not damaged during the washing cycle.
• All instruments and scopes need to be removed from machine after cleaning.
GAS sterilization
Endoscopes must be processed according to the hospital’s specific regulations for gas-sterilization. Each
instrument should be packed in appropriate packaging. The following sterilization method has been validated.
Please follow the manufacturer’s instructions.
Ethylene Oxide Sterilization Process
DMB-Sterivit-Automatic
Half-Cycle-Process
Gas:
6 % Ethylene Oxide, 94 % Carbon Dioxide
Chamber pressure: 1.7 bar
Temperature :
55 degrees Celsius / 131 degrees Fahrenheit
Sterilization Time:
60 minutes
Packaging: Standard sterilization bags made of paper laminate (Steriking brand)
(Sterilizer: DMB-Sterivit-Automatic, type 30010 VS, version 908.01a, DMB Aparatebau, volume 300)
After sterilization, the endoscopes need to be aerated at room temperature (approximately 20 degrees Celsius /
68 degrees Fahrenheit) for a minimum of 24 hours. Increasing the temperature shortens the aeration time.
steam sterilization
Endoscopes must be processed according to the hospital’s specific regulations for steam-sterilization. Only
scopes marked “Autoclave” can be autoclaved without restriction. The following sterilization method has been
validated.
Please follow the manufacturer’s instructions.
Gravity Vacuum Process
Half-Cycle-Process
Parameters:
134 degrees Celsius / 273 degrees Fahrenheit
Sterilization time:
5 minutes
Packagingin metal containers and sterilization bags made of paper laminate (type Steriking)
After sterilization and prior to opening the packaging, let the instruments cool at room temperature. Accelerating
the cooling process puts stress on the endoscope, which can cause damage and shorten its working life.
contact information
If you have any questions or for more information on Bryan Corporation products and services, please contact
us through one of the methods below.
Customer Service: 800-343-7711
E-mail: [email protected]
Website: www.bryancorp.com
WE APPRECIATE YOUR BUSINESS!
© Bryan Corporation 2008