1
INSTALLER:
Leave this manual with the appliance.
CONSUMER:
Retain this manual for future reference.
WARNING: If the information in these
instructions is not followed exactly a fire
or explosion may result causing property
damage, personal injury or death.
FOR YOUR SAFETY
Do not store or use gasoline or other
flammable vapours and liquids in the vicinity
of this or any other appliance.
WHAT TO DO IF YOU SMELL GAS
• Do not try to light any appliance.
• Do not touch any electrical Switch.
• Do not use any phone in your building.
• Immediately call your gas supplier
from a neighbour’s phone. Follow the gas
supplier’s instructions.
• If you cannot reach your gas supplier
call the fire department.
Installation and service must be performed
by a qualified installer, service agency or
the gas supplier.
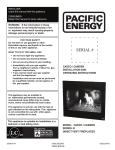
CASCO / CAMDEN
INSTALLATION AND
OPERATING INSTRUCTIONS
This appliance may be installed in
an aftermarket permanently located,
manufactured home (USA only) or mobile home,
where not prohibited by local codes.
This appliance is only for use with the type
of gas indicated on the rating plate. This
appliance is not convertible for use with other
gases unless a certified kit is used.
This appliance is suitable for installation in a
bedroom or bed sitting room.
MODEL: CASCO / CAMDEN
SERIES: B
DIRECT VENT FIREPLACES
Visit www. pacificenergy.net for the most up-to-date version of this manual
251115-44
CASC.BODYB - CMDN.BODYB
5055.634-B
Table of Contents
Owner Information
Installer Information
IMPORTANT NOTE FOR THE COMMONWEALTH OF
MASSACHUSETTS ........................................................... 3
CAUTION ......................................................................... 4
SAFETY ............................................................................ 5
CONGRATULATIONS ON YOUR PURCHASE OF A
PACIFIC ENERGY GAS FIREPLACE.............................. 6
FIRST FIRE ...................................................................... 6
REMOTE CONTROL OPERATION ................................. 7
IFC MODULE ................................................................. 8
INITIALIZING THE SYSTEM FOR THE FIRST TIME ...... 8
TEMPERATURE INDICATION DISPLAY .........................9
TURN ON THE FIREPLACE ...........................................9
TURN OFF THE FIREPLACE ..........................................9
MANUAL BYPASS OF THE REMOTE SYSTEM ............ 9
KEY LOCK ..................................................................... 9
REMOTE FLAME CONTROL ...................................... 10
ROOM THERMOSTAT (TRANSMITTER OPERATION) . 10
SMART THERMOSTAT (TRANSMITTER OPERATION) 10
COMFORT FAN SPEED CONTROL ............................. 11
CONTINUOUS PILOT/INTERMITTENT
PILOT (CPI/IPI) SELECTION ........................................ 11
WARNINGS AND CAUTIONS ....................................... 12
LOW BATTERY POWER DETECTION.......................... 12
MAINTENANCE ............................................................. 13
GLASS DOOR: ........................................................... 13
ANNUAL INSPECTION:................................................ 13
PERIODICALLY: ......................................................... 13
LIGHTING INSTRUCTIONS .......................................... 14
5055.634-B
FIREPLACE DIMENSIONS ........................................... 15
FIREPLACE FRAMING DIMENSIONS ......................... 16
CLEARANCES TO COMBUSTIBLES ........................... 17
LOCATING THE FIREPLACE ........................................ 18
VENTING ........................................................................ 19
DAMPER POSITION .................................................... 19
VENT TERMINAL MINIMUM CLEARANCES .............. 20
VENTING COMPONENTS ............................................. 21
PLUMBING AND ELECTRICAL .................................... 22
GAS CONNECTION ..................................................... 22
ELECTRICAL CONNECTION ....................................... 22
GAS SUPPLY ................................................................. 23
GAS PRESSURE CHECK ............................................. 23
GAS PRESSURE TESTING PROCEDURE ................... 24
PILOT ADJUSTMENT ................................................... 24
SURROUND INSTALLATION INSTRUCTIONS ............ 25
PROPANE CONVERSION ............................................. 27
DOOR INSTALLATION/REMOVAL ............................... 28
REMOVAL .................................................................... 28
INSTALLATION ............................................................. 28
FAN REMOVAL / INSTALLATION ................................. 29
PANEL INSTALLATION / REMOVAL ............................ 32
PANEL REMOVAL ...................................................... 32
PANEL INSTALLATION .............................................. 32
LOG BURNER KIT INSTALLATION / REMOVAL ......... 33
TRADITIONAL LOG SET INSTALLATION / REMOVAL 34
RUSTIC LOG SET INSTALLATION / REMOVAL .......... 35
INSTALLATION ............................................................. 35
GLASS BURNER KIT .................................................... 36
DAMPER ADJUSTMENT .............................................. 37
REPLACEMENT PARTS ............................................... 38
CASCO AESTHETIC COMPONENTS .......................... 38
CAMDEN AESTHETIC COMPONENTS .......................38
WIRING DIAGRAM ........................................................39
CASCO RATING LABEL ................................................40
CAMDEN RATING LABEL ............................................ 41
2
181115-44
CASC.BODYB
CMDN.BODYB
Owner Information
Owner Information
Important Note for the Commonwealth of Massachusetts
From Massachusetts Rules and Regulations 248 CMR 5.08:
(a) For all side wall horizontally vented gas fuelled equipment i
finished grade in the area of the venting, including but not limited
to decks and porches, the following requirements shall be satisfied.
1. INSTALLATION OF CARBON MONOXIDE DETECTORS. At the time of installation of the side wall horizontal vented gas fuelled
equipment, the installing plumber or gas fitter shall observe that a hard wired carbon monoxide detector with an alarm and battery
back-up is installed on the floor level where the gas equipment is to be installed, in addition, the installing plumber or gas fitter
shall observe that a battery operated or hard-wired carbon monoxide detector with an alarm is installed on each additional level
of the dwelling, building or structure served by the side wall horizontal vented gas fuelled equipment. It shall be the responsibility
of the property owner to secure the services of qualified licensed professionals for the installation of hard-wired carbon monoxide
detectors.
a. In the event that the side wall horizontally vented gas fuelled equipment is installed in a crawl space or an attic, the hard-wired
carbon monoxide detector with alarm and battery back-up may be installed on the next adjacent floor level.
b. In the event that the requirements of this subdivision cannot be met at the time of completion of installation, the owner shall
have a period of thirty (30) days to comply with the above requirements; provided, however, that during said thirty (30) day period, a
battery operated carbon monoxide detector with an alarm shall be installed.
2. APPROVED CARBON MONOXIDE DETECTORS. Each carbon monoxide detector as required in accordance with the above
provisions shall comply with NFPA 720 and be ANSI/UL 2034 listed as IAS certified.
3. SIGNAGE. A metal or plastic identification plate shall be permanently mounted to the exterior of the building at a minimum height
of eight (8) feet above grade directly in line with the exhaust vent terminal for the horizontally vented gas fuelled heating appliance or
equipment. The sign shall read, in print size no less than one-half (1/2) inch in size, ‘‘GAS VENT DIRECTLY BELOW. KEEP CLEAR
OF ALL OBSTRUCTIONS’’.
4. INSPECTION. The state or local gas inspector of the side wall horizontally vented gas fuelled equipment shall not approve the
installation unless, upon inspection, the inspector observes carbon monoxide detectors and signage installed in accordance with
the provisions of 248 CMR 5.089(2)(a) 1 through 4.
(b) EXEMPTIONS. The following equipment is exempt from 248 CMR 5.089(2)(a) 1 through 4.
1. The equipment listed in Chapter 10 entitled ‘‘Equipment Not Required To Be Vented’’ in the most current edition of NFPA 54 as
adopted by the Board; and
2. Product Approved side wall horizontal vented gas fuelled equipment installed in a room or structure separate from the dwelling,
building or structure used in whole or in part for residential purposes.
(c) MANUFACTURER REQUIREMENTS - -- GAS EQUIPMENT VENTING SYSTEM PROVIDED. When the manufacturer of Product
Approved side wall horizontally vented gas equipment provides a venting system design or venting system components with the
equipment, the instructions provided by the manufacturer for installation of the equipment and the venting system shall include:
1. Detailed instructions for the installation of the venting system design or the venting system components; and
2. A complete parts list for the venting system design or venting system.
(d) MANUFACTURER REQUIREMENTS - -- GAS EQUIPMENT VENTING SYSTEM NOT PROVIDED. When the manufacturer of a
Product Approved side wall horizontally vented gas fuelled equipment does not provide the parts for venting the fuel gases, but
identifies ‘‘special venting systems’’, the following requirements shall be satisfied by the manufacturer.
1. The referenced ‘‘special venting system’’ instructions shall be included with the appliance or equipment installation instructions;
and
2. The ‘‘special venting systems’’ shall be Product Approved by the Board, and the instructions for that system shall include a parts
list and detailed installation instructions.
(e))
A copy of all installation instructions for all Product Approved side wall horizontally vented gas fuelled equipment, all venting
instructions, all parts lists for venting instructions, and/or all venting design instructions shall remain with the appliance or equipment
at the completion of the installation.
CASC.BODYB 251115-44
CMDN.BODYB
3
5055.634-B
Owner Information
Caution
FOR YOUR SAFETY - Do not install or operate your Pacific Energy fireplace without first
reading and understanding this manual. Any installation or operational deviation from the
following instructions voids the Pacific Energy Warranty and may prove hazardous.
This appliance and its individual shut off valve must be disconnected from gas supply piping
system during any pressure testing of that system at test pressures in excess of 1/2 psi (3.5 kPa).
This appliance must be isolated from the gas supply piping system by closing its individual
manual shut off valve during any pressure testing of the gas supply piping system at test
pressures equal to or less than 1/2 psi (3.5 kPa).
Do not use the fireplace if any part has been under water. Immediately call a qualified service
technician to inspect the fireplace and to replace any part of the control system and any gas
control which has been under water.
This fireplace is equipped with a micro mesh safety screen for your protection and
must be installed with the unit. Removal of the safety screen will cause the fireplace
to become a burn and fire hazard.
5055.634-B
4
251115-44
CASC.BODYB
CMDN.BODYB
Owner Information
Safety
• Due to high temperatures, this gas appliance should be located out of traffic and away
from furniture and draperies.
• Children and adults should be alerted to the hazards of high surface temperatures and
should stay away to avoid burns or clothing ignition.
• Young children should be carefully supervised when they are in the same room as the appliance. Toddlers, young children and others may be susceptible to accidental contact burns.
A physical barrier is provided if there are at risk individuals in the house. To restrict access to a
fireplace or stove, install an adjustable safety gate to keep toddlers, young children and other at
risk individuals out of the room and away from hot surfaces.
• Clothing or other flammable material should not be placed on or near the appliance.
•
A barrier designed to reduce the risk of burns from the hot viewing glass is provided with
the appliance and shall be installed.
•
If the barrier becomes damaged, the barrier shall be replaced with the manufactures’ barrier for this appliance.
• Any grill, panel or door removed for servicing the unit must be replaced prior to operating.
•
Installation and repair should be done by a qualified service person. The appliance should
be inspected before use and at least annually by a professional service person. More frequent cleaning may be required due to excessive lint from carpeting, bedding material, etc.
It is imperative that control compartments, burners and circulating air passageways of the
appliance be kept clean.
• This appliance must not be connected to a chimney flue serving a separate solid fuel burning appliance.
• It is our policy that no responsibility is assumed by the Company or by any of its employees or representatives for any damages caused by an inoperable, inadequate, or unsafe
condition which is the result, either directly or indirectly, of any improper operation or installation procedures.
CASC.BODYB 251115-44
CMDN.BODYB
5
5055.634-B
Owner Information
Congratulations on your purchase of a Pacific Energy Gas Fireplace.
Your fireplace has been professionally installed by:
Dealer name:
__________________________________
Phone Number: __________________________________
If you discover any problems with your gas fireplace contact your dealer immediately to have the
unit repaired.
Caution: Do not attempt to repair the fireplace yourself, you may cause injury to yourself or others
and risk causing damage to the unit.
Before operating your fireplace, carefully read this manual and pay close attention to all Safety
Warnings. The manual contains important information on the unit’s safe operation and maintenance.
First Fire
When lit for the first time, the fireplace will emit a slight odour for a couple of hours. This is due
to the curing of paints, sealants, gaskets, and lubricants used in the manufacturing process. This
condition is temporary. Open doors and windows to the ventilate area. Odour caused by the curing
process may cause discomfort to some individuals.
It is normal for fireplaces fabricated from steel to give off some expansion and/or contraction
noises during the start up or cool down cycle. Similar noises are found with your furnace heat
exchanger or cook stove oven.
NOTE: Pilot may take
up to 30 seconds to
ignite each time the
“ON” button has been
selected
5055.634-B
6
251115-44
CASC.BODYB
CMDN.BODYB
Owner Information
Remote Control Operation
System Description
The Proflame 2 Remote Control System consists of two elements:
1. Proflame2 Transmitter.
2. Proflame2 Integrated Fireplace Control (IFC) board and a wiring harness to connect the IFC to
the gas valve and stepper motor.
Transmitter (Remote Control with LCD Display)
The Proflame 2 Transmitter uses a streamline design with a simple button layout and informative
LCD display (Figure 1). The transmitter is powered by 3 AAA type batteries. A Mode key is provided to Index between the features and a Thermostat key is used to turn on/off or index through
thermostat functions (Figure 1) & (Figure 2).
Blue back lit LCD display
ON/OFF Key
THERMOSTAT Key
UP/DOWN Arrow Key
MODE Key
Figure 1: Proflame 2 remote control Transmitter.
Figure 2: Proflame 2 LCD screen detail.
CASC.BODYB 251115-44
CMDN.BODYB
7
5055.634-B
Owner Information
IFC Module
The Proflame 2 Integrated Fireplace Control (IFC) module (Figure 3) is a device that allows automatic
ignition and pilot flame supervision, and commands the functions of the hearth Fireplace. It’s
configured to control the ON/OFF main burner operation, giving the choice of both IPI (intermittent
pilot ignition), and CPI (continuous pilot ignition) modes. The Proflame2 IFC module controls and
connects directly to the pilot assembly and the automatic valve using low electric power.
The IFC module can be powered by both an AC power supply, and battery pack for back up. The
Proflame 2 offers the added ability to control the comfort fan speed from OFF through six (6)
speeds, a remotely actuated auxiliary outlet and a dimmable light outlet. The external batteries can
provide DC power to the IFC allowing the batteries to be used only when line power is interrupted or
lost, and if the Fireplace does not use a combustion fan.
Operating Procedure
Initializing the System for the first time
1. Install 4 AA batteries into the battery holder (Figure 4) located on the rear side behind the
surround below the firebox. Install the ON/OFF switch cover (Figure 5) over top of the battery
bay. Make sure that the selection switch is on the “Remote” setting.
2. Install 3 AAA batteries into the Proflame2 Remote Transmitter (Figure 1).
3. Plug the power cord into the Brentwood/Broadway and open the gas supply line.
4. Insert a straightened paper clip into the opening marked “PRG” of the ON/OFF battery bay
cover (Figure 4) or (Figure 5) and press the program button once. The module will beep 3 times
indicating that it is ready to synchronize with a remote transmitter.
5. On the remote transmitter, push the power on button once. The remote transmitter will beep
4 times to indicate that the remote transmitter and the control module are now synchronized.
The remote transmitter is now ready to use.
Figure 4: On-off switch.
Figure 5: On-off switch cover.
Figure 3: IFC module.
5055.634-B
8
251115-44
CASC.BODYB
CMDN.BODYB
Owner Information
Temperature indication Display
With the system in the “OFF” position, press the Thermostat Key and the
Mode Key at the same time. Look at the LCD screen on the transmitter
to verify that a C or F is visible to the right of the Room Temperature
display (Figure 6) or (Figure 7).
Turn on the Fireplace
With the system OFF, press the ON/OFF Key on the remote transmitter. The remote transmitter display will show some other active Icons
on the screen. At the same time the Receiver will activate the Heater. A
single “beep” from the Receiver (module) will confirm reception of the
command.
Figure 6: Display in Fahrenheit.
Turn off the Fireplace
With the system ON, press the ON/OFF Key on the Remote transmitter.
The Remote transmitter LCD display will only show the room
temperature (Figure 6) or (Figure 7). At the same time the Receiver
(module) will turn off the Heater. A single “beep” from the Receiver
confirms reception of the command.
Figure 7: Display in Celcius.
Manual Bypass of the Remote System
If the batteries of the receiver or remote transmitter are low or depleted,
the Heater can be turned off manually using ON/OFF switch located on
battery box at the rear of the Broadway/Brentwood. This will bypass the
remote transmitter.
Key Lock
This function will lock the keys to avoid unsupervised operation. To
activate this function, press the MODE and UP keys at the same time.
The lock icon will appear (Figure 8). To de-activate this function, press
the MODE and UP keys at the same time.
CASC.BODYB 251115-44
CMDN.BODYB
9
Figure 8: Key lock.
5055.634-B
Owner Information
Remote Flame Control
The Proflame2 has six (6) flame levels. With the
system on, and the flame level at the maximum in
the appliance, pressing the down arrow key once
will reduce the flame height by one step until the
flame is turned off.
The Up Arrow Key will increase the flame height
each time it is pressed. If the Up Arrow Key is
pressed while the system is on but the flame is off,
the flame will come on in the high position
(Figure 9). A single “beep” will confirm reception
of the command.
Figure 9: Flame level control
ROOM TEMPERATURE
Room Thermostat (Transmitter Operation)
The Remote Control can operate as a room thermostat. The
thermostat can be set to a desired temperature to control the
comfort level in a room. To activate this function, press the
Thermostat key (Figure 1). The LCD display on the transmitter
will change to show that the room thermostat is “ON” and the
set temperature is now displayed (Figure 10). To adjust the set
point, press the up or down arrow keys until the desired set point
temperature is displayed on the LCD screen of the transmitter.
SET TEMPERATURE
Figure 10: Room
temperature.
Smart Thermostat (Transmitter Operation)
The Smart Thermostat function adjusts the flame height in
accordance to the difference between the set point and the room
temperatures. As the room temperature gets closer to the set
point, the Smart Function will modulate the flame down. If the
room temperature is cool, the Smart Function will modulate the
flame up. To activate this function, press the THERMOSTAT key
(Figure 1) until the word “SMART” appears to the right of the
temperature icon (Figure 11). To adjust the set point, press the
up or down arrow keys until the desired set point temperature is
displayed on the LCD screen of the remote transmitter
(Figure 12).
Figure 11: Smart flame
function.
Figure 12: Smart flame
adjusting temperature.
5055.634-B
10
251115-44
CASC.BODYB
CMDN.BODYB
Owner Information
Comfort Fan Speed Control
If the Heater is equipped with a hot air circulating fan, the speed of the fan can be controlled by
the Proflame 2 System. The fan speed can be adjusted through six (6) speeds. To activate this
function use the Mode Key (Figure 1) to index to the fan control icon (Figure 13). Use the Up/Down
Arrow Keys (Figure 1) to turn on, off or adjust the fan speed (Figure 13). A single “beep” will confirm
reception of the command.
Figure 13: Fan control
Continuous Pilot/Intermittent Pilot (CPI/IPI) selection
With the system in the “OFF” position, press the Mode Key (Figure 1) to index to the CPI mode
icon (Figure 14). Pressing the Up Arrow Key will activate the Continuous Pilot Ignition mode (CPI).
Pressing the Down Arrow Key will return to IPI. A single “beep” will confirm the reception of the
command.
Figure 14: CPI - IPI Selection.
CASC.BODYB 251115-44
CMDN.BODYB
11
5055.634-B
Owner Information
Low Battery Power Detection
Transmitter
The life span of the remote control batteries depends on various
factors: quality of the batteries used, the number of ignitions of
the Heater, the number of changes to the room thermostat set
point, etc.
When the remote batteries are low, an icon will appear on the
LCD display of the remote (“Figure 15: Low battery power.” on
page 12) before all battery power is lost. When the batteries
are replaced this icon will disappear.
Figure 15: Low battery power.
Receiver
The life span of the IFC module batteries depends on various factors: quality of the batteries
used, the number of ignitions of the Heater, the number of changes to the room thermostat set
point, etc.
When the IFC batteries are low, a “double-beep” will be emitted from the IFC module when it
receives a command from the remote. This is an alert for a low battery condition for the IFC
board. When the batteries are replaced, a single “beep” will be emitted from the IFC module
when a key is pressed. See (“Initializing the System for the first time” on page 8).
Warnings and Cautions
WARNING
Fire Hazard. Can cause severe injury or death
The Receiver causes ignition of the appliance. The appliance can turn on
suddenly. Keep away from the appliance burner when operating the remote
system or activating manual bypass of the remote system.
WARNING
Shock Hazard. Can cause severe injury or death
This device is powered by line voltage. Do not try to repair this device.
In no way is the enclosure to be tampered with or opened.
Disconnect from line voltage before performing any maintenance.
5055.634-B
12
251115-44
CASC.BODYB
CMDN.BODYB
Owner Information
Maintenance
Turn off gas and electrical power supply (if applicable) and allow ample time for unit to cool
before servicing appliance. It is recommended that the fireplace and its venting should be
inspected at least once a year by a qualified service person.
Glass Door:
Warning: Do not operate fireplace with glass door removed, cracked or broken. Replacement
of the glass door should be done by a licensed or qualified service person.
Do not strike or otherwise impact the glass in any way that may cause it to break. If the glass
becomes cracked or broken it must be replaced before using the fireplace. Replacement
door can be obtained from your nearest Pacific Energy dealer. Do not substitute with any
other type.
To remove broken glass, remove Door as noted in “Door Installation/Removal” on page 28.
Annual Inspection:
a)
Remove glass door and decorative media (such as logs and rocks). Inspect decorative
media and burner assemblies for soot buildup. If excessive buildup of soot is present,
have a qualified service person inspect and adjust unit for proper combustion. Clean
burners with a brush or vacuum cleaner, paying close attention to burner ports.
b)
Check the pilot system for proper flame size and operation. Clean pilot free of soot,
dust or any other deposits.
c)
Check that the vent pipe and vent terminal are open and free from blockage or debris.
If the venting is disassembled for cleaning, it must be properly assembled and resealed. Refer to “Venting” on page 19 for proper procedure.
d)
Check glass panel gasket, replace if necessary. It is important that the glass seal be
maintained in good condition.
e)
Check and replace batteries as needed.
Note: The appliance area must be kept clear and free from combustible materials,
gasoline and other flammable vapors and liquids.
Periodically:
a) Viewing glass may be cleaned as necessary with fireplace glass cleaner.
b) Exterior finish may be cleaned with mild soap and water.
CAUTION:
Do not use abrasive cleaners on glass or any other part of the fireplace.
Do not clean glass when hot.
CASC.BODYB 251115-44
CMDN.BODYB
13
5055.634-B
Installer Information
Installer Information
Lighting Instructions
FOR YOUR SAFETY READ BEFORE LIGHTING
WARNING: If you do not follow these instructions exactly, a
fire or explosion may result causing property damage,
personal injury or loss of life.
A. This appliance is equipped with an ignition device which
automatically lights the pilot. Do not try to light the pilot by hand.
B. BEFORE LIGHTING smell all around the appliance area for gas. Be
sure to smell next to the floor because some gas is heavier than
air and will settle on the floor.
WHAT TO DO IF YOU SMELL GAS:
- Do not try to light any appliance.
- Do not touch any electric switch; do not use any phone in your
building.
- Immediately call your gas supplier from a neighbour's phone. Follow
the gas supplier's instructions.
- If you cannot reach your gas supplier, call the fire department.
C. Use only your hand to push in or turn the gas control knob. Never use
tools. If the knob will not push in or turn by hand, don't try to repair it,
call a qualified service technician. Force or attempted repair may
result in a fire or explosion.
D. Do not use this appliance if any part has been under water.
Immediately call a qualified service technician to inspect the
appliance & to replace any part of the control system & any gas
control which has been under water.
LIGHTING INSTRUCTIONS
1. STOP! Read the safety information above on this label.
2. This appliance is equipped with an ignition device which
automatically lights the pilot. Do not try to light the pilot by hand.
3. Push the "On/ Off" switch to turn the fireplace ON.
- If the burner does light go to step 6.
- If the burner does not light, complete steps 4 through 5.
- If the burner will not light or stay lit after several tries, push the
"On/ Off" switch for the fireplace to OFF, turn off all electric power
to the fireplace and call your service technician or gas supplier.
Note: Sufficient time must be allowed for air to escape from lines if
the unit is being lit for the first time.
4. Push the "On/ Off" switch to the fireplace Off.
5. Allow sufficient length of time (minimum 5 minutes) for any gas in the
combustion chamber to escape. If you still smell gas, STOP! Follow
"B" in the safety information above on this label. If you don't smell
gas, go to step 3.
6. Set fireplace to desired setting by using hand held remote.
TO TURN OFF GAS APPLIANCE
1. Push the "on/ off" switch to the "Off" position.
2. Turn off all electric power to the appliance and remove backup
batteries if service is to be performed or for extended shutdown.
Due to high surface temperatures, keep children, clothing and furniture away. Keep burner and control compartment clean. See installation and
operating instructions accompanying the appliance.
A cause de la temperature elevee des parios, tenir eloignes les enfants, les vetements et les meubles. Maintenir propres le bruleur et le
compartiment de commande. Voir les instructions relatives a l'installation et au fonctionnement qui accompagnent l'appareil.
CAUTION:
Hot while in operation. Do not touch. Severe burns may result. Keep children,
clothing, furniture, gasoline and other liquids having flammable vapours away. Keep burner and control
compartment clean. See installation and operating instructions accompanying the appliance.
ATTENTION:L'appareil est chaud lorsqu'il fonctionne. Ne pas toucher l'appareil. Risque de
brûlures graves. Serveiller les enfants. Garder les vêtements, le meubles, l'essence ou autres liquides
produisant des vapeurs infl ammables loin de l'appareil. S'assurer que le brûleur et le compartiment des
commandes sont propres. Voir les instructions d'installation et d'utilisation qui accompagnent l'appareil.
090713
5051.185
5055.634-B
14
GBWY
251115-44
CASC.BODYB
CMDN.BODYB
Installer Information
Fireplace Dimensions
CASCO:
CAMDEN:
19 5/16"
(491mm)
16 5/32"
(411mm)
27 7/32"
(592mm)
16 5/32"
(411mm)
38"
(965mm)
30"
(762mm)
27 1/8"
(689mm)
24 1/8"
(613mm)
36 15/32"
(926mm)
19 13/16"
(503mm)
39 15/32"
(1003mm)
22 13/16"
(580mm)
35 1/2"
(902mm)
32 1/2"
(826mm)
27 1/32"
(687mm)
24 1/32"
(610mm)
22 1/16"
(560mm)
25 1/16"
(636mm)
30 9/16"
(775mm)
39 1/16"
(992mm)
22 9/16"
(573mm)
31 1/16"
(789mm)
Figure 16: Casco dimensions.
Figure 17: Camden dimensions.
NON-COMBUSTIBLE
FACING MATERIAL:
12” HIGH BY 1/2” THICK (MIN)
BY WIDTH OF FIREBOX.
NON-COMBUSTIBLE
FACING MATERIAL:
WIDTH DETERMINED
BY FIREBOX WIDTH
1/2"
12"
A
SURROUND
BOX
BACKING
FLANGE
DETAIL A
SCALE 1 : 4
2 1/2"
ADJUSTMENT FOR
DIFFERENT
FACING MATERIAL
THICKNESS
Figure 18: Camden lintel and facing.
FRAMING NOTE: A sheet of non-combustible material must be used as facing material
above the lintel. “Detail A” shows the required dimensions of 12” tall by 1/2” thick
(minimum) by X” width as determind by the width of the fireplace at its widest.
CASC.BODYB 251115-44
CMDN.BODYB
15
5055.634-B
Installer Information
Fireplace Framing Dimensions
39 3/4"
(1010mm)
36 3/4"
(933mm)
31 1/2"
(800mm)
39 1/2"
(1003mm)
20 7/8"
(530mm)
Figure 19: Casco framing dimensions.
20 7/8"
(530mm)
Figure 20: Camden framing dimension.
51 31/32"
(1320mm)
17 5/32"
(436mm)
17 5/32"
(436mm)
MINIMUM 2"
(51mm) CLEARANCE
51 31/32"
(1320mm)
Figure 21: Casco corner framing.
5055.634-B
Figure 22: Camden corner framing.
16
251115-44
CASC.BODYB
CMDN.BODYB
Installer Information
Clearances to Combustibles
* Mantel clearances as measured from the bottom of the
fireplace to the bottom of the lintel.
CASCO
F
E
CAMDEN
LOUVERED
CONTOURED
LOUVERED
CONTOURED
34”
34”
34”
34”
34”
34”
45”
43.5”
42”
40”
39.5”
39”
D
A
B
C
Distance that mantel extends from wall
C
B
D
E
F
A
Figure 23: Casco Camden mantel
clearances.
12”
9”
6”
“Louvered” and “Contured” refer to the style of “Fronts” available to both the Casco and Camden fireplaces. Because of
the different dimensions and BTU output of the two fireplaces,
the distance between the bottom of the fireplace and the bottom of the mantels will vary depending on how far the mantel
extends from the wall. Use the above tables to determine the
correct position of the mantel.
Minimum Clearance to Combustible Materials
ENCLOSED SIDE WALL
ENCLOSED BACK WALL
ENCLOSED CEILING
ENCLOSED FRONT WALL
EXPOSED SIDE WALL
VENT ENCLOSURE
EXTERIOR SOFFIT
CASCO
1.75”
NCR*
4”
NCR*
8”
1”
30”
CAMDEN
1.75”
NCR*
4”
NCR*
8”
1”
30’
* NCR stands for “No Clearance required”. You may use combustible
materials in direct contact with the appliance on these surfaces.
CASC.BODYB 251115-44
CMDN.BODYB
17
5055.634-B
Installer Information
Locating the Fireplace
In planning the installation for the fireplace, it is necessary to determine where the unit is to be
installed, location of vent system and where gas supply piping may be plumbed. Various installations
are possible, such as, into an existing wall, a corner, a built in wall or a wall projection. Due to high
temperatures, do not locate this fireplace in areas of high traffic or near furniture or draperies.
Figure 24: Casco Camden common locations.
A
B
B
CASCO
31.5“
36.75“
CAMDEN
39.5“
39.75“
A
Figure 25: Casco camden framing dimensions.
5055.634-B
18
251115-44
CASC.BODYB
CMDN.BODYB
Installer Information
Venting
Damper Position
Note: The intake
damper positions
specified in this
chart were set in
a controlled testing
environment, and
serve as a general
guideline for
installations. Every
venting configuration
is different, and the
damper setting may
need slight
adjustment from this
chart.
Note: The vent must
not exceed a total
length of 35 feet.
Any combination
of rise and run may
be used but must
be constrained to
the boundaries of this
chart. A Maximum
of three 90° elbows
may be used. Only
one (1) 90° elbow or
combination of other
elbows equalling 90°
can be used without
reducing horizontal
run. For each
additional 90°
elbow, or an
equal combination
of elbows, reduce
horizontal vent run
by 2 feet. Ensure
vent pipe is properly
supported.
Figure 26: Casco camden venting chart.
CASC.BODYB 251115-44
CMDN.BODYB
19
5055.634-B
Installer Information
Vent Terminal Minimum Clearances
G
V
A
H
D
E
C
V
L
FIXED
CLOSED
V
B
F
B
OPEN- FIXED
ABLE CLOSED
V
OPENABLE
V
V
I
B
B
V VENT TERMINAL
A
G
B
V
J
M
A
V
A
AREA WHERE TERMINAL
IS NOT PERMITTED
AIR SUPPLY INLET
G
K
A
GAS METER
Figure 27: Vent terminal minimum clearances.
^
**
*
*
A=
*12 inches (30 cm) min.
Clearances above grass, top of plants, wood, combustible veranda, porch, deck, or balcony.
B=
*12 inches (30 cm) min.
Clearance beside or below a window or door that may be opened.
C=
12 inches (30 cm) min.
Clearance to permanently closed window recommended to prevent condensation on window.
D=
16 inches (40 cm) min.
Vertical clearance to ventilated soffit located above the terminal within a horizontal distance of 16 inches (40 cm) .
E=
30 inches (76 cm) min.
Clearance to unventilated soffit.
F=
6 inches (15 cm) min.
Clearance to outside corner.
G=
6 inches (15 cm) min.
Clearance to inside corner.
H=
3 feet (90 cm) min.
*Not to be installed above a meter/regulator assembly within 3feet (90 cm) horizontally from the
the regulator.
I=
*6 feet (1.8 m) min.
Clearance to service regulator vent outlet.
J=
*12 inches (30 cm) min.
Clearance to non mechanical air supply inlet to building or the combustion air inlet to any other appliance.
K=
*6 feet (1.8 m) min.
Clearance to a mechanical air supply inlet.
L=
7 feet (2.1 m) min.
^ Clearance above paved side-walk or a paved driveway located on public property
M=
30 inches (76 cm) min.
Clearance under veranda, porch, deck, or balcony
center-line of
a vent shall not terminate directly above a side-walk or paved driveway which is located between two single family dwellings and serves both dwellings*
only permitted if veranda, porch, deck, or balcony is fully open on a minimum of 2 sides beneath the floor*
as specified in CGA B149 Installation Codes, Note: local Codes or Regulation may require different clearances
for U.S.A. Installations follow the current National Fuel Gas Code, ANSI Z223.1
This fireplace is certified for use with 4” x 6-5/8”coaxial venting components only. It is
permitted to only use certified venting for this appliance. Including certified coaxial
flexible venting.
Figure 28: Co-axial venting components.
5055.634-B
20
251115-44
CASC.BODYB
CMDN.BODYB
Installer Information
Venting Components
NOTE: Mixing venting components from different manufacturers is inadvisable.
Description
6” Pipe Length
9” Pipe Length
12” Pipe Length
18” Pipe Length
24” Pipe Length
36” Pipe Length
48” Pipe Length
60” Pipe Length
Adjustable Length (<12”)
Adjustable Length (>12”)
Telescopic Pipe
45° Elbow
45° Elbow (Swivel)
90° Elbow
90° Elbow (Swivel)
ICC
EXCELDirect®
Galvanize
Black
d
4DL6
4DL6B
N/A
N/A
4DL1
4DL1B
N/A
N/A
4DL2
4DL2B
4DL3
4DL3B
4DL4
4DL4B
N/A
N/A
4DLT
4DLTB
Metal-Fab®
Sure-Seal
Galvanized
Black
4D6
N/A
4D12
4D18
4D24
4D36
4D48
N/A
4DAL
4D6B
N/A
4D12B
4D18B
4D24B
4D36B
4D48B
N/A
4DALB
Security
Secure Vent™
Galvanized
Black
N/A
N/A
N/A
N/A
N/A
N/A
N/A
N/A
SV4L6
N/A
SV4L12
N/A
SV4L24
SV4L36
SV4L48
N/A
SV4LA
SV4LA12
SV4LA24
N/A
4DE45
N/A
4DE90
N/A
4DE45B
N/A
4DE90B
N/A
N/A
4D45L
N/A
4D90L
N/A
4D45LB
N/A
4D90LB
N/A
SV4E45
N/A
SV4E90
SV4LB6
N/A
SV4LB12
N/A
SV4LB24
SV4LB36
SV4LB48
N/A
SV4LBA
SV4LBA12
SV4LBA24
N/A
SV4EBR45
SV4EB45
SV4EBR90
SV4EB90
Selkirk
Direct-Temp™
Galvanized
Black
DuraVent
DirectVent Pro®
Galvanized
Black
4DT-06
4DT-09
4DT-12
4DT-18
4DT-24
4DT-36
4DT-48
N/A
4DT-AJ12
4DT-06B
4DT-09B
4DT-12B
4DT-18B
4DT-24B
4DT-36B
4DT-48B
N/A
4DT-AJ12B
46DVA-06
46DVA-09
46DVA-12
46DVA-18
46DVA-24
46DVA-36
46DVA-48
46DVA-60
46DVA-08A
46DVA-06B
46DVA-09B
46DVA-12B
46DVA-18B
46DVA-24B
46DVA-36B
46DVA-48B
46DVA-60B
46DVA-08AB
N/A
4DT-TL14
4DT-TL38
4DT-EL45
N/A
4DT-EL90S
N/A
N/A
4DT-TL14B
4DT-TL38B
4DT-EL45B
N/A
4DT-EL90SB
N/A
46DVA-16A
46DVA-17TA
46DVA-24TA
46DVA-E45
N/A
46DVA-E90
N/A
46DVA16AB
46DVA-17TAB
46DVA-24TAB
46DVA-E45B
N/A
46DVA-E90B
N/A
Figure 29: 4” x 6⅝” Rigid Piping Cross Reference Chart.
Description
Horizontal Termination Kit
ICC
EXCELDirect®
4CS
4SS
4WS
4OS
4WT
4FS
4TP
4AS
4SC
4F
4FA
4FB
4VSS
4VT
4DHT
4VT
4HT
4ST14
4ST36
4HTK
Vertical Termination Kit
N/A
Ceiling Support
Ceiling Support Box
Wall Support
Offset Support
Wall Thimble
Firestop Spacer
Trim Plate
Attic Insulation Shield
Storm Collar
Flat Roof Flashing
Adjustable Flashing (0/12-6/12)
Adjustable Flashing (6/12-12/12)
Vinyl Siding Standoff
High Wind Vertical Cap
High Wind Horizontal Cap
Vertical Termination Cap
Horizontal Termination Cap
Snorkel Termination Cap
Metal-Fab®
Sure-Seal
4DSP
4DRS
4DWS
N/A
4DWT
4DFS
4DCP
N/A
4DSC
N/A
4DF
4DF-12
4DVS
N/A
N/A
4DVT
4DHT
4DST14
4DST36
4DHTKA
4DHTKB
4DVTK
Security
Secure Vent™
SV4SD
SV4CSB
SV4BM
SV4SU
SV4RSM
SV4BF
SV4PF
SV4RSA
SV4FC
SV4F
SV4FA
SV4FB
SV4VS
N/A
N/A
SV4CGV
SV4CHC
SV4STC14
SV4STC36
SV0HK
SV0HK2
SV0FK
SV0FAK/SV0FBK
Selkirk
Direct-Temp™
4DT-CS
4D5-CSS
4DTWS/B
4DT-OS
4DT-WT
4DT-FS
4DT-TP
4DT-AIS
4DT-SC
4DT-AF
4DT-AF6
4DT-AF12
4DT-VS
N/A
N/A
4DT-VT
4DT-HC
4DT-ST14
4DT-ST36
4DT-HKA
4DT-HKB
4DT-VKC
DuraVent
DirectVent Pro®
46DVA-DC
46DVS-CS
46DVA-WS
46DVA-ES
46DVA-WT
46DVA-FS
N/A
46DVA-IS
46DVA-SC
46DVA-FF
46DVA-F6
46DVA-F12
46DVA-VSS
46DVA-VCH
46DVA-HSCH
46DVA-VC
46DVA-HC
46DVA-SNK14
46DVA-SNK36
46DVA-KHA
46DVA-KHC
N/A
Figure 30: 4” x 6⅝” Rigid Pipe Components Cross Reference Chart.
CASC.BODYB 251115-44
CMDN.BODYB
21
5055.634-B
Installer Information
Plumbing and Electrical
Figure 31: Casco camden gas connection & electrical access panel.
Gas connection
To make the required electrical and gas connections, start by positioning the gas fireplace.
Connect the gas supply line to the 1/2” fitting that extends out of the unit (Figure 31).
Please see the gas supply section for requirements of the gas supply.
A gas shut off valve is located inside the fireplace and may be accessed by removing the
inner firebox unit.
Electrical connection
Open the access panel seen in (Figure 31) and connect the line wires to the supplied wires
inside the junction box using marrettes. A licensed electrician must be used to make this
connection.
5055.634-B
22
251115-44
CASC.BODYB
CMDN.BODYB
Installer Information
Gas Supply
Servicing of the appliance can be performed from the front of the unit by removing the door and the
gas tray from the unit.
Caution: The gas line should be installed by a qualified service person in accordance with all building codes. This section is intended as a guide for qualified technicians installing this appliance.
Consult local and/or national building codes before proceeding.
Gas supply line connection is located on the side of the fireplace. Gas connection accepts a ½”
NPT fitting. Correct gas line diameter must be used to assure proper operation and pressure.
The fireplace input rating is shown in the chart below.
A drip leg must be installed in the gas supply line going to the gas control valve to minimize the
possibility of any loose scale or dirt within the gas supply line from entering the control valve.
Check local codes for additional requirements.
Turn on the gas supply and check that all connections are tight and leak free.
WARNING: The gas tray including gasket must be reinstalled after conversion/installation
or servicing has been completed.
Gas Pressure Check
Please refer to following page for gas pressure testing procedure.
Casco
Gas pressure requirements
Input Pressure
Minimum
Maximum
Manifold Pressure
High
Low
Natural Gas
5.0” WC
13.9” WC
Propane
11.0” WC
13.9” WC
3.5” WC
1.6” WC
10” WC
6.4” WC
CASC.BODYB 251115-44
CMDN.BODYB
Gas
NG
LP
Orifice
1.98mm
1.25mm
Output
18,000 btu/hr
17,000 btu/hr
AFUE
76%
76%
Camden
Gas
NG
LP
23
Orifice
2.55mm
1.52mm
Output AFUE
30,000 btu/hr
26,000 btu/hr
5055.634-B
75%
75%
Installer Information
Gas Pressure Testing Procedure
Note: To test the gas pressure, turn off the gas supply to the appliance before loosening
test point screws. Verify gas pressures with the fireplace lit and at the highest setting.
1. Remove bottom trim and locate the valve as seen in (Figure 32).
2. Locate the inlet and outlet test points on the valve which can be seen in (Figure 33). After
locating test ports loosen the screws within the ports using a flat-tip screwdriver.
3. Attach pressure gauge to the test ports.
4. Turn gas supply back on and test pressures.
5. After testing is finished turn off gas supply, remove the pressure gauges and retighten the
screws in the test points.
Pilot Adjustment
The pilot flame level can
be adjusted by turning the
adjustment screw, using a flattip screwdriver, seen on the
valve in (Figure 33).
Receiver and
battery holder
Valve
Figure 32: Gas control valve location.
PILOT ADJUSTMENT
SCREW
MAIN GAS
SOLENOID
PILOT
SOLENOID
Figure 33: Gas control valve.
PRESSURE
MODULATOR
DEVICE
5055.634-B
MANIFOLD PRESSURE
TEST POINT
INLET
PRESSURE
TEST POINT
24
251115-44
CASC.BODYB
CMDN.BODYB
Installer Information
Surround Installation Instructions
Figure 34: Surround.
Figure 35: Surround and lintel tab.
The surround cover (Figure 34) attaches to the lintel once the decorative backing plate has been
installed. The surround easily fits into place by connecting all four of its hooks to the lintels four tabs
(Figure 35).
Figure 37: Surround in place (backing not
shown).
Figure 36: Top of surround fitting inside the baffle
during
installation.
CASC.BODYB 251115-44
CMDN.BODYB
25
5055.634-B
Installer Information
CAMDEN
LOUVERED FRONT
CASCO
LOUVERED FRONT
32”
24”
20 1/2”
23 1/2”
11”
14”
28 1/
20 5/
2”
8”
BRCA.18LFBKB - Black
BRCA.18LFGYB - Grey
BRCA.18LFPCBKC - Powder coat Black
BRCA.18LFPCCUB - Powder coat Copper
BRCA.18LFPCSGB - Powder coat Silver/Grey
BDCD.30LFBKB - Black
BDCD.30LFGYB - Grey
BDCD.30LFPCBKC - Powder coat Black
BDCD.30LFPCCUB - Powder coat Copper
BDCD.30LFPCSGB - Powder coat Silver/Grey
CAMDEN
CONTOURED FRONT
CASCO
CONTOURED FRONT
24”
20 1/2”
32”
23 1/2”
11”
14”
28 1/
20 5/
2”
8”
BDCD.30CFBKB - Black
BDCD.30CFGYB - Grey
BRCA.18CFBKB - Black
BRCA.18CFGYB - Grey
Figure 38: Surround dimensions and part numbers.
5055.634-B
26
251115-44
CASC.BODYB
CMDN.BODYB
Installer Information
Propane Conversion
Before starting the conversion make sure to shut off the
gas supply to the unit and allow fireplace to cool to room
temperature.
To convert the gas fireplace from natural gas to propane the
(GASC.LPKIT) kit is required. This kit comes with new pilot and
burner orifices as well as a new pressure modulator for the valve.
To switch the pressure modulator, follow the instructions that are
provided with the conversion kit.
Pilot
To change the orifices you are required to remove the door,
media set, and burner. Please refer to the appropriate sections
of this manual and follow instructions on how to correctly
remove the components.
After removing the burner you will have access to the burner
orifice which is located on the bottom of the burner tray, as seen
in (Figure 39). The orifice can be removed using a ½” socket.
Before installing the new orifice, Thread Sealant needs to be
applied to the threads of the new orifice to ensure a proper seal
when installed.
Burner
orifice
Figure 39: Burner orifice and pilot.
To replace the pilot orifice you will need to remove the pilot hood
which is held in place by a spring. First remove the spring, and
then remove the hood by pulling it up from the pilot bracket,
seen in (Figure 40). To remove the existing orifice insert a 5/32”
or 4mm Allen wrench into the hexagonal key-way of the orifice
and rotate counter-clockwise until free. Insert the new orifice
using the same Allen wrench and tighten it until a torque of 9
lbf in (1 Nm) is achieved. Replace the pilot hood by aligning
the tab on the base of the hood with the slot in the side of the
pilot journal, and push the hood down onto the pilot bracket.
Replace the spring by pushing it onto its seat.
Before returning the burner into position, the venturi shutter will
have to be adjusted to the correct opening. The correct venturi
settings are shown in (Figure 41). Loosen the screw with a
Phillips screwdriver and rotate the shutter until the open slots on
both sides are completely open. Tighten the screw, and return
the burner into position.
Figure 40: Pilot.
Venturi Opening
Propane
Natural Gas
Casco
Open
1/16”
Camden
Open
1/16”
Figure 41: Venturi shutter.
CASC.BODYB 251115-44
CMDN.BODYB
27
5055.634-B
Installer Information
Door Installation/Removal
Removal
1. Remove surround from lintel by lifting it from 4
tabs located on the lintel (Figure 42).
2. Locate and remove the two 3/8” bolts securing
the bottom of door as seen in (Figure 43).
3. Tilt the bottom of the door away from the
appliance and lift the top of the door from the
firebox lip (Figure 44).
4. When removing the door, be careful to not
damage or bend the lintel tabs (Figure 46).
Installation
Figure 42: Removing surround from lintel tabs.
installation is the reverse of removal.
Figure 44: Lip to hang door bracket from.
Figure 43: Accessing securring bolt.
Lintel tabs
Figure 45: Door’s upper hanging bracket.
5055.634-B
Figure 46: Lintel tabs.
28
251115-44
CASC.BODYB
CMDN.BODYB
Installer Information
Fan Removal / Installation
1. Make sure that the gas and electrical supply is shut off.
2. Locate and remove the two 3/8” bolts securing the bottom of door as seen in
(“Figure 43: Accessing securring bolt.” on page 28).
3. Remove media from firebox
Remove panels to protect them while extracting fan.
Remove burner, baffle, burner tray, side and rear panels.
1. Remove the screw holding the burner to the burner tray (Figure 47).
2. Remove two screws from the front of the upper baffle and remove the baffle (Figure 48).
3. Remove two screws from the burner plate (Figure 49) and remove burner plate.
4. Remove the side and rear firebox panels (Figure 50) and (Figure 51).
Note: The two side firebox panels hold the rear firebox panel in place.
Support the rear firebox panel as the side panels are being removed.
Figure 47: Burner securring screw.
Figure 48: Removing the upper baffle.
Figure 49: Removing the burner plate.
Figure 50: Removing one of the side
panels.
CASC.BODYB 251115-44
CMDN.BODYB
29
5055.634-B
Installer Information
5. Remove two screws which hold the back ledge (Figure 52) in place and remove.
6. Remove the approximately 25 screws hold the base plate (Figure 53) to the frame of the firebox.
Figure 51: Removing the rear panel.
Figure 52: Removing back ledge.
7. Gently remove the base plate (Figure 54) and set aside to the right hand side of the firebox.
There is no need to disconnect any of the electrical or gas fittings.
Figure 54: Base plate with wiring attached.
Figure 53: Removing base plate.
5055.634-B
30
251115-44
CASC.BODYB
CMDN.BODYB
Installer Information
8. The fan is located inside the opening and toward the rear of the firebox. A 3/8” nut (Figure
55) holds the fan assembly onto a threaded post. Remove the nut and gently extract the fan
assembly from the fire box (Figure 56). Be careful not to accidentally catch any other wires while
the fan is being extracted.
9. Disconnect the two power wires (Figure 57) before fully extracting the fan from the opening.
10. Installation is reverse of removal. Return the media to its proper place according to by referring to
the appropriate section of this manual.
Figure 56: Fan removal
Figure 55: Fan nut location.
Figure 57: Extracted fan.
CASC.BODYB 251115-44
CMDN.BODYB
31
5055.634-B
Installer Information
Panel Installation / Removal
Panel Installation
NOTE: Air Deflector from burner kit needs to be installed
before panels. See Burner Kit Installation
1. Insert back panel so that it is sitting on ledge at
the back of the firebox (Figure 59).
2. Insert first side panel by inserting the front edge
of the panel into the lip at the front of the firebox.
Then slide the rear part of the panel until it
reaches the firebox side wall (Figure 60).
3. Repeat step 2 for the second side panel.
4. To hold panels in place, install the baffle, from the
burner kit, by resting the back flange on top of
the back panel and use two screws to secure the
front of the baffle to the top of the firebox, seen in
(Figure 61).
Left
Side
Panel
Right
Side
Panel
Rear Panel
Figure 58: Panels.
Panel Removal
1. Remove the baffle by removing screws securing
the front edge of the baffle (Figure 61). After
removing the two screws you can slide the baffle
out of the fireplace.
Figure 59: Back panel.
2. Remove first side panel by pulling the back edge
of panel out away from the firebox wall until there
is enough room to remove the front edge of the
panel from the lip at front of firebox. When you
have enough room, remove panel’s front edge
from the firebox lip and remove from fireplace.
Figure 60: Side panel.
3. Repeat step 2 for the second side panel.
4. Remove back panel by tilting the top
forward and then pull out of fireplace.
Figure 61: Baffle.
5055.634-B
32
251115-44
CASC.BODYB
CMDN.BODYB
Installer Information
Log Burner Kit Installation / Removal
Air Deflector Installation / Removal
Installation
Position the air deflector in the fireplace (Figure 62)
and secure with two screws using a screwdriver.
Screws
Removal
Remove the two screws (Figure 62) using a
screwdriver, and remove the air deflector from
fireplace.
Burner Tray Installation / Removal
Installation
Place the burner tray in the fireplace and secure with
4 screws using a screwdriver (Figure 63).
Figure 62: Air deflector.
Removal
Remove the 4 screws (Figure 63) using a
screwdriver, and remove the burner tray.
Burner Installation / Removal
Installation
Screws
Place the burner in firebox so that the venturi is over
top of the orifice. To secure the burner, insert the
screw using a screwdriver (Figure 64).
Removal
Remove the screw (Figure 64) and lift the burner out
of the unit.
Figure 64: Burner securing screw.
CASC.BODYB 251115-44
CMDN.BODYB
Figure 63: Burner tray.
Figure 65: Burner tray parts.
33
5055.634-B
Installer Information
Traditional Log Set Installation / Removal
Installation
1. Position rear log against the back firebox
(Figure 67).
2. Position front log just behind the front burner
tube (Figure 68).
3. Position log 3 (decorative log) with the thin end of
the log resting on top of the right end of the front
log(Figure 69).
4. Place ember chunks in front of the front log to
hide the burner(Figure 70).
Figure 66: Log set and pilot shield.
Note: Do Not Block Burner Ports with Embers.
Removal
1. Remove embers from fireplace.
2. Lift the decorative log off of the front log and
remove it from the firebox.
3. Lift the front log off of the burner and remove it
from the firebox.
4. Lift the back log over the pilot and burner and
remove it from the firebox.
Figure 67: Rear log installation.
Figure 68: Front log installation.
Figure 70: Ember placement.
Figure 69: Decorative log installation.
Figure 71: Completed log set.
5055.634-B
34
251115-44
CASC.BODYB
CMDN.BODYB
Installer Information
Rustic Log Set Installation / Removal
INSTALLER
INFORMATION
Installation
1. Position rear logs1 and 2 against the back firebox
(Figure 73).
2. Position front logs 3 and 4 between the front
burner tubes (Figure 74).
3. Position side logs 5 & 6 (Figure 75).
4. Position logs 7 and 8 (Figure 76).
5. Place logs 9, 10 and 11 and ember chunks in
front of burner to hide the burner tube (Figure 77).
Note: Do Not Block Burner Ports with Embers
Figure 74: Rustic front logs 3 & 4 installation.
Removal
1. Remove embers from fireplace.
2. Lift the side and log off of the front log and
remove it from the firebox.
3. Lift the front logs off of the burner and remove
it from the firebox.
4. Lift the rear logs over the pilot and burner and
remove from firebox.
Figure 75: Rustic logs 5 & 6 installation.
Figure 76: Rustic logs 7 & 8 installation.
Figure 72: Rustic log set.
Figure 73: Rear logs 1 and 2 installation.
CASC.BODYB 251115-44
CMDN.BODYB
Figure 77: Rustic logs 9, 10 & 11 plus embers installation.
35
5055.634-B
Installer Information
Glass Burner Kit
The glass burner plate comes with a collar for the pilot, screws to secure the burner tray to the
firebox and and a bag of glass.
Pilot
Collar
Screw locations
Screw locations
Figure 78: Casco camden glass tray.
5055.634-B
36
251115-44
CASC.BODYB
CMDN.BODYB
Installer Information
Damper Adjustment
The Casco and Camden fireplaces both come with an adjustable damper that can limit the flow of
intake air. This damper is located behind the air deflector at the rear of the inner firebox. Sometimes
on installations that involve vertical venting configurations over 10 feet in height, the intake air tends
to accelerate down the vent causing hectic flame action. This damper can be closed partially to
reduce the speed of the intake air and thus calm the flames to a more natural look. Over-closure of
this damper could cause an insufficient air supply to the fire, which would result in flames that cause
soot. See “Damper Position” on page 19 for optimum damper position.
To adjust the damper, loosen the two screws that hold the air deflector in place. Slide the damper
down to a position that will reduce the air speed entering the appliance, using the bend tab at the
bottom edge of the damper. This might take a few adjustments to obtain the best flame appearance.
Because removal of the media, burner and burner tray are necessary for damper adjustment, you
may put the burner and tray in place without fastening the screws to test the intake airflow. Once the
damper is fastened in its adjusted position, return the burner and tray into place and fasten with the
appropriate screws. Position the media as instructed in this manual.
Figure 79: Air shutter.
CASC.BODYB 251115-44
CMDN.BODYB
37
5055.634-B
Installer Information
Replacement Parts
Description
1.
2.
3.
4.
5.
6.
7.
8.
Order Number
Casco Screen ........................................5002.610-A (for louvered front)
Casco Screen ..................................... 5002.615-A (for contoured front)
Camden Screen .....................................5002.710-A (for louvered front)
Camden Screen .................................. 5002.715-A (for contoured front)
Complete Replacement Gas Tray............................. GASC.BRNTRAYA
Replacement Remote Control .......................................GASC.CNTRLA
CASC Replacement Blower .......................................... BDEM.BLOWB
CMDN Replacement Blower ........................................... BRET.BLOWB
Casco Aesthetic Components
Camden Aesthetic Components
CMDN.BODYB
CASC.BODYB
Door Kit (required)
FLUSH MOUNT DOOR .......................... BRCA.260091-A
Door Kit (required)
FLUSH MOUNT DOOR .......................... BDCD.267507-A
Surround Fronts (required)
Louvered Front - Black............................BRCA.18LFBKB
Louvered Front - Grey ............................ BRCA.18LFGYB
Surround Fronts (required)
Louvered Front - Black........................... BDCD.30LFBKB
Louvered Front - Grey ............................ BDCD.30LFGYB
Contoured Front - Black......................... BRCA.18CFBKB
Contoured Front - Grey ..........................BRCA.18CFGYB
Contoured Front - Black.........................BDCD.30CFBKB
Contoured Front - Grey ..........................BDCD.30CFGYB
Panel Set (required)
Slate Grey Fluted Panel Set .....................BDEM.CPNFLA
Red Brick Panel Set ................................BDEM.CPNRDA
Grey Brick Panel Set ............................... BDEM.CPNGYA
Ledgestone Panel Set ............................. BDEM.CPNLDA
Panel Set (required)
Slate Grey Fluted Panel Set ...................... BRET.CPNFLA
Red Brick Panel Set ................................ BRET.CPNRDA
Grey Brick Panel Set .................................BRET.CPNGYA
Ledgestone Panel Set ...............................BRET.CPNLDA
Porcelain Panel Set Black ....................... BDEM.PPNBKA
Porcelain Panel Set Red.......................... BDEM.PPNRDA
Porcelain Panel Set Titanium .................... BDEM.PPNTIA
Porcelain Panel Set Coffee Bean ............ BDEM.PPNCBA
Porcelain Panel Set Copper .................... BDEM.PPNCUA
Porcelain Panel Set Black .........................BRET.PPNBKA
Porcelain Panel Set Red............................BRET.PPNRDA
Porcelain Panel Set Titanium ......................BRET.PPNTIA
Porcelain Panel Set Coffee Bean ..............BRET.PPNCBA
Porcelain Panel Set Copper ..................... BRET.PPNCUA
Burner Sets (required)
Traditional Log Set ......................................BDEM.NG01B
Rustic Log Set ............................................BDEM.NG05B
Burner Sets (required
Traditional Log Set & Burner........................ BRET.NG01B
Rustic Log Burner ....................................... BRET.NG05B
Glass Burner...............................................BDEM.NG03B
Black Glass ................................................ GASC.3GLBK
Desert Glass ................................................GASC.3GLDE
Pacific Glass ...............................................GASC.3GLPA
Twilight Glass .............................................. GASC.3GLTW
Glass Burner................................................ BRET.NG03B
Black Glass ................................................ GASC.5GLBK
Desert Glass ................................................GASC.5GLDE
Pacific Glass ...............................................GASC.5GLPA
Twilight Glass .............................................. GASC.5GLTW
Metro Rock Set Black ........................ GASC.METROBKA
Metro Rock Set Grey.......................... GASC.METROGYA
Tranquility Rock Set ................................. GASC.TRANQA
Metro Rock Set-Black ........................ GASC.METROBKA
Metro Rock Set Grey.......................... GASC.METROGYA
Tranquility Rock Set ................................. GASC.TRANQA
Optional Components
LP Conversion Kit .....................................GASC.LP18KIT
Optional Components
LP Conversion Kit .....................................GASC.LP30KIT
5055.634-B
38
251115-44
CASC.BODYB
CMDN.BODYB
Installer Information
Wiring Diagram
Caution. Label all wires prior
to disconnection when servicing
controls. Wiring errors can cause
improper and dangerous operation.
Verify proper operation after
servicing.
Figure 80: Wiring diagram.
CASC.BODYB 251115-44
CMDN.BODYB
39
5055.634-B
Installer Information
Casco Rating Label
VENTED GAS FIREPLACE - NOT FOR USE
WITH SOLID FUEL///FOYER AU GAZ À ÉVACUATION NE PAS UTILISER AVEC DU COMBUSTIBLE SOLIDE
ANSI Z21.88-2014 / CSA 2.33-2014 Vented Gas Fireplace Heaters
CAN/CGA 2.17-M91 Gas-Fired Appliance For Use At High Altitudes.
Certified for / Certifié pour Canada and U.S.A.
B
NATURAL GAS
GAZ NATUREL
LP-GAS
LP GAZ
NATURAL GAS/
LP GAS/
DU GAZ NATUREL DU GAZ LP
Minimum supply pressure / Pression minimum d’alimentation:
5.0 in/wc / 5.0 po/c.e.
(1.25 kPa)
13.9 in/wc / 13.9 po/c.e.
(3.45 kPa)
3.5 in/wc / 3.5 po/c.e.
(.87 kPa)
12.5 in/wc / 12.5 po/c.e.
(3.11 kPa)
13.9 in/wc / 13.9 po/c.e.
(3.45 kPa)
10.0 in/wc / 11.0 po/c.e.
(2.74 kPa)
1.98mm
1.25mm
Maximum supply pressure / Pression maximum d’alimentation:
SERIES/
SERIE:
MADE IN CANADA
FABRIQUE AU CANADA
This Appliance is Equipped For Use With /
Cet Appareil est Équipé Pour Utilise Avec :
FOR USE WITH/
EN CASE D’EMPLOI AVEC:
(For the purpose of input adjustment / dans le but de régler l’alimenation)
MODEL/
MODELE:CASCO
LC- 208
Manifold pressure / Pression de la tuyauterie:
Maximum
Orifice Size / Diametre de l’injectuer:
Input BTU/hr (kW) / Entree BTU/h (kW):
Max.:18,000Btu (5.3kw)
Min.: 12,300Btu (3.6kw)
Max.:17,000Btu (5.0kw)
Min.:13,500Btu (4.0kw)
Unit electrical rating: 115v, 60hz, 0.52A / Normes electriques du unité: 115v, 60hz, 0.52 A
This appliance equipped for altitudes 0 - 4500 ft. (0 - 1372 m) / Cet unité est conçu pour des altitudes variant entre 0 - 4500 pieds (0 - 1372 m). In Canada, also
certified for installation in a bedroom or a bedsitting room / Aussi certifié pour installation dans une chambre à coucher ou une salle de séjour. This appliance
must be installed in accordance with local codes, if any; if none, follow the current CAN/CGA-B149 (Canada), or ANSI Z223.1 (USA) Installation Codes. Installer
l’appareil selon les codes ou règlements locaux, ou, en l’absence de tels règlements, selon les codes d’installation CAN/CGA-B149 (Canada), or ANSI Z223.1
(USA) en vigeur.
MANUFACTURED (MOBILE) HOME: This appliance is only for use with the type of gas indicated on the rating plate and may be installed in an aftermarket,
permanently located, manufactured (mobile) home where not prohibited by local codes. See owners manual for details.
FABRIQUEZ (MOBILE) MAISON: Cet appareil doit être utilisé uniquement avec le type de gaz indiqué sur la plaque signalétique et peut être installé dans une
maison préfabriquée (mobile) installée à demeure si les règlements locaux le permettent. Voir la notice du propriétaire pour plus de détails. Cet appareil ne
peut être converti à d’autres gaz sauf si une trousse de conversion certifiée est utilisée.
Install in accordance with the current standard Mobile Homes,CAN/CSA Z240 MH (in CANADA), and the Manufacturer’s Home Construction and Safety
Standard, Title 24 CFR, Part 3280, or the current Standard for Fire Safety Criteria for Manufactured Home Installations, Sites, and Communities ANSI/NFPA
501A, (in the U.S.A.). Cet appareil diot être installé conformemént aux exigences de la norme CAN/CSA Z240 MH en vigueur de l’ACNOR, Installations de gaz
dans les Constructions Mobiles.
FOR USE WITH GLASS DOORS CERTIFIED WITH THE APPLIANCE ONLY / POUR UTILISATION UNIQUEMENT AVEC LES PORTES IN VERRE CERTIFIÉES AVEC
L’APPAREIL
MINIMUM CLEARANCES TO COMBUSTIBLES / CLAIRANCES MINIMALES AVEC LES COMBUSTIBLE
Left and Right side are determined when facing the front of the appliance. / Les côtés droit et gauche se déterminent
en se mettant devant l’appareil et en lui faisant face.
For installation in a masonary fireplace only / Pour une installation dans
un foyer maçonnerie seulement
Sidewall to Appliance / Du mur latéral a l’appareil
Mantel to Appliance / Du manteau al’appareil
Maximum Mantel Extension / Allongement maximum du manteau
*See Installation Manual for more detail / Voyez des Directive
de l’Installation pour plus détaux.
0 in.
8 in.
* SEE USER MANUAL
*12 in.
(0 mm)
(203 mm)
Pacific Energy
Fireplace Products Ltd.
Duncan, British Columbia,
Canada
(305 mm)
WARNING: Improper installation, adjustment, alteration, service or maintenance can cause injury or property damage.
Refer to the owner’s information manual provided with this appliance. For assistance or additional information, consult a
qualified installer, service agency or the gas supplier.
AVERTISSEMENT: Une installation, un réglage, une modification, une réparation ou un entretien mal effectué peut causer
des dommages matériels ou des blessures. Voir la notice de l’utilisateur qui accompgne l’appareil. Pour de l’aide ou des
renseignements supplémentaires, consultez un installateur, un technicien agréé ou le fournisseur de gaz.
120515
5050.634-B
5055.634-B
40
CASC.BODYB
251115-44
CASC.BODYB
CMDN.BODYB
Installer Information
Camden Rating Label
VENTED GAS FIREPLACE - NOT FOR USE
WITH SOLID FUEL///FOYER AU GAZ À ÉVACUATION NE PAS UTILISER AVEC DU COMBUSTIBLE SOLIDE
ANSI Z21.88-2014 / CSA 2.33-2014 Vented Gas Fireplace Heaters
CAN/CGA 2.17-M91 Gas-Fired Appliance For Use At High Altitudes.
Certified for / Certifié pour Canada and U.S.A.
B
NATURAL GAS
GAZ NATUREL
LP-GAS
LP GAZ
NATURAL GAS/
LP GAS/
DU GAZ NATUREL DU GAZ LP
Minimum supply pressure / Pression minimum d’alimentation:
5.0 in/wc / 5.0 po/c.e.
(1.25 kPa)
13.9 in/wc / 13.9 po/c.e.
(3.45 kPa)
3.5 in/wc / 3.5 po/c.e.
(.87 kPa)
12.5 in/wc / 12.5 po/c.e.
(3.11 kPa)
13.9 in/wc / 13.9 po/c.e.
(3.45 kPa)
10.0 in/wc / 11.0 po/c.e.
(2.74 kPa)
2.55mm
1.52mm
Maximum supply pressure / Pression maximum d’alimentation:
SERIES/
SERIE:
MADE IN CANADA
FABRIQUE AU CANADA
This Appliance is Equipped For Use With /
Cet Appareil est Équipé Pour Utilise Avec :
FOR USE WITH/
EN CASE D’EMPLOI AVEC:
(For the purpose of input adjustment / dans le but de régler l’alimenation)
MODEL/
MODELE:CAMDEN
LC- 209
Manifold pressure / Pression de la tuyauterie:
Maximum
Orifice Size / Diametre de l’injectuer:
Input BTU/hr (kW) / Entree BTU/h (kW):
Max.:30,000Btu (8.8kw)
Min.: 22,000Btu (6.5kw)
Max.:26,000Btu (7.6kw)
Min.: 20,000Btu (5.9kw)
Unit electrical rating: 115v, 60hz, 0.52A / Normes electriques du unité: 115v, 60hz, 0.52 A
This appliance equipped for altitudes 0 - 4500 ft. (0 - 1372 m) / Cet unité est conçu pour des altitudes variant entre 0 - 4500 pieds (0 - 1372 m). In Canada, also
certified for installation in a bedroom or a bedsitting room / Aussi certifié pour installation dans une chambre à coucher ou une salle de séjour. This appliance
must be installed in accordance with local codes, if any; if none, follow the current CAN/CGA-B149 (Canada), or ANSI Z223.1 (USA) Installation Codes. Installer
l’appareil selon les codes ou règlements locaux, ou, en l’absence de tels règlements, selon les codes d’installation CAN/CGA-B149 (Canada), or ANSI Z223.1
(USA) en vigeur.
MANUFACTURED (MOBILE) HOME: This appliance is only for use with the type of gas indicated on the rating plate and may be installed in an aftermarket,
permanently located, manufactured (mobile) home where not prohibited by local codes. See owners manual for details.
FABRIQUEZ (MOBILE) MAISON: Cet appareil doit être utilisé uniquement avec le type de gaz indiqué sur la plaque signalétique et peut être installé dans une
maison préfabriquée (mobile) installée à demeure si les règlements locaux le permettent. Voir la notice du propriétaire pour plus de détails. Cet appareil ne
peut être converti à d’autres gaz sauf si une trousse de conversion certifiée est utilisée.
Install in accordance with the current standard Mobile Homes,CAN/CSA Z240 MH (in CANADA), and the Manufacturer’s Home Construction and Safety
Standard, Title 24 CFR, Part 3280, or the current Standard for Fire Safety Criteria for Manufactured Home Installations, Sites, and Communities ANSI/NFPA
501A, (in the U.S.A.). Cet appareil diot être installé conformemént aux exigences de la norme CAN/CSA Z240 MH en vigueur de l’ACNOR, Installations de gaz
dans les Constructions Mobiles.
FOR USE WITH GLASS DOORS CERTIFIED WITH THE APPLIANCE ONLY / POUR UTILISATION UNIQUEMENT AVEC LES PORTES IN VERRE CERTIFIÉES AVEC
L’APPAREIL
MINIMUM CLEARANCES TO COMBUSTIBLES / CLAIRANCES MINIMALES AVEC LES COMBUSTIBLE
Left and Right side are determined when facing the front of the appliance. / Les côtés droit et gauche se déterminent
en se mettant devant l’appareil et en lui faisant face.
For installation in a masonary fireplace only / Pour une installation dans
un foyer maçonnerie seulement
Sidewall to Appliance / Du mur latéral a l’appareil
Mantel to Appliance / Du manteau al’appareil
Maximum Mantel Extension / Allongement maximum du manteau
*See Installation Manual for more detail / Voyez des Directive
de l’Installation pour plus détaux.
0 in.
(0 mm)
8 in.
(203 mm)
* SEE USER MANUAL
*12 in.
(305 mm)
Pacific Energy
Fireplace Products Ltd.
Duncan, British Columbia,
Canada
WARNING: Improper installation, adjustment, alteration, service or maintenance can cause injury or property damage.
Refer to the owner’s information manual provided with this appliance. For assistance or additional information, consult a
qualified installer, service agency or the gas supplier.
AVERTISSEMENT: Une installation, un réglage, une modification, une réparation ou un entretien mal effectué peut causer
des dommages matériels ou des blessures. Voir la notice de l’utilisateur qui accompgne l’appareil. Pour de l’aide ou des
renseignements supplémentaires, consultez un installateur, un technicien agréé ou le fournisseur de gaz.
120515
CASC.BODYB 251115-44
CMDN.BODYB
5050.635-B
41
CMDN.BODYB
5055.634-B
Installer Information
5055.634-B
42
251115-44
CASC.BODYB
CMDN.BODYB
Installer Information
CASC.BODYB 251115-44
CMDN.BODYB
43
5055.634-B
© 2015 Copyright Pacific Energy Fireplace Products LTD
Reproduction, adaptation, or
translation without prior written
permission is prohibited, except
as allowed under the copyright
laws.
For technical support, please contact your retailer
Web site: www. pacificenergy.net
2975 Allenby Rd., Duncan, BC V9l 6V8