1
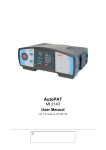
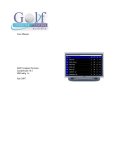
Copyright © 2001, 2003, 2006, 2007. LanA Consulting ApS. All rights reserved.
USER MANUAL
Patent Claim Generator
AutoPat
Version 1.2
English Edition (apparatuses& methods)
Jacobys Alle 23
DK-1806 Copenhagen, Denmark
Tel.: +45 20 15 44 28
Fax: +45 48 79 0715
e-mail: [email protected]
www.lanaconsult.com
Content
What is AutoPat .............................................................................................................................. 2
Technical support............................................................................................................................ 3
System requirements....................................................................................................................... 3
Installation....................................................................................................................................... 3
Uninstallation.................................................................................................................................. 4
Registration ..................................................................................................................................... 4
Starting and resuming AutoPat sessions ......................................................................................... 4
Quitting AutoPat and saving files ................................................................................................... 4
Creating CLAIMS on APPARATUSES......................................................................................... 5
User Interface.............................................................................................................................. 5
Background window ................................................................................................................... 6
Pop-up windows.......................................................................................................................... 6
Verbose mode vs. Professional mode ......................................................................................... 7
Menu bar ..................................................................................................................................... 7
Verbose Mode of the Interface ................................................................................................... 8
Welcome to AutoPat ............................................................................................................... 8
Composing from scratch ......................................................................................................... 9
Title ......................................................................................................................................... 9
Title template and its menus ................................................................................................. 10
Main elements....................................................................................................................... 11
Element template and menus ................................................................................................ 13
Complex element .................................................................................................................. 13
Sub-elements......................................................................................................................... 13
Novel shape and material features ........................................................................................ 14
Specify shape and/or material............................................................................................... 15
Relations ............................................................................................................................... 16
Relation type menu ............................................................................................................... 18
Predicate menu...................................................................................................................... 18
Add a new predicate to the dictionary. ................................................................................. 19
Word box .............................................................................................................................. 19
Relation specification................................................................................................................ 20
Predicate template................................................................................................................. 21
Coreference ........................................................................................................................... 23
Claim format ......................................................................................................................... 24
Get text.................................................................................................................................. 25
Professional mode..................................................................................................................... 26
Info........................................................................................................................................ 27
Title ....................................................................................................................................... 27
Elements................................................................................................................................ 28
Shape and material................................................................................................................ 29
Relations ............................................................................................................................... 30
Coreference ........................................................................................................................... 31
US or European Format ........................................................................................................ 32
Dependent claims.................................................................................................................. 32
Get text.................................................................................................................................. 33
Creating CLAIMS on METHODS ............................................................................................... 34
Title ........................................................................................................................................... 34
Method steps and substeps........................................................................................................ 37
Dependent claims...................................................................................................................... 38
How to edit claim on methods .................................................................................................. 39
How to generate claim text ....................................................................................................... 39
How to get better claim................................................................................................................. 40
General recommendations ........................................................................................................ 40
Pay attention to your descriptions............................................................................................. 41
Group features........................................................................................................................... 41
Order element names and sentences ......................................................................................... 41
Effort-saving and input-proof functionalities ............................................................................... 42
Spell checking........................................................................................................................... 42
Grammar checking.................................................................................................................... 42
Content checking ...................................................................................................................... 42
Automatic completion of words................................................................................................ 42
Automatic text transfer ............................................................................................................. 43
Moving element names and sentences ...................................................................................... 43
How to add new words to the dictionary ...................................................................................... 43
“Add as” menu.......................................................................................................................... 43
Add a new predicate to the dictionary. ..................................................................................... 44
1
What is AutoPat
AutoPat is a powerful tool for authoring (composition) of patent claims, which models the
professional behavior of a patent expert during the authoring of patent claims. It helps the user to
compose patent claims meeting all legal requirements. Patent law guidelines impose rather rigid
constraints on the structural composition of the text of the informationally central and legally
crucial part of a patent disclosure, the claim. The claim must consist of a single, albeit possibly
very complex, sentence with a well specified conceptual, syntactic and stylistic/rhetorical
structure. AutoPat maintains two main claim structures describing apparatuses and methods
(processes) for any technical domain.
With a tool like AutoPat it will take little effort to create a claim ready to use in a patent
document.
AutoPat consists of two stages
•
•
interactive elicitation of technical knowledge about the invention with a user adaptive
interface at the user end and
a fully automatic generation of a legal (syntactically complex) claim text.
Our elicitation technique is a domain-dependent automated mixed-initiative interview. All user
computer communication is done in a natural language (English in our case). The knowledge
elicitation scenario consists of the system requesting the user, in English, to supply information
about the invention. Using common graphical interface tools (mouse support, dialogue boxes,
menus, templates and slide bars) the interface draws the user through a step-by step procedure of
describing every essential feature of the invention. It provides content, composition and
terminology maintenance support through choices of standing and pull-down menus. These
menus supply access to words and phrases required in a claim. Though the user is encouraged to
use the AutoPat controlled language given in the menus the user has always a choice to type in
active text areas of interface windows.
To compose a claim on apparatuses the interface can be adapted to different user profiles and has
two modes: a) Verbose that guides a user through a step-by step procedure of describing the
invention and b) Professional that allows for more speed and flexibility when authoring a claim, the user may freely navigate among the stages of claim composition. It automates tedious tasks
such as typing, spell checking, revising texts, propagating changes through document, etc.
Claims on methods can be composed in the Professional mode only.
Once the acquisition scenario is concluded, the user has only to click the button "Get Text" and
the system presents the user with the text of the claim which is semantically correct and
syntactically legal (e.g., consists of a single complex sentence) and meets all other style
requirements. This version of AutoPat is a 32-bit Windows application developed to run in a
number of operating environments: Windows 95/98/Me or Windows NT 4.0/2000/XP.
2
Technical support
LanA Consulting IT company located in Copenhagen, Denmark, reserves all rights for AutoPat
application. All registered users will receive up-to-date information on new versions of this
program as well as full support for this system (consulting, training, versions upgrade, FAQ
answers etc.).
Contact address:
Jacobys Alle 23
DK-1806 Copenhagen, Denmark
Tel.: +45 20 15 44 28
Fax: +45 48 79 0715
e-mail: [email protected]
URL: http://www.lanaconsult.com
System requirements
Your system must fulfill the following minimum requirements if you want to run AutoPat:
•
•
PC: Pentium processor, 32 MB RAM, 100MB free hard disk space, CD-ROM drive
Operating system: Windows 95/98/Me or Windows NT 4.0/2000/XP
Installation
To install AutoPat on your personal computer, proceed as follows:
1. Start the setup program: Insert the CD-ROM in the appropriate drive and click on the
AutoPat setup icon. The program will be installed automatically. Follow the dialogue.
2. Select the installation directory: Confirm the suggested installation location (default: C:
\Program Files\AutoPat). You may also choose a different directory.
3. Select the Program Folder: Confirm the suggested Program Folder (default: AutoPat).
You may type a new folder name, or select one from the existing Folder list.
4. Run AutoPat: Click on the icon of AutoPat in Program Folder or on the icon on the
Desktop, or check the check box "Yes, Launch the program file".
5. Register: After you ran the program AutoPat, you will get a pop-up window in which
you will see an empty text field Serial number. Type in your serial number in this field
and click the button Update, you will get another window with your user code generated
uniquely for your computer. You will be suggested to enter your name and registration
key to open AutoPat. To get your registration key please e-mail your serial number
and your user code to [email protected]. We will send you your registration key in
reply to your message.
3
Uninstallation
If you want to uninstall AutoPat, proceed as follows:
1. Open the dialog box Add/Remove Program Properties by selecting Settings-Control
Panel-Add/Remove Programs from the Windows Start menu.
2. Select AutoPat for removal.
Registration
Run AutoPat, after you ran the program AutoPat, you will get a pop-up window in which you
will see an empty text field Serial number. Type in your serial number in this field and click the
button Update, you will get another window with your user code. You will be suggested to
enter your name and registration key to open AutoPat.
To get your registration key please e-mail your serial number and your user code to
[email protected]. We will send you your registration key in reply to your message.
Starting and resuming AutoPat sessions
To start an AutoPat session double click on the AutoPat icon.
Select New or Open in the File menu or
Follow the dialogue in the StartUp window.
If you select the subject matter Methods AutoPat will take you to the Professional mode.
In case you select Apparatuses you can open a new file in either the Verbose mode, which
opens by default, when you check "Create new claim” in the StartUp window . To open a new
file in the Professional mode select New in the File menu.
Quitting AutoPat and saving files
Before quitting AutoPat do not forget to save your claim draft as a program file to be able to
resume the AutoPat session to work with this draft later. To save your draft as a program file
select options "File -> Save" or "File -> Save as..."
You can also save an output claim text as a text file. To do so, use the "Save as" button in the
OUTPUT window.
4
Creating CLAIMS on APPARATUSES
User Interface
The purpose of the AutoPat User Interface (see Figure 1) is to elicit technical knowledge from
the user. Our elicitation technique is a domain-dependent automated mixed-initiative interview.
All user-computer communication is done in a natural language (English in our case).
Figure 1. A screenshot of the user interface in the Professional mode.
The knowledge elicitation scenario consists of the system requesting the user, in English, to
supply information about the invention. Using common graphical interface tools (mouse support,
dialogue boxes, menus, templates and slide bars) the interface draws the user through a step-by
step procedure of describing every essential feature of the invention. It provides content,
composition and terminology maintenance support through choices of standing and pull-down
menus. These menus supply access to words and phrases required in a claim.
Though the user is encouraged to use the AutoPat controlled language given in the menus the
user has always a choice to type in active text areas of interface windows. If a word is in a menu
5
it will be automatically completed right after the first characters are typed. In case the word
cannot be found in the inherent knowledge of the system the user will be asked to add it through
an easy-to-use pop-up entry box.
To add a new word to the dictionary the user is presented with a word template where the slots
are automatically filled out with the semantic class of the word and its grammatical forms
required by the generator. The user is only supposed to check the fillers and correct them if
necessary. All the new words thus added will further be found in the interface menus. Most of
lexical units displayed on the screen can be transferred to a new text area if the user clicks on
them. All transferred phrases can be edited. The user can check the content elicited so far in the
background window where the immediate results of each quantum of acquisition are displayed.
If the content appears incorrect, the user can undo the latest quantum of acquisition and do it
again correctly.
The interface has two main components, - the background window were the results of elicitation
procedure stay displayed through the whole session and a set of pop-up windows through which
you supply your knowledge into the system. All pop-up windows can be moved freely around
the screen to allow the user to see any part of the background window at any time.
Background window
The background window stays during the whole authoring session. Its main purpose is to
visualize the knowledge you supply into the system during the computer interview for you to
control and correct it if necessary. This window has two panes. The left pane is headed "Your
invention comprises" and displays a tree of elements, - a graphical representation of the
hierarchy of main elements and sub-elements of your invention. The names of the elements at the
tree nodes can be transferred to any of pop-up windows by simply clicking on them.
The right pane is headed "Essential features of your invention". It displays the title of the
invention and every essential feature of the invention in the form of a simple sentence that is
generated every time you supply a quantum of technical knowledge. You cannot type in the
background window. But you can easily edit its content through pop-up windows.
At the stage of eliciting knowledge about relations of invention elements a new section headed
"Your terminology" appears in the bottom of the left pane. Form now on all phrases used earlier
stay displayed for further reuse. You can transfer them to any of the text areas by clicking on
them. You can move split bars of every pane to have a better view of the information presented
there. Use the mouse to drag a bar to the desired position.
Pop-up windows
Pop-up windows are either menus, or knowledge elicitation windows with instructions and active
text areas into which you will supply your knowledge in the form of natural language phrases.
You can either transfer these phrases from the background window or type them in. Any phrase
in an active text area can be edited.
6
Knowledge elicitation windows have usual graphical interface tools: radio buttons, tick boxes,
pop-up menus the "Back", "Next", "OK", and "Done" buttons, and word boxes to customize your
dictionary. The "Output" pop-up window displayed a claim text generated on the basis of the
knowledge you supplied to the system. If necessary you can edit the text right in this window and
save it as a text file. All pop-up windows can be moved freely around the screen.
Verbose mode vs. Professional mode
The interface can be adapted to different user profiles and has two modes: Verbose and
Professional.
The Verbose mode is highly recommended for a beginner. It guides the user through a step-by
step procedure of describing every essential feature of the invention so as not a step of claim
composition could be omitted. All Verbose windows have detailed instructions and the "Help"
button.
The Professional mode is meant for a trained user. It allows for more flexibility when
composing a claim, - a user may freely navigate the stages of claim composition, working on
them in any order. In the Professional mode the user is supposed to be instructed by window
buttons including the "Help" button. The Professional mode is especially convenient when
editing a claim draft that has been created earlier as it allows for deleting/adding/editing any
essential feature (simple sentence) of a claim draft keeping the rest of the claim content intact.
Menu bar
The menu bar is located at the top of the background window. It contains the following
selections File, Claim Composition, Tools, Help. The File menu contains the selections New,
Open, Save, Save as and Exit that are standard Microsoft dialogues. The Tools menu has the
selections Regenerate and Settings. The Regenerate selection should be used in case you get
any update of your AutoPat. After downloading any updated AutoPat program open a .pcp file
you work with and click Regenerate. The Settings selections allows you for displaying or
hiding the Welcome and /or StartUp windows and the Claim Composition Tool Bar. Simply
check or uncheck corresponding tick boxes. Here you can also change your default directory for
saving claim drafts composed with AutoPat.
The menu bar selection Claim Composition is a menu that opens the Professional Mode of
AutoPat. This menu contains the selections Info, Title, Elements, Shape and Material, Relations,
Coreference, Main Claim Format, Dependent Claim, Generate Claim. If you start the
Professional mode to compose a new claim you will only get the Info and Title selections
enabled. In case you have not gone through the entire knowledge elicitation interview during
your previous AutoPat session only those selections will be enabled that you had covered before
you left off. If your draft was composed after a complete knowledge elicitation procedure all
selections will be enabled and you can freely navigate among the stages of the knowledge
elicitation interview.
7
There is the tool bar in the icon bar that includes the Claim Composition tool bar, which can
be expanded or collapsed by checking a corresponding selection in the Settings window. You
can also see an output claim text for any open file. Just click the triangle icon in the tool bar.
Verbose Mode of the Interface
The Verbose mode of the interface is highly recommended for a beginner. It guides the user
through a step-by step procedure of describing every essential feature of the invention so as not a
step of claim composition could be omitted. All Verbose Windows have detailed instructions and
the "Help" button. To work in the Verbose mode just follow the instructions on the pop-up
windows, which will appear in a predetermined order. The Verbose windows have the “Back”
button starting from the "Complex element" window. The "Back" button lets you return to any
previous step of claim composition if necessary. Note, that after you clicked the "Back" button
you loose the knowledge you supplied to the system in the window from which you go back.
Welcome to AutoPat
The Welcome to AutoPat is the first page of the interface that gives a brief description of the
program. You can uncheck the message "Show this page next time" in order to skip it in future.
To proceed click the "Continue" button.
Figure 2. The StartUp window.
The second Verbose window StartUp gives you a choice to either start composing a claim from
scratch or continue working on one of existing claim drafts. By default the radio-button "Create a
new claim" is checked. If you click the "OK" button you will start the procedure of composing a
new claim. However, if you want to edit a claim draft created before check the "Open existing
8
draft" radio-button. A menu of drafts appears. Select a draft to be edited and click the "OK"
button.
Composing from scratch
The third Verbose window Composing from scratch will make you index your draft. Do not
confuse a draft name with the claim title (you will compose it later). The draft name is simply a
name of a file where the results of your session will be saved.
Figure 3. The “Composing from scratch” window.
In your version of AutoPat the "apparatus" is a default selection in the Subject matter menu.
Click the "OK" button to see next window.
Title
The fourth Verbose window Title helps you specify the title of your invention. This window
contains a title template (see Figure 4). To compose the title of an invention you can choose
between the following:
•
•
Type in your title straight in the main title text area. If the word you started typing is
the one in the menus it will be competed automatically, you can skip typing the rest of it
and proceed to typing next word.
Select words from corresponding category menus of the title template. The linear order
of these menus is essentially the order in which the words should appear in the title. To
look for a word in a menu you can simply scroll it or start typing it in a lower active text
area under the label "Other". If the word is in the menu you'll get it competed
automatically otherwise you'll have to type the whole word you need. After doing so
9
press "Enter" and this word will be included in the menu so that next time you could find
it there.
Figure 4. A screenshot of the title template.
You can also compose the title combining typing in and menu selections. To delete a word from
the title, put the cursor after this word and click the "Delete word" button. When finished click
the button "Done".
Title template and its menus
The title template is a table you see in the Title pop-up window (Figure 4). The columns of this
table are template slots, either optional or mandatory. The slots/columns are filled with menus of
corresponding words and phrases.
The linear order of the menus is essentially the order in which words should appear in the title.
They are put into the following categories:
CORE CONCEPT - is the main word in the title that is a term describing a particular object you
invented, for example, fastener, window sash, brush, etc.
Core-concept Part(s) - words that denote parts of an object described with a CORE CONCEPT,
for example, bed having two parts
10
GENUS TERM - is a word describing an object that you invented not specifying in detail what
it really is. Genus terms are such terms as apparatus, construction, assembly, device, means,
machine, unit, etc. Genus terms can describe the core concept.
Attribute is a word that specifies a property of an object, for example, Disposable article
Attribute Purpose are those words in the title, which are usually, precede a CORE CONCEPT
to describe the purpose of your invention, for example, Flotation therapy bed
Purpose is a phrase in the title which are usually put at the end of the title to describe the
purpose of your invention, for example, cassette for holding excess of light waveguides .
With, having, etc. are auxiliary words for linking different parts of the title description, for
example, mattress with hexagonal polypropylene baffle
A number of sample titles with explanations of their structure are given in the Table below.
Compare formal descriptions with text examples. Note that every title should necessarily include
a CORE CONCEPT and/or a GENUS TERM. Other terms are optional.
Possible Title Structures
Examples
Core Concept
Fastener
Core Concept Genus Term
Separation apparatus
Attribute Core Concept
Finger-mounted toothbrush
Attribute Core Concept Genus Term
Pivotal window sash assembly
Attribute Genus Term Core Concept
Disposable article of bedding
Core Concept (including, having, with) Core Concept Waterbed mattress with hexagonal
Part(s)
polypropylene baffle structures
Core Concept Genus Term (including, having, with) Brush construction including movableCore Concept Part(s)
mounted bristles
Genus Term Purpose
Apparatus for cleaning sewers
Attribute Purpose Core Concept (including, having, Flotation therapy bed having two part
with) Core Concept Part(s) Genus Term
construction
Main elements
The fifth Verbose window is called Main elements. When it appears the background window
will display the information you have already supplied into the system.
At the top of the "Essential features of your invention" pane of the background window there
will be the title of the invention you composed at the previous stage. In the left top corner of the
left pane of the background window, which is headed "Your invention comprises:" a conceptual
11
schema of your invention is started to be drawn in the form of a tree of invention elements. The
title forms the root of the element tree.
Figure 5. A screenshot of the Main elements page.
At this page you are supposed to describe the main elements of the prototype of your invention.
You are recommended to introduce main elements, which constitute the novelty of the invention
later at the "Relations" page.
Hint. You are encouraged to include the properties (shape or material) of an element in its
specification on this page, if they ARE NOT novelty features of your invention. For example, if
an element you specify is round and is made of steel and the purpose of having it is to fix some
other element, then if none of these properties is novel, specify this element in one phrase, as "a
round metal element for fixing another element"
The element thus described is added to the tree of elements and the first essential feature of your
invention in the form of a simple sentence is generated in the right pane of the main background
window after you quit this page. To specify another main element of the invention prototype
click the "Next element" button. After you specified all the main elements of the prototype of
your invention click the "No more" button.
12
Next Verbose windows will have the "Back" button to let you return to any previous step of
claim composition if necessary. Note, that when using the "Back" button you loose the
knowledge you supplied to the system in the window from which you go back.
Element template and menus
The element template and menus are given in the "Main Elements", "Complex Element", "Subelements" and "Elements" pop-up windows (see Figure 5). They are similar to those you used in
the "Title" window. One more menu "Quantity" is added where you can select a phrase to
indicate the quantity of elements. Some other menus of the Title template ("Attribute Purpose",
"Core-concept Parts", "With") are not given in these windows as now you can easily type in any
parts of element description on your own. You can make the specification of your element as
long as you feel it necessary.
Complex element
The sixth Verbose window Complex element is to be used when you want to point out that a
certain element is complex, i.e., contains other elements (sub-elements).
Figure 6. A screenshot of the Complex element window.
Highlight a complex element in the tree. The highlighted element appears in the front window
and the "Specify" button gets enabled. Click this button and you will be guided to the "Subelements" Verbose window. If you choose the title as a parent element, the main element will be
added. You can skip this stage by clicking the "Done" button.
Sub-elements
The seventh Verbose window "Sub-elements" looks the same as the "Main elements" window.
You can add any number of the sub-elements to a highlighted parent element specifying them
one by one.
You are encouraged to include element properties, such as shape, material, etc., in its
specification if these properties ARE NOT novelty features of your invention. For example, if an
element you specify is round and is made of steel and the purpose of having it is to fix some
13
other element, then if none of these properties is novel, specify this element in one phrase, as "a
round metal element for fixing another element".
Figure 7. A screenshot of the Sub-elements pop-up window.
To specify one more sub-element of the same parent element use the "Next element" button.
When all the sub-elements of the same parent are specified click the "No more" button and you
will return to the "Complex element" window where you can select another parent element in the
tree of elements and proceed to the description of a set of its sub-elements.
You can iterate so as many times as you need. The result of your activity will be displayed in
both panes of the background window. When all the sub-elements are specified click the "Done"
button in the "Complex element" window to get next page.
Novel shape and material features
The eighth Verbose window Element with novel characteristics should be used in case one or
more elements in the element tree are characterized by a certain shape or material that contribute
to the novelty of your invention. You can skip this stage by clicking the "Done" button.
To describe shape or material of a certain element on this page highlight this element in the tree.
The element will appear in the active text area of the pop-up window and the "Specify" button
will be enabled. Note that this time it is possible to edit a phrase describing an element right in
the active text area. For example, the element tree contains a node "a plurality of covers" and
you want to specify that only one of these covers has special characteristics. Then you still
highlight "a plurality of covers" in the tree and after the phrase has appeared in the pop-up
window text area you edit it into "one of the covers". When ready click the "Specify" button to
be guided to next window.
14
Specify shape and/or material
Figure 8. A screenshot of the Shape/Material pop-up window.
The ninth Verbose window Shape/Material is for describing shape and/or material of an
element you specified at the previous stage. On the left there are two menus of shapes and on the
right there are two menus materials. This gives you a flexibility of two ways to describe an
element. If you select words from the upper pop-up menus in the "shape" or "material" part of
the window you will get descriptions as follows:
•
•
"An element is in the shape of a circle"
"An element is made of steel"
You can alternatively select words from the standing menus and get descriptions in a different
form as follows:
•
•
"An element is round"
"An element is golden"
All descriptions will be generated in the "Generated sentence" text area of this window for you to
check whether you got what you really wanted. In case you change your mind click the "Clear"
button and reselect the features of the element you are working on.
Note that if necessary you can describe both shape and material of one element in one take. Just
select the words in the two menus and you'll get two sentences-features generated.
15
To look for a word in any menu (if it is not in the visible area) you can simply scroll it or start
typing it in a lower active text area with the label "Add". If the word is in the menu you'll get it
competed automatically and it will be highlighted in the menu area. Click on it in the menu to get
a sentence generated. If a word you need is not in the menu you'll have to type it in a lower
active text area next to the "Add" button and click this button.
You will get a word box Press "Enter" and the template will be automatically filled out with the
forms of your new word. Please check these forms, edit them if necessary and click "Add". This
results in adding this new word to the AutoPat dictionary.
When the word is added to the dictionary you are returned to the "Shape/Material" window. The
word you introduced is in the menu now. Select it in the menu and you'll get the description of
the property of your element.
If you need to specify shape or material of another element click the "Next element" button. You
can iterate so as many times as needed. When finished with shape/material specification click
"No more". All knowledge you supplied at this stage of claim composition will stay displayed in
the "Essential features of invention" section in the background window.
Relations
The tenth Verbose window Relations guides you through the specification of relations between
the elements of your invention that are essential features of the invention. You are supposed to
specify these relations one by one. To better concentrate on what you are going to do you can
highlight the elements in the element tree and then proceed to specifying the relation between
them. From a predicate menu choose a predicate (verb, preposition or adjective), which describes
the relation.
You have two options to do this. You can start by first selecting a relation type in the "Relation
type" menu and then choose a predicate within a menu of predicates offered by the system that
are commonly used to describe the type of relation you have chosen. Or if you feel it more
convenient you can start directly with selecting a predicate in the predicate menu. If you choose
the first option (see Figure 9).
•
•
•
•
check the radio button "first select relation type then predicate" is checked
select the type of the relation between the elements in the” Relation types" menu; a list of
words that can be used to describe this relation type appears in the "Predicates" menu
select a word from a predicate menu (it can be a verb, an adjective or a preposition)
click "Specify" button to get next window.
16
Figure 9. A screenshot of the Relations window. A relation type is first selected.
Figure 10. A screenshot of the Relations window. A predicate is first selected.
You can alternatively do the following:
•
check the "first select predicate then relation type" radio button; a menu of words,
which can be used to describe any type of relations between elements, appears in the
"Predicates" menu
17
•
•
•
select a word from this menu; a list of relation types described by the selected word
appears in the "Relation type" menu
if there appear more than one relation type in the relation type menu select one of them,
which better describes the meaning of the predicate you have chosen. If the relation type
is the only one it is selected automatically
click "Specify" to get the next window.
To look for a word in any menu (if it is not in the visible area) you can simply scroll it or start
typing it in a lower active text area next to the label "Add". If the word is in the menu you'll get it
competed automatically and it will be highlighted in the menu. If a predicate you need is not in
the menu you'll have to add it to the AutoPat Dictionary.
Relation type menu
To help you better choose a predicate that describes a relation between the elements of the
invention all predicates are grouped into several relation types according to their meaning
(Figure 9), for example the type "meronymy" groups such predicates as "having", "comprising",
"including", etc., the type "connection" includes such predicates as "connected", "associated",
etc. Relation types are given in the relation type menu on the Relations page
Sometimes one and the same predicate can belong to more than one relation type. This happens
when predicate has different meanings (Figure X). For example, the predicate "extending" in the
sentence "one element extends perpendicular to another element " means that one element is
positioned perpendicular to another element and thus belongs to the relation type "spatial". The
meaning of the predicate "extending" is different in the sentence like "The element extends and
hides in a slot during the operation". The predicate with this meaning belongs to the "movement"
relation type.
You can select a relation type from a standing menu on "Relations" page and get a corresponding
group of predicates in the predicate menu.
Predicate menu
Predicates are words (verbs, adjectives and prepositions) that are used to describe properties and
relations between the elements of invention.
The menu of predicates contains two (active and passive) forms for every verb predicate. In the
menu of predicates active verbs are presented in the form of active participles (connecting,
extending, etc.) while passive verbs are given in the form of passive participles (connected,
extended, etc.) (Figures 9-10).
It is very important to select the correct (passive or active) form of the verb you want to use.
For example if you want to specify that one element is connected to another element you should
select the predicate connected from the predicate menu, in case an essential feature of the
invention is that one element connects another element to a third element your selection in the
menu of predicates should be connecting.
18
Anyway you'll have a chance to check whether your selection of words was right at the next
stage of relation specification when a sentence describing an essential feature of your invention
is generated. If the sentence is not what you want to say you can always correct a wrong choice
of words by using the "Back" button and reselecting the predicate.
Add a new predicate to the dictionary.
If the predicate you need for description does not appear highlighted in the predicate menu after
you typed it in the text area located next to the "Add" button (on the "Relations" page) you
should add it to the AutoPat dictionary before proceeding further.
To add a predicate to the AutoPat dictionary
•
•
•
Type it in the text area next to the button "Add". Mind the form of the predicate: it
should be , depending on what you want to say, either active or passive. In the former
case you should type in an -ing form of your predicate, e.g. "connecting", in the latter
case type in an -ed form (e.g. connected), or irregular form (e.g., brought).
Click "Add" and get a word box.
Fill out this word box and you will get your new word highlighted both in the text area
next to "Add" and in the predicate menu.
Click "Specify" to proceed with your description
Word box
A word box is a template of predicate word forms you get when you are prompted to add a new
predicate to the AutoPat dictionary. It has
•
•
•
•
an instruction line,
the "Relation type" menu that shows the relation type you have chosen at the previous
stage of work (you can reselect it if necessary),
the "word" text area filled with a predicate to add to the dictionary, and
a number of empty text areas for word forms.
To fill out this word box proceed as follows:
•
If the "word" text area is filled with an adjective (e.g., "round") or a passive verb form
(e.g., "connected", "given") then put the cursor at the end of this word and press "Enter”.
All empty fields of the template will be automatically filled out. Click "Add" to put the
predicate to the dictionary. You will return to the previous page with your new word in
the menu of predicates.
•
If the "word" text area is filled with an active verb form (e.g. "connecting") then put the
cursor at the end of this word and press "Enter". Present singular, Present Plural and
Participle forms will be filled out. Check these fillers and correct if necessary. For
19
example, you want to add the predicate "flying". After pressing "Enter" you will get what
you see in the left word box in Figure 11.
Figure 11. A screenshot of two stages of semi-automatic filling a predicate box.
•
The Present singular form is not correct. Edit it so as to have: “flies”
•
Then put the cursor at the end of the Present Plural filler and press "Enter" again. Other
text areas will be filled automatically (see the right box in Figure X).
•
Click "Add" to put the predicate to the dictionary. You will return to the previous page
with your new word in the menu of predicates. Select the predicate in the menu and
proceed to specify the relation.
Relation specification
The eleventh Verbose window is Relation specification. In the top part of the window you are
reminded of the predicate you selected at the previous stage. Lower there is a text area called
"Generated sentence" where a simple sentence-essential feature of your invention will be
generated after you fill out a predicate template. After you filled out a predicate template click
either the "Next" or "No more" button.
•
•
Note that after you specified the first relation the "Your terminology" text area appears in
the left bottom part of the background window. From now on every relation template
filler will stay displayed in "Your terminology" for reuse in future. In case you need the
phrase (or part of phrase) you have already typed in to specify other relations just click it
in "Your terminology" and it will appear in the activated text area of your current
template.
Do not pay much attention to the articles in the phrases. No matter what article you put
(or do not put in the phrase) the claim generator will revise it. You are only
recommended to still put an article in front of nouns ending in ~ing (the building) or
20
•
those which are homonymous with adjectives (the front) to help the system distinguish
nouns from an adjectives or participles for generating a correct claim.
Do not be afraid of making your filler as along as you want it to be to include all the
relevant information. For example, the filler of the What for text area can be as follows:
for sensing transverse deviations between the actual belt travel path and a
predetermined belt travel path. AutoPat will cope with processing such phrases.
Predicate template
At the stage of specifying relations between the elements of the invention (when a predicate is
selected) you are supposed to fill out a predicate template.
A predicate template contains a number of question words What, Where, How, What for, By
means of, etc. and active text areas next to them. Question words stand for questions you are
supposed to answer (if you feel like it) to specify the relation (predicate) you have already
selected. The answers should be put in the text areas next to questions. Template text areas have
pop up menus of auxiliary phrases that can be selected from there.
Note that you should only put the information relevant to the relation describing leaving some of
the template slots unfilled.
To fill out template slots (text areas) first put a cursor in it to activate the area, then fill it out
either by clicking on a corresponding phrase in the background window (in the element tree or
"Your terminology") or by typing in a new phrase. We'll explain how to fill out a predicate
template on a particular example.
Suppose at the previous stage of claim composition we have selected the predicate mounted
(relation type: "Spatial"). Then we'll get the predicate mounted template (see Figure 12) with
text areas next to the following question words: What, Where, How, What for, By means of.
These words stand for the following questions:
•
•
•
•
•
What element is mounted? (A computer, a bottom part, etc.)
Where is this element mounted? (On the top, in the gap, etc)
How is this element mounted? (rotatably, at a distance, etc.)
What for (for what purpose) is this element mounted? (for closing a door, to fix smth.,
etc)
By means of what is this element mounted? (by means of screws, etc)
When the window appears the word What is in blue color, the cursor is in its text area. This
means that this text area is already activated and it should be filled out with an answer to the
question What element is mounted? Let it be a splice holder that is mounted somewhere and we
have this element in the element tree. So we click on it in the tree and get it in the text area of
What. No editing is necessary. Suppose it is on the cover part where the splice holder is
mounted. We first click the Where text area and then click the cover part in the element tree.
21
The next step is to edit this phrase to add the preposition on in front of it. To add any word we
can either type it in or select it from the pop-up menu of this text area. The word will appear left
to the cursor. Mind the position of the cursor! Suppose it is also essential to indicate that the
purpose of mounting the splice holder on the cover part is to form a rotatable splice holder.
Then we click the What for text area and put our answer there by either typing it, or to save
effort, by clicking on the element tree to transfer the phrase splice holder into the text area and
then editing it. If you don't think it is relevant to specify this relation further you leave other text
areas of the template empty. Then our filled mounted template will look as:
Figure 12. A screenshot of the filled template for the predicate mounted.
Once the template is filled out the sentence The splice holder is mounted on the cover part to
form a rotatable splice holder is generated in the "Generated sentence" text area as well as in
the "Essential features of the invention" part in the background window.
You can further edit the specification of this relation by changing the fillers in question text
areas, or you can go "Back" and reselect the relation (predicate) itself. In case you are happy with
the result at this stage click the "Next" button to specify another relation. You can iterate so as
many times as you need. When all the relations are specified click the "No more" button.
After you specified the first relation (predicate) the "Your terminology" text area appears in the
left bottom part of the background window. From now on every relation template filler will stay
displayed in "Your terminology" to save your typing time in future. In case you need a phrase (or
any part of a phrase) you have already used to specify other relations
•
put the cursor in the corresponding slot of a predicate template
22
•
•
click on a phrase in the "Your terminology" section to transfer it to the slot
edit this phrase if necessary.
Figure 13. A screenshot of the user interface at the Relation elicitation stage showing the
authoring memory units in the section “Your terminology.
Feel free to make your filler as along as you want it to be to include all the relevant information.
For example, the filler of the What for text area can be as follows: for sensing transverse
deviations between the actual belt travel path and a predetermined belt travel path. AutoPat
will cope with processing of such phrases.
Coreference
The twelfth Verbose window Coreference is very important. You should help AutoPat to avoid
confusing the features that belong to different objects referred to by the same word.
This word is usually a noun. The window Coreference displays in sets of text boxes with
sentences containing the same nouns. These nouns are in red color. You should simply see to it
that the same word referring to the same object was marked with the same number, which is
displayed in the menu left to the sentence containing the word in question. If a highlighted word
in the current sentence refers to an object different from that which was named by the same word
in the previous sentence simply select a different number in the pop-up menu next the current
sentence.
23
For example, you said that your invention had a bottom part and upper part. On this page you
will be given all the sentences with the word part and the result of your coreference session
should look as follows:
Figure 14. A screenshot of the Coreference window.
The system will guide you through all sets of "suspicious" nouns, some of them may not be
relevant as they are used as attributes, not names of the elements. If this is so, simply neglect
such sentences and go further by clicking the "Next" button. After one set of sentences with
similar nouns is checked click one of the enabled buttons: "Next" or "Done".
Claim format
The thirteenth Verbose window Claim format is for you to decide on the format of the nascent
claim. The pop-up window on this page shows you all your sentences-essential features next to
tick boxes.
If you want your final claim text to be in the US format, simply make sure the sentences contain
complete and correct knowledge you want to be present in the claim text. Then click the "Get
Text" button.
If you need your claim in the European format which should have a generic part with the
essential features of the invention prototype and a difference part which contains the novelty
features of the invention linked by the expression "characterized in that " proceed as follows:
24
• tick the boxes next to the sentences describing novelty
• look at the "Essential features of your invention" pane in the background window to make
sure you did it right. All the sentences there will be put into two groups
• click the "Get Text" button.
Figure 15. A screenshot of the Claim format pop-up window.
You can always regroup the features by reticking the sentences in the "Claim Format" window.
Important. In case one of generic or difference parts contains more than 12 sentences to get
better claim text it you should help AutoPat and divide that large group of sentences into two. To
do so you will be guided to the Main Claim Format-Difference and /or Main Claim FormatDifference Verbose windows. Similar to the Claim format window they present a "tickable"
menu of generic/difference sentences-features. Tick those features of the invention that are closer
related. Then in the final text these features will appear closer to each other and the quality of the
claim will read better.
Get text
The fourteenth Verbose window Output shows you a draft text of your claim generated
automatically by AutoPat on the basis of the knowledge you supplied into the system during the
knowledge elicitation session.
25
Figure 16. A screenshot of the pop-up window with the generated claim
The claim text may require posteding. The trouble might be caused by some mistakes you did
when supplying knowledge into the system. Read the section “How to get better text” to improve
the claim automatically. You can also edit the claim manually right in the output window and
then save it as a plain text.
Professional mode
The menu bar selection Claim Composition is a menu that opens the Professional Mode of
AutoPat.
If you start the Professional mode to compose a new claim you will only get the Info and Title
selections enabled. In case you have not gone through the entire knowledge elicitation interview
during your previous AutoPat session only those selections will be enabled that you had covered
before you left off. If your draft was composed after a complete knowledge elicitation procedure
all selections will be enabled and you can freely navigate among the stages of the knowledge
elicitation interview. Click on any of the menu selections to get a pop-up window with
bookmarks corresponding to the stages of knowledge elicitation procedure (see Figure 17).
26
Figure 17. A screenshot of the background window with the menu opening the Professional
mode of the interface.
Info
If you are starting to create a new claim in the Professional mode the Info bookmark is the first
pop-up window that will open. It has an active window for you to type in your claim draft. Do
not confuse a draft name with the claim title (you will compose it later). The draft name is
simply a name of a file where the results of your session will be saved. Click the "Title"
bookmark to see next window. In case you are authoring a claim draft that you have created
earlier the Info bookmark will contain the properties of your draft: index, path, creation and
modification times.
Title
The second Professional bookmark Title helps you specify or edit the title of your invention.
This window contains a title template. Proceed as in the Verbose mode. When finished click the
button "Update".
27
Elements
The Elements bookmark in the Professional mode is a merger of the four Verbose windows
designed to elicit knowledge about elements and sub-elements of the invention.
You can easily create an element tree using the title of your invention as the root of the tree. To
do so
•
•
highlight the root of the tree (or any other node) , it will appear in the active text area of
the window
add brother elements and sub-elements of the highlighted element by clicking the buttons
"Add brother element", "Add sub-element".
Figure 18. A screenshot of the interface in the Professional mode with the Elements
bookmark .
The element tree can easily be restructured:
•
•
use the "Delete" button to delete a highlighted element
use the buttons "Move the element up" or "Move the element down" to move a
highlighted element along the element tree
28
After the name of a highlighted elements appeared in the active text area it can be edited. In case
you are editing a draft composed earlier note that all changes done at any stage of authoring
propagate through the rest of the draft. Deletion of an element in the element tree (after an alert
message ) automatically deletes all invention features-sentences with this element. Change of an
element name in the tree automatically changes its name in all corresponding sentences.
Shape and material
To describe or edit shape and material features in the Professional mode of AutoPat click the
bookmark "Shape and Material" in the Claim Composition menu. The left pane of the
bookmark window will be empty if you have not yet input any shape/material feature.
In case you have already put any such features they will be shown in the left pane of the window.
Figure 19. A screenshot of the Shape/Material bookmark in the Professional mode.
To add a feature
•
•
click the button "Add new feature" and you will get menus of shapes and materials;
proceed as in the Verbose mode.
To edit a feature
29
•
•
highlight it in the list of features; the right pane will show the predicate template
corresponding to the highlighted feature.
edit the fillers of the template slots.
To delete a feature
•
•
highlight it in the window;
click the button "Delete feature"
Relations
Figure 20. A screenshot of the interface with the Relations bookmark.
To describe or edit relations between the elements of the invention click the bookmark
"Relations" in the Claim Composition menu or in the bookmark pop-up window.
The left pane of the bookmark window will be empty if you have not yet input any relations
between the elements.
To add a relation feature
•
click the button "Add new feature" and you will get menus relations.
30
•
proceed as in the Verbose mode.
In case you have already put any relation features they will be shown in the left pane of the
window (see Figure 20).
To change the order of the features in the list of features (which might be useful to get a better
claim text)
•
•
highlight a feature in the list of features;
use "up" and "down" arrows to move the highlighted feature.
To edit a feature
•
•
highlight it in the list of features; the right pane will show the predicate template
corresponding to the highlighted feature.
edit the fillers of the template slots.
To delete a feature
•
•
highlight it in the left window
click the button "Delete feature"
Coreference
To check or change the coreference of nouns in the Professional mode click the "Coreference"
bookmark in the Claim Composition menu. On the left you will see a list of terms to be checked
for coreference. Highlight any of these terms; the sentences in which they are used will appear in
the right pane of the window. Proceed as in the Verbose mode.
The window Coreference displays in sets of text boxes with sentences containing the same
nouns. These nouns are in red color. You should simply see to it that the same word referring to
the same object was marked with the same number, which is displayed in the menu left to the
sentence containing the word in question. If a highlighted word in the current sentence refers to
an object different from that which was named by the same word in the previous sentence simply
select a different number in the pop-up menu next the current sentence.
31
Figure 21. A screenshot of the Coreference bookmark.
US or European Format
Click the bookmark "Main Claim Format". Proceed as in the Verbose mode.
Dependent claims
To compose a dependent claim
•
•
•
•
•
click the bookmark "Dependent claim" (see Figure 21)
select the number of the claim (to which the current dependent claim refers ) from the
drop down menu in the top right corner of the bookmark window
click the "Add new relation" button and specify the relation
repeat the previous step until you input all the knowledge to be included in the current
dependent claim
click the button "Update"
To delete a relation feature in the current dependent claim
•
•
•
click on it in the "List of features"
click the "Delete relation" button
click the button "Update”
32
Figure 22. A screenshot of the Dependent claims bookmark.
To edit a relation in the current dependent claim
•
•
•
click on it in the "List of features" to get a filled predicate template corresponding to the
specified relation
edit phrases in the texts areas of the predicate template
click the button "Update"
To compose another dependent claim
•
•
•
click the button "Add new claim" in the window of the current dependent claim
proceed to compose a new dependent claim
click the "Update" button
To delete or edit a dependent claim
•
•
•
click the bookmark corresponding to the number of the dependent claim
edit the claim or delete it by clicking the "Delete claim" button.
click the "Update" button.
Get text
In the Professional mode you can get a claim text at any bookmark by clicking the "Get text"
button. You will see a partial or complete claim text depending upon the amount of the
knowledge you supplied into the system during the knowledge acquisition session.
33
The claim text may require posteding. The troubles might be caused by some mistakes you did
when supplying knowledge into the system. Read the section “How to get better claim” to
automatically improve its text.
You can also edit the claim manually right in the output window and then save it as a plain text.
Creating CLAIMS on METHODS
The AutoPat interface for composing claims on methods is different from that for apparatuses.
To tune the software for the Method type of clams in the “Composing from scratch” window
• Select “ Method”
• Type in the Draft name
• Click OK to get a page as in Figure 23
Title
•
•
•
On the “Title” page select the beginning of your claim title “A method of” or “A
method for” in the upper menu of the left pane of the window
Select the continuation of the title in the menu of –ing predicates in the left pane of
the window
Click the button “Specify” to get a template as in Figure 24.
Figure 23. The first “Title” page of the AutoPat interface for Method claims.
34
Figure 24. The title template for the predicate “forming”.
•
•
•
•
Fill out relevant fields in the title predicate template you got.
Click the button “Update”
The title of your claim will appear in the background window
Edit the template fields if necessary and click “Update”
If you further want to specify relations between any elements you mentioned in your title
•
•
•
•
•
Click the Relations bookmark to get the Relations menu as in Figure 25
Select/type in a Relation predicate as in Figure 25
If the predicate is in the AutoPat dictionary (it will be highlighted in the menu) select the
relation type in the right menu and click “Specify”
In case the predicate you typed in does not appear in the menu click “Add”, to add the
predicated to the dictionary, follow the dialogue and after the predicate appears in the
menu click “Specify”
Fill out a Relation template as in Figure 26, edit if necessary and click “Specify”. New
sentences-features will appear in the background window.
35
Figure 25. Selecting a Relation predicate.
Figure 26. Filling out a template describing the relations between two items in the title.
•
•
•
Add as many relations to the title part of the claim as necessary.
Click the “Coreference” bookmark and mark coreferential words as described on p.31
Click the “Text” bookmark to check the final text of the title part of the claim.
36
Method steps and substeps
To describe method steps return to the “Title” bookmark and click “Add step”, you will get a
window as in Figure 27. Within every step or sub-step you can further specify relations of the
step elements as in the Title part.
Figure 27. Specification of method steps.
•
•
•
•
•
•
•
•
•
Select a predicate word in the menu and click “Specify” to get a step template
Fill out the step template and click “Update”
Use the “Relations” bookmark to describe relations of the elements within this step. Do
not forget to mark coreference.
To add another step after Relations click on the “Method step” bookmark”
Click “Add brother step” to describe next method step, select the word in the menu, fill
out the template and click “Update”
Click “Add sub-step” to describe a sub-step of the current step, select the word in the
menu, fill out the template and click “Update”
Proceed as described above; the tree of steps and substeps will be shown in the left pane
of the background window.
NOTE: To resume step description after Relations you need to click the “Method step”
bookmark
To get the claim text composed so far close pop-up window and click “Generate Claim”
in the “Claim Composition” menu. Figure 30.
37
Dependent claims
Figure 28. Specifying dependent claim.
Figure 29. Specifying dependent claim.
38
To compose dependent claims referring to the main claim
Click either the bookmark “Title” in the pop-up window or on the title line in the claim tree in
the left pane of the background window
• Click “Add Dependent Claim” to get the window as in Figure 28.
• Select the starting phrase for your dependent claim from the menus (Figures 28,29)
1. Select “comprising the further steps of…” if you refer to the whole claim and your
dependent claim contains additional steps
2. Select “wherein step…” if you refer to a certain step in the main claim which contain
substeps you will specify in the dependent claim in question
i. In this case select the step (a., b., etc) from a second pop-up menu to
which you refer to
3. Select “where in…” in case you refer to the whole claim and your dependent claim
contains additional relations between elements
• If you selected starting phrases 1 or 3 click “Add step” in the new window you got.
Consult the background window to be sure you are getting the right result
• If you selected phrase 2 click “Relations” in the new window you got.
• Proceed as when composing the main claim.
• NOTE that the button “Add sub-step” adds the sub-step to the step within the same
claim.
To compose claims referring to other dependent claims
•
•
Click on the corresponding nodes in the claim tree as shown in Figure 30.
Proceed as above
How to edit claim on methods
Following your input to AutoPat a full set of simple sentences-features is shown in the
background window. The tree of steps is shown in the left pane of the background window.
To edit you claim click on the corresponding node in the tree of steps. You will get
interactive pop-up templates where you can change any phrase. Please do not forget to click
“Update” and mark coreference every time you change your input.
You can check the text generated for every step by clicking the “text “ bookmark in the
step pop-up window.
How to generate claim text
To get the claim text composed so far close pop-up window and click “Generate Claim” in the
“Claim Composition” menu. Figure 30.
39
How to get better claim
It is easy to get a better claim of any kind by following some very simple rules when feeding
your knowledge into the AutoPat engine.
General recommendations
•
•
•
•
•
Make sure that the simple sentences-features of your invention in the background
window correspond to the content of your claim. If not you can delete/add/edit these
features on the "Relations" bookmark.
Make sure none of the words are marked as misspelled. If so, correct their spelling or add
new words to the AutoPat dictionary.
Check whether you assigned different marks to the same words, which mean different
objects at the coreference bookmark.
Check whether you have correctly marked the novelty features at the Claim format
bookmark.
Check if the number of the sentences-features in the generic and/or difference part is
larger than 12. If so break these sentences into two groups as described in the instruction
line.
40
•
•
•
Check whether you put commas when listing phrases in the predicate template slots. If
you did not, insert them on the "Relations" bookmark in the "Professional” mode.
Improve the way you described the elements of your invention. Read the section “Pay
attention to your descriptions”
Try to change the order of elements or features-sentences. Read the section “Ordering
element names and sentences”.
You can always edit the output claim text manually right in the output window.
Pay attention to your descriptions
If shape and material ARE NOT novelty features of your invention include them (if necessary)
in a phrase describing an element on the Element page.
For example, if an element you specify is round and is made of steel and the purpose of having it
is to fix some other element, then if none of these properties is novel, specify this element in one
phrase, as "a round metal element for fixing another element"
You are recommended to put an article in front of nouns ending in ~ing (the building) or those
which are homonymous with adjectives (the front) to help the system distinguish nouns from
adjectives or participles.
Group features
In case the generic and/or difference part contains more than 12 sentences click the Main Claim
Format-Generic and/or Main Claim Format- Difference bookmark. Similar to the "Main Claim
Format" bookmark they present a "tickable" menu of generic/difference sentences-features. Tick
those features of the invention that are closer related. This will improve the quality of the claim
text.
Order element names and sentences
The order of the elements and features can affect the final claim text, for example, one of the
annoying troubles you might have is to get a claim with a fragment like this:
An apparatus comprising a panel connected to a frame, a cover... and the frame....
This might happen if some simple sentences- essential features in your description read as
following:
1. An apparatus comprises a panel, a frame and a cover
2. The panel is connected to the frame.
To correct this
•
open the file at the "Elements" bookmark in the Professional mode,
41
•
use "up" or "down" arrows at the bottom of the page to change the order of the elements
in the element tree so as to get the first simple sentence like this:
An apparatus comprises a frame, a panel, and a cover.
The output text will be generated correctly:
An apparatus comprising a frame, a panel connected to said frame and, a cover...
In general, in the Professional mode of AutoPat on the "Elements", "Shape and Material" and
"Relations" bookmarks you can move up and down element names in the element tree and
generated sentences in the "Essential features of your invention" pane by clicking "up" and
"down" arrows at the bottom of these bookmarks.
Effort-saving and input-proof functionalities
Spell checking
AutoPat has a built-in spell checker that works similar to any other spell checker. It is
recommended to correct the spelling of the words in the pop-up windows, rather that in a
background window.
If you are sure that a word marked as misspelled is spelled correctly add it to the AutoPat
dictionary straight away. Right click on this word will show you "Add as" menu. Simply click on
the corresponding selection in the "Add as" menu (Figure 31 )
Grammar checking
AutoPat has a built-in grammar checker. You can correct you grammar in the active text areas of
the pop-up windows. Just right click on the green lines under a suspicious segment and click on
an appropriate hint.
Content checking
There is a content check at the stage of filling predicate templates that helps to correctly input
your knowledge in the right slot of the template. Incorrectly filled phrases are marked with green
lines. Right click on the underlined segment and select an appropriate hint.
Automatic completion of words
When you type in a word it will be automatically completed in case it is included in AutoPat
menus.
42
Automatic text transfer
You can transfer a word or a phrase from the background window to a particular type in area in a
pop-up window by first putting the cursor in the required location and then clicking the word or
phrase to transfer. You can transfer any phrase from the element tree and authoring memory. The
word will appear left to the cursor. Mind the position of the cursor! All transferred phrases can
be edited.
Moving element names and sentences
In the Professional mode of AutoPat on the "Elements", "Shape and Material" and "Relations"
pages you can move up and down element names in the element tree and generated sentences in
the "Essential features of your invention" pane by clicking "up" and "down" arrows at the bottom
of these pages.
How to add new words to the dictionary
“Add as” menu
Figure 31. A screenshot of an interface pop-up window with the “Ad as” menu.
If you are sure that a word marked as misspelled is spelled correctly add it to the AutoPat
dictionary straight away. Right click on this word will show you "Add as" menu. Simply click on
the corresponding selection in the "Add as" menu (Figure 22).
The "Add as" menu is a list of parts of speech, such as noun, adjective, verb, etc, in which nouns
and verbs are further divided into subclasses depending upon their meaning or/and some
morphological characteristics.
43
The subclasses for nouns are
•
Noun
o
o
o
o
Physical Object
singular (cover)
plural (covers)
Substance
singular (material)
plural (materials)
Event-ing (nouns ending in -ing)
singular (cleaning)
Other (all other nouns)
singular (movement)
plural (movements)
The subclasses for verbs are as follows:
•
Verb
o
o
o
o
o
o
Singular (simple present, 3d person) (connects)
Plural (including Infinitive) (connect)
-ed (verb forms ending in -ed) (connected)
-ing (verb forms ending in -ing) (connecting)
Irregular (forms of irregular verbs) (brought)
Other (other verb forms)
Add a new predicate to the dictionary.
If the predicate you need for description does not appear highlighted in the predicate menu after
you typed it in the text area located next to the "Add" button (on the "Relations" page) you
should add it to the AutoPat dictionary before proceeding further.
•
•
Type it in the text area next to the button "Add". Mind the form of the predicate: it
should be , depending on what you want to say, either active or passive. In the former
case you should type in an -ing form of your predicate, e.g. "connecting", in the latter
case type in an -ed form (e.g. connected), or irregular form (e.g., brought).
Click "Add" and get a word box. A word box is a template of predicate word forms.. Fill
out this word box as described in the section “Word box”.
44