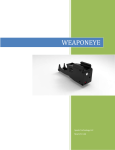
Download • Fits Glock® 26, 27 & 42 Pistol • All Generations 1, 2, 3 & 4 • Dual
Transcript
Auto-Off Feature:
®
• After 5 minutes in any mode, warning mode pulse will activate.
• After 1 minute in warning pulse mode, laser will turn off.
• Press the switch during warning pulse for laser reset.
LASER LYTE
LASER LYTE
LASER LYTE
5 min.
6 min.
Off
5 min.
Batteries: 3 x 392 batteries
•
•
•
•
Batteries can be changed with laser installed on gun!
Remove battery cover
Insert 3 x 392 batteries (+ side up).
Tighten down the battery cover, and check periodically.
LASERLYTE
LASERLYTE
WARRANTY:
Three Year Limited
Warranty.
UTA-YY
• Fits Glock® 26, 27 & 42 Pistol
• All Generations 1, 2, 3 & 4
• Dual Modes: pulse and constant on
• Auto-Off feature
• Quick and Easy Installation
DANGER
LASER LIGHT AVOID DIRECT EYE EXPOSURE
POWER OUTPUT < 5mw WAVELENGTH 630-670mm
CLASS IIIa PRODUCT
®
30 N. Alamos Drive - Cottonwood, AZ 86326
Phone 928-649-3201 - Fax 928-649-3970
www.LaserLyte.com
®
REV315
UTA_YY.indd 1
3/13/15 10:49 AM
GLOCK® 26, 27 & 42 LASER
UTA-YY
LASERLYTE
LASERLYTE
LASERLYTE
LASERLYTE
Installation: • UNLOAD FIREARM
1
Activation: This laser has ambidextrous activation.
1 Press once turns laser on : constant or pulse
2 Press and hold for 5 seconds to change mode
.
3 Second press turns laser off.
2
ON/OFF
26/27
Ensure Proper
Button Placement
42
1
•
1
3
2*
Attach danger label to side of gun near laser with arrow pointing
toward front sight.
LASER LYTE
LASER LYTE
SE
26/27
RL
YT
E
26/27
Laser Sight In:
1 Use the provided .035 hex key to adjust the sight.
2 Always end adjustments on a clockwise turn.
3 Make final adjustments at shooting range.
2
UTA_YY.indd 2
ON/OFF
or
ON/OFF
LASER LYTE
LA
Place small button provided into button hole in left-side of laser body shell.
Place left-side of laser body shell on gun, ensuring proper button placement.
* NOTE: For GLOCK® 26 & 27, use the 26/27 laser bodies
3 Move pre-assembled right-side laser body shell on top of trigger guard and
left-side and gently squeeze both sides together.
4 From left side (non-battery cover side), insert three 1/2” hex head screws using
the larger .050 hex key provided. Tighten screws until snug.
* GEN1 GLOCK® 26 & 27 Pistols only:
Insert 1 spacer into each side of laser as shown
or
ON/OFF
UNLOAD FIREARM.
3
LASER LYTE
5 sec.
* Failure to read instructions may result in damage to your laser or firearm.
•
ON/OFF
2
LASER LYTE
GEN1 GLOCK® 26 & 27 Pistols Only:
4
26/27
ER
LAS
YTE
L
1
26/27
3
LASERLYTE
LASERLYTE
2
Windage
Screw
Windage
right
left
Elevation
down
Moving
Laser
Dot
up
3/13/15 10:49 AM


