1
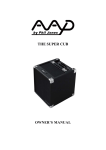
CUB II
OWNER’S MANUAL
CONTENTS
Read First ------------------------------------------------------------------Page 2
General Overview & Introduction-------------------------------------Page 3
Panel Overview------------------------------------------------------------Page 4
Panel Description---------------------------------------------------------Page 5
Operation & Positioning-----------------------------------------------Page 7
Transporting and storing of the CUBII-----------------------------Page 7
Specifications--------------------------------------------------------------Page 8
Service/Warranty information-----------------------------------------Page 9
1
Thank you for purchasing the AAD CUBII Acoustic Guitar Amplifier. A
great deal of dedication and passion went into designing and building this
no compromise, high performance compact guitar amplifier. It was
conceived to be a dedicated amplifier for the “connoisseur” guitarist looking
for the most accurate sound reproduction. Reading this manual will enable you
to get the best performance from it so that you may enjoy many years of
service.
READ THIS FIRST
•
•
Before using the CUBII please read ALL the instructions.
On receipt of product, check for any signs of physical damage arising from
shipping. If any damage is visible contact your dealer as soon as possible.
• If possible, keep all original packing.
• Do not use this amplifier in a way that would compromise its ventilation system.
When operating, never cover the heat sink on rear panel.
• Do not locate this amplifier near any heat source.
• This amplifier must be connected only to a power source specified in this manual.
• For safety do not leave the amplifier plugged into a power source for long
periods of time when not in use.
• Do not let any liquid or foreign objects fall into any openings on the amplifier.
• Never use this amplifier if it has:
1. Suffered any physical damage.
2. Been subjected to any liquids, rain or moisture.
3. Damaged cables connected to it.
If any of the above occurs, the amplifier should be examined by qualified service
personnel.
• Always operate this amplifier with the correctly rated fuse.
• Never use this amplifier without proper grounding.
•
The mains plug is used as disconnect device, the disconnect device shall
remain readily operable.
•
Protective earthing terminal. The apparatus should be connected to a
mains socket outlet with a protective earthing connection.
•
Correct Disposal of this product. This marking indicates that this product
should not be disposed with other household wastes throughout the EU. To
prevent possible harm to the environment or human health from
uncontrolled waste disposal, recycle it responsibly to promote the sustainable
reuse of material resources.
•
The apparatus shall not be exposed to dripping or splashing.
2
OVERVIEW OF THE CUB II
The original Cub proved to be a big success but we knew we could make it even better with
more features. We made all the controls easily accessible on top.
A second input channel was added to handle a microphone or guitar. Both channels have
3-band EQ. There is also a stereo auxiliary input for I-pod or backing tracks for practice.
FX send and return can be use on either or both channels. It can be stand mounted with our
proprietary accessory stand or tilted upwards on the ground for more projection.
DI, Line and tuner outputs on back.
The cub II comes with a padded gig bag and can operate on any AC voltage worldwide.
With 100 watts of power, you can practice or perform anywhere.
Available in red or black.
FEATURES
•
Dual channel switchable high impedance/high gain input OR low impedance/low
gain stage.
•
One stereo input for Drum machine or I-pod/MP3 player.
•
3 Band EQ designated for guitar.
•
FX Send Return sockets with blend control.
•
Tuner out.
•
Pre-amp Output.
•
Balanced Line Output with ground lift.
•
Smart power sensing that allows amplifier to work on any AC voltage worldwide. Just
plug in, no switching required.
•
Sophisticated amplifier protection circuitry
•
Special “Soft-Clipping” 100watt Amplifier
•
Ultra low noise pre amplifier circuit.
3
FRONT PANEL OVERVIEW
1
2 3
4
5
6
7
INPUT LEVEL
BASS
MID
TREBLE
8
9
SEND
FX
10
11
12
INPUT A
HEADPHONE
RETURN
PUSH
CLIP
MIC
LOW
A+B
HIGH
MIN
MAX -18dB
+18dB -18dB
+18dB -18dB
+18dB
A
POWER
B
INPUT B
CLIP
INPUT LEVEL
BASS
MID
TREBLE
INPUT
MASTER VOL
LEVEL
AUX
MUTE
LOW
HIGH
MAX -18dB
MIN
16
14 15
17
+18dB -18dB
18
+18dB
19
MIN
20
MAX
MIN
21
24
25
POWER
LIFT
GND
26
ON
O
23
OFF
AC~INPUT
DI OUT
100-240V~ 50-60Hz
TUNER OUT
CAUTION
BEFORE OPENING
PULL MAIN PLUG
NO USER SERVICEABLE PARTS INSIDE
REFER TO OWNERS MANUAL
LINE OUT
27
28
BACK
4
MAX
22
BACK PANEL OVERVIEW
I
13
+18dB -18dB
FRONT PANEL DESCRIPTION
1. INSTRUMENT INPUT JACK CHANNEL A
This is a combo socket accepts both standard ¼ inch mono jack and XLR plug.
2. INPUT GAIN SWITCH CHANNEL A
High: Higher sensitivity, high impedance input for passive guitar with magnetic pickups
Low: Lower sensitivity input setting for guitars/basses with onboard electronics.
MIC: Switch to this when plugging in a microphone. This input is for dynamic low impedance
balanced line microphones. If you need to use a condenser microphone that requires phantom
power, you will need an optional phantom power unit.
3. CLIP INDICATOR
When the amplifier output is clipping, the LED will light up with red.
4. INPUT LEVEL SENSITIVITY CHANNEL A
5. BASS EQ CONTROL
6. MID RANGE EQ CONTROL
7. TREBLE EQ CONTROL
8. FX SEND
Connect the FX send to auxiliary FX unit input.
9. FX BLEND SWITCH
This switch select signal from channel A or channel B or both to the FX SEND output.
10. FX Return
Connect the FX Return to auxiliary FX unit output.
11. HEADPHONE OUTPUT JACK
This jack accepts ¼ inch stereo headphone jacks.
12. POWER LED INDICATOR
With power switched on the LED light will turn bright blue.
13. INSTRUMENT INPUT JACK CHANNEL B
This is a standard ¼ inch mono jack socket.
14. CLIP/ MUTE INDICATOR
When the amplifier output is clipping, the LED will light up with red. When muted, the LED
will light up with green.
5
15. INPUT GAIN SWITCH CHANNEL B
High: Higher sensitivity, high impedance input.
Low: Lower sensitivity input setting for guitars with onboard electronics.
Mute: mute the input stage, when switch on, the clip LED will light up with green.
16. INPUT LEVEL SENSITIVITY CHANNEL B
17. BASS EQ CONTROL
18. MID RANGE EQ CONTROL
19. TREBLE EQ CONTROL
20. AUX INPUT
Stereo input for Drum machine or I-pod/MP3 player.
21. AUX INPUT VOLUME CONTROL
Use to control the level of backing/rhythm track.
22. MASTER VOUME CONTROL
This is the master volume control and it controls how much power you send to your speakers as
well as the line out socket on the back of the amp. When setting up your tone or plugging in your
instrument, you should keep this control at a low level. All instruments are different when it
comes to how much output is from the pickups. Likewise for players, depending on how hard or
soft you play.
BACK PANEL DESCRIPTION
23. GROUND LIFT SWITCH
This allows the grounding of balanced out socket to be disconnected. This is useful if you are
experiencing hum caused by grounding loops/problems.
24. BALANCED LINE OUT
This is an ultra-low impedance (200Ω) balanced line out for use with recording or PA mixing
consoles. This output is not controlled by the volume control. Changing the level on your
instrument will however, vary the DI output.
25. AC INPUT SOCKET & FUSE
Connects the amplifier to AC power supply. Always use a grounded plug and make sure
the AC cable is more than 3A rating at 250-volt AC. If you require a longer AC power cord,
we recommend the PJB heavy-duty 20 foot power cords. These are available as an
accessory. If fuse needs replacing, use a slow blow ¾ inch fuse with the correct current
rating.
26. POWER ON/OFF SWITCH
6
This switches the main power on and off in the amplifier. When you turn on the power, it will
have about 2 seconds delay to protect the speaker.
Do not leave the amplifier plugged into a power source for long periods of time when not in use.
27. LINE OUT
Can be used for driving a second amplifier.
28. TUNER OUT
Connect to instrument tuner. This output can also be used as an additional line out but is not
controlled by the volume control. Even when the volume control is turned down there will still
be a signal out.
OPERATION & POSITIONING
TURN THE VOLUME DOWN on the CUB II before plugging in your instrument.
Positioning the CUB II for Best Sound
It is recommended that you place the cub II on a solid object or the dedicated stand for best
sound and projection. Do not place on a high microphone stand as it will be unstable and
easily topple over.
TRANSPORTING AND STORING THE CUB II
When transporting in a vehicle, it is recommended that you use an external case such as a
custom flight case or heavy-duty cover to prevent it being damaged by falling over or other
objects falling on it. The Cub II is supplied with a padded carrying bag.
When Storing:
• Keep the CUB II in a dry location preferably at room temperature.
• Do not store the CUB II in temperatures below -20 Degrees C or above 40 Degrees C.
• Do not allow it to get wet. If this occurs, never turn it on in this condition.
• It is advisable not to leave the CUB II connected to a power source for long periods of time.
7
SPECIFICATIONS
Speaker
Computer Optimized Infinite Baffle Enclosure
Speaker Frequency Response: 80Hz –15KHz
Speaker Compliment: 2 x 5inch proprietary NEO-POWER, extended-range drivers
Speaker Sensitivity: 95dB/W/M
Internal Speaker Impedance: 4 Ohms
Dimensions (HxWxD): 8.2x12x11.6inch
Weight: 15 Lbs
Amplifier
100watt Solid State class AB amplifier with soft clip feature
Signal to Noise Ratio
Better than 95 dB
Impedance
High Input: >4MΩ/22pF
Low Input: >100KΩ/22pF
Pre Amp Out: < 2KΩ
Bal. Line Out: <200Ω
Levels
High Input: 10mV-2.5V
Low Input: 20mV-5V
Pre Amp Out: 1.2V
FX send: 250mV
Bal. Line Out: Typical 600mV
Protection Circuits
1. AC line filter.
2. Slow-blow Fuse: 2.5A / 250V.
3. Smart Thermal Protection: auto turn down the output power to about 50% when the heat
sink temperature over 65º C.
4. Loudspeaker Short-Circuit Protection.
5. DC Output Protection.
Included Parts
6 ft AC Power Cord
8
SERVICE/WARRANTY INFORMATION
The CUB II has a warranty period of 2 years, starting from the date of purchase. The buyer
must complete and return the enclosed warranty card within 14 days of purchase.
This warranty covers defect in materials or workmanship that occurs in normal use. Within
warranty period AAD will repair or replace the defect unit free of labor and parts charge. It is
the buyer’s responsibility to use the unit strictly according to instructions written in this
manual and amplifier manual.
This warranty is not transferable; it is provided to original owner only. Damage/defects caused
by the following conditions are not covered by this warranty:
•
•
•
•
Improper handling, neglect or failure to operate the unit in compliance with the
instructions given in user manual;
Connection or operation of the speakers in any way that does not comply with the technical
or safely regulations applicable in the country where the product is used;
Repairs or modifications by anyone other than authorized AAD service agent;
Damages/defects caused by force majeure or any other condition that is beyond the
control of AAD.
Should you need any warranty service, please bring the CUB II back to the dealer from whom
you purchased, along with your sales receipt. Depending on the complexity of the repair work,
your dealer may return the defect unit to AAD service center for repair or replacement.
IN USA
American Acoustic Development LLC
8559 Page Avenue St. Louis, MO 63114 USA
Tel: 314 814 3383
Fax: 314 536 1338
www.philjonespuresound.com
[email protected]
For servicing outside USA please contact our
distributor in your country. Information can be
found on our website.
9