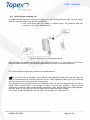
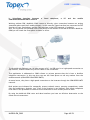
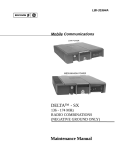
1
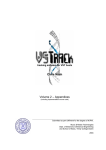
MobiLink GSM i Interface to PBX trunk over GSM 900/ 1800MHz User’s MANUAL 2009 USER`S MANUAL About TOPEX group, TOPEX is a group of Romanian companies, founded in 1990, by ten enthusiastic engineers experienced in telecommunications. Its activity is directed to the research, development and production of telecom equipment as well as service for them. TOPEX becomes very quick the most important supplier of IT&C solutions for small to large companies as well as for telecommunications operators and providers in Romania. The company designs equipment for all existing mobile systems (GSM/GPRS, CDMA/EVDO, HSDPA), including 3G technologies. TOPEX is represented all over Romania by a wide network of local distributors through which the promotion, administration and product maintenance are running. Due to our innovation power, authentic flexibility, real respect for our partners and secure solutions that we provide TOPEX extended its business worldwide. Currently TOPEX delivers its products through its distributors to: Italy, France, Spain, Holland, Bulgaria, Greece, Russia, UK, Republic of Moldova, Turkey, South Africa, Nigeria etc. In order to achieve effective and flawless manufacturing for its products, TOPEX has carefully organized its Research and Development Department along with its production facility. This allows TOPEX to have maximum control of all the processes involved in the complex operations related to high-technology electronic manufacturing. At the present time, the Research and Development Department counts over 30 specialists and the trend is ascending. TOPEX also considered the training and the service as part of the solutions it provides. Therefore, comprehensive trainings are organized at Topex Factory, complimentary for the company’s clients. Service is also provided via Internet, as all Topex solutions are designed especially to allow this, at the lowest cost. TOPEX has implemented the quality management system according ISO9001 standard certified by SRAC since 1997, respectively by IQNET since 2002. TOPEX become a sector member of I.T.U. (International Telecommunication Union) since 2001. For more details please visit www.topex.ro IM-REVA-EN_2009 Page 2/ 51 USER`S MANUAL DEAR CLIENT! TOPEX thanks for your choice; with MobiLink GSMi equipment you have made an excellent choice. By purchasing the MobiLink GSMi you have: 9 Flexible analog interface between a PBX or a single phone and a mobile network (quad band GSM/GPRS/UMTS) 9 Substantial savings at phone billing by means of routing for least costs (LCR) 9 Capability to connect to an analog phone as well as to a PBX trunk 9 Programmable routing rules and CLIP table 9 Configuration of settings either by means of OAM program or from a DTMF phone 9 Wireless access to high speed Internet, using 2G or 3G mobile networks, GSM/GPRS/UMTS (W-CDMA) 9 Excellent quality of a vocal signal 9 Fully compatibility with a wide range of PBX exchanges, analog or digital 9 Possibility to use together with others applications or data solutions, for instance SMS, GSM Phase 2+ supplementary services or data switching (HSCSD) 9 Easy and quickly installation IM-REVA-EN_2009 Page 3/ 51 USER`S MANUAL WEEE Directive Compliance This symbol applied on your product or on its packaging means WEEE Directive that this product fulfils the WEEE Directive. The product shall not be recycled as household waste; it will be disposed separately as sorted waste. Regarding to WEEE Directive the recycling EE equipments must be accomplish separately in purpose of natural resources preserving and to avoid the occurring negative effects about human health and environment. The acquired product shall not be treated like household waste and will be given to a specialized company for recycling waste. ! Please do not dispose your TOPEX product as unsorted waste (household waste), recycle it to protect the environment. Separate the packages according to waste disposal options and sort it for recycling. For supplementary information contact us to: Phone: +4021 408.39.00 or www.topex.ro IM-REVA-EN_2009 Page 4/ 51 USER`S MANUAL CONTENT 1 About MobiLink GSM....................................................................................... 6 2 PACKAGE CONTENT........................................................................................ 7 3 MobiLink GSM i - INSTALLATION ........................................................................ 8 3.1 Configuring and installing the SIM card ............................................................. 8 3.1.1 Configuring SIM card 8 3.1.2 Inserting the SIM card 9 3.2 Mounting MobiLink GSMi ..............................................................................11 3.3 Connecting the equipment ...........................................................................12 3.3.1 Labels and identifiers 12 3.3.2 Significance of Labels 12 3.3.3 Identifying the connectors 13 3.3.4 Connecting the cables 14 4 ACHIEVING A VOICE LINK ................................................................................19 4.1 Installing the equipment on the PBX exchange ..................................................19 4.2 Connecting to a PBX trunk or a telephone........................................................19 4.3 Achieving an incoming call ...........................................................................19 4.4 Achieving an outgoing call ...........................................................................20 5 ACHIEVING TEST CALLS ..................................................................................21 6 ENTERING THE PIN OR PUK CODE .....................................................................21 7 CONFIGURING THE PC CONNECTION ..................................................................23 7.1 The installation of USB driver .......................................................................24 7.2 The installation of MobiLink GSM on USB port ...................................................25 7.3 Accessing the Topex modem.........................................................................31 7.4 Setting up an Internet connection..................................................................32 7.5 Connecting to Internet ................................................................................36 8 9 10 11 12 13 14 MONITORING THE FUNCTION STATUS ................................................................38 CONFIGURING ..............................................................................................40 PROGRAMMING MobiLink GSM THROUGH ITS LINE INTERFACE ..................................41 TECHNICAL SPECIFICATIONS ............................................................................45 ENVIRONMENTAL AND OPERATING CONDITIONS ...................................................46 APPLICATIONS..............................................................................................47 GLOSSARY...................................................................................................49 Revision B, Oct 2009. IM-REVA-EN_2009 Page 5/ 51 USER`S MANUAL 1 About MobiLink GSM MobiLink GSMi is the smallest member of the analog range of Topex mobile gateways. MobiLink is a voice and data interface between the subscribers of a PBX exchange and the mobile network of 2G/3G, which can be GSM/GPRS/UMTS. MobiLink GSMi assures the wireless connection for voice and data and decreases the cost of fixed–to-mobile and mobile–to-fixed calls, while allowing you to send or receive SMS messages from your computer. MobiLink GSMi achieves a direct contact between a trunk of a PBX or local phone over GSM/GPRS/UMTS (W-CDMA) mobile network. Using the automated routing program of the PBX, any call generated from a fixed phone subscribed to the PBX exchange will be analyzed for optimal routing. If it is for a mobile network, it will be routed to go out through the trunk on which MobiLink GSMi was installed via its FXS interface. Thus the call intended for a mobile network will reach the mobile module of MobiLink, to achieve minimum costs. If it is for the fixed telephony network, it will be routed instead to the PSTN, via the FxO interface of MobiLink. This way the fixed-to-mobile calls are converted into mobile-to-mobile calls. Thus you will pay only the mobileto-mobile cost. Moreover, if you have several MobiLink devices connected to your PBX, you can assign one for each of mobile carriers, so all incoming calls will be terminated as mobile-to-mobile calls inside the same network. Also, for any call made from a mobile phone in the field to the number assigned to SIM card that is used by a MobiLink GSMi connected to a PBX exchange, you can call any local subscriber extension This will be again charged only as a mobile – to – mobile call. The routing must be performed by the phone exchange. But you can use it also at home or in a small office, where there is no PBX available. In this case, your fixed phone will be connected directly to the FXS interface of MobiLink. Of course, when MobiLink GSMi equipment is wired to a junction interface (trunk) of the PBX exchange, the flexibility is higher. MobiLink GSMi is also suited for using as WLL or FCT interface, this means the wireless a voice / data connection for one fixed telephone station belongings to your household, an office or a factory. The connection is performed over a mobile voice and data network, avoiding the necessity of installing cables of phone lines at remote or temporary locations, and thus saving both time and money. Finally, by using MobiLink GSMi you have, also a mobile data interface for your needs. You can connect a computer to USB port of MobiLink , for internet access over GSM/GPRS/UMTS networks. The same computer connected via USB can be used to manage the equipment, to retrieve the logs, to send and receive SMS and to perform maintenance, debug, and firmware update. IM-REVA-EN_2009 Page 6/ 51 USER`S MANUAL 2 PACKAGE CONTENT When opening the package, please check the contents against the following: Component Image Component Description MobiLink GSMi unit in its plastic case. It is a mobile gateway with two interfaces, type FXS and GSM. Power supply: switching mains adapter Input: 100-240V A.C Output: 12VD.C. / 2A Max. Power: 25 W USB cable for connecting PC Flat telephone cable with RJ11 connector, for connecting to PBX Antenna for mobile networks Multiband, with magnetic base and 2,5 m long cable - IM-REVA-EN_2009 CD with Drivers, Manuals, OAM program Wall Mounting Kit Quick Install leaflet Warranty Certificate Page 7/ 51 USER`S MANUAL 3 MobiLink GSM i - INSTALLATION For installing the equipment you must accomplish the following steps: 3.1 configuring and installing the SIM card mounting the equipment identifying the connectors connecting the cables and antenna connecting a DTMF phone powering the MobiLink GSM setting the PIN or PUK code, if is required performing other settings, via OAM or phone Configuring and installing the SIM card In order to work, MobiLink GSM i needs and adequate SIM card for the GSM/GPRS/GSM/GPRS/UMTS operators to which you want to connect. 3.1.1 Configuring SIM card MobiLink GSM i works with a SIM card that must be activated by GSM/GPRS/GSM/GPRS/UMTS operator. The SIM card must be configured before to be inserted into the MobiLink GSMi slot. For configuring the SIM card, use an ordinary GSM cell phone. Required configurations: PIN CODE REQUEST – enter the default value of the equipment PIN CODE - 1234. ~ The default value of PIN CODE for equipment is 1234, if you want to change it use the OAM application. ~ If the check box „Change PIN Code” is enable, MobiLink GSMi will generated a new PIN Code, unknown for user, which prevents using the SIM card on another terminal, so we recommend you disable this option. Disable GSM services – GSM operators offers you different supplementary services for calls (divert calls, vocal messages). When you use the MobiLink GSMi interface is recommended that these options to be disable, because they are available only with extra cost. Disable Roaming – is required to disable the roaming services because MobiLink GSM was designed for stationary working, with PBX exchange, not to go out in the field. Disable Auto-Redial and Auto Answer Set OFF for Dial-Again Interval, Call Waiting ~ Depending on your mobile phone type some of the above options are available or not. IM-REVA-EN_2009 Page 8/ 51 USER`S MANUAL 3.1.2 Inserting the SIM card The SIM card must be inserted into the special slot (holder) of MobiLink GSM. The slot of SIM card is located on top right side, under the status LED`s. For inserting or extracting the SIM card use the mobile holder for SIM. Push the little yellow button for activating the holder. Handle with care the inserting or extracting the SIM card. ! When inserting or change the SIM card MobiLink GSMimust be powered off. For inserting the SIM card follow the next steps: 1. Push the little yellow button for taking off the SIM carrier. Note: Because its small dimensions, you can push the button using an object that has hard edge, such as a screwdriver. Note! Because it’s reduced dimensions, the button can be pushed with sticking object (keys, pencil, screwdriver, etc)! 2. Pull out the black holder (the support for SIM)! IM-REVA-EN_2009 Page 9/ 51 USER`S MANUAL 3. Insert the SIM card into the holder – the cut (notched) corner must be orientated upwards and the side with contacts towards you 4. Push the holder with SIM card back into the slot! ~ The described operation must be achieved also when you want to change the existing SIM card with a new SIM card. ~ When the MobiLink GSMi equipment is powered and includes a SIM card that has the „PIN CODE REQUEST” option enabled, MobiLink GSM I will send to SIM the code that was stored. If this code is different from the SIM code, MobiLink GSMi switches into the mode of “waiting for PIN code” from the telephone interface. Now you must either dial the code from a DTMF phone connected to the equipment, or use the O.A.M. software to enter the code. If the PIN code was sent incorrectly to the SIM for three times in a row, the SIM becomes inactive. For unlocking you must use the PUK code. MobiLink GSMirequests the PIN or PUK code, by means of blinking of the signaling LEDs, and by special tonalities that you hear in the handset. IM-REVA-EN_2009 Page 10/ 51 USER`S MANUAL 3.2 Mounting MobiLink GSMi MobiLink GSMi should be mounted in a place that allows the maximum reception of GSM/GPRS/UMTS networks signal. The equipment can be mounted in a vertical position on a wall or in a horizontal position on a desk or a shelf. MobiLink GSMi and its antenna must be positioning at a proper distance for avoiding the interference with others sensitive equipments at radio emissions (PC, monitors. TV set, radio apparatus). Warning! The GSM/GPRS//UMTS modem used by MobiLink GSMi sends out electromagnetic radiations. Due its dual functioning, as voice interface for the phone exchange and data interface for a PC the emission time will be longer than that from an ordinary mobile phone. Don’t stay or work near the MobiLink GSMi antenna. For mounting the MobiLink GSMi on a wall uses the assembly kit that was found in the package. Mounting on a wall: For mounting MobiLink on a wall, use the mounting kit (plastic dowels, woodscrews, etc) provided by Topex. On the back of equipmnet there is a pair of mounting holes, 55 mm apart. The pair is located near the top of the plastic case, to secure the MobiLink GSMi to the wall with indicators up and connector’s panel downwards. Perform the following steps: - Choose the mounting place such as it to be suited with a proper operation and installing and mounting requirements mark the position of a pair of holes on the wall, spaced at 55 mm apart drill the holes in the wall insert the plastic dowels into the holes thread the metallic woodscrews into the plastic dowels leaving the end to protrude outside for some 5 mm hang the case of the MobiLink GSMi in the two metallic woodscrews and push it down a little to get it a good fastening if it does not lock properly, adjust the screws Figure 1.: Mounting MobiLink GSMi on a wall Mounting on a desk / shelf This means simply placing the MobiLink GSMi on a flat surface, which is safe e for sustaining the weight of MobiLink GSMi and its belonging cables and accessories. A desk, a table or a shelf is suited for mounting MobiLink GSM. To benefit of the best performances you should place the equipment upper, in an area without obstacles. Installing MobiLink GSMi on a shelf higher up, with no obstructions around, ensures the best performance for the embedded GSM or 3G modems. Take care to ensure the adequate cooling of the MobiLink terminal. IM-REVA-EN_2009 Page 11/ 51 USER`S MANUAL 3.3 Connecting the equipment 3.3.1 Labels and identifiers On the bottom of the case of the MobiLink GSM i equipment there are glued several labels or tags that show the characteristics and compliance. 3.3.2 Significance of Labels These adhesive labels contain information about the manufacturer, type, model, certification, approval, compliance to international and UE directives. The label may include barcodes and refer to: Rear View of MobiLink IP PRODUCT LABEL FIELDS SIGNIFICANCE OF FIELDS MANUFACTURER - Full manufacturer identification: Company, address, origin country, INFORMATION PRODUCT FEATURES CONFORMITY MARKS PRODUCT CODE LABEL PRODUCT LABEL IMEI contact information - Model identification, which allows the network operator to check the terminal as one of its approved models, so no additional certification or approval is required; - Description and details of variant, the type of mobile networks it works with, number of mobile modules, supply voltage - Conformity marks required by product certification and other UE or international directives - indicates exactly what type of product it is. You must mention this code when you call Support for upgrade and for repairs - IMEI code, International Mobile Equipment Identity for SIM based equipments. A unique 15- or 17-digit number. - The first 6 numbers of IMEI represent the TAC code IM-REVA-EN_2009 Page 12/ 51 USER`S MANUAL 3.3.3 Identifying the connectors The panel with connections is placed on the bottom of the MobiLink GSM case. Figure 2.: Identifying the connectors The connectors are, from left to right: DC – Power, round JACK- used for connecting the power supply adapter (delivery in package). USB – USB-B connector, female - used for connecting USB cable between MobiLink and a PC FXS – Subscriber: RJ11 connector – used for connecting the telephone cable to an analog fixed phone or an analog trunk of the PBX FME connector - used for connecting the GSM antenna is on the upper side of the MobiLink GSMi equipment! IM-REVA-EN_2009 Page 13/ 51 USER`S MANUAL 3.3.4 Connecting the cables Figure 3.: Connecting the cables Connecting the telephone cable for FxS interface MobiLink GSMi is shipped with a piece of flat telephone cable, wired on both side with RJ11 connectors. Depending upon the actual condition of installation, you may need a second piece of cable, or a greater length of telephone cable. ) Connect the telephone cable with one of the end to the FxS connector, and the other end to the PBX trunk of PBX exchange or an analogue phone. Figure 4.: Achieving FXS connection IM-REVA-EN_2009 Page 14/ 51 USER`S MANUAL The analog telephone set can be used for initiating or receiving calls and also for MobiLink GSMi configuration (among other parameter settings, the inserting PIN code). If the exchange has the terminal trunks not equipped with standard RJ11 connectors, you can couple the two middle wires of telephone cable directly to internal distributing frame of PBX exchange (the central two wires of the cable). ! MobiLink GSM should not be connected to an ISDN interface of PBX exchange. ! Improper installing the MobiLink GSMi equipment might lead to damage of MobiLink GSMi or PBX exchange. (If you join a local line of PBX exchange to the FxS connector of MobiLink GSMi, then both equipments will generate current into the connection cable, in this way MobiLink GSMi and PBX exchange may be damaged). Connecting the USB data cable ) Connect the USB-B connector (male) to USB connector (female) of MobiLink GSM, and the other end of cable to the USB-A port of a PC, see the figure 3. Figure 5.: Achieving USB connection Note: The same USB connection has a double function: for data transfer (connecting to Internet) and for MobiLink GSM I configuration by means the OAM application. IM-REVA-EN_2009 Page 15/ 51 USER`S MANUAL Connecting the antenna MobiLink GSMi package includes a multiband antenna for GSM/GPRS/UMTS mobile network. The antenna has a cable of 2,50 m length and a magnetic base, so it can be installed on any ferromagnetic surface. ! You should fasten the antenna on a safe (with great stability) and flat area, even one that is not magnetic. The antenna will be threaded to RF connector available on MobiLink GSMi (FME male type). This RF connector is on the top side of equipment, the antenna attachment will be done as is shown in the picture bellow. Figure 6. Antenna attachment Caution! Don’t force the fastening of antenna, screw the antenna manually (by hand only). Using a pairs of pliers may lead to damage of antenna thread. When you install the antenna, be carefully that the chosen place to be suited for the best reception of signal from the mobile network. IM-REVA-EN_2009 Page 16/ 51 USER`S MANUAL Antenna features Frequency bands Gain Polarization Height Base Cable End Connector GSM 890-960 MHz PCN 1710-1880 MHz PCS 1850-1990 MHz UMTS/HDSPA 1920-2170 MHz 2 dBi Vertical Total 73 mm Active stick 43 mm Magnetic, diameter 2,8cm Type RG174, length 2,5 m Nipple, male Note: z z The MobiLink GSMi unit and its antenna should be placed as far as possible from appliances or office equipment that is sensitive to radio interference (microwave ovens, copiers, TV sets, PC displays, and multimedia systems). For best results, try to find a place of maximum signal reception for the Mobile antenna In addition, the antenna must NOT be located near heavy-duty equipment that may generate electromagnetic interferences, such as electric motors or heaters. IM-REVA-EN_2009 Page 17/ 51 USER`S MANUAL Connecting the power-supply adapter ) Connect the JACK connector to DC connector, then plug-in the power supply adapter to the wall outlet (230VAC). Figure 7. Connecting power supply ~ For powering of MobiLink GSMi you must use only the adapter delivered by the manufacturer. Using other kind of adapter with different characteristics can cause the damage of MobiLink GSMi interface! ~ Remember that the adapter is the disconnection device (there is no POWER switch on MobiLink GSMi so the 230 VAC socket-outlet must be installed near the equipment and must be easily accessible. Before executing the operations from chapter 4 you must do the following operations: - The installation of USB driver – launch the „PL-2303 Driver Installer.exe” application (see chapter 6.1.) - Install the OAM program from the CD which consorts the equipment! – see the “Operation, Administration and Maintenance Manual” manual. IM-REVA-EN_2009 Page 18/ 51 USER`S MANUAL 4 ACHIEVING A VOICE LINK 4.1 Installing the equipment on the PBX exchange MobiLink GSMi can be connected in two ways: With its FXS interface to an analogue trunk of a PBX exchange With its FXS interface directly to an analogue phone. To this purpose MobiLink GSMi has a RJ11 connector, where you attach the PBX or phone cable, as shown below. The configuration of the interface selection is done through the OAM software application. 4.2 Connecting to a PBX trunk or a telephone Use the FXS interface of MobiLink GSMi (which must be enabled). ~ For easy configuration of the equipment, it is recommended to make a temporary connection of MobiLink GSMi to a DTMF telephone (that has the capacity to generate „tones”). This way you can set up parameter by dialing special codes, and into the handset you can hear the alarm tonalities by means which MobiLink GSMi informs you about its operating status or sends error warnings. 4.3 Achieving an incoming call ) From mobile phone dial the number of SIM card used by MobiLink GSMi and the equipment will redirected your call to the fixed phone atatched Figure 8. Connecting to a PBX trunk MobiLink GSMi interface receives a call over the mobile network. The equipment sends a call signal to the analog phone that is connected to FXS, or to the PBX exchange; in the second variant the exchange switches the call to a local subscriber. IM-REVA-EN_2009 Page 19/ 51 USER`S MANUAL 4.4 Achieving an outgoing call The PBX exchange must be configured to output the calls through MobiLink GSM. The user simply dials the wanted number from an office telephone. ) From fixed phone dial the number of mobile phone, the MobiLink GSMi will transfer the call to the GSM networks Figure 9. Connecting to an analogue phone PBX processes the number and analyses the prefix and sends it to the outgoing trunk where MobiLink GSMiis installed. Then MobiLink GSMi transmits the call to the mobile network. For further details of operation, please see the OAM manual! ~ A voice link can be initiated in the moment when MobiLink GSMi generates dial tone (by default continuously tone, frequency 440 Hz). But the Topex equipment allows you to u customize the dial and busy tones, as well as the ringing sound. The telephone sets, the PBX extension or exchange trunk can send to MobiLink GSMi the call in DTMF mode or PULSE mode. If the number of digits is smaller than number of digits that are waited for by MobiLink GSMi (programmable parameter), then, after a delay (also programmable, typically about 10 seconds), the call is transferred to GSM/GPRS/UMTS modem. If you want to send immediately the call, after the last digit you should press "#". IM-REVA-EN_2009 Page 20/ 51 USER`S MANUAL 5 ACHIEVING TEST CALLS It is recommended to make first some test call, for verifying if MobiLink GSMi equipment is operating correctly. For MobiLink GSMi connected to PBX trunk Incoming call Ring, from a mobile phone, to the number of SIM card used by MobiLink GSMi. The Interface diverts the call and sends the ringing signal to trunk of PBX exchange. The operator answers and transfers the call. Outgoing call The PBX exchange must be configured to route special outgoing numbers (for instance the prefixes of mobile, such as 072x) towards the trunk assigned to MobiLink GSMi interface. Dial the number of mobile network subscriber, the call will be sent from exchange to MobiLink GSMi, which achieves the link over mobile network. 6 ENTERING THE PIN OR PUK CODE If the SIM card has activated the “PIN Code Request”, when you insert it and power up MobiLink, it will send the stored PIN code. If the stored PIN code doesn’t match, the equipment goes in stand-by and waits the new PIN code to be inserted either from the phone interface of via OAM program. When you hear in the handset the audio signal, you can insert the right PIN code. If the PIN code is sent wrong for three times in a row, the SIM card will become blocked and request the PUK code to unlock! To enter the codes you can use an analogue phone, which is connected to the MobiLink GSMithrough the FxS interface. The phone must allow you to dial digits in DMTF mode (tones). Also the FxS interface of MobiLink must be activated. Alternatively, if the MobiLink GSMi equipment is connected to a PBX trunk, dial the code, which allows you to force the engaging of that trunk. When the equipment is connected through an FxO interface, you will dial the extension number for a connection with the equipment. In both cases the tones that you hear and the mode how you insert the codes are the same as when you use a phone, which is directly connected to MobiLink GSMi. Inserting the PIN code: - wait the tone signal, which request the PIN code the digits which are allowed are between 0 and 9 (you can’t use also * and #) - the code must have minimum 4 (four) and maximum 8 (eight) digits - if the PIN code which you want to insert has less than 8 digits, after you insert it press # to validate it. If the code has eight digits, it will be automatically sent. Inserting the PUK code: - wait the tone signal, which request the PUK code - the figures that are allowed are between 0 and 9 - insert the PUK code and then press # - if the option “ Change PIN code” is not set, then you must enter the new PIN code, as previously described. IM-REVA-EN_2009 Page 21/ 51 USER`S MANUAL ~ Normally, after you enter the PUK code you, must insert the new PIN code (defined by you). But when the option “Change PIN code” is enabled in the OAM progran, the TOPEX equipment will generate automatically a new PIN code, so you don’t have to do anything. This prevents the SIM to be used on another terminal. When this option is not enabled then you must enter a new PIN code. If the PIN code was successfully inserted, you should hear an mobile registration tone (the GSM module signals that it has got the right PIN code and waits for registration over the GSM/GPRS/UMTS network) If the PIN code was sent incorrectly, then you should hear a warning tone and after that the PUK code request – a fast beeping! 5.6. Cautions: a) Interferences: Some types of phone exchanges are more sensible to the radio-frequency interferences, which might cause some noises. In this situation you have to place the MobiLink GSMi equipment as far as you can from the PBX exchange. IM-REVA-EN_2009 Page 22/ 51 USER`S MANUAL 7 CONFIGURING THE PC CONNECTION To configure an Internet connection using MobiLink you have to follow these steps: - First, achieve the installation of the USB driver on your PC. The driver is required so than the computer can “see” the MobiLink device connected to it, which is required not only for the data transfer, but also for connection to the OAM program - Configure an access connection to the Internet on the PC - Specify the initialization AT commands (for dial-up) - Connect to the Internet Warning! The mobile phone number used by the connection, the user name and the password, and also the additional AT commands are dependent on the mobile phone network carrier. The following examples are for the Vodafone Romania network! - - - Check if the MobiLink GSMiequipment is properly connected with the PC and is powered up; First you have to install the USB driver for the MobiLink GSMiequipment. This interface can be used for data transfer and also for configuring the equipment (with the OAM application). There is an executable program that automatically installs the USB driver. The executable name is “ PL-2303 Driver Installer.exe”. Create a dial-up connection for the mobile network. The connection must specify the mobile number, *99**1#, the user name and the password used for log-in (such as "internet" and respective "provider"). Also, the modem must be configured with an initialization command (an additional AT command). This command must be typed with capital letters. The name of the mobile Internet provider, the password, and dial-up number are speciffic to each carrier. An example of command is : AT+CGDCONT=1, “IP”, “INTERNET_PROVIDER” (where the name of the mobile data carrierr may be, for instance, Vodafone). This command must be inserted in the “Extra Settings” window, from Modem>Properties>Advanced. Finally you can connect to the Internet using the Dial-Up connection. IM-REVA-EN_2009 Page 23/ 51 USER`S MANUAL 7.1 The installation of USB driver ) Unplug the USB data cable, if it is connected ) Insert the TOPEX CD „Driver_usb” into the CD-ROM unit and brow the folder called ) Double click on „PL-2303 Driver Installer.exe” application (delivered by TOPEX on CD) in order to install the USB driver ) Connect the USB data cable and the message “Found new hardware” must appear ) Install the MobiLink GSM equipment on the USB port (COMx) ) Verify the correct installation of USB port by view the COMx appearance in “Device Manager” Now you have finished the procedure of USB driver installation. Note: The same driver for USB is also needed for connecting the OAM application to the MobiLink GSMi equipment. The OAM program is used for configuring and managing MobiLink FXS, and also to send or receive SMS. Thus, even if you use MobiLink only for voice and SMS applications, you must still install the USB driver. Remember the number of the COM port that was used for the USB connection. IM-REVA-EN_2009 Page 24/ 51 USER`S MANUAL 7.2 The installation of MobiLink GSM on USB port Enter “Control Panel” > select “Phone and Modem Options” > press on the “Modems” tab > Select “Add” IM-REVA-EN_2009 Page 25/ 51 USER`S MANUAL Check “Don’t detect my modem; I will select it from a list” > IM-REVA-EN_2009 Page 26/ 51 USER`S MANUAL Click “Next” to continue … Select from “Standard Modem Types” a Standard 33600 bps Modem: The wizard asks you for the port number where it will connect the modem: IM-REVA-EN_2009 Page 27/ 51 USER`S MANUAL Select the installed port of the USB driver, such as COM10 in the example (To get this information go to Device Manager and press on the “+” symbol at “Port (COM & LPT)” > Next Wait on “please wait” message … The installation of the MobiLink GSMi mobile modem has successfully ended and to finish this wizard press Finish. If the modem was successfully installed it should appear in the “Phone and Modem Options” window with the port number where it was installed. IM-REVA-EN_2009 Page 28/ 51 USER`S MANUAL Identifying the COM port To see the number of the COM port where MobiLink GSMi is attached, go to Control panel>System Properties>Hardware>Device manager>Ports: Among the COM ports, you will see also the one (COM 10 in the example below) where MobiLink is connected. Of course, the figures for your actual connections may be different! IM-REVA-EN_2009 Page 29/ 51 USER`S MANUAL Set the communication parameters – speed 115200 bps, data bits 8, parity none, stop bits 1, flow control None. IM-REVA-EN_2009 Page 30/ 51 USER`S MANUAL 7.3 Accessing the Topex modem To be able to access directly the modem of MobiLink, you must first send it the command string „AT”. This can be done by means of an console emulator program, such as HyperTerminal in Windows. Click Start>Programs>Accessories>Communications>HyperTerminal: Configure HyperTerminal for the respective COM ports and 8-N-1 communication parameters: IM-REVA-EN_2009 Page 31/ 51 USER`S MANUAL Then the HyperTerminal screen opens up: Pick up the phone (“call”) to connect. The status bar at the bottom of the screen will show the successful connection to MobiLink; Type the command “AT” to place the modem in data transfer mode. Be careful to use capital letters, and no spacing between AT and the three zeroes! Alternate command – AT is the normal command, which sets the modem of MobiLink in data mode if the modem is registered and free (not busy with a voice call or SMS message). But there is an alternate command, which forces the modem to go into data mode, no matter which state it is in. This forced command is “AT001”. Note: Remember that you have to memorize the name of the MobiLink GSMimodem and the port, because you gone use this information when you will perform the Dial-Up connection. Also, the same COM port number will be used for the connection to the OAM program. 7.4 Setting up an Internet connection Enter “Network Connections” (Start > Programs > Accessories > Communications > Network Connections) > Press “Create a new connection” > Next > Check “Connect to the Internet” > Next > Check “Set up my connection manually” > Next > Check “Connect using a dial-up modem” > Next > IM-REVA-EN_2009 Page 32/ 51 USER`S MANUAL From the list with the modems attached to your computer, select “Modem – Standard 19200 bps Modem) (COM 10)” and check if the COM port is the right one > Next > Insert the name of your Internet connection, such as “MobiLink FXS” in our example. Next> In the “Phone Number” field, insert “*99***1#” > Next > (The mobile number used must have a specific format, depending on your actual mobile phone operator). In the “User name” field write “internet” > In the “Password” field and respective “Confirm password” field write “operator’s name” > Next > Finish. IM-REVA-EN_2009 Page 33/ 51 USER`S MANUAL In this moment you have created an Internet connection, and to finish this wizard press the “Finish” button. Also, the GSM/GPRS/UMTS modem must be configured with some initialization commands (an additional AT command), depending on the mobile phone carrier that you use. From “Control Panel” select “Phone and Modem options” and select again the MobiLink modem (in the current example Standard 33600 bps Modem on the COM 10 port respectively). Click on Properties, and then the ”Advanced” tab. IM-REVA-EN_2009 Page 34/ 51 USER`S MANUAL In the “Extra initialization commands:” window insert the following command: AT then confirm all by pressing “OK”. This command is strictly required to place the modem in the DATA mode, you will see that the middle LED, orange color, blinks three times to indicate data operation. Some mobile data providers may require extra initialization commands, such as the APN, which includes the name of the respective carrier: Thus, the example below shos the initialization command sting for Vodafone Romania> Now you have finished installing the Internet connection for the MobiLink equipment. IM-REVA-EN_2009 Page 35/ 51 USER`S MANUAL 7.5 Connecting to Internet Use the connection you just created. Enter “Network Connections” (Start > Programs > Accessories > Communications > Network Connections) , select your connection, in the example below called “Mlink” and double click on it: The “Connect Mlink” window shows up: In the windows “Connect Mobilnk” you should check or enter in the corresponding fields the values adequate for your mobile data carrier: - the user name the password in the “Dial” field enter the mobile number to be dialed, such as “#777” or “*99***1#” Then click the “Dial” button at the bottom left: The MobiLnk modem will dial a connection: IM-REVA-EN_2009 Page 36/ 51 USER`S MANUAL Then a window named "Connecting Mlink" must appear on your screen, which informs you that the equipment is connecting to Internet and the remote server verifies the username and password. In the right corner of the status bar, he network icon for Mlink connection begins to blink. Now you can open a browser (such as Internet Explorer) and surf on the Internet! IM-REVA-EN_2009 Page 37/ 51 USER`S MANUAL 8 . MONITORING THE FUNCTION STATUS The operation state of the MobiLink equipment may be monitored via OAM program, by means of the three indicator LEDs and is also signaled by different tones that you hear in the handset of the phone connected to MobiLink GSM. Out of these, the LED indicators are the most important, since they are always available to give you useful information about the state of the Topex box! The LED’s significance The equipment has three status LED’s. These optical indicators are located on the right side of the MobiLink GSM, and their colors are red, orange and green (from top downwards, as shown in the drawing to the right) Theese are marked with the following signs: (1) A phone handset (LED for FXS interface status – red LED) (2) Symbols for USB/antenna/signal level (LED for wireless module status – orange LED) (3) A symbol of the power button (LED for power status) LED for FXS interface status – red LED Off – the line is not engaged ON – the line is engaged LED for wireless module status – orange LED) Blinks 1 time - wireless module is in initializing mode Blinks 2 times - wireless module is registered in mobile mode Blinks 3 times - wireless module works in data mode LED for power status ON – equipment is powered OFF - equipment is not powered Note: If none of the indicator LEDs light up, this is not a normal situation, it shows that the MobiLink equipment is not properly powered! At least the green LED must be on … IM-REVA-EN_2009 Page 38/ 51 USER`S MANUAL 7.2. Tonalities MobiLink GSMi also signals the function status and the errors by means of some audible tones, which can be heard in the handset of the connected phone. If the control module of the equipment does not communicate with the mobile modem or if the mobile phone module has no network signal, MobiLink GSMi generates a warning tone. The tone is represented by a busy (congestion) tone, the 440 HZ signal is fast cadenced (150 msec on, 150 msec off). When the GSM module is properly registered, you should hear a dial tone, the 440 HZ signal is continuous. Warning tones If the SIM card has activated the request for PIN, when the equipment starts it send the recorded PIN code. If the sent code is not the same, the equipment goes into a wait status and signals this with a sound. Now you may enter the PIN code from the phone keyboard. The connection of the phone is achieved through the FxS interface (check if the FxS is activated). If the PIN code was incorrectly entered for three times then it locks up. You must enter the PUK code to unlock (this phase is also signaled with tone, as shown in the above table). The code warning tones are cadenced very fast, to draw your attention! Pin request tone : 50 ms 280Hz, 50 ms 355 Hz Puk request tone : 50 ms 350Hz + 440Hz, 50 ms pause IM-REVA-EN_2009 Page 39/ 51 USER`S MANUAL 9 CONFIGURING OAM configuration MobiLink GSMi should be configured with the OAM program, which is supplied on the CD or floppy disk. The OAM program allows you to configure the GSM module and FxS phone interfaces (parameter setting), to perform the ring and tones adjustments, to send and receive SMS. Some of the most important settings are: IN, input: if the module has activated this option, the calls to the mobile module will be sent through the FxS interface, if disabled, the calls will be rejected by the GSM/GSM/GPRS/UMTS module. - OUT, output - if the module has activated this option, the user can initiate a call to the mobile network through the module. If note enabled, outgoing call won’t be allowed over the GSM module. - CLIR – when this feature is activated, the ID number will not be send over the mobile network. - „Change PIN code”: if this feature is activated, the equipment generates a new PIN code, known only by the user. When MobiLink GSMi equipment starts, after the old PIN code is insert the equipment will generate a new code. In this way the user makes sure that the SIM card cannot be used by others equipments. The details concerning the configuring of mobile module , phone interfaces can be found in the OAM manual of the MobiLink GSMi product. As an alternative, many parameters of the equipment can be set up by dialing codes from a phone connected to it, as in the next chapter. IM-REVA-EN_2009 Page 40/ 51 USER`S MANUAL 10 PROGRAMMING MobiLink GSM THROUGH ITS LINE INTERFACE What it is? You can set up the parameters of the Topex equipment without the OAM program, by simply using an ordinary telephone, connected to the subscriber port (FXS) of MobiLink FXS. Why is it used? Sometimes you don’t have a computer available at the location where the unit is operating, or the OAM program is not installed, or simply you need to set up very quickly just a few parameters of the MobiLink equipment. Also, the USB port of the equipment may be unavailable, so the only way to program it is using a telephone! How to do it? To enter into the mode of programming by phone you must : - connect an analog telephone, with DTMF capability, to the line(FXS) interface of MobiLink - dial ## - dial one of the codes described below. ATTENTION! If the equipment is waiting for a PIN or PUK code, it cannot enter into programming mode. General Rule : - when the programming is correct, you will hear a tone and you can go to the next step of programming; - when the programming is NOT correct (upon error) you will hear no tone. This means that you must hang up the phone and try again to enter into the programming mode. So, for each of the parameters to be set up, which are described below, you must first dial the “##” code, because after each programming the MobiLink GSMi returns to the normal operating state (it waits for digits to route calls, not to be programmed). Set number of digits For setting up the number of digits that are waited before sending the numbering to the GSM module: - dial : 1xy , where xy is the number of digits that must be waited. The minimum value is two, while the max value is 20 ; if the number must be less than ten, then x = 0 (for eight digits you must dial 08, not 8); the default is 20 digits. Programming of timer loopbreak - to set up the loopbreak timer, dial : 4xy -> the value of the timer loopbreak is “xy” multiplied by 40 milliseconds, xy * 40 ms; maximum value for xy = 99; for example: should you need to set the loopbreak timer to 1 (one) second, you must dial 425. Programming of enable/disable CLIR : - to enable: you dial 201 - to disable (the default state): you dial 200. By default the call ID restriction is disabled, which means that MobiLink send out caller ID IM-REVA-EN_2009 Page 41/ 51 USER`S MANUAL Programming of action upon incoming calls form GSM: - should you want the calls coming in from the mobile network to be REJECTED: you dial 220 - if you want the calls coming in from the mobile network to be sent to the analog telephone interface (the default setting) : you dial 221. By default, the calls coming in from the GSM network are routed to one of the FXS or FXO interfaces. Programming of action upon calls getting out through GSM: - the outgoing calls from the analog interface are rejected : you dial 230 - the outgoing calls from the analog interface will be sent to the GSM network (the default setting): you dial 231. Here again, the normal action is the default one – the outgoing calls are routed via GSM module. Using the OAM program, you can also reject all outgoing calls, or selectively reject certain phone number or prefixes. Programming of enable/disable of progress tone for calls going out via GSM: - enable: you dial 251 - disable (the default state): you dial 250 Programming of polarity during the call: - if you want the polarity to be REVERSED during the call as compared to the other states of a call (the default setting ): you dial 371 - if you want the polarity to remain the same during the call as it was during the other states of a call: you dial 370 Programming of “power denial”: You can select to generate or not line voltage on the subscriber port, while the GSM module is not registered with the mobile network. If the line is not powered, the user won't be able to dial while the module is not registered: - for the duration while the GSM module is not registered, no line voltage will be generated over the FXS port: you dial 301 - line voltage will always be provided for the port type FXS, even when the GSM module is not registered with the mobile network (the default state): you dial 300 Programming of loopbreak: - when a call ends, MobiLink generates a loop break for the duration set by the loopbreak timer: you dial 311 - no loop break is generated upon the ending of a call (the default state) : you dial 310. Programming of hotline: - enable : you dial 321 - disable (the default state, hotline service is disabled) : you dial 320 Programming of “minute minder” signal: - no generating - you dial 330 - to generate minute minder, you dial 331. Here also, the default state is with minute minder NOT active. IM-REVA-EN_2009 Page 42/ 51 USER`S MANUAL Programming of CLIP generation If Caller ID is enabled, you can select the mode of sending out ID (by FSK or with DTMF) and its timing – before the ringing signal or after it. - for CLIP generated after the ringing signal, in mode ETSI FSK, you dial 510 - for CLIP generated before the ringing signal, in mode ETSI FSK, you dial 511 - for CLIP generated after the ringing signal, in mode ETSI DTMF, you dial 512 - for CLIP after the ringing signal, in mode ETSI DTMF you dial 513. Programming of billing signal generation. Teletax signal for billing can be generated, either over 12 or 16 KHz (out of band). - no billing signal generated, you dial 520 (default setting). - billing signal with 12kHz frequency is generated, you dial 521 - billing signal with 16kHz frequency is generated, you dial 522. Programming of timer for billing signal, minute minder - you dial “60xyz”, where xyz is the value in seconds of the timer, such as 20120 for 120 seconds. The minim value is 2 seconds and maximum is 600 seconds. Programming of timer preminder If enabled, “preminder minder” audio signal will be generated at a few seconds before the end of each billing period. - you dial 61xyz, where “xyz” is the value in seconds of the preminder timer. - the maximum value is the value of the minder minus one second - example : if the time quanta for billing is of 60 de seconds and you want to sound a warning 5 seconds before the billing period occurs, you should dial : 60060 and respectively 61055. Programming of the timer for dialing - you dial 62xyz, where “xyz” is the value in seconds of the timer, minimum two seconds, maxim 600 seconds Programming of hotline timer: - you dial 81x, where x is the value in seconds to enable hotline service; minimum value is one second, maximum is 5. Programming of the number for hotline: - you dial 82dig1dig2...dign#. So you must dial at first “82”, then the string of digits, and you end with a “#”. Programming generating of minute minder signal - no generation of minute minder, you dial 330 - to generate minute minder, you dial 331 Programming of timer for billing signal, minute minder - you dial 6xyz, where xyz is the value in seconds of the timer, from a minimum of 2 seconds up to the maxim of 600 seconds. IM-REVA-EN_2009 Page 43/ 51 USER`S MANUAL Programming of hotline service: - to enable : you dial 321 - to disable (the default state) : you dial 320 Programming of timer for hotline: - you dial 81x, where x is the value in seconds for “enable hotline” Programming the number for hotline: - you dial 82dig1dig2...dign# Programming of audio level towards the telephone interfaces: - you dial 83x, where “x” may be from 1(minimum) up to 4(maximum) Programming of audio level towards the mobile network: - you dial 84x, where “x” can also be from 1(minimum) up to 4(maximum) Programming of technology access You can establish what kind of mobile technology the GSM module will access: - you dial 85x, where x = 1 -> both 2G and 3G technologies are selected (default) x = 2 -> 2G (GSM) only x = 3 -> 3G (UMTS) only - Reset to default: for general reset to the default (factory settings), you should dial: *#* IM-REVA-EN_2009 Page 44/ 51 USER`S MANUAL 11 TECHNICAL SPECIFICATIONS Analog FxS voice port Depending upon the type of mobile module used, as specified on the label on the back of the case, such as: Dual band - GSM/GPRS: 850/1900 MHz Quad band -GSM/GPRS: 800/850/1800/1900 MHz UMTS: 2100 MHz Voice, data, SMS GPRS data: class GPRS 10, type B GSM/GPRS/UMTS data: PS, speed 384 Kbps Download and 128 Kbps Upload Connector RJ 11 Data and programming port USB B, version1.1 External antenna Multiband, for GSM/GPRS/GSM/GPRS/UMTS Signaling LED’s Dial tone GSM, FXO, FXS 12 VDC / 2A 230 VAC / 0,3 A / 50 Hz 440Hz 5%, programmable Line voltage 48Vcc Line current 30 mA max. Ring signal 25 Hz, min. 65 V Impedance 600 Dimensions (L x l x H) 222 x 115 x 32 mm Weight Max 500g – MobiLink GSMi 1 kg – whole package Operating temperature 5 to 50 oC Humidity 10 to 90%, without condense Mobile phone networks Network services Power supply IM-REVA-EN_2009 10% Page 45/ 51 USER`S MANUAL 12 ENVIRONMENTAL AND OPERATING CONDITIONS MobiLink GSMi equipment must be installed only indoor, in closed rooms, which follow these environment conditions: Operating temperature 5 to 50 oC Humidity 10 to 90%, without condense The equipment must not be installed outside! Also MobiLink GSMi will not be installed in flammable or explosive environments. MobiLink GSMi must not be used in environments with high vibrations. Use any kind of radio equipments can interfere with the medical equipments function, which are not enough protected. Also other equipments can suffer because of MobiLink GSMi equipment interferences. MobiLink GSMi must not be mounted in environments with strong electromagnetic interferences, like: Xerox, monitors display, electrical motors. It must not be stored in environment with extreme temperatures. When MobiLink GSMi unit is moved from cold environments to warm environments, the equipment must not be start immediately. It must be let half an hour to accommodate with the new temperatures, else condensation may occur. The mounting place will be selected according to conditions from installation chapter. The location must have full signal from the mobile network for the external antenna. When is functioning, the equipment must be protected from dust and solar radiations. The equipment clean up will not be performed with aggressive substances. Also the equipment must be manipulated with care, avoiding mechanical shocks. MobiLink GSMi does not contain any kind of polluting materials or dangerous parts. When you open up the equipment, first you have to pull up the power supple jack before you disconnect the antenna or the others cables. IM-REVA-EN_2009 Page 46/ 51 USER`S MANUAL 13 APPLICATIONS a. Voice/Data interface between a PBX, a PC and the GSM/GPRS/GSM/GPRS/UMTS network MobiLink GSMi achieves a direct voice connection between a private exchange and the GSM/GPRS/UMTS mobile phone network. It may be connected on an analog trunk of the exchange or to a local subscriber line and provides the possibility to call directly in the mobile network from all the local extension, thus avoiding the national fixed telephone operator. You can either use the PBX exchange option to route automatically the calls depending on the prefix, or set up MobiLink to perform this routing for minimum costs. This way any call towards a mobile telephone will be transmitted through the trunk that has installed the MobiLink GSMi equipment. In this way you will pay only a mobile-to-mobile call, avoiding interconnection costs. Also, any phone call initialized from a mobile phone in the field to a local subscriber of the PBX will be billed as a mobile-to-mobile call inside the same network and not like a mobile-to-fixed call. You can also connect a PC to MobiLink FXS, through the USB port, ensuring an easy mean of sending out SMS and a high-speed wireless Internet connection. This application is intended to small or middle business companies that have a high telephone traffic with the mobile GSM/GPRS/GSM/GPRS/UMTS network and want to cut down the telephone costs. Also, the users can benefit form the wireless Internet connection in the GSM/GPRS/UMTS network. IM-REVA-EN_2009 Page 47/ 51 USER`S MANUAL b. Voice/Data interface between GSM/GPRS/GSM/GPRS/UMTS network a fixed telephone, a PC and the mobile Working without PBX, MobiLink GSMi creates a directly voice connection between an analog (standard) phone and the S mobile network. In this case the Topes interface has connected its FXS interface to your fixed phone, and the FXO interface to the PSTN network, if available. Also, for any phone call initiated from a cell phone to the number of the SIM card used in MobiLink GSMi you can reach the fixed phone at home or office. To the MobiLink GSMiunit you can also connect a PC, via USB port for a high-speed connection to the Internet, without need of any kind of cable or DSL connection. This application is addressed to SOHO clients or private persons that don’t have a landline telephone connection. In this way they can use the fixed phone to call any number from the mobile network (GSM/GPRS/GSM/GPRS/UMTS). As extra bonus, they have a high-speed connection to the Internet through the GSM/GPRS/UMTS network. Both options are indicated for temporally events (cultural events, sporting competitions, trade fairs and exhibitions, festivals, etc). Even if the location is not isolated, with classic telephone lines there is not profitable to create a fixed connection for such a short period of time. By using the MobiLink GSMi voice and data interface you have an efficient alternative to the classic wired connections. IM-REVA-EN_2009 Page 48/ 51 USER`S MANUAL 14. GLOSSARY DTMF – Acronym for Dual Tone Multi Frequency, also known as "touch tone". Advanced method for dialling a number, instead of the older PULSE mode. When you press a key on the keypad a combination of two audio frequencies is sent on the line. DTMF capability is important because it allows access to a wide range of interactive voice applications. MobiLink GSMi uses DTMF dialling to transmit the numbering from local subscribers to the mobile networks. PBX - Acronym for Private Branch eXchange. The PBX is a small, private version of the larger central switching office of the phone company. A PBX is a private telephone switch. It is connected to groups of lines (junctions) from one or more central offices and to all of the telephones at the location (subscribers, extensions) served by the PBX. Current exchanges are in fact PABX, automated PBX, which don’t require a human operator to route the calls. MobiLink GSMi was designed to work optimally together with a phone exchange, but it can also be used without PBX, it can perform advanced call routing by itself. USB – Acronym for Universal Service Bus. A high-speed port, which allows serial communication of several peripheral units. Up to 127 peripheral units can be connected to a PC. The USB interface of MobiLink is used for data transfer and for communication with the OAM program. IM-REVA-EN_2009 Page 49/ 51 USER`S MANUAL IM-REVA-EN_2009 Page 50/ 51 USER`S MANUAL The manufacturer reserves the right to modify the product and manual for the purpose of technical improvement without prior notice. The manufacturer guarantees the good functioning of the product provided that it has been correctly installed and the directives for storage and usage have been respected. The warranty implies exclusively repairing or replacing the defective unit. The warranty does not include any indirect losses or loss of profit. The manufacturer is not liable for any damage, whether direct, indirect, special, incidental, or consequential, as a result of using MobiLink GSM. No part of this manual may be reproduced, stored in a retrieval system, or transmitted, in any form or by any means, electronic, mechanical, recording, or otherwise, without the prior written permission of the company TOPEX S.A. We certify hereby that the MobiLink GSMi unit is manufactured in concordance with the legal provisions concerning responsibility towards the quality of delivered products, fulfills the quality parameters specified in its “User’s manual” and is fit for the purpose for which it has been designed. We also warrant that the equipment will perform substantially in accordance with the accompanying documentation. Any comments, suggestions and proposals of yours concerning our products are welcome and we are gladly waiting for your feedback at the following address. TOPEX S.A. Strada Feleacu nr. 10, sector 1 014186, Bucharest, ROMANIA Tel: +4 021 408 39 00 Fax: +4 021 408 39 09 E-mail: [email protected] Web: IM-REVA-EN_2009 www.topex.ro Page 51/ 51