1
ENTERTAINMENT
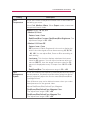
6 Select IP Auto Setting or IP Manual
Setting.
7
- If selecting IP Manual Setting,
press the Navigation and Number
buttons. IP addresses will need to
be input manually.
- IP Auto Setting: Select this if
there is a DHCP server (Router)
on the local area network
(LAN) via wired connection,
the projector will automatically
be allocated an IP address.
If you’re using a broadband
router or broadband modem
that has a DHCP (Dynamic Host
Configuration Protocol) server
function, the IP address will
automatically be determined.
- IP Manual Setting: Select if there
is no DHCP server on the network
or you want to set the IP address
manually.
When you are finished, press EXIT.
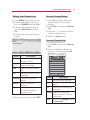
WPS (Wi-Fi Protected Setup)
If your router or AP has a WPS button,
there is the easiest connection
method. You simply press the button
on the router and then select the WPS
on the projector within 120 seconds.
1
Repeat step 1-3 on "Setting to a
Wireless Network".
2 Press the Navigation buttons to
select the Simple setting (WPSbutton mode).
3 Press the WPS button on your
router.
4 Go back to the projector and select
Connect.
29
5 Repeat step 5-6 on "PIN(Personal
Identification Number)".
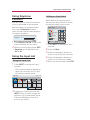
Ad-hoc Mode
Ad-hoc mode allows the projector
to use a wireless to connect to a
computer without using a router or
access point.
1
Repeat step 1-3 on "Setting to a
Wireless Network".
2 Press the Navigation buttons to
select Setting Ad-hoc network and
press OK.
3 Press the Navigation buttons to
select Enter and press OK.
4 Press OK to select Connect to
connect Ad-hoc network.
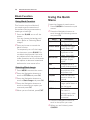
- You can see the Network ID and
Security Key on your screen.
- Enter this Network ID and
Security Key to your device.
- When needed, you can change
the setting information using the
Red.
NOTE
When searching for wireless
networks on your PC using ad-hoc,
the projector is named LGPJT0.
LGPJT0 that appears in the list.
(Select the same name as the
network ID that appears on your
screen.)