Download SpeedVault Model SV 500 User Manual
Transcript
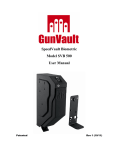
SpeedVault
Model SV 500
User Manual
Patented
Rev 1 (10/11)
Firearm Safety
WARNING: The SpeedVault safe or any other firearm storage device cannot
take the place of other safety procedures including advising children of the
dangers of firearms.
WARNING: The manufacturers and distributors of the SpeedVault safe do not
recommend, suggest, advise, promote or otherwise condone the ownership
or use of firearms. We at GunVault Inc. believe the decision to own or use a
firearm is a serious decision that should only be made by an adult who has
carefully considered the risks and benefits of such a decision.
WARNING: The keypad and push buttons on the control panel are electronic.
They have a certain feel to them and may seem different to different people. It
is important for you to become accustomed through practice, as to how the
SpeedVault safe responds to your own personal touch.
WARNING: Never mix alcohol or drugs with firearms or the SpeedVault safe.
Alcohol and other substances likely to impair normal mental or physical
functions should not be used before shooting or handling firearms or the
SpeedVault safe.
WARNING: Never grab your firearm by the trigger when removing or placing into
the SpeedVault safe. Make sure your firearm’s safety mechanism is on.
WARNING: Always point your firearm in a safe direction. Common sense should
dictate which direction is the safest.
WARNING: Always follow the firearm safety rules set out by the firearm’s
manufacturer.
WARNING: Be familiar with how firearms work. GunVault recommends that you
obtain as much information as possible on firearm safety.
WARNING: Always handle firearms as if they are loaded and ready to fire.
Always assume that a firearm is loaded.
WARNING: In order to enjoy the maximum security benefits of the SpeedVault
safe product, it must be mounted in place using the equipment provided with
the product, according to the instructions provided herein. Use of this product
as a storage receptacle without mounting according to the instructions
provided herein, may compromise security of the SpeedVault.
-1-
Getting Started
Set your keys to the side. Don’t lock them inside the safe!
● Pull open the battery cover.
● Pull out the battery holder.
● Insert new 9v battery. Following the Positive (+) and Negative (-) guides on
the holder.
● When power has been connected, the green light blinks one time and then
the red light blinks one time, with a long beep during the process.
● Use the factory-default code to open the unit, which is: Press each button one
time, from left to right -- 1 , 2 , 3 , 4.
● Getting ready to program
● Find the LED light in the keypad.
● It can glow either green or red. Depending upon the function being utilized.
● There is an audible beep when keys are pressed.
-2-
Choosing Your Own Access Code
● An access code is a series of entries on the keypad.
WARNING: This is not a numeric keypad, you cannot program digits (there is
no 5, 6, 7, 8, 9, or 10).
● An “entry” is a single press of one or more buttons at the same time.
● The user can use a minimum of three entries, or a maximum of six entries, for
access code.
● For each entry of the access code, the user may choose one, more than one
or ALL of the buttons on the keypad in combination.
● Example of a valid access code: press button one, press button two, press all
four buttons together.
Programming Your Access Code
● First, press and hold the Learn Button for two seconds, the green light blinks
and there will be a beep. The unit is now in “Learn” mode.
● Enter new code in 13 seconds. The light will remain green.
● Press and hold the Learn Button again for two seconds. The light will turn red,
and you will hear a beep. Release the Learn Button.
● While the light is red, enter your new code a second time to confirm it.
● Press and hold the Learn Button a third time for two seconds. The light will
blink green five times. And you will hear five beeps, confirming that the new
code has been accepted. If the red light blinks five times with five soft beeps
at this point, an error has occurred. Just start over by pressing the Learn
Button for two seconds.
Mute Button
Find the Mute button beside the learn button, press the Mute button for two
seconds to turn the keypad input tone (beeps) on or off.
-3-
Tamper Detect Feature
Entering an invalid access code sets the Tamper Indicator.
Hold down buttons two “2” and three “3” for five seconds to activate the Tamper
Indicator.
● If tampering has been detected, the red light will glow until buttons two “2” and
three “3” are released.
● If tampering hasn’t been detected, the green light will glow until buttons two
and three are released.
Security Sleep Mode
The SpeedVault has a Security Sleep Mode. 24 incorrect entries on the keypad
triggers “Security Sleep Mode”. Sleep Mode lasts for two minutes. During Sleep
Mode the keypad does not accept any entries. If a button is pressed during Sleep
Mode, the LED blinks red and the alarm beeps three times.
Low Battery Warning Indicator
● The low -battery warning indication is seven red flashes and seven soft beeps
when the keypad is operated.
Replacing the Battery
Pull open the battery cover.
Pull out the battery holder.
a) Remove old 9v battery.
b) Insert new 9v battery. Following the Positive (+) and Negative (-) guides on
the holder.
Reinsert the battery holder and snap the battery cover back into place.
The user code will not be erased or lost when changing the batteries.
-4-
Mounting Bracket Installation
Tools Required:
Phillips-Head Screw Driver
Mounting Bracket Images:
Optional Tools:
Power Drill
Phillips-Head Bit
Supplied Parts:
SpeedVault Safe x 1
Mounting Bracket x 1
Wood Screws x 4*
Thumbscrew(s) x 5
* Mounting screws provided are
for solid wood surface only. If mounting to another surface type, drywall,
cement, and etc, the appropriate hardware can purchased through a local
hardware store.
Mounting Positions:
The SpeedVault can be mounted from the left, right, or back using the provided
bracket holes (see images below).
Left or Right Side View:
Back Side View:
-5-
Installing the SpeedVault:
IMPORTANT: When mounting the SpeedVault make sure the drawer has
enough space to drop open. The drawer requires gravity to fully release, always
install in a vertical position (see image below)
1. Secure the “Mounting Bracket” to the desired location using the “Wall
Mounting Holes” on the bracket and the provided wood screws.
IMPORTANT: Mounting screws provided are for solid wood surface only. If
mounting to another surface type, drywall, cement, and etc, the appropriate
hardware can purchased through a local hardware store.
2. Remove the two “Thumbscrews” located on the bottom of the SpeedVault
(see image below).
3. After removing the two “Thumbscrews”, open the SpeedVault using the
supplied keys. This will allow the drawer to be removed by lifting it up and out.
4. With the drawer removed, the SpeedVault can now be mounted to the bracket.
Insert the “Mounting Hooks” into the “Hook Mounting Holes” located on the
left, right, or back of the SpeedVault. Now that the SpeedVault is mounted to
the bracket, it can be secured to the bracket by using the supplied
“Thumbscrews”.
5. Locate the three “Thumb Mounting Holes” beneath the “Mounting Hooks”
inside the safe. They will be on the same side as the “Mounting Bracket”.
-6-
6. Insert the “Thumbscrew” into the “Thumb Mounting Hole” and turn
clockwise until tight. Repeat for the other two “Thumbscrews”. The
SpeedVault is now securely mounted.
7. Reinstall the drawer and the two “Thumbscrews”.
8. The SpeedVault is now ready to be used.
-7-
Technical Support
If you have followed the above steps carefully and still have a problem operating
your GunVault, phone GunVault Technical Support. Almost all problems can be
solved within minutes over the telephone.
800-222-1055
Requirements for Return & Repair
If possible, do not return your GunVault safe to your dealer. Instead, call
GunVault Technical Support, most problems can be solved over the telephone,
making return unnecessary. GunVault products delivered without a pre-arranged
Return Authorization Number may be returned unopened, at owner expense,
and fees may accrue.
-8-
Limited Warranty
1. GunVault (the “Company”) warrants to the original consumer (the “Purchaser’)
that the SpeedVault safe will be free from defects in workmanship and materials
for a period of one (1) year from the date of purchase. These warranties are not
assignable or transferable to any other person.
2. Any damage to the SpeedVault safe as a result of misuse, tampering, abuse,
neglect, accident, improper installation, modification, unauthorized service,
destruction, or the alteration of the serial number, or use violation of the
instructions furnished by the Company will void this warranty.
3. The sole responsibility of the Company shall be limited to the repair or
replacement (in its sole discretion) of any component of SpeedVault safe which
fails to conform to this warranty at no cost to the purchaser for a period of one (1)
year from the date of original purchase.
4. Contact the Company directly to obtain service under this warranty. If it becomes
necessary to send a defective product to the Company, a Return Authorization
Number must first be obtained from the company.
5. Products shipped without prior Return Authorization and Return Authorization
Number may not be accepted, and the Company will not be responsible for their
disposition and/or cost of return to the owner.
6. The Company will not assume any responsibility for any loss or damage incurred
in shipping. All return authorized products should include a copy of the original
invoice in order that this warranty may be honored.
7. This warranty is not an insurance policy. The Company is not responsible for
damage to or theft of the Purchaser’s SpeedVault safe or its contents.
8. We recommend that the enclosed warranty card be completed in full, and
returned to the Company within ten (10) days of the original date of purchase to
validate this warranty.
9. Any implied warranties which the purchaser may have are limited to the duration
of the warranties described above. There are no further warranties which
extend or apply beyond the face hereof, and the company expressly disclaims
and excludes any and all warranties of merchant ability or fitness for a particular
purpose. Some states do not allow limitations on how long an implied warranty
lasts, so the above limitation may not apply to you.
10. Repair or replacement shall be the sole remedy for the purchaser under this
warranty. The Company shall not be liable for any direct, indirect, incidental or
consequential damages, losses or expense arising from the use or misuse of
the SpeedVault safe. Some states do not allow the exclusion or limitations of
incidental or consequential damages, so the limitation may not apply to you.
11. This warranty gives you specific legal rights, and you may also have other rights
which vary from state to state.
-9-
Notes:
- 10 -
Inquiries or questions regarding the SpeedVault should be directed to:
GunVault, Inc.
Technical Support 800-222-1055
Protected by United States Patent Numbers
5,161,396 and 5,549,337
- 11 -


