1
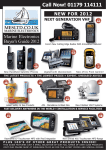
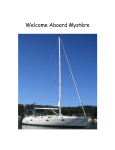
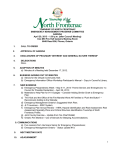
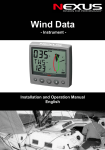
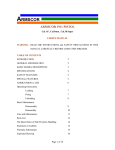
Self-Steering Basics for the Solo Sailor
By Bill Tucker (January 2014)
Thanks to Large Boat Skippers Rick McLaren and Mark Mahowald for their input.
Introduction
As a solo sailor if you go for more than a short day sail you need some type of self-steering, you
can’t steer continuously without time to sleep, eat, and navigate. Even though some form of selfsteering is mandatory in GLSS Challenges solo sailors doing the Mac, from Port Huron or
Chicago to Mackinac Island for the first time often try to hand steer all the way to the island.
They do great for the first 18 or maybe 24 hours, they are often well ahead of me but after the
first day or so they hit the wall and by the end of the second day I am ahead of them. This paper
talks about the basics of self-steering. Although wind vanes are briefly discussed autopilots are
the primary means of self-steering today. My autopilot experience has been exclusively with
tiller pilots but wheel based autopilots common on larger boats have similar features thought the
mechanical hookup is a bit more complicated. In Appendix A I describe my windvane and the
autopilots I have owned. In Appendix B Mark describes some of his BIG boat autopilot
experience. I must admit, that I really hate hand steering and I do as little as possible. First let’s
cover a little selective history.
A Little Selective History
In the years between 1895 and 1898 Joshua Slocum was the first person to sail single handed
around the world. This was done in the 37 foot Yawl named Spray. He had no self-steering but
was able to adjust the sails so that Spray would sail herself.
In the first 1960 Observer Singlehanded Transatlantic Race or OSTAR for short Blondie Hasler
sailed his 26 foot junk rigged boat Jester using a wind vane for self-steering. Originally used on
model boats Blondie lead the early practical development of wind vanes. From here a great
variety of different designs were developed.
Autopilots, known as “Iron Mike” had long been used on commercial ships but in the 80s they
began to be practical steering devices for yachts. In 1983 I arrived in Newport a week before the
start of the Bermuda 1-2. My friends were really impressed that I planned to sail single handed
to Bermuda. But in that week before the start boats were arriving in Newport after completing
the BOC Challenge, having sailed around the world single handed. This helped to put my
upcoming race in perspective; I was just going day sailing in comparison. One of the finishers
was Bertie Reed from South Africa. I sat in his cockpit and we talked about autopilots. He had
three Autohelm tiller pilots, with linear drive and separate magnetic compass housed in round
plastic enclosure with a course adjustment knob on top. He told me that at best he could only
keep one autopilot working at a time and that was done by scrounging parts from the other two.
Page 1 of 16 File: SelfSteeringBasics_WMT_2014_0127.docx He also told me to enclose the compass in a plastic bag as it wasn’t really waterproof. I started
the Bermuda 1-2 with one Autohelm autopilot similar to Bernie’s, a more primitive Tillermaster
autopilot, and a Plastimo Navik wind vane. My Autohelm failed on the way to the starting line
at Newport, and so my Navik steered for 95% of the race. During the other 5% the wind was
very light, to light for the Navik, and that was steered by the Tillermaster.
Several years ago Dick Lappin, who has completed 27 Port Huron Solo Macs and placed 1st
more than anyone) complemented me on my steering from the start near Port Huron to the
turning buoy at Goderich. It had been a hard beat with moderate winds. I had to admit that I had
not steered a bit, my Navik had done it all and better than me! My Navik got a complement from
Dick!
Over a period of 30 plus years I have owned a number of autopilots as outlined in Appendix A.
Over this period the autopilots have gotten better with each generation. I now race exclusively
using one of 4 ½ autopilots and the Navik pendulum rudder is removed to reduce drag and stored
onboard in case of an emergency.
Windvane Self-steering
Self-steering wind vanes had their hay day in the 60s, and 70s. They made long distance sailing
in small boats with limited crew possible. The number and complexity would have made Rube
Goldberg proud. They are still used extensively on cruising boats today but infrequently on the
Great Lakes. In the 10 years I have been doing GLSS races I am the only one who has used a
wind vane. The Navik is no longer manufactured. If I were to replace it, it would probably be
replaced with a Monitor Windvane.
The primary advantages of self-steering windvanes, particularly when compared to autopilots,
are as follows:
•
•
•
•
They are very reliable (especially when compared to autopilots)
Force available typically increase with wind speed
They steer well to wind ward at heavy heel when one can’t operate the engine
They can steer at a constant close angle to the wind optimizing windward progress
The primary disadvantages of self-steering windvanes are as follows:
•
•
•
•
•
It is very difficult to get them to steer when wind is astern and there is little apparent wind.
They do not steer well in very light and variable conditions
They follow the wind and not a desired course requiring periodic adjustment to make a
constant course if that is the goal.
They must be periodically adjusted to be sure the windvane is operating in its mid span of
control.
They add a slight drag that may not be present when using an autopilot.
Page 2 of 16 File: SelfSteeringBasics_WMT_2014_0127.docx To be effective one must keep the boat balanced. With a tiller it is easy to see this and to see that
the wind vane is operating at the center of its operating range. On GL3 this is adjusted with lines
to the tiller that pass through a loop in a traveler on top of the tiller and are attached with cam
cleats on either side of the tiller. The traveler allows one to adjust the amount of displacement
the tiller receives for the wind shift; in short this is the gain.
Wind vanes do require maintenance such as cleaning or replacing bearings periodically, painting
components, and occasionally replacing components that are worn out.
For more information on wind vanes visit Google® “self steering windvanes” or my favorite
Scanmar International.
Autopilot Features
This section describes the various features available in autopilots. The first two, gain and course
keeping adjustment are generally available in most autopilots. The other features may not
necessarily be included but are common in more expensive and newer autopilots.
•
•
•
•
Gain – This is an adjustment that allows one to control how much ruder motion is caused by
a certain amount of off course deviation. This is a key setting for setting up an autopilot so it
will efficiently deal with deviations as will be discussed below. Most autopilots will allow
one to change this while sailing which is important as it allows one to adjust for various
sailing conditions on the fly.
Course Keeping – This determines how accurately an autopilot will maintain a course. In
short this determines how fussy the autopilot will be at maintain the course. Under some
points of sail one wants to maintain a very accurate course but this will make the autopilot
work harder and will use more electricity. On a broad reach for example the accuracy is not
as important and can be relaxed with some saving in battery energy. This can usually be
adjusted while the autopilot in in operation.
Off course rate correction - The device that does this may be called a rate gyro, or
accelerometer, or may have some other mysterious name. This feature is becoming more
common on new autopilots. The gain mentioned above will adjust the rudder proportionally
to how far the boat is off course. The farther off course the greater the rudder adjustment. In
some cases this may occur to slowly and the boat will be significantly off course before the
rudder is pushed enough to bring it back on course. With off course rate correction the rate
of course change is detected, that is how fast the boat is moving off course and an appropriate
correction is applied before the compass detects a significant course deviations. In short this
anticipated a significant course deviation and take action before it is significant. This feature
is particularly important when flying a spinnaker in heavy air with a following or quartering
sea that is tending to push the boat off course.
Sail to Course Waypoint – This feature requires a connection to a GPS or Chart Plotter with
a waypoint or track capability. This feature will steer a course to a waypoint. It will steer the
Page 3 of 16 File: SelfSteeringBasics_WMT_2014_0127.docx •
•
•
course to the waypoint but also will keep track of deviation from a track that may be caused
by current, or boat lateral motion. This is useful in sailing a course or track where very
accurate course keeping is necessary to avoid obstructions.
Sail to a Constant Apparent Wind Angle – This feature requires hookup to the boats wind
instrument. This feature makes the autopilot act like a windvane and is a great feature if one
wants to make the best vmg in the direction of the wind even when the wind is shifting.
Compatibility between the boat wind instruments and the autopilot is important especially if
they come from different manufacturers.
Automatic Autopilot Setup – Some of the newer autopilots have a feature that allows for
automatic set up. Essentially this involves taking the boat to open water where there are no
other boats nearby and allowing the autopilot internal computer to run the boat through a
number of course changes automatically making adjustments until the computer senses that
parameters such as gain have been optimized. This is done with the boat under power at
cruising speed. This is a neat feature for initial system setup but it is not representative of the
various conditions and speeds one will sail under and additional optimization will be required
under sailing conditions as will be described below.
Dynamic Autopilot Adjustment – This is a feature that has been incorporated in autopilots
for some time but has recently gotten much more sophisticated. With increased computing
power and instrument sophistication the autopilot will adjust various settings to optimize
performance based on boat performance. In this mode it will adjust the auto pilot for the
existing conditions greatly improving overall performance.
Some of the features described above require hookup to various boat instruments such as the
wind instrument and GPS or Chart Plotter. It is important to be sure that the autopilot and
instruments are compatible. It is often much easier if autopilot and instruments are made by the
same manufacturer and are part of a compatible integrated system. If this is not the case be sure
you understand all the technical details of hooking these items together. There may be hidden
issues that ultimately make these instruments incompatible such as damping rates, sampling
rates, and communications protocols.
Autopilots may have a variety of features. Over the years features have been added and the
performance has greatly increased.
Buying and Autopilot
Buying a new autopilot can be a bewildering challenge as there are many models and
manufacturers to choose from. Here are a few things to consider in making your decision on
what to buy:
•
Boat displacement and autopilot capability – Specs for autopilots usually indicate the boat
displacement range for a particular autopilot. Don’t believe them and fall for the cheaper
unit that looks like it will work on your boat! Try for at least twice the displacement
Page 4 of 16 File: SelfSteeringBasics_WMT_2014_0127.docx capacity, the smaller one may be cheaper but remember we aren’t just going day sailing. If
one buys the smaller autopilot first one may also buy the larger, beefier one later.
This is an example of where bigger is better!
•
•
•
•
•
Large Boats with Wheel Considerations - My large boat friends tell me one should very
seriously consider an underdeck autopilot as it is to be much preferred to a wheel pilot.
Wheel pilots are undersized to begin with. They rely on the manufacturer’s steering cables,
so there is no redundancy in steering. They are exposed to the elements. They are exposed
to the skipper/crew kicking them or otherwise screwing them up. If a rookie asks around,
many skippers will be found quickly who have wasted their money on a wheel pilot only to
replace it with an underdeck version.
Instrument and Autopilot Compatibility – If you plan to use features like course keeping,
or sailing to a wind angle be sure your instruments are really compatible with the autopilot.
You may need special plugs, adaptors, or signal convertors.
Installation Configuration – Be sure the autopilot will really fit in the space available for a
linear drive in the cockpit of a tiller boat or below decks for a wheel steering boat. It may
also be necessary to reinforce areas that are taking the reaction force from a linear tiller drive
for example. If you already have a tiller autopilot the tiller pin may not be compatible with
the new autopilot. If the drive unit is mounted below decks, in the transom area for example,
be sure there is room for the chosen model to fit. Particularly if your boat is from the 1960s
and 1970s, you should measure twice, and then measure again. The transom areas of these
boats are often very narrow. This may not provide adequate room for an electric linear drive
but a hydraulic drive may be an alternative in this restricted space. The hydraulic drive may
use more power than the electric linear drive.
Accessories – A number of accessories may be necessary to complete the installation. For a
tiller boat these may include linear drive extension, tiller pin offset arm to keep the drive
level, and various cables to hook up the various interfaces. One may want to purchase a
couple extra tiller pins. (I have had them break a couple of times.) For some installations it
may be necessary to have some custom components built. I have a custom bracket for the
tiller pin, actually it has 2 pins. Or a modification to the rudder shaft may be necessary to
accommodate another arm.
Spare Parts – What spares you need may be the result of learning experience. For a wheel
drive consider a spare drive belt. For a tiller drive consider a spare tiller attachment pin and
spare drive rod end piece.
Download and read the various documents for the new autopilot you are considering. This may
include installation manual, operating manual and other information or user guides which are
usually available from the manufacturer’s web site under the service or support area. If you are
not sure of compatibility issues be sure to contact tech support rather than marketing.
Page 5 of 16 File: SelfSteeringBasics_WMT_2014_0127.docx Talk to someone, hopefully with a boat like yours, who has used an autopilot like the one you are
contemplating purchasing. His experience will help with your decision.
Autopilot Installation
There are many autopilot configurations and also many boat configurations to which they must
be fitted. First read the manufacturers installation recommendations. This may be in a separate
document. The manufacturer may also have generic instructions on the web. The following are
items that may not be mentioned by the manufacturer but are worth considering in the
installation process:
•
•
•
•
Electrical Connection: For wheel or tiller pilots that have electrical plug connections for
power and instrument control mount the plug in an area where it is least apt to be stepped on,
kicked, or lassoed by a line. Also consider a place where it will have the least possible
contact with spray.
Autopilot Power Cabling: The autopilot can draw a lot of power compared to other
electrical devices. This is especially true of hydraulic drive units on larger boats. Electrical
wiring to items such as hydraulic units and linear drives should be kept as short as possible
and adequately sized to minimize voltage drop. Consider using wire sizes larger than
recommended especially with long runs. My article on “Advanced Electrical Basics for Solo
Sailors” talks about how to calculate voltage drop and measure it.
Control Unit Mounting: Mount the autopilot control where you can conveniently operate
the controls as well as engage the autopilot and steer with the wheel or tiller. One should
also be able to see the sails while setting or adjusting the autopilot. Also consider mounting
the control unit where it will not get kicked or stepped on.
Compass Location, Location, Location! Compass location is really important. If the
compass is built into a tiller pilot there is not much one can do about the location but
remember to keep anything magnetic or electrical away from it when it is in operation. In
the case of a separate fluxgate compass choose the location carefully. Mount it as close to
the centerline and center of gravity of the boat. Also mount it away from anything magnetic
or electrical. Here is a list of things to keep it away from:
o Other compasses
o Other electrical instruments
o Electrical equipment such as bilge pump, fans, blowers, anything with a motor
o The engine (a large steel magnetic mass)
o Electrical system equipment including wiring, batteries, electrical panels
o Stored stuff such as tool boxes, rigging cutters, etc. This can be a problem after
installation when a tool box is unwittingly stored near a compass.
I suspect the best location would be in a wooden dingy, towed by a Dacron line, attached
with a plastic eye in the dingy, about 100 feet behind one’s yacht. In short avoid anything
with magnetic metal (steel, nickel, etc.) or electrical. Consider temporarily mounting the
compass and complete the compass setup discussed in the autopilot setup section below.
Page 6 of 16 File: SelfSteeringBasics_WMT_2014_0127.docx •
•
•
•
•
•
That is don’t run the compass wire through the overhead or tightly screw the compass in
place until proper operation is confirmed. Also as the compass is turned in the setup process
compare the autopilot fluxgate compass readings with the ships compass. If one thinks there
are any electrical cables even remotely near, such as running light cables or cabin lighting
cables, turn the item on and off while on two 90 degree different courses to be sure they do
not impact the compass readings. (Using the two courses is done to insure that the electrical
field from the cable is not just reinforcing the magnetic field on the first compass heading the
boat happens to be on.) This may seem like a pain but it may prevent finding a problem later
and having to move the compass to another location after all the wiring etc. is permanently
installed.
Drive Unit Mounting: The drive units must transfer a lot of force to the side of the cockpit
or hull. Be sure the mounting points are stiff. If necessary stiffen the areas with a wood
block epoxied on the inside or outside of the cockpit.
Drive Unit Alignment: Be sure the pins for either end of a tiller pilot are aligned vertically.
This may require manufacture of a special bracket for the tiller end and a fairing block to
adapt to a sloping combing on the other end. Similarly a special adaptor might be necessary
for mounting the motor drive unit to be sure the drive belt is aligned with the wheel and is
adequately stiff.
Drive Unit Joints – The drive unit may theoretically be water tight but an added layer of
black electricians tape will provided an added barrier to keep water out. (A small offset in
the closure gasket on my Simrad Tillerpilot resulted in a soaked insides and an expensive
repair trip to the manufacturer.)
Labeling – If you have several autopilots be sure to label the various plugs. Attempting to
plug the wrong unit into a plug can potentially damage the plug mechanically and the unit
electrically.
Mechanical Check – This is a good opportunity to be sure your tiller moves freely. In the
case of a wheel be sure the wheel turns easily under no load. Check component alignment,
lubrication, and belt tension. There is no need for the autopilot to work any harder than
necessary as it puts unnecessary wear on the drive unit and uses more electrical power.
At the Pier Check – Once the autopilot is installed make a complete functional check at the
pier. It is easier to fix a wiring error at the pier than under sail. Be sure to check as many
functions as possible. It should be possible to check that the drive unit can move the rudder.
Also check that other functions such as steer to wind, or course following appear to work.
These functions can’t be fully checked at the pier but one may find a significant installation
error and thus save time during the sea trials.
Autopilot Setup – Sea Trials
This may be the most important part of this paper. Autopilot setup may be one of the most
neglected tasks but only to the skipper’s detriment. Proper setup will determine how much of the
time you can get the autopilot to steer for you and how much of the time you will spend at the
wheel or tiller.
Page 7 of 16 File: SelfSteeringBasics_WMT_2014_0127.docx First read the manual and go through the manufacturer’s setup procedure; don’t skip any of it.
Setup procedures vary greatly. Older autopilots will require a manual process where you put the
boat and autopilot through a series of maneuvers to adjust the autopilot. The newer autopilots
will ask you to get into clear water, and motor at cruising speed and the autopilot will
automatically go through a number of maneuvers and automatically optimize the various
settings. At this point the autopilot is not really ready to go sailing.
As a first step in setup most autopilots will require that you slowly turn the boat through a couple
of circles. This is essentially the old process of swinging the compass, and will automatically
make corrections for magnetic stuff onboard that will impact the flux gate compass readings.
This process may be tedious and if water conditions aren’t quite calm it may be hard to get the
compass properly adjusted. Don’t blow through this step be patient but if you can’t get an
acceptable calibration attempt it on a calmer day.
The factory recommended setup procedure is just a start. It was done with the boat under engine
power at cruising speed. In a solo challenge one will be sailing on several points of sail and in
everything from a dead calm to a real blow. Check out your operating instructions and be sure
you know how to adjust your autopilots gain (how much the rudder moves for a given course
deviation) and how to adjust the course keeping ability (that is how far off course the boat must
be before the autopilot takes action). With a newer autopilot you should be able to make these
adjustments with the autopilot steering the boat, that is a dynamic adjustment. Now go sailing!
Go sailing in all kinds of conditions from light to heavy weather and sail on all points of sail with
any sail configurations you might think you would use in a race. The goal should be to get the
autopilot to steer the boat under any condition. Here are some suggestions on how to proceed:
•
•
•
•
•
Keep a record of wind speed and angle, sail configuration and autopilot optimum
adjustments.
Be sure that sails are properly trimmed and that there is as little weather helm as possible.
Adjust the gain either side of the initial setting to determine what is optimum. Typically
greater gain will result in better performance during heavy weather. Under lighter conditions
gain may need to be reduced to prevent over steering. Course keeping can also be adjusted
for optimum results. Allowing wider variation may be possible on a beat or a run.
Especially try to optimize your system under more challenging conditions such as spinnaker
run with the wind and waves on the stern or quarter.
From a power use and wear and tear on the autopilot drive keep in mind that lower gain and
less strict course keeping will result in less power use and less wear and tear on the autopilot.
To figure out the various setting it may be necessary to go sailing on several days in varying
conditions. It may be a challenge to go day sailing in a 25 kt. wind but better to deal with it
before the race.
Page 8 of 16 File: SelfSteeringBasics_WMT_2014_0127.docx Some autopilots will return to the initial settings each time they are turned on. In looking at the
under sail settings determine what the most common setting are and reset your autopilot at those
settings rather than leaving them at the initial setup settings. It still may be necessary to adjust
them for varying wind conditions but this will at least get them in the right ball park. With my
S1 I have found that the auto setup procedure resulted in a lower gain setting then I use most of
the time so it has been reset to the higher setting per the instructions in the user’s manual.
Occasionally I hear stories of a skipper who installs a new autopilot the day before a race only to
find that it won’t steer very well or much of the time during the race. A through on the water test
program will prevent this.
Autopilot Operation
My goal is to let the autopilot sail the entire race. At times I give up some progress to pursue this
challenge. If one does not need to steer one should use the time and effort to be sure that the
boat is sailing as efficiently as possible. It is important that the boat is well trimmed with little
weather helm. One has the time to keep the sails well-trimmed while not steering. Here are a
few comments on practices I have found beneficial. My boat GL3 has a very compact cockpit so
one can reach the tiller, autopilot controls, main sheet, and genoa sheets from essentially one
place in the cockpit. The procedure followed may depend on deck and cockpit layout.
Basic Sail Trim
•
•
I usually trim sails in a little harder when using the autopilot then when hand steering. This
is especially true of flying a spinnaker and helps to keep it from collapsing.
When flying a symmetrical spinnaker I keep the pole lower than one might with a full crew
and constant trimming.
Tacking and Jibing
•
•
Some autopilots have a jibe feature that will swing the boat about 100 degrees (or some other
adjustable amount). I have found that this swings the boat too slowly. I will usually shift the
autopilot to standby and manually swing the boat to the new tack. In the case of the S-1
drives I leave the drive attached to the tiller, but with the other autopilots it has been
necessary to remove the drive from the tiller while swinging the boat because the other drives
are much more resistant in standby.
With my windvane Navik I shift the Navik wind vane to the new course and let the vane
swing the boat as it is much faster. One must stand in the back of the cockpit to make this
shift.
Sailing to Windward
•
When sailing to windward the feature that allows one to steer to a constant apparent wind
angle is a great feature. It alleviates the necessity of continually adjusting the compass
Page 9 of 16 File: SelfSteeringBasics_WMT_2014_0127.docx course to make the best wind vmg and keep the sails trimmed. It may be necessary to sail at
a slightly greater than optimum apparent wind angle to keep the sail from luffing. This can
be impacted by the response time and characteristics of the mast head wind instrument. My
experience has been that this feature does not work well in very light or shifting air as the
system is damped to ignore minor shifts that otherwise might be caused by shifting of the
mast due to wave action. Before this feature was available, it only works with my S1
autopilot, I would often shift to the Navik wind vane when close hauled and trying to follow
the wind.
If all of a sudden your autopilot starts to act erratically and refused to steer, check your battery
voltage, it may need a charge.
When the autopilot is not in use be sure that the plug is covered with a water tight cover and the
autopilot if removable is stowed below in a dry place.
A Final Comment
Autopilots can be amazingly unreliable. One of two autopilots failed me on the way to the start
line for the Bermuda 1-2 in 1983, and I returned home from a Solo Challenge with only one of
three autopilots working. They have lots of failure modes in spite of one’s best treatment.
Consider getting a second autopilot as backup. You can never have enough autopilots!
Navik Sailing GL3 on a Beautiful Day
Page 10 of 16 File: SelfSteeringBasics_WMT_2014_0127.docx Appendix A – Self Steering Devices I Have Owned
I have owned GL3 since 1980 so almost all my experience has been with
her, a 1979, 30 foot, finned keel, Beneteau First 30. She is a tiller boat.
The following is a list of self-steering devices I have owned with a few
comments.
•
Navik Plastimo Windvane – This Windvane came with my
Beneteau 30. It sailed GL3, in 1980 known as Le First, across the
Atlantic. It is extremely reliable and does an excellent job steering
the boat to windward or on a beam reach but does poorly when
sailing downwind when there is little apparent wind. As the
autopilots have gotten better and added capabilities I have shifted to
using the autopilots and do not normally race with the pendulum
paddle installed to reduce drag. The vane senses changes in wind
direction and tilts one way or the other. Through a
series of linkages and levers it moves a trim tab on the
back of a pendulum rudder that hangs down in the
water. The pendulum rudder swings around a pivot
either way as demanded. At the top of the pendulum is
a semi-circular wooden plate to which lines are
connected that pass through a couple of blocks and are
in turn attached to the tiller. (Rube Goldberg would be
proud of the design.) The lines are attached to the tiller
using a track with a car that can be adjusted and a pair
of cam cleats on either side to hold the lines in place.
I have used the Navik to steer in some very rough
conditions and it does spectacularly well. The Navik is
no longer made or supported by Plastimo but parts are
still available on a limited basis.
•
Tillermaster Autopilot - This was my first autopilot. I
first used it on my San Juan 26 and later on my
Beneteau First 30. This autopilot used a magnetic
compass built into the drive unit. The unit was reliable
in relatively light to moderate conditions. The motor
drove a rod using a “Rube Goldberg” of pulleys, drums,
springs, and light airplane cable. When the cable came
off the pulleys, which it occasionally did, it was a real
Page 11 of 16 File: SelfSteeringBasics_WMT_2014_0127.docx project to hand steer and rethread the system. (I left it on my dock box and it was stolen.
The thief has my deepest sympathy.)
•
Autohelm Tiller Pilot – This unit consisted of a magnetic compass in a plastic cylinder with
course adjuster on top and separate linear drive motor to drive the tiller. The unit gain could
be adjusted with a knob on the bottom of the compass enclosure and with the steering
precision adjustment on top one could set course accuracy. This was an excellent, state of
the art autopilot at the time. As suggested by Bertie Reed I always kept the compass in a
plastic bag. Occasionally the unit would start steering a jerky course. The gimbaled
compass was housed in a plastic cylinder filled with mineral oil. This usually meant that
some of the oil had leaked out. Refilling the compass housing to eliminate the bubble was
tricky but fixed the problem. Today the compass is long since gone but the drive unit is my
backup drive unit for my Raymarine S-1 unit described below. The drive unit is better than
anything built today by Raymarine and has outlasted two more modern drive units.
•
Plastimo AT-50 Tiller Pilot – This unit included a
drive unit and compass in the same rather boxy
enclosure. There were two setting for steering
accuracy. This was the best autopilot I had at the time
as it would steer well in fairly rough weather with
spinnaker and following seas. The circuit board
eventually failed and Plastimo no longer supported the
unit so I had to give up on it after several repair attempts.
•
Simrad Tillerpilot TP32 – As I
began to have problems maintaining
my AT-50 and Autohelm auto pilots I
looked for a replacement and the
TP32 was the solution. It had better
steering capabilities than any of its
predecessors. In addition one could
adjust both the gain and course
accuracy with it in operation. In
particular it did a better job of
steering downwind with a spinnaker,
heavy wind and a following or
Raymarine ST2000
quartering sea. I purchased a second
Simrad TP32
unit as a backup and for several years
Raymarine Grand Prix S1 Drive Unit
this was my primary auto pilot. I had
one problem with the case seal leaking and damaging the electronics after which I checked to
Page 12 of 16 File: SelfSteeringBasics_WMT_2014_0127.docx be sure the case was properly sealed and put electrical tape over the seal. These auto pilots
are today my backup in case there is a failure of the S1 described below.
•
Raymarine ST2000 Tiller Pilot – I purchase this autopilot as I thought it could be integrated
with my Raymarine C70 chart plotter and ST60 electronics particularly the wind instrument.
As it turned out within a few months it failed during some testing in modest winds while
flying a spinnaker in Lake St Clair. Raymarine told me it I had over loaded the electronics
that drives the steering motor. The unit was well within the advertised limit for displacement
of my boat. The unit has been repaired but I do not use it as it appears to be incapable of
handling anything but the most modest duty.
•
Raymarine S1 Tiller Pilot – This autopilot is similar to
the current Raymarine S5 tiller pilot. The S1 consists
of a ST602 SmartPilot Controller which is mounted in
the cockpit to the right of my companion way, a Grand
Prix Linear Drive mounted in the cockpit, and a Course
Computer mounted on the bulkhead beside the chart
table, and a fluxgate compass mounted toward the
center top of the bulkhead under the mast. The Grand
Prix or GP drive is the heavy duty drive supposedly
good for a boat twice GL3’s displacement. Even so it
has been replaced twice in about six years due to failure
of the mechanical gears. My backup is the old (about
28 years) Autohelm drive unit that I salvaged when the
electronics and magnetic compass would no longer
work. Inspire of the poor drive unit the performance has
been excellent. In particular it is possible to fly a
spinnaker with a following or quartering sea in really
rough conditions. The installed rate gyro anticipates a
major push off course by sensing acceleration off course.
In addition the S1 can steer a course to the apparent
wind which makes it easier to go to windward
efficiently. This steers to apparent wind angle like the
Navik wind vane. This is one reason why the Navik is
no longer used during races. All the instruments are
Raymarine so they work well together. In going to and from a race under power the course
and waypoint tracking feature is used.
Page 13 of 16 File: SelfSteeringBasics_WMT_2014_0127.docx The autopilot drive units have mostly used different attachment points and different style and
size of pins for connection. The two pins on the tiller have a thread on the attachment end and
use two nuts to hold them in place in a custom heavily reinforced stainless steel bracket on the
tiller. The pins have broken due to fatigue at the top threads. Thus the second pin on the bracket
and a few spares below. Eventually the pins will be welded in place. The autopilots or drive
units attach to the coaming of the cockpit. This has been reinforced with plywood epoxied to the
inside of the coaming to stiffen it up especially in heavy weather when the autopilot is working
hard.
Simrad TP32 Steering GL3
Navik Steering GL3
Page 14 of 16 File: SelfSteeringBasics_WMT_2014_0127.docx Appendix B: Big Boat Autopilot Experience – by Mark Mahowald
There are many approaches to electronics systems, and I have tended to keep my autopilot
systems independent from my wind and GPS navigational instruments for a number of safety
reasons. I suppose part of my approach is based on old habits as well. My first below deck wheel
autopilot was on an Ericson 38. It was a completely isolated unit and could only steer a compass
course. In a lot of ways that is what great crews do anyway; it was a tireless crewmember who
kept an excellent compass course, and never complained about flies! I have always used my
autopilot as an extra crewmember, one who loves to steer a compass course, but does not try to
navigate, call sail trim or handle tactics. I believe this has some safety advantages for the solo
sailor and I have maintained that philosophy as I have changed boats.
I sail a Beneteau 46 today, and it came from the factory with 100% Raymarine gear. Everything
is integrated, so I could use the steer by wind angle functions, and course to waypoints, but I
have never tried these features in 6 years with the boat and more than 11,000 miles. From a
safety perspective, I have read stories of people running aground as the autopilot happily steers
towards incorrect waypoints (or out of order way points from a route). It is my personal view,
that by focusing on the navigation myself and making course corrections manually, I force
myself to pay more attention to navigation and improve my overall safety. (A word of caution: if
you use the waypoint feature check your course carefully, especially after skipping a waypoint,
and don’t use light houses as a waypoint unless you plan to visit as a freighter did at the Detroit
Light a few years ago.) By not using the steer by wind angle functions, I force myself to react to
each wind shifts and optimize sail trim and COG. By keeping the autopilot isolated from the
other navigational systems, I also reduce the chance that any NEMA or Raytheon data bus errors,
or chart plotter issues will cause my auto pilot to malfunction.
There are many ways to do things in solo sailing, and what I think works well may seem like a
very poor set of choices for someone else. Bill’s paper has outlined some well thought out ways
to do things and sometimes they are different than the way I have decided to approach the same
problem. Hopefully these choices give the reader something to think about as they plan or
improve their systems. No matter how you set your systems up, it is critical to have worked with
every feature you are counting on before you set out on a long event. Murphy’s law thrives on
the water, and untested features may not work as you expect when you need them the most.
My son and I did the double handed hook race in 2013 and the race check-in form asked you to
confirm that you and your crew had practiced a man overboard recovery in the last 2 months. So
as we sailed up to Racine the day before the race (no sense waiting until the last minute!), we
tossed a cushion over, and I sat in the back of the cockpit to see if my son could recover “me”
solo. He pushed the man overboard button on our Raymarine chart plotter as we had discussed,
and the whole display went dead. It simply froze up. We aborted the drill and played with the
display some more. It was simply unreliable when you pushed the man overboard button.
Sometimes it would lock up, other times it would seem to work, but not actually track the
Page 15 of 16 File: SelfSteeringBasics_WMT_2014_0127.docx location of the MOB. I have since upgraded the firmware, which was 6 years old, and it seems
stable now, but if we had not tried it before the race, using it under real MOB conditions would
have created some serious issues for whoever was left on the boat and reduced the chances of a
successful recovery. For the race we decided to leave the track function running so we had a
detailed trail, and if someone went in, our sail takedown would create a large zig-zag in the track,
so we could start at this zig-zag and motor slowly back down our track looking for the person
who fell in. I was surprised the man over board button did not work, but I had never tried it. If
you plan on using something in a pinch, make sure you verify it works on a nice clear day.
There are many ways to design your systems, and use them in solo sailing. There is no perfect
answer, only what works well for you and your boat. We would welcome additions to this paper
and additional ideas. If you have suggestions to improve this paper, please pass them to Bill for
incorporation in the next draft.
Page 16 of 16 File: SelfSteeringBasics_WMT_2014_0127.docx