1
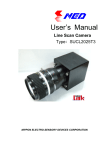
User’s Manual
Line Scan Camera
Type:NUCLi7370T6
NIPPON ELECTRO-SENSORY DEVICES CORPORATION
2
NED
For Customers in U.S.A.
This equipment has been tested and found to comply with the limits for a Class A
digital device, in accordance with Part 15 of the FCC Rules. These limits are designed to
provide reasonable protection against harmful interference when the equipment is
operated in a commercial environment. This equipment generates, uses, and can radiate
radio frequency energy and, if not installed and used in accordance with the instruction
manual, may cause harmful interference to radio communications. Operation of this
equipment in a residential area is likely to cause harmful interference, in which case the
user will be required to correct the interference at his or her own expense.
For Customers in the EU
This equipment has been tested and found to comply with the essential requirements
of the EMC Directive 2004/108/EC, based on the following specifications applied:
EU Harmonized Standards
EN55011: 1998+A1: 1999+A2: 2002 Group1 Class A
EN61000-6-2: 2005
*Group 1 contains all ISM (Industrial, Scientific and medical) equipment in which there
is intentionally generated and/or used conductively coupled radio-frequency energy
which is necessary for the internal functioning of the Equipment itself.
*Class A equipment is equipment suitable for use in all establishments other than
domestic and those directly connected to a low voltage power supply network which
supplies buildings used for domestic purposes.
Directive on Waste Electrical and Electronic Equipment (WEEE)
Please return all End of Life NED products to the distributor from whom the product
was purchased for adequate recycling and / or disposal. All costs of returning the
Product to NED are borne by the shipper.
NUCLi7370T6
UME-0018-01
NED
3
Introduction
Thank you for purchasing NED’s Line Scan Camera. We look forward to your
continued custom in the future.
For safety use
u For your protection, please read these safety instructions completely before
operating the product and keep this manual for future reference.
u The following symbols appear next to important information regarding safe product
handling.
Warning
If the product is not handled properly, this may result in
serious injury or possible death.
Caution
If the product is not handled properly, this may result in
physical injury or cause property damage.
Safety precaution
Warning
u Never disassemble or modify this product, unless otherwise specified to do so in this
manual.
u When hands are wet, avoid handling this product and do not touch any of the
connection cable pins or other metallic components.
u Do not operate this product in an environment that is exposed to rain or other severe
external elements, hazardous gases or chemicals.
u If the product is not to be used for an extended period of time, as a safety precaution,
always unplug the connection cable from the camera unit.
u If the product installation or inspection must be executed in an overhead location,
please take the necessary measures to prevent the camera unit and its components
from accidentally falling to the ground.
u If smoke, an abnormal odor or strange noise is emitted from the camera unit, first
turn OFF power, then unplug the cable from the camera unit.
u This product is not intended for use in a system configuration built for critical
applications.
UME-0018-01
NUCLi7370T6
4
NED
Instructions before use
u Only operate this product within the recommended environmental temperature
range.
u Use only the specified power source and voltage rating.
u Do not drop this product. Avoid exposure to strong impact and vibrations.
u Install the camera unit in a well-ventilated environment, in order to prevent the
camera from overheating.
u If the camera must be installed in an environment containing dust or other particles,
take required measures to protect the camera unit from dust adhesion.
u Do not unplug the cable while power is being supplied to the camera unit. To prevent
product damage, always shut down the power supply before unplugging the power
cable.
u When the surface of the camera window becomes dirty due to dust or grime, black
smudges appear in the displayed image. Use an air blower to remove the dust
particles. Dip a cotton swab into ethanol alcohol and clean the camera window. Be
careful not to scratch the glass.
u Use of non-infrared lighting such as a daylight fluorescent lamp is recommended. If
halogen lighting is employed, always install an infrared filter into your system
configuration.
u Please note that exposure to long wavelength light outside of the sensors visible
optical range can affect the image.
u Sensitivity may fluctuate depending on the spectral response level of the light source.
In cases like this, changing the light source to one with a different spectral response
level may reduce this problem.
u Please note that when the CCD is exposed to excessive quantities of light, blooming
can occur. (This product does not have an Anti-Blooming function)
u For stabilized image capturing, turn ON the power supply and execute aging for ten
to twenty minutes before actually using the camera unit.
u Do not share the power supply with motor units or other devices that generate noise
interference.
u The signal ground (SG) and the frame ground (FG) are connected inside the camera
unit. Design the system configuration so that a loop will not be formed by the ground
potential differential.
u Do not disconnect the camera while rewriting the embedded memory.
u When you change the exposure mode that is set at the NED factory, input control
signal (CC1) from the capture board.
NUCLi7370T6
UME-0018-01
NED
5
Exclusion Clause
u The manufacturer assumes no responsibility for damages resulting from natural
disasters, earthquakes, or acts executed by a third party. Warranty excludes any
accidents resulting from improper handling or misuse of this product, whether
intentional or not, and any camera operations conducted under abnormal conditions.
u The manufacturer assumes no responsibility for any incidental damages (loss of
corporate profits, interruption of business, etc.) resulting form use or non-use of this
product.
u The manufacturer assumes no responsibility for damages resulting from failure to
follow the instructions and procedures indicated in this User’s Manual.
u The manufacturer assumes no responsibility for any damages resulting from
malfunctions caused by combined use of this product with other peripheral
equipment.
u The manufacturer assumes no responsibility for damages resulting from
malfunctions caused by non-authorized repair or modifications made to this product.
UME-0018-01
NUCLi7370T6
6
NED
Table of Contents
1 Product Outline ................................................................................................ 9
1.1 Features ................................................................................................................................ 9
1.2 Applications ......................................................................................................................... 9
1.3 Image Sensor ..................................................................................................................... 10
1.4 Performance Specifications ............................................................................................. 10
2 Camera Setting and Optical Interface ............................................... 13
2.1 Setting Camera .................................................................................................................. 13
2.2 Fixing Camera .................................................................................................................... 13
2.3 Camera dimension............................................................................................................. 13
2.4 Optical Interface................................................................................................................. 14
3 Hardware ............................................................................................................ 15
3.1 Camera Connection........................................................................................................... 15
3.2 Input / Output Connectors and Indicator ........................................................................ 17
3.3 Connectors・Pin Assignments・Cables ............................................................................ 18
3.4 Power Supply ..................................................................................................................... 22
4 Camera Control .............................................................................................. 23
4.1 Flow of Camera Control .................................................................................................... 23
4.1.1 Command Overview ......................................................................................................... 23
4.1.2 Command Format (PC to Camera Transmission) ......................................................... 23
4.1.3 Reply Format (Camera to PC Transmission) ................................................................. 24
4.1.4 Camera Control Commands ............................................................................................ 25
4.1.5 Memory Setup Values (Factory Settings)....................................................................... 28
4.2 Details on Commands ....................................................................................................... 29
4.2.1 Adjusting automatic white balance................................................................................. 29
4.2.2 Setting Offset..................................................................................................................... 29
4.2.3 Setting Output Signals (Setting Data Format) ............................................................... 29
4.2.4 Readout the Operation Status ......................................................................................... 30
4.2.5 Memory Initializing (Initializing Camera Settings)......................................................... 31
4.2.6 Memory Load (Readout the Camera setting from the flash memory)......................... 31
4.2.7 Memory Save ..................................................................................................................... 33
4.2.8 Line Delay .......................................................................................................................... 33
4.2.9 Pixel Correction Data Import ........................................................................................... 33
4.2.10 Pixel Correction Data Save ............................................................................................ 34
4.2.11 Pixel Correction Reference Setting .............................................................................. 34
4.2.12 Pixel Correction Mode .................................................................................................... 34
NUCLi7370T6
UME-0018-01
NED
7
4.2.13 Exposure Mode ............................................................................................................... 34
4.2.14 Programmable Exposure Time Setting ........................................................................ 35
4.3 Internal Circuit Configuration Block................................................................................ 35
4.4 Startup................................................................................................................................. 36
4.5 Saving and Loading Camera Settings............................................................................. 36
4.6 Serial Communication Settings ....................................................................................... 37
4.7 Video Output Format ......................................................................................................... 37
4.8 Exposure Mode and Timing Chart ................................................................................... 39
4.8.1 Free Run Exposure Mode................................................................................................. 39
4.8.2 External Trigger Exposure Mode..................................................................................... 39
4.8.3 Pseudo-exposure control mode (Edge) ......................................................................... 40
4.8.4 Pseudo-exposure control mode (Trigger) ...................................................................... 40
4.9 Setting Offset ..................................................................................................................... 41
4.10 Setting Gain...................................................................................................................... 42
4.11 Auto white balance .......................................................................................................... 43
4.11.1 Note about optical adjustment ...................................................................................... 43
4.11.2 Setting the optical adjustment conditions ................................................................... 44
4.11.3 Auto white balance adjustment ..................................................................................... 44
4.12 Pixel Correction ............................................................................................................... 46
4.12.1 Command Settings ......................................................................................................... 47
4.12.2 How to correct ................................................................................................................. 47
5 Confirming Camera Settings .................................................................. 48
5.1 Before Power-on ................................................................................................................ 48
5.2 After Power-on ................................................................................................................... 49
5.3 During Operation ............................................................................................................... 51
6 Sensor Handling Instructions ................................................................ 52
6.1 Electrostatic Discharge and the Sensor ......................................................................... 52
6.2 Protecting Against Dust, Oil and Scratches ................................................................... 52
6.3 Cleaning the Sensor Window ........................................................................................... 52
7 Troubleshooting ............................................................................................. 53
7.1 No Image............................................................................................................................. 53
7.2 Noise on Image .................................................................................................................. 55
7.3 Camera becomes hot ........................................................................................................ 57
8 NCCtrl .................................................................................................................. 58
8.1 Overview ............................................................................................................................. 58
8.2 System Requirements ....................................................................................................... 58
UME-0018-01
NUCLi7370T6
8
NED
8.3 Installaton ........................................................................................................................... 59
8.4 Uninstall.............................................................................................................................. 59
8.5 Operation ............................................................................................................................ 59
8.5.1 General description .......................................................................................................... 59
8.5.2 Starting NCCtrl .................................................................................................................. 59
8.5.3 Open the control setting file ............................................................................................ 60
8.5.4 Selecting interface and Timeout setting ........................................................................ 61
8.5.5 Connect.............................................................................................................................. 64
8.5.6 Disconnect and exit program .......................................................................................... 64
8.5.7 Check the contents of communication........................................................................... 64
8.5.8 Export Parameters to text file.......................................................................................... 64
8.5.9 Import Parameters from text file ..................................................................................... 65
8.6 Control ................................................................................................................................ 65
8.6.1 Gain and Offset ................................................................................................................. 66
8.6.2 Clock, Video output, Video shift, Exposure mode ........................................................ 67
8.6.3 Exposure time ................................................................................................................... 67
8.6.4 Binning............................................................................................................................... 67
8.6.5 Camera Memory ................................................................................................................ 67
8.6.6 Calibration ......................................................................................................................... 68
8.6.7 Level Correction................................................................................................................ 68
8.6.8 Test Pattern........................................................................................................................ 68
8.6.9 Line Delay .......................................................................................................................... 69
8.6.10 Auto White Balance ........................................................................................................ 69
8.6.11 Pixel Correction Reference Setting............................................................................... 70
8.7 Software Upgrades ............................................................................................................ 70
8.7.1 NCCtrl upgrades................................................................................................................ 70
8.7.2 Adding/Replacing control setting file ............................................................................. 71
8.7.3 Adding/Replacing the interface Plug-in.......................................................................... 71
8.8.Data Transmission Programming .................................................................................... 71
8.9 NCCtrl Troubleshooting .................................................................................................... 71
8.9.1 You can not change the exposure time with NCCtrl ..................................................... 71
8.10 Attention on use .............................................................................................................. 71
9 Others ................................................................................................................... 72
9.1 Notice .................................................................................................................................. 72
9.2 Contact for support ........................................................................................................... 72
9.3 Product Support ................................................................................................................ 73
Revision History .................................................................................................... 75
NUCLi7370T6
UME-0018-01
NED
9
1 Product Outline
1.1 Features
l High speed readout(70MHz Odd/Even 6tap of each RGB)
l High resolution(7300pixels)
l Easy control of gain / offset / video output (8-/10-bit) with external software.
l Single power source DC12V to 15V for operation
l Flat-field correction - minimizes lens vignetting, non-uniform lighting and sensor
FPN and PRNU
l Auto white balance
l Pseudo-exposure control
1.2 Applications
l Inspection of Transparent panels and PCBs
l Visual inspection of color printed materials
l Color identification and inspection of foreign material
l Inspection of sheet film
l Inspection of wood surface
An example of Visual Inspection of PCBs is shown below.
Power
Supply
PCB pattern
Figure 1-2-1
UME-0018-01
LED incident lighting
Visual Inspection of PCBs
NUCLi7370T6
10
NED
Applicable Work
PCB pattern
Performance
1. Maximum board size: 150mm×150mm
2. Resolution: 20µm
3. Inspection time: less than 30 seconds
Unit Configuration
1. Camera: Color line scan camera
2. Controller: Dedicated software for PC system
3. Size: L930 x D500 x H500 (mm)
Applicable Fields
Inspection of patterns on film PCBs
1.3 Image Sensor
The camera uses a CCD sensor with a maximum data rate of 140MHz to acquire
high responsivity and superior quality images.
The pixel size is 10µm x 10µm. It outputs 7300 pixels data through 70MHz x
2(Odd/Even),
1.4 Performance Specifications
The Performance Specifications are shown below. Unless otherwise specified, the
data shown is when the camera is operating at the maximum scan rate.
Table 1-4-1
Items
Number of Pixels
Pixel Size
H x V (µm)
Sensor Length (mm)
Line pitch (µm)
Performance Specifications
Specifications
NUCLi7370T6
7300 x 3
10 x10
73
40 (=4 lines) *R-G G-B distance
400 – 900
Spectral Responsivity (nm)
(Peak:R=610,G=540,B=460)
See Figure 1-4-1
Data Rate (MHz)
Maximum Scan Rate
(µs) / [kHz]
Saturation Exposure ( lx ・ s )
(typically)
NUCLi7370T6
140(fixed)
56 / [17.8]
0.0384
[Minimum Gain, 3 wavelength Daylight Fluorescent Light]
UME-0018-01
NED
11
Responsivity(typically)
[Minimum Gain, 3 wavelength
Daylight Fluorescent Light]
130(V/[lx・s])
Analog 5V Conversion Sensitivity/Visible Area (400∼700nm)
Recommended:x1 to x2.5(251 Steps)
Gain Adjustable Range
* Possible : up tox10
Offset Adjustable Range
8 bit:0 to 12 DN (13 Steps)
* Digital Number(DN)
10 bit:0 to 48 DN (13 Steps)
PRNU
Typically 6 % (without correction, at minimum gain)
(Photo Response Non Uniformity)
Random Noise
2 % (with correction, at minimum gain)
Typically 30DN (peak value at minimum gain)
Camera Link Medium Configuration (8 bit )
Video output
Camera Link Full Configuration (10 bit )
See Table 3-3-1
Control Input
Connectors
CC1: External Trigger Signal, CC2-4: Not in use
Data/Controller
3M: MDR26 [Camera Link] x 2
Power Supply
Hirose: HR10G (4Pin)
Lens Mount
M 84.5
Operating Temperature (°C)
0 to 50
*No Condensation
DC12 to 15 [+/-5%]
Power Supply Voltage (V)
Consumption
Current
(typically)
Size
W x H x D (mm)
Mass (g)
2.5 A
(mA)
1200
104×150×62.2
Approx. 770
1. Auto white balance
2. Pixel correction
3. RGB line delay
4. Pseudo-exposure control mode
Additional Functions
5. Programmable Exposure Control
6. Gain / Offset Control
7. 8 or 10 bit Video Output
8. Scan Direction Switching
9. Test Pattern Output
UME-0018-01
NUCLi7370T6
12
NED
The spectral Responsivity is shown below.
Ta = 25 ℃
100
Relative Responsivity (%)
R
80
G
60
B
40
G
20
B
0
400
500
600
700
800
900
Wavelength (nm)
Figure 1-4-1 Spectral Responsivity
NUCLi7370T6
UME-0018-01
NED
13
2 Camera Setting and Optical Interface
2.1 Setting Camera
The M4 screws on the front panel can be used to set the camera.
2.2 Fixing Camera
u No X-, Y-axis orientation and tilt adjustment mechanism is available. Please provide
an adjustment mechanism yourself as necessary.
2.3 Camera dimension
The dimensions for the cameras are shown below.
4-M4.0
for fixing camera
104
20
88
10
25.9
6.3
11
CL2
CL1
NUCLi7370
φ93
0.5
.5×
M84
φ96
68
150
RAINBOW series
NIPPON ELECTRO-SENSORY DEVICES CORP.
DC 12V IN
MADE IN JAPAN
Image plane
unit:mm
Figure 2-3-1 Dimensions(M84.5 Mount)
UME-0018-01
NUCLi7370T6
14
NED
2.4 Optical Interface
For the camera M84.5×0.5 screw mount is used.
The amount and wavelengths of light required to capture useful images depend on
the intended use. Factors include the property, speed, the object’s spectral
characteristics, exposure time, the light source characteristics, the specifications of
the acquisition system and so on.
The exposure amount (exposure time x light amount) is the most important factor in
getting desirable images. Please determine the exposure amount after studying what
is most important to your system.
Keep these guidelines in mind when setting up your light source:
l LED light sources are relatively inexpensive, provide a uniform field and longer
life span compared to other light sources. However, they also require a camera
with excellent sensitivity.
l Halogen light sources generally provide very little blue relative to infrared light
(IR).
l Fiber-optic light distribution systems generally transmit very little blue light
relative to IR.
l Metal halide light sources are very bright but have a shorter life span compared
to other light sources.
Generally speaking, the brighter light sources, the shorter life span.
CCD image sensors are sensitive to infrared (IR). We recommend using daylight
color fluorescent lamps that have low IR emissions. If you use a halogen light source,
to prevent infrared from distorting the images use an IR cutoff filter that does not
transmit IR wavelengths.
NUCLi7370T6
UME-0018-01
NED
15
3 Hardware
3.1 Camera Connection
(1) Camera Link cables shall be used to connect the camera unit with the frame grabber
board.
u Use two cables of the same length and the same manufacturer. If you use
asymmetric Camera Link cables, connect the camera with the connector labeled
as ”Camera side”.
(2) Connect with a power supply.
Use a power cable to connect the camera with the power source for the camera.
Insert the plug end of the cable into the camera. Attach the opposite end (loose wires)
to the power unit.
u Other than the above, a personal computer, a frame grabber board, a photographic
lens, a photographic lens mount, a light source and an encoder are necessary,
depending on the situation.
NUCLi7370T6
Camera Link Cable
3M:14B26‐SZLB‐xxx‐0LC
PC
CL1
CL1
CL2
CL2
Camera Link
Medium or FUll
Configuration
Frame Grabber Board
Power Cable
Camera Power supply
DC+12V 30W
Figure 3-1-1 Connections between Camera and Frame Grabber Board and Power Supply
u There are two connectors available for the Camera Link Medium or Full
Configuration board. Always check the frame grabber board specifications before
making connections.
UME-0018-01
NUCLi7370T6
16
NED
<Note: Choosing the appropriate Camera Link cable length >
According to the Camera Link Specification, the maximum cable length is 10m. But the
maximum cable length to be able to transfer data depends on the type of cable
performance and clock speed. The actual maximum transmission distance becomes less
than 10m at faster clock speeds, though the transmission distance of 10m is feasible at
slower clock speeds.
The following table shows values being calculated in accordance with the Camera Link
Specification 2007.Version1.2, using a typical cable (14B26-SZLB-xxx-0LC from 3M) and
frame grabber board (Solios from Matrox). Please choose the appropriate Camera Link
cable type and length for your application. We recommend you perform a connection test
in advance.
Table 3-1-1 calculated value of maximum cable length
Solios model
clock speed(MHz)
maximum cable length (m)
SOL 6M CL E*
(20∼66MHz)
40
9.8
66
8.0
SOL 6M FC E*
(20∼85MHz)
75
7.6
85
5.8
NUCLi7370T6
UME-0018-01
NED
17
3.2 Input / Output Connectors and Indicator
The layout of input /output connecters and the indicator lamp are as follows.
Camera Link Connector (
MDR26)
CL2
CL1
NUCLi7370
RAINBOW series
NIPPON ELECTRO-SENSORY DEVICES CORP.
DC 12V IN
MADE IN JAPAN
Indicator
Power Supply Connector
(
HIROSE HR10G-7R-4P)
Figure 3-2-1 Input/Output Connectors and Indicator
UME-0018-01
NUCLi7370T6
18
NED
3.3 Connectors・Pin Assignments・Cables
This camera uses the Medium Configuration (8 bit output) and the Full Configuration
(10 bit output) of the Camera Link interface standard. The figure shown below shows
the interface for the camera and a typical implementation for the frame grabber
interface in the case of Medium Configuration.
Camera
Channel Link Bus
LVAL,FVAL
DVAL,SP
Por
t
A∼C
28
LVDS_RECEIVER(NS)
DS90CR286MTD
recommended
X0±
X0±
X1±
X1±
X2±
X2±
XClk±
CK40MHz(8040SA_6040SA)
LVDS_DRIVER/
RECEIVER(NS)
DS90LV019TM
equivalent
Ser
TFG
SerTFG±
Ser
TC
SerTC±
100Ω
LVDS_RECEIVER(NS)
DS90LV048AT
equivalent
CC1(
control input)
CC2
100Ω
CC3
100Ω
CC4
100Ω
100Ω
CC1±
X3±
Cable
26-pin MDR Connector
CK60MHz(8060SA)
26-pin MDR Connector CL1
X3±
Channel Link Bus
LVAL,FVAL
DVAL,SP
Por
t
D∼F
Frame Grabber Board
LVDS_DRIVER(NS)
DS90CR285MTD
equivalent
XClk±
100Ω
28
100Ω
100Ω
100Ω
100Ω
LVDS_DRIVER/
RECEIVER(NS)
DS90LV019TM
recommended
SerTFG±
SerTC±
100Ω
LVDS_DRIVER(NS)
DS90LV047AT
recommended
CC1±
CC2±
CC2±
CC3±
CC3±
CC4±
CC4±
LVDS_DRIVER(NS)
DS90CR285MTD
equivalent
28
LVDS_RECEIVER(NS)
DS90CR286MTD
recommended
Y0±
Y0±
Y1±
Y1±
Y2±
Y2±
CK40MHz(8040SA_6040SA)
100Ω
100Ω terminated
100Ω
Y3±
Cable
26-pin MDR Connector
YClk±
26-pin MDR Connector CL2
Y3±
CK60MHz(8060SA)
YClk±
100Ω
28
100Ω
100Ω
100Ω
100Ω
100Ω 100Ω
terminated
100Ω
100Ω
Figure 3-3-1 Camera / Frame Grabber Interface
NUCLi7370T6
UME-0018-01
NED
19
The table below shows the Camera Link port assignments for 8bit/10bit output.
Table 3-3-1
Output data bit assignment
8bit RGB o/e
10bit RGB o/e
8bit RGB o/e
10bit RGB o/e
Medium
Full
Medium
Full
Configuration
Configuration
Configuration
Configuration
Port A0
Ro0
Ro0
Port E0
Ge0
Bo0
Port A1
Ro1
Ro1
Port E1
Ge1
Bo1
Port A2
Ro2
Ro2
Port E2
Ge2
Bo2
Port A3
Ro3
Ro3
Port E3
Ge3
Bo3
Port A4
Ro4
Ro4
Port E4
Ge4
Bo4
Port A5
Ro5
Ro5
Port E5
Ge5
Bo5
Port A6
Ro6
Ro6
Port E6
Ge6
Bo6
Port A7
Ro7
Ro7
Port E7
Ge7
Bo7
Port B0
Go0
Ro8
Port F0
Be0
Bo8
Port B1
Go1
Ro9
Port F1
Be1
Bo9
Port B2
Go2
−
Port F2
Be2
Be1
Port B3
Go3
−
Port F3
Be3
Be0
Port B4
Go4
Go8
Port F4
Be4
Re8
Port B5
Go5
Go9
Port F5
Be5
Re9
Port B6
Go6
−
Port F6
Be6
Be8
Port B7
Go7
−
Port F7
Be7
Be9
Port C0
Bo0
Go0
Port G0
−
Ge0
Port C1
Bo1
Go1
Port G1
−
Ge1
Port C2
Bo2
Go2
Port G2
−
Ge2
Port C3
Bo3
Go3
Port G3
−
Ge3
Port C4
Bo4
Go4
Port G4
−
Ge4
Port C5
Bo5
Go5
Port G5
−
Ge5
Port C6
Bo6
Go6
Port G6
−
Ge6
Port C7
Bo7
Go7
Port G7
−
Ge7
Port D0
Re0
Re0
Port H0
−
Ge8
Port D1
Re1
Re1
Port H1
−
Ge9
Port D2
Re2
Re2
Port H2
−
Be2
Port D3
Re3
Re3
Port H3
−
Be3
Port D4
Re4
Re4
Port H4
−
Be4
Port D5
Re5
Re5
Port H5
−
Be5
Port D6
Re6
Re6
Port H6
−
Be6
Port D7
Re7
Re7
Port H7
−
Be7
UME-0018-01
NUCLi7370T6
20
NED
u Set the LVDS, Channel Link receiver side to 100-ohm termination.
u With the driver side of LVDS, even if not used, do not make it open but set the logic
to H or L.
Driver
H or L
Receiver
+
+ 100Ω
-
-
Figure 3-3-2 Circuit of LVDS
The camera has 26-pin MDR connectors for control signals of Camera Link, data
signals and serial communications. The camera also has a 4-pin HIROSE connector
for power supply.
13 12 11
3
2
1
26 25 24
16 15 14
Figure 3-3-3 Camera Link Connector
l
l
Half pitch (miniature half ribbon) shape
Locking screw (UNC #4-40) type
NUCLi7370T6
UME-0018-01
NED
21
Table 3-3-2
Camera Link Connector (26-pin MDR Connector) pin assignments
CL1 (Base Configuration)
No
NAME
No
NAME
1
Inner Shield
14
Inner Shield
2
X0-
15
X0+
3
X1-
16
4
X2-
5
CL2 (Medium or Full Configuration)
I/O
No
NAME
No
NAME
1
Inner Shield
14
Inner Shield
Out
2
Y0-
15
Y0+
Out
X1+
Out
3
Y1-
16
Y1+
Out
17
X2+
Out
4
Y2-
17
Y2+
Out
Xclk-
18
Xclk+
Out
5
Yclk-
18
Yclk+
Out
6
X3-
19
X3+
Out
6
Y3-
19
Y3+
Out
7
SerTC+
20
SerTC-
In
7
100Ωterminated
20
100Ωterminated
8
SerTFG-
21
SerTFG+
Out
8
Z0-
21
Z0+
Out
9
CC1-
22
CC1+
In
9
Z1-
22
Z1+
Out
10
CC2+
23
CC2-
In
10
Z2-
23
Z2+
Out
11
CC3-
24
CC3+
In
11
Zclk-
24
Zclk+
Out
12
CC4+
25
CC4-
In
12
Z3-
25
Z3+
Out
13
Inner Shield
26
Inner Shield
13
Inner Shield
26
Inner Shield
l
I/O
Explanation of Signals
Inner Shield:
Shield cable (GND)
X0+, X0-…X3+, X3-: Data output (Channel Link)
Xclk+,Xclk- :
Clock output for above data output synchronization (Channel Link)
Y0+, Y0-…Y3+, Y3-: Data output (Channel Link)
Yclk+,Yclk- :
Clock output for above data output synchronization (Channel Link)
Z0+, Z0-…Z3+, Z3-: Data output (Channel Link)
Zclk+, Zclk- :
Clock output for above data output synchronization (Channel Link)
SerTC+, SerTC- :
Serial data input (LVDS)
SerTFG+, SerTFG- : Serial data output (LVDS)
CC1+,CC1- :
External synchronous signal input (LVDS)
*When using External Trigger
CC2+,CC2- :
Not in use (LVDS)
CC3+,CC3- :
Not in use (LVDS)
CC4+,CC4- :
Not in use (LVDS)
UME-0018-01
NUCLi7370T6
22
u
u
NED
To avoid uncoupling of cable connectors during power on, make sure to clamp them
with locking screws.
Do not unplug the cable while power is being supplied to the camera.
The pin assignment of the power supply connector is shown below.
1
4
2
3
Figure 3-3-4 Power Supply Connector (HIROSE: HR10G -7R- 4P)
l
Round shape push-pull lock type
Table 3-3-3 Pin Assignment of Power Supply Connector
No
NAME
Color of Cable
1
12 -15V
White
2
12 -15V
Red
3
GND
Green
4
GND
Black
3.4 Power Supply
The camera requires a single power supply (DC+12 to +15V).
u When selecting a power source, choose one with the capacity to allow for
inrush current. (30W or more recommended)
u Insert the cable plug securely until it locks into position. This is to prevent the
connector from coming loose during power transmission.
l
l
l
Compatible Cable (Compatible plug): DGPS -10 (HIROSE: HR10A -7P - 4S)
Power supply voltage:
DC+12 -15V (+/-5%)
Consumption Current (rated):
DC+12V: 1200mA
l
The LED lamp illuminates when +12V to +15V power is being supplied to the
camera.
u If the lamp fails to illuminate even after power is supplied, turn OFF power
immediately. Inspect wiring. Check the voltage and capacity of the supplied power
source.
NUCLi7370T6
UME-0018-01
NED
23
4 Camera Control
The camera can be controlled through serial communication. Two methods can be
used to change the camera’s parameters. The first approach is to change parameters
using NCCtrl(Camera control software). (See “8 NCCtrl”.) Or you can also change the
parameters directly from your application by using binary read/write commands to set
values in the camera register.
The camera can be used without the serial interface after it has been set up
correctly.
4.1 Flow of Camera Control
4.1.1 Command Overview
The serial interface uses a simple ASCII-based command.
l
Communication begins when the computer sends control commands to the camera.
l
The camera receives and interprets the computer commands and then executes control
operation accordingly.
l
Transmission ends when the camera returns the analyzed results of control commands
to the computer.
u Always allow the previous transmission to end before starting the next transmission.
(Only one command can be sent per transmission.)
4.1.2 Command Format (PC to Camera Transmission)
l
Format 1
CMD CR
l
Format 2
CMD VAL CR
CMD: Control text (1 Byte) Use 1~4 lowercase letters only. No numerals allowed.
CR:
Carriage Return (0x0D)
VAL:
Setting value (decimal, 1 Byte x maximum 4 digits)
<Example>
r0CR
WBr684CR
UME-0018-01
NUCLi7370T6
24
NED
4.1.3 Reply Format (Camera to PC Transmission)
l
Format 1 >R CR >[SB] CR EOT
l
Format 2 (for “l” command) >OK CR >[MEM] CR >l CR EOT
>:
R:
Results start text (0×3E)
Camera receive command analyzed results
[SB] :
[MEM] :
CR:
EOT:
Camera receive command send back
Memory data readout value
Separated text (0×0D)
Send command all text End text (0×04)
<Example>
>OK CR >r 0 CR EOT
Table 4-1-3-1 Error Messages
Camera Response
Meaning
OK
Camera executed command
CMD ERR!
Command is not valid
CMD OVR ERR!
Command text line is too long
VAL ERR!
Parameter accepted was outside of specified
MEM ERR!
Memory error
NUCLi7370T6
UME-0018-01
NED
25
4.1.4 Camera Control Commands
The table below shows the list of Camera Control Commands.
Table 4-1-4-1 List of Camera Control Commands
Control Item
Gain
Auto
white
Setting
UME-0018-01
balance
Control Description
CMD
VAL1
r
280 to 530
g
220 to 470
b
310 to 560
grfo
280 to 530
grfe
280 to 530
grro
280 to 530
grre
280 to 530
ggfo
220 to 470
ggfe
220 to 470
ggro
220 to 470
ggre
220 to 470
gbfo
310 to 560
gbfe
310 to 560
gbro
310 to 560
gbre
310 to 560
WBr
128 to 896
Red channel brightness level
WBg
128 to 896
Green channel brightness level
WBb
128 to 896
Blue channel brightness level
Red gain adjustment (all pixels)
x1...x2.5(+0.032dB/step)
Green gain adjustment (all pixels)
x1... x2.5 (+0.032dB/step)
Blue gain adjustment (all pixels)
x1... x2.5 (+0.032dB/step)
Red (front half, odd pixels) gain adjustment
x1...x2.5 (+0.032dB/step)
Red (front half, even pixels) gain adjustment
x1...x2.5 (+0.032dB/step)
Red (rear half, odd pixels) gain adjustment
x1...x2.5 (+0.032dB/step)
Red (rear half, even pixels) gain adjustment
x1...x2.5 (+0.032dB/step)
Green (front half, odd pixels) gain adjustment
x1...x2.5 (+0.032dB/step)
Green (front half, even pixels) gain adjustment
x1...x2.5 (+0.032dB/step)
Green (rear half, odd pixels) gain adjustment
x1...x2.5 (+0.032dB/step)
Green (rear half, even pixels) gain adjustment
x1...x2.5 (+0.032dB/step)
Blue (front half, odd pixels) gain adjustment
x1...x2.5 (+0.032dB/step)
Blue (front half, even pixels) gain adjustment
x1...x2.5 (+0.032dB/step)
Blue (rear half, odd pixels) gain adjustment
x1...x2.5 (+0.032dB/step)
Blue (rear half, even pixels) gain adjustment
x1...x2.5 (+0.032dB/step)
NUCLi7370T6
26
NED
Run Auto white balance
function
Run Auto white balance function
WB
Red offset adjustment (all pixels)
q
0 to 12
0...12 (1 DN / step at 8 bit)
0...48 (4 DN / step at 10 bit)
o
0 to 12
p
0 to 12
orfo
0 to 12
orfe
0 to 12
orro
0 to 12
orre
0 to 12
ogfo
0 to 12
ogfe
0 to 12
ogro
0 to 12
ogre
0 to 12
obfo
0 to 12
obfe
0 to 12
obro
0 to 12
obre
0 to 12
v
0 to 1
Offset
Output Signal Setting
Operation
Status
Readout
sta
Green offset adjustment (all pixels)
As above
Blue offset adjustment (all pixels)
As above
Red (front half, odd pixels) offset adjustment
As above
Red (front half, even pixels) offset adjustment
As above
Red (rear half, odd pixels) offset adjustment
As above
Red (rear half, even pixels) offset adjustment
As above
Green (front half, odd pixels) offset adjustment
As above
Green (front half, even pixels) offset adjustment
As above
Green (rear half, odd pixels) offset adjustment
As above
Green (rear half, even pixels) offset adjustment
As above
Blue (front half, odd pixesl) offset adjustment
As above
Blue (front half, even pixels) offset adjustment
As above
Blue (rear half, odd pixels) offset adjustment
As above
Blue (rear half, even pixels) offset adjustment
As above
8bit / 10bit
Returns the current camera settings
Memory Initializing
z
Reset to factory settings
Memory Load
l
Readout setup data in memory
Memory Save
w
Store present setup data in memory
NUCLi7370T6
UME-0018-01
NED
27
Line Delay
d
-16 to 16
MFr
0 to 1023
MFg
0 to 1023
Adjust output delay between lines (RGB)
Red Channel factory set Pixel Correction Reference
Level
Green Channel factory set Pixel Correction Reference
Level
MFb
0 to 1023
Blue Channel factory set Pixel Correction Reference
Level
Pixel
Correction
Reference Setting
MUr
0 to 1023
Red Channel User1 Pixel Correction Reference Level
MUg
0 to 1023
Green Channel User1 Pixel Correction Reference
Level
MUb
0 to 1023
Blue Channel User1 Pixel Correction Reference Level
MVr
0 to 1023
Red Channel User2 Pixel Correction Reference Level
MVg
0 to 1023
Green Channel User2 Pixel Correction Reference
Level
MVb
Pixel Correction Data
Import
Pixel Correction Data
Save
0 to 1023
Acquire user pixel correction data
W
Store the acquired data in the memory
L
0 to 3
Pixel Correction Mode
Blue Channel User2 Pixel Correction Reference Level
C
OFF / ON (Reset to factory set selection)
/ ON (User1 Pixel Correction selection) / ON (User2
Pixel Correction selection)
0 to 3
Exposure Mode
t
Free Run / Edge mode
/ Pseudo Exposure control (Edge Mode)
/ Pseudo Exposure control (Level Mode)
Programmable
Exposure Time
Test Pattern
Scanning Direction
UME-0018-01
i
56 to 32767
56μs∼32.767ms
T
0 to 1
OFF / ON
rev
0 to 1
Forward / Reverse
NUCLi7370T6
28
NED
4.1.5 Memory Setup Values (Factory Settings)
The memory setup values (factory settings) are shown below.
CMD
Control Item
grfo, grfe
grro, grre
ggfo, ggfe
Gain
ggro, ggre
gbfo, gbfe
gbro, gbre
Auto
white
balance
setting
WBr,WBg,WBb
orfo, orfe
Correction
Reference Setting
Pixel Correction Mode
Programmable
Green front and rear half, odd-even pixel gain (x1)
≒310
Blue front and rear half, odd-even pixel gain (x1)
684
Red,Green,Blue channel brightness level
8
Blue front and rear half odd-even pixel offset (8DN)
v
0
8bit
d
4
Output delay between lines (RGB)
MFr,MFg,MFb
760
MUr,MUg,MUb
760
MVr,MVg,MVb
760
C
1
ON (factory set Pixel Correction)
i
56
56μs
t
0
Free Run
T
0
OFF
rev
0
Forward
obro, obre
Pixel
≒220
Green front and rear half odd-even pixel offset (8DN)
obfo, obfe
Setting
Red front and rear half, odd-even pixel gain (x1)
8
ogro, ogre
Delay Line
≒280
Red front and rear half odd-even pixel offset (8DN)
ogfo, ogfe
Output Signal Setting
Control Description
8
orro, orre
Offset
VAL1
Red,Green,Blue channel factory set Pixel Correction
Reference Level
Red,Green,Blue
channel
User1
Pixel
Correction
channel
User2
Pixel
Correction
Reference Level
Red,Green,Blue
Reference Level
Exposure Time
Programmable
Exposure Time
Test Pattern
Scanning Direction
Table 4-1-5-1 Memory Setup Values (Factory Settings)
NUCLi7370T6
UME-0018-01
NED
29
4.2 Details on Commands
4.2.1 Setting automatic white balance
Sets RGB balance.
• Format 2
CMD VAL CR
• CMD
WBr(WBr,WBg,WBb)
• VAL
128∼896
<Example>
WBr700CR(Sets R output level before pixel correction to 700DN(10 bit)
>OK
>WBr700
4.2.2 Setting Offset
Sets offset from 0 to +12(8 bit: 1DN/Step), or from 0 to +48(10 bit: 4DN/step).
• Format 2
CMD VAL CR
• CMD
q(q,o,p)
• VAL
0 ∼ 12
<Example>
q5CR (Sets offset 5(8-bit) or 20(10-bit))
>OK
>q5
4.2.3 Setting Output Signals (Setting Data Format)
Sets the data format of output signals.
• Format 2
CMD VAL CR
• CMD
v
• VAL
0,1
<Example>
v0CR (8bit output)
>OK
>v0
UME-0018-01
NUCLi7370T6
30
NED
4.2.4 Readout the Operation Status
Reads out the current camera settings.
• Format 2
CMD VAL CR
• CMD
sta
<Example>
sta
>OK
>Type=NUCLi7370T6
>Ver.=1.00
>r280
>g220
>b310
>grfo254
>grfe246
>grro262
>grre261
>ggfo197
>ggfe192
>ggro201
>ggre205
>gbfo278
>gbfe283
>gbro291
>gbre284
>q8
>o8
>p8
>orfo8
>orfe8
>orro8
>orre8
>ogfo8
>ogfe8
>ogro8
>ogre8
>obfo8
>obfe8
>obro8
>obre8
>d4
NUCLi7370T6
UME-0018-01
NED
31
>v0
>t0
>C1
>MFr760
>MFg760
>MFb760
>MUr760
>MUg760
>MUb760
>MVr760
>MVg760
>MVb760
>T0
>rev0
>WBr684
>WBg684
>WBb684
>i56
>sta
4.2.5 Memory Initializing (Initializing Camera Settings)
Reset the flash memory to the factory default.
• Format 1
CMD CR
• CMD
z
<Example>
zCR
>OK
>z
4.2.6 Memory Load (Readout the Camera setting from the flash memory)
Reads out the camera settings from the flash memory.
• Format 1
CMD CR
• CMD
l
<Example>
l
>OK
>Type=NUCLi7370T6
>Ver.=1.00
>r280
UME-0018-01
NUCLi7370T6
32
NED
>g220
>b310
>grfo254
>grfe246
>grro262
>grre261
>ggfo197
>ggfe192
>ggro201
>ggre205
>gbfo278
>gbfe283
>gbro291
>gbre284
>q8
>o8
>p8
>orfo8
>orfe8
>orro8
>orre8
>ogfo8
>ogfe8
>ogro8
>ogre8
>obfo8
>obfe8
>obro8
>obre8
>d4
>v0
>t0
>C1
>MFr760
>MFg760
>MFb760
>MUr760
>MUg760
>MUb760
>MVr760
NUCLi7370T6
UME-0018-01
NED
33
>MVg760
>MVb760
>T0
>rev0
>WBr684
>WBg684
>WBb684
>i56
>l
4.2.7 Memory Save
Stores current camera settings in the flash memory.
• Format 1
CMD CR
• CMD
w
<Example>
wCR
>OK
>w
4.2.8 Line Delay
Adjust the delay between lines (RGB).
• Format 2
CMD VAL CR
• CMD
d
• VAL
-16-16
<Example>
d5CR (Sets delay to 5)
>OK
>d5
4.2.9 Pixel Correction Data Import
Acquires user pixel correction data.
• Format 1
CMD CR
• CMD
W
<Example>
WCR
>OK
>W
UME-0018-01
NUCLi7370T6
34
NED
4.2.10 Pixel Correction Data Save
Saves and applies acquired correction data in the memory.
• Format 1
CMD CR
• CMD
L
<Example>
LCR
>OK
>L
4.2.11 Pixel Correction Reference Setting
Sets pixel correction reference level.
• Format 2
CMD VAL CR
• CMD
MUr(MUr,MUg,MUb,MVr,MVg,MVb)
• VAL
0-1023
<Example>
MUr768CR (Sets user1,R pixel correction reference level to 768)
>OK
>MUr768
4.2.12 Pixel Correction Mode
Sets pixel correction mode.
• Format 2
CMD VAL CR
• CMD
C
• VAL
0,1,2,3
<Example>
C1CR (factory settings Pixel Correction selection)
>OK
>C1
4.2.13 Exposure Mode
Sets Exposure Mode.
• Format 2
CMD VAL CR
• CMD
t
• VAL
0,1,2,3
<Example>
t0CR (Free run selection)
>OK
>t0
NUCLi7370T6
UME-0018-01
NED
35
4.2.14 Programmable Exposure Time Setting
Sets Exposure time.
• Format 2
CMD VAL CR
• CMD
i
• VAL
56-32767
<Example>
i200CR (Sets Exposure time to 200μs.)
>OK
>i200
4.3 Internal Circuit Configuration Block
The Internal Circuit Configuration block is shown below.
After the output signal from the CCD image sensor is converted by the A/D converter,
digital data processing is done in the FPGA video is output in the Camera Link
Medium configuration.
+12∼15V
bullet-shaped
connecter
HR10G
X0±,X1±,
X2±,X3±,
XCl
k±
COLOR CCD SENSOR (7300 pi
xel
s)
Channel
Li
nk
driver1
CC1±
CC2±
CC3±
CC4±
LVDS
receiver
1 2 3・・・・ 3650 3651・・・・7299 7300 LVAL,FVAL
DVAL,CK
SP
PortA∼C
0/E
0/E
Ser
TC±
Y0±,Y1±,
Y2±,Y3±,
YCl
k±
0/E
R
A/D
LVDS
driver・
receiver
Channel
Li
nk
driver2
G
A/D
4
FPGA
Ser
TFG±
B
A/D
A/D
A/D
A/D
0/E
0/E
LVAL,FVAL
DVAL,CK
SP
PortD∼F
0/E
indicator
(LED)
Figure 4-3-1 Internal Circuit Configuration Block
Digital Processing flow in FPGA
The figure below shows the digital processing flow in the FPGA.
Digital Data Processing block diagram
Video
(10bi
t
)
From A/D
Video(8 or 10bit)
To Channel Link Driver
White reference
multiple
Line Delay
8 or 10 bit select
Figure 4-3-2 Digital Processing Block Diagram
UME-0018-01
NUCLi7370T6
36
NED
4.4 Startup
After turning on, the camera runs a startup procedure before it starts getting images
and outputting data. It takes about four seconds.
The startup procedure is as follows.
(1) The camera initializes the hardware.
(2) Reads out the latest camera settings from the flash memory. (User settings if
any or factory default settings)
(3) Sets up the camera with the setting values from the flash memory.
After this sequence, the camera is ready to get images and output data.
4.5 Saving and Loading Camera Settings
The camera setting data is saved in the internal memory (flash memory) and is
loaded from the memory when turning on the power supply or loading (sending the
“rfd” command).
l The number of times the flash memory can be rewritten will vary depending on
actual operational conditions. After turning on the power supply, the camera always
checks the memory status. If the data is not within the designated range due to a
malfunction or other type of trouble, the memory will be automatically rewritten with
the factory settings.
u If disconnecting camera power while rewriting the memory, all data saved in the
memory will be deleted.
As it takes several seconds to rewrite the memory, do not disconnect the power
supply before receiving the response from the camera.
Commands for rewriting the memory are as follows.
l Reset to factory settings(z)
l Store present setup data in memory(w)
l Store pixel correction data in memory (L)
u When changing the camera setting, be sure to send the control input signal
(CC1) from the frame grabber board. If you do not send CC1 or send control input
signals are out of the designated range, you cannot get images and cannot change
the settings. See 4.8.2 to 4.8.4.
NUCLi7370T6
UME-0018-01
NED
37
4.6 Serial Communication Settings
Serial communication is performed through the Camera Link Interface.
The table below shows the serial communication settings.
Table 4-6-1 Serial Communication Settings
Parameter Items
Setup Value
Communication Speed (Baud rate)
9600bps
Data Length
8bit
Parity Bit
None
Stop bit
1bit
Flow Control
None
4.7 Video Output Format
The camera outputs 8-bit or 10-bit digital data through 6 taps (R,G,B x odd / even)
8-bi
t
(Default)
MSB
bi
t
9
bi
t
8
bi
t
8
bi
t
7
bi
t
7
bi
t
6
bi
t
6
bi
t
5
8bi
t
bi
t
4
MSB
bi
t
5
10bi
t
bi
t
4
bi
t
3
bi
t
3
bi
t
2
ADC
ADC
bi
t
9
10-bi
t
LSB
bi
t
2
bi
t
1
bi
t
1
bi
t
0
bi
t
0
LSB
Figure 4-7-1 Pin Assignments of Digital Data
u The A/D converter of the camera has a 10-bit resolution. For 8-bit output, the upper
8-bit signal can be output as a video data.
u In R, G, B 8-bit output mode, output is Camera Link Medium Configuration.
u In R, G, B 10-bit output mode, output is Camera Link Full Configuration.
UME-0018-01
NUCLi7370T6
38
NED
The video output phase is shown below.
1
3650
XClk
(70MHz)
DVAL
LVAL
VIDEO R Odd
(8bit: Port A)
(10bit: Port A,B)
invalid invalid invalid invalid
1
3
5
7295
7297
7299
invalid invalid invalid invalid
VIDEO G Odd
(8bit: Port B)
(10bit: Port E,F)
invalid invalid invalid invalid
1
3
5
7295
7297
7299
invalid invalid invalid invalid
VIDEO B Odd
(8bit: Port C)
(10bit: Port C,B)
invalid invalid invalid invalid
1
3
5
7295
7297
7299 invalid invalid invalid invalid
VIDEO R Even
(8bit: Port D)
(10bit: Port G,B)
invalid invalid invalid invalid
2
4
6
7296
7298
7300
invalid invalid invalid invalid
VIDEO G Even
(8bit: Port E)
(10bit: Port D,F)
invalid invalid invalid invalid
2
4
6
7296
7298
7300
invalid invalid invalid invalid
VIDEO B Even
(8bit: Port F)
(10bit: Port H,B)
invalid invalid invalid invalid
2
4
6
7296
7298
7300
invalid invalid invalid invalid
NUCLi7370T6
UME-0018-01
NED
39
4.8 Exposure Mode and Timing Chart
The camera has four exposure modes. The overview of each mode and the timing
are as follows.
4.8.1 Free Run Exposure Mode
In free-run exposure mode, the camera generates its own internal control signal
based on two programmable parameters, exposure time and readout time. The range
of programmable exposure time and the timing chart of the exposure and the readout
are shown below.
Table 4-8-1-1 Free Run Exposure Time
e
Programmable exposure time
r
Readout time(
LVAL)
56∼32767
52.2
(
unit :μs)
e
Exposure
Readout
(
LVAL)
r
Figure 4-8-1-1 Free Run Exposure Mode
4.8.2 External Trigger Exposure Mode
In external trigger exposure mode, the exposure time is determined by the setting
made through the external trigger pulse (CC1) cycle. Each exposure starts with the
rising edge and the line period is determined by the time from rising edge to rising
edge of the trigger pulse. The range of programmable exposure time and the timing
chart of the exposure and the readout are shown below.
Table 4-8-2-1 External Trigger Exposure Time
h
Trigger pulse High time
≧0.1
t
Trigger pulse cycle
≧56
r
Readout time (
LVAL)
52.2
(
unit :μs)
Trigger
(CC1)
h
t
Exposure
Readout
(LVAL)
r
Figure 4-8-2-1 External Trigger Exposure Mode
UME-0018-01
NUCLi7370T6
40
NED
4.8.3 Pseudo-exposure control mode (Edge)
In Pseudo-exposure control mode (Edge), the exposure time is determined by
sending a camera command. Each exposure starts with the rising edge and the line
period is determined by the time from rising edge to rising edge of trigger pulse. The
range of programmable exposure time, the timing chart of the exposure and the
readout are shown below.
Table 4-8-3-1 Pseudo-exposure control mode (Edge)
h
Trigger pulse High time
≧0.1
t
Trigger pulse cycle
≧e+56
e
Programmable exposure time
56∼32767
r
Readout time (LVAL)
52.2
(
unit :μs)
Trigger
(CC1)
h
t
e
Exposure
Readout
(LVAL)
r
Figure 4-8-3-1 Pseudo-exposure control mode
4.8.4 Pseudo-exposure control mode (Trigger)
In Pseudo-exposure control mode (Trigger), the exposure time is determined by the
High time of the trigger pulse. Each exposure starts with the rising edge and the line
period is determined by the time from rising edge to rising edge of trigger pulse. The
range of programmable exposure time, the timing chart of the exposure and the
readout are shown below.
Table 4-8-4-1 Pseudo-exposure control mode (Trigger)
h
Trigger pulse High time
≧56
l
Trigger pulse Low time
≧56
r
Readout time (LVAL)
52.2
(unit :μs)
Trigger
(
CC1)
h
l
Exposure
Readout
(LVAL)
r
Figure 4-8-4-1 Pseudo-exposure control mode
NUCLi7370T6
UME-0018-01
NED
41
4.9 Setting Offset
In the figure below, the horizontal axis indicates the amount of incident light and the
vertical axis indicates the output.
Fs shows the output at saturation. Dd shows the output at darkness. (Both Fs and Dd
are digital.) Se shows the saturation current, or the amount of exposure when the
output saturates.
Output
Fs
Se : Saturation Exposure
Fs : Saturation Output
Dd : Dark Current
Dd
Se
Amount of Incident
Light (lx・
s)
Figure 4-9-1 Saturation Exposure and Dark Current Output
By setting the offset, you can set the Y-intercept arbitrarily. DF shows the digital
offset value. The gradient of the line does not change.
DF
Output
DF : Offset Value
Amount of
Incident Light
(lx・
s)
Figure 4-9-2 Offset Adjustment
u Adjust amount of offset in accordance with the requirements of your camera system.
UME-0018-01
NUCLi7370T6
42
NED
4.10 Setting Gain
The camera can adjust the gain (x1 to x 2.5). As shown in the figure below,
increasing the gain setting increases the gradient of the camera’s response curve and
results in a higher camera output for a given amount of light.
Figure 4-10-1 PGA Gain Adjustment
Fs : Saturation Output
(a<b<c)
Fs
Gain a
Gain b
Gain c
Amount of Incident
Light (lx・s)
u Gain and noise values are proportionally related.
u Adjust the amount of gain in accordance with the requirements of your camera
system.
NUCLi7370T6
UME-0018-01
NED
43
Gain-Sensitivity is shown below.
Table 4-10-1 Gain-Sensitivity
Gain VAL
R:280
Sensitivity
Gain
G:220
(V/lx・s)
B:310
+0
0dB
x1.00
130
+25
0.8dB
x1.10
143
+50
1.6dB
x1.20
156
+75
2.4dB
x1.32
171
+100
3.2dB
x1.45
188
+125
4.0dB
x1.58
206
+150
4.8dB
x1.74
226
+175
5.6dB
x1.91
248
+200
6.4dB
x2.09
272
+225
7.2dB
x2.29
298
+250
8.0dB
x2.51
327
4.11 Auto white balance
The NUCLi7370T6 has a simple function for balancing the output levels of each channel
of the sensor. This section describes how to adjust the RGB signal to the desired level.
As an example, the procedure below describes how to adjust the RGB level to 190DN
(in 8bit mode) in the factory set pixel correction mode.
4.11.1 Note about optical adjustment
The Auto white balance adjustment function adjusts front and rear half of the CCD’s pixels by
sampling the center 512 pixels of the sensor. Please adjust the lighting such that this center
area is targeted. If the lighting is off-center, it may result in a difference in level across
these center pixels.
UME-0018-01
NUCLi7370T6
44
NED
4.11.2 Setting the optical adjustment conditions
① Send the command “C1” to set pixel correction to Factory Set Pixel Correction Mode.
② Depending on the exposure time and light source, try to get the level as close to the
desired level as possible (in this case, 190DN, shown in the figure below)
output level (8bit)
255
192
190(
target value)
128
64
0
7300pixel
Figure 4-11-2-1 output profile before auto white balance is executed
4.11.3 Auto white balance adjustment
①
Set the target value by sending commands-, e.g. “MUr684”, “MUg684”,”
MUb684” .The value sent in the command should be 0.9 x the target value (in factory set
mode). Auto white balance adjusts the uncorrected data, so here, it necessary to divide
by 1/0.9 (correction output level/no correction output level) , the factory correction ratio.
In this case, 760(10-bit value of the target 190DN)x0.9 = 684 (the value to be sent by
command)
② Send the “WB” command. The data level in the center becomes 190DN, as shown
below.
output level (8bit)
255
192
190(target value )
128
64
0
7300pixel
Figure 4-11-3-1 output profile after executing auto white balance
NUCLi7370T6
UME-0018-01
NED
45
[Supplementary note]
• It is possible to set the target value of each RGB channel.
• The value sent by command should be divided by the correction ratio at the time.
• When using User Pixel Correction, it is recommended first to perform Auto white
balancing with pixel correction turned off (Command “C0”), then to obtain the pixel
correction data.
• It is possible to read out the gain setting value of each channel with the command
“sta” after auto white balance adjustment, and to adjust gain for each channel
manually through commands.
sta
>OK
>Type=NUCLi7370T6
>Ver.=1.00
>r280
>g220
>b310
>grfo254←present Red front half odd pixels channel gain set value
>grfe246←present Red front half even pixels channel gain set value
>grro262←present Red rear half odd pixels channel gain set value
>grre261←present Red rear half even pixels channel gain set value
>ggfo197←present Green front half odd pixels channel gain set value
>ggfe192←present Green front half even pixels channel gain set value
>ggro201←present Green rear half odd pixels channel gain set value
>ggre205←present Green rear half even pixels channel gain set value
>gbfo278←present Blue front half odd pixels channel gain set value
>gbfe283←present Blue front half even pixels channel gain set value
>gbro291←present Blue rear half odd pixels channel gain set value
>gbre284←present Blue rear half even pixels channel gain set value
・
・
・
>sta
UME-0018-01
NUCLi7370T6
46
NED
4.12 Pixel Correction
As a rule, image sensors (CCD, CMOS and so on) have fixed pattern noise and
photo response non-uniformity. Lens shading and light sources can also cause
non-uniformity. The camera is set to the optimal correction before shipping in order to
provide images of the highest grade.
The camera also has a user white correction function to cope with lens shading and
non-uniform illumination, or to be able to completely clear the uneven brightness
generated by changing the spectral response level of the light source. Cal_wh:
Output data of each pixel in uniform illumination (digital)
Target_Val : Target value for correction (10bit digital)
Vin :Input data (digital)
Vout :Output data (digital) The corrected data is expressed in the following equation.
Vout=(Vin x Target_val) / Cal_wh
Waveform before bit correction
Output
Pixel Number
Waveform after bit correction
Output
Pixel Number
Figure 4-11-1 Waveform before and after bit correction
NUCLi7370T6
UME-0018-01
NED
47
4.12.1 Command Settings
Set the correction on or off; acquire user white correction data by sending
commands through serial communication.
Examples of command settings
C0: No correction
C1: Factory white correction
C2: User white correction(User 1)
C3: User white correction(User 2)
W: Acquisition of user white correction data
L: Save of user white correction data
4.12.2 How to correct
(1) Send the “C2 CR” command through serial communication. Set C2 or C3
Pixel Correction Mode
(2) Remove the lens cap and place a white object. Then you can acquire user white
correction data. With a lens, the shading by both the lens and the light source will be
simultaneously corrected. At this time, please defocus a little to avoid being affected
by the non-uniformity of the object.
(3) Sending “W CR” commands through serial communication.
(4) Confirm that the camera returns “>OK” and “>W”.
(5) Confirm that the image data is correct. If it is okay, save the correct data through
command “L CR”
(6) Confirm that the camera returns “>OK” and “>L”.
Send the “shc 2 VAL2 CR” command through serial communication. Then the
user white correction will be on and set the correction level as “VAL2”.
UME-0018-01
NUCLi7370T6
48
NED
5 Confirming Camera Settings
5.1 Before Power-on
(1) Confirm the pin assignment of the power cable.
1
4
2
3
No
NAME
Color of Cable
1
12 -15V
White
2
12 -15V
Red
3
GND
Green
4
GND
Black
Figure 5-1-1 Pin Assignment of Power Cable
(2) Confirm the direction and the channel of the cables. Some Camera Link cables
are directional.
If one of the connectors says “Camera side”, connect this to the camera.
Camera side
Frame grabber side
Figure 5-1-2 Connection Direction of Camera Cable
NUCLi7370T6
UME-0018-01
NED
49
MADE IN JAPAN
DC 12V IN
NIPPON ELECTRO-SENSORY DEVICES CORP.
RAINBOW series
CL2 = CHANNEL #1
CL2
CL1 = CHANNEL #0
NUCLi7370
CL1
The connection channel of in the case of using a “Solios” board:
CL1 = CHANNEL #0
CL2 = CHANNEL #1
Figure 5-1-3 Channel of Camera Link Cables
5.2 After Power-on
(1) Confirm sent and received commands using the camera control utility. Launch
NCCtrl02, set COM port and connect. Click “Load” and ”O.K”, then wait for the
response.
Figure 5-2-1 Confirmation of Connection
UME-0018-01
NUCLi7370T6
50
NED
(2) Set a video output mode with the camera control utility.
Video output mode =24bit RGB or 30bit RGB
Figure 5-2-2 Video Output Mode Settting
u If you have your own application to check the images, select suitable settings.
(3) Capture images using a camera interface board utility. In the case of Matrox’s
Solios, it is convenient to use Intellicam.
Figure 5-2-3 Solios Window
NUCLi7370T6
UME-0018-01
NED
51
5.3 During Operation
(1) Does an acquisition time out error occur?
<Cause>
<1> Captured images are too large.
If there are many filtering processes, the assignments to the driver may be
insufficient.
<2> The cable is detached from the connector
Ensure that the power cable and Camera Link cables are connected to the camera
firmly.
<3> Camera Link cables are susceptible to noise when the cables are laid near a
light source inverter line or a power line. The personal computer in use may be freeze
and need to be reset.
(2) Are there dark lines in the direction of vertical scanning on the image?
<Cause>
<1> Dust on the sensor window
Dust may get onto the sensor window from the inside or the outside of the camera.
Remove the dust with air or a lens cleaner.
UME-0018-01
NUCLi7370T6
52
NED
6 Sensor Handling Instructions
6.1 Electrostatic Discharge and the Sensor
CCD sensors are susceptible to damage from electrostatic discharge and can
deteriorate as a result. Take care when handing the sensor.
6.2 Protecting Against Dust, Oil and Scratches
The CCD sensor window is part of the optical path and should be handled like other
optical components with care. If you use the camera in a dusty area, prepare a
dust-proof enclosure. Dust can obscure pixels, producing dark lines on the image.
6.3 Cleaning the Sensor Window
Dust: Can usually be removed by blowing the window surface using a compressed
air blower.
Oil: Wipe the window with a lint-free cloth wiper moistened with ethyl alcohol
carefully and slowly.
When there is dust or smudges on the sensor window, it appears in the same way as
noise on the image. Please remove it appropriately.
NUCLi7370T6
UME-0018-01
NED
53
7 Troubleshooting
The following pages contain several troubleshooting charts that can help you find the
cause of problems users sometimes encounter.
7.1 No Image
The camera has the correct connections
No
The indicator is glowing.
No
with the power source and the frame
grabber.
Yes
Yes
No
The power source meets the specified voltage.
Yes
After power on, the power source meets the
No
specified voltage.
The capacity of the power
Yes
No
source is sufficient
The camera may be out of
Yes
order. Please contact us
for service.
The
camera
has
Use a power source that meets
the specifications.
the
correct
No
connection with the frame grabber.
Connect the camera and the frame
grabber board with camera cables.
Yes
The frame grabber board is
After being powered on, set up the
No
frame grabber board suitably.
powered on and set up.
Yes
The sample software program is used to control
The frame grabber
No
is communicating
No
the camera.
Yes
with the camera
The sample software program is used to
successfully.
control the camera and is communicating
To next page
with the camera successfully.
B
Yes
To next page
To next page
A
B
No
Confirm the communication software, the control
protocol for the camera and commands.
UME-0018-01
NUCLi7370T6
54
NED
No
A
The communication port is set correctly.
B
Yes
Set
the
communication
port
correctly.
The camera may be out of order. Please
contact us for service.
The capture software program is
No
The capture software program is provided
with the board as a sample program.
custom made.
Yes
With the sample software program
No
provided, no image is captured.
Check the compatibility between the
camera and the frame grabber board.
Yes
No
Nothing blocks off the light.
If a lens cap is attached, take it off.
Yes
The
amount
of
illumination
is
No
enough.
Yes
No image at the full aperture.
No
Yes
The optical axes of the camera and
the image sensor are aligned.
No
Check the light source. If the
images are too dark, try to increase
the light intensity, and vice versa.
The camera may be out of order. Please
contact us for service.
NUCLi7370T6
UME-0018-01
NED
55
7.2 Noise on Image
The camera has been used for 3 or
Noise is present from
No
more
the beginning.
years,
or
the
ambient
No
temperature is higher than room
temperature.
Yes
Yes
A
servomotor
or
a
No
magnetic valve is placed
There are some consumable parts
near the camera.
in the camera. Please contact us
for service.
Yes
Turning on a servomotor
or
a
magnetic
valve
The power supply has been used for
No
3 or more years, or the ambient
generates noise.
No
temperature is higher than room
temperature.
Yes
Yes
Prevent
the
Check the deterioration of the
noise
power supply.
source from disturbing
the camera cables and
the power cable.
The camera, the camera cables and
No
the power source cable are in
swinging motion.
Yes
Check the deterioration of the
camera cables and the power
supply cable.
The camera may be out of order.
Please contact us for service.
To next page
C
UME-0018-01
NUCLi7370T6
56
NED
C
No
Cables are asymmetric e.g. thin cables.
Yes
Only one of the connectors of an asymmetric
camera cable can be connected with the camera.
(Labeled as “Camera side”)
The camera cables are too long.
No
Yes
Use camera cables in accordance with the
transmission rate. The cables should not be
too long in order to avoid noise disturbance.
The power source has no fluctuation in voltage and is not deteriorated.
No
Yes
Use a stable power supply.
When the camera gain is on a
high level, bright spots occur
without incident light.
No
Yes
Secondary
radiation
(rays)
could cause bright spots, but
The camera may be out of order. Please
contact us for service.
this is not a malfunction.
NUCLi7370T6
UME-0018-01
NED
57
7.3 Camera becomes hot
The consumption current of the
power supply is larger than the
No
rating.
Yes
No
The camera is too hot to touch.
Yes
The camera will become hotter than the
ambient temperature while in operation
because of self-heating. Allow sufficient
air circulation around the camera to give
it a longer life.
Keep the ambient temperature within
the range the specifications specify.
The camera may be out of order. Please
contact us for service.
UME-0018-01
NUCLi7370T6
58
NED
8 NCCtrl
8.1 Overview
NCCtrl is software designed for line scan cameras that support the NED camera control protocol
(NCCP). This software enables you to remotely control line scan cameras from a PC.
The following interface connections are available:
1) COM port (RS232C)
2) Camera Link
8.2 System Requirements
PC:
PC/AT compatible
OS:
Microsoft Windows series ( 9x / NT / 2000 / XP )
Free disk space: 1 MB – 2 MB
(The required size may vary depending on the number of camera setting files)
The following system environment is required for the respective interfaces.
For COM port (RS232C) connection:
1) COM port that is compatible with the hardware and OS
2) RS232C cross cable (Dsub9s – Dsub9s)
Dsub9p
Dsub9s
1
Dsub9s
Dsub9p
1
1
RxD
2
RxD
2
2
RxD
2
RxD
TxD
3
TxD
3
3
TxD
3
TxD
4
4
4
GND
5
1
4
5
5
6
6
6
6
7
7
7
7
8
8
8
8
9
9
9
9
GND
PC side
GND
RS232C cross cable
5
GND
Camera side
For Camera Link connection:
1) Camera Link compatible frame grabber board and device driver must be installed.
The DLL file for Camera Link API provided by the frame grabber manufacturer must be
included. For details, ask the frame grabber manufacturer.
2) Camera Link compatible cable
NUCLi7370T6
UME-0018-01
NED
59
8.3 Installaton
Insert the FD or CD-ROM (or other media) provided by NED into your PC.
Copy the NCCtrl folder into the desired location in your hard disk drive.
Note: In case you copy from CD-ROM you should cancel the read only attribute.
8.4 Uninstall
1) Delete NCCtrl folder and all data files that included in that folder.
8.5 Operation
8.5.1 General description
8.5.2 Starting NCCtrl
Start Windows Explorer and double-click the NCCtrl02.exe icon.
UME-0018-01
NUCLi7370T6
60
NED
There are some buttons in the tool-bar. The function of each button is follows.
A B
C
D
E
F
G
A: Open a camera setting file (*.ini file)
B: Export the parameters to text file (*.txt file)
C: Load the parameters from a text file (*.txt file)
D: Connect to the camera.
E: Disconnect from the camera
F: Communication settings
G: Version information.
8.5.3 Open the control setting file
1) Click on tool-bar button “A”.
2) Select the appropriate setting file (*.ini file) and click on the "Open" button.
3) The setting is loaded, and each control parameter is initialized.
Note: If the parameters displayed are gray, this indicates that the camera does not support
the function.
NCCtrl memorizes automatically the setting file name that was last opened.
This file is automatically opened when NCCtrl is booted up.
NUCLi7370T6
UME-0018-01
NED
61
8.5.4 Selecting interface and Timeout setting
8.5.4.1 Selecting interface
1) Click tool-bar button F.
2) Select the desired interface in the Drop-down-list-box.
3) Using the “Detailed setting” button, you can change the interface setting.
4) Click on the “OK” button to complete this operation. Click on the “Cancel” button to cancel this
operation.
Note: NCCtrl memorizes settings automatically. So you do not have to repeat this operation every
time.
8.5.4.2 Setting the COM port
1) Set each item as follows. (NED standard)
Unless in cases where different settings have been specified.
UME-0018-01
NUCLi7370T6
62
NED
(1) Port: Select connecting port.
(2) Bits per Second: 9600
(3) Data bits: 8
(4) Parity: None
(5) Stop bits: 1
(6) Flow control: None
Note: Other parameter should not be used.
2) Click on the “OK” button to complete this operation.
Click on the “Cancel” button to cancel this operation.
Note: NCCtrl memorize settings automatically. So you do not have to repeat this operation every time.
8.5.4.3 Setting Camera Link
1) Enter the DLL file name of Camera Link API in the edit-box, or click “Browse” button and select
DLL file.
2) Enter value corresponding to the position of Camera Link cable to connect into the “Serial Index”
column.
NUCLi7370T6
UME-0018-01
NED
63
3) Click on the “OK” button to complete this operation.
Click on the “Cancel” button to cancel this operation.
Note: NCCtrl memorize settings automatically. So you do not have to repeat this operation every
time.
Frame grabber manufacturers provide the DLL file for Camera Link API.
Some frame grabber boards are connected directly to the PC’s COM port.
In this case, set the interface to COM port (RS232C).
For details, please inquire with the frame grabber manufacturer.
8.5.4.4 Setting Timeout
1) Enter timeout values to each edit-box in milliseconds.
Click "Default" button to restore all timeout values to default settings.
The meanings of each timeout are as follows.
First Receive:Maximum time, allowed to arrival of first characters after command transmission.
Next Receive :Maximum time, allowed to elapse between the arrival of two characters.
Send
:Maximum time, allowed to completing of command transmission.
2) Click on the “OK” button to save the setting.
Click on the “Cancel” button to cancel the setting.
Note: NCCtrl memorizes settings automatically. So you do not have to repeat this operation every
time.
UME-0018-01
NUCLi7370T6
64
NED
8.5.5 Connect
Click on tool-bar button D. Then you can control the camera.
8.5.6 Disconnect and exit program
Click on tool-bar button E. Then click the “X” button in the top right of the window.
8.5.7 Check the contents of communication
Click on the "Console" tab at the bottom of the window to confirm the settings.
8.5.8 Export Parameters to text file
1) Click on tool-bar button B.
NUCLi7370T6
UME-0018-01
NED
65
2) Input the desired file name and click on the “Save” button. The current settings value of each
item is saved in text format.
8.5.9 Import Parameters from text file
1) Select menu “File” – “Text Load”
2) Select the file name and click on the “Open” button.
Each command written in the text file is executed sequentially.
8.6 Control
The controllable functions and range of values differ for every camera.
For details, refer to the camera specifications. (Section.4)
UME-0018-01
NUCLi7370T6
66
NED
8.6.1 Gain and Offset
Enter the value directly into the edit-box or click on the spin-button to set the value.
Then, click on the “Send” button to send the command to the camera.
NUCLi7370T6
UME-0018-01
NED
67
8.6.2 Clock, Video output, Video shift, Exposure mode
Every time you choose from the Drop-down-list-box, the command is sent to the camera.
8.6.3 Exposure time
Enter the value in the edit-box and click the “Send” button to send the command to the camera.
8.6.4 Binning
Every time you click the Check-box, the command is sent to the camera.
8.6.5 Camera Memory
a) “Load”: Load data from camera memory
b) “Save”: Save data into camera memory
c) “Factory default”: Restore camera memory data to factory settings.
UME-0018-01
NUCLi7370T6
68
NED
8.6.6 Calibration
a) ”Calib Black”: Acquisition of black data (When you do this please cover the lens.)
b) ”Calib White”: Acquisition of white data.
c) “Data reflect”: Save the calibration data to camera memory and apply the data.
d) “Level”: Enter the value directly in the edit-box or click the spin-button to set the value.
Then, click the “Send” button to send the command to the camera.
e) “Mode”: Every time you choose from the Drop-down-list-box, the command is sent to the camera.
8.6.7 Level Correction
a) “Minimum”: Enter the value directly in the edit-box or click the spin-button to set the value.
Then, click the “Send” button to send the command to the camera.
b) “Maximum”: Enter the value directly in the edit-box or click the spin-button to set the value.
Then, click the “Send” button to send the command to the camera.
c) “Enable”: Every time you click the Check box, the command is sent to the camera.
8.6.8 Test Pattern
Every time you choose from the Drop-down-list-box, the command is sent to the camera.
NUCLi7370T6
UME-0018-01
NED
69
8.6.9 Line Delay
Enter the value directly in the edit-box or click the spin-button to set the value.
Then, click the “Send” button to send the command to the camera.
8.6.10 Auto White Balance
① Set the target value of each RGB channel by entering “WBrxxx”, “WBgxxx”, “WBbxxx”
respectively in the edit box of the console panel. Each time, click the “send” button.
② Input “WB” and click the “send” button to run auto white balance.
③ Click the “save” button to save the target value (gain setting value) in the camera’s internal
memory to complete auto white balance.
UME-0018-01
NUCLi7370T6
70
NED
8.6.11 Pixel Correction Reference Setting
① Set the target value of each RGB channel by entering “Murxxx”, “Mugxxx”, “Mubxxx” respectively
in the edit box of the console panel in the case of User1 Pixel Correction. Each time click the
“send” button.
② Input “W” and click the “send” button to run auto white balance.
③ Input “L“ and click the “save” button to save the target value (gain setting value) in the camera’s
internal memory to complete auto white balance.
8.7 Software Upgrades
When you received the newest software from NED,
Please execute the following procedure.
8.7.1 NCCtrl upgrades
1) Check the old version of NCCtrl is not in operation.
2) Uninstall old version. (See “4.Uninstall”)
3) Install new version. (See “3.Software installation”)
NUCLi7370T6
UME-0018-01
NED
71
8.7.2 Adding/Replacing control setting file
1) Check the old version of NCCtrl is not in operation.
2) Copy the control setting file(*.ini) to NCCtrl¥Camconf folder.
8.7.3 Adding/Replacing the interface Plug-in
1) Check the old version of NCCtrl is not in operation.
2) Copy the Plug-in file (*.dll) to the NCCtrl folder.
8.8.Data Transmission Programming
To make your own communication program, please refer to the sample programs in
NCCtrl¥SampleProgram folder.
8.9 NCCtrl Troubleshooting
8.9.1 You can not change the exposure time with NCCtrl
Cause:If these items are gray, the camera does not have a function to change exposure time.
Solution:First, change the exposure mode to “External Trigger”with NCCtrl.
Then, provide a periodic trigger signal to the camera from the frame grabber board.
Please refer to the frame grabber board specifications.
In this case, the trigger signal period is equal to exposure time.
8.10 Attention on use
1) Reproducing and distributing without notice part or all of this software and this manual is
prohibited.
2) Reverse engineering, decompiling, disassembling and modifying without notice part or all of this
software is prohibited.
3) The specification of this software and the contents of this manual may be changed by NED at any
time without notice.
UME-0018-01
NUCLi7370T6
72
NED
9 Others
9.1 Notice
l No part of this document may be reproduced in any form, in whole or in part, without the
expressed written consent of NED.
l Contents of this document are subject to change without prior notice.
l Every care has been taken in the preparation of this User’s Manual. If you should discover any
errors or omissions, please notify your nearest NED representative.
9.2 Contact for support
Nippon Electro-Sensory Devices Corporation
Head Office
2-5-12, Itachibori, Nishi-ku, Osaka 550-0012, Japan
Phone +81-6-6534-5300
Fax +81-6-6534-6080
Tokyo Branch
Jiburaruta Seimei Oi BLDG., Room No.402
1-45-2, Oi, Shinagawa-ku, Tokyo 140-0014, Japan
Phone +81-3-5718-3181
Fax +81-3-5718-0331
Nishi-Nippon Branch
1-8-28 Enokida, Hakata-ku, Fukuoka 812-0004, Japan
Phone +81-92-451-9333
Fax +81-92-451-9335
URL
http://ned-sensor.co.jp/
E-Mail
[email protected]
NUCLi7370T6
UME-0018-01
NED
73
9.3 Product Support
If there is still a problem with your camera after checking it in accordance with the
troubleshooting guide, turn off the power and call your NED representative.
In such case, please inform us of the status of the camera. You can get the status by
executing the “sta” command.
The example of the camera status.
sta
>OK
>Type=NUCLi7370T6
>Ver.=1.00
>r280
>g220
>b310
>grfo254
>grfe246
>grro262
>grre261
>ggfo197
>ggfe192
>ggro201
>ggre205
>gbfo278
>gbfe283
>gbro291
>gbre284
>q8
>o8
>p8
>orfo8
>orfe8
>orro8
>orre8
>ogfo8
>ogfe8
>ogro8
UME-0018-01
NUCLi7370T6
74
NED
>ogre8
>obfo8
>obfe8
>obro8
>obre8
>d4
>v0
>t0
>C1
>MFr760
>MFg760
>MFb760
>MUr760
>MUg760
>MUb760
>MVr760
>MVg760
>MVb760
>T0
>rev0
>WBr684
>WBg684
>WBb684
>i56
>sta
NUCLi7370T6
UME-0018-01
NED
75
Revision History
Revision Number
Date
Changes
01
9 Mar. 2012
Initial release
UME-0018-01
NUCLi7370T6