1
Gigaset R410H PRO / UK / A31008-M2154-R901-1-7619 / Cover_front.fm / 21.08.2012
Gigaset R410H PRO / UK / A31008-M2154-R901-1-7619 / Cover_front.fm / 21.08.2012
www.InternetVoipPhone.co.uk | [email protected] | 0800 088 48 46
Gigaset R410H PRO / IM1 eng / A31008-M2154-R901-1-7619 / overview.fm / 21.08.2012
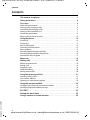
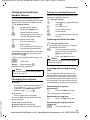
The handset at a glance
The handset at a glance
1 Display in idle status
2 Charge status of the batteries
= e V U (flat to full)
= flashes: batteries almost flat
e V U flashes: batteries charging
3 Display keys (
page 15)
4 Message key
Access to calls and message lists;
Flashes: new message or new call
5 End call key, On/Off key
End call, cancel function, go back one menu
level (press briefly), back to idle status
(press and hold), activate/deactivate handset
(press and hold in idle status)
6 Hash key
Keypad lock on/off (press and hold in
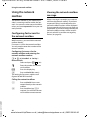
idle status);
Toggle between upper/lower case and digits
7 Call-by-call list key
Open call-by-call list
8 Connection socket for headset (
page 12)
9 Microphone
10 Recall key
- Consultation call (flash)
- Insert a dialling pause (press and hold)
11 Star key
Ring tone on/off (press and hold),
With an open connection: switch between dial
pulsing/touch tone dialling (press briefly);
Text input: Open table of special characters
12 Key 1
Dial network mailbox (press and hold)
13 Talk key
Answer a call, open last number redial list
(press briefly), start dialling (press and hold)
14 Handsfree key
Switch between handset and handsfree mode;
Lights up: handsfree activated;
Flashes: incoming call
page 14)
15 Control key (
16 Eco Mode enabled (
page 25)
page 25)
17 Eco Mode + enabled (
¢
17
16
¼
½
V
1
2
INT 1
01.10.09
INT
09:45
SMS
¢
3
15
14
4
13
5
12
11
6
10
7
9
Version 4.1, 21.11.2007
8
¢
¢
¢
1
www.InternetVoipPhone.co.uk | [email protected] | 0800 088 48 46
Gigaset R410H PRO / IM1 eng / A31008-M2154-R901-1-7619 / R410HIVZ.fm / 21.08.2012
Contents
Contents
The handset at a glance . . . . . . . . . . . . . . . . . . . . . . . . . . . . . . . . . . . . . . . . . . . . 1
Safety precautions . . . . . . . . . . . . . . . . . . . . . . . . . . . . . . . . . . . . . . . . . . . . . . . . . 4
First steps . . . . . . . . . . . . . . . . . . . . . . . . . . . . . . . . . . . . . . . . . . . . . . . . . . . . . . . . . 5
Check the pack contents . . . . . . . . . . . . . . . . . . . . . . . . . . . . . . . . . . . . . . . . . . . . . . . . . . . . . . 5
Setting up the charging cradle . . . . . . . . . . . . . . . . . . . . . . . . . . . . . . . . . . . . . . . . . . . . . . . . 6
Connecting the charging cradle . . . . . . . . . . . . . . . . . . . . . . . . . . . . . . . . . . . . . . . . . . . . . . . 6
Setting up the handset for use . . . . . . . . . . . . . . . . . . . . . . . . . . . . . . . . . . . . . . . . . . . . . . . . 7
Connecting the headset . . . . . . . . . . . . . . . . . . . . . . . . . . . . . . . . . . . . . . . . . . . . . . . . . . . . . 12
What would you like to do next? . . . . . . . . . . . . . . . . . . . . . . . . . . . . . . . . . . . . . . . . . . . . . . 13
Using the phone . . . . . . . . . . . . . . . . . . . . . . . . . . . . . . . . . . . . . . . . . . . . . . . . . . 14
Control key . . . . . . . . . . . . . . . . . . . . . . . . . . . . . . . . . . . . . . . . . . . . . . . . . . . . . . . . . . . . . . . . . .
Display keys . . . . . . . . . . . . . . . . . . . . . . . . . . . . . . . . . . . . . . . . . . . . . . . . . . . . . . . . . . . . . . . . .
Keys on the keypad . . . . . . . . . . . . . . . . . . . . . . . . . . . . . . . . . . . . . . . . . . . . . . . . . . . . . . . . . .
Correcting incorrect entries . . . . . . . . . . . . . . . . . . . . . . . . . . . . . . . . . . . . . . . . . . . . . . . . . .
Menu guidance . . . . . . . . . . . . . . . . . . . . . . . . . . . . . . . . . . . . . . . . . . . . . . . . . . . . . . . . . . . . . .
Activating/deactivating the handset . . . . . . . . . . . . . . . . . . . . . . . . . . . . . . . . . . . . . . . . . .
Activating/deactivating the keypad lock . . . . . . . . . . . . . . . . . . . . . . . . . . . . . . . . . . . . . .
Illustration in the user guide . . . . . . . . . . . . . . . . . . . . . . . . . . . . . . . . . . . . . . . . . . . . . . . . . .
14
15
15
15
15
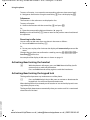
16
16
17
Menu tree . . . . . . . . . . . . . . . . . . . . . . . . . . . . . . . . . . . . . . . . . . . . . . . . . . . . . . . . 18
Making calls . . . . . . . . . . . . . . . . . . . . . . . . . . . . . . . . . . . . . . . . . . . . . . . . . . . . . . 19
Making an external call . . . . . . . . . . . . . . . . . . . . . . . . . . . . . . . . . . . . . . . . . . . . . . . . . . . . . .
Ending a call . . . . . . . . . . . . . . . . . . . . . . . . . . . . . . . . . . . . . . . . . . . . . . . . . . . . . . . . . . . . . . . . .
Accepting a call . . . . . . . . . . . . . . . . . . . . . . . . . . . . . . . . . . . . . . . . . . . . . . . . . . . . . . . . . . . . . .
Handsfree talking . . . . . . . . . . . . . . . . . . . . . . . . . . . . . . . . . . . . . . . . . . . . . . . . . . . . . . . . . . . .
Making internal calls . . . . . . . . . . . . . . . . . . . . . . . . . . . . . . . . . . . . . . . . . . . . . . . . . . . . . . . . .
19
19
19
20
20
Using the directory and lists . . . . . . . . . . . . . . . . . . . . . . . . . . . . . . . . . . . . . . . 21
Directory/call-by-call list . . . . . . . . . . . . . . . . . . . . . . . . . . . . . . . . . . . . . . . . . . . . . . . . . . . . . 21
Last number redial list . . . . . . . . . . . . . . . . . . . . . . . . . . . . . . . . . . . . . . . . . . . . . . . . . . . . . . . 23
Opening lists with the message key . . . . . . . . . . . . . . . . . . . . . . . . . . . . . . . . . . . . . . . . . . 23
Using the network mailbox . . . . . . . . . . . . . . . . . . . . . . . . . . . . . . . . . . . . . . . 24
Configuring fast access for the network mailbox . . . . . . . . . . . . . . . . . . . . . . . . . . . . . . 24
Viewing the network mailbox message . . . . . . . . . . . . . . . . . . . . . . . . . . . . . . . . . . . . . . . 24
ECO DECT . . . . . . . . . . . . . . . . . . . . . . . . . . . . . . . . . . . . . . . . . . . . . . . . . . . . . . . . 25
Setting the alarm clock . . . . . . . . . . . . . . . . . . . . . . . . . . . . . . . . . . . . . . . . . . . 25
Version 4.1, 21.11.2007
Using a handset as a room monitor . . . . . . . . . . . . . . . . . . . . . . . . . . . . . . . . 25
2
www.InternetVoipPhone.co.uk | [email protected] | 0800 088 48 46
Gigaset R410H PRO / IM1 eng / A31008-M2154-R901-1-7619 / R410HIVZ.fm / 21.08.2012
Contents
Handset settings . . . . . . . . . . . . . . . . . . . . . . . . . . . . . . . . . . . . . . . . . . . . . . . . . 27
Quick access to functions . . . . . . . . . . . . . . . . . . . . . . . . . . . . . . . . . . . . . . . . . . . . . . . . . . . .
Changing the display language . . . . . . . . . . . . . . . . . . . . . . . . . . . . . . . . . . . . . . . . . . . . . .
Setting the display . . . . . . . . . . . . . . . . . . . . . . . . . . . . . . . . . . . . . . . . . . . . . . . . . . . . . . . . . . .
Setting the screen picture . . . . . . . . . . . . . . . . . . . . . . . . . . . . . . . . . . . . . . . . . . . . . . . . . . . .
Setting the display lighting . . . . . . . . . . . . . . . . . . . . . . . . . . . . . . . . . . . . . . . . . . . . . . . . . . .
Activating/deactivating auto answer . . . . . . . . . . . . . . . . . . . . . . . . . . . . . . . . . . . . . . . . .
Changing the handsfree/handset volume . . . . . . . . . . . . . . . . . . . . . . . . . . . . . . . . . . . . .
Changing the ring tone . . . . . . . . . . . . . . . . . . . . . . . . . . . . . . . . . . . . . . . . . . . . . . . . . . . . . .
Activating/deactivating advisory tones . . . . . . . . . . . . . . . . . . . . . . . . . . . . . . . . . . . . . . .
Restoring the handset default settings . . . . . . . . . . . . . . . . . . . . . . . . . . . . . . . . . . . . . . . .
27
27
27
28
28
28
29
29
30
30
Customer Service . . . . . . . . . . . . . . . . . . . . . . . . . . . . . . . . . . . . . . . . . . . . . . . . . 31
Questions and answers . . . . . . . . . . . . . . . . . . . . . . . . . . . . . . . . . . . . . . . . . . . . . . . . . . . . . . 31
Authorisation . . . . . . . . . . . . . . . . . . . . . . . . . . . . . . . . . . . . . . . . . . . . . . . . . . . . . . . . . . . . . . . . 31
Environment . . . . . . . . . . . . . . . . . . . . . . . . . . . . . . . . . . . . . . . . . . . . . . . . . . . . . 32
Appendix . . . . . . . . . . . . . . . . . . . . . . . . . . . . . . . . . . . . . . . . . . . . . . . . . . . . . . . . 33
Care . . . . . . . . . . . . . . . . . . . . . . . . . . . . . . . . . . . . . . . . . . . . . . . . . . . . . . . . . . . . . . . . . . . . . . . . .
Contact with liquid . . . . . . . . . . . . . . . . . . . . . . . . . . . . . . . . . . . . . . . . . . . . . . . . . . . . . . . . . .
Specifications . . . . . . . . . . . . . . . . . . . . . . . . . . . . . . . . . . . . . . . . . . . . . . . . . . . . . . . . . . . . . . . .
Writing and editing text . . . . . . . . . . . . . . . . . . . . . . . . . . . . . . . . . . . . . . . . . . . . . . . . . . . . . .
33
33
33
34
Accessories . . . . . . . . . . . . . . . . . . . . . . . . . . . . . . . . . . . . . . . . . . . . . . . . . . . . . . . 35
Mounting the charging cradle to the wall . . . . . . . . . . . . . . . . . . . . . . . . . . 35
Version 4.1, 21.11.2007
Index . . . . . . . . . . . . . . . . . . . . . . . . . . . . . . . . . . . . . . . . . . . . . . . . . . . . . . . . . . . . 36
3
www.InternetVoipPhone.co.uk | [email protected] | 0800 088 48 46
Gigaset R410H PRO / IM1 eng / A31008-M2154-R901-1-7619 / security.fm / 21.08.2012
Safety precautions
Safety precautions
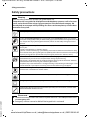
Warning
Read the safety precautions and the user guide before use.
Comprehensive user guides for all telephones and telephone systems as well as for accessories can be found online at http://gigaset.com/pro in the Downloads category. We
thereby help to save paper while providing fast access to the complete up-to-date documentation at any time.
Use only the power adapter indicated on the device.
Use only rechargeable batteries that correspond to the specification. Never use a conventional (non-rechargeable) battery or other battery types as this could result in significant health
risks and personal injury. Rechargeable batteries, which are noticeably damaged, must be
replaced.
Using your telephone may affect nearby medical equipment. Be aware of the technical conditions in your
particular environment, e.g. doctor's surgery.
If you use a medical device (e.g. a pacemaker), please contact the device manufacturer. They
will be able to advise you regarding the susceptibility of the device to external sources of high
frequency energy (for the specifications of your Gigaset product see "Technical Data").
Do not hold the rear of the handset to your ear when it is ringing or when speaker mode is activated. Otherwise you risk serious and permanent damage to your hearing.
Your Gigaset is compatible with the majority of digital hearing aids on the market. However,
perfect function with all hearing aids cannot be guaranteed.
The phone may cause interference in analogue hearing aids (humming or whistling) or cause
them to overload. If you require assistance, please contact the hearing aid supplier.
The base and charger are not splashproof. For this reason do not install them in a damp environment such as bathrooms or shower rooms.
Do not use the devices in environments with a potential explosion hazard (e.g. paint shops).
If you give your Gigaset to a third party, make sure you also give them the user guide.
Remove faulty devices from use or have them repaired by our Service team, as these could
interfere with other wireless services.
Please note
Version 4.1, 21.11.2007
u The device cannot be used in the event of a power failure. It is also not possible to trans-
mit emergency calls.
u Emergency numbers cannot be dialled if the keypad lock is activated!
4
www.InternetVoipPhone.co.uk | [email protected] | 0800 088 48 46
Gigaset R410H PRO / IM1 eng / A31008-M2154-R901-1-7619 / starting.fm / 21.08.2012
First steps
First steps
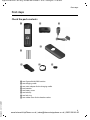
Check the pack contents
1
2
3
5
4
6
7
8
Version 4.1, 21.11.2007
1 one Gigaset R410H PRO handset
2 one charging cradle
3 one mains adapter for the charging cradle
4 two batteries
5 one battery cover
6 one belt clip
7 one lock ring
8 one rubber cover for the headset socket
5
www.InternetVoipPhone.co.uk | [email protected] | 0800 088 48 46
Gigaset R410H PRO / IM1 eng / A31008-M2154-R901-1-7619 / starting.fm / 21.08.2012
First steps
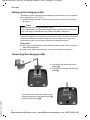
Setting up the charging cradle
The charging cradle is designed to be operated in enclosed, dry areas at temperatures ranging from +5°C to +45°C.
¤ Place the charging cradle on a level, non-slip surface or mount it on the wall
¢ page 35.
Please
Pay attention to the range of the base station.
This is up to 300 m in unobstructed outdoor areas and up to 50 m inside buildings. The range is reduced when eco mode is activated (¢ page 25).
The phone's feet do not usually leave any marks on surfaces. However, due to the
multitude of different varnishes and polishes used on today's furnishings, the
occurrence of marks on the surfaces cannot be completely ruled out.
Please note:
u Never expose the telephone to the influence of heat sources, direct sunlight or
other electrical devices.
u Protect your Gigaset from moisture, dust, corrosive liquids and vapours.
Connecting the charging cradle
2
¤ Connect the flat plug of the mains
1
adapter 1.
¤ Plug the mains adapter into the plug
socket 2.
2
Version 4.1, 21.11.2007
If you need to disconnect the plug from the
charging cradle, press the release button 1
and disconnect the plug 2.
1
6
www.InternetVoipPhone.co.uk | [email protected] | 0800 088 48 46
Gigaset R410H PRO / IM1 eng / A31008-M2154-R901-1-7619 / starting.fm / 21.08.2012
First steps
Setting up the handset for use
The display and control key are protected by a plastic film.
Please remove the protective film!
Inserting the batteries and closing the battery cover
Warning
Only use the rechargeable batteries (¢ page 33) recommended by Gigaset
Communications GmbH. Never use conventional (non-rechargeable) batteries,
as this could result in significant health risks and damage to property. For example, the outer casing of the batteries could be destroyed or the batteries could
explode. The phone could also malfunction or be damaged as a result of using
batteries that are not of the recommended type.
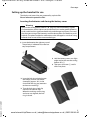
¤ Insert the batteries the right way round.
The polarity is indicated in/on the battery compartment.
b
¤ Hold the battery cover at a slight
¤
angle and push it onto the casing,
bottom first a.
Then press the cover b until it
clicks into place.
a
¤ Insert the lock ring or belt clip into
Version 4.1, 21.11.2007
¤
the battery cover as illustrated
(rotated by approx. 20°). In the
case of the lock ring, pay attention
to the arrow markings.
Turn the lock ring or belt clip
clockwise to the end stop.
When the markings on the ring
and cover are aligned, the lock
ring is closed.
7
www.InternetVoipPhone.co.uk | [email protected] | 0800 088 48 46
Gigaset R410H PRO / IM1 eng / A31008-M2154-R901-1-7619 / starting.fm / 21.08.2012
First steps
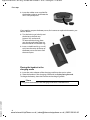
¤ Insert the rubber cover supplied for
the headset socket to guarantee the
unit is still splashproof.
If you need to re-open the battery cover, for instance to replace the batteries, proceed as follows:
¤ Turn the lock ring or belt clip anticlockwise to the end stop
(approx. 20°) and remove.
To remove the lock ring, place
your thumb and index finger on
the two notches on the lock ring.
¤ Insert a suitable tool (e.g. a small
coin) into the cavity at the top of
the battery cover and twist until
the cover opens.
Placing the handset in the
charging cradle
¤ Insert the mains adapter of the charging cradle into the mains socket.
¤ Place the handset in the charging cradle with its display facing forward.
To charge the battery, leave the handset in the charging cradle.
Please
Version 4.1, 21.11.2007
Only place the handset in the charging cradle that is intended for it.
8
www.InternetVoipPhone.co.uk | [email protected] | 0800 088 48 46
Gigaset R410H PRO / IM1 eng / A31008-M2154-R901-1-7619 / starting.fm / 21.08.2012
First steps
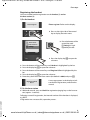
Registering the handset
You must initiate handset registration on the handset (1) and on
the base station (2).
1)On the handset
Please register
Please register flashes on the display.
¤ Press on the right side of the control
key to display the main menu.
¤ Press the bottom of the
ì Alarm Clock
í Add. Features
Ð Settings
Ý
control key until
Ð Settings is highlighted by the bar.
OK
¤ Press the display key §OK§ to open the
submenu.
¤ Press the bottom of the control key until Handset is highlighted by the bar.
¤ Press the display key §OK§ to open the submenu.
¤ Press the bottom of the control key until Register H/Set is highlighted by the
bar.
¤ Press the display key §OK§ to open the submenu.
¤ Enter the system PIN of the base station (the default is 0000) and press §OK§.
Regstr.Procedure
Base 1
A message appears in the display to indicate that the registration procedure has
started.
2) On the base station
¤ Within 60 seconds, press and hold the registration/paging key on the base station (approx. 3 seconds).
Version 4.1, 21.11.2007
Following successful registration, the internal number of the handset is displayed,
e.g. INT 1.
If registration was unsuccessful, repeat the process.
9
www.InternetVoipPhone.co.uk | [email protected] | 0800 088 48 46
Gigaset R410H PRO / IM1 eng / A31008-M2154-R901-1-7619 / starting.fm / 21.08.2012
First steps
First battery charge and discharge
The correct charge status can only be displayed once the battery is first fully
charged and discharged.
¤ Place the handset in the charging cradle for six
hours.
6h
¤ Once the battery is fully
charged, remove the handset from the charging cradle
and do not put it back again
until the battery is fully discharged.
Please
u After the first battery charge and discharge, you may place your handset in
the charging cradle after every call.
u Always repeat the charging and discharging procedure if you remove the
battery from the handset and reinsert it.
u The battery may warm up during charging. This is not dangerous.
u After a time, the charge capacity of the battery will decrease for technical
Version 4.1, 21.11.2007
reasons.
10
www.InternetVoipPhone.co.uk | [email protected] | 0800 088 48 46
Gigaset R410H PRO / IM1 eng / A31008-M2154-R901-1-7619 / starting.fm / 21.08.2012
First steps
Setting the date and time
Set the date and time so that the correct date and time can be assigned to incoming
calls, and so that the alarm can be used.
Time
time, press the key below §Time§ on
the display screen to open the input
field.
¤ The active line is marked [...].
Date/Time
Enter day, month and year as a
6-digit number via the keypad, e.g.
Q
Q QO for 01/
10/2009.
Date
[01.10.09]
Time
00:00
Ý
¤ If you have not yet set the date and
Save
¤ Press the bottom of the control key
to scroll down to enter the time.
¤ Enter the hours and minutes as a 4-
Date/Time
digit number via the keypad, e.g.
Q M 5 for 07:15 AM.
Version 4.1, 21.11.2007
Date
01.10.09
Time
[07:15]
Ý
Save
Ý
Save
¤ Press the key below §Save§ on the display screen to save the settings.
11
www.InternetVoipPhone.co.uk | [email protected] | 0800 088 48 46
Gigaset R410H PRO / IM1 eng / A31008-M2154-R901-1-7619 / starting.fm / 21.08.2012
First steps
Display in idle status
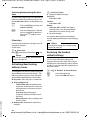
Once the phone is registered and the time set, the idle display is shown as in this
example.
Displays
¼
½
Eco Mode + activated (¢ page 25)
Eco Mode activated (¢ page 25)
Charge status of the batteries:
= e V U (flat to full)
= flashes: batteries almost flat
INT 1 Internal name of the handset
¼
½
V
INT 1
01.10.09
INT
07:15
SMS
If Eco Mode + (¢ page 25) is not activated, the top left of the display shows the
strength of the radio contact between the base station and the handset:
u Good to poor: Ð i Ñ Ò
u No reception: | flashes
Your phone is now ready for use!
Connecting the headset
Version 4.1, 21.11.2007
After removing the rubber cover, you can
connect a headset to the underside of your
telephone with the 2.5 mm jack connector.
See the relevant product page at
www.gigaset.com for information on
recommended headsets.
After using the headset, always replace the
rubber cover.
12
www.InternetVoipPhone.co.uk | [email protected] | 0800 088 48 46
Gigaset R410H PRO / IM1 eng / A31008-M2154-R901-1-7619 / starting.fm / 21.08.2012
First steps
What would you like to do next?
Now you have successfully started your Gigaset, you will probably want to adapt it
to your personal requirements. Use the following guide to quickly locate the most
important subjects.
If you are unfamiliar with menu-driven devices such as other Gigaset telephones
you should first read the section entitled "Using the phone" ¢ page 14.
Information on ...
Eco Mode / Eco Mode +
Setting the ring tone and volume
Setting the handset volume
Transferring directory entries from existing
Gigaset handsets to the new handset(s)
... is located here.
g
g
g
g
¢ page 25
¢ page 29
¢ page 29
¢ page 22
Version 4.1, 21.11.2007
If you have any questions about using your phone, please read the tips
on troubleshooting ("Questions and Answers" ¢ page 31) or contact
our customer service department (Customer Care ¢ page 31).
13
www.InternetVoipPhone.co.uk | [email protected] | 0800 088 48 46
Gigaset R410H PRO / IM1 eng / A31008-M2154-R901-1-7619 / starting.fm / 21.08.2012
Using the phone
Using the phone
Control key
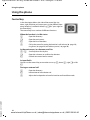
In the description below, the side of the control key (up,
down, right, left) that you have to press in the different operating situations is marked in black, e.g. v for "press right on
the control key".
The control key has a number of different functions:
When the handset is in idle status
s
v
u
t
Open the directory.
Open the main menu.
Open the list of handsets.
Call up the menu for setting the handset's call volume (¢ page 29),
ring tones (¢ page 29) and advisory tones (¢ page 30).
In the main menu, in submenus and lists
t/s
v
u
Scroll up/down line by line.
Open the submenu or confirm the selection.
Go back one menu level or cancel.
In input fields
You can use the control key to move the cursor up t, down s, right v or left
u.
During an external call
Version 4.1, 21.11.2007
s
u
t
Open the directory.
Initiate internal consultation cal.
Adjust the loudspeaker volume for handset and handsfree mode.
14
www.InternetVoipPhone.co.uk | [email protected] | 0800 088 48 46
Gigaset R410H PRO / IM1 eng / A31008-M2154-R901-1-7619 / starting.fm / 21.08.2012
Using the phone
Display keys
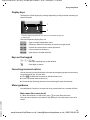
The functions of the display keys change depending on the particular operating situation. Example:
INT
SMS
1
2
1 Current display key functions are shown in the bottom display line.
2 Display keys
The most important display keys are:
§§§Options§§
Open a context-dependent menu.
W
Delete key: delete one character at a time from right to left.
Î
Go back one menu level or cancel operation.
Ó
Copy number into directory.
•
Open the last number redial list.
Keys on the keypad
c / Q / * etc.
Press the matching key on the handset.
~
Enter digits or letters.
Correcting incorrect entries
You can correct incorrect characters in the text by navigating to the incorrect entry
using the control key. You can then:
u Press X to delete the character to the left of the cursor
u Insert a character next to the cursor
u Overwrite the (flashing) character when entering the time and date etc.
Menu guidance
Your telephone's functions are accessed using a menu that has a number of levels.
Main menu (first menu level)
¤ When the handset is in idle status, press v to open the main menu.
Version 4.1, 21.11.2007
The main menu functions are shown in the display as a list with colour icons and
names.
15
www.InternetVoipPhone.co.uk | [email protected] | 0800 088 48 46
Gigaset R410H PRO / IM1 eng / A31008-M2154-R901-1-7619 / starting.fm / 21.08.2012
Using the phone
To access a function, i.e. to open the corresponding submenu (next menu level):
¤ Navigate to the function using the control key q. Press the display key §OK§.
Submenus
The functions in the submenus are displayed as lists.
To access a function:
¤ Scroll to the function with the control key q and press §OK§.
Or:
¤ Enter the corresponding digit combination (¢ page 18).
Briefly press the end call key a once to return to the previous menu level/cancel
the operation.
Reverting to idle status
You can revert to idle status from anywhere in the menu as follows:
¤ Press and hold the end call key a.
Or:
¤ Do not press any key: after 2 minutes the display will automatically revert to idle
status.
Changes that you have not confirmed or saved by pressing §OK§, §Yes§, §Save§, §Send§ or
Save Entry §OK§ will be lost.
An example of the display in idle status is shown on page 12.
Activating/deactivating the handset
a
With the phone in idle status, press and hold the end call key (confirmation tone) to switch off the handset.
Press and hold the end call key again to switch the handset on.
Activating/deactivating the keypad lock
Version 4.1, 21.11.2007
The keypad lock prevents any inadvertent use of the phone.
#
Press and hold the hash key in idle status to activate or deactivate the
keypad lock. You will hear the confirmation tone.
When the keypad lock is activated you will see the Ø icon in the display and a message when you press a key.
The keypad lock deactivates automatically when you receive a call. It is reactivated
when the call is finished.
16
www.InternetVoipPhone.co.uk | [email protected] | 0800 088 48 46
Gigaset R410H PRO / IM1 eng / A31008-M2154-R901-1-7619 / starting.fm / 21.08.2012
Using the phone
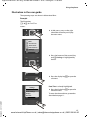
Illustration in the user guide
The operating steps are shown in abbreviated form.
Example
The illustration:
v ¢ Ð ¢ Date/Time
means:
¤ In idle status, press on the right
side of the control key to display
the main menu.
î SMS
ê Sel. Services
ì Alarm Clock
í Add. Features
Ð Settings
Ý
OK
¤ Press the bottom of the control key
until Ð Settings is highlighted by
the bar.
Ý
OK
¤ Press the display key §OK§ to open the
submenu.
Date/Time is already highlighted.
¤ Press the display key §OK§ to open the
function menu.
To enter the date and time, proceed as
described on page 11.
Settings
Date/Time
Audio Settings
Display
Handset
Version 4.1, 21.11.2007
Ý
OK
17
www.InternetVoipPhone.co.uk | [email protected] | 0800 088 48 46
Gigaset R410H PRO / IM1 eng / A31008-M2154-R901-1-7619 / menuetree.fm / 21.08.2012
Menu tree
Menu tree
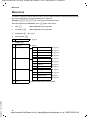
Instead of scrolling to locate a menu function, you can select a function more quickly by opening
the menu and keying in a digit combination (or shortcut).
Example: v 5 2 2
for "Set ring tone for external calls".
With the telephone in idle status, press v (open main menu):
1
SMS î
(Menu dependent on base station)
2
Sel. Services ê
(Menu dependent on base station)
3
Alarm Clock ì
4
Add. Features í
4-3 Room Monitor
5
Settings Ð
5-1 Date/Time
5-2 Audio Settings
5-3 Display
5-4 Handset
Version 4.1, 21.11.2007
5-5 Base
¢ page 25
¢ page 25
¢ page 11
5-2-1
Handset Volume
5-2-2
Ringer Settings
5-2-3
Advisory Tones
5-2-4
Silent Alert
5-3-1
Screen Picture
5-3-2
Colour Scheme
5-3-3
Contrast
5-3-4
Lighting
5-4-1
Language
5-4-2
Auto Answer
5-4-3
Register H/Set
5-4-4
Reset Handset
¢ page 29
¢ page 29
¢ page 30
¢ page 30
¢ page 28
¢ page 27
¢ page 27
¢ page 28
¢ page 27
¢ page 28
¢ page 9
¢ page 30
(Submenu dependent on base station)
18
www.InternetVoipPhone.co.uk | [email protected] | 0800 088 48 46
Gigaset R410H PRO / IM1 eng / A31008-M2154-R901-1-7619 / telefony.fm / 21.08.2012
Making calls
Making calls
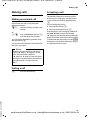
Making an external call
External calls are calls using the public
telephone network.
~c
Enter the number and press the
talk key.
Or:
c~
Press and hold the talk key c
and then enter the number.
You can cancel the dialling operation with
the end call key a.
You are shown the duration of the call while
the call is in progress.
Accepting a call
The handset indicates an incoming call in
three ways: by ringing, by a display on the
screen and by the flashing handsfree key
d.
You can accept the call by:
¤ Pressing the talk key c.
¤ Pressing the handsfree key d.
If the handset is in the charging cradle and
the Auto Answer function is activated
(¢ page 28), the handset will automatically
accept a call when you lift it out of the cradle.
To deactivate the ring tone, press the §Silence§
display key. You can accept the call as long as
it is displayed on the screen.
Please
Dialling using the directory, the call-bycall list (¢ page 1/ ¢ page 21) or the
calls and last number redial list
(¢ page 23/¢ page 23) saves you from
having to re-enter numbers and network
provider prefixes ("call-by-call numbers").
Ending a call
Version 4.1, 21.11.2007
a
Press the end call key.
19
www.InternetVoipPhone.co.uk | [email protected] | 0800 088 48 46
Gigaset R410H PRO / IM1 eng / A31008-M2154-R901-1-7619 / telefony.fm / 21.08.2012
Making calls
Handsfree talking
Making internal calls
In handsfree mode, instead of holding the
handset to your ear you can put it down, for
example on the table in front of you. This
allows others to participate in the call.
Internal calls to other handsets registered to
the same base station are free of charge.
Activating/deactivating handsfree
mode
Activating while dialling
~d
¤
Enter the number and press the
handsfree key.
You should inform your caller before you
use the handsfree function so that they
know someone else is listening.
Switching between handset and
handsfree mode
Version 4.1, 21.11.2007
d
Press the handsfree key.
Activate/deactivate handsfree during a call.
If you wish to place the handset in the charging cradle during a call:
¤ Press and hold the handsfree key d
while placing the handset in the base station. If handsfree key d does not light
up, press the key again.
For instructions on how to adjust the loudspeaker volume, ¢ page 29.
Calling a specific handset
u
~
Or:
u
s
c
Initiate internal call.
Enter the number of the handset.
Initiate internal call.
Select handset.
Press the talk key.
Calling all handsets ("group call")
u
*
Initiate internal call.
Press the star key. All handsets
are called.
Ending a call
a
Press the end call key.
20
www.InternetVoipPhone.co.uk | [email protected] | 0800 088 48 46
Gigaset R410H PRO / IM1 eng / A31008-M2154-R901-1-7619 / direct_charges.fm / 21.08.2012
Using the directory and lists
Using the directory and
lists
The options are:
u Directory
u Call-by-call list
u Last number redial list
u SMS list
u Calls list
You create the directory and call-by-call list
for your own individual handset. You can
also send lists/entries to other handsets
(¢ page 22).
Directory/call-by-call list
You can save a total of 150 entries in the
directory and call-by-call list.
Please
For quick access to a number from the
directory (shortcut), you can assign the
number to a key.
In the directory you can save numbers and
corresponding names.
¤ With the handset in idle status, open the
directory by pressing the s key.
In the call-by-call list, you can save network
provider prefixes
("call-by-call numbers").
¤ Open the call-by-call list in idle status by
pressing the C key.
Length of the entries
Version 4.1, 21.11.2007
Number:
Name:
max. 32 digits
max. 16 characters
Storing a number in the directory
s ¢ New Entry
¤ Change multiple line input:
Number
Enter the number.
Name
Enter name.
Shortcut
Select key for shortcut.
¤ Save the changes.
Storing a number in the call-by-call
list
C ¢ New Entry
¤ Change multiple line input:
Number
Enter the number.
Name
Enter name.
Order of directory entries
The directory entries are usually sorted in
alphabetical order. Spaces and digits take
first priority. The sort order is as follows:
1. Space
2. Digits (0–9)
3. Letters (alphabetical)
4. Other characters
To work round the alphabetical order of the
entries, insert a space or a digit in front of the
name. These entries will then move to the
beginning of the directory.
Selecting entries in the directory
and call-by-call list
s/C
Open the directory or call-bycall list.
You have the following options:
u Use s to scroll through the entries until
the required name is selected.
u Enter the first character of the name and
scroll to the entry using s if required.
21
www.InternetVoipPhone.co.uk | [email protected] | 0800 088 48 46
Gigaset R410H PRO / IM1 eng / A31008-M2154-R901-1-7619 / direct_charges.fm / 21.08.2012
Using the directory and lists
Dialling with the directory/call-bycall list
s/C
c
¢ s (select entry)
Press the talk key. The number is
dialled.
Managing directory/call-by-call
entries
s/C
¢ s (select entry)
Viewing entries
§View§
Press the display key. The entry
is displayed.
Back with §OK§.
Editing an entry
§View§ §Edit§
¤
Press the display keys one after
the other.
Carry out changes and save.
Using other functions
§Options§
Version 4.1, 21.11.2007
Press the display key.
The following functions can be selected with
q:
Display Number
To edit or add to a saved number, or to
save it as a new entry, press Ó after
the number is displayed.
Edit Entry
Edit selected entry.
Delete Entry
Delete selected entry.
VIP Entry (directory only)
Mark a directory entry as a VIP (Very
Important Person) and assign a specific
ring tone to it. You can then recognise
important calls from the ring tone.
Precondition: Calling Line Identification.
Copy Entry
Send a single entry to a handset
(¢ page 22).
Delete List
Delete all entries in the directory/call-bycall list.
Copy List
Send complete list to a handset
(¢ page 22).
Available Memory
Display the available entries in the directory and call-by-call list (¢ page 21).
Using shortcut keys
¤ Press and hold the required shortcut key
(¢ page 21).
Sending the directory/call-by-call
list to another handset
Preconditions:
u The sending and receiving handsets must
both be registered to the same base station.
u The other handset and the base station
can send and receive directory entries.
s / C ¢ s (select entry) ¢ §Options§
(open menu) ¢ Copy Entry / Copy List
s
Select the internal number of
the receiving handset and press
§OK§.
You can transfer several individual entries
one after the other by responding §Yes§ to the
Copy next entry? prompt.
A successful transfer is confirmed by a message and confirmation tone on the receiving
handset.
Please note:
u Entries with identical numbers are not
overwritten on the receiving handset.
u The transfer is cancelled if the phone
rings or if the memory of the receiving
handset is full.
22
www.InternetVoipPhone.co.uk | [email protected] | 0800 088 48 46
Gigaset R410H PRO / IM1 eng / A31008-M2154-R901-1-7619 / direct_charges.fm / 21.08.2012
Using the directory and lists
Copying a displayed number to the
directory
Managing entries in the last
number redial list
Numbers displayed in a list, e.g. the calls list
or the last number redial list, or during a call
can be copied to the directory.
If you have CNIP, the first 16 characters of the
transmitted name are copied to the Name
line.
A number is displayed:
§Options§ ¢ Copy to Directory
¤ Complete the entry (¢ page 21).
c
s
Copying a number from the
directory
There are many operating situations in
which you can open the directory, e.g. to
copy a number. Your handset need not be in
idle status.
¤ Depending on the operating situation,
open the directory with s or Ò
or ¨ Directory.
q
Select entry (¢ page 21).
Last number redial list
The last number redial list contains the
twenty numbers last dialled with the handset (max. 32 digits). If a number is in the
directory or the call-by-call list, then the corresponding name will be displayed.
Press the key briefly.
Select entry.
§Options§
Open menu.
The following functions can be selected with
q:
Display Number
(as in the directory ¢ page 22)
Copy to Directory
Copy an entry to the directory
(¢ page 21).
Delete Entry
(as in the directory ¢ page 22)
Delete List
(as in the directory ¢ page 22)
Opening lists with the
message key
An advisory tone sounds as soon as a
new message arrives in a list. The f key
flashes (it goes off when the key is pressed).
In idle status, the display shows an icon for
the new message.
If you press the message key f, you access
the lists that contain new messages.
Manual last number redial
c
s
c
Version 4.1, 21.11.2007
Press the key briefly.
Select entry.
Press the talk key again.
The number is dialled.
When a name is displayed, you can display
the corresponding phone number by pressing the display key §View§.
23
www.InternetVoipPhone.co.uk | [email protected] | 0800 088 48 46
Gigaset R410H PRO / IM1 eng / A31008-M2154-R901-1-7619 / T-NetBox_SAG.fm / 21.08.2012
Using the network mailbox
Using the network
mailbox
The network mailbox is your network provider's answering machine within the network. You cannot use the network mailbox
unless you have requested it from your network provider.
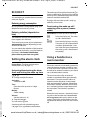
Configuring fast access for
the network mailbox
Viewing the network mailbox
message
When a message is recorded, you receive a
call from the network mailbox. If you have
requested Calling Line Identification, the
network mailbox number will be displayed.
If you accept the call, the new messages are
played back. If you do not accept the call, the
network mailbox number will be saved in
the missed calls list and the message key
flashes (¢ page 23).
With fast access, you can dial the network
mailbox directly.
Fast access is set for the network mailbox.
You only need to enter the number of the
network mailbox.
Configuring fast access for the
network mailbox and entering the
network mailbox number
v ¢ Ð ¢ Voice Mail ¢ Set Key 1
Network Mailb.
Select and press §OK§ ( ‰ = on).
~
Enter the number for the network mailbox.
§Save§
Press the display key.
a
Press and hold (idle status).
The setting for fast access applies to all
Gigaset R410H PRO handsets.
Calling the network mailbox
Version 4.1, 21.11.2007
d
Press and hold. You are connected directly to the network
mailbox.
Press handsfree key d if
required. You will hear the network mailbox announcement.
24
www.InternetVoipPhone.co.uk | [email protected] | 0800 088 48 46
Gigaset R410H PRO / IM1 eng / A31008-M2154-R901-1-7619 / registr_sett.fm / 21.08.2012
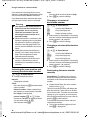
ECO DECT
ECO DECT
You are helping to protect the environment
with your Gigaset.
Reducing energy consumption
By using a power-saving adapter plug, your
telephone consumes less power.
Reducing radiation (dependent on
base)
The radiation can only be reduced if your
base supports this function.
The transmission power of your telephone is
automatically reduced depending on the
distance to the base.
You can reduce the radiation of the handset
and base even further by using Eco Mode or
Eco Mode+. For further information,
please refer to your base user guide.
Setting the alarm clock
Precondition: The date and time have
already been set (¢ page 11).
Version 4.1, 21.11.2007
Activating/deactivating the alarm
clock and setting the wake-up time
v¢ì
¤ Change multiple line input:
Activation
Select On or Off.
Time
Enter the wake-up time in 4-digit
format.
Melody:
Select melody.
Volume:
Set the volume (1–6).
¤ Save the changes.
You will see the ì icon.
A wake-up call with selected ring tone
(¢ page 29) is signalled on the handset.
The wake-up call sounds for 60 seconds. ì is
shown in the display. If no key is pressed, the
wake-up call is repeated twice at five minute
intervals and then switched off.
During a call, the wake-up call is only signalled by a short tone.
Deactivating the wake-up call/
repeating after a pause (snooze
mode)
Precondition: A wake-up call is sounding.
§OFF§
Press the display key. The wakeup call is deactivated.
or
§Snooze§
Press the display key or any key.
The wake-up call is deactivated
and then repeated after 5 minutes. After the second repetition
the wake-up call is deactivated
completely.
Using a handset as a
room monitor
If the room monitor is activated, a previously
saved destination number is called as soon
as a set noise level is reached. You can save
an internal or external number in your handset as the destination number.
The room monitor call to an external
number is terminated after approximately
90 seconds. The room monitor call to an
internal number (handset) is terminated
after approximately 3 minutes (depending
on the base station). When the room monitor is activated, all keys except the end call
key are locked. The handset's speaker is
muted.
When the room monitor is activated, incoming calls to the handset are indicated without a ring tone and are only shown on the
screen. The display and keypad are not illuminated and advisory tones are also turned
off.
25
www.InternetVoipPhone.co.uk | [email protected] | 0800 088 48 46
Gigaset R410H PRO / IM1 eng / A31008-M2154-R901-1-7619 / registr_sett.fm / 21.08.2012
Using a handset as a room monitor
If you accept an incoming call, the room
monitor is suspended for the duration of the
call, but the function remains activated.
If you deactivate then reactivate the handset, the room monitor remains activated.
Warning
u You should always check the opera-
tion of the room monitor before use.
For example, test its sensitivity.
Check the connection if you are
diverting the room monitor to an
external number.
u When the function is switched on, the
handset's operating time is considerably reduced. If necessary, place the
handset in the charging cradle. This
ensures that the batteries do not run
down.
u Ideally the handset should be positioned 1 to 2 metres away from the
baby. The microphone must be
directed towards the baby.
u The connection to which the room
monitor is diverted must not be
blocked by an activated answering
machine.
Version 4.1, 21.11.2007
Activating the room monitor and
entering the destination number
v ¢ í ¢ Room Monitor
¤ Change multiple line input:
Room M.
Select On to activate.
Call to
Press the display key §Edit§ and enter destination number.
External number: Select number from
the directory or enter directly. Only the
last 4 digits are displayed.
Internal number: §INT§ ¢ s (Select
handset or Call All if all registered handsets are to be called) ¢ §OK§.
Store number with §Save§.
Level
Set noise level sensitivity (Low or High).
¤ Press §Save§ to save the settings.
Changing a set external
destination number
v ¢ í ¢ Room Monitor
s
Scroll to the Call to line.
§Edit§
Press the display key.
X
Delete existing number.
¤ Enter number as described in "Activating
the room monitor and entering the destination number" (¢ page 26).
¤ Press §Save§ to save the settings.
Changing a set internal destination
number
v ¢ í ¢ Room Monitor
s
Scroll to the Call to line.
§Delete§
Press the display key.
§Edit§
Press the display key.
¤ Enter number as described in "Activating
the room monitor and entering the destination number" (¢ page 26).
¤ Press §Save§ to save the settings.
Deactivating the room monitor
remotely
Preconditions: The phone must support
touch tone dialling and the room monitor
should be set for an external destination
number.
¤ Accept the call from the room monitor
and press keys 9 ;.
The room monitor function will deactivate
after the call ends. There will be no further
room monitor calls. The other room monitor
settings (e.g. no ring tone) on the handset
will remain activated until you press the display key §OFF§ on the handset.
To reactivate the room function with the
same phone number:
¤ Turn on the activation again and save
with §Save§ (¢ page 26).
26
www.InternetVoipPhone.co.uk | [email protected] | 0800 088 48 46
Gigaset R410H PRO / IM1 eng / A31008-M2154-R901-1-7619 / registr_sett.fm / 21.08.2012
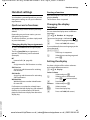
Handset settings
Handset settings
Your handset is preconfigured, but you can
change the settings to suit your individual
requirements.
Quick access to functions
The display keys have a function preset by
default.
Depending on your base station, you can
change the assignment.
To start the function, you then simply need
to press the button.
Changing display key assignments
¤ Press and hold the left or right display
key.
The list of possible key assignments is
opened. The following can be selected
(example):
INT
Internal calls (¢ page 20).
SMS
Assign menu for SMS functions to a key.
SMS Service
Assign key with the menu for ordering
info services.
SMS Notific.
Assign key with the menu for activating
SMS notification.
Withhold No.
Withhold phone number identification
for next call.
Version 4.1, 21.11.2007
If a function or number has already been
assigned to the left display key, the selected
function (or its abbreviation) will be displayed in the lowest display line above the
display key.
Starting a function
With the handset in idle status, press the display key briefly.
The function menu is opened.
Changing the display
language
You can view the display texts in different
languages.
v ¢ Ð ¢ Handset ¢ Language
The current language is indicated by ‰ .
s
Select a language and press §OK§.
a
Press and hold (idle status).
If you accidentally choose a language you do
not understand:
v 5 4
Press keys in sequence.
s
Select the correct language and
press §OK§.
Setting the display
You have a choice of four colour schemes
and several different contrasts.
v ¢ Ð ¢ Display
Colour Scheme
Select and press §OK§.
s
Select a colour scheme and
press §OK§ ( ‰ = current colour).
a
Press briefly.
Contrast Select and press §OK§.
r
Select contrast.
§Save§
Press the display key.
a
Press and hold (idle status).
27
www.InternetVoipPhone.co.uk | [email protected] | 0800 088 48 46
Gigaset R410H PRO / IM1 eng / A31008-M2154-R901-1-7619 / registr_sett.fm / 21.08.2012
Handset settings
Setting the screen picture
Setting the display lighting
You can display a screen picture (picture or
digital clock) when the handset is in idle status. This will replace the idle status display. It
may conceal the date, time and name.
The screen picture is not displayed in certain
situations, e.g. during a call or when the
handset has been de-registered.
If a screen picture has been activated,
the menu item Screen Picture is marked
with ‰ .
v ¢ Ð ¢ Display ¢ Screen Picture
The current setting is displayed.
¤ Change multiple line input:
Activation
Select On (screen picture is displayed) or
Off (no screen picture).
Selection:
Change screen picture if necessary (see
below).
¤ Save the changes.
If the screen picture conceals the display,
briefly press a to show the idle display
with time and date.
Depending on whether or not the handset is
in the charging cradle, you can activate or
deactivate the lighting. If it is activated, the
display is permanently dimmed.
v ¢ Ð ¢ Display ¢ Lighting
The current setting is displayed.
¤ Change multiple line input:
In Charger
Select On or Off.
Outside Charger
Select On or Off.
Changing the screen picture
Version 4.1, 21.11.2007
v ¢ Ð ¢ Display ¢ Screen Picture
s
Scroll to the Selection line.
§View§
Press the display key. The active
screen picture is displayed.
s
Select screen picture and
press §Save§.
¤ Save the changes.
Please
With the On setting, the standby time of
the handset can be significantly reduced.
§Save§
a
Press the display key.
Press and hold (idle status).
Activating/deactivating auto
answer
If you activate this function, when you
receive a call you can simply lift the handset
out of the charging cradle without having to
press the talk key c.
v ¢ Ð ¢ Handset
Auto Answer
Select and press §OK§ ( ‰ = on).
a
Press and hold (idle status).
28
www.InternetVoipPhone.co.uk | [email protected] | 0800 088 48 46
Gigaset R410H PRO / IM1 eng / A31008-M2154-R901-1-7619 / registr_sett.fm / 21.08.2012
Handset settings
Changing the handsfree/
handset volume
You can set the loudspeaker volume for
handsfree talking to five different levels and
the handset volume to three different levels.
t ¢ Handset Volume
r
Set the handset volume.
s
Scroll to the Speaker line.
r
Set the handsfree volume.
§Save§
Press display key if necessary to
save the setting permanently.
Setting the volume during a call:
t
Press the control key.
r
Select volume.
§Save§
Press display key if necessary to
save the setting permanently.
The setting will automatically be saved after
approximately 3 seconds, if not then press
the display key §Save§.
If t is assigned with another function, e.g.
toggling:
§Options§
Open menu.
Volume
Select and press §OK§.
Configure setting (see above).
Please
You can also change this setting via the
menu (¢ page 18).
Changing the ring tone
Version 4.1, 21.11.2007
u Volume:
You can choose between five volumes (1–
5; e.g. volume 2 = ˆ) and the
"crescendo" ring (6; volume increases
with each ring = ‰).
u Ring tones:
You can select various ring tones.
You can set different ring tones for the following functions:
u Ext. Calls: for external calls
u Internal Calls: for internal calls
u All: the same ring tone for all functions
Settings for individual functions
Set the volume and melody depending on
the type of signalling required.
t ¢ Ringer Settings
q
Select setting, e.g. Ext. Calls and
press §OK§.
r
Set volume (1–6).
s
Scroll to the next line.
r
Select melody.
§Save§
Press the display key to save the
setting.
Same ring tone for all functions
t ¢ Ringer Settings ¢ All
¤ Set volume and ring tone (see "Settings
for individual functions").
§Save§
Press the display key and confirm the security prompt with
§Yes§ to save the setting.
a
Press and hold (idle status).
Please
You can also change this setting via the
menu (¢ page 18).
Activating/deactivating the ring
tone
You can deactivate the ring tone on your
handset before you answer a call or when
the handset is in idle status; the ring tone
can be deactivated permanently or just for
the current call. The ring tone cannot be reactivated while an external call is in progress.
Deactivating the ring tone
permanently
*
Press and hold the star key.
The Ú icon appears in the display.
Reactivating the ring tone
*
Press and hold the star key.
Deactivating the ring tone for the
current call
§Silence§
Press the display key.
29
www.InternetVoipPhone.co.uk | [email protected] | 0800 088 48 46
Gigaset R410H PRO / IM1 eng / A31008-M2154-R901-1-7619 / registr_sett.fm / 21.08.2012
Handset settings
Activating/deactivating the alert
tone
In place of the ring tone you can activate an
alert tone. When you receive a call, you will
hear a short tone ("Beep") instead of the ring
tone.
*
Press and hold the star key and
within 3 seconds:
§Beep§
Press the display key. A call will
now be signalled by one short
alert tone. º appears in the
display.
Silent alert
Incoming calls and other messages are indicated by a vibration.
In idle status:
t ¢ Silent Alert
Press §OK§ to activate or deactivate ( ‰ = on).
Please
You can also change this setting via the
menu (¢ page 18).
Version 4.1, 21.11.2007
Activating/deactivating
advisory tones
Your handset uses advisory tones to tell you
about different activities and statuses. The
following advisory tones can be activated/
deactivated independently of each other:
u Key tones: every key press is confirmed.
u Acknowledge tones:
– Confirmation tone (ascending tone
sequence): at the end of an entry/setting and when a new entry arrives in
the calls list
– Error tone (descending tone
sequence): when you make an incorrect entry
– Menu end tone: when scrolling to the
end of a menu
u Battery tone: the batteries need to be
charged.
t ¢ Advisory Tones
¤ Change multiple line input:
Key Tones
Select On or Off.
Confirm.
Select On or Off.
Battery
Select On, Off or In Call. The battery
warning tone is only activated/deactivated and only sounds during a call.
¤ Save the changes.
You cannot deactivate the confirmation
tone for placing the handset in the charging
cradle.
Please
You can also change this setting via the
menu (¢ page 18).
Restoring the handset
default settings
You can reset individual settings and
changes that you have made. This will not
affect entries in the directory, call-by-call list
or calls list, nor the handset's registration to
the base station.
v ¢ Ð ¢ Handset ¢ Reset Handset
§Yes§
Press the display key.
a
Press and hold (idle status).
30
www.InternetVoipPhone.co.uk | [email protected] | 0800 088 48 46
Gigaset R410H PRO / IM1 eng / A31008-M2154-R901-1-7619 / appendix.fm / 21.08.2012
Customer Service
Customer Service
Questions? For rapid assistance, refer to this
user guide or visit www.gigaset.com/pro.
The trade outlet where you bought your
PABX will be happy to help with further
questions relating to your Gigaset Professional PABX.
Questions and answers
If you have any questions about the use of
your phone, visit us at any time at
www.gigaset.com/service. The table below
contains a list of common problems and
possible solutions.
The display is blank.
¥
1. The handset is not switched on.
Press and hold the end call key a.
¥
2. The batteries are flat.
Charge or replace the batteries
page 7).
(
¢
You hear an error tone when keying an input
(a descending tone sequence).
¥
Action has failed/invalid input.
Repeat the operation.
Watch the display and refer to the user guide if
necessary.
Authorisation
This device is intended for use within the
European Economic Area and Switzerland. If
used in other countries, it must first be
approved nationally in the country in
question.
Country-specific requirements have been
taken into consideration.
We, Gigaset Communications GmbH,
declare that this device meets the essential
requirements and other relevant regulations
laid down in Directive 1999/5/EC.
A copy of the 1999/5/EC Declaration of Conformity is available at this Internet address:
www.gigaset.com/docs
"Base x" flashes on the display.
1. The handset is outside the range of the base
station.
Move the handset closer to the base station.
¥
The base station's range is reduced because
eco mode is activated.
Deactivate eco mode (
page 25) or
reduce the distance between the handset
and the base station.
¥
¢
¥
2. The base station is not switched on.
Check the base station mains adapter.
Please register flashes on the display.
Handset has not been registered with the base
station or has been deregistered.
Register the handset (
page 9).
¥
¢
Handset does not ring.
¥
¢
Version 4.1, 21.11.2007
The ring tone is deactivated.
Activate the ring tone (
page 29).
31
www.InternetVoipPhone.co.uk | [email protected] | 0800 088 48 46
Gigaset R410H PRO / IM1 eng / A31008-M2154-R901-1-7619 / appendix.fm / 21.08.2012
Environment
Environment
Our environmental mission
statement
We, Gigaset Communications GmbH, carry
social responsibility and are actively committed to a better world. Our ideas, technologies and actions serve people, society and
the environment. The aim of our global
activity is to secure sustainable life resources
for humanity. We are committed to a responsibility for our products that comprises their
entire life cycle. The environmental impact
of products, including their manufacture,
procurement, distribution, use, service and
disposal, are already evaluated during product and process design.
Further information on environmentally
friendly products and processes is available
on the Internet under www.gigaset.com.
Environmental management
system
Version 4.1, 21.11.2007
Gigaset Communications
GmbH is certified pursuant
to the international standards ISO 14001 and
ISO 9001.
ISO 14001 (Environment): certified since
September 2007 by TüV SÜD Management
Service GmbH.
ISO 9001 (Quality): certified since 17/02/
1994 by TüV Süd Management Service
GmbH.
Disposal
Batteries should not be disposed of in general household waste. Observe the local
waste disposal regulations, details of which
can be obtained from your local authority or
the dealer you purchased the product from.
All electrical and electronic products should
be disposed of separately from the municipal waste stream via designated collection
facilities appointed by the government or
the local authorities.
This crossed-out wheeled
bin symbol on the product
means the product is covered by the European Directive 2002/96/EC.
The correct disposal and separate collection
of your old appliance will help prevent
potential negative consequences for the
environment and human health. It is a precondition for reuse and recycling of used
electrical and electronic equipment.
For more detailed information about disposal of your old appliance, please contact
your local council refuse centre or the original supplier of the product.
32
www.InternetVoipPhone.co.uk | [email protected] | 0800 088 48 46
Gigaset R410H PRO / IM1 eng / A31008-M2154-R901-1-7619 / appendix.fm / 21.08.2012
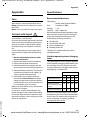
Appendix
Appendix
Specifications
Recommended batteries
Care
Wipe the base station and handset with a
damp cloth (do not use solvent) or an antistatic cloth.
Never use a dry cloth. This can cause static.
Contact with liquid
!
Version 4.1, 21.11.2007
Your handset is splash proof.
If it comes into contact with water, knock the
water out of the microphone opening and
remove any water on the handset with an
absorbent cloth. Your handset is ready for
use.
If your handset comes into contact with a
larger amount of liquid take the following
steps:
1. Do not switch the handset on under
any circumstances!
2. Remove the battery pack immediately.
3. Remove the headset socket cover.
4. Hold the handset horizontally with the
open battery compartment facing down.
5. Hold the handset vertically. Tilt the handset backwards and forwards slightly, giving it a gentle shake each time.
6. Dab all parts dry and then leave the
handset for at least 72 hours with the
battery compartment open and the keypad facing down in a dry, warm place (not
in a microwave, oven or similar).
When it has fully dried out, you will normally
be able to use it again.
In rare cases, contact with chemicals may
lead to changes in the surface of the phone.
Due to the large number of chemicals available on the market, it has not been possible
to test all substances.
Technology:
Nickel-metal-hydride (NiMH)
Size:
AAA (Micro, HR03)
Voltage:
1.2 V
Capacity: 600 - 1200 mAh
We recommend the following battery types,
because these are the only ones that guarantee the specified operating times, full
functionality and long service life:
u GP 700 mAh
u Yuasa Phone 700 mAh
u Yuasa AAA 800 mAh
u Peacebay 650 mAh
The device is supplied with two recommended batteries.
Handset operating times/charging
times
The operating time of your Gigaset depends
on the capacity and age of the batteries and
the way they are used. (All times are maximum possible times and apply when the display lighting is switched off ).
Capacity (mAh) approx.
Standby time (hours)
500
700
900 1100
180
250
320
395
Talktime (hours)
9
12
16
19
Operating time for
1.5 hrs of calls per day
(hours)
80
115
150
180
Charging time (hours)
5
7
9
11
Due to the constant progression in battery
development, the list of recommended batteries in the FAQ section of the Gigaset Customer Care pages is regularly updated:
www.gigaset.com/service
33
www.InternetVoipPhone.co.uk | [email protected] | 0800 088 48 46
Gigaset R410H PRO / IM1 eng / A31008-M2154-R901-1-7619 / appendix.fm / 21.08.2012
Appendix
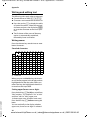
Writing and editing text
The following rules apply when writing text:
u Control the cursor with u v t s.
u Characters are inserted next to the cursor.
u Press the star key * to display the table
of special characters. Select the required
character and press the display key §Insert§
to insert the character at the cursor position.
u The first letter of the name of directory
entries is automatically capitalised,
followed by lower case letters.
Writing names
Press the relevant key several times to enter
letters/characters.
Standard characters
1x
2x
2)
1)
2 a b
3 d e
4 g h
5 j k
L m n
M p q
N t u
O w x
Q .
,
1) Space
2) Line break
3x
4x
5x
6x
7x
8x
9x 10x
1
c
f
i
l
o
r
v
y
?
2
3
4
5
6
s
8
z
!
ä
ë
ï
á
é
í
à
è
ì
â
ê
î
ã
ç
ö
7
ü
9
0
ñ
ß
ú
ÿ
ó
ò
ô
õ
ù
ý
û
æ
ø
å
When you press and hold a key, the characters of that key appear in the display and are
highlighted one after the other. When you
release the key, the highlighted character is
inserted into the input field.
Version 4.1, 21.11.2007
Setting upper/lower case or digits
Press the hash key # briefly to switch from
"Abc" mode to "123" and from "123" to "abc"
and from "abc" to "Abc" (upper case:
1st letter upper case, all others lower case).
Press the hash key # before entering the
letter.
You can see briefly in the display whether
upper case, lower case or digits is selected.
34
www.InternetVoipPhone.co.uk | [email protected] | 0800 088 48 46
Gigaset R410H PRO / IM1 eng / A31008-M2154-R901-1-7619 / appendix.fm / 21.08.2012
Mounting the charging cradle to the wall
Accessories
Ordering Gigaset products
You can order Gigaset products from your specialist retailer.
Only use original accessories. This will avoid possible health risks and damage to
property, and also ensure that all the relevant regulations are complied with.
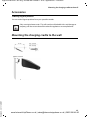
Mounting the charging cradle to the wall
21 mm
Version 4.1, 21.11.2007
approx. 2.5 mm
35
www.InternetVoipPhone.co.uk | [email protected] | 0800 088 48 46
Gigaset R410H PRO / IM1 eng / A31008-M2154-R901-1-7619 / R410HSIX.fm / 21.08.2012
Index
Index
A
Accepting a call . . . . . . . . . . . . . . . . . . . . . . . 19
Accessories . . . . . . . . . . . . . . . . . . . . . . . . . . . 35
Acknowledge tones . . . . . . . . . . . . . . . . . . . 30
Activating
advisory tones . . . . . . . . . . . . . . . . . . . . . . 30
call acceptance . . . . . . . . . . . . . . . . . . . . . 28
handset . . . . . . . . . . . . . . . . . . . . . . . . . . . . 16
keypad lock . . . . . . . . . . . . . . . . . . . . . . . . 16
room monitor . . . . . . . . . . . . . . . . . . . . . . 26
Advisory tones . . . . . . . . . . . . . . . . . . . . . . . . 30
Alarm clock . . . . . . . . . . . . . . . . . . . . . . . . . . . 25
Alert tone . . . . . . . . . . . . . . . . . . . . . . . . . . . . 30
Answering machine, see also
Network mailbox
Assigning
key . . . . . . . . . . . . . . . . . . . . . . . . . . . . . . . . 27
numerical keys . . . . . . . . . . . . . . . . . . . . . . 27
Authorisation . . . . . . . . . . . . . . . . . . . . . . . . . 31
Auto answer . . . . . . . . . . . . . . . . . . . . . . . 19, 28
B
Base station
setting up . . . . . . . . . . . . . . . . . . . . . . . . . . . .6
Battery
charging . . . . . . . . . . . . . . . . . . . . . . . . . 1, 10
display . . . . . . . . . . . . . . . . . . . . . . . . . . . . . . .1
icon . . . . . . . . . . . . . . . . . . . . . . . . . . . . . . . . . .1
inserting . . . . . . . . . . . . . . . . . . . . . . . . . . . . .7
recommended batteries . . . . . . . . . . . . . 33
tone . . . . . . . . . . . . . . . . . . . . . . . . . . . . . . . 30
Version 4.1, 21.11.2007
C
Call
ending . . . . . . . . . . . . . . . . . . . . . . . . . . . . . 19
external . . . . . . . . . . . . . . . . . . . . . . . . . . . . 19
internal . . . . . . . . . . . . . . . . . . . . . . . . . . . . 20
Call acceptance . . . . . . . . . . . . . . . . . . . . . . . 28
Call duration . . . . . . . . . . . . . . . . . . . . . . . . . . 19
Call-by-call
key . . . . . . . . . . . . . . . . . . . . . . . . . . . . . . . . . .1
list . . . . . . . . . . . . . . . . . . . . . . . . . . . . . . . . . 21
numbers . . . . . . . . . . . . . . . . . . . . . . . . . . . 21
Calling
external . . . . . . . . . . . . . . . . . . . . . . . . . . . . 19
internal . . . . . . . . . . . . . . . . . . . . . . . . . . . . 20
Care of the telephone . . . . . . . . . . . . . . . . . 33
Changing
destination number . . . . . . . . . . . . . . . . . 26
display language . . . . . . . . . . . . . . . . . . . . 27
handset volume . . . . . . . . . . . . . . . . . . . . 29
handsfree volume . . . . . . . . . . . . . . . . . . . 29
ring tone . . . . . . . . . . . . . . . . . . . . . . . . . . . 29
Charge status display . . . . . . . . . . . . . . . . . . . .1
Confirmation tone . . . . . . . . . . . . . . . . . . . . 30
Connecting the headset . . . . . . . . . . . . . . . 12
Control key . . . . . . . . . . . . . . . . . . . . . . . . . 1, 14
Correcting incorrect entries . . . . . . . . . . . . 15
Customer Care . . . . . . . . . . . . . . . . . . . . . . . . 31
D
Deactivating
advisory tones . . . . . . . . . . . . . . . . . . . . . . 30
call acceptance . . . . . . . . . . . . . . . . . . . . . 28
handset . . . . . . . . . . . . . . . . . . . . . . . . . . . . 16
keypad lock . . . . . . . . . . . . . . . . . . . . . . . . 16
room monitor . . . . . . . . . . . . . . . . . . . . . . 26
Delete key . . . . . . . . . . . . . . . . . . . . . . . . . . . . 15
Deleting characters . . . . . . . . . . . . . . . . . . . 15
Destination number (room monitor) . . . . 26
Dialling
call-by-call list . . . . . . . . . . . . . . . . . . . . . . 22
directory . . . . . . . . . . . . . . . . . . . . . . . . . . . 22
using shortcuts . . . . . . . . . . . . . . . . . . . . . 22
Dialling pause
entering . . . . . . . . . . . . . . . . . . . . . . . . . . . . . .1
Directory . . . . . . . . . . . . . . . . . . . . . . . . . . . . . 21
copying number from text . . . . . . . . . . . 23
managing entries . . . . . . . . . . . . . . . . . . . 22
opening . . . . . . . . . . . . . . . . . . . . . . . . . . . . 14
order of entries . . . . . . . . . . . . . . . . . . . . . 21
saving entry . . . . . . . . . . . . . . . . . . . . . . . . 21
sending entry/list to handset. . . . . . . . . 22
using to enter numbers . . . . . . . . . . . . . . 23
Display
changing display language . . . . . . . . . . 27
contrast . . . . . . . . . . . . . . . . . . . . . . . . . . . . 27
in idle status . . . . . . . . . . . . . . . . . . . . . . . . 16
lighting . . . . . . . . . . . . . . . . . . . . . . . . . . . . 28
memory (directory/call-by-call) . . . . . . 22
network mailbox message . . . . . . . . . . . 24
screen picture . . . . . . . . . . . . . . . . . . . . . . 28
setting . . . . . . . . . . . . . . . . . . . . . . . . . . . . . 27
wrong language . . . . . . . . . . . . . . . . . . . . 27
Display keys . . . . . . . . . . . . . . . . . . . . . . . . 1, 15
assigning . . . . . . . . . . . . . . . . . . . . . . . . . . . 27
Disposal . . . . . . . . . . . . . . . . . . . . . . . . . . . . . . 32
36
www.InternetVoipPhone.co.uk | [email protected] | 0800 088 48 46
Gigaset R410H PRO / IM1 eng / A31008-M2154-R901-1-7619 / R410HSIX.fm / 21.08.2012
Index
E
ECO DECT . . . . . . . . . . . . . . . . . . . . . . . . . . . . 25
End call key . . . . . . . . . . . . . . . . . . . . . . . . . 1, 19
Ending, call . . . . . . . . . . . . . . . . . . . . . . . . . . . 19
Ending, see Deactivate
Entry, selecting from directory . . . . . . . . . 21
Environment . . . . . . . . . . . . . . . . . . . . . . . . . . 32
Error tone . . . . . . . . . . . . . . . . . . . . . . . . . . . . 30
F
Fast access
network mailbox . . . . . . . . . . . . . . . . . . . . 24
G
Group call . . . . . . . . . . . . . . . . . . . . . . . . . . . . 20
Guarantee Certificate . . . . . . . . . . . . . . . . . . 32
H
Handset
activating/deactivating . . . . . . . . . . . . . . 16
advisory tones . . . . . . . . . . . . . . . . . . . . . . 30
contact with liquid . . . . . . . . . . . . . . . . . . 33
display language . . . . . . . . . . . . . . . . . . . . 27
display lighting . . . . . . . . . . . . . . . . . . . . . 28
handset volume . . . . . . . . . . . . . . . . . . . . 29
handsfree volume . . . . . . . . . . . . . . . . . . . 29
idle status . . . . . . . . . . . . . . . . . . . . . . . . . . 16
list . . . . . . . . . . . . . . . . . . . . . . . . . . . . . . . . . 14
mode . . . . . . . . . . . . . . . . . . . . . . . . . . . . . . 20
restoring to factory settings . . . . . . . . . . 30
screen picture . . . . . . . . . . . . . . . . . . . . . . 28
setting . . . . . . . . . . . . . . . . . . . . . . . . . . . . . 27
setting up . . . . . . . . . . . . . . . . . . . . . . . . . . . .7
using room monitor . . . . . . . . . . . . . . . . . 25
volume . . . . . . . . . . . . . . . . . . . . . . . . . . . . . 29
Handset operating time
in room monitor mode . . . . . . . . . . . . . . 26
Handsfree
key . . . . . . . . . . . . . . . . . . . . . . . . . . . . . . 1, 12
talking . . . . . . . . . . . . . . . . . . . . . . . . . . . . . 20
Hash key . . . . . . . . . . . . . . . . . . . . . . . . . . . 1, 16
Headset socket. . . . . . . . . . . . . . . . . . . . . . . . 12
Hearing aids . . . . . . . . . . . . . . . . . . . . . . . . . . . .4
Version 4.1, 21.11.2007
I
Icon
alarm clock . . . . . . . . . . . . . . . . . . . . . . . . .
for new messages . . . . . . . . . . . . . . . . . . .
keypad lock . . . . . . . . . . . . . . . . . . . . . . . .
ring tone . . . . . . . . . . . . . . . . . . . . . . . . . . .
25
23
16
29
Idle status (display) . . . . . . . . . . . . . . . . . . . . 16
Idle status, returning to . . . . . . . . . . . . . . . . 16
Incorrect input (correction) . . . . . . . . . . . . 15
Installing, base station . . . . . . . . . . . . . . . . . . .6
Internal call . . . . . . . . . . . . . . . . . . . . . . . . . . . 20
K
Key 1 (fast access) . . . . . . . . . . . . . . . . . . . . . . .1
Keypad lock . . . . . . . . . . . . . . . . . . . . . . . . . . 16
Keys
assigning directory entry . . . . . . . . . . . . 21
call-by-call. . . . . . . . . . . . . . . . . . . . . . . . . . . .1
control key . . . . . . . . . . . . . . . . . . . . . . . 1, 14
delete key . . . . . . . . . . . . . . . . . . . . . . . . . . 15
display keys . . . . . . . . . . . . . . . . . . . . . . 1, 15
end call key . . . . . . . . . . . . . . . . . . . . . . . 1, 19
fast access . . . . . . . . . . . . . . . . . . . . . . . . . . . .1
handsfree key . . . . . . . . . . . . . . . . . . . . 1, 12
hash key . . . . . . . . . . . . . . . . . . . . . . . . . 1, 16
message key . . . . . . . . . . . . . . . . . . . . . . . . . .1
on/off key . . . . . . . . . . . . . . . . . . . . . . . . . . . .1
recall key . . . . . . . . . . . . . . . . . . . . . . . . . . . . .1
shortcuts . . . . . . . . . . . . . . . . . . . . . . . . 21, 22
star key . . . . . . . . . . . . . . . . . . . . . . . . . . . . . .1
talk key . . . . . . . . . . . . . . . . . . . . . . . . . . 1, 19
L
Language, display . . . . . . . . . . . . . . . . . . . . .
Last number redial . . . . . . . . . . . . . . . . . . . .
Liquid . . . . . . . . . . . . . . . . . . . . . . . . . . . . . . . .
List
call-by-call list . . . . . . . . . . . . . . . . . . . . . .
handsets . . . . . . . . . . . . . . . . . . . . . . . . . . .
Lock
activating/deactivating keypad lock . .
27
23
33
21
14
16
M
Making calls
accepting a call . . . . . . . . . . . . . . . . . . . . . 19
external . . . . . . . . . . . . . . . . . . . . . . . . . . . . 19
internal . . . . . . . . . . . . . . . . . . . . . . . . . . . . 20
Manual last number redial . . . . . . . . . . . . . 23
Medical equipment . . . . . . . . . . . . . . . . . . . . .4
Memory
directory/call-by-call . . . . . . . . . . . . . . . . 22
Menu
end tone . . . . . . . . . . . . . . . . . . . . . . . . . . . 30
opening . . . . . . . . . . . . . . . . . . . . . . . . . . . . 14
overview . . . . . . . . . . . . . . . . . . . . . . . . . . . 18
prompting . . . . . . . . . . . . . . . . . . . . . . . . . 15
37
www.InternetVoipPhone.co.uk | [email protected] | 0800 088 48 46
Gigaset R410H PRO / IM1 eng / A31008-M2154-R901-1-7619 / R410HSIX.fm / 21.08.2012
Index
Message key . . . . . . . . . . . . . . . . . . . . . . . . . . . .1
opening lists . . . . . . . . . . . . . . . . . . . . . . . . 23
Microphone . . . . . . . . . . . . . . . . . . . . . . . . . . . .1
Specifications . . . . . . . . . . . . . . . . . . . . . . . . . 33
Star key . . . . . . . . . . . . . . . . . . . . . . . . . . . . . . . .1
N
Talk key . . . . . . . . . . . . . . . . . . . . . . . . . . . . 1, 19
Troubleshooting . . . . . . . . . . . . . . . . . . . . . . 31
Network mailbox . . . . . . . . . . . . . . . . . . . . . .
Network provider (numbers list) . . . . . . . .
Number
as destination for room monitor . . . . . .
copying from directory . . . . . . . . . . . . . .
copying to directory . . . . . . . . . . . . . . . . .
entering with directory . . . . . . . . . . . . . .
saving in the directory . . . . . . . . . . . . . . .
Numbers list
network provider . . . . . . . . . . . . . . . . . . .
24
21
26
23
23
23
21
21
O
On/Off key . . . . . . . . . . . . . . . . . . . . . . . . . . . . . .1
Order in directory . . . . . . . . . . . . . . . . . . . . . 21
P
T
V
Viewing the network mailbox
message . . . . . . . . . . . . . . . . . . . . . . . . .
VIP (directory entry) . . . . . . . . . . . . . . . . . . .
Volume
handset handsfree volume. . . . . . . . . . .
handset volume . . . . . . . . . . . . . . . . . . . .
ring tone . . . . . . . . . . . . . . . . . . . . . . . . . . .
setting . . . . . . . . . . . . . . . . . . . . . . . . . . . . .
24
22
29
29
29
29
W
Warning tone, see Advisory tones
Writing, editing text . . . . . . . . . . . . . . . . . . . 34
Pack contents . . . . . . . . . . . . . . . . . . . . . . . . . . .5
Power adapter . . . . . . . . . . . . . . . . . . . . . . . . . .4
Q
Questions and answers . . . . . . . . . . . . . . . . 31
R
Recall key . . . . . . . . . . . . . . . . . . . . . . . . . . . . . . .1
Ring tone
changing . . . . . . . . . . . . . . . . . . . . . . . . . . . 29
setting volume. . . . . . . . . . . . . . . . . . . . . . 29
Room monitor . . . . . . . . . . . . . . . . . . . . . . . . 25
Version 4.1, 21.11.2007
S
Screen picture . . . . . . . . . . . . . . . . . . . . . . . . 28
Searching in directory . . . . . . . . . . . . . . . . . 21
Sending directory entry to handset . . . . . 22
Sensitivity (room monitor) . . . . . . . . . . . . . 26
Service . . . . . . . . . . . . . . . . . . . . . . . . . . . . . . . 31
Setting
date . . . . . . . . . . . . . . . . . . . . . . . . . . . . . . . 11
time . . . . . . . . . . . . . . . . . . . . . . . . . . . . . . . 11
Setting up
handset . . . . . . . . . . . . . . . . . . . . . . . . . . . . . .7
Shortcut . . . . . . . . . . . . . . . . . . . . . . . . . . . . . . 18
Shortcuts . . . . . . . . . . . . . . . . . . . . . . . . . . . . . 21
Signal tone, see Advisory tones
Silent alert . . . . . . . . . . . . . . . . . . . . . . . . . . . . 30
Snooze mode . . . . . . . . . . . . . . . . . . . . . . . . . 25
Sound, see Ring tone
38
All rights reserved. Rights of modification reserved.
www.InternetVoipPhone.co.uk | [email protected] | 0800 088 48 46
Gigaset R410H PRO / UK / A31008-M2154-R901-1-7619 / Cover_back.fm / 21.08.2012
A31008-M2154-R901-1-7619
www.InternetVoipPhone.co.uk | [email protected] | 0800 088 48 46