1
SE 30
Touch less, battery-operates urinal flusher user manual
Use
When user comes within the sensing
area standing for about 1,5 seconds, the
flusher will automatically activate a 2
seconds pre-flush. When the user
leaves, the flusher will automatically
activate main flush for about 10 seconds
after-flush.
Simple manufacture, it includes one special valve, one filter and one flushing pipe.
Primary Application
Public places.
Technical Data
Working water pressure: 0.1 – 0.4 Mpa
Power supply: DC4.5V (three 1.5V alkaline batteries)
Control valve: integrative solenoid valve
Inlet calibre: G1/2’’
Recognition range: 300 – 600 mm adjustable
Checking List
N°
1
2
3
4
5
6
7
8
9
Parts
Internal parts
Control unit
Protection box
Flushing pipe
Concealed pipe
Attachment tool
AA size alkaline battery
User manual
Quality warranty
Quantity
1 set
1 set
1
1 set
1
1 set
3
1
1
Remarks
Solenoid valve included
Notes
1. Check carefully packed parts before installation and contact us for any further
request.
2. All parts are packed in suitable bags, please do not bump them excessively.
1
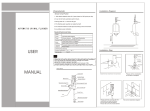
Name of the parts
Installation
NOTE: If you are not expert of it, please do not
disassemble or repair the faucet and do not install it in
a sun-exposed site.
-
-
Pay attention to turn off water supply
before installation. Check the pipeline
and keep it clean.
Installation consists of two steps: setting
the embedded parts and fixing the valve
body and the control unit.
2
1 : Installation of embedded parts.
-
Set the position on the urinal flusher.
Hole the wall.
Set the concealed hose in the hole (1).
Set the whole internal parts into the hole of
the wall (2).
Put the protection box on the internal parts
thus avoiding a cement block (3).
2 : Installation of the flushing pipe unit.
-
Set the flushing gasket in the urinal
hole (1).
Place the button decorative cover.
Screw the nut to the concealed
hose outlet (2).
Set again the top decorative cover.
NOTE: After cement solidifies, remove the
protection box (3) and skip to the following point.
3 : Installation of control unit.
-
After removing protection, do the same with battery-box
cover (1) and install the new battery.
Set again the battery-box cover.
Close control valves connectors (2).
Install control unit (3).
Set the stainless steel cover on the
external one (4).
Battery change.
3
-
Take out the stainless steel cover.
Detach the control connectors.
Remove the battery-box cover and take out old battery.
Set new battery in the correct position.
Reassemble the parts.
Adjustment of after-flushing time and inductive recognition range.
-
Take out the surface panel.
Set the right time-data with suitable adjustment device.
NOTE: Values are pre-set, there is no need to adjust them again normally.
Maintenance
1. Clean the plate surface and keep it dry.
2. In case of flashing light in the inductive window change
the battery.
3. Rinse the urinal periodically.
-
Automatic flush begins when the flushing control device
gets close to the inductive window.
4. Rinse valve core.
-
Unscrew valve core cover.
Take out the valve core (1).
Dry the little hole in the core (2).
Put the valve core in vertical position and screw the cover.
4
5. Filter cleaning.
A water flow decrease may occur and it may be due to a dirty filter that has to be
cleaned following these points:
- Unscrew control unit.
- Undo all connectors.
- Close water flow inlet with ON/OFF switch.
- Unscrew filter cover (1).
- Remove filter from nipple (2).
- Clean the filter with running water (3) and replace it or use a new one.
- Reassemble in reverse way.
- Open water inlet.
6. In case the faucet has no action, this may be due to no accurate connection of the
control wire or no power supply. Check both of them.
7. In case of abnormal induction state, check the surface of the sensing window (and
keep it clean) and the sensing distance (adjust it if needed)
5