1
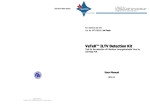
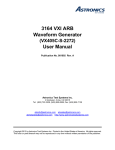
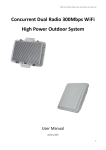
Addendum to Polycrystalline Power Panel Instructions INSTRUCTIONS: Products: 80 Watt Polycrystalline MOUNTING: 123 Watt Polycrystalline 1. Choose an appropriate location that provides the most direct sunlight and can support the solar panel, and is free from shade. Be aware of surrounding objects, although an object seems far from the mounting location it may still obscure the sun from the panel. The ideal year round position for a solar panel in the Northern Hemisphere is facing due South tilted at an angle equal to your latitude. For most North American locations any angle between 30 and 50 degrees is suitable. Note: Mounting a solar panel vertically will optimize low winter sun position but is not beneficial in the summer months. MOUNTING BRACKET PLEASE READ THESE INSTRUCTIONS CAREFULLY BEFORE INSTALLATION REMINDERS: • Avoid Electrical Hazards when installing, wiring, operating, and maintaining your Solar Panel. The solar panel included in the kit generates DC electricity when exposed to sunlight or other light sources. • For use in 12-Volt systems only • Observe Proper Polarity throughout entire power cable wiring route. • Work Safely. Do not wear jewelry when working with electrical or mechanical equipment. Use protective eyewear when working with batteries or drills. Use extreme caution when on ladders or on roof. • Follow all Safety Precautions of the Battery Manufacturer. Some batteries can release flammable hydrogen gas. Do not produce sparks when working in locations where flammable gases or vapors exist. Shield skin and eyes from battery acid. Wash thoroughly with water if skin or clothing come in contact with acid or any corrosive matter, which may have accumulated, on the battery. Keep the terminals and casing clean. • Use a Charge Controller for wattages above 15W • Do not attempt to charge non-rechargeable batteries • Always connect charge controller to battery first • When disconnecting, always disconnect battery last TROUBLESHOOTING: I am not sure if my panel is functioning? • Ensure Battery is operational. Over time, a battery’s ability to recharge will deteriorate • Ensure the distance of the wires are not longer than 30 feet and all connections are secure • Measure the panel voltage with a voltmeter. The voltage reading should be between 16 to 25 volts in the sun. (Constantly fluctuating) • Use a solar voltage tester or a multi-meter to test the solar panel’s voltage. To Base To Solar Panel 2. Using the mounting brackets and screws included, first attach the bracket to the solar panel. Place the rubber ring between the panel and the bracket. The rubber ring allows for air flow between the panel and the mounting surface, maximizing the efficiency of the panel. Note: If mounting to a roof of a vehicle, it may be necessary to drill holes in the roof. These holes should be resealed once the panel is installed, clear silicon caulking is commonly used. If mounting to a surface where it is impractical to drill holes it may be necessary to construct a frame. RUBBER RING Included in this kit are 6 packets of: 1- bracket, 2- self tapping screws plus clear rubber washers, 1- 1/4” bolt plus washer and nut, 1-3/16” bolt plus washer and nut, 1-rubber ring. CHARGE CONTROLLER INSTALLATION: Connect to Battery: Connect the Solar Charge Controller (SCC) battery side (right) positive to the positive battery terminal and the negative wire to the negative battery terminal Connect to Solar Panel: Option 1: Strip the wire from the solar panel and connect positive to positive and negative to negative of SCC. Ensure connections are secure. Option 2: Some panels may include a quick connect for use with the SCC. If included, connect positive to positive and negative to negative of SCC. Ensure connections Addendum to Polycrystalline Power Panel Instructions GENERAL TESTING PROTOCOL Always test outdoors under optimal sunlight conditions. A. Test Solar Panels for Voltage. If included connect the Voltmeter to each individual panel separately and observe Open Voltage. Open voltage is when the solar panels are not connected to any other components. The voltmeter should be connected in parallel with the panel, positive to positive and negative to negative. If the reading is negative or there is no reading it is possible the leads have been reversed. Open Voltage can range from 16 Volts to 24 Volts. Once all panels test for voltage, proceed to step B. (Using a solar voltage tester is also an option) B. Test Connection to Charge Controller for Voltage. Reconnect Solar Panels, and connect to charge controller as per instructions. Measure open circuit voltage of the panel and charge controller together at the battery side of the charge controller. Open circuit voltage should read 5-10% lower than without charge controller. Open circuit measurement will read between 15 and 23.5. C. Connect charge controller to battery First, disconnect solar panels and connect charge controller to battery. Always connect charge controller to battery first and remove last. Observe polarity – positive to positive and negative to negative. D. Reconnect Solar Panels to Charge Controller. Please refer to your charge controllers User Manual for technical parameters and testing procedure, this may differ with different charge controllers. If all testing results within the above indicated ranges, solar system is in acceptable range. If Voltage reading indicate lower ranges, repeat above connections and retest. Finally, it is common to have 12V Battery issues such as dead cells or non-rechargeable battery problems. FAQ: What types of batteries can I recharge? You can recharge all types of 12 volt batteries including lead-acid automotive batteries, deep cycle (traction type) batteries, gel-cell batteries, and heavy-duty (stationary type) batteries. When using the Solar Panel to run appliances on a regular basis, we recommend the use of deep cycle marine batteries which are designed to withstand frequent charge and discharge cycles. Can the Solar Panel drain my battery at night? Once the solar charge controller is installed there is no danger of reverse current, so you may leave your panel installed overnight. Can the Solar Panel overcharge my battery? Yes, but only if used without the charge controller. That is why it is important to use a solar charge controller. Do not connect the panel directly to the battery with wattages of 15W or higher. Always use in conjunction with a solar charge controller. Can I run my 110 volt appliances with my solar power system? Yes. You can run your 110 volt appliances with an inverter, which will attach to your battery to change the battery’s 12 volt (DC) energy into 110 volt (AC) or 220 volt (AC). Can my panel be left outdoors without a protective covering? Yes. The Solar panel has been weatherproofed and can be mounted outdoors without any additional protection. Do I have to disconnect the panels from the battery when I drive my RV or while I am recharging my battery by other means? No, solar panels are designed to be permanently connected to the battery. There is no need to disconnect them while driving a RV for example, or when charging the batteries by other means such as AC chargers, or a vehicle’s generator or alternator. General Info 1. How do solar cells generate electricity? A. Solar Panels, also known as Photovoltaics or PV for short can be thought of as a direct current (DC) generator powered by the sun. When light photons of sufficient energy strike a solar cell, they knock electrons free in the structure forcing them through an external circuit (battery or direct DC load), and then returning them to the other side of the solar cell to start the process all over again. 2. Will solar work in my location? A. Solar is universal and will work virtually anywhere, however some locations are better than others. Irradiance is a measure of the sun's power available at the surface of the earth and it averages about 1000 watts per square meter. Obviously different parts of the world receive more sunlight from others, so they will have more "full sun hours" per day. 3. These panels are made up of polycrystalline solar cells. What are polycrystalline cells? A. Polycrystalline cells are created by using liquid silicon which solidifies to form bricks, these bricks are then cut into thin layers. Crystals of various sizes form during this process. These Polycrystalline panels are covered by tempered glass making them extremely durable. Polycrystalline solar panels have a higher output than amorphous panels of the same dimensions, making polycrystalline panels more cost and space effective. IINSTRUCTIONS FOR INCLUDED VOLTAGE TESTER (Voltage Tester not included in all kits) To test the battery: •Disconnect or power down all other components. •Connect the negative lead of the tester to the negative post of the battery. •Touch the positive probe to the positive post of the battery. To test Solar Battery Charger •Disconnect Solar Battery Charger from all components. •Connect the negative lead of the tester to the negative lead of the Solar Battery Charger. •Touch the positive probe to the positive post of the Solar Battery Charger. No lights will show if polarity is reversed. LIMITED WARRANTY: THESE PRODUCTS ARE WARRANTED FROM DEFECTS IN WORKMANSHIP AND FUNCTIONALITY FOR A PERIOD INDICATED ON THE PACKAGING. THIS WARRANTY DOES NOT APPLY IN THE EVENT OF MISUSE OR ABUSE OF THE PRODUCT OR AS A RESULT OF UNAUTHORIZED REPAIRS OR ALTERATIONS.POWER OUTPUT IS WARRANTED UP TO 80% OF STATED OUTPUT AND MUST BE TESTED UNDER FULL SUNLIGHT CONDITIONS. TO ADDRESS WARRANTY ISSUES, PLEASE CONTACT INITIAL POINT OF PURCHASE.