1
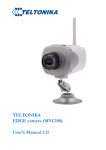
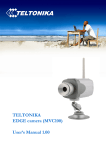
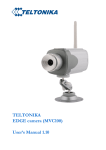
6.
Press the Show default camera page button to Start your Internet browser (e.g. IE or Mozilla) with
default IP address http://10.0.0.1 (Make sure that cookies are enabled on your browser).
Enter the login username and password. The default administrator login settings are:
Login: admin
Password: admin
If the camera connection is lost close the CCT, unplug the power and USB, plug in again power and
USB and start CCT.
The welcome page of the WEB management interface after successful login to the camera is displayed.
From this menu all essential configuration pages are accessed.
Click Live view to view live video.
The camera is now ready for configuration. Further details for setting camera features please refer to
user’s manual.
TELTONIKA
EDGE Camera (MVC100)
Quick Start guide v1.04
Accessing camera from the WEB
There are two ways to connect the EDGE camera from internet:
1. Use SIM card with public static IP address
2. Use SIM card with public dynamic IP address witch will be linked to static hostname
using DDNS service.
Note: If the SIM card is with private IP address then reaching camera from the internet is not
possible as connection is routed through a NAT firewall in your provider’s network.
LEGAL NOICE
Copyright © 2009 TELTONIKA Ltd. All rights reserved. Reproduction, transfer, distribution or
storage of part or all of the contents in this document in any form without the prior written permission of
TELTONIKA Ltd is prohibited.
Other product and company names mentioned herein may be trademarks or trade names of their
respective owners.
4
PACKAGE CONTENTS CHECKLIST
MVC100 EDGE Camera
External GSM antenna
AC/DC Power adapter (Euro or UK)
USB cable
Angled wall mount bracket
Leaflet “Quick Start Guide”
CD with software, drivers and
manual
Step 2 Attach antenna
Back panel
Screw the antenna in a clockwise
direction. Position the antenna upwards
at its connecting joint. This will ensure
optimal reception.
Step 3 Installing the software and drivers (Windows XP only)
To start using first EDGE Camera drivers and software must be installed:
Figure 1. EDGE camera back panel view.
LED
1.
2.
3.
4.
5.
6.
7.
8.
9.
10.
Power supply adapter socket.
Battery ON/OFF switcher
5-pin terminal block
2-pin terminal block
MicroSD card socket
Power LED
GPRS/EDGE conn. status LED
Ready LED
USB socket
GSM antenna connector
Colour
Solid
Off
Power
Green
Power ON
Power OFF
GPRS/EDGE conn. status
Green
Connected
No connection
Ready
Green
Ready to work
Booting
Step 1 Insert SIM card
Open and remove the back panel of the camera. To do that, use the screw-driver to unscrew four
screws holding panel. After the back panel is removed gently insert the SIM card as showed in figures below.
Before inserting SIM card do not forget to remove SIM card PIN code request. Otherwise you will not
be able to connect to GSM network.
1.
2.
3.
4.
Connect power supply to the camera, then connect camera to the USB port.
Insert the CD supplied with the camera into CD-ROM drive of your PC.
The CD will start up automatically opening installation window. If the window does not
appear, run setup.exe file located in the CD.
Follow the instructions to install drivers and software for the MVC100.
Note: if a Hardware Installation warning appears informing that Teltonika Camera has not passed
Windows Logo testing to verify its compatibility with Windows XP, press Continue Anyway.
Note: The installation software installs FTDI company USB drivers. If FTDI drivers to PC have
never been installed before Windows New Hardware Wizard window may appear. To finish the installation
choose Yes this time only, click Next, then choose Install the software automatically (Recommended) and
to all other windows simply click Next.
Step 4 Connecting to the EDGE Camera with Camera Connection Tool (CCT)
1.
2.
3.
4.
5.
Unplug camera power supply and USB.
Connect power supply to the camera, then connect camera to the USB.
Wait for power and ready LED lights up
Start CCT (Camera Connection Tool). To start it go:
Start => Programs => Teltonika => MVC100 Camera => Camera Connection Tool
Press Connect button.
Insert the SIM card into the holder with the metal contacts facing to the SIM connector side. Ensure
that the ‘cut-off’ corner is at the bottom right as in figure above. After the SIM card is inserted attach the panel
to its previous position.
2
3